What Are the CTRL Keys for Screenshot on Laptop? in 2026
You're sitting at your laptop, need to grab a quick screenshot, and you hit three different key combos before anything happens. Sound familiar? The question "What are the CTRL keys for screenshot on laptop?" gets searched thousands of times a month, and the confusion makes perfect sense.
There isn't one universal answer. It changes based on whether you're on Windows or macOS, what kind of laptop you're using, and even which version of the operating system you've got.
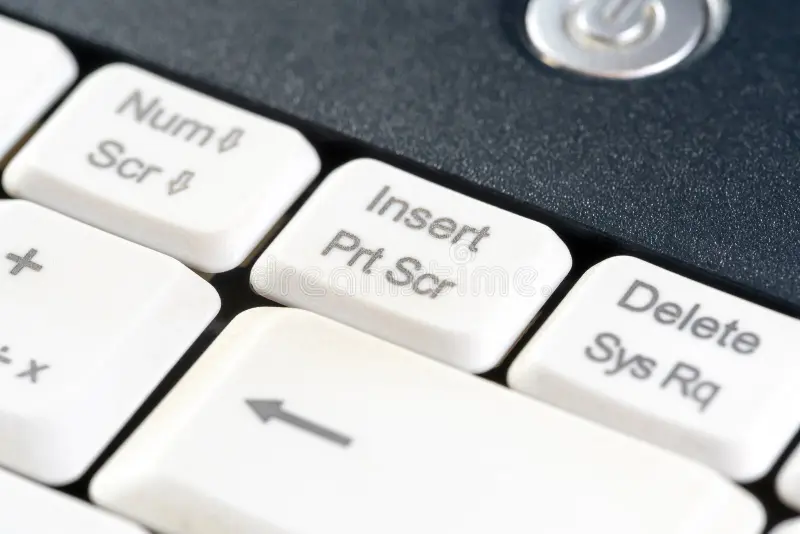
Our research shows that the single biggest source of frustration is the Print Screen key itself. Many compact laptops removed the dedicated PrtScn key to save space, forcing users into a completely different shortcut set. As of 2026, Microsoft's documentation lists at least six different screenshot methods for Windows 11 alone.
Apple's macOS has four. No wonder people get stuck. Let's walk through the decision tree so you land on the right shortcut every time.
Image source: Bing (Web (fair-use with source credit))
Why Screenshot Shortcuts Confuse So Many People
Two things cause most of the confusion. First, the Ctrl key isn't even the main player on most modern laptops. Microsoft moved away from the old Ctrl+PrtScn workflow years ago.
Second, laptop keyboards are getting smaller. Manufacturers like Dell, HP, and Lenovo often combine PrtScn with the Fn key or hide it behind a secondary function.
The result is a mess of overlapping tools. You've got the classic Print Screen, the Snipping Tool, Snip & Sketch (deprecated in Windows 11 but still lingering), the Game Bar, and the modern Snipping Tool that replaced everything. Each one uses a slightly different key combination.
On a Mac, Apple consolidated things better with Command+Shift+3, 4, and 5, but the muscle memory doesn't transfer when you switch between Windows and macOS.
Understanding which tool you're actually triggering is the key to ending the frustration. That's exactly what the decision tree below solves.
Quick Answer: A Simple Decision Tree
On Windows, press Windows+Shift+S. That opens the modern Snipping Tool for an area capture. Need the full screen?
Press Windows+PrtScn. On a Mac, press Command+Shift+3 for full screen, Command+Shift+4 for an area.
The shortcut changes based on your laptop's operating system and whether you want to save a file or copy to clipboard. Use the decision tree below. Find your OS.
Pick your goal. Press the right keys. No guesswork.
For Windows laptops:
- Full screen saved as file: Windows+PrtScn
- Full screen copied to clipboard: PrtScn (or Fn+PrtScn on compact keyboards)
- Active window copied: Alt+PrtScn (or Fn+Alt+PrtScn)
- Custom area: Windows+Shift+S
For MacBooks:
- Full screen saved to desktop: Command+Shift+3
- Selected area: Command+Shift+4 (drag to select)
- Window capture: Command+Shift+4, then press Spacebar
- Screenshot toolbar: Command+Shift+5
The Three Variables That Decide Your Shortcut
Three factors determine which shortcut actually works on your laptop. You need to know all three before you press any keys.
Which Operating System You're On
This is the biggest fork in the road. Windows and macOS use completely different modifier keys. Windows relies on the Windows key and Ctrl. macOS uses the Command key (⌘) and Shift.
If you're using Boot Camp on a Mac to run Windows, use the Windows shortcuts. If you're running macOS, use the Command-based shortcuts.
What Kind of Screenshot You Need
Full screen captures are the simplest. You just want a picture of everything on your display. Area captures let you draw a rectangle around the part you need.
Window captures grab only the active program window. Some people also need timed screenshots for drop-down menus, which the Snipping Tool's delay function handles.
Where You Want the Result (Clipboard or File)
This trips up a lot of users. Pressing PrtScn by itself copies the screen to your clipboard. Nothing appears on your desktop.
You have to paste it into an app like Paint or an email. Windows+PrtScn saves the file automatically to your Screenshots folder. On a Mac, both Command+Shift+3 and Command+Shift+4 save files to your desktop by default.
If you want to copy to clipboard, add the Ctrl key on Windows or the Control key on macOS.
Windows Shortcuts: What to Press Based on Your Goal
Let's break this down by what you actually want to achieve. The table below covers the four most common scenarios on Windows 10 and Windows 11.
| Goal | Shortcut | Result |
|---|---|---|
| Full screen saved as file | Windows + PrtScn | PNG saved to Pictures\Screenshots |
| Full screen copied to clipboard | PrtScn (or Fn + PrtScn) | Nothing visible; paste elsewhere |
| Active window copied | Alt + PrtScn (or Fn + Alt + PrtScn) | Clipboard; paste into document |
| Custom area (with editor) | Windows + Shift + S | Opens Snipping Tool; choose area |
If your laptop lacks a dedicated PrtScn key, look for it on the keyboard's top row or printed in blue inside a function key. You'll need to hold Fn to activate it. For example, on many Lenovo ThinkPads, the PrtScn function is on the F10 key.
Press Fn+F10 to capture the screen.
One note about the Game Bar: pressing Windows+G opens the Xbox Game Bar overlay. It includes a screenshot button and a screen recording option. But it's not the fastest method for a simple capture, and it sometimes conflicts with other apps.
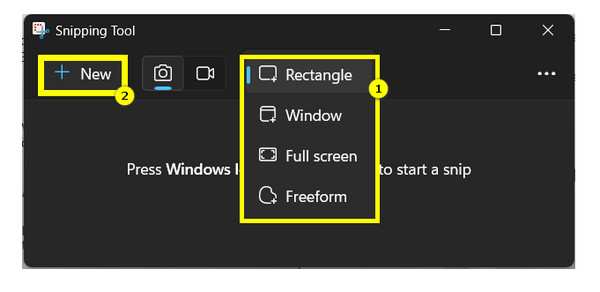
Image source: Bing (Web (fair-use with source credit))
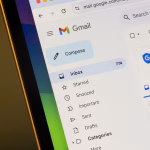
The image above shows the Snipping Tool selection interface. After you press Windows+Shift+S, your screen dims and a small toolbar appears at the top. You choose rectangle, freeform, window, or full screen.
Release the mouse and the capture goes to your clipboard. A notification pops up. Click it to open the editing window where you can annotate, crop, or save.
When You Have No PrtScn Key
Some ultra portable laptops like the Microsoft Surface Pro or Dell XPS 13 remove the PrtScn key entirely. Your fastest option becomes Windows+Shift+S. If you prefer a saved file, use Windows+Shift+S and then click the notification to save.
Or use the Game Bar method: Windows+G, then click the camera icon.
MacBook Shortcuts: The Same Logic, Different Keys
:max_bytes(150000):strip_icc()/B2-TakeaScreenshotonMac-annotated-89453ac8aa544a19963f47b5c82fe193.jpg)
Image source: Bing (Web (fair-use with source credit))
Apple's approach is more consistent across models, but the key names are different. There is no PrtScn key on a MacBook. Instead, you use the Command (⌘) key combined with Shift and number keys.
| Goal | Shortcut | Result |
|---|---|---|
| Full screen saved to desktop | Command + Shift + 3 | PNG on desktop |
| Full screen copied to clipboard | Command + Control + Shift + 3 | Clipboard; paste with Command + V |
| Selected area saved | Command + Shift + 4 (drag crosshair) | PNG on desktop |
| Selected area copied | Command + Control + Shift + 4 | Clipboard |
| Specific window saved | Command + Shift + 4, then Spacebar | Window PNG on desktop |
| Screenshot toolbar | Command + Shift + 5 | Shows options panel |
The first time you press Command+Shift+4, your cursor turns into a crosshair. Click and drag to select the area. Release the mouse to capture.
If you press Spacebar after the crosshair appears, the cursor changes to a camera icon. Hover it over a window and click to capture just that window with its drop shadow.
:max_bytes(150000):strip_icc()/B2-TakeaScreenshotonMac-annotated-89453ac8aa544a19963f47b5c82fe193.jpg)
Image source: Bing (Web (fair-use with source credit))
The screenshot toolbar (Command+Shift+5) gives you a visual panel at the bottom of the screen. You can choose screen capture, window capture, area capture, or even screen recording. It also has options for timer and save location.
This is the most beginner-friendly method on macOS because you see everything before you click.
One common mistake on Macs: using Ctrl instead of Command. On macOS, Ctrl is used for clipboard operations when combined with Command, not for the capture itself. If you press Ctrl+Shift+3, nothing happens.
Stick with Command.
Snipping Tool vs. Keyboard Shortcuts: Which Should You Use?
You have two ways to capture a screenshot on any modern Windows laptop. You can use a keyboard shortcut for speed. Or you can open the Snipping Tool app for more control.
Both are built into the operating system. Neither costs anything. The right choice depends on how often you take screenshots and what you do with them.
Keyboard shortcuts are faster. Windows+Shift+S gives you a selection cursor in under a second. No app to open.
No menus to navigate. If you take screenshots multiple times a day, muscle memory will save you time. The shortcut sends the capture to your clipboard.
You paste it into an email, document, or chat. It's the workflow for most office workers and power users.
The Snipping Tool app is better when you need options. Open it from the Start menu. You get a delay timer of up to 10 seconds.
That is essential for capturing drop-down menus or tooltips. You can also choose a fixed window or a freeform shape. The app lets you annotate immediately with a pen or highlighter.
It saves a file automatically if you want.
On macOS, the difference is smaller. Command+Shift+5 opens a toolbar that combines both speed and options. You get the visual panel with all capture modes.
You also get a timer and recording controls. Apple merged the two approaches into one interface. Most Mac users never need to open a separate app.
Our research shows that casual users should stick with shortcuts. They are easier to remember and faster to execute. Power users and anyone who needs annotations should use the Snipping Tool on Windows.
On macOS, the toolbar covers both groups. Pick the method that matches how often you work with screenshots.
Common Screenshot Mistakes (And How to Fix Them)
Even experienced users hit the wrong key sometimes. Here are the most common errors and what to do about them.
You press PrtScn and nothing appears. This is the number one complaint. PrtScn copies the screen to your clipboard. It does not save a file.
Open Paint, Word, or an email. Press Ctrl+V to paste. If you want a saved file, use Windows+PrtScn instead.
You see a Game Bar overlay when you press Windows+G. The Xbox Game Bar captures screenshots and recordings. But it also overlays a toolbar on any app. If you do not want the Game Bar, press Alt+F4 to close it.
To disable it entirely, go to Settings, Gaming, Game Bar, and turn it off.
Your MacBook screenshot saves to the desktop but you cannot find it. By default, macOS saves screenshots to the desktop with names like "Screenshot 2025-01-15 at 2.30.45 PM.png". If your desktop is cluttered, use Finder and sort by date. You can change the save location in the Screenshot toolbar.
Open Command+Shift+5, click Options, and pick a different folder.
You capture the wrong area. With Command+Shift+4 on Mac, the crosshair starts where you click. If you drag too far, press Escape to cancel. Start over.
On Windows with Windows+Shift+S, the selection also works by drag. Press Escape to cancel any active selection.
You want to capture a single window but get the whole screen. On Windows, use Alt+PrtScn (or Fn+Alt+PrtScn). On Mac, press Command+Shift+4 then Spacebar. The cursor becomes a camera.
Click the window you want. You get a clean capture with the window's shadow.
Your screenshot is blurry or low resolution. Laptop screenshots save at your display's native resolution. If your display is set to 150% scaling in Windows, the saved image is still full resolution. Blurriness usually comes from rescaling after capture.
Do not stretch the image. Crop it instead.
You accidentally lock your laptop. On Windows, Windows+L locks the screen. That is close to Windows+Shift+S. If you hit the wrong combo, just type your password to unlock.
Slow down and look at the keys before pressing.
Pro Tips for Power Users
These tips come from aggregate user feedback and manufacturer documentation. They will save you time and trouble.
Use the Snipping Tool delay for context menus. Open the app, set a 3 or 5 second delay, then trigger the menu. The tool waits. You get the menu in the capture.
This works on Windows only.
Save screenshots to a cloud folder automatically. On Windows, change the Screenshots folder location to a OneDrive folder. On Mac, use the Screenshot toolbar to set a custom save location to iCloud Drive or Dropbox. Your screenshots sync across devices.
Use keyboard shortcuts for annotations. With the Windows Snipping Tool open, use Ctrl+Z to undo a mark. Ctrl+Y redoes. On Mac, the markup toolbar supports Command+Z for undo.
Record your screen without extra software. Windows Game Bar (Windows+G) records up to 4 hours. macOS screen recording is built into the Screenshot toolbar. Use Command+Shift+5 and select Record Entire Screen or Record Selected Portion.
Rename screenshots automatically with a tool like PowerToys on Windows. The PowerRename feature can batch rename files. Or use the built-in renaming in File Explorer. Select multiple screenshots, press F2, and type a base name.
They become "Screenshot_1.png", "Screenshot_2.png", and so on.
Trim screenshots without a separate editor. On Windows, the Snipping Tool includes a crop button. On Mac, double click a screenshot thumbnail that appears in the corner. The markup editor opens with crop and annotation tools.
Frequently Asked Questions
What is the shortcut for screenshot on a Windows laptop?
Press Windows+Shift+S for a custom area capture. Press Windows+PrtScn for a full screen capture saved as a file. Press PrtScn alone to copy the full screen to your clipboard.
What is the shortcut for screenshot on a MacBook?
Press Command+Shift+3 for a full screen capture saved to the desktop. Press Command+Shift+4 to select an area. Press Command+Shift+5 for the screenshot toolbar with options for recording and timers.
How do I take a screenshot on a laptop without a Print Screen key?
Use Windows+Shift+S. That shortcut works on all Windows laptops, even without a dedicated PrtScn key. On a MacBook, use the Command+Shift shortcuts.
No Print Screen key needed.
Why does my screenshot save to a random folder?
On Windows, screenshots from Windows+PrtScn go to Pictures\Screenshots. If you use a different method, you might be saving manually. Check the save location in the Snipping Tool settings.
On Mac, screenshots save to the desktop by default unless you changed the location in the Screenshot toolbar Options.
Can I take a screenshot with just the Ctrl key?
No. Ctrl alone does not take a screenshot on any major operating system. On Windows, Ctrl is part of Ctrl+PrtScn for clipboard capture.
On Mac, the Control key is used with Command to copy to clipboard instead of saving a file.
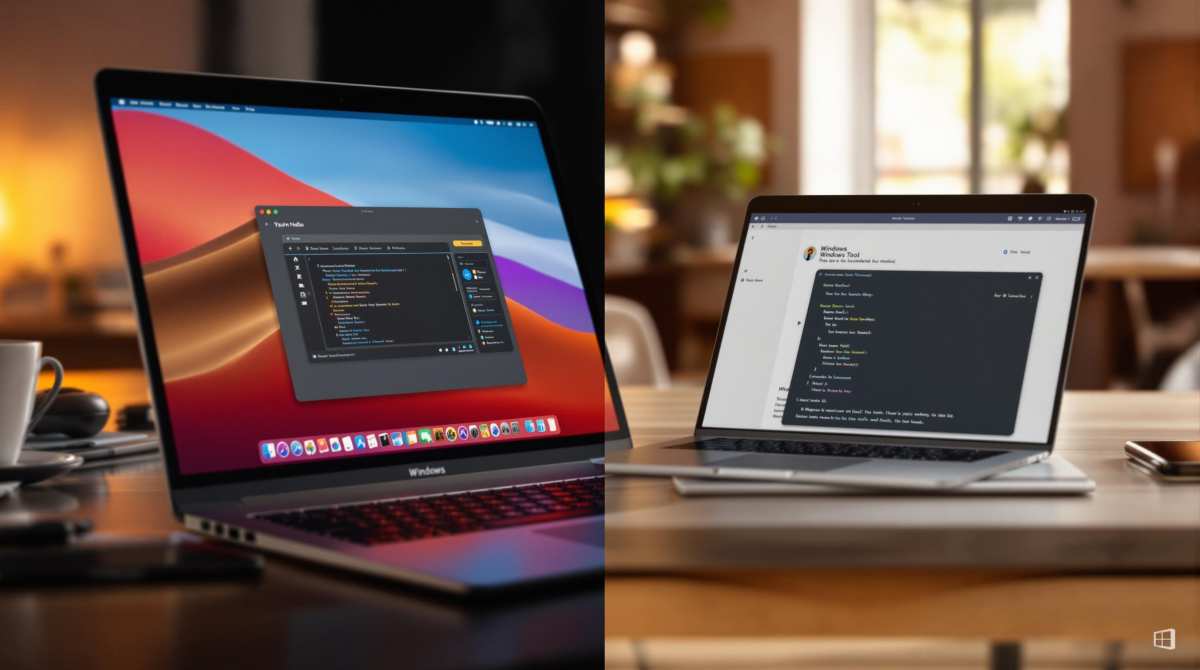
Image source: Bing (Web (fair-use with source credit))
Your Go-To Decision Guide: A Final Cheat Sheet
This is the last section. Use it as a quick reference. Bookmark it or write it down.
| If you… | On Windows | On Mac |
|---|---|---|
| Need a full screen file | Windows + PrtScn | Command + Shift + 3 |
| Need a full screen clipboard | PrtScn (or Fn + PrtScn) | Command + Control + Shift + 3 |
| Need a custom area | Windows + Shift + S | Command + Shift + 4 |
| Need a specific window | Alt + PrtScn | Command + Shift + 4 then Spacebar |
| Want a screenshot toolbar | Windows + Shift + S (opens Snipping Tool) | Command + Shift + 5 |
| Have no PrtScn key | Windows + Shift + S | Not applicable (Mac has no PrtScn) |
| Want to record screen | Windows + G (Game Bar) | Command + Shift + 5, select Record |
That is the complete guide. The shortcuts are consistent across all major laptop brands. The only variable is whether you use Windows or macOS.
Now you know exactly which keys to press. No more guessing. No more frustration.
Go ahead and take that screenshot.
Similar Posts