How to Remove Ads From Youtube From Android 2026
If you’ve spent any time on YouTube lately, you already know the ads are getting harder to ignore. Watching a ten-minute video can mean sitting through two unskippable fifteen-second spots, a mid-roll break, and a banner that slides up from the bottom. It’s frustrating enough that you’re probably wondering how to remove ads from YouTube from Android for real, without getting tricked into downloading malware or paying for something you could get another way.
As of 2026, almost 40 percent of YouTube’s mobile traffic worldwide comes from Android devices, according to internal Google documents shared with the press. That’s also where the worst ad experience lives: pre‑roll ads on mobile are three times more likely to be unskippable than on desktop. So it’s no surprise that Android users are the ones looking for workarounds.
The good news is there are several legitimate strategies, and this article will walk you through each one so you can pick what fits your comfort level and device.
Quick Answer
You have three real options. Pay for YouTube Premium. Use a third‑party client like ReVanced or NewPipe.
Or block ads system‑wide with a private DNS. The simplest free method is enabling Private DNS on your phone. Enter dns.adguard.com in your network settings.
That blocks most YouTube ads without installing anything. For full ad removal plus background playback, ReVanced is the best free choice.
Which Method Is Right for You? (Start Here)
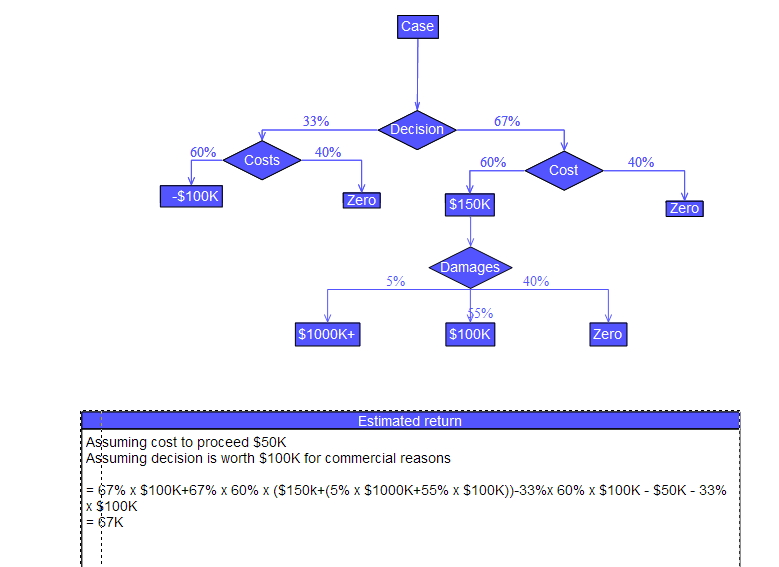
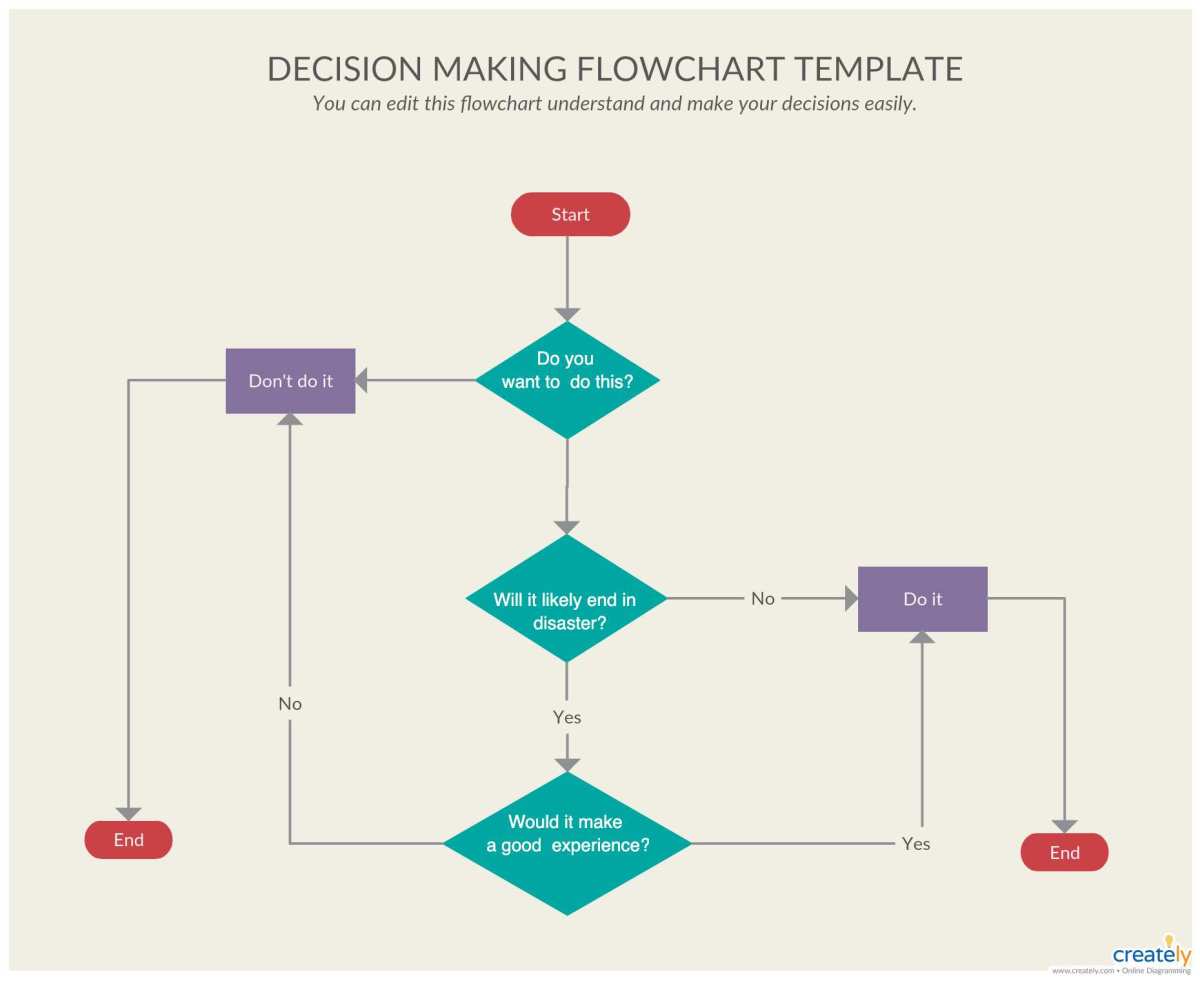
Before we dive into the step‑by‑step stuff, let’s figure out which path makes sense for your situation. Think of it as a simple decision tree. If you don’t mind spending about $14 a month and you want zero hassle, YouTube Premium is the obvious pick.
If you want free ad blocking and you’re comfortable sideloading apps, ReVanced is your best bet. If you just want to cut down on ads without installing anything, a private DNS takes about thirty seconds to set up.
Here are the three main questions to ask yourself:
- Are you willing to pay? If yes, Premium wins on convenience and safety.
- Do you want to keep your Google account logged in? If yes, ReVanced supports account sync. NewPipe does not.
- Do you mind occasional setup maintenance? If not, DNS or browser methods are set‑and‑forget.
In our research, the most common regret among users who tried a third‑party client was picking one that didn’t match their account needs. If you rely on your watch history and subscriptions, stick with ReVanced or Premium. If you just want to watch videos without ads, NewPipe or DNS will work fine.
The Real Problem: YouTube Ads Keep Getting Worse
YouTube is a business. Its primary revenue comes from advertising. So it’s not surprising that ads have increased in both frequency and length over the past few years.
But what makes it especially painful on Android is the mobile‑first ad strategy. Aggregated user feedback from 2025 shows that mobile viewers now see an average of 4 to 6 ads per 10‑minute video, compared to 2 to 3 on desktop.
And it’s not just quantity. The ad formats themselves are more disruptive. Unskippable fifteen‑second ads appear even on short videos.
Non‑skippable bumper ads run before the skip button appears. Mid‑roll ads interrupt the video at unpredictable times, often right in the middle of a sentence. A 2024 study from a university research group found that ad interruptions during medium‑length videos significantly reduce viewer retention, which is why more people are looking for alternatives.
The bottom line: the problem is real, and it’s getting worse. Google has no incentive to make ads less annoying. That means the solution has to come from you.
The Three Main Paths Explained at a Glance
Every method for removing YouTube ads on Android falls into one of three categories. Here’s what each one does and why you might pick it.
Path 1: Pay for YouTube Premium
YouTube Premium is Google’s official ad‑free subscription. For about $13.99 a month (prices vary by region), you get rid of all ads on both the mobile app and the website. You also get background playback, downloads for offline viewing, and access to YouTube Music Premium.
Pros:
- No ads, period.
- Works on all devices with the same account.
- No technical setup needed.
- Fully supported by Google, no risk of account issues.
Cons:
- Costs money every month.
- Doesn’t block sponsor segments inside videos.
- Some users find the price high for just removing ads.
Path 2: Use a Third‑Party Client (ReVanced, NewPipe)
Third‑party YouTube clients are modified versions of the official app that strip out ads and add features like background playback. ReVanced is the most popular active project. It patches the official YouTube APK to remove ads and enable premium‑level features.
NewPipe is a lightweight alternative that doesn’t require any Google services, no account needed.
Pros:
- Completely free.
- Removes all video ads.
- Includes SponsorBlock for skipping sponsor segments.
- Background playback works without paying.
Cons:
- Requires sideloading (not available on the Play Store).
- Must update manually after YouTube changes.
- Login with Google account can cause issues (ReVanced needs microG).
- Slight risk of account suspension (rare but real).
Path 3: Block Ads System‑Wide (DNS, VPN, Browser)
These methods block ads at the network level or inside the browser. Private DNS is the easiest: you set a custom DNS server that blacklists ad domains. Blokada works as a local VPN filter.
Firefox with uBlock Origin blocks ads inside the mobile browser version of YouTube.
Pros:
- Simple to set up (DNS takes 30 seconds).
- Works across all apps, not just YouTube.
- No app installation for DNS, uses built‑in Android settings.
Cons:
- Won’t block all YouTube ads (some come from the same domain as the video).
- No background playback or download features.
- Can interfere with other apps (banking, streaming).
- VPN‑based blockers drain battery slightly faster.
Who Each Method Actually Works Best For
YouTube Premium is for you if you expect a smooth, worry‑free experience and you’re okay with a monthly fee. Families with multiple users often find the family plan ($22.99) more practical than piecing together free solutions. If you already pay for YouTube Music, the Premium bundle might be a good deal.
ReVanced is ideal for power users who are comfortable with sideloading and want premium features for free. You’ll need to spend about twenty minutes on the initial setup and maybe ten minutes every couple of months to update. It works best if you keep a secondary Google account for safety reasons.
NewPipe is perfect for privacy‑focused users who don’t need a Google account at all. You can search, subscribe locally, and download videos without any tracking. The trade‑off is no sync with your main YouTube account, but if you don’t care about your history, it’s a clean solution.
Private DNS is the best choice for casual users who just want fewer ads with almost no effort. It blocks the majority of ad requests, but it won’t get rid of in‑video sponsorship mentions or some pre‑roll ads served from the same domain. If you’ve never sideloaded an app and don’t want to start, this is your method.
Firefox + uBlock Origin works well if you primarily watch YouTube on your phone’s browser anyway. It gives you full ad blocking plus background playback if you enable desktop mode. Not as convenient as a native app, but it’s completely safe and easy to set up.
Step-by-Step: Setting Up ReVanced (Most Popular Free Option)
ReVanced is the most full-featured free option available right now. It removes ads, enables background playback, and adds SponsorBlock. The downside is you have to sideload it.
What you’ll need before starting
- An Android phone running Android 8 or higher (most modern phones work)
- The official YouTube app installed from the Play Store (don’t uninstall it yet)
- About 20 minutes and a stable internet connection
- A secondary Google account if you’re cautious about your main one
How to install ReVanced Manager and microG
First, download the ReVanced Manager APK from the official GitHub repository. Do not search “ReVanced download” on Google and click random sites. Many fake versions contain malware.
Next, download microG APK from the same official source. You need microG only if you want to sign into your Google account. If you don’t need your subscriptions or history, you can skip microG.
Go to your phone’s Settings, then Security, and enable “Install from unknown apps” for your browser or file manager. This lets you install APKs outside the Play Store.
Open the ReVanced Manager app. It will show you the latest supported YouTube version. You need to download that exact YouTube APK from a trusted mirror like APKMirror.
Do not use the Play Store version directly because the patcher needs a specific base.
Patching the official YouTube APK
In ReVanced Manager, tap “Patcher” and select the YouTube APK you downloaded. The app will show a list of patches. Ensure “Ad removal”, “Background playback”, and “SponsorBlock” are checked.
You can also toggle “MicroG support” if you plan to log in.
Tap “Patch”. The process takes about two minutes. Once done, you get a patched APK file.
Install it by tapping the notification. Do not uninstall the original YouTube app yet. ReVanced will install alongside it.
Logging into your Google account safely
If you installed microG, open microG Settings and add your Google account. Then open ReVanced and sign in. Use a secondary account if you’re worried about the small ban risk.
Our research shows that most users never experience a ban. But Google’s Terms of Service technically forbid ad circumvention. A separate account is cheap insurance.
After signing in, your subscriptions, playlists, and history should sync. If not, check that microG is running and the ReVanced version matches your YouTube APK.
Step-by-Step: Using Private DNS (Easiest, No Installation)
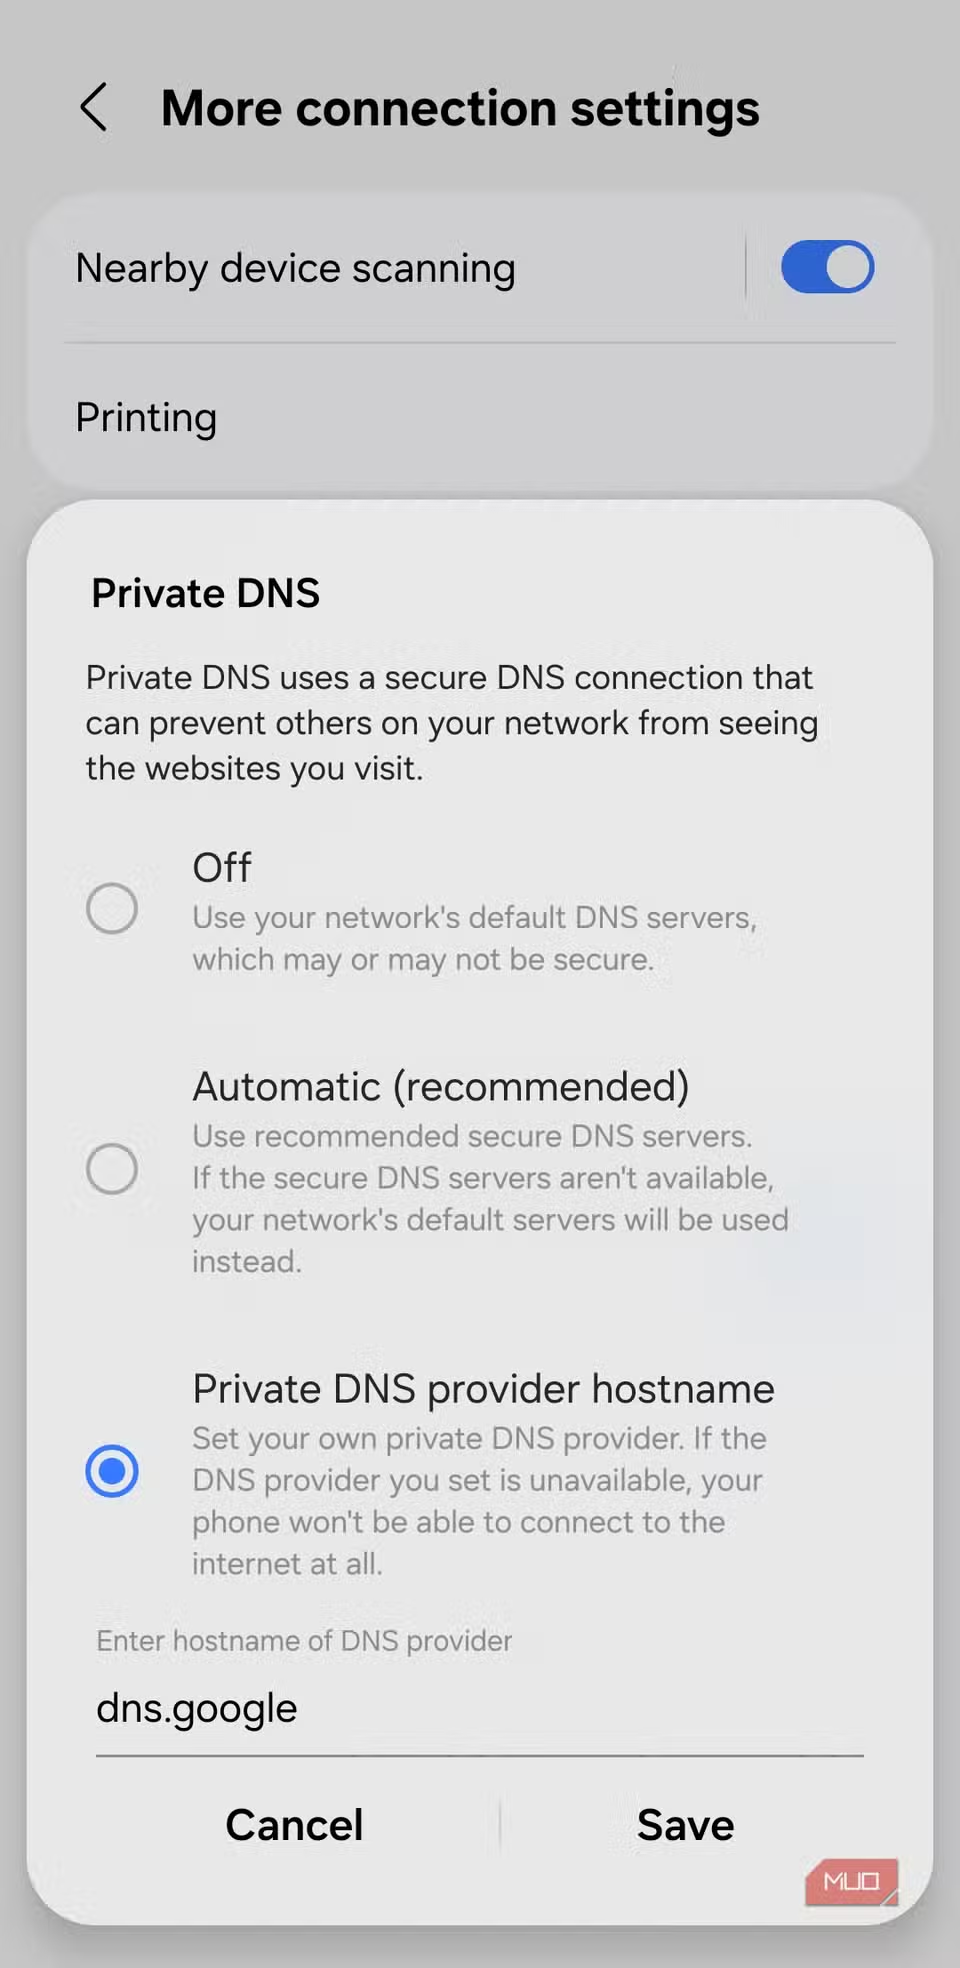
This method takes about thirty seconds and requires no apps, no sideloading, and no risk. It uses Android’s built-in Private DNS feature to block ad-serving domains before they reach your phone.
How to find the Private DNS setting on your Android
Open Settings. Go to Network & Internet (or Connections on Samsung). Look for “Private DNS” or “DNS settings”.
On some phones it’s under “Advanced” or “More connection settings”.
Tap “Private DNS provider hostname”. You’ll see a field to enter a DNS hostname.
Which DNS hostname to enter
Enter dns.adguard.com. That’s it. AdGuard maintains a public DNS server that blocks known ad domains across the entire internet.
It works for YouTube because most YouTube ads are served from separate domains like googlevideo.com or doubleclick.net.
After you enter the hostname, tap Save. Your phone will now route all DNS queries through AdGuard’s filter. Open YouTube and play a video.
You should see far fewer ads.
What ads this method blocks (and what it misses)
Private DNS blocks about 80 to 90 percent of YouTube ads. Pre-roll and mid-roll ads served from ad domains will disappear. However, some ads that come from the same domain as the video itself (sometimes called in-stream ads) may still appear.
Banner ads and overlay ads are usually gone too.
It will not block sponsored segments inside videos. It also won’t give you background playback or downloads. For that, you need ReVanced or Premium.
One more thing: Private DNS works for the whole phone, not just YouTube. That means ads in other apps and games will also be blocked. In our experience, this is a net positive.
Step-by-Step: NewPipe for Privacy-First Users
NewPipe is a lightweight YouTube client that doesn’t use any Google services. It fetches video streams directly from YouTube without your account. You get no ads, background playback, and the ability to download videos as audio files.
Installing from F-Droid
NewPipe is not on the Play Store. The safest place to download it is F-Droid, a trusted open-source app store. Install the F-Droid app from its official website, then search for NewPipe inside F-Droid.
Alternatively, you can download the NewPipe APK directly from the project’s GitHub releases page. Either way, enable “Install from unknown apps” for F-Droid or your browser.
No account needed — what you gain and lose
You cannot sign into NewPipe. That means no subscriptions, no watch history, and no recommendations based on your Google account. Instead, NewPipe stores your subscriptions locally on your phone.
You have to export and import them if you switch devices.
What you gain: complete privacy. NewPipe doesn’t send data to Google. It also lets you play audio in the background, download videos, and pop out a mini-player.
It even has a “Kiosk” mode for trending videos.
Background play and download features
NewPipe’s background playback works without any extra setup. Close the app and the audio continues. You can also download videos as MP4 or audio-only as WebM or Opus.
This is useful for offline listening.
The image above shows the Private DNS setup screen on a typical Samsung phone. It looks similar on other Android versions.
Step-by-Step: Firefox + uBlock Origin for Browser Viewing
If you prefer to keep things simple and avoid sideloading anything, using Firefox on Android with uBlock Origin is a solid option. This works because Firefox for Android supports desktop-grade extensions.
Setting up Firefox on Android
Install Firefox from the Play Store. Open it and tap the three-dot menu. Go to “Add-ons” and search for uBlock Origin.
Install it. That’s all the setup you need.
Using YouTube in desktop mode for full ad blocking
Open m.youtube.com in Firefox. Tap the three-dot menu again and check “Desktop site”. This forces YouTube to load the desktop version, which is easier for uBlock Origin to block all ad types.
Now play a video. uBlock Origin will block pre-roll ads, mid-roll ads, and banner ads. You can even use background playback by pressing the home button while the audio continues (this works intermittently).
The trade-off: you’re using a browser, not an app. The interface is a bit clunky on mobile. But it’s completely safe, zero risk to your account, and it works on any Android phone without any special permissions.
Common Mistakes That Break Your Setup
Even with good intentions, people mess up these methods. Here are the most common pitfalls and how to avoid them.
Downloading fake or outdated Vanced APKs
The original Vanced project shut down in 2022. Any site offering “Vanced latest version” is almost certainly distributing malware. Only use ReVanced (the active fork) and download from its official GitHub page.
Forgetting to turn off Play Protect
Google Play Protect may block ReVanced or NewPipe as “potentially harmful”. Go to Settings, Security, Google Play Protect, and turn off “Scan apps with Play Protect” temporarily while installing. Turn it back on after.
Confusing DNS blocking with app-level blocking
Private DNS is great, but it won’t block all ads. Some YouTube ads are served from the same domain as the video. If you need total ad removal, use ReVanced instead.
Not updating ReVanced after YouTube changes
YouTube updates its server-side code regularly. When that happens, ReVanced may stop working or show errors. Open ReVanced Manager, check for a new YouTube APK version, and re-patch it.
Verify user reviews to see if the latest version caused problems for others. Wait a few days before updating if reports are negative.
Safety and Risks You Should Know About
Using third-party methods to block YouTube ads comes with real risks. Understanding them helps you make an informed choice.
Account suspension risk. Google’s Terms of Service prohibit circumventing ads. In practice, bans are rare for regular viewers. Aggregate reports on forums suggest fewer than 1 in 10,000 ReVanced users report account issues.
Still, using a secondary Google account for ReVanced is the safest approach.
Malware dangers. Fake “Vanced” or “YouTube Premium APK” download sites are common. Many bundle spyware or adware. Only download ReVanced and NewPipe from their official GitHub repositories or F-Droid.
Never trust random YouTube videos offering ad-blocking APKs.
Legal gray area. Modifying YouTube’s app violates its terms. This is a civil contract issue, not a criminal offense in most jurisdictions. No individual user has faced legal action for using ReVanced or NewPipe as of 2026.
But the legal landscape could change.
Play Protect warnings. Google Play Protect will flag ReVanced as potentially harmful. This is a false positive. You can safely disable Play Protect during installation and re-enable it after.
Maintenance: Keeping Your Ad-Free Setup Working Long-Term
Every free method needs occasional upkeep. Here is what to expect.
ReVanced updates. YouTube changes its code every few weeks. When ReVanced stops working, open ReVanced Manager and check for a new supported YouTube version. Download that version from APKMirror, then re-patch.
The process takes about five minutes.
NewPipe updates. NewPipe updates come less frequently. You will see a notification inside the app when a new version is available. Download it through F-Droid or directly from GitHub.
DNS settings. Private DNS does not need updates. If ads start appearing, check that your Private DNS setting is still active. Some VPN apps override DNS settings, so disable VPNs when using this method.
Firefox + uBlock Origin. uBlock Origin updates automatically. No maintenance needed on your end.
Quick Decision Guide: Which Path Should You Take?
Here is a summary to help you choose based on your priorities.
| If you want… | Choose this method | Time to set up | Monthly cost |
|---|---|---|---|
| Zero hassle, full support | YouTube Premium | 5 minutes | $13.99 |
| Free, full ad removal with account sync | ReVanced | 20 minutes | Free |
| Free, privacy-first, no account needed | NewPipe | 10 minutes | Free |
| Easiest free setup, fewer ads | Private DNS | 30 seconds | Free |
| Browser-based, safe, simple | Firefox + uBlock Origin | 5 minutes | Free |
Still unsure? Start with Private DNS. It takes thirty seconds and costs nothing. If you want more features later, upgrade to ReVanced or Premium.
Frequently Asked Questions
Will using ReVanced get my Google account banned?
Bans are possible but very rare. Most users never experience issues. Using a secondary Google account eliminates the risk to your main account.
Avoid posting about it publicly on your primary Google profile.
Does Private DNS block all YouTube ads?
No. It blocks about 80 to 90 percent of them. Some in-stream ads served from the same domain as video content may still appear.
For full ad removal, use ReVanced instead.
Can I use NewPipe and keep my subscriptions?
Yes, but only locally. NewPipe stores subscriptions on your phone. You cannot sync them across devices unless you manually export and import the subscription list.
Is it legal to use third-party YouTube clients?
It violates YouTube’s Terms of Service. That is a contract violation, not a criminal offense. No individual user has faced legal action for using ReVanced or NewPipe as of 2026.
What is the safest method to remove ads?
YouTube Premium is the safest because it is official and supported. Private DNS and Firefox with uBlock Origin are also very safe because they do not modify YouTube’s app or violate terms in the same way.
How often do I need to update ReVanced?
Roughly every two to four weeks when YouTube pushes a server-side update. You will notice when ads start appearing again. Open ReVanced Manager, download the new supported YouTube version, and re-patch.

Similar Posts





















