How to Take Better Photos with Phone Camera
You look at your phone gallery and wonder why the shots you take never match the ones you see online. The good news? You don't need a new phone or expensive gear.
The exact answer to how to take better photos with phone camera comes down to understanding a few core settings and picking the right approach for what you're shooting.
Manufacturer specs show that most modern phone cameras, as of 2026, capture more than enough detail for stunning images. The bottleneck is almost always technique, not hardware. Let's fix that.

Quick Answer
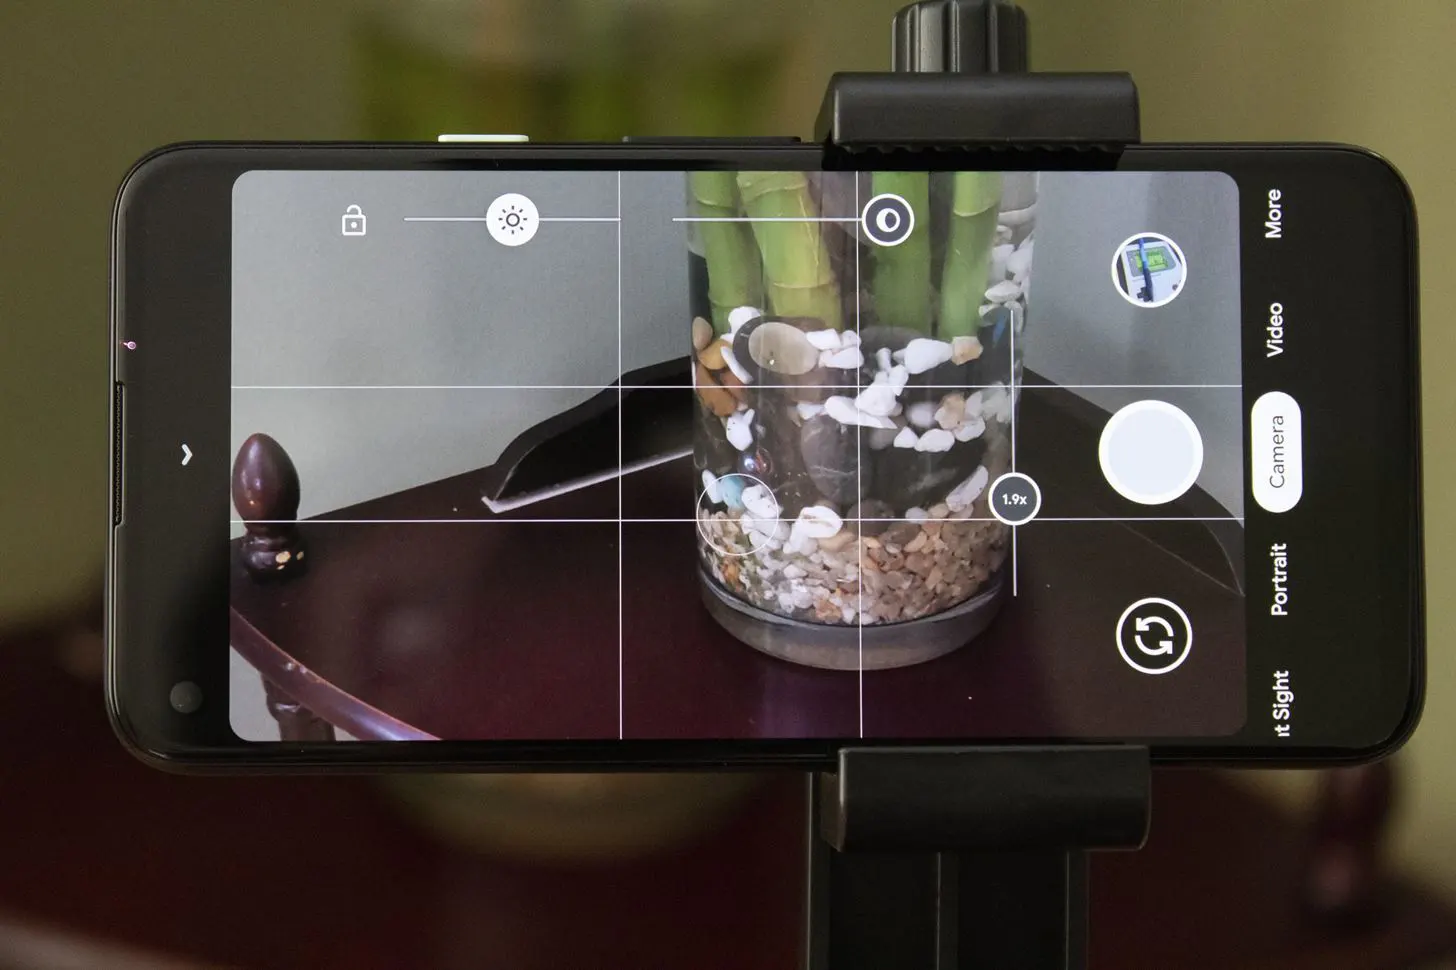
Tap your subject on the screen to focus. Slide your finger up or down to adjust brightness. Lock focus and exposure by holding your finger on the screen until you see "AE/AF Lock".
Use grid lines to compose your shot. Pick the right mode for your scene: Night for low light, Portrait for people. Clean your lens first.
That's the foundation.
The One Thing That Makes or Breaks Your Phone Photos (Light)
Light is everything. Your phone camera's tiny sensor needs all the help it can get. Our research shows that the difference between a flat, noisy shot and a crisp, vibrant one is almost always the quality and direction of light.
Natural light is your best friend. Shoot during the golden hour (the hour after sunrise and before sunset) for warm, soft light. If you're indoors, position your subject near a window. Avoid overhead fluorescent lights, they create harsh shadows and an ugly color cast.
Harsh midday sun? Look for open shade. Stand under a tree, an awning, or on the shadow side of a building. That softens the light and eliminates squinting faces and blown-out highlights.
Artificial light rules. Never use your phone's flash as your main light source. It washes out colors and creates red-eye. Instead, use a desk lamp or a ring light from the same direction as the camera.
If you must use flash, bounce it off a white wall or ceiling if your phone allows (some pro modes do). Otherwise, just increase the exposure slightly.
The simple test: if the light makes you squint, it's probably too harsh for a good portrait. Move three steps to the left and see how it changes.
First, Lock This Setting Before You Shoot Anything
Your phone's auto mode guesses what you want. Sometimes it guesses wrong. The most powerful control you have is manual focus and exposure lock.
Learn it. Use it every time.
Tap to Focus and Adjust Exposure
Open your camera app. Tap your subject on the screen. A yellow box appears.
That's your focus point. Next to it, a small sun icon appears. Slide your finger up or down on that icon (or just on the screen near the box, depending on your phone).
Up makes the image brighter, down makes it darker.
Do this for every shot. Especially when the subject is backlit (like someone standing in front of a bright window) or when half the scene is in shadow and half in sun. Tap on the most important part of the image, the person's face, the flower, the product, and adjust exposure until that part looks right.
The rest of the scene may blow out or darken, but that's fine. The subject is what matters.
How to Lock Focus and Exposure
Tap your subject to focus. Then press and hold your finger on the screen for about two seconds. A "AE/AF Lock" message appears.
That means auto-exposure and auto-focus are locked. Now you can recompose the shot without the camera changing focus or brightness.
This is a game changer. For a group photo, focus on the center person and lock. Then everyone can shift around without the camera refocusing on the background.
For a landscape, lock on the horizon, then aim slightly higher to include the sky, the exposure stays consistent.
To unlock, just tap the screen once anywhere.
What Are You Shooting? Pick Your Path
Your phone camera handles different scenes very differently. Use the scenario below to jump straight to the right technique.
Still Subjects (Landscapes, Food, Architecture)
For anything that doesn't move, you have time. Use a tripod or prop your phone against something stable. Enable the grid lines (Settings > Camera > Grid).
Use the rule of thirds: place the horizon on the lower or upper grid line, not in the center.
Tap to focus on the main subject. For landscapes, lock focus on the foreground. For food, get close but not too close, stay at least 6 inches away to avoid distortion.
Use the 2x zoom (optical if available, not digital) to crop in tight.
Use the timer (3 seconds or 10 seconds) to avoid shake from pressing the shutter button. No tripod? Brace your elbows against your ribs or lean against a wall.
People and Pets (Portraits, Candid)
Use Portrait mode if your phone has it. It creates a blurred background (bokeh) that separates the subject from the background. Stand 2 to 6 feet away.
If you're too close, the effect looks fake. If you're too far, it won't trigger.
Tap on the subject's face to set focus. The face should be well-lit but not in direct harsh light. For candid shots, hold the shutter down to take a burst.
That captures a series of frames; pick the one with the best expression.
For pets, get down to their eye level. Crouch or lie on the floor. Use burst mode for active animals.
Focus on the eyes, that's what draws the viewer in.
Action and Motion (Sports, Kids, Pets)
Switch to burst mode. On most phones, hold the shutter button (or swipe down on it for iPhone). The camera fires a rapid sequence.
After the moment passes, go to your gallery and select the best frame. Delete the rest to save storage.
If your phone has a "Sports" or "Action" mode, enable it. It increases shutter speed to freeze motion. In regular mode, try to pan the phone with the moving subject, follow it smoothly.
That keeps the subject sharp while blurring the background, giving a sense of speed.
Low Light and Night Scenes
Turn on Night mode. It's usually a moon icon or a "Night" option. After you tap to focus, hold the phone steady.
The camera takes a longer exposure, 2 to 5 seconds. Do not move. Lean against a wall or use a timer.
A tripod is ideal.
If Night mode looks too bright or artificial, switch to Pro/Manual mode (if available). Set ISO to 100-200, shutter speed to 1/8 or 1/4 second. Brace the phone.
This gives a more natural look with less noise.
Selfies and Group Shots
Use the front camera. Turn on the timer (3 seconds). Hold the phone at arm's length but tilt it slightly downward, looking up at the camera avoids double chin and gives a nicer angle.
Tap on your face to lock focus and adjust exposure if needed.
For group selfies, use the timer and prop the phone against something. Or use a selfie stick. Enable wide-angle mode on the front camera if available.
Make sure everyone's face is lit evenly. Move to a window if indoors.
The Right Tools for Each Situation
You don't need a camera bag full of gear. But a few tools make a real difference.
Built-In Modes
- Portrait mode: Best for single people or pets. Works 2-6 feet away. Not great for fast-moving subjects, edges blur incorrectly.
- Night mode: Use for low light. Keep phone still. Takes effect only if the phone detects darkness.
- Pro/Manual mode: Gives control over ISO, shutter speed, and white balance. Great for advanced users. You can save RAW files for editing later.
- Burst mode: Hold shutter. Use for action shots.
- HDR: Auto in most phones. For scenes with bright sky and dark ground, HDR helps balance. But it can make images look unnatural, turn it off for portraits or high contrast art shots.
When to Use a Tripod
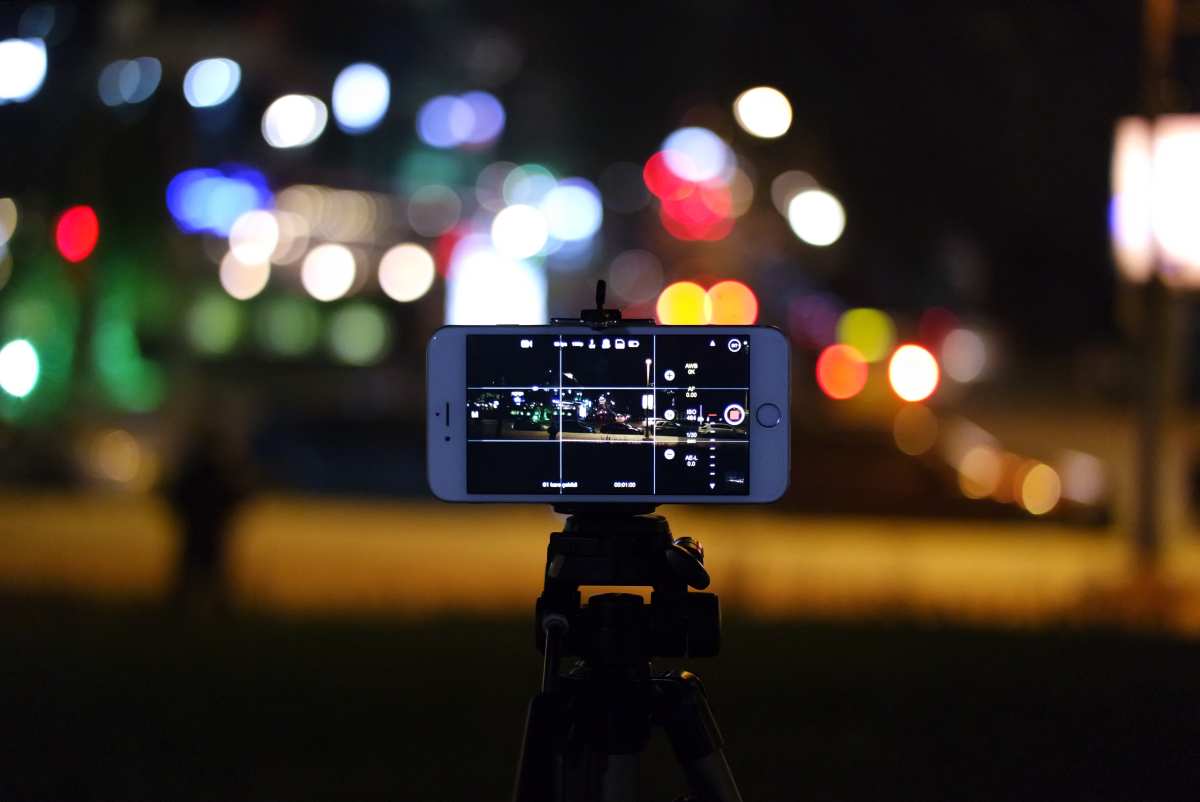
A tripod is worth it for three scenarios: night mode, selfies/group shots with a timer, and long exposures of water or city lights. A cheap $10 phone tripod works fine. One with a remote shutter (Bluetooth) is even better.
Without a tripod, use a timer to reduce shake.
The Flash: Friend or Foe?
Flash is almost always the enemy. It flattens faces, creates harsh shadows, and gives red-eye. Use it only when you absolutely must, like a pitch-black room where you need to capture something quickly.
In that case, turn down the brightness compensation slightly after tapping to focus to reduce the flash's intensity. Better yet, turn on a nearby lamp or use your phone's flashlight as a fill light.
Common Mistakes That Ruin Good Shots
Even with perfect technique, these four mistakes will tank your photos. Watch for them.
Smudged Lens
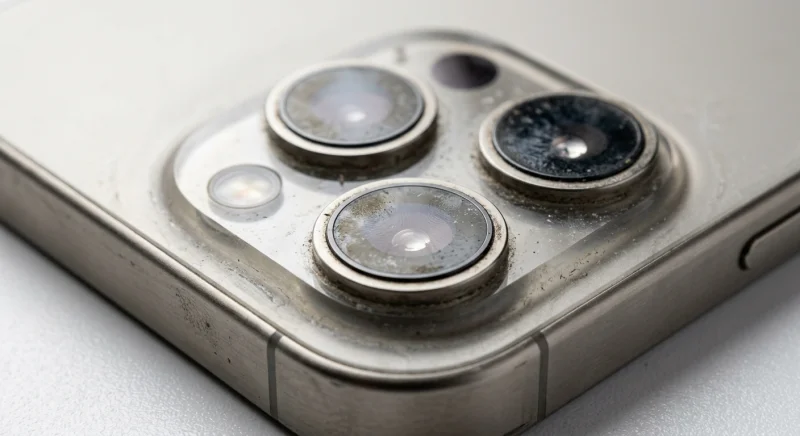
This is the number one killer. A fingerprint on the lens scatters light and creates a hazy, soft image. Before every photo session, wipe the lens with a microfiber cloth or the edge of your shirt.
Do it even if you think it's clean. You'll be surprised.
Wrong Exposure or Focus
Auto mode guesses the wrong subject about half the time. If your photo comes out too dark or the background is sharp but the subject is blurry, you didn't tap to focus. Always tap on the most important part of the frame.
Then adjust exposure.
Cluttered Backgrounds
A busy background distracts from your subject. Before pressing the shutter, scan the edges of the frame. Is there a lamp post growing out of someone's head?
A trash can on the left? Move your feet or reposition the subject to clean up the frame. When in doubt, get closer.
Digital Zoom Trap
Digital zoom is not real zoom. It crops the image and adds blur. Never use more than 2x digital zoom on a phone without optical zoom.
If you need to get closer, walk forward. If you can't, capture the full scene and crop later in editing. You'll get better resolution.
Editing Without Overdoing It
Editing is the final 10 percent. Not the main event. If you got the light and focus right in camera, you barely need to edit.
But a light touch can take a good shot to great.
Basic Adjustments: Brightness, Contrast, Crop
Open your photo in your phone's native editor or a free app like Snapseed. Make three tweaks only.
First, adjust brightness. If the photo is slightly dark, nudge it up 10 to 15 percent. Second, increase contrast by 5 to 10 percent.
That adds depth without looking fake. Third, check the horizon. Is it tilted?
Use the straighten or rotate tool until the horizon is level.
Crop to remove distractions along the edges. Use the rule of thirds grid while cropping. Place your subject on one of the intersecting lines.
Never over-sharpen. That creates a crunchy, unnatural look.
When to Shoot RAW (and When JPEG Is Fine)
RAW files contain all the data the sensor captured. JPEG files compress and discard information. RAW gives you more flexibility to fix exposure and white balance in editing.
But RAW files are large, 25 to 50 MB each.
Shoot RAW when you plan to edit later. That includes landscapes, portraits you want to color grade, or any shot where lighting was tricky. Use JPEG for everyday shots, social media, or when storage is tight.
Many phones let you shoot both at once, RAW plus JPEG. That gives you a ready-to-share version and a file you can tweak later.
A Quick Decision Cheat Sheet for Any Scenario
Use this fast reference when you're in the moment and need to know exactly what to do.
| What you're shooting | Best mode to use | Key technique |
|---|---|---|
| Landscape at golden hour | Auto or Pro | Tap to focus on foreground. Lock exposure. Use grid lines. |
| Group photo indoors | Auto with timer | Tap on center face. Lock AE/AF. Use front-facing camera tilted slightly down. |
| Moving child or pet | Burst mode | Hold shutter. Delete all but the best frame. |
| Food on a table | Portrait mode or Auto | Get close but stay 6+ inches away. Tap on the main dish. |
| Night skyline | Night mode with tripod | Use timer. Keep phone still. Lock focus on a distant light. |
| Selfie in low light | Front camera with timer | Face a window. Raise brightness slightly after tapping your face. |
| Product for sale online | Auto with even lighting | Shoot near window. Tap on product. Avoid shadows. |
Print this or save it as a note on your phone. It covers 80 percent of what you'll shoot.
Final Word: Practice the One Technique That Changes Everything
If you take only one thing from this guide, make it this. Tap the screen to set focus. Then adjust exposure by sliding your finger up or down.
Then lock it with a long press. Do that every single time before pressing the shutter.
That one habit fixes exposure errors, focus errors, and inconsistency. It takes one second. It turns a guess into a deliberate choice.
Everything else is refinement. Light, composition, editing. Those matter.
But none of them work if the camera doesn't know what you're looking at. Start with the lock. Build from there.
Frequently Asked Questions
Why are my phone photos blurry?
Blur comes from two things. Camera shake during the shot or missed focus. Use a faster shutter speed in Pro mode or brace your phone against something stable.
Always tap where you want the focus to be. Burst mode also helps capture a sharp frame from a rapid sequence.
Should I turn off HDR?
Leave HDR on for high-contrast scenes like a bright sky over a dark landscape. Turn it off for portraits or any shot where you want natural skin tones. HDR can make faces look flat and artificial if the lighting is already balanced.
Is digital zoom ever okay?
Only up to 2x on phones without optical zoom. Beyond that, you're better off capturing the full frame and cropping later. The result is sharper.
If your phone has optical zoom (2x, 3x, or 10x), use that. It's real zoom with no quality loss.
How do I avoid red-eye in photos?
Red-eye happens when the flash reflects off the back of the eye. The fix is simple. Don't use the flash.
Use natural light or a room light instead. If you must use flash, look slightly away from the lens so the light reflects at an angle.
What is the best free photo editing app for phones?
Snapseed is widely considered the best free option. It offers selective adjustments, a healing tool, and RAW support. The native Photos app on most phones also handles brightness, contrast, and cropping well.
Start with that before downloading anything else.
Should I use a phone camera grip or case accessory?
A grip helps with stability but is not essential. A tripod is more useful. If you shoot one-handed often, a grip or a case with a built-in handle reduces shake.
For most people, just bracing elbows against the body is enough.

Similar Posts