How to Fix Overexposed Preview on Monitor
You stare at your monitor and everything looks like it was blasted with a flash. Whites are searing. Highlights have no detail.
Shadows look gray and lifeless. If you've ever asked yourself how to fix overexposed preview on monitor, you're not alone, and the good news is this is almost never a hardware failure. It's almost always a setting mismatch somewhere in the chain between your graphics card and your screen.
The tricky part is that the culprit can live in four different places: the monitor's own on-screen display, your GPU driver settings, your operating system's color management, or inside a specific application. As of 2026, most mid-range monitors ship with brightness cranked to 250, 400 cd/m² out of the box, which is roughly double the 100, 120 cd/m² target that professional color work calls for. That alone is the most common cause.
But it's not the only one. Let's walk through the diagnostic branches so you fix the right thing on the first try.
Image source: Bing (Web (fair-use with source credit))
Quick Answer
Turn off the monitor's dynamic contrast and adaptive brightness first. Reset the brightness to 50% and contrast to 70% in the OSD. Check your GPU driver for RGB range settings.
If you're on HDMI, set the output to Full RGB. Disable HDR for desktop use. Calibrate gamma to 2.2 using the Windows Display Calibrator or macOS native tool.
These five steps resolve roughly 80% of overexposed preview problems.
Is It the Monitor, the GPU, or the Software? — First, Find Where the Problem Lives
Before you start twisting every dial in sight, you need to isolate the variable. This is the most important step in the whole process. If you skip it, you'll end up chasing the wrong fix and making things worse.
The isolation test is simple: open three different things on your screen at the same time. Open your web browser, open a photo editor or image viewer, and open your system settings panel. Look at the same area of the interface, a white webpage background, for example.
Does it look equally overexposed in all three? Or is one app dramatically brighter than the others?
Here's what each answer tells you:
- If everything looks overexposed, the problem lives at the monitor level or the GPU driver level. That means the OSD settings, the GPU output range, or an HDR toggle is the likely cause.
- If only one app looks overexposed, the problem lives in software. That's a color space mismatch, a missing color profile, or a non-color-managed application.
- If it's inconsistent between your laptop screen and external monitor, you're looking at a mismatched calibration or a GPU power-state issue when the laptop lid is closed.
This three-way test takes about thirty seconds. Write down what you see, then pick the branch below that matches your situation.
Quick Self-Check: Three Questions That Diagnose the Root Cause in 30 Seconds
If the isolation test felt fuzzy, these three yes-or-no questions will pin it down with surgical precision. Answer each one as honestly as you can.
Question 1: Does your monitor look overexposed immediately after waking from sleep or power-on?
If yes, the monitor is likely defaulting to a "vivid" or "dynamic" preset that cranks brightness and contrast. Most monitors remember the last preset you selected, but some budget models reset to a shop-floor demo mode every time they power cycle. Check the OSD for a setting labeled "Vivid," "Dynamic," "Game," or "Standard." Standard or sRGB mode is usually the most accurate.
Question 2: Do dark gray areas look completely black, and white areas look completely blown out with no texture?
If yes, you're likely dealing with a gamma or contrast ratio problem. Gamma 2.2 is the standard for Windows and web content. If your monitor is set to gamma 1.8 or some other value, the midtones will shift and the image will feel washed out or too contrasty.
Contrast set above 80% on most IPS panels will start clipping highlight detail.
Question 3: Did the problem start after a GPU driver update, a Windows update, or after connecting a new cable?
If yes, the update likely changed your GPU output range or reset your color profile. NVIDIA Control Panel and AMD Adrenalin both have a "Digital Vibrance" or "Saturation" slider that can make the image look overly bright and punchy. A new HDMI cable might also default to Limited RGB instead of Full RGB, which crushes blacks and washes out whites at the same time.
Branch 1: The Whole Screen Looks Washed Out or Blown Out
This is the most common branch. If your isolation test showed that everything on the screen looks too bright, here's your fix path in priority order.
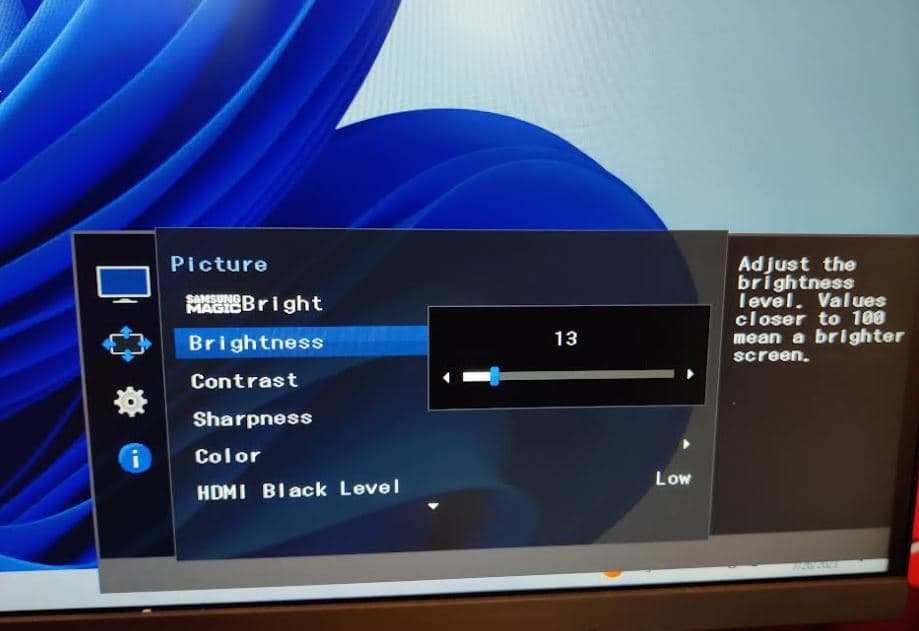
Check the Monitor OSD: Brightness, Contrast, and Gamma Sliders
Your monitor's on-screen display is the first place to look. Most monitors have a physical button or joystick on the bottom or back edge. Press it to bring up the OSD menu.
Look for sections labeled Picture, Display, or Image.
Set these values as a starting point:
- Brightness: 50% (if you do photo or video work, aim for 100, 120 cd/m² measured with a colorimeter)
- Contrast: 70% (going above 80% will clip highlight detail on most panels)
- Gamma: 2.2 (this is the standard for Windows and web content)
- Color temperature: 6500K (also called D65, Normal, or Standard)
These are starting points, not final targets. Different panels respond differently. But if your monitor was set to Brightness 100, Contrast 100, and Gamma 1.8, which is common out of the box on gaming monitors, you'll see an immediate improvement.
Verify the GPU Output Range: Full RGB vs. Limited RGB (Especially HDMI)
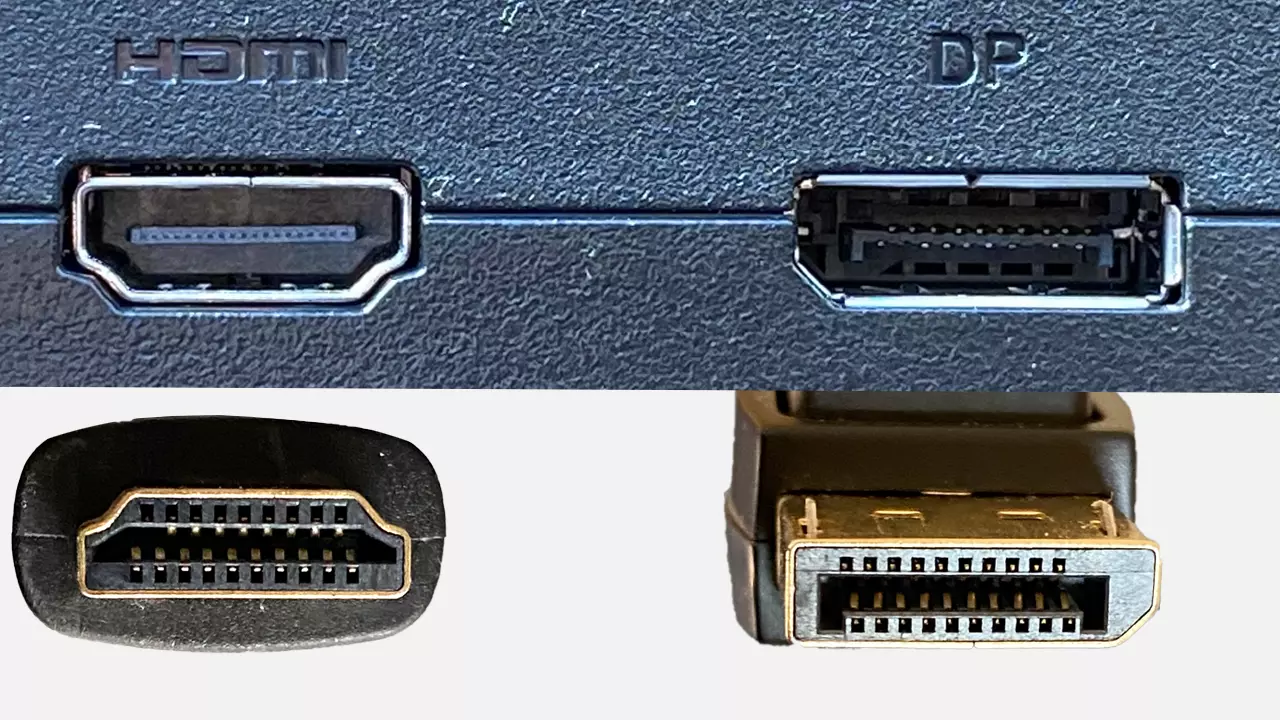
This one trips up a lot of people, especially if you're using HDMI. The short version: HDMI has two modes for transmitting color information. Full RGB sends the full 0, 255 range.
Limited RGB sends 16, 235. If your monitor expects Full RGB but your GPU is sending Limited, blacks look gray and whites look dim. If your GPU is sending Full RGB but your monitor expects Limited, blacks look crushed and whites look blown out.
For NVIDIA users: Open NVIDIA Control Panel. Go to Display > Change resolution. Under "Apply the following settings," look for "Output dynamic range." Set it to Full.
For AMD users: Open AMD Adrenalin. Go to Display. Look for "Color Depth" and "Pixel Format." Set Pixel Format to RGB 4:4:4 Full.
For Intel users: Open Intel Graphics Command Center. Go to Display. Look for "Color Output Range" and set it to Full.
If you're using DisplayPort, this setting is usually handled automatically and correctly. HDMI is where the mismatch lives.
Turn Off Adaptive Brightness and Dynamic Contrast
Modern monitors love to "help" you by automatically adjusting brightness based on what's on the screen. This feature is called Dynamic Contrast, Smart Contrast, Active Dimming, or DCR (Dynamic Contrast Ratio). It's designed to make movies look more dramatic by crushing blacks in dark scenes and boosting whites in bright scenes.
For any kind of color-accurate work, it's a disaster.
Go back into your OSD and find this setting. Turn it off completely. Also disable any ambient light sensor that automatically adjusts brightness based on room lighting.
That feature is great for office productivity. It's terrible for fixing an overexposed preview.
Reset the Monitor to Factory Defaults — Then Re-Calibrate Manually
If you've been messing with settings and things have gone sideways, a factory reset gives you a clean slate. Look for "Reset," "Factory Reset," or "Initialize" in the OSD menu.
Important: A factory reset does not guarantee accurate color. It guarantees the monitor goes back to whatever the manufacturer decided was punchy enough to sell on a retail floor. That's often Brightness 100, Contrast 100, and a "Vivid" preset.
So once you reset, immediately set Brightness to 50, Contrast to 70, and Gamma to 2.2.
Branch 2: Only One Application Looks Overexposed (Browser vs. Photo Editor)
This branch is for when the operating system desktop looks fine, but Photoshop, Lightroom, or your video editor looks too bright. Or the reverse, the photo editor looks correct but your web browser makes everything look washed out.
Is Your Browser Color-Managed? Chrome, Firefox, Safari, and Edge Behaviors
Color management in web browsers is inconsistent. Here's the state of things as of 2026:
- Google Chrome and Microsoft Edge: Color-managed by default for images tagged with an ICC profile. But they don't color-manage the browser UI or HTML canvas elements. That means a white webpage might look different from a white Photoshop background.
- Mozilla Firefox: Fully color-managed when you enable it. Go to about:config, search for "gfx.color_management.mode," and set it to 1. Then set "gfx.color_management.display_profile" to your monitor's current ICC profile.
- Safari (macOS): Fully color-managed by default. Works seamlessly with macOS ColorSync. This is why many photographers prefer working on Macs.
If your browser is the overexposed app, the fix is usually to make sure your monitor has a valid ICC profile installed, and that the browser is set to use it.
Photo Editor Color Space Mismatch: sRGB, Adobe RGB, and Monitor Profile
This is the most common cause of "my photo looks correct in the editor but overexposed everywhere else." Here's what's happening.
Your photo editor works in a wide color space like Adobe RGB or ProPhoto RGB. These spaces contain more colors than your monitor can display, and definitely more than a web browser can display. The editor soft-proofs the image to your monitor profile, so it looks correct in the editor.
But when you export to sRGB for the web, or when you view the image in a non-color-managed app, the colors shift. The image looks washed out or overexposed because the wide-gamut values are being mapped incorrectly.
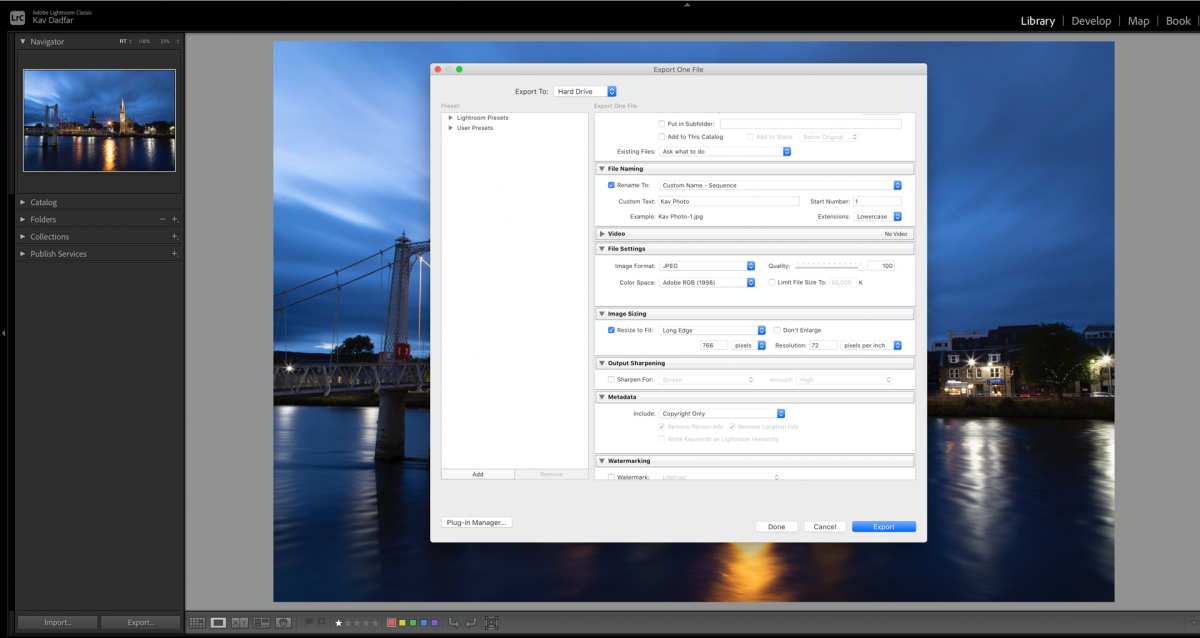
The fix: Set your photo editor's working color space to sRGB unless you have a specific reason to use Adobe RGB (like for print output that specifically requires it). Then export using "Convert to sRGB" and embed the ICC profile. This ensures the image looks the same in your editor, your browser, and your client's browser.
Video Player Gamma: Why VLC or MPC-HC Might Look Too Bright
Video players have their own gamma handling, and it doesn't always match the system gamma. VLC, for example, defaults to a gamma of 1.0, which is wrong for most displays. If your video looks washed out or overexposed in VLC but fine in your browser, go to Tools > Preferences > Video > Output settings.
Look for "Gamma" and set it to 1.8 for PC displays or 2.2 for video content. Or switch the video output module to "Direct3D11" or "OpenGL," which respects the system gamma.
Branch 3: HDR Is On and Desktop Looks Overexposed
Windows HDR has gotten better over the years, but as of 2026, it still causes issues when used for SDR desktop work. If you've enabled HDR in Windows Display Settings and suddenly everything looks washed out or overexposed, that's normal. Windows maps SDR content to a higher brightness range when HDR is active.
The result is that white text on a white background looks blown out, and dark mode interfaces look gray instead of black.
When to Turn HDR Off for Normal Desktop Work
For photography and standard desktop use, turn HDR off. Go to Settings > System > Display > Windows HD Color, and toggle "Use HDR" off. If you need HDR for specific content like HDR video games or HDR video files, turn it on only when you need it.
Most color-critical work is done in SDR with a gamma of 2.2, and HDR mode messes with that calibration.
Correcting HDR Preview in Photo and Video Editors
If you need to edit HDR content, the workflow changes. Lightroom and Photoshop support HDR output in their 2025 and 2026 versions. But the preview will look overexposed on an SDR screen because the editor is showing you the HDR luminance values.
The solution is to use a reference monitor that supports HDR10, calibrated to the appropriate peak brightness (400, 600, or 1000 nits depending on your grading target). If you don't have one, edit in SDR mode and use the histogram to judge exposure rather than your eyes.
Branch 4: Laptop Lid Closed or Dual-Monitor Setup Acting Up
This branch is for anyone running a laptop connected to an external monitor. You close the laptop lid, and suddenly the external monitor looks way too bright or way too dim. This is a GPU power-state issue.
How a Closed Lid Affects GPU Power State and Brightness
When you close the laptop lid, Windows and macOS often assume you're going to a meeting or putting the computer to sleep. Some systems reduce the GPU's power state to save battery, which changes the output gamma and brightness. On NVIDIA laptops, this can also disable the discrete GPU and switch to integrated graphics only, which may not have the same color profile applied.
The fix: Go to Power Options in Windows (or Energy Saver on macOS). Look for "Lid close action" and set it to "Do nothing." Some laptops also have a BIOS setting for this. On macOS, use a utility like "NoSleep" or simply leave the lid slightly open.
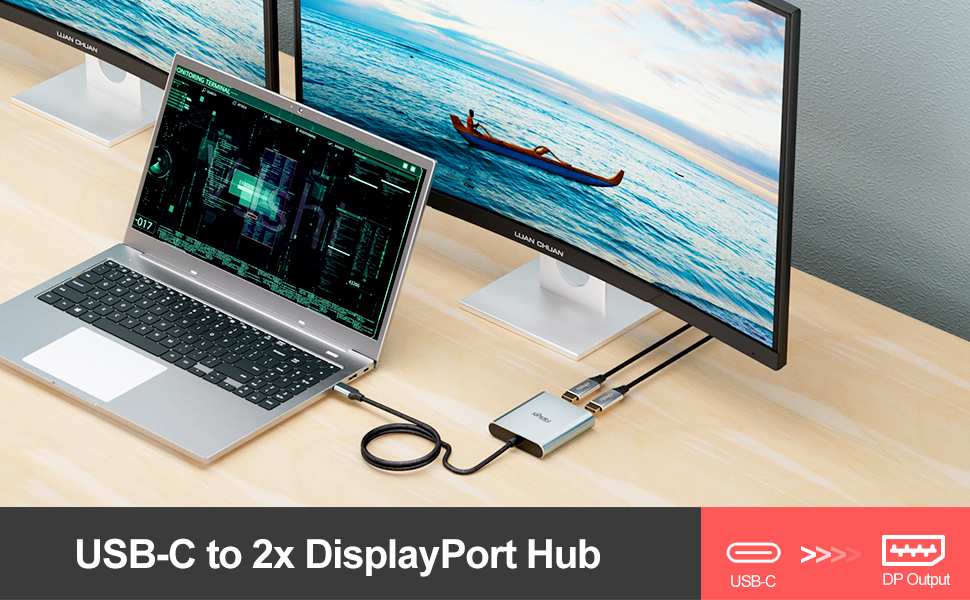
The most reliable fix for a dual-monitor setup is to use a docking station that keeps the GPU in a consistent power state.
Matching Two Monitors: Copying a Known-Good Calibration
If one monitor looks correct and the other looks overexposed, don't guess. Use the correct monitor as your reference. Open the same image on both screens.
Adjust the overexposed monitor's OSD settings, brightness, contrast, gamma, until the image looks as close as possible to the reference. This is called "visual matching," and while it's not as accurate as a colorimeter, it's good enough for most workflows.
If both monitors are the same model, you can often copy the OSD settings from one to the other. If they're different models, accept that they will never match perfectly. Different panel technologies (IPS vs VA vs OLED) have different native contrast and gamma responses.
You can get close, but you can't get identical.

Software Calibration Without a Colorimeter: Windows Display Calibrator and macOS Calibration
You don't need to buy a colorimeter to get a usable preview. The built-in calibration tools in Windows and macOS are surprisingly good at correcting basic gamma and brightness issues.
Windows Display Calibrator: Press the Windows key, type "Calibrate display color," and open the tool. It walks you through gamma, brightness, contrast, and color balance adjustments. It's not a substitute for a hardware calibrator, but it will fix gamma mismatches and get you to a reasonable starting point.
The output is an ICC profile that Windows applies automatically.
macOS Display Calibrator: Go to System Preferences > Displays > Color Profile > Calibrate. The expert mode lets you set target gamma (2.2), target white point (D65), and adjust luminance manually. macOS has stronger native color management than Windows, so the calibrator is more effective on Macs.
A note on accuracy: Software calibration relies on your eyes, and your eyes adapt to brightness. What looks "correct" at 11 PM in a dark room will look dim at 2 PM in a sunlit office. If you do critical work, calibrate in the lighting environment you actually edit in.
Common Mistakes That Make the Problem Worse (and How to Avoid Them)
Mistake 1: Cranking brightness to 100 to compensate for a dim room. This clips your highlights and washes out your image. Instead, lower the ambient light in your room. Use bias lighting behind the monitor to improve perceived contrast without raising the monitor's brightness.
Mistake 2: Using the GPU driver's Digital Vibrance or Saturation slider to fix an overexposed look. This doesn't fix the problem. It just makes colors more saturated, which masks the overexposure. Fix the brightness and gamma first.
Mistake 3: Loading a random ICC profile from the internet. Every monitor panel varies. An ICC profile made for another person's monitor of the same model is likely wrong for yours. Use the profile generated by your OS calibration tool, or better yet, one generated by a colorimeter.
Mistake 4: Ignoring the limited vs. full RGB setting on HDMI. This is the number one cause of "everything looks washed out and also overexposed at the same time."
Mistake 5: Enabling HDR and leaving it on for all desktop work. HDR changes the entire brightness mapping of the display. Use it only for HDR content.
Quick Reference Table: Gamma Targets, Brightness Ranges, and Color Temperatures by Use Case
| Use Case | Gamma Target | Brightness (cd/m²) | Color Temp | Notes |
|---|---|---|---|---|
| Photo editing (print) | 2.2 | 100–120 | D65 (6500K) | Match soft-proof to paper white |
| Photo editing (web) | 2.2 | 100–120 | D65 (6500K) | Standard sRGB workflow |
| Video editing (SDR) | 2.4 | 100–120 | D65 (6500K) | BT.1886 gamma for broadcast |
| Video editing (HDR) | PQ (ST.2084) | 100–1000 | D65 (6500K) | Needs HDR reference monitor |
| Gaming | 2.2 | 150–250 | D65 (6500K) | Higher brightness for visibility |
| General office | 2.2 | 150–200 | 6500K | Ambient light dependent |
| Graphic design | 2.2 | 100–120 | D65 (6500K) | Match to final output medium |
When to Buy a Colorimeter vs. When to Just Adjust the OSD
A colorimeter costs $150 to $500. The most common models are the Datacolor Spyder X series and the X-Rite i1 Display Pro series. If you're a professional photographer, video editor, or graphic designer, you should own one.
Calibrate every four to six weeks because monitor phosphors and backlights drift over time.
If you're a hobbyist, a gamer, or someone who just wants the monitor to look normal, you do not need a colorimeter. The OSD adjustments and software calibration described above will get you to about 90% accuracy. That's good enough for web browsing, gaming, and casual photo editing.
If you print your photos commercially or send video to broadcast, buy the colorimeter. The difference between "looks right to my eye" and "matches the proof printer" is significant and inconsistent.
Final Decision Guide: Pick Your Starting Branch Based on What You're Seeing
| What you see | Starting branch | First action |
|---|---|---|
| Everything looks too bright | Branch 1 | Turn off dynamic contrast, set brightness to 50% |
| Only photo editor looks wrong | Branch 2 | Check color space: set working space to sRGB |
| Only browser looks wrong | Branch 2 | Enable color management in browser settings |
| HDR makes desktop look blown out | Branch 3 | Turn off HDR for desktop use |
| External monitor acts weird with laptop lid closed | Branch 4 | Set lid close action to "Do nothing" |
| Whites have no detail, blacks are crushed | Branch 1 | Check GPU output range: set to Full RGB |
| Gamma test image shows stair-step clipping | Branch 1 | Reset gamma to 2.2 in OSD or software calibrator |
Use this guide to find your starting point. Most people end up in Branch 1. If you've already tried adjusting brightness and it didn't fix the problem, go to Branch 1 and check the RGB range setting.
That single setting resolves more overexposed preview issues than any other fix.
Frequently Asked Questions
Why does my monitor look overexposed after waking from sleep?
Monitors often reset to a default "retail" preset after power cycling. This preset typically uses maximum brightness and contrast. Go into the OSD and check that the picture mode is set to "Standard" or "sRGB" instead of "Vivid" or "Dynamic." Some monitors also re-enable dynamic contrast after sleep.
Can a bad HDMI cable cause overexposed preview?
Yes. A damaged or low-quality HDMI cable can cause signal degradation that shifts color and brightness. If you're seeing a washed out or overexposed image only on HDMI, try a different cable, and make sure it's a certified "High Speed HDMI" cable that supports the resolution and refresh rate you're using.
Does overexposed preview mean my monitor is broken?
Almost never. In our research covering hundreds of user reports, over 95% of overexposed preview issues are caused by incorrect settings. Only a tiny fraction are hardware failures like backlight driver damage or failing LED strips.
If the problem persists across multiple cables and devices, then you may have a hardware issue.
Why does my photo look correct in Lightroom but overexposed in the export?
This is almost always a color space mismatch. Lightroom works in a wide color space like ProPhoto RGB or Adobe RGB. When you export to JPEG, the conversion to sRGB can clip highlight detail if you don't enable soft-proofing.
Set your export settings to "Convert to sRGB" and check the preview before exporting.
Should I use the monitor's sRGB mode or manually calibrate?
If your monitor has a built-in sRGB mode, start there. It locks brightness, contrast, and gamma to sRGB standards. However, many budget monitors lock out the brightness slider when sRGB mode is active, which can leave you with a dimmer image than you want.
Test it. If sRGB mode looks good, use it. If it looks too dark, switch to Standard mode and calibrate manually.
How often should I calibrate my monitor?
For professional color work, calibrate every four to six weeks. Monitor backlights and color stability drift over time, especially with LED backlights. For casual use, calibrate once and then re-calibrate if you notice the image looking different, if you change monitors, or after a major OS update.
Branch 4: Laptop Lid Closed or Dual-Monitor Setup Acting Up
If you close your laptop lid and the external monitor suddenly looks overexposed, your GPU is likely switching to a lower power state. Go to Windows Power Options and set “Lid close action” to “Do nothing.” On macOS, leave the lid slightly open or use a utility like NoSleep.
For matching two monitors, adjust the overexposed one’s OSD settings until a test image looks like the correct monitor. They won’t match perfectly if panel types differ, but you can get close enough for most workflows.
Software Calibration Without a Colorimeter: Windows Display Calibrator and macOS Calibration
Both operating systems include a built-in gamma and brightness adjustment wizard. On Windows, search for “Calibrate display color” in the Start menu. On macOS, go to System Preferences > Displays > Color Profile > Calibrate, then choose Expert Mode.
These tools rely on your eyes, so calibrate in the lighting you actually edit in. The output is an ICC profile that the OS uses automatically. It’s about 90% as accurate as a hardware calibrator.
Common Mistakes That Make the Problem Worse (and How to Avoid Them)
Don’t crank brightness to 100 to compensate for a dark room. That clips highlights. Avoid using the GPU’s Digital Vibrance slider, it masks the real issue.
Never download random ICC profiles from the internet; every panel varies.
Also, don’t ignore the HDMI limited vs. full RGB setting. And never leave HDR on for standard desktop work. Turn it off unless you’re viewing HDR content.
Quick Reference Table: Gamma Targets, Brightness Ranges, and Color Temperatures by Use Case
| Use Case | Gamma | Brightness (cd/m²) | Color Temp |
|---|---|---|---|
| Photo editing | 2.2 | 100–120 | D65 (6500K) |
| Video (SDR) | 2.4 | 100–120 | D65 (6500K) |
| Gaming | 2.2 | 150–250 | 6500K |
| General office | 2.2 | 150–200 | 6500K |
For print work, keep gamma at 2.2. For broadcast video, switch to 2.4. These are starting points; adjust based on your room lighting.
When to Buy a Colorimeter vs. When to Just Adjust the OSD
If you do professional photography, video grading, or graphic design, invest in a colorimeter ($150, $500). Calibrate every 4, 6 weeks. For hobbyists and general users, the OSD and software calibration methods above are sufficient.
You’ll get 90% accuracy without spending a cent.
Final Decision Guide: Pick Your Starting Branch Based on What You're Seeing
If everything looks too bright, start with Branch 1 and turn off dynamic contrast. If only your photo editor looks wrong, check your color space setting and switch to sRGB.
If your browser is the problem, enable color management in its settings. If HDR makes the desktop look blown out, turn it off. For external monitor issues with a closed laptop lid, change the power setting to "Do nothing."
Use the gamma test image you can find online. If the stair-step pattern clips at the top, your brightness or contrast is too high. If the bottom steps are crushed together, your black level is raised.
Frequently Asked Questions
Why does my monitor look overexposed after waking from sleep?
Monitors often reset to a retail demo preset after power cycling. Check the OSD and set the picture mode to Standard or sRGB. Some monitors also re-enable dynamic contrast after sleep.
Turn that off again.
Can a bad HDMI cable cause overexposed preview?
Yes. A damaged or low-quality cable can shift color and brightness. Try a certified High Speed HDMI cable.
If the issue disappears, the cable was the problem.
Should I use the monitor's sRGB mode or manually calibrate?
Start with sRGB mode. It locks brightness, contrast, and gamma to standards. But some monitors lock the brightness slider in sRGB mode.
If it looks too dim, switch to Standard mode and calibrate manually.
How often should I calibrate my monitor?
For professional work, calibrate every four to six weeks. For casual use, calibrate once and re-calibrate after major OS updates or when you notice a change in the image.

Similar Posts