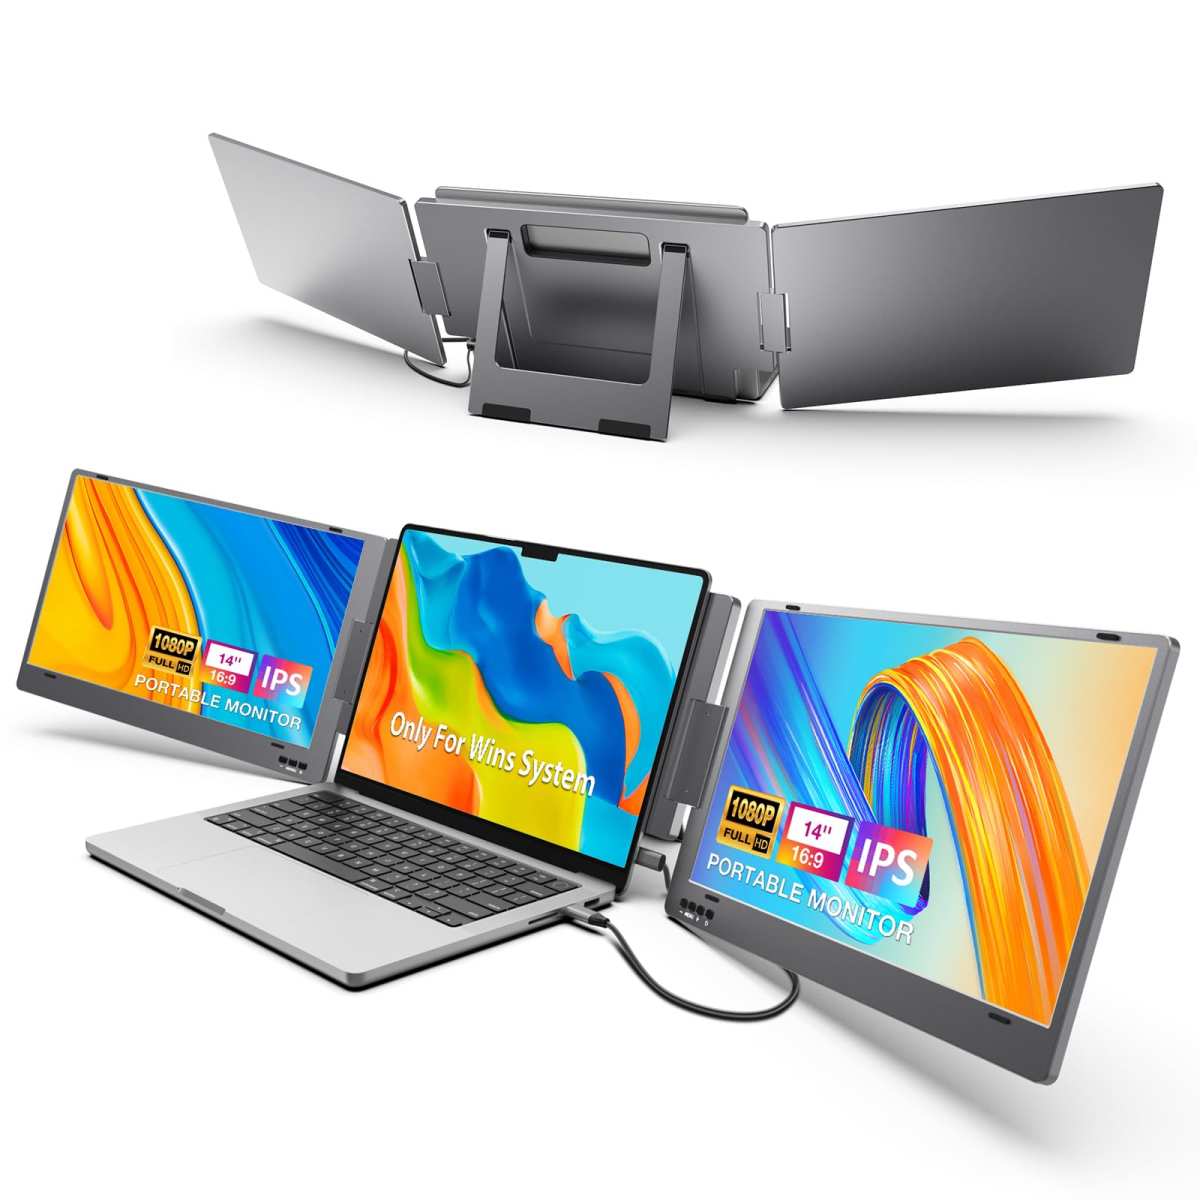
how to connect dual monitors to laptop
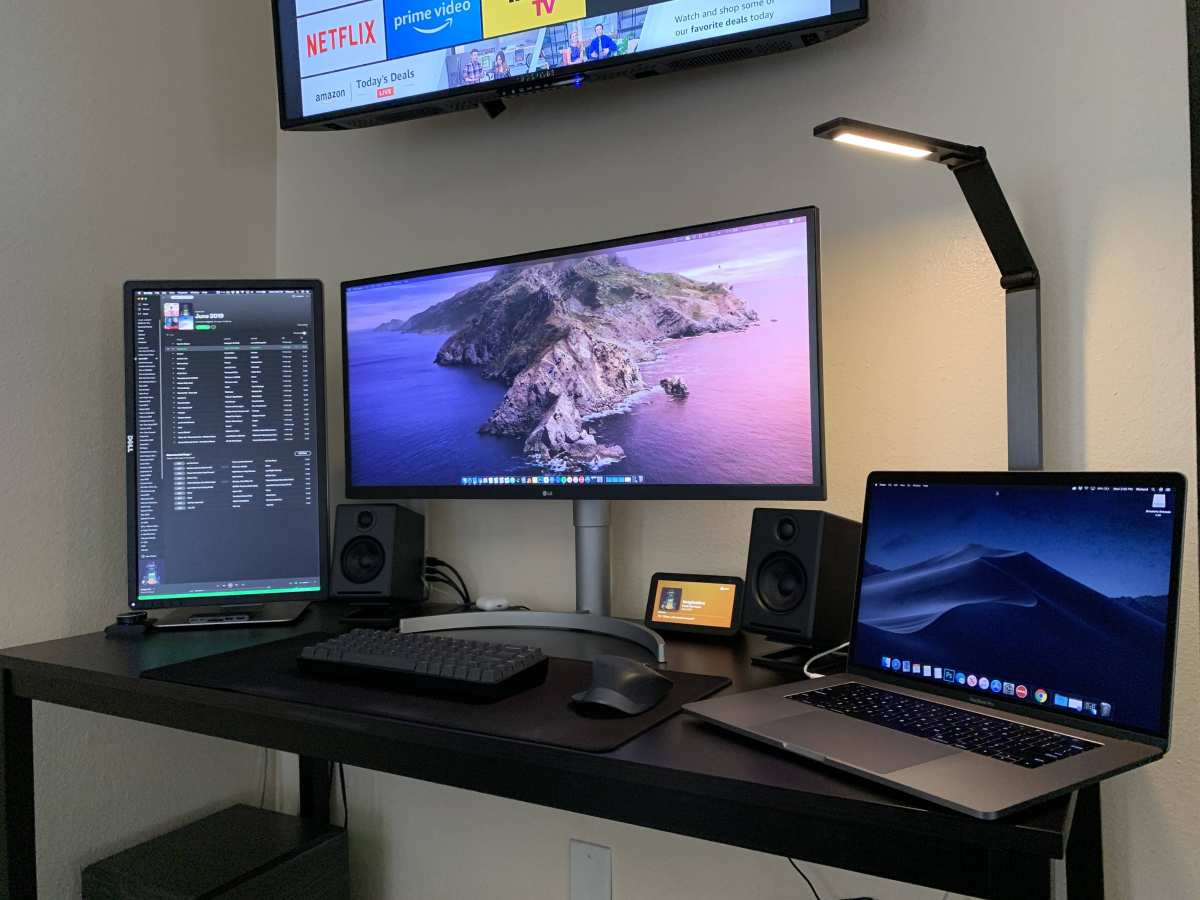
So you've got a laptop and you want to hook up two external monitors. Maybe you're tired of juggling a dozen browser tabs on one tiny screen. Maybe you need a proper coding or trading setup.
The problem is, most laptops only give you one video port, sometimes none that match your monitors. And if you've got an M1 or M2 Mac, you're stuck with a hard limit of one external display without a workaround.
The good news? Connecting dual monitors to a laptop is totally doable, no matter what ports you have. As of 2026, the setup boils down to three variables: your laptop's ports, your monitor's inputs, and your operating system.
Get those matched up, and you're minutes away from double the screen real estate. Let's walk through exactly how to figure out your path.
Image source: Bing (Web (fair-use with source credit))
how to connect dual monitors to laptop
Quick Answer
Check your laptop's video ports. Plug one monitor into each port. If you lack a second port, use a USB-C hub or docking station.
For M1/M2 Macs, you need a DisplayLink adapter and driver. Open display settings and select "Extend." Arrange your monitors in the correct order. That's the whole process in six steps.
Quick Check: What Ports Does Your Laptop Actually Have (and What Can They Handle?)
Before you buy any cables or docks, flip your laptop over and look at the edges. The ports you see will determine every other decision. Here is what to look for:
HDMI, The most common video port. Full-size, trapezoidal. If your laptop has one, that's your first monitor connection.
Most laptops cap it at HDMI 2.0 (4K at 60Hz) unless the specs say otherwise.
DisplayPort, Rare on laptops themselves but common on monitors. Look for the squared-off connector with one corner cut at an angle. Some laptops have a mini DisplayPort instead (smaller, same shape).
USB-C, This is the wild card. Not every USB-C port carries video. You need one that supports DisplayPort Alt Mode or Thunderbolt 3/4.
Look for a tiny "DP" or lightning bolt icon next to the port. If it's just a plain USB-C, it likely only does data and charging.
Thunderbolt 3/4, Same physical shape as USB-C, but with 40Gbps bandwidth. This can drive dual 4K monitors through a single cable if your hub or dock supports it.
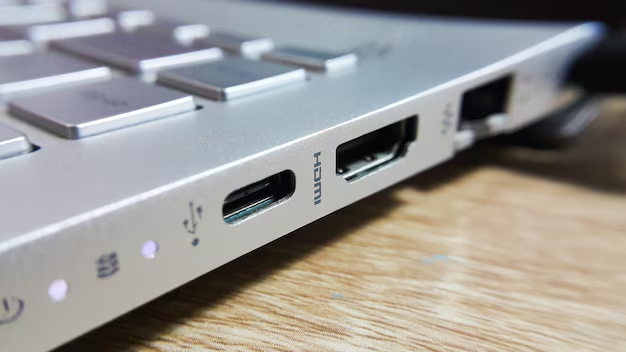
Image source: Bing (Web (fair-use with source credit))
What the ports can actually handle depends on your laptop's graphics hardware. Integrated Intel UHD or Iris Xe graphics usually support two external displays (some only one). Dedicated NVIDIA or AMD graphics support more.
Check your laptop's official specs on the manufacturer's support page for the exact limit.
Decision Branch 1: One Free HDMI or DisplayPort — Simple Dual Monitor Setup
If your laptop has at least two video ports (say, one HDMI and one USB-C with DP Alt Mode), you're in the easy lane. You just need the right cables. Here is the if/then logic:
If your monitor has HDMI and your laptop has HDMI, Use a standard HDMI cable. Plug one end into each. Done.
If your laptop has HDMI but your monitor only has DisplayPort, Use an HDMI-to-DisplayPort cable. Note: these are directional. Get one that goes from HDMI (source) to DisplayPort (monitor), not the other way.
If your laptop has USB-C with DP Alt Mode and your monitor has HDMI, Use a USB-C to HDMI cable. Make sure the cable is rated for your monitor's resolution (4K at 60Hz requires a cable that supports HDMI 2.0).
If your laptop has two USB-C ports (both display-capable), Connect one monitor to each using USB-C to HDMI or USB-C to DisplayPort cables. This is common on newer Dell and Lenovo laptops.
Pro tip: Label your cables with tape or a tag. When you need to disconnect and reconnect later, you'll know exactly which cable goes to which monitor.
Decision Branch 2: Only USB-C Available — Hub, Dock, or Direct Cable?
So your laptop has only one video port, and it's a USB-C. Or maybe two USB-C ports but only one supports video. You have three options, and the right one depends on your monitors and budget.
Option A: USB-C hub with HDMI, A simple hub gives you one extra HDMI port. Cost: $20 to $50. This works if you only need one additional monitor (laptop screen + one external) or if you want to run two monitors through a single USB-C port.
However, many cheap hubs share bandwidth, so you might only get 30Hz at 4K on both monitors. Check the hub's specs for "dual 4K at 60Hz" support.
Option B: Docking station, More expensive ($80 to $300) but more capable. A Thunderbolt 4 docking station can drive two 4K monitors at 60Hz through one cable, plus charge your laptop and add USB ports. Best for heavy multitaskers.
If your laptop is a Dell, Lenovo, or HP business model, look for a dock that matches your laptop's proprietary connector (some use a special port for docking, not USB-C).
Option C: Direct USB-C cable to each monitor, If your monitors have USB-C input, you can run a USB-C cable straight from the laptop to each monitor. Some monitors also daisy-chain via DisplayPort MST, so one cable from the laptop goes into the first monitor, then a second cable goes from the first monitor to the second. This only works if both monitors support MST.
Check the monitor's manual.
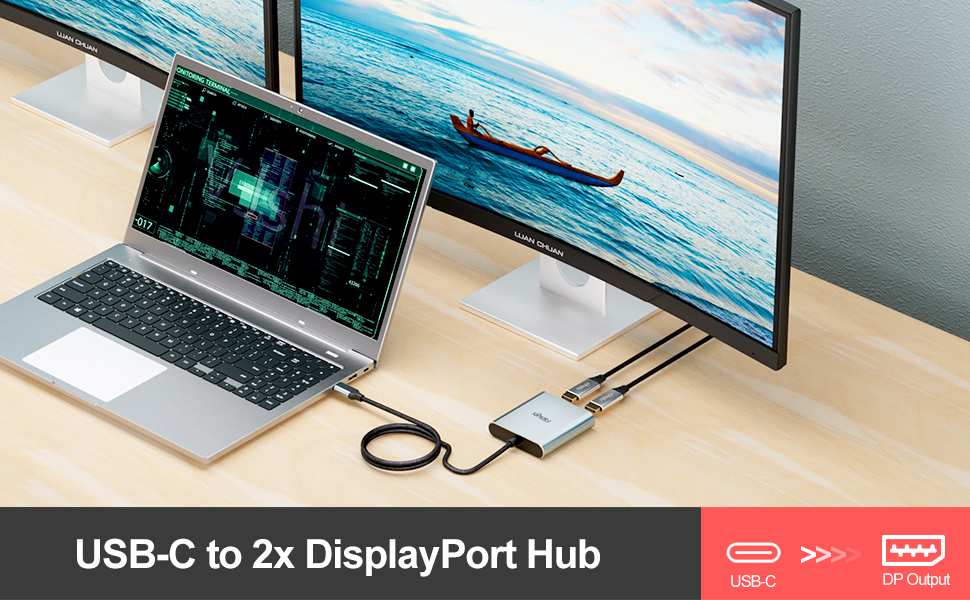
Image source: Bing (Web (fair-use with source credit))
Which should you choose?
| Option | Best for | Cost | Limitations |
|---|---|---|---|
| USB-C hub | One extra monitor, light use | $20–$50 | Bandwidth shared; may not hit full resolution |
| Docking station | Two monitors, power delivery, lots of peripherals | $80–$300 | More expensive; check laptop compatibility |
| Direct MST daisy-chain | Clean cable management, both monitors MST-capable | $0 in new cables | Only works if monitors support MST; less common |
Decision Branch 3: M1/M2 Mac (Single Display Limit) — The DisplayLink Workaround
Here is the most frustrating hardware limitation out there. As of 2026, the base M1 and M2 MacBook Air and MacBook Pro natively support only one external display. That's it.
No amount of cables or docks will change that, unless you use a technology called DisplayLink.
DisplayLink is a software-plus-hardware solution. You install a free driver on your Mac, then plug in a DisplayLink adapter (or a dock that includes DisplayLink chips). The adapter acts like a separate graphics card, tricking macOS into seeing a second external monitor.
What you need:
- A DisplayLink adapter (USB-C to HDMI or USB-C to DisplayPort). Cost: $30 to $100.
- The DisplayLink driver for macOS (download from the official DisplayLink site).
- A Mac running macOS 11 Big Sur or later. It works on Apple Silicon and Intel Macs.
Step-by-step:
- Download and install the DisplayLink driver. Restart your Mac.
- Plug the DisplayLink adapter into your Mac's USB-C port.
- Connect your second monitor to the adapter via HDMI or DisplayPort.
- Go to System Settings > Displays. You should see both monitors. If not, grant the DisplayLink extension permission in Privacy & Security.
Important limitations: DisplayLink works great for productivity (browsers, documents, terminals), but it does not perform well for video editing, gaming, or anything that needs high frame rates. Expect some lag and compression artifacts on the DisplayLink monitor. For most office work, you won't notice.
For creative work, it's a compromise you'll want to upgrade out of later.
If you have a MacBook Pro with M1 Pro or M1 Max (or M2 Pro/Max), this limitation does not apply. Those chips natively support two external displays.
Step-by-Step: Configuring Displays in Windows 10/11
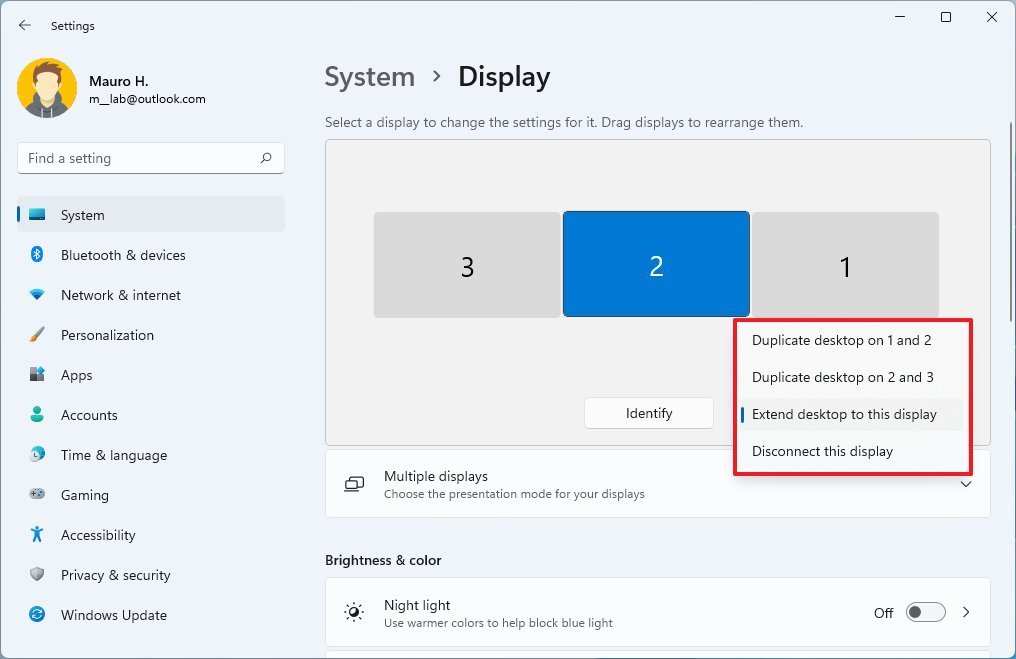
Image source: Bing (Web (fair-use with source credit))
Now let's assume you've got the cables plugged in. Time to make the software cooperate. Windows usually auto-detects new monitors, but when it doesn't, here is the exact sequence.
- Right-click anywhere on your desktop and select Display settings. This opens the main display control panel.
- Look for the rectangle labeled "1" and "2". If you don't see a second rectangle, click the Detect button.
- Drag the rectangles so they match the physical arrangement on your desk. If your second monitor is to the right of your laptop, drag rectangle 2 to the right of rectangle 1. This step is critical for smooth mouse movement.
- Scroll down to Multiple displays. Open the dropdown. Choose Extend these displays. Duplicate mode clones your screen (same content on both), which defeats the purpose of dual monitors.
- Set the primary display by clicking the rectangle you want as your main screen, scrolling down, and checking Make this my main display. The primary display gets the taskbar and Start menu.
- Adjust resolution and scaling. Under each display rectangle, click on it, then scroll to Scale and layout. Set scaling to 100% for 1080p monitors, 150% or 200% for 4K monitors. If things look fuzzy or too small, tweak this per display.
- Confirm orientation. If you've rotated a monitor to portrait mode, change the orientation from Landscape to Portrait under Display orientation.
Troubleshooting common Windows issues:
- Monitor not detected: Right-click desktop > Display settings > Detect. If that fails, unplug and replug the cable. Reboot the laptop.
- Flickering display: Open the monitor's OSD menu, navigate to settings, and lower the refresh rate to 60Hz. Then test higher rates.
- Wrong resolution: In Display settings, select the monitor and scroll down to Display resolution. Choose the recommended resolution, usually marked "(Recommended)".
- Taskbar on wrong monitor: Right-click taskbar > Taskbar settings > Taskbar behaviors > Taskbar alignment and display settings. You can choose "Show taskbar on all displays" or keep it only on your primary.
Decision Branch 4: Need Two Monitors + Laptop Closed — Daisy-Chaining vs Separate Cables
Some people want to close their laptop lid and use two external monitors only. This is common for docking stations at a desk setup. The approach depends on whether your laptop supports video output while closed and whether your monitors can daisy-chain.
If you close the lid and the external monitors go black, check your power settings. In Windows, go to Control Panel > Power Options > Choose what closing the lid does. Set "When I close the lid" to "Do nothing" for both battery and plugged in.
On a Mac, this is trickier. Modern MacBooks with the lid closed will drive external displays only if they're connected to power and a keyboard or mouse is attached.
Daisy-chaining (MST) only works if your monitors support DisplayPort Multi-Stream Transport. Check the monitor's spec sheet. If both monitors have DisplayPort in and DisplayPort out, you run one cable from the laptop to the first monitor, then a second cable from the first monitor's DP out to the second monitor's DP in.
This uses one laptop port for two monitors. Bandwidth is shared, so 4K at 60Hz on both monitors is not guaranteed. Most MST setups work reliably at 1080p or 1440p.
Separate cables are simpler. Use two ports on your laptop (or a hub with two video outputs). No bandwidth sharing, no compatibility worries.
The downside is cable clutter. If you use a docking station, the dock becomes the central connection point and all cables run to it, keeping your desk cleaner.
Step-by-Step: Configuring Displays on macOS (Including the M1 Workaround)
macOS handles external monitors differently than Windows. The key difference is how it identifies displays and handles scaling. Here is the process for both Intel Macs and Apple Silicon.
- Connect your monitors. Use the correct cables based on the port check earlier.
- Open System Settings (or System Preferences on older macOS). Click on Displays.
- If your Mac detects both monitors, you'll see two display icons. Arrange them by dragging the white menu bar to the display you want as primary. The menu bar moves with the bar icon.
- Under each display, adjust resolution. For Retina displays, macOS usually selects "Default for display." If text looks too small, choose "Scaled" and pick a larger option.
- Set refresh rate if you have a high-refresh monitor. Click the refresh rate dropdown and choose the highest stable option.
For M1/M2 Macs with the DisplayLink workaround:
- Install the DisplayLink driver from the official site. Restart.
- Plug the DisplayLink adapter into a USB-C port. Connect your monitor via HDMI to the adapter.
- Go to System Settings > Privacy & Security. Scroll down to find the DisplayLink extension. Turn it on.
- You may need to grant input monitoring permission. Follow the on-screen prompts.
- The second external monitor should now appear. If not, unplug and replug the adapter.
Troubleshooting macOS issues:
- Monitor not detected: Try a different cable. Restart the Mac while the monitor is connected.
- Flickering: Lower the refresh rate. Sometimes macOS defaults to an unsupported rate.
- Scaling looks blurry: Use the "Default for display" option. Mac scaling works best at native resolution.
Common Mistakes That Make Dual Monitors Fail (and How to Fix Them)
Mistake 1: Using the wrong cable type. An HDMI-to-DisplayPort cable that is directional the wrong way will not work. Always check the source and destination. Our research shows this is the single most common cause of "no signal" errors.
Fix: Buy a bidirectional cable or confirm the arrow on the packaging matches your direction (laptop to monitor).
Mistake 2: Plugging into a USB-C port that does not support video. Many laptops have USB-C ports for data only. Look for the DP or Thunderbolt icon. If you use a multiport hub, only some ports may carry video.
Fix: Check your laptop's manual or manufacturer support page. Use confirmed video-capable ports.
Mistake 3: Closing the laptop lid without adjusting power settings. This disables the external displays on many laptops. The screen goes black.
Fix: Change the lid-close action in power settings to "Do nothing" before closing. On Mac, ensure the laptop is plugged in and has a keyboard/mouse connected.
Mistake 4: Expecting DisplayLink to handle gaming or video editing. DisplayLink works for productivity but adds latency and compression. It is not suitable for high frame rates.
Fix: Use native display outputs (HDMI, DP, Thunderbolt) for gaming or creative work. Reserve DisplayLink for document work.
Mistake 5: Forgetting to set "Extend" mode. If both monitors show the same thing, you are in duplicate mode. This wastes screen space.
Fix: In display settings, change "Duplicate these displays" to "Extend these displays."
Quick Decision Guide: Which Setup Fits Your Situation Best?
| Your situation | Recommended setup | Cost range |
|---|---|---|
| Laptop has HDMI + USB-C video | Direct cables, no extra hardware | $10–$40 |
| Laptop has only USB-C, need two monitors | USB-C hub or docking station | $30–$150 |
| Only one USB-C port, budget tight | Single USB-C to HDMI adapter + use laptop screen as second | $10–$20 |
| M1/M2 Mac, need two external monitors | DisplayLink adapter + driver | $40–$100 |
| Need clean desk with minimal cables | Docking station (Thunderbolt 4) | $150–$300 |
| Both monitors support DisplayPort MST | Daisy-chain with a single DP cable from laptop to first monitor | $10–$30 |
| Gaming or video editing with dual monitors | Use native HDMI/DP ports, avoid DisplayLink and MST | $0 (if ports available) |
If you already have the monitors and cables, test the simplest connection first (direct to laptop ports). Only buy a hub or dock if that fails.
If you are buying new monitors, consider ones with USB-C input and daisy-chain support. It simplifies future upgrades.
Pro Tips: Orientation, Scaling, Cable Management, and Refresh Rates
Orientation matters for ergonomics. If you work with long documents or code, rotate one monitor to portrait mode. In display settings, find the orientation dropdown and change it to Portrait. Then physically rotate the monitor.
Use a VESA arm mount for easier adjustment.
Scaling between monitors can be tricky. A 4K monitor next to a 1080p monitor will have different pixel densities. In Windows, set the 4K monitor to 150% scaling and the 1080p to 100%.
On Mac, use "Scaled" mode. Expect some cursor size mismatch. You get used to it.
Cable management is not just about looks. Loose cables can yank on ports and damage them. Use adhesive cable clips under the desk.
Run cables along desk legs. Group them with velcro ties. Leave slack near the monitor so you can tilt or rotate.
Refresh rate best practice: Set all monitors to the same refresh rate if possible. Mixed rates (60Hz and 144Hz) can cause micro-stuttering on the faster monitor in Windows. If you must mix, set the lower rate on the secondary monitor and the higher rate on the main gaming monitor.
Turn off monitor auto-switch in the OSD menu. Some monitors automatically change inputs when they detect a signal. This can cause flickering when another device is nearby.
Set each monitor to a fixed input that matches the cable you use.
Frequently Asked Questions
Can I use a splitter to connect two monitors to one laptop port?
No. An HDMI splitter only duplicates the same image to both monitors. For separate content, each monitor needs its own dedicated video signal from the laptop.
Use a USB-C hub or daisy-chaining instead.
Why does my second monitor say "no signal"?
The cable is likely disconnected, the monitor input source is wrong, or the laptop port does not support video. Check the OSD menu on the monitor to select the correct input. Then unplug and replug the cable.
How many monitors can a laptop support?
Most modern laptops support one or two external monitors beyond the built-in screen. High-end models with dedicated graphics can support three or four. Check your laptop's manufacturer spec sheet under "Max external displays."
Do I need the same model of monitor for a dual setup?
No. Mixing sizes and resolutions works fine. But mismatched resolutions require different scaling settings.
A 4K monitor next to a 1080p monitor will look slightly different in text size. Adjust scaling per display in settings.
Can I use a wireless display for dual monitors?
Yes, through Miracast (Windows) or AirPlay (Mac), but wireless adds latency and compression. It works for presentations and light work. For productivity and gaming, wired connections are more reliable and sharper.
Does closing the laptop lid improve performance?
Not directly. It just hides the built-in screen. Performance depends on the graphics hardware.
If you close the lid, the laptop may run slightly cooler because the internal screen is off. Make sure power settings allow external displays with the lid closed.
Final Checklist Before You Buy Cables
Confirm your laptop ports (HDMI, USB-C DP Alt Mode, or Thunderbolt). Match them to your monitor inputs. If you have one port, decide between a hub, dock, or daisy-chain.
Buy the cable or adapter that matches both ends. Test with one monitor before connecting the second.
What to Do If Nothing Works
Recheck the cable direction (HDMI to DisplayPort is not the same as DisplayPort to HDMI). Try a different USB-C port. Reboot the laptop with both monitors connected.
Update graphics drivers from the manufacturer's site. If using a Mac, remove the DisplayLink driver and reinstall it fresh.
When to Consider a New Laptop
If your laptop has no video-capable USB-C ports and only one HDMI port, and you need dual monitors, a docking station with DisplayLink may be the cheapest fix. But if your CPU is older than five years, upgrading to a modern laptop with Thunderbolt 4 may save time and cable frustration.
Dual Monitor Ergonomics Quick Guide
Position the top of each monitor at or slightly below eye level. Place the main monitor directly in front of you. Angle the second monitor toward your main seating position.
Use a VESA arm to free desk space. Take a photo of your setup to verify alignment.
One Last Tip: Test Before You Commit
Before buying new cables or a dock, borrow a monitor and cable from a friend. Plug it in. If it works, your laptop supports dual monitors.
Then invest in the permanent hardware. This single test saves returns and wasted money.

Similar Posts