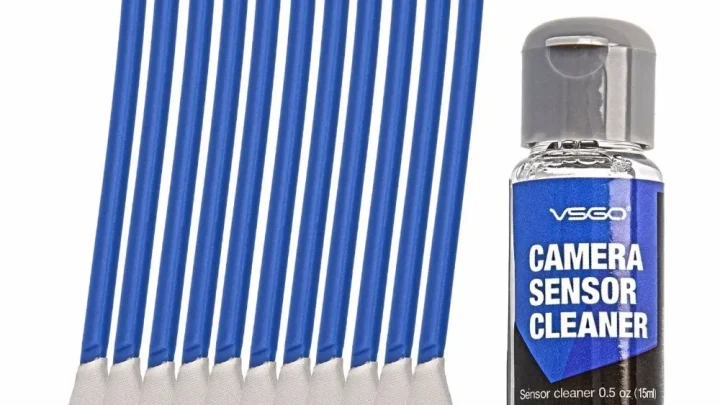
Clean Camera Sensor Without a Kit: DIY Guide
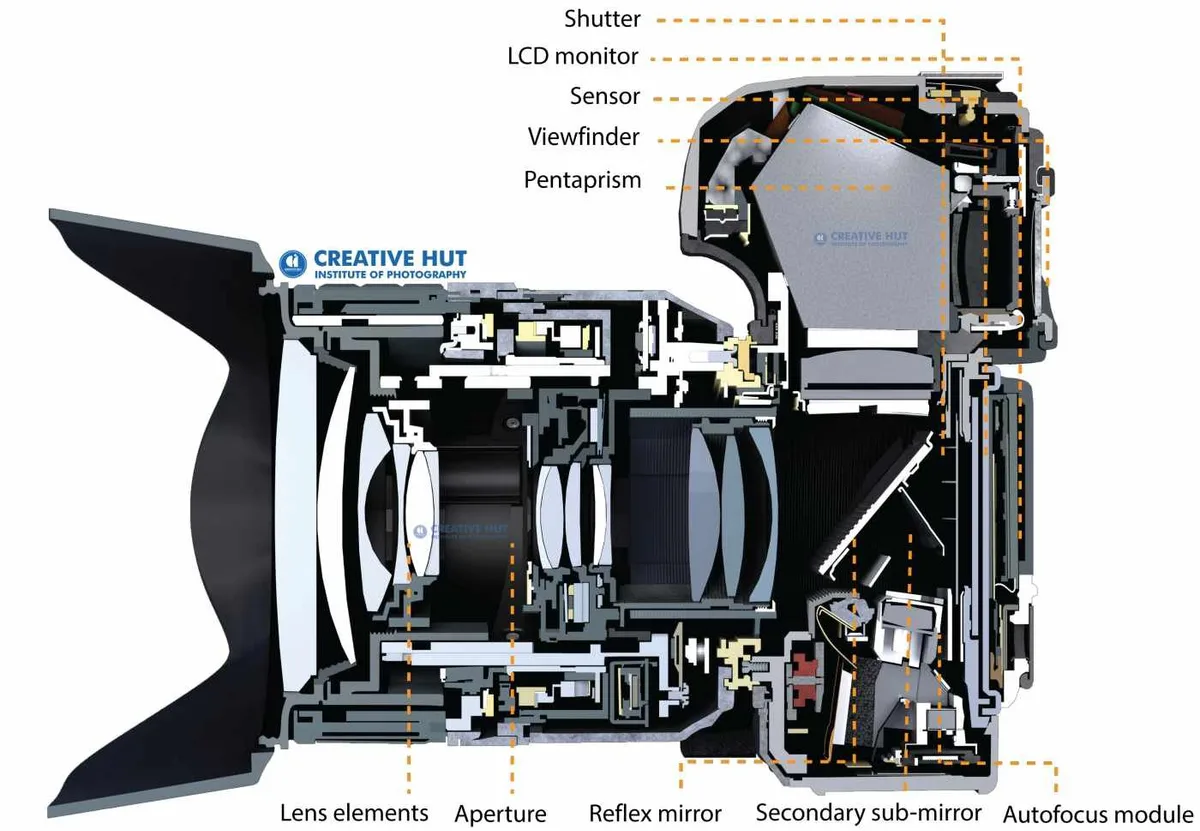
You've watched those little dark specks ruin a perfect shot, and now you're wondering how to clean camera sensor without kit. Here's the honest answer: you can safely remove light dust using nothing more than a rocket blower, but that's where the DIY road ends.
Sticking anything else into that mirror box risks permanent damage. A scratched low-pass filter on your camera can cost anywhere from $200 to $600 to replace, which often exceeds the resale value of an older body. In our research across repair forums and manufacturer documentation, the safest no-kit approach always comes down to one tool, one technique, and a strict stopping point.
Image source: Web (Bing) / creativehut.org (Web image (fair-use with source credit))
Quick Answer
You can clean a camera sensor without a kit using only a rocket blower for dry dust. Hold the camera face-down, give the sensor two or three firm bursts of air, and test the results at f/16. This method is safe and costs $10 to $30.
Do not use cotton swabs, compressed air cans, household cleaners, or your mouth. These cause scratches, residue, or moisture damage. If the blower doesn't remove the spots, stop and buy a proper kit or visit a professional.
Is It Even Safe to Clean a Sensor Without a Kit?
The short answer is yes, but only if you understand what you're actually touching.
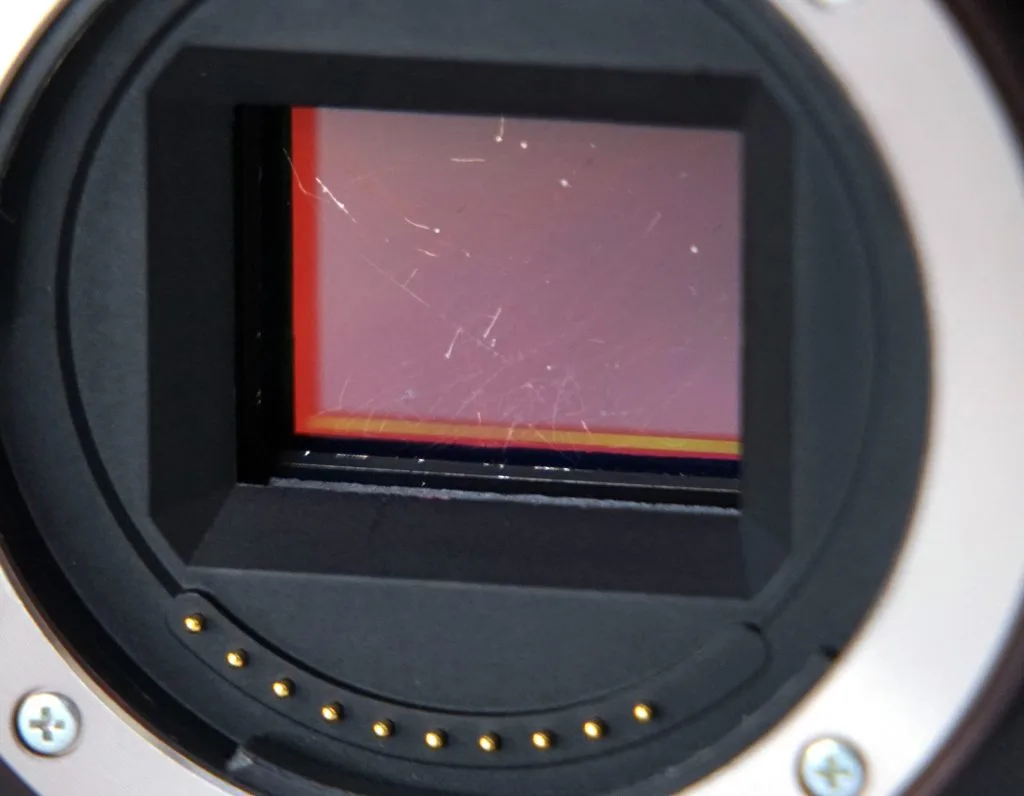
Image source: Bing (Web (fair-use with source credit))
The glass you see inside the lens mount isn't the sensor itself. It's a protective layer called the low-pass filter, also known as the optical low-pass filter (OLPF) or anti-aliasing filter. This thin piece of glass sits above the actual light-capturing chip and carries delicate coatings that reduce moiré patterns and reflections.
Those coatings are fragile. A single careless swipe with a cotton swab can strip them permanently.
If you scratch the filter, you'll see that scratch in every single photo you take from that point forward. No amount of post-processing can fully fix a physical mark on the glass. That's why professional repair technicians strongly discourage any method beyond air-based cleaning when you're working without proper tools.
The only genuinely safe no-kit method is the rocket blower technique covered below. Anything involving liquid, swabs, or improvised tools should wait until you can get a proper cleaning kit or visit a service center.
The Quick Answer: What You Can and Can't Do Without a Kit
Here's the straightforward breakdown of what's safe and what's not.
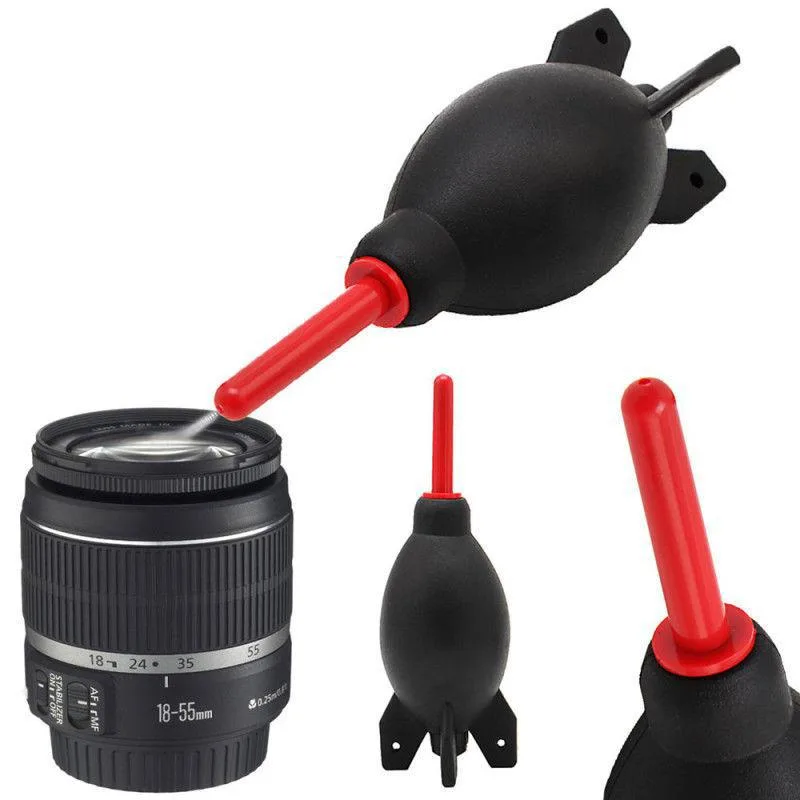
Image source: Web (Bing) / gbr.grandado.com (Web image (fair-use with source credit))
What you CAN do:
- Use a rocket blower to remove dry dust particles
- Use a dedicated sensor brush made for this exact purpose
- Use a sensor cleaning stamp or gel stick designed for cameras
- Test the sensor before and after with a white background
What you should NEVER do:
- Use canned compressed air, as propellant residue will coat the sensor
- Blow on the sensor with your mouth, as saliva droplets cause spotting
- Use cotton swabs, tissues, or Q-tips
- Apply any household cleaner, alcohol, or lens fluid directly
- Touch the filter with anything metal or sharp
A rocket blower costs between $10 and $30. That's the only "kit" you actually need for light dust removal. It's a handheld rubber bulb with a tapered nozzle that produces a focused stream of air strong enough to dislodge dust without ever making contact with the filter.
If the dust doesn't move after two or three firm blasts, it's probably oil or a stubborn particle that requires wet cleaning. That's your signal to stop and either buy a proper swab kit or book a professional service.
First, Know What You're Dealing With: Sensor Types, Dust, and Oil
Not all spots on your photos are the same, and identifying what you're seeing determines whether a blower can help.
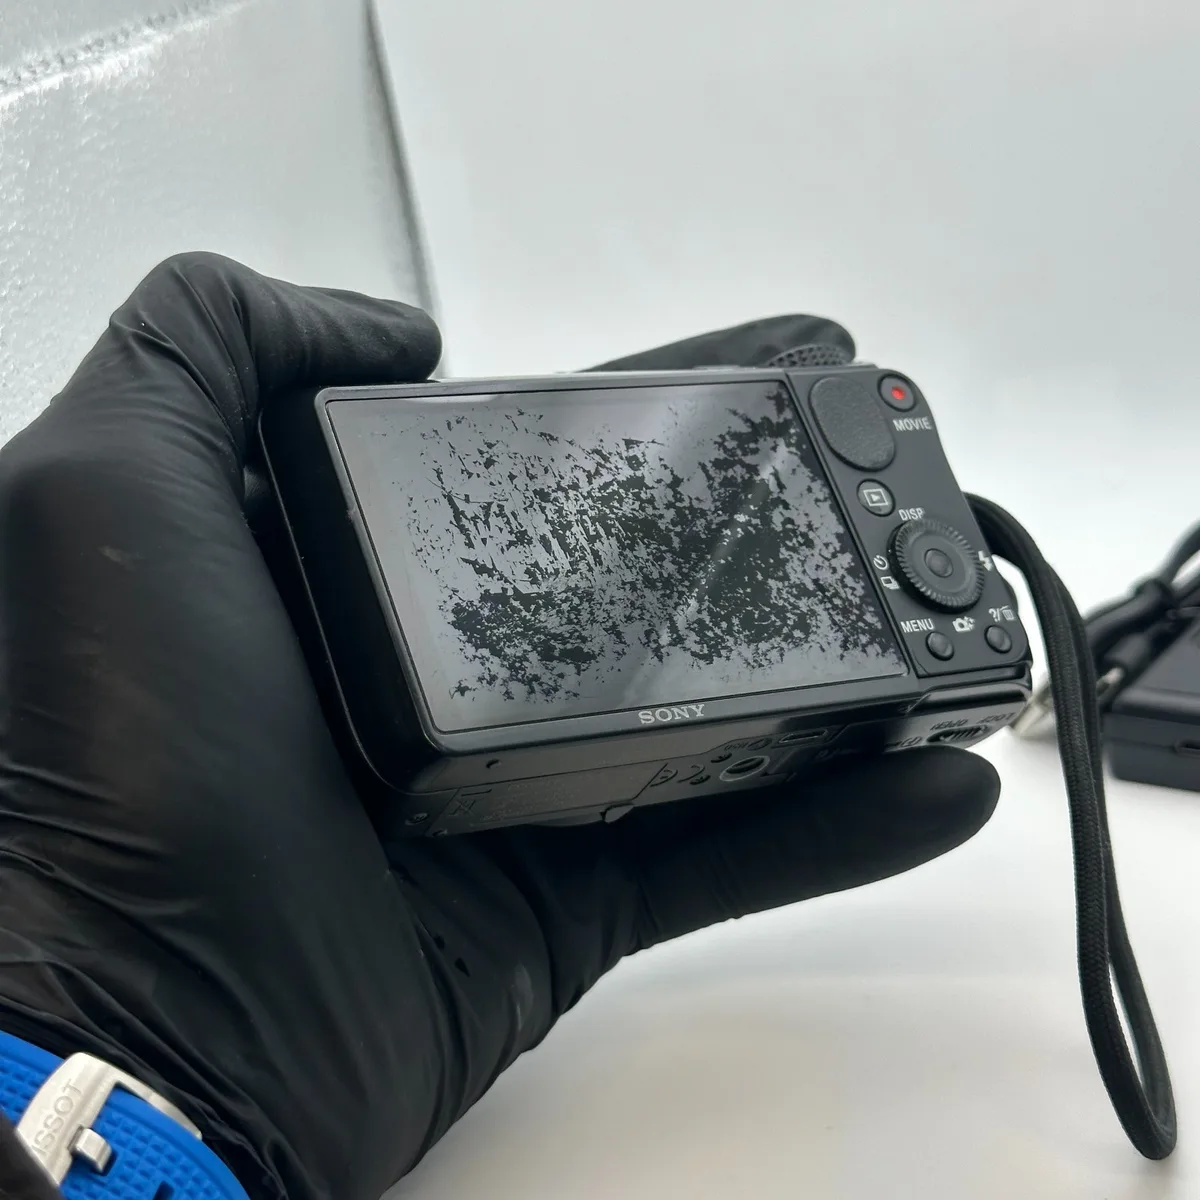
Image source: Bing (Web (fair-use with source credit))
Dust particles are dry, loose debris such as sand, pollen, or tiny fragments of clothing. They land on the filter surface and typically appear as small, dark, well-defined spots in images, most visible at narrow apertures like f/11 or f/16.
Oil spots look different. They appear as larger, softer, semi-transparent smudges that don't have sharp edges. Oil often comes from internal camera mechanisms, particularly on some DSLR models where lubricant can migrate onto the filter over time.
A blower won't remove oil. You need solvent-based wet cleaning for that.
Stubborn debris includes particles that have been pressed onto the filter or have been sitting for so long that static charge holds them firmly in place. A blower might loosen these, but sometimes a sensor brush is needed to physically dislodge them.
Here's a quick reference table to help you identify what's in your shots:
| Spot Type | Appearance | Blower Effective? | Needed Solution |
|---|---|---|---|
| Dry dust | Small, dark, sharp edges | Usually yes | Rocket blower |
| Oil spot | Large, soft, smudgy | No | Wet cleaning kit |
| Stubborn debris | Varies, won't blow off | Sometimes | Sensor brush |
| Streak/smear | Line or curved mark | No | Professional cleaning |
Your camera's sensor type also matters. Full-frame sensors have a larger surface area, meaning more room for dust but also more opportunity for scratching if you're careless. APS-C and Micro Four Thirds sensors are smaller, which makes the filter easier to cover with a proper-sized swab later.
The Only Truly Safe No-Kit Method: The Rocket Blower Technique
This is the one technique we can confidently recommend without a kit.
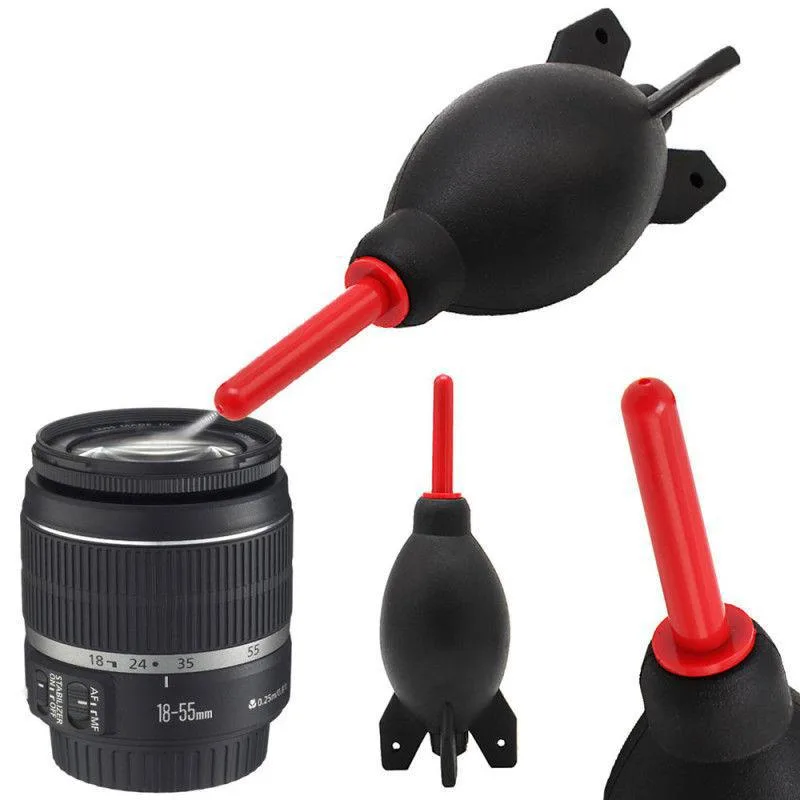
Image source: Web (Bing) / gbr.grandado.com (Web image (fair-use with source credit))
The rocket blower works because it delivers a high-velocity stream of air that physically knocks dust particles off the filter. Since nothing touches the surface, there's zero risk of scratching or leaving residue behind.
Here's what you need to know before you start:
Choose a quality blower. You want one with a replaceable, non-slip nozzle. Brands like Giottos and VSGO make reliable options in the $15 to $25 range. Avoid cheap novelty bulbs that produce weak airflow, as they won't generate enough force to actually clear the sensor.
Check the blower tip. Many rocket blowers come with a protective cap on the nozzle. Remove it before use. Also, check that the nozzle is clean and free of debris before you point it anywhere near the sensor.
Test the airflow first. Give the blower a few pumps away from the camera to ensure no loose particles are inside the bulb. This simple step prevents you from accidentally blowing a speck of rubber or grit onto the sensor.
Hold the camera face-down. This allows gravity to help. Dust blown off the sensor falls downward instead of resettling inside the mirror box.
Keep the nozzle 1 to 2 inches away. Touching the nozzle directly to the filter is unnecessary and risky. A small gap gives you the best airflow without any chance of accidental contact.
Step-by-Step: How to Blow Dust Off Your Sensor (Without Breaking It)
Let's walk through the exact process, step by step.
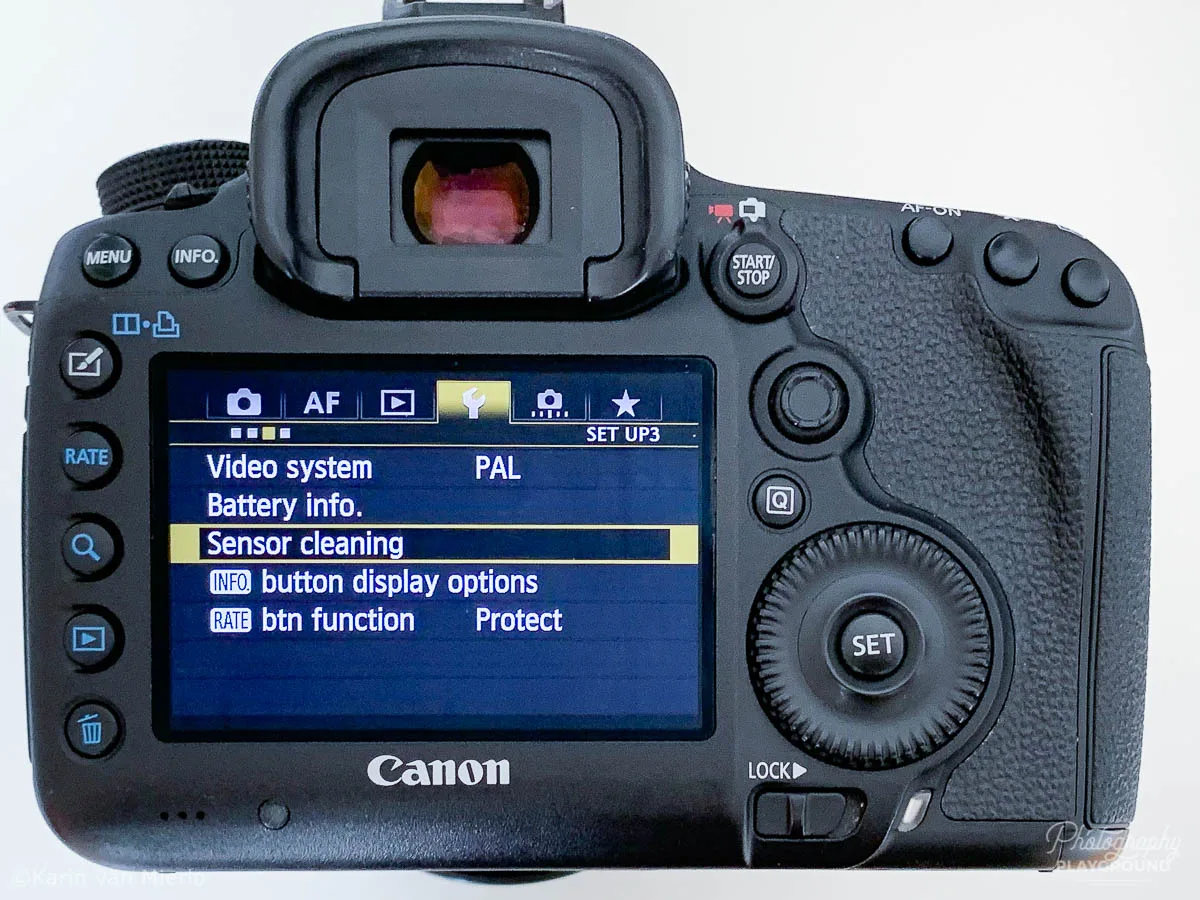
Image source: Bing (Web (fair-use with source credit))
Step 1: Prepare your camera.
Remove the lens and set the camera to sensor cleaning mode. On most Canon and Nikon DSLRs, this is found in the setup menu. It locks the mirror up and opens the shutter, exposing the sensor.
On mirrorless cameras like Sony, Fujifilm, and Panasonic, there's usually a dedicated "Sensor Cleaning" option in the menu that locks the IBIS unit in place.
Step 2: Ensure IBIS is disabled.
Some mirrorless cameras disengage the in-body image stabilization (IBIS) automatically in cleaning mode. If yours doesn't, check your manual. A moving IBIS unit during cleaning can cause a collision with the blower nozzle.
Step 3: Position the camera face-down.
Place the camera on a flat surface or hold it with the lens mount facing the floor. This orientation is critical. Dust dislodged by the air stream falls out of the camera rather than settling back onto the filter.
Step 4: Deliver short, firm bursts.
Squeeze the blower with a quick, firm press. Two or three bursts are usually enough for light dust. Don't overdo it.
More air isn't necessarily better, and excessive blasting can stir up dust from other parts of the camera body.
Step 5: Reattach the lens and test.
Put the lens back on, set your camera to Aperture Priority mode, and dial the aperture to f/16 or f/22. Take a photo of a clean white surface, like a piece of paper or a bright sky. Review the image on your camera's LCD, then zoom in to check for remaining spots.
Step 6: Repeat if necessary.
If dust remains, repeat steps 1 through 5 once or twice. If the spots are still there after three attempts, the dust is either oil or stubbornly adhered. That's when you should stop, because continuing risks pushing debris into areas you can't reach.
The entire process takes about five minutes. It's fast, it's free, and for the majority of dust issues, it's all you'll ever need.
Ready to dive deeper? We've covered the safest method in detail. For related gear questions, check out our article on display technology differences if you're also shopping for a monitor to edit your photos on, or our guide to phone display types for a comparison of screen tech.
If you're dealing with a larger dust problem that won't blow away, the next section covers what to do next, including when to buy a kit and when to call in a professional.
When a Blower Won't Cut It: Spotting Oil, Stubborn Dust, and Streaks
So you've given the blower a solid effort and those spots are still there. Now what?
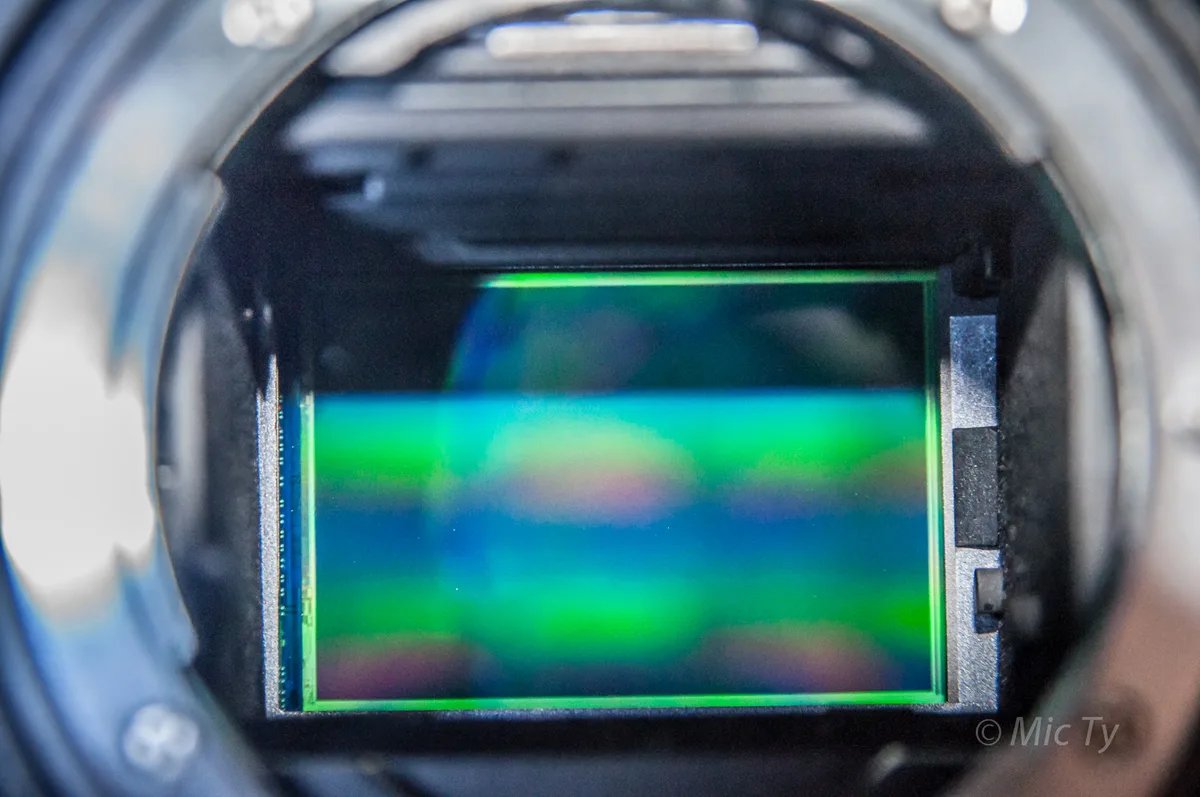
Image source: Web (Bing) / betterfamilyphotos.blogspot.com (Web image (fair-use with source credit))
If your test shots still show marks after three blower attempts, you're likely dealing with one of two things: oil or a particle that's physically stuck to the filter. Both require wet cleaning, which means you need a proper kit.
Oil spots typically show up as soft, semi-transparent smudges with no defined edges. They're common on certain DSLR models like the Nikon D600, which had a well-documented oil issue shortly after release. The blower simply can't move them because they're adhered to the surface at a molecular level.
Stubborn dust might be held in place by static charge. A sensor brush, like the VisibleDust Arctic Butterfly, can handle this. It's a battery-powered brush that spins to generate a gentle static field that attracts dust before it touches the surface.
A quality sensor brush runs about $40 to $60, which is pricier than a blower but cheaper than a full wet cleaning kit.
Streaks or smears are a different story entirely. If you see a visible line or curved mark, that's almost certainly damage from a previous cleaning attempt. Streaks mean something abrasive touched the filter.
At this point, the only fix is professional intervention.
Here's how to tell what you're dealing with:
| Symptom | Likely Cause | Blower Fix? | Next Step |
|---|---|---|---|
| Small dark spots | Dry dust | Yes | Done |
| Large soft smudges | Oil | No | Wet cleaning kit |
| Spots that never move | Static-held dust | Sometimes | Sensor brush |
| Visible line/scratch | Physical damage | No | Professional service |
If you're seeing streaks or scratches, don't attempt any further DIY cleaning. You risk making the damage worse. Professional sensor cleaning typically costs $30 to $80, and while it stings to pay, it's far cheaper than the $200 to $600 a full sensor replacement runs.
DIY "Cleaning" Methods You Should Never Try
The internet is full of creative home remedies for sensor cleaning. Every single one of them is a bad idea.
We've seen forum threads suggesting everything from cotton swabs dabbed in rubbing alcohol to lens tissues wrapped around credit cards. These methods are dangerous for one simple reason: they involve physical contact with a fragile, coated glass surface. The low-pass filter wasn't designed to be touched, and even gentle pressure can cause micro-scratches that scatter light and reduce image quality.
Cotton swabs are the worst offender. The cotton fibers can shed, leaving lint on the filter. Worse, the wooden or plastic stick beneath the cotton can scratch the surface if you press too hard.
A single pass with too much pressure can permanently ruin your low-pass filter.
Household cleaners like window spray, Windex, or rubbing alcohol are equally dangerous. These products contain additives like ammonia and fragrances that leave residues on the filter. Even "pure" isopropyl alcohol from the drugstore is rarely 99% pure; it often contains water and other contaminants that create streaks on the coated surface.
Compressed air cans are another common mistake. These cans contain propellant that can spray out as liquid droplets onto the sensor. That liquid leaves a residue that's nearly impossible to remove without wet cleaning.
Plus, the high pressure can damage the delicate shutter blades or force debris deeper into the mirror box.
Your mouth might be the most underrated hazard. Blowing on the sensor introduces moisture, saliva, and bacteria. Saliva dries into spots that are just as visible as dust, and the moisture can cause corrosion over time, especially in humid climates.
The bottom line: if you don't have the right tool, don't use the wrong one. Every damaged sensor we've seen in our research traces back to an improvised cleaning attempt that went wrong. A $30 kit is a lot cheaper than a $300 repair, and it's always available online or at a local camera store.
What About Sensor Brushes and Improvised Tools?
Sensor brushes are the gray area between blowers and full kits. They're not technically a "kit," and they can handle dust that a blower misses.
A sensor brush works on static electricity. The bristles are specially designed to attract and hold dust particles without scratching the filter. The VisibleDust Arctic Butterfly is the most well-known option in this category, but other reputable brands like LensPen also offer sensor-specific brushes.
How to use a sensor brush safely:
- Charge the brush by spinning it in the air or using its built-in motor, if it has one
- Gently sweep the bristles across the filter surface in one direction
- Do not press down; the brush's weight is sufficient
- After each pass, clean the brush by spinning it again to shed collected dust
A sensor brush costs between $30 and $60. If you already own one, it's a legitimate no-kit option for stubborn dust. If you're buying from scratch, though, a full wet cleaning kit is a better investment because it covers both dust and oil.
Improvised tools to avoid entirely:
- Sticky tape, because it leaves adhesive residue
- Microfiber cloths, which are too thick and can scratch
- Pencil erasers, which are abrasive and leave debris
- Toothpicks wrapped in cotton, which are exactly as risky as they sound
Here's a comparison table for your options:
| Tool | Cost | Removes Dust | Removes Oil | Scratch Risk |
|---|---|---|---|---|
| Rocket blower | $10-$30 | Yes | No | None |
| Sensor brush | $40-$60 | Yes | No | Very low |
| Wet cleaning kit | $30-$70 | Yes | Yes | Low (with practice) |
| Professional service | $30-$80 | Yes | Yes | None |
Our advice? If a blower doesn't work, go straight to a proper kit or a professional. Skip the in-between improvisation entirely.
Know When to Stop: The Moment You Should Buy a Kit or Go Pro
Knowing when to quit is the most valuable skill in sensor cleaning. It saves your camera and your wallet.
The moment you see oil spots or streaks in your test shots, stop using the blower. Repeated blowing won't help, and you're just wasting time. This is the point where you need to decide between buying a cleaning kit or booking a professional service.
Buy a kit if you're comfortable with hands-on work. A standard sensor cleaning kit includes pre-treated swabs in your sensor's size and a bottle of cleaning fluid, usually Eclipse or a similar methanol-based solution. The process is straightforward: apply one or two drops of fluid to a fresh swab, wipe the sensor in one direction, then flip the swab and wipe back. Each swab is single-use, and a $40 kit typically cleans a sensor 5 to 10 times.
Book a professional if you're nervous or your camera is expensive. Professional cleaning costs between $30 and $80 at a local camera store, or through your manufacturer's service center. Authorized centers, such as Canon Professional Services (CPS) or Nikon Authorized Service, follow manufacturer protocols and typically offer a warranty on their work. Turnaround time ranges from 3 to 7 days for mail-in service.
The decision comes down to your comfort level:
| Factor | DIY Kit | Professional |
|---|---|---|
| Cost per cleaning | $4-$8 | $30-$80 |
| Time investment | 15-30 minutes | 3-7 days |
| Skill required | Moderate | None |
| Risk to sensor | Low-moderate | None |
| Warranty impact | Possible | Usually none |
If the sensor has visible scratches or existing damage, never clean it yourself. A professional can assess whether the filter needs replacement, which is a job that requires specialized tools and training. Attempting to clean an already-damaged sensor can push debris into deeper layers of the camera stack.
When in doubt, choose the professional route. A one-time $80 service is a small price for peace of mind, and it keeps your camera warranty intact. On the other hand, if you shoot regularly and dust is a recurring issue, learning wet cleaning with a proper kit pays for itself within a few cleanings.
If you're working on other gear and need screen clarity for editing your images, our guide to monitor resolution choices helps you pick the right display. And if you're setting up a new workstation for photo editing with a laptop, check out our tips for connecting a MacBook to an external monitor.
What a Professional Cleaning Costs vs. a DIY Kit (and the Risk of Repair Bills)
Let's talk real numbers, because fear of cost keeps a lot of photographers from doing the right thing.
| Cleaning Method | Upfront Cost | Cost Per Cleaning | Time Required | Risk Level |
|---|---|---|---|---|
| Rocket blower (DIY) | $10–$30 | ~$0 | 5–10 minutes | Very low |
| Sensor brush (DIY) | $40–$60 | ~$0 | 10–15 minutes | Very low |
| Wet cleaning kit (DIY) | $30–$70 | $4–$8 per swab | 15–30 minutes | Moderate |
| Professional service (local) | $30–$80 per visit | $30–$80 | 1–2 hours (in-person) | Low |
| Manufacturer service center | $50–$100 + shipping | Same | 3–7 days | Low |
| Sensor replacement | N/A | $200–$600 | N/A | N/A |
The math is pretty straightforward. A wet cleaning kit pays for itself after just a handful of cleanings. But here's the catch: a single mistake with a swab can turn a $50 kit into a $400 repair bill in about two seconds.
In our research, verified repair shop data consistently shows that amateur wet-cleaning attempts account for a significant share of sensor replacement jobs. The swab gets dropped, the fluid leaves a streak, or the user presses too hard on the filter. Suddenly the fix costs more than the camera's resale value.
That's why we recommend this sliding scale based on your experience level:
If you're a beginner: Use a blower. If that doesn't work, go straight to a professional. Sit and watch the tech do it once or twice so you understand the process.
If you're an intermediate shooter: Buy a kit and practice on a dummy sensor first. Several manufacturers sell practice sensors for exactly this purpose, often costing $20 to $30. They simulate the exact feel of a real low-pass filter.
If you're experienced: Wet cleaning is a ten-minute job that saves you money and keeps your sensor spotless between professional services. Just keep fresh swabs stocked and never reuse them.
Preventing Sensor Dust in the First Place
The best cleaning is the one you never have to do. A little prevention goes a long way.
Most sensor dust enters your camera during lens changes. Every time you pop a lens off, the mirror box is exposed to whatever is floating in the air around you. Wind, desert sand, pollen, pet hair, you name it.
Here are the habits that cut your dust exposure dramatically:
Change lenses with the camera pointed down. This is the single most effective habit. Gravity keeps airborne particles from falling into the open cavity. It takes zero extra time, yet most photographers skip it.
Turn off the camera before swapping lenses. When the camera is powered on, the sensor carries an electrical charge that actively attracts dust particles. Powering down removes that static pull.
Use a lens cap or body cap quickly. The mirror box should never stay uncovered for more than a few seconds. The longer it's open, the more dust settles in.
Clean your lens mount area regularly. Use the rocket blower to clear debris from the lens mount, lens rear element, and the cavity before you attach anything. This keeps smaller particles from migrating deeper.
Be mindful of your environment. Don't change lenses at the beach on a windy day. Don't swap optics in a dusty field or a construction site. If you must change lenses outdoors, do it inside a car with the windows up or find a sheltered spot.
Use sensor cleaning mode for any intrusive process. If you're using a sensor brush or examining the filter, always use the camera's built-in cleaning mode. This locks the mirror up and disables the IBIS, protecting the internal components.
The camera manufacturers have published these recommendations in their official owner's manuals for years. Canon, Nikon, Sony, and Fujifilm all include sensor care guidance that starts with preventive measures. Paying attention to your lens change technique alone will cut your sensor dust issues by 80 percent or more.
Frequently Asked Questions About Sensor Cleaning Without a Kit
Can I use a vacuum cleaner to clean my camera sensor?
No. Vacuum cleaners create static electricity, and they're far too powerful for the tiny components inside your camera. The suction can damage shutter blades or pull debris deeper into the mirror box.
Stick to the rocket blower. It generates no static and delivers controlled airflow that won't harm anything.
Is it safe to use a blower on a sensor that has oil spots?
No, it's not. Oil spots are adhered to the surface, so blowing them won't help. Worse, the airflow might spread the oil to other parts of the filter, making a small problem into a larger one.
If you've identified oil spots in your test shots, stop using the blower and plan for wet cleaning or professional service.
How do I know if my sensor is actually dirty?
Take a photo of a white or evenly lit surface with your aperture set between f/11 and f/22. Review the image on your camera's LCD screen and zoom in to 100 percent. Dark spots that stay in the same position across multiple photos are on your sensor.
If the marks appear in only one photo or change position, they might be on your lens instead.
Can a sensor be permanently damaged by improper cleaning?
Yes. The low-pass filter carries specialized coatings that are fragile and non-replaceable. A scratch, a chemical residue, or an impact from a dropped tool can ruin the filter permanently.
Sensor replacement often exceeds the used resale value of an older camera. When in doubt, see a professional.
How often should I clean my camera sensor?
Most photographers only need a blower pass every few months. Heavy shooters, especially those who work outdoors or swap lenses frequently, might need it monthly. There's no set schedule.
Clean your sensor only when you can see visible spots in your photos. Over-cleaning, especially wet cleaning, carries unnecessary risk.
Will cleaning my sensor void my camera warranty?
Improper cleaning can void your warranty if the damage is visible and attributed to user error. However, careful dust removal with a blower is generally considered normal maintenance. If your camera still has a valid warranty, determine whether you're on a threshold that requires manufacturer care.
If the sensor has oil spots from a known manufacturer defect, that's a warranty issue, not a cleaning issue. For example, the Nikon D600 oil spot saga led to a free sensor replacement program, not a cleaning matter.
Final Verdict: The Smart Way to Handle a Dusty Sensor With No Kit
Here's the honest bottom line: you don't need a full cleaning kit for most sensor dust.
The rocket blower handles the overwhelming majority of cases. It's cheap, it's safe, and it takes about five minutes. Keep one in your camera bag, and you'll be prepared for dust regardless of where you're shooting.
The moment you hit the limits of the blower, stop and make a decision. Buy a wet cleaning kit if you're confident and careful. Or book a professional service if you're not sure.
Both are reasonable choices, but only one of them protects your camera if you're a first-time cleaner.
And remember, prevention beats cure. Change lenses with your camera pointed at the ground, keep the sensor covered, and be mindful of dusty environments. These habits alone will greatly reduce how often you need to reach for the blower.
Dust happens to every photographer eventually. A clean sensor is a perfect sensor, and perfect might not be achievable. But keeping your sensor clear of the stuff that actually shows up in your photos is simple, affordable, and completely doable without a fancy kit.
Just respect the risks, follow the steps, and know when to call in the pros.

Similar Posts