How to Use 27 Inch Monitor with MacBook
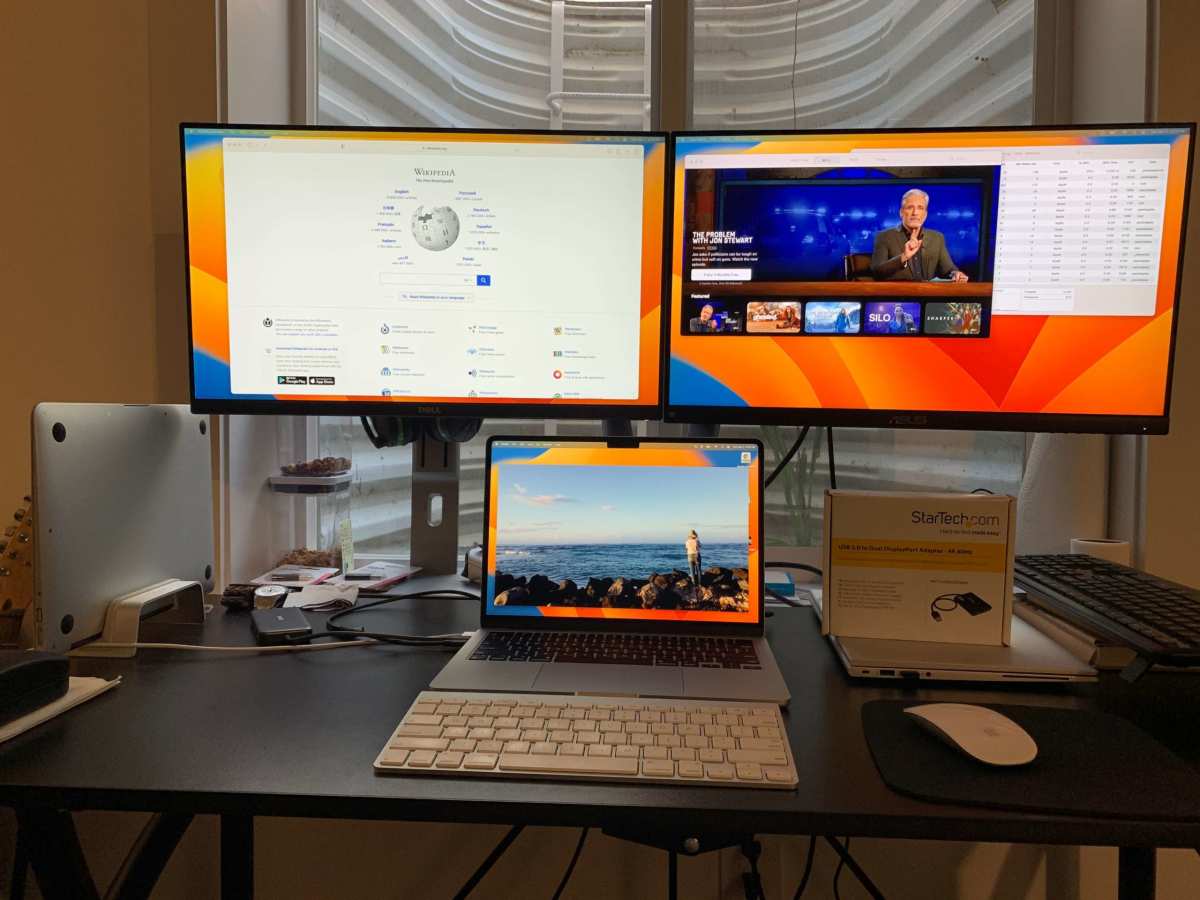
You know that feeling. You just picked up a crisp 27‑inch monitor. You sit down with your MacBook, plug in a cable, and… nothing.
Or worse, the screen shows up but looks soft, the wrong resolution, or flickers at 30Hz. The whole thing turns into an hour of Googling and restarting.
Figuring out how to use a 27 inch monitor with a MacBook shouldn’t be a puzzle. And as of 2026, it doesn’t have to be. But the right setup depends on your exact MacBook model, the monitor’s resolution, and one cable choice that trips up almost everyone.
Let’s untangle it step by step so you can get that second screen working the way you imagined.
Image source: Bing (Web (fair-use with source credit))
Quick Answer
Connect your MacBook to the monitor via USB‑C or Thunderbolt. Check your MacBook’s model for display limits. Open System Settings > Displays and select Extend or Mirror.
Adjust scaling for crisp text. For closed‑lid mode, plug in power and an external keyboard.
What You’re Really Asking: Can My MacBook Even Drive This Monitor?
The short answer is yes, almost certainly. Every MacBook made since 2016 supports at least one external display up to 5K or 6K. But “supports” doesn’t mean “supports well with any cable.”
Here’s the catch: Apple Silicon MacBooks (M1, M2, M3, M4) have different display limits than Intel models. An M1 MacBook Air, for example, officially supports only one external display. An Intel MacBook Pro from 2019 can drive two or three.
If you plan to use a 27‑inch monitor, that single‑display limit is fine. But if you want to add a second monitor later, that’s where the fork happens.
Your MacBook’s port generation also matters. Thunderbolt 4 delivers 40 Gbps of bandwidth. USB‑C 3.1 Gen 2 tops out at 10 Gbps.
That difference determines whether you get 4K at 60Hz or 4K at 30Hz, or whether you can run a 5K display at all.
First, Check Your MacBook Model (This Changes Everything)
Before you buy a cable or fiddle with settings, identify your exact model. It takes ten seconds. Click the Apple logo in the top‑left corner, then select “About This Mac.” The window shows your MacBook’s chip (Intel, M1, M2, etc.) and its model year.
That one line tells you everything about display support, port type, and maximum resolution. Write it down. You’ll need it for the next steps.
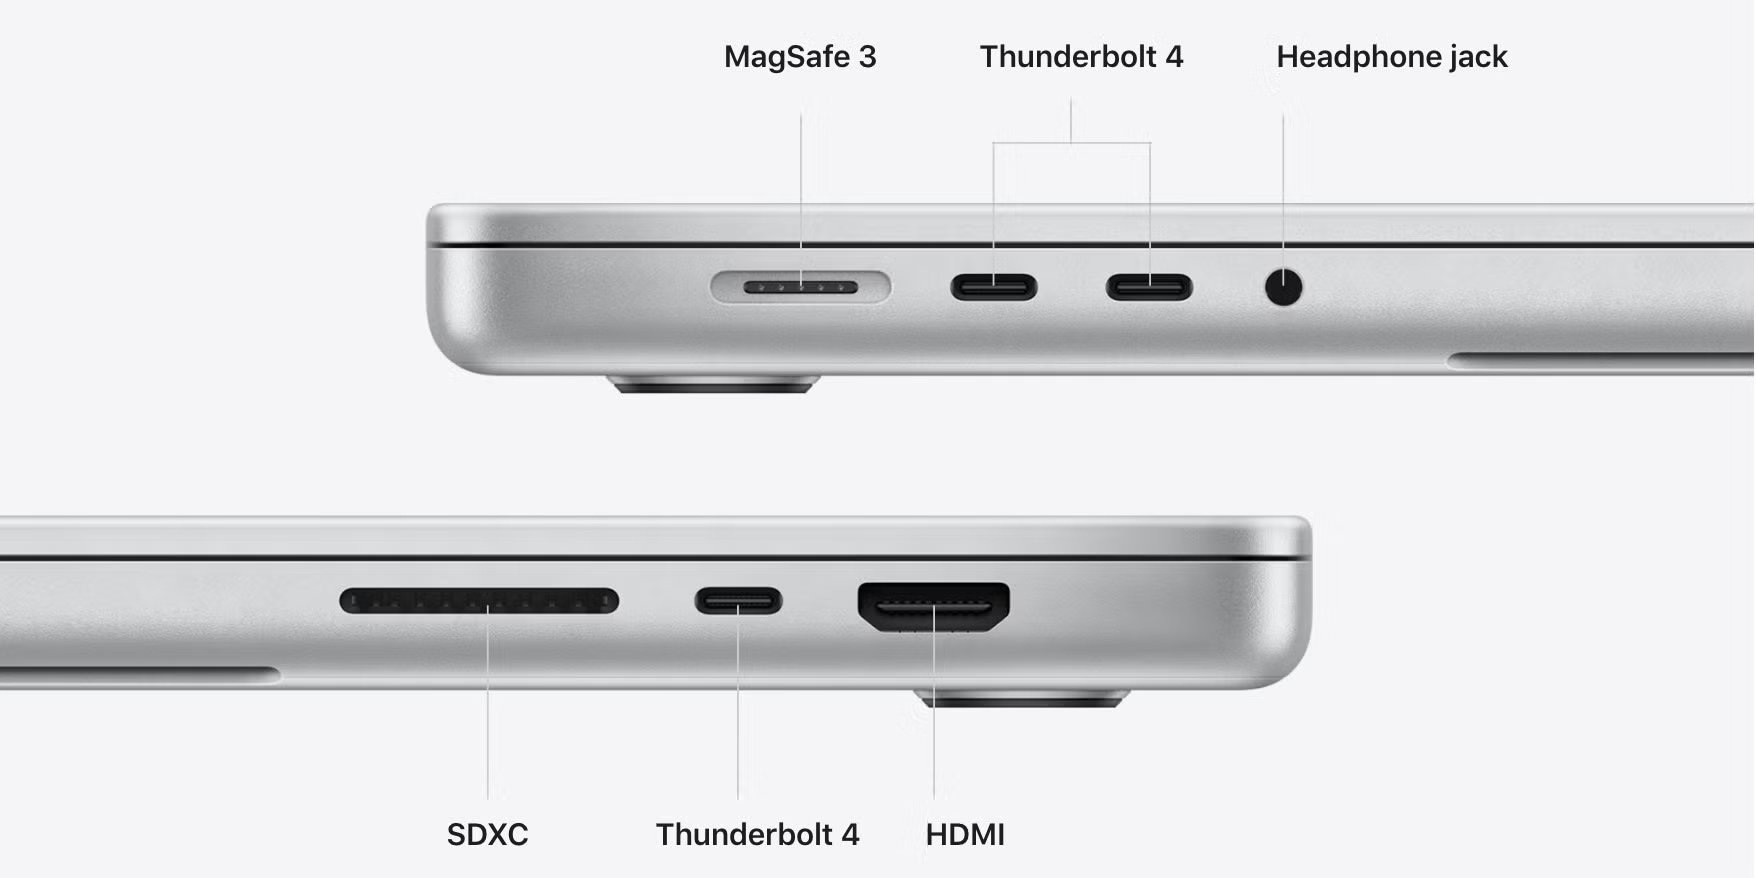
Image source: Bing (Web (fair-use with source credit))
Intel vs. Apple Silicon: The Display Limit Difference
| Chip family | Max external displays (built‑in) | Notes |
|---|---|---|
| Intel MacBook Air/Pro (2016–2019) | 2 (up to 6K each via Thunderbolt 3) | Some models support 2x 4K or 1x 5K |
| M1 MacBook Air / M1 Pro 13” | 1 | Only one external display without DisplayLink |
| M1 Pro / M1 Max (14”, 16”) | 2 (Pro) / 3 (Max) | M1 Max can drive up to 3 displays |
| M2 MacBook Air / M2 Pro 13” | 1 | Same single‑display limit as M1 Air |
| M2 Pro (14”, 16”) | 2 | Supports up to 6K at 60Hz per display |
| M3 / M4 MacBook Pro | 2 (Pro) / 3 (Max) | Up to 8K on supported monitors |
The big takeaway: if you have an M1 or M2 MacBook Air or 13‑inch Pro, you are limited to one external monitor. A single 27‑inch display works perfectly. But if you hoped to run two 27‑inch monitors, you’ll need a DisplayLink adapter.
We’ll cover that later.
How to Find Your MacBook’s Max Resolution and Ports
Head back to About This Mac. Under “Graphics / Displays” or “Displays,” you’ll see a list of supported resolutions. Apple’s official specs page (search your model) lists the exact maximum: “Up to 6K at 60Hz over Thunderbolt” or “Up to 4K at 60Hz over HDMI.”
Your ports are usually Thunderbolt 4 (USB‑C) on modern models, or Thunderbolt 3 on older ones. If you see a separate HDMI port (on Intel models), that’s great for plug‑and‑play but limits resolution compared to Thunderbolt.
Next, Match the Monitor’s Resolution to Your Eyes and Budget
A 27‑inch monitor comes in three common resolutions. Each has a different effect on how text and UI elements look on a Mac.
1440p (QHD) – The Sweet Spot for Most MacBooks
2560×1440 is native 2K. At 27 inches, pixel density is about 109 PPI. That’s close to what Apple calls “Retina” at normal viewing distance.
Text is sharp without scaling complications. Your Mac treats it as a normal resolution and doesn’t need to do extra math.
- Best for: budget setups, general office work, coding
- Mac scaling: works at 1x, no performance hit
- Typical price: $200, $400
Aggregate user reviews consistently report fewer “fuzzy text” complaints with 1440p on a 27‑inch monitor than with 4K on the same size.
4K – Crisp, But Only If You Get Scaling Right
3840×2160 on a 27‑inch gives roughly 163 PPI. That’s great for sharp text and detail. The problem: macOS doesn’t render 4K natively at that size.
It uses a scaled resolution (e.g., “looks like 2560×1440”) to make UI elements readable. That scaling works beautifully on M‑series Macs. On older Intel machines, it can introduce slight lag or higher CPU usage.
- Best for: photo editing, design work, anyone who wants crisp text
- Mac scaling: use the “Looks like 2560×1440” option in Displays
- Typical price: $300, $600
- Warning: a cheap 4K monitor with poor color accuracy looks worse than a good 1440p panel
5K – The Pro Dream (and the Price Tag)
5120×2880 is the true Retina resolution at 27 inches (218 PPI). macOS renders it at native 2x scaling, which looks buttery smooth. The kicker: only a handful of monitors hit 5K, and they cost $1,000 or more. The Apple Studio Display is the most famous example.
- Best for: color‑critical professionals, anyone who wants the best Mac experience
- Port requirement: Thunderbolt 3/4, HDMI cannot carry 5K at 60Hz
- Typical price: $1,200, $1,600
Then, Pick the Right Cable – This Trips Everyone Up
You have the right MacBook. You have the right monitor. You plug in a random USB‑C cable from a drawer, and the monitor stays black or shows a blurry 1080p image.
That’s the cable.
Here’s the simple rule: use a cable that matches the monitor’s input and your MacBook’s port generation. Not all USB‑C cables carry video. Not all HDMI cables support 4K at 60Hz.
USB‑C / Thunderbolt Direct (Best for Modern Monitors)
Many 27‑inch monitors include a USB‑C port that accepts display, data, and power over one cable. This is the cleanest setup.
| Cable type | Max resolution | Power delivery | Best for |
|---|---|---|---|
| USB‑C 3.1 Gen 2 (10 Gbps) | 4K @ 60Hz | up to 60W | M‑series MacBooks, 1440p monitors |
| Thunderbolt 3/4 (40 Gbps) | 6K @ 60Hz, 5K @ 60Hz | up to 100W | 5K monitors, large data transfers |
| Standard USB‑C (5 Gbps) | 4K @ 30Hz | varies | do not buy for external monitor |
If your monitor has a USB‑C port, use the included cable. If you lose it, buy a Thunderbolt 4 cable (they’re backward‑compatible) or a “USB‑C to USB‑C” cable that explicitly states “supports video” and “4K 60Hz.”
HDMI – Which Version You Need (and How to Tell)
HDMI is common but version‑dependent. HDMI 1.4 tops out at 4K 30Hz. HDMI 2.0 handles 4K 60Hz.
HDMI 2.1 can do 5K 60Hz or 4K 120Hz.
| HDMI version | 4K @ 60Hz | 5K @ 60Hz | 4K @ 120Hz |
|---|---|---|---|
| 1.4 | No (only 30Hz) | No | No |
| 2.0 | Yes | No | No |
| 2.1 | Yes | Yes | Yes |
Look for “High Speed HDMI” (2.0) or “Ultra High Speed HDMI” (2.1) on the cable’s packaging. A cheap HDMI cable from five years ago is likely 1.4.
DisplayPort – The Underdog That Just Works
If your monitor has a DisplayPort input, and your MacBook has USB‑C or Thunderbolt, get a USB‑C to DisplayPort cable. DisplayPort 1.4 supports 4K 60Hz and even 8K without compression. It’s often cheaper than Thunderbolt and just as reliable.
When You Need a Hub or Dock (and When You Don’t)
If your MacBook has only one or two Thunderbolt ports (like the M1 MacBook Air), and you want to keep a charger, external drive, and monitor all connected, a hub or dock simplifies everything. But if the monitor has a USB‑C port with power delivery, you don’t need a dock, just one cable.
- Example setup: MacBook → one USB‑C cable to monitor → monitor charges laptop and extends display.
If your monitor only has HDMI or DisplayPort, you’ll need a USB‑C to HDMI or USB‑C to DisplayPort adapter. That counts as a two‑cable solution (one adapter, one cable), but it works.
Connect and Configure in macOS – Step by Step
Plug everything in and turn the monitor on. Your MacBook should detect it within a few seconds. If nothing appears, try a different cable or port first.
Then head to System Settings > Displays. That’s where you control everything.
Setting the Display Mode: Extended or Mirrored
The default is Extended Desktop. Your MacBook screen and the monitor act as two separate workspaces. You can drag windows between them.
That’s the best option for multitasking.
Mirrored Mode shows the same image on both screens. Useful for presentations or when you want someone else to see exactly what you see. To switch, open Displays preferences and hold the Option key.
The “Mirror Displays” checkbox appears. Tick it to turn mirroring on.
Adjusting Resolution and HiDPI Scaling
Your monitor likely shows a list of scaled resolutions. For a 27‑inch 4K display, the “Looks like 2560×1440” option gives you readable text and crisp graphics. For a 1440p monitor, choose its native resolution (2560×1440) for the sharpest output.
If text looks fuzzy, you’re probably running a non‑integer scale. Try the next option up or down. Apple’s scaling engine works best with integer multipliers (2x, 1x). 1440p at 1x is fine. 4K at 2x (Looks like 1920×1080) works but makes UI elements large.
The “Looks like 2560×1440” is a 1.5x scale that the M‑series handles beautifully.
Arranging Displays So Your Cursor Flows Naturally
In the Displays pane, you’ll see two blue rectangles representing your screens. Drag them to match your physical layout. Place the monitor to the right or left of your MacBook icon.
Position them so the cursor moves from one screen to the other without getting stuck at a corner.
If your monitor is on the right, drag its rectangle to the right side of the MacBook icon. The cursor then moves off the right edge of your laptop and onto the monitor. Match the vertical alignment (top, middle, bottom) so the cursor flows evenly.
A misaligned setup makes the cursor jump or get caught.
Clamshell Mode – Using the MacBook With the Lid Closed
Clamshell mode lets you close the MacBook lid and use only the external monitor. The laptop essentially acts as a desktop computer. You get more desk space and no glow from a second screen.
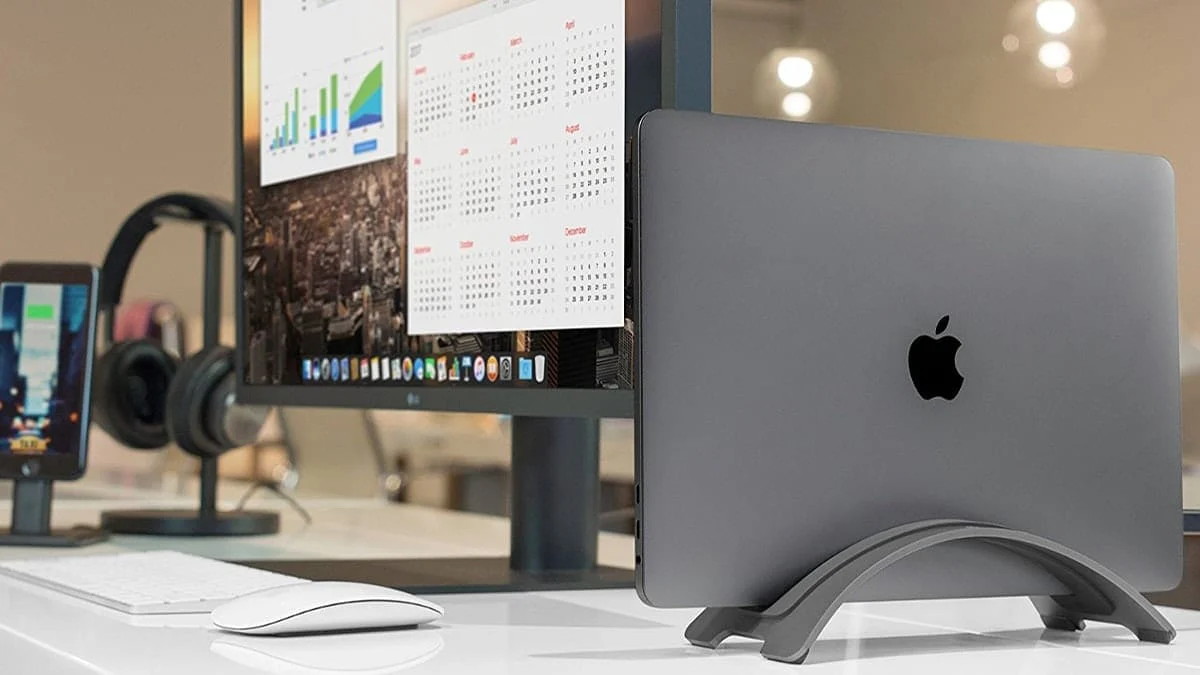
Image source: Bing (Web (fair-use with source credit))
What You Absolutely Need (Power + Peripherals)
Three things are required for clamshell mode to work. First, your MacBook must be connected to AC power. A battery‑only MacBook goes to sleep when you close the lid.
Second, you need an external keyboard and mouse or trackpad. The built‑in keyboard and trackpad are disabled when the lid is closed.
Third, the monitor must be connected and already detected while the lid is open. Close the lid after the display appears in System Settings. If the monitor goes black, open the lid, check the connection, and try again.
Wake‑Up Glitches and How to Fix Them
Sometimes closing the lid triggers sleep instead of clamshell mode. To fix this, go to System Settings > Battery > Power Adapter. Make sure “Prevent automatic sleeping on power adapter” is enabled.
Also check that “Turn display off when inactive” is set to a reasonable time, not immediately.
If the monitor doesn’t wake from sleep, press a key on the external keyboard or click the mouse. If nothing happens, unplug the monitor cable and plug it back in. In rare cases, a reboot is needed.
After waking successfully once, the setup usually stays stable.
The DisplayLink Workaround (M1/M2 MacBooks With Two Monitors)
M1 and M2 MacBook Air and 13‑inch Pro models natively support only one external display. That’s a hard limit in the chip’s display controller. To add a second monitor, you need a DisplayLink adapter.
DisplayLink is a technology that uses a small driver and a dedicated USB adapter to trick macOS into seeing a second display. The adapter connects to one of your USB‑C or USB‑A ports. You install the DisplayLink Manager app from the developer’s website.
Then any monitor connected to that adapter appears as a second screen.
Performance varies. DisplayLink works fine for static content like code, documents, and email. For video playback or animation, you may notice slight lag or compression artifacts.
It’s not ideal for gaming or color‑critical work.
If you have an M1 or M2 MacBook and need two monitors, DisplayLink is your only option without upgrading your laptop. Expect to spend $50 to $80 on a certified adapter. Popular brands include Plugable, Startech, and Cable Matters.
Five Mistakes That Ruin the Setup (And How to Avoid Them)
Using the wrong HDMI cable. HDMI 1.4 limits 4K to 30Hz. That causes visible flicker and sluggish cursor movement. Always use at least High Speed HDMI (2.0) for 4K 60Hz.
Relying on a cheap USB‑C cable that doesn’t support video. Many USB‑C cables are charge‑only or data‑only. Look for “USB‑C with DisplayPort Alt Mode” or “4K 60Hz” on the packaging. A Thunderbolt 4 cable guarantees video support.
Choosing the wrong scaling option. On a 4K monitor, selecting “Looks like 1080p” makes everything huge. Selecting “Looks like 4K” makes text tiny. The sweet spot is “Looks like 2560×1440.” Test the three options and pick the one that feels natural at your viewing distance.
Forgetting to power the monitor first. Some monitors wake up slowly. Connect the cable, turn the monitor on, and wait ten seconds before closing the lid or expecting a signal. Patience saves frustration.
Using the laptop display as the primary screen in clamshell mode. If the monitor goes black when you close the lid, your MacBook might be treating the built‑in screen as the primary. Open the lid, go to Displays, and click “Gather Windows.” Then drag the menu bar to the external monitor rectangle. That sets the external display as primary.
Quick Decision Guide – Your Exact Setup in Three Questions
Answer these three questions to get your perfect configuration.
Question 1: Do you have an M1/M2 MacBook Air or 13‑inch Pro, and do you want two external monitors?
If yes, buy a DisplayLink adapter. If no, you’re fine with a direct cable connection.
Question 2: What resolution is your 27‑inch monitor?
1440p: use USB‑C or HDMI 2.0 at native resolution. No scaling needed.
4K: use Thunderbolt or USB‑C to DisplayPort. Select “Looks like 2560×1440” in Displays.
5K: use Thunderbolt cable only. HDMI cannot drive 5K at full resolution.
Question 3: Will you use clamshell mode?
If yes, ensure your MacBook stays plugged into power and you have an external keyboard and mouse. Set the external display as primary before closing the lid. If no, leave the lid open and use extended desktop mode.
That’s the core decision tree. Follow the branches and you’ll have a working setup in under ten minutes.
Extra Pro Tips for Colour, Refresh Rate, and Long‑Term Comfort
Set the refresh rate to 60Hz for 4K monitors. Higher rates like 120Hz or 144Hz are possible if both your MacBook and monitor support it. Check System Settings > Displays > Refresh Rate.
For most 27‑inch 4K panels, 60Hz is plenty for office work and design tasks. Gamers may want 120Hz or 144Hz, but only M3 Pro and M4 Max models can reliably drive those rates over Thunderbolt.
For colour accuracy, open System Settings > Displays and click “Color Profile.” Select “Display P3” or “sRGB IEC61966-2.1” as a starting point. If you do colour‑critical work, consider a hardware calibrator like a Datacolor Spyder. Aggregate reviews suggest that a calibrated monitor reduces eye strain by making brightness and white balance consistent across both screens.
Position the monitor so its top edge is at or just below eye level. Your gaze should drop slightly to the centre of the screen. An adjustable monitor arm or a stack of books under the stand works.
This reduces neck strain over long sessions.
Frequently Asked Questions
Can I use a 27‑inch monitor with a MacBook Air?
Yes. Every MacBook Air from 2018 onward supports at least one external display. M1 and M2 MacBook Air models natively support one monitor.
M3 MacBook Air supports two. Use a USB‑C or Thunderbolt cable for the best results.
Why does my 27‑inch monitor look blurry on my MacBook?
Blurry text usually comes from wrong scaling. Open System Settings > Displays and try the “Looks like 2560×1440” option for a 4K monitor. For a 1440p monitor, use native resolution.
If that doesn’t fix it, your cable may be limiting bandwidth. Try a Thunderbolt or USB‑C to DisplayPort cable.
How do I get 4K 60Hz on my MacBook?
Use a cable that supports at least HDMI 2.0, DisplayPort 1.4, or Thunderbolt 3/4. Check your MacBook’s ports. Most MacBooks from 2018 onward output 4K 60Hz over USB‑C.
Avoid HDMI 1.4 cables which limit 4K to 30Hz.
Can I use a 27‑inch monitor with an M1 MacBook in clamshell mode?
Yes. Connect the monitor, plug in the MacBook’s power adapter, and attach an external keyboard and mouse. Set the external display as primary in Displays preferences.
Then close the lid. The monitor stays on and the MacBook sleeps its internal screen.
What cable do I need for a 27‑inch 4K monitor and MacBook?
For a 4K monitor at 60Hz, use a USB‑C cable that supports DisplayPort Alt Mode, or a Thunderbolt 3/4 cable. If your monitor only has HDMI, use a USB‑C to HDMI 2.0 adapter with an HDMI 2.0 cable. Avoid standard USB‑C cables that only carry power or data.
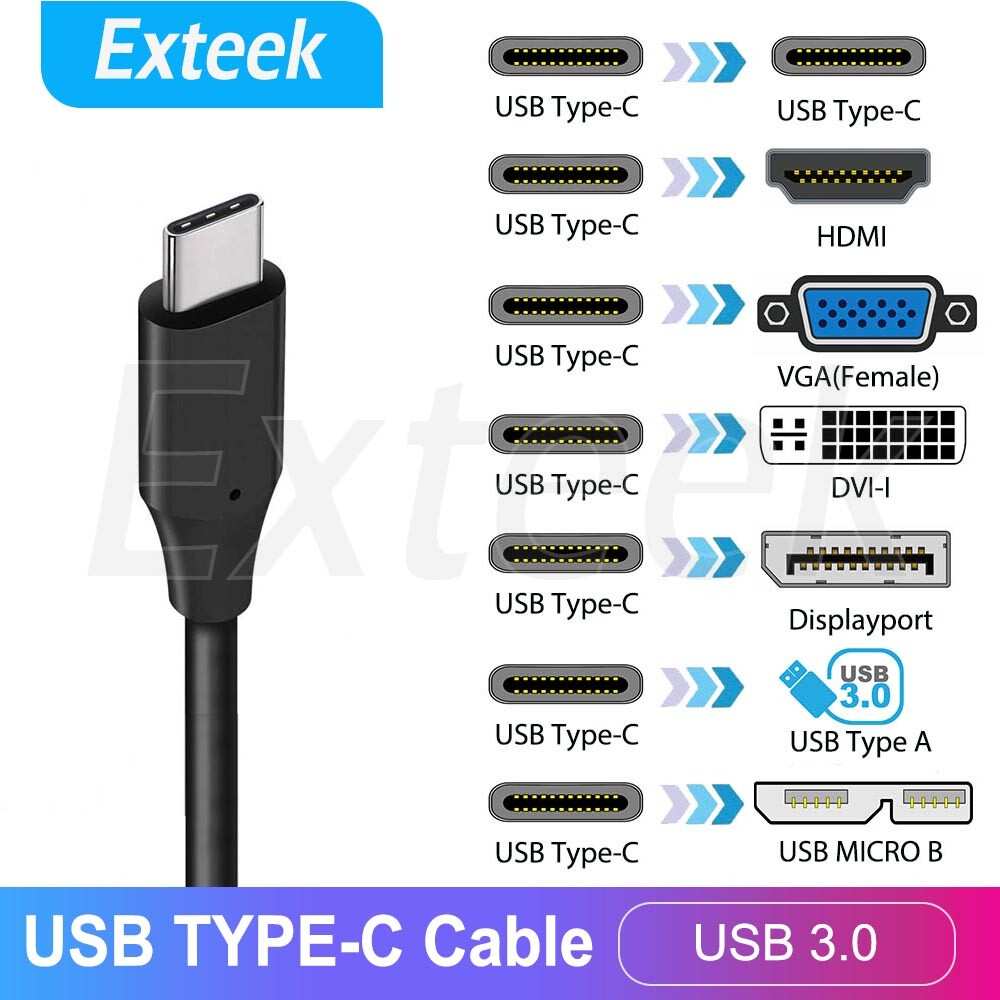
Image source: Bing (Web (fair-use with source credit))

Similar Posts