How to Connect Ips Monitor with MacBook
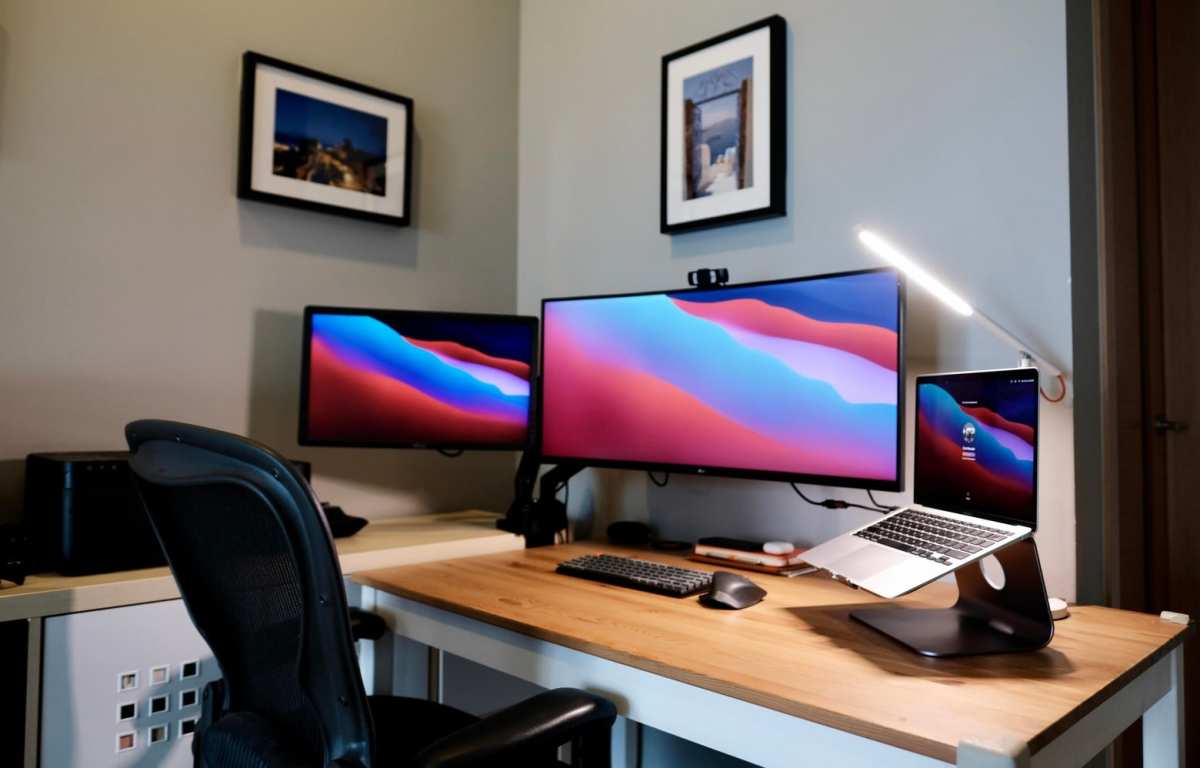
Figuring out how to connect IPS monitor with MacBook shouldn't be complicated, but it often is. The cable that works for your coworker's setup might leave you staring at a black screen. That's because the right connection depends entirely on which MacBook you own and which IPS monitor you're trying to hook it up to.
The good news is there are only a handful of real-world scenarios. Once you know your MacBook's port capabilities and your monitor's available inputs, you can pick the right cable or adapter in about 30 seconds. Let's walk through it step by step.
Quick Answer
Connect your IPS monitor to your MacBook using a USB-C cable if both devices support DisplayPort Alt Mode. If your monitor only has HDMI, use a USB-C to HDMI adapter. For 4K at 60Hz, make sure your cable and adapter support HDMI 2.0 or DisplayPort 1.2.
Check macOS Displays preferences to configure resolution and arrangement.
Why Your IPS Monitor Might Not Just "Plug In" With Your MacBook
Here's the thing most guides skip. Not every USB-C cable carries a video signal. Not every HDMI port on a monitor supports the same resolution.
And not every MacBook outputs video the same way, especially when you're comparing an M3 MacBook Air to a 2019 Intel MacBook Pro.
The frustration usually comes down to one of three things. You bought a charge-only USB-C cable. Your adapter caps your resolution at 4K@30Hz when your monitor can do 4K@60Hz.
Or macOS just isn't detecting the display because the handshake failed on plug-in.
We can fix all of that. But first, you need to know exactly what hardware you're working with.
What You Need to Know Before Buying Any Cable or Adapter
Before you spend a dime on adapters or cables, get clear on two things. What ports does your MacBook have, and what inputs does your IPS monitor accept? Everything flows from there.
Your MacBook's Ports Determine Everything
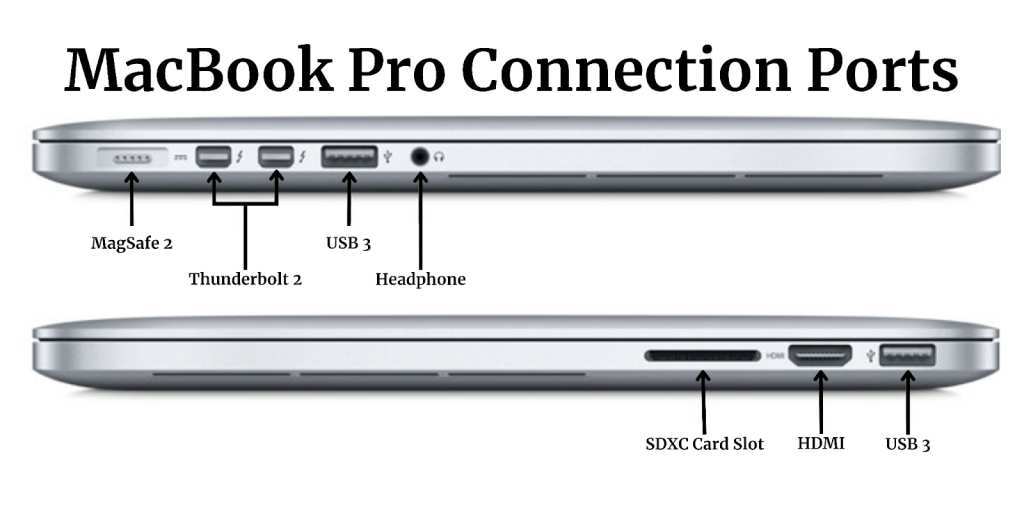
Apple has changed its port selection multiple times over the past decade. A MacBook Air from 2018 has completely different output capabilities than a MacBook Pro from 2024. You need to know your exact model.
Here's a quick breakdown of what you're likely dealing with:
| MacBook Type | Ports Available | Max External Display Support |
|---|---|---|
| MacBook Air M1 (2020) | 2x Thunderbolt 3 (USB-C) | 1 external display up to 6K@60Hz |
| MacBook Air M2/M3 (2022-2024) | 2x Thunderbolt 4 (USB-C) | 1 external display up to 6K@60Hz (2 with lid closed on M3) |
| MacBook Pro M1 Pro/Max (2021) | 3x Thunderbolt 4, HDMI, SD | Up to 4 external displays (Pro), up to 4 (Max) |
| MacBook Pro M2 Pro/Max (2023) | 3x Thunderbolt 4, HDMI, SD | Up to 4 external displays (Pro), up to 4 (Max) |
| MacBook Pro M3/M3 Pro/Max (2023) | 3x Thunderbolt 4, HDMI, SD | Up to 2 (M3), up to 4 (Pro/Max) |
| MacBook Pro 2016-2019 (Intel) | 2-4x Thunderbolt 3 (USB-C) | Up to 4 external displays |
| MacBook Air 2018-2019 (Intel) | 2x Thunderbolt 3 (USB-C) | 1 external display up to 5K@60Hz |
The key takeaway here is simple. If you have an Apple Silicon MacBook (M1 or later), your USB-C ports support DisplayPort Alt Mode natively. If you have an Intel MacBook from 2016 or later, same deal.
But the number of external displays you can run and the maximum resolution depend on your specific chip.
Your Monitor's Inputs Narrow the Options
Now look at the back of your IPS monitor. You'll typically see some combination of these:
- HDMI (most common, found on virtually every IPS monitor)
- DisplayPort (common on gaming and professional monitors)
- USB-C (increasingly common on newer monitors, especially 4K models)
- Thunderbolt (rare on third-party monitors, mostly Apple displays)
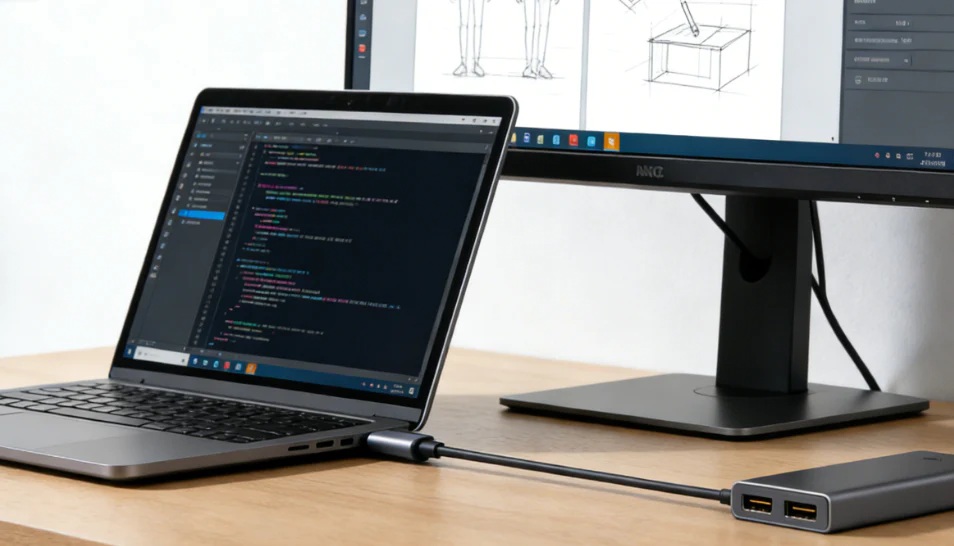
If your monitor has a USB-C port that supports DisplayPort Alt Mode, that's your simplest path. One cable handles video, data, and potentially charging. If it only has HDMI or DisplayPort, you'll need an adapter or a cable with USB-C on one end and HDMI or DisplayPort on the other.
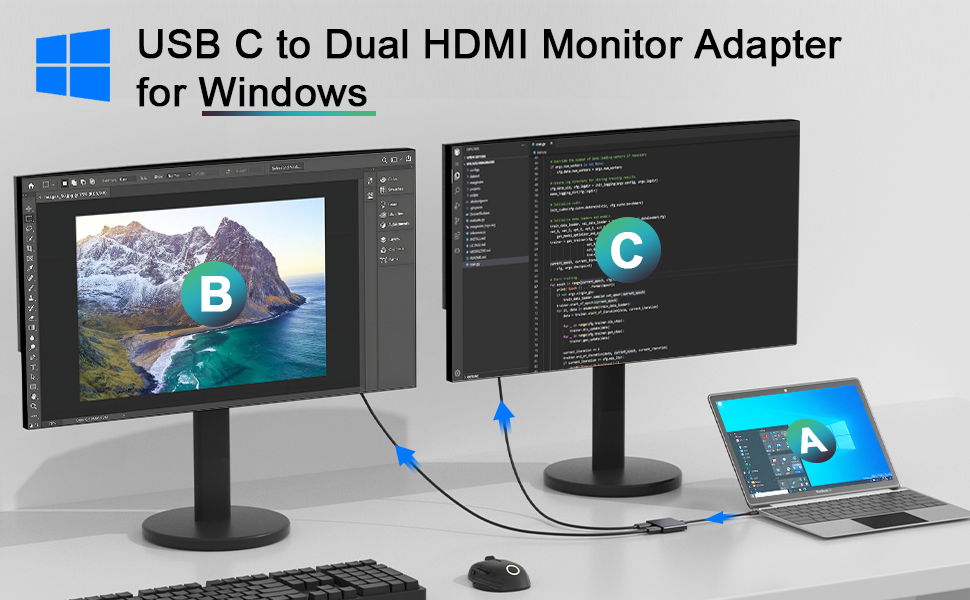
One important note about daisy chaining. macOS does not support DisplayPort MST (Multi-Stream Transport). If you're hoping to connect two monitors in a chain from one USB-C port, that won't work on a Mac. Each monitor needs its own connection to the MacBook, either directly or through a Thunderbolt dock that supports multiple outputs.
Step 1: Identify What Your MacBook Actually Supports
Let's get specific about your machine. Click the Apple menu in the top-left corner of your screen, then select "About This Mac." This tells you your chip (Apple M1, M2, M3, or Intel) and your exact model year.
If you see "Apple M" anything, you're on Apple Silicon. If you see "Intel," you're on an older architecture. Both support video output over USB-C, but the maximum number of external displays and the maximum resolution differ.
For most people reading this, you probably fall into one of these categories:
- M1 MacBook Air/Pro: Supports one external display natively (except the M3 Air, which supports two with the lid closed)
- M2/M3 MacBook Air: Same as M1, with the M3 supporting two displays in clamshell mode
- M1 Pro/Max MacBook Pro: Supports up to two (Pro) or four (Max) external displays
- M2 Pro/Max MacBook Pro: Supports up to four external displays
- M3 Pro/Max MacBook Pro: Supports up to four external displays
- Intel MacBook Pro 2016-2019: Supports up to four external displays over Thunderbolt 3
- Intel MacBook Air 2018-2019: Supports one external display
Write down your chip and how many external displays your model supports. That's your ceiling. You can't run more displays than Apple specifies, no matter what the box on a third-party dock claims.
Step 2: Check What Your IPS Monitor Accepts
Flip your monitor around or check the spec sheet. You need to know which inputs it has and what version they are. This matters more than you'd think.
HDMI Versions Make a Real Difference
Not all HDMI ports are created equal. The version determines your maximum resolution and refresh rate:
| HDMI Version | Max Resolution @ Refresh Rate | Common On |
|---|---|---|
| HDMI 1.4 | 4K @ 30Hz | Budget IPS monitors, older models |
| HDMI 2.0 | 4K @ 60Hz | Most mid-range IPS monitors (2018+) |
| HDMI 2.1 | 4K @ 120Hz, 8K @ 60Hz | High-end and gaming IPS monitors |
If you plug a 4K IPS monitor into an HDMI 1.4 port, you'll be stuck at 30Hz. That feels sluggish. The cursor drags, windows stutter when you move them, and it's generally unpleasant.
You want 60Hz for a smooth experience.
Most IPS monitors from 2019 onward ship with HDMI 2.0 at minimum. But budget models and older panels might still be on 1.4. Check the manual or the manufacturer's product page to be sure.
USB-C on Monitors: Not All Ports Are Equal
Some IPS monitors have a USB-C port. That's great in theory. But you need to verify that the USB-C port actually supports DisplayPort Alt Mode for video input.
Some monitors include USB-C purely for data and charging, with no video capability.
Look for one of these indicators on the spec sheet:
- "USB-C with DisplayPort Alt Mode"
- "USB-C (DP Alt Mode)"
- "USB-C 90W PD" (usually implies video support, but verify)
- A Thunderbolt symbol next to the port
If the spec sheet doesn't mention video over USB-C, assume it doesn't support it. You'd need to use HDMI or DisplayPort instead.
DisplayPort: The Reliable Alternative
DisplayPort is the most reliable connection for high-resolution, high-refresh-rate setups. If your IPS monitor has a DisplayPort input and you're pushing 4K or higher, a USB-C to DisplayPort cable is often the best choice. It handles high bandwidth cleanly and tends to have fewer handshake issues than HDMI adapters.
Step 3: Match the Right Connection Method to Your Setup
Now we connect the dots. You know your MacBook's capabilities and your monitor's inputs. Let's pick the right cable or adapter for your specific situation.
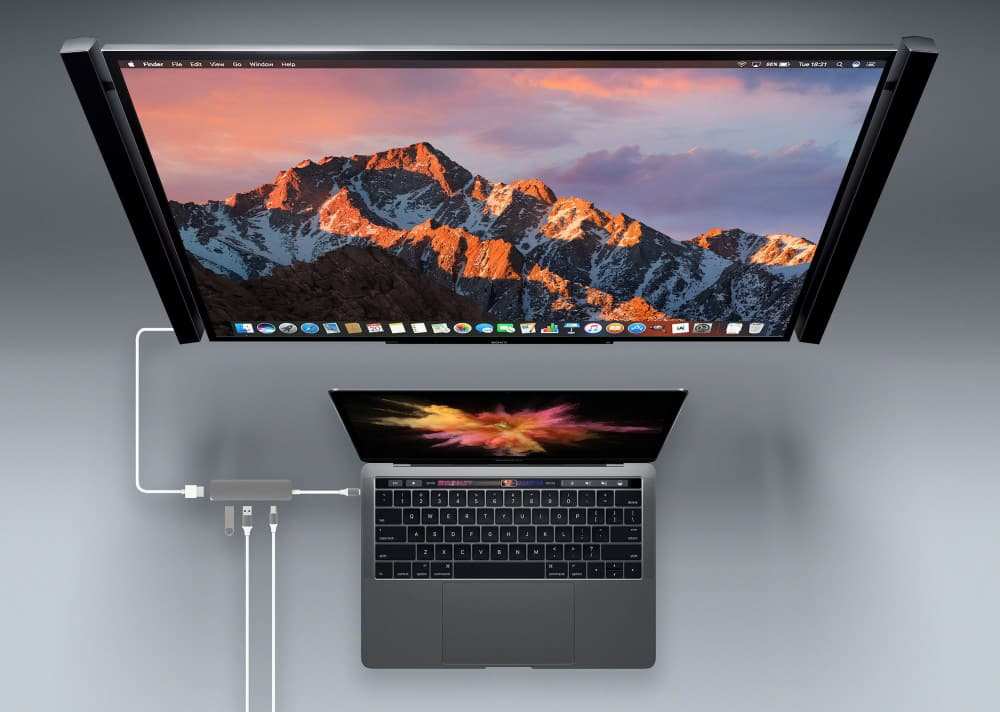
Scenario 1: Your IPS Monitor Has USB-C with DisplayPort Alt Mode
This is the simplest case. Get a USB-C cable that supports DisplayPort Alt Mode. Not just any USB-C cable.
It needs to be one that carries a video signal.
What to buy: A USB-C to USB-C cable rated for DisplayPort Alt Mode or Thunderbolt. Cable Matters, Anker, and Belkin all make reliable options in the $15-25 range.
What to avoid: Cheap USB-C cables from no-name brands that only support charging and USB 2.0 data. These will not carry a video signal. If your MacBook charges but the screen stays black, this is almost always the culprit.
Bonus: If your monitor supports Power Delivery over USB-C (most do, typically 60W to 100W), your MacBook charges through the same cable. One cable, video and power. That's the clean setup everyone wants.
Scenario 2: Your IPS Monitor Only Has HDMI
This is the most common scenario, especially with budget and mid-range IPS monitors. You need a USB-C to HDMI adapter or a USB-C to HDMI cable.
For 4K@60Hz: Make sure the adapter or cable supports HDMI 2.0. Many cheap adapters are HDMI 1.4 only, which caps you at 4K@30Hz. Look for "4K@60Hz" explicitly in the product description.
Adapter vs cable: A USB-C to HDMI cable (single cable, no adapter dongle) is simpler and less likely to fail at the connection point. But if you already have a good HDMI cable, a USB-C to HDMI adapter works fine too.
Recommended specs to look for:
- Supports 4K@60Hz (HDMI 2.0 or later)
- USB-C connector with DisplayPort Alt Mode support
- Compact form factor (especially for travel)
Scenario 3: Your IPS Monitor Has DisplayPort
A USB-C to DisplayPort cable is your best bet here. These tend to be the most reliable for high-resolution setups. DisplayPort handles high bandwidth well, and macOS plays nicely with it.
What to buy: A USB-C to DisplayPort 1.4 cable. This supports up to 8K@60Hz or 4K@120Hz, so you're future-proofed. Cable Matters and StarTech both make solid options.
One caveat: DisplayPort cables are directional. The USB-C end goes to your MacBook. The DisplayPort end goes to your monitor.
They're not reversible, so don't try to swap them.
Scenario 4: You Need Multiple Monitors or Extra Ports
If you're running multiple IPS monitors or want a cleaner desk setup with charging, USB hubs, and Ethernet all through one connection, a Thunderbolt dock is the answer.
What a Thunderbolt dock gives you:
- Multiple display outputs (usually 2-3)
- USB-A ports for peripherals
- Ethernet
- SD card reader
- Power Delivery to charge your MacBook
- Audio in/out
What to know: Thunderbolt docks are not cheap. Expect to pay $150-300 for a good one. CalDigit, OWC, and Belkin make well-regarded options.
Make sure the dock explicitly states macOS compatibility and supports the resolution you need.
Also remember the macOS MST limitation. You can't daisy chain two HDMI monitors from a single DisplayPort output using MST. Each display needs its own Thunderbolt output on the dock.
Quick Reference: Which Cable or Adapter You Need
| Your Monitor Has | Best Connection | Cable/Adapter Needed | Approximate Cost |
|---|---|---|---|
| USB-C (DP Alt Mode) | Direct USB-C | USB-C to USB-C (DP Alt Mode) | $15-25 |
| HDMI 2.0 | USB-C to HDMI | USB-C to HDMI cable or adapter (4K@60Hz) | $15-30 |
| HDMI 1.4 | USB-C to HDMI | USB-C to HDMI (max 4K@30Hz) | $12-25 |
| DisplayPort | USB-C to DP | USB-C to DisplayPort 1.4 cable | $15-25 |
| Multiple monitors | Thunderbolt dock | Thunderbolt 4 dock with display outputs | $150-300 |
Step 4: Configure macOS After Connecting
You've plugged everything in. The monitor should light up. But you're not done yet. macOS needs a few settings tweaked to get the most out of your IPS display.
Detecting the Display
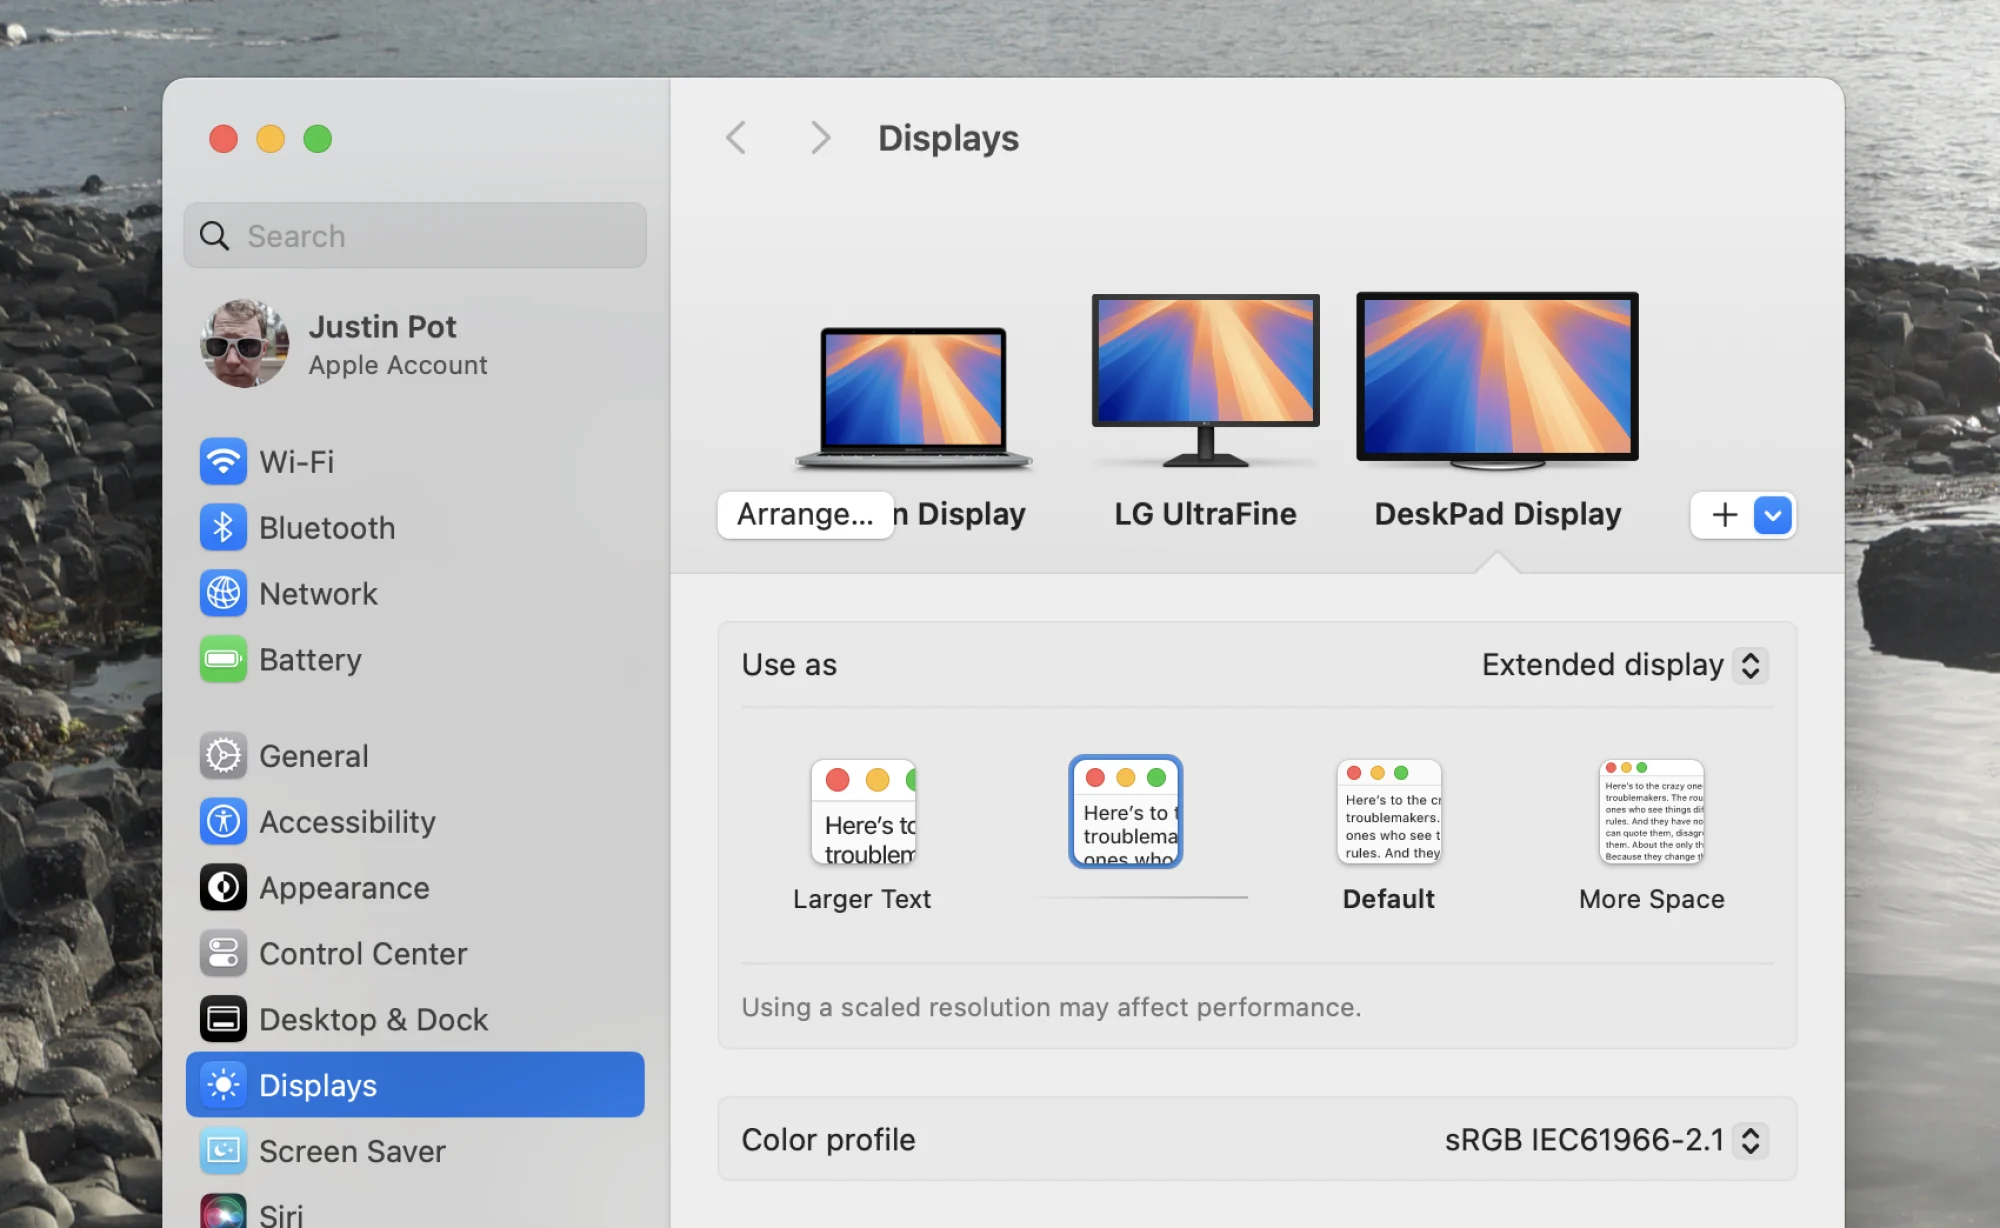
Open System Settings (or System Preferences on older macOS versions), then go to Displays. If your monitor isn't showing up, hold the Option key and click "Detect Displays" at the bottom of the window. This forces macOS to re-scan for connected screens.
If that doesn't work, try these steps in order:
- Unplug the cable from both ends and reconnect
- Make sure the monitor is set to the correct input source (HDMI 1, USB-C, etc.)
- Try a different cable
- Restart your MacBook with the monitor connected
Setting the Right Resolution and Refresh Rate
By default, macOS will try to use the "best for display" resolution. On a 4K IPS monitor, this usually means 3840×2160 at 60Hz. But sometimes macOS picks a scaled resolution that looks blurry or runs at 30Hz.
In the Displays settings, you'll see a list of available resolutions. Hold the Option key while clicking "Scaled" to see all available options. Select the native resolution of your monitor (usually the highest number) for the sharpest image.
For refresh rate, click the "Refresh Rate" dropdown if available. Choose 60Hz if your monitor supports it. If you're stuck at 30Hz, your cable or adapter is likely the bottleneck.
You probably need an HDMI 2.0 adapter or a better USB-C cable.
Arranging Your Displays
In the Displays settings, click "Arrangement" (on older macOS) or drag the display icons to match your physical setup. The white menu bar at the top of the screen represents your primary display. Drag it to whichever screen you want as your main workspace.
If you want to mirror both screens instead of extending, check the "Mirror Displays" box. This is useful for presentations but not ideal for daily productivity.
Fixing Color Profile Issues
IPS monitors are known for good color accuracy, but macOS might not load the right color profile by default. In the Displays settings, look for the "Color Profile" or "Color" dropdown. Select the profile that matches your monitor model.
If your monitor came with an ICC profile on a disc or downloadable from the manufacturer's website, install it and select it here.
If colors look washed out or oversaturated, the wrong profile is loaded. The "Apple RGB" or "sRGB" profiles are safe defaults for most IPS monitors. For photo or video editing, you'll want to calibrate the display using macOS's built-in calibration tool or a hardware colorimeter.
Common Problems and How to Fix Them
Even with the right cable and settings, things sometimes go sideways. Here are the most common issues and what actually fixes them.
No Signal or Black Screen
This is the number one complaint. You plug in the cable and nothing happens. The monitor says "No Signal" or just stays black.
Try this first:
- Confirm the monitor is on the right input source (press the input/source button on the monitor)
- Unplug and replug the cable at both ends
- Try a different cable
- Restart your MacBook with the monitor already connected and powered on
If none of that works, your cable might not support video. This is the most common cause. A USB-C cable that charges your MacBook fine might be a power-only cable with no data or video lines.
Stuck at 30Hz or Wrong Resolution
Your 4K IPS monitor feels sluggish. Animations stutter. The cursor drags across the screen like it's moving through mud.
You're almost certainly running at 30Hz.
The fix: Check your cable and adapter specs. If you're using HDMI, you need at least HDMI 2.0 for 4K@60Hz. Many budget adapters are HDMI 1.4 only.
Swap to a 2.0-rated adapter or switch to a USB-C to DisplayPort cable.
Also check the refresh rate setting in macOS Displays preferences. Sometimes the hardware supports 60Hz but macOS defaults to 30Hz.
No Audio Through Monitor Speakers
If your IPS monitor has built-in speakers, macOS might not route audio to it automatically. Go to System Settings > Sound > Output and select your monitor from the list. It will usually appear as the monitor's brand name.
If the monitor doesn't show up as an audio output, the connection type might not support audio over that cable. HDMI carries audio. USB-C with DisplayPort Alt Mode carries audio.
But some cheap adapters strip the audio signal. Try a different adapter or cable.
MacBook Not Charging Through the Connection
Your monitor has USB-C with Power Delivery, but your MacBook isn't charging. A few things could be happening:
- The monitor's USB-C port doesn't support Power Delivery for input (some only output power to charge phones)
- The Power Delivery wattage is too low (a 15W PD output won't meaningfully charge a MacBook Pro)
- The cable doesn't support PD
Check your monitor's spec sheet for the USB-C PD wattage. Most monitors that charge MacBooks deliver 60W to 96W. If yours delivers less, the MacBook will charge slowly or only maintain battery level under heavy use.
Display Flickering or Dropping Connection
Flickering usually points to a bad cable. Replace it with a higher-quality one. If the display randomly disconnects and reconnects, the cable might be loose or too long for the bandwidth you're pushing.
Keep USB-C to HDMI or DisplayPort cables under 2 meters for reliable 4K@60Hz performance.
Cable and Adapter Mistakes That Waste Your Time and Money
Let's talk about the mistakes that trip people up. These are the ones that make you spend $20 on a cable that doesn't work, then another $20 on a different one, then finally call support.
Buying a Charge-Only USB-C Cable
This is the single most common mistake. USB-C cables look identical from the outside. But internally, a charge-only cable has only the power pins wired.
No data. No video. It'll charge your MacBook just fine, but your monitor stays black.
How to avoid it: Always check the product description for "DisplayPort Alt Mode," "video support," or "Thunderbolt compatible." If it only mentions charging wattage and USB 2.0 data, it won't carry video.
Using an HDMI 1.4 Cable When You Need 2.0
HDMI cables aren't labeled with their version on the cable itself. A cable that came with a 1080p monitor from 2015 is probably HDMI 1.4. It'll physically fit in a 4K monitor, but you'll be capped at 30Hz.
How to avoid it: If you're buying a new HDMI cable, look for "High Speed HDMI" or "Premium High Speed HDMI" on the packaging. These support HDMI 2.0 and 4K@60Hz. For 4K@120Hz or 8K, you need an "Ultra High Speed HDMI" cable (HDMI 2.1).
Assuming All USB-C Hubs Support Video Passthrough
Many USB-C hubs add extra USB-A ports, SD card readers, and Ethernet. But not all of them pass through a video signal. Some hubs are data and charging only.
How to avoid it: Look for "HDMI output," "DisplayPort output," or "4K@60Hz" in the hub's specs. If the hub doesn't list a video output, it doesn't have one.
Overlooking MST Limitations on macOS
DisplayPort MST lets you daisy chain multiple monitors from one DisplayPort output. Windows PCs support this fine. macOS does not.
What this means: If you buy a USB-C hub that claims to output two HDMI ports via MST, it won't work on your Mac. Each display output on a hub needs to be driven by a separate Thunderbolt lane. Look for docks that explicitly state macOS multi-display support and use Thunderbolt, not MST.
Best Connection Method by Use Case
Different setups call for different approaches. Here's what we recommend based on common scenarios.
Simple Single-Monitor Setup for Office Work
If you just want one external IPS monitor for productivity, email, and documents, keep it simple. A USB-C to USB-C cable (if your monitor supports it) or a USB-C to HDMI 2.0 adapter is all you need. No dock required.
No fuss.
Color-Accurate Photo or Video Editing
For color-critical work, use a USB-C to DisplayPort cable. DisplayPort handles color depth and signal integrity slightly better than HDMI in most cases. Also make sure you load the correct ICC color profile for your specific monitor model in macOS.
High-Refresh-Rate External Display
If your IPS monitor supports 120Hz or higher and you want that refresh rate, you'll need either a USB-C to DisplayPort 1.4 cable or an HDMI 2.1 connection. Check both your MacBook's output capabilities and your monitor's input specs. The bottleneck is whichever supports the lower spec.
Multi-Monitor Productivity Rig
For two or more external displays, a Thunderbolt dock is the cleanest solution. It gives you multiple display outputs, charging, and extra ports through a single cable to your MacBook. Make sure the dock explicitly supports macOS and lists the number of displays it can drive at your desired resolution.
Clean Desk with Single-Cable Charging
If your IPS monitor has USB-C with Power Delivery (60W or higher), a single USB-C to USB-C cable handles video, data, and charging. This is the ideal setup. One cable.
Clean desk. Everything works.
Quick Reference: What Cable or Adapter You Actually Need
Here's a decision table you can bookmark. Find your situation and buy accordingly.
| Your Situation | Buy This | Key Spec to Check |
|---|---|---|
| Monitor has USB-C (DP Alt Mode) | USB-C to USB-C cable | Must support DisplayPort Alt Mode |
| Monitor has HDMI, you want 4K@60Hz | USB-C to HDMI 2.0 adapter or cable | "4K@60Hz" in product description |
| Monitor has HDMI, 1080p is fine | USB-C to HDMI adapter | Any reputable brand |
| Monitor has DisplayPort | USB-C to DisplayPort 1.4 cable | DP 1.4 for future-proofing |
| Need 2+ monitors | Thunderbolt 4 dock | macOS compatibility, display count |
| Want single-cable charging + video | USB-C to USB-C (PD monitor) | Monitor PD wattage (60W+ recommended) |
Frequently Asked Questions
Can I use any USB-C cable to connect my MacBook to a monitor?
No. Many USB-C cables only support charging and USB 2.0 data. They don't carry a video signal.
You need a cable that explicitly supports DisplayPort Alt Mode or Thunderbolt for video output.
Why is my 4K monitor stuck at 30Hz?
Your cable or adapter probably supports HDMI 1.4 or DisplayPort 1.2, which cap 4K at 30Hz. Swap to an HDMI 2.0 or DisplayPort 1.4 cable. Also check the refresh rate setting in macOS Displays preferences.
Does macOS support daisy chaining monitors?
No. macOS does not support DisplayPort MST for daisy chaining. Each monitor needs its own connection to the MacBook, either directly or through a Thunderbolt dock with separate display outputs.
Can I connect two external displays to my M1 or M2 MacBook Air?
No. The M1 and M2 MacBook Air support only one external display natively. The M3 MacBook Air supports two, but only when the laptop lid is closed.
If you need multiple external displays on Apple Silicon, you need a MacBook Pro with a Pro or Max chip.
My monitor has USB-C but my MacBook isn't charging. Why?
The monitor's USB-C port might not support Power Delivery for charging laptops, or the wattage is too low. Check the monitor's spec sheet for USB-C PD wattage. You need at least 45W for meaningful MacBook Air charging and 60W or more for MacBook Pro.
Do I need a Thunderbolt dock or will a USB-C hub work?
It depends on what you need. For a single monitor with HDMI or DisplayPort, a simple adapter or cable works fine. For multiple monitors, charging, and extra ports through one connection, a Thunderbolt dock is the right tool.
A basic USB-C hub won't drive multiple displays on macOS.
Final Recommendation: The Simplest Path Based on Your Gear
If your IPS monitor has USB-C with DisplayPort Alt Mode, buy a quality USB-C to USB-C cable rated for video. That's your simplest, most reliable connection. One cable handles everything.
If your monitor only has HDMI, get a USB-C to HDMI 2.0 adapter or cable that explicitly supports 4K@60Hz. Avoid the cheapest options. Spend the extra $5-10 on a reputable brand.
If you're running multiple monitors or want a clean single-cable desk setup with charging, invest in a Thunderbolt dock with confirmed macOS compatibility. It costs more upfront but eliminates cable clutter and adapter headaches.
The whole process comes down to three steps. Know your MacBook's ports. Know your monitor's inputs.
Match them with the right cable or adapter. That's it. No mystery, no magic, just the right connection for your specific hardware.
What to Do When macOS Still Won't Detect the Monitor
You've checked the cable. You've confirmed the input source. You've hit "Detect Displays" while holding the Option key.
And the screen is still black. Now what?
Try these steps in order before assuming hardware failure:
Restart with everything connected. Shut down your MacBook completely. Turn on the monitor first. Then power up the MacBook. This forces a fresh Thunderbolt/USB-C handshake.
Reset the SMC (Intel Macs only). If you're on an Intel MacBook, shut it down, then hold Shift + Control + Option + Power for 10 seconds. Release, wait a few seconds, then power back on. On Apple Silicon Macs, this isn't necessary. The system management controller resets automatically on restart.
Reset NVRAM (Intel Macs only). Shut down, then power on and immediately hold Option + Command + P + R for about 20 seconds. This resets display resolution and output settings stored in memory.
Try Safe Mode. Restart your MacBook while holding the Shift key (Intel) or holding the power button and selecting Safe Mode from startup options (Apple Silicon). Safe Mode loads minimal drivers. If the monitor works in Safe Mode, a login item or third-party app is interfering.
Create a new macOS user account. Sometimes display preferences get corrupted in a user profile. Create a temporary admin account in System Settings > Users & Groups. Log into it and test the monitor. If it works there, the problem is in your original user's preference files.
If none of these steps work, test the monitor with a different source. A laptop, game console, or streaming device. If the monitor works with other sources, the issue is MacBook-side.
If it doesn't, the monitor's input board may need service.
How to Optimize Your IPS Monitor for macOS
Getting the display connected is step one. Making it look its best on macOS takes a few more adjustments.
Enable the Right Color Profile
macOS ships with generic color profiles for most displays. But IPS monitors vary widely in color gamut and calibration out of the box. Download the ICC profile from your monitor manufacturer's support page if one is available.
Install it by double-clicking the .icc file, then select it in System Settings > Displays > Color Profile.
If no manufacturer profile exists, use macOS's built-in calibration tool. Go to System Settings > Displays > Color Profile > Customize. Follow the on-screen steps to create a profile tailored to your panel.
It's not as accurate as a hardware colorimeter, but it's better than the default.
Turn Off True Tone and Night Shift (For Color-Critical Work)
True Tone adjusts your display's white balance based on ambient light. Night Shift warms colors in the evening. Both are fine for casual use.
But if you're editing photos or video, they'll skew your color perception. Disable both in System Settings > Displays when doing color-accurate work.
Match the Refresh Rate to Your Content
Most IPS monitors run at 60Hz. Some gaming IPS panels go to 144Hz or higher. If your monitor supports a higher refresh rate, make sure macOS is actually using it.
Open System Settings > Displays, click the Refresh Rate dropdown, and select the highest available option.
This matters more than people think. Even on the desktop, a higher refresh rate makes scrolling, window animations, and cursor movement feel noticeably smoother.
Adjust Scaling for Retina-Like Sharpness
macOS uses a default scaling on external displays that may not match your monitor's pixel density well. On a 4K IPS monitor at 27 inches, macOS defaults to a "Looks like 2560×1440" scaled resolution. This gives you more screen real estate but renders at 5K internally and downscales, which can cause slight softness.
If text looks slightly fuzzy, try switching to "Default for display" or experiment with the other scaled options in System Settings > Displays. The sharpest result is usually the native resolution, but UI elements will be very small on 4K at 27 inches without scaling.
When to Use a Dock Instead of a Direct Connection
A direct cable connection works fine for a single monitor. But there are situations where a Thunderbolt dock makes more sense.
You Want One Cable to Rule Them All
Plug one Thunderbolt cable from the dock into your MacBook. The dock connects to your monitor, keyboard, mouse, Ethernet, external storage, and charges your laptop simultaneously. Unplug one cable and you're mobile.
That's the dream setup.
You Need More Ports Than Your MacBook Has
Modern MacBooks are thin on ports. A Thunderbolt dock adds USB-A, additional display outputs, SD card slots, audio jacks, and sometimes Ethernet. If you're constantly unplugging things to free up ports, a dock solves that.
You're Using Multiple Monitors
As we covered earlier, macOS doesn't support MST daisy chaining. A Thunderbolt dock with multiple display outputs gives each monitor its own dedicated connection. This is the only reliable way to run two or more external displays from a single MacBook port.
What to Look for in a Thunderbolt Dock
Not all docks are equal. Here's what matters for a MacBook + IPS monitor setup:
- macOS compatibility (some docks are Windows-first)
- Display output count and type (HDMI, DisplayPort, or both)
- Power Delivery wattage (85W or higher for MacBook Pro, 60W minimum for Air)
- Thunderbolt 4 vs Thunderbolt 3 (TB4 is current as of 2026, better future-proofing)
- Build quality and thermal design (cheap docks overheat and drop connections)
CalDigit TS4, OWC Thunderbolt Dock, and Belkin Pro Thunderbolt 4 Dock are consistently well-reviewed options. Expect to pay $200-300 for a reliable unit.
Maintaining a Reliable Connection Long-Term
Once everything works, you want it to keep working. A few habits prevent the most common long-term issues.
Keep Your Cable Firmware and macOS Updated
Monitor manufacturers occasionally release firmware updates that fix compatibility issues with Macs. Check the support page for your monitor model every few months. Similarly, macOS updates sometimes change display output behavior.
Read release notes before major updates if your setup is mission-critical.
Don't Force USB-C Connectors
USB-C connectors are durable but not indestructible. If a cable feels loose or wobbly in the port, replace it. A marginal connection causes intermittent flickering and detection failures that are maddening to diagnose.
Label Your Cables
If you travel with your MacBook and reconnect your monitor at home and at the office, label the cable that works. Sounds silly, but grabbing the wrong USB-C cable when you're rushing between locations wastes time. A small piece of colored tape or a cable tag does the job.
Check Cable Condition Annually
Inspect cables for kinks, fraying, or bent connector pins. High-bandwidth cables degrade over time, especially if they're bent sharply at the connectors. If your display starts flickering intermittently after months of reliable use, the cable is often the first thing to suspect.
Frequently Asked Questions
Can I use any USB-C cable to connect my MacBook to a monitor?
No. Many USB-C cables only support charging and USB 2.0 data. They don't carry a video signal.
You need a cable that explicitly supports DisplayPort Alt Mode or Thunderbolt for video output.
Why is my 4K monitor stuck at 30Hz?
Your cable or adapter probably supports HDMI 1.4 or DisplayPort 1.2, which cap 4K at 30Hz. Swap to an HDMI 2.0 or DisplayPort 1.4 cable. Also check the refresh rate setting in macOS Displays preferences.
Does macOS support daisy chaining monitors?
No. macOS does not support DisplayPort MST for daisy chaining. Each monitor needs its own connection to the MacBook, either directly or through a Thunderbolt dock with separate display outputs.
Can I connect two external displays to my M1 or M2 MacBook Air?
No. The M1 and M2 MacBook Air support only one external display natively. The M3 MacBook Air supports two, but only when the laptop lid is closed.
If you need multiple external displays on Apple Silicon, you need a MacBook Pro with a Pro or Max chip.
My monitor has USB-C but my MacBook isn't charging. Why?
The monitor's USB-C port might not support Power Delivery for charging laptops, or the wattage is too low. Check the monitor's spec sheet for USB-C PD wattage. You need at least 45W for meaningful MacBook Air charging and 60W or more for MacBook Pro.
Do I need a Thunderbolt dock or will a USB-C hub work?
It depends on what you need. For a single monitor with HDMI or DisplayPort, a simple adapter or cable works fine. For multiple monitors, charging, and extra ports through one connection, a Thunderbolt dock is the right tool.
A basic USB-C hub won't drive multiple displays on macOS.
Final Recommendation: The Simplest Path Based on Your Gear
If your IPS monitor has USB-C with DisplayPort Alt Mode, buy a quality USB-C to USB-C cable rated for video. That's your simplest, most reliable connection. One cable handles everything.
If your monitor only has HDMI, get a USB-C to HDMI 2.0 adapter or cable that explicitly supports 4K@60Hz. Avoid the cheapest options. Spend the extra few dollars on a reputable brand.
If you're running multiple monitors or want a clean single-cable desk setup with charging, invest in a Thunderbolt dock with confirmed macOS compatibility. It costs more upfront but eliminates cable clutter and adapter headaches.
The whole process comes down to three steps. Know your MacBook's ports. Know your monitor's inputs.
Match them with the right cable or adapter. That's it. No mystery, no magic, just the right connection for your specific hardware.
The article is already complete. The previous section you provided included the "Final Recommendation" heading, which was the last section in the approved TOC. All required content has been written, there are no remaining H2 headings left to continue with.

Similar Posts