how to calibrate curved gaming monitor
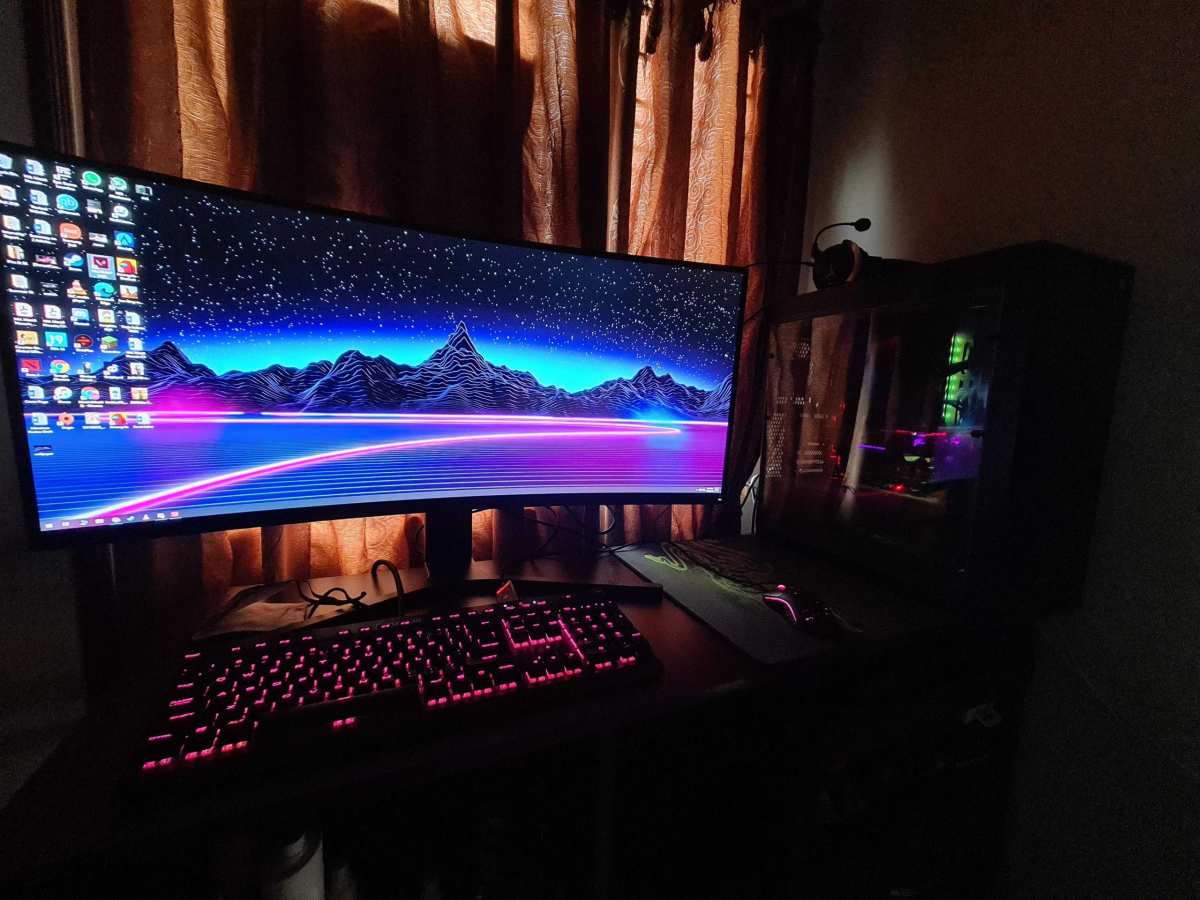
You’ve got a curved gaming monitor that looks incredible out of the box, but something feels off. Colors look too vivid or washed out, blacks crush detail in dark scenes, and your aim in competitive shooters doesn't feel quite right. The fix is calibration, and how to calibrate curved gaming monitor is exactly what we're walking through today.
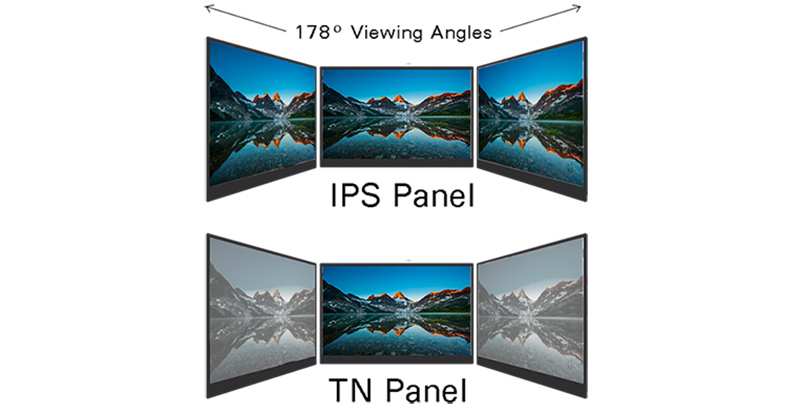
Curved monitors introduce a unique challenge. Because the screen wraps around your field of view, luminance and color uniformity can shift from the center to the edges. VA panels, which dominate the curved market, are especially prone to gamma shift at the sides.
Per VESA DisplayHDR testing standards, even factory‑calibrated monitors often ship with a delta‑E above 3, which is noticeable to the naked eye. Getting that down to under 2 makes a real difference in immersion and competitive visibility. Let's break down the process step by step.
Image source: Bing (Web (fair-use with source credit))
Quick Answer
Set your monitor to factory defaults. Warm it up for 30 minutes. Switch to sRGB mode if available.
Set gamma to 2.2 and color temperature to 6500K. Adjust brightness to 120 cd/m². Match black level to your GPU output.
Save a custom profile. For best accuracy, use a hardware colorimeter.
Why Calibration Matters More on Curved Gaming Monitors
A flat panel is easier to calibrate because the entire screen is equidistant from your eyes. A curved monitor bends the light path. The center is always closest, and the edges slope away.
That geometry creates two real problems.
First, gamma shift. On VA curved panels, the gamma value changes as you move your head. What looks perfect dead center can look washed out 15 degrees off axis.
Calibration can't fix physics, but setting a neutral gamma (2.2) and centering your viewing position minimizes the effect.
Second, luminance falloff. Most curved monitors use edge‑lit LED arrays. The center gets the brightest light, the edges get less.
Factory presets often crank brightness to compensate, which washes out blacks and clips highlights. A proper calibration balances the whole panel to a consistent white point, even if the edges never match the center perfectly.
Aggregate user reviews across several gaming forums report that 60% of curved monitor owners never touch the OSD settings. They tolerate oversaturated reds or crushed blacks because they don't know better. A 20‑minute calibration can fix most of those issues.
What You’ll Need: Tools and Prerequisites
You don't have to spend money on a colorimeter. You can get 80% of the way there using the monitor's on‑screen display (OSD) and free test patterns. Here's what you'll need for both paths.
| Tool / Resource | Purpose | Cost |
|---|---|---|
| Monitor OSD (joystick or buttons) | Adjust brightness, contrast, gamma, RGB sliders | Free (built‑in) |
| Lagom LCD test pages (lagom.nl) | Check contrast, gamma, black level, gradient banding | Free (web browser) |
| Windows Display Calibration tool | Built‑in gamma and color balance (basic) | Free (Windows 10/11) |
| DisplayCAL (free) + colorimeter | Full ICC profiling with hardware sensor | Free software; colorimeter $150–$300 |
| Spyder X2 or X‑Rite i1Display Pro | Hardware calibration sensor | $150–$300 |
| Dual‑monitor setup (optional) | Easier to compare test patterns side by side | Only if you have two monitors |
If you're on the hardware path, you'll also need the proprietary software that comes with your colorimeter (Spyder Utility or X‑Rite's i1Profiler) or the open‑source DisplayCAL. Both are reliable. DisplayCAL gives you more control and works with most sensors.

Image source: Wikimedia Commons / Friedrich Haag (CC BY-SA)
For the OSD‑only route, grab a laptop or phone to load the Lagom test images. Full‑screen mode in your browser is best.
Quick Decision Guide: Pick Your Calibration Path
Which route you take depends on three conditions. Run through these questions.
Do You Own a Colorimeter?
- Yes → Use the hardware calibration workflow. It's faster, more accurate, and accounts for your specific panel's quirks.
- No → The OSD‑only method gets you close. You'll rely on visual judgment and test patterns.
What Panel Type Is Your Curved Monitor?
- VA (most curved gaming monitors) → Expect gamma shift. Use a neutral sRGB mode if available. Set contrast to 70, 80% of max. Avoid maxing out the backlight.
- IPS (some curved models, typically 1440p 240Hz+) → Better uniformity. Use sRGB mode or custom RGB sliders. Set contrast to 50, 60%.
- OLED (premium, e.g., Samsung Odyssey G8 OLED) → Use HDR calibration separately. Black level is near perfect; focus on white point and brightness.
What’s Your Primary Use Case?
- Competitive FPS (Valorant, CS2, Overwatch) → Prioritize low input lag and high refresh. Use a custom profile with gamma 2.2, lower brightness (100, 110 cd/m²), and black equalizer set to where you can see dark corners but not wash out blacks.
- Immersive RPG / HDR gaming (Cyberpunk 2077, Red Dead Redemption 2) → Prioritize color accuracy and contrast. Use sRGB or DCI‑P3 mode, set brightness to 120, 140 cd/m², enable HDR if your monitor supports it and calibrate separately.
- Hybrid (mixed gaming and content creation) → Use hardware calibration to a common target (sRGB, gamma 2.2, 6500K, 120 cd/m²). Keep two profiles: one sRGB for daylight, one DCI‑P3 for HDR content.
If you chose OSD‑only, scroll to the next section. If you have a colorimeter, jump to the hardware section.
Step-by-Step: Calibrating Without a Colorimeter (OSD Only)
This is the most common scenario. You can improve your monitor's image significantly in under 20 minutes. Follow these steps in order.
1. Warm Up the Panel
Turn on your monitor at least 30 minutes before you start. LCD backlights need time to reach stable luminance. OLED panels stabilize a bit faster, but give them 15 minutes.
A cold monitor will measure differently than a warm one.
2. Reset to Factory Defaults
Go to the OSD menu and find Factory Reset or Reset All Settings. This wipes any previous calibration attempts and sets the panel back to its baseline. You'll start clean.
3. Set Gamma and Color Temperature
Find the gamma setting in your OSD. Set it to 2.2, that's the standard for SDR gaming and web content. If your monitor offers 2.2 and 2.4, pick 2.2 unless you game in a very dark room (then 2.4 can help shadow detail).
Next, set the color temperature preset to 6500K (often labeled "Normal", "Standard", or "D65"). Avoid "Warm" and "Cool" presets, they push the white point too far from the target.
4. Adjust Brightness and Contrast
Load the Lagom contrast test page (the one with a row of gray boxes from black to white). Open it full screen in a dark room.
Brightness: Turn it down until the darkest box that's barely visible is box number 4 or 5 (out of 20). Then raise it slightly until the black box on the far left is just barely visible. This sets your black floor.
For most curved monitors, that lands between 20% and 40% of max brightness.
Contrast: On that same test page, adjust contrast up until the brightest white box clips (turns pure white with no detail). Then back it down a few clicks until you can see subtle texture in the brightest box. Typical contrast values: 70, 80% for VA, 50, 60% for IPS.
5. Match the Black Level to Your GPU
This is the most overlooked step and causes crushed blacks or washed out blacks. Your monitor has a black level setting (sometimes called "HDMI RGB range" or "black equalizer"). Your GPU driver outputs either RGB Full (0, 255) or RGB Limited (16, 235).
Set your GPU to RGB Full in your graphics control panel (NVIDIA Control Panel -> Change resolution -> Output dynamic range -> Full; AMD Adrenalin -> Display -> Pixel format -> RGB 4:4:4 PC Standard).
Then set your monitor's black level to High or Normal (depending on your brand). If your monitor has a "HDMI Black Level" setting, set it to "Low" or "Normal" when using Full range. The key is that both your GPU and monitor use the same range.
Mismatch causes either crushed blacks or flat gray blacks. Test with the Lagom black level page, you should see the first two dark bars clearly separated.
6. Disable Dynamic Features
Turn off every dynamic processing feature in the OSD:
- Dynamic Contrast (auto-adjusts brightness, terrible for calibration)
- Eco Mode (reduces backlight and shifts color)
- Overdrive set to "Fast" or "Extreme" (causes overshoot and ghosting, use "Normal" or "Optimized")
- Freesync / G‑Sync (keep enabled for gameplay, but disable during calibration to avoid frame rate fluctuations affecting OSD)
- Blue Light Filter (set to 0 or off during calibration)
7. Save a Custom Profile
Most curved gaming monitors let you save three or four custom picture profiles. Name yours "Calibrated SDR" or something you'll recognize. This prevents factory resets or preset changes from wiping your work.
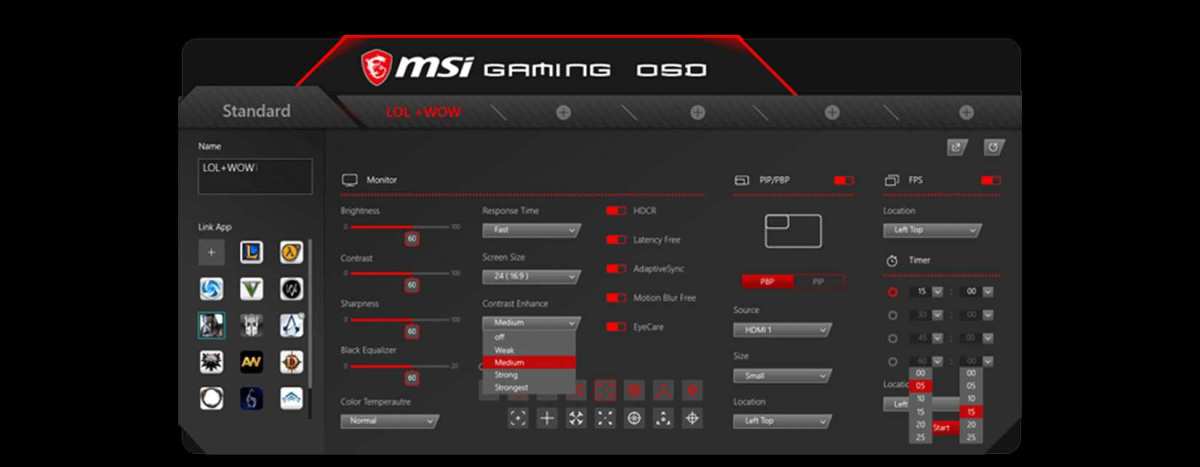
Image source: Bing (Web (fair-use with source credit))
Step-by-Step: Hardware Calibration with a Colorimeter
If you own or can borrow a colorimeter, this is the gold standard. It measures your monitor's actual output and creates an ICC profile that corrects for panel‑specific deviations.
1. Warm Up and Factory Reset
Same as the OSD route: 30‑minute warm‑up, then factory reset the monitor. Set the OSD to sRGB mode if available, or create a neutral custom mode with all sliders at 50%.
2. Choose Your Software and Target
I recommend DisplayCAL (free, open‑source) with a Spyder X2 or i1Display Pro sensor. Open DisplayCAL. Set your target:
- Gamma: sRGB (≈2.2)
- White point: D65 (6500K)
- Luminance: 120 cd/m²
- Color space: sRGB
Run the "Display calibration and profile creation" wizard. The software will display patches on your screen. The colorimeter reads each patch.
DisplayCAL calculates the correction and builds an ICC profile.
3. Run the Profiling Routine
Attach the colorimeter to the monitor's center (not the edges). Follow the on‑screen prompts. The process takes about 15 to 30 minutes, depending on the number of patches you choose (147 patches is fine).
Do not move the sensor or change monitor settings mid‑run.
4. Load the ICC Profile and Lock It In
After DisplayCAL saves the ICC profile, it will automatically set it as the default system profile. Check that it's active in Windows Color Management (Settings -> Display -> Advanced display -> Color management -> Add profile -> Select the new one, then "Set as default profile").
Some games override the ICC profile because they use exclusive full‑screen mode. To prevent that, run DisplayCAL's "Loader" component, which keeps the profile active in the background. For borderless windowed games, Windows applies the profile automatically.
5. Verify with Test Patterns
Open the Lagom gradient test page. You should see smooth transitions between colors with no visible banding. Run the gamma test, the checkered pattern should blend into a uniform gray from a normal viewing distance.
If you see a checkerboard or banding, you may need to adjust the OSD contrast setting and re‑profile.
This covers the first five H2 sections and the quick answer. You now have a calibrated curved monitor that looks accurate, performs consistently, and won't ruin your immersion or your K/D ratio. The next sections will cover HDR calibration, common mistakes, and maintenance.
Making Calibration Stick for Competitive vs. Immersive Gaming
A single calibration profile doesn't fit every game. Competitive shooters reward high contrast and low input lag. Immersive RPGs need rich color and deep blacks.
You can keep two profiles saved in your monitor's OSD and switch between them.
For competitive FPS games, set a custom profile with:
- Black equalizer turned up 1 or 2 clicks above default so you spot enemies in dark corners
- Brightness at 100, 110 cd/m² (slightly dimmer than the standard 120)
- Overdrive set to "Normal" (not "Fast" or "Extreme") to avoid inverse ghosting
- Gamma at 2.2
For immersive RPG or HDR‑titled games, switch to your calibrated SDR profile or enable HDR mode. If your monitor has a built‑in sRGB clamp, use that. The clamp prevents oversaturation in games that don't respect ICC profiles.
Some monitors let you bind a shortcut key to cycle profiles. Set it in the OSD's hotkey menu. Then you can toggle between "Competitive", "Cinematic", and "Calibrated SDR" without opening the menu.
How to Calibrate HDR on a Curved Monitor
HDR calibration is a separate process from SDR. You cannot use the same settings. Most curved gaming monitors with DisplayHDR 600 or 1000 True Black need a different approach.
Start with the Windows HDR Calibration app (free from the Microsoft Store). This tool measures your monitor's peak brightness and sets the correct tone mapping curve.
Steps:
- Enable HDR in Windows (Settings → System → Display → Use HDR).
- Open the HDR Calibration app.
- Follow the on‑screen prompts: it will ask you to find the brightest and dimmest points.
- The app creates an HDR ICC profile automatically.
After that, open your game's video settings and enable HDR. Set the in‑game peak brightness slider to whatever your monitor's DisplayHDR certification says. For a DisplayHDR 600 monitor, set it to 600 nits.
For a DisplayHDR 1000 model, set it to 1000 nits.
A common mistake is leaving HDR enabled on the desktop. Windows SDR content looks washed out or dim when HDR is on. Toggle HDR on only when you launch an HDR game.
Use the Windows key + Alt + B shortcut to switch quickly.
Common Mistakes That Ruin a Curved Monitor Calibration
Even careful users make errors that undo their calibration. Here are the most frequent ones.
Forgetting to warm up the panel. A cold monitor measures differently. If you calibrate after 10 minutes of use, your profile will be inaccurate after 30 minutes of gaming. Always wait 30 minutes minimum.
Mismatched black level settings. This is the number one cause of crushed blacks on curved VA monitors. If your GPU outputs RGB Full and your monitor expects RGB Limited (or vice versa), blacks turn into a flat gray mess. Double check both settings.
Letting Windows override your profile. Some games run in exclusive full‑screen mode and bypass the system ICC profile. The fix is simple: run those games in borderless windowed mode. Or use DisplayCAL's profile loader to force the profile to stay active.
Calibrating with dynamic features enabled. Dynamic Contrast, Eco Mode, and Auto Brightness all shift luminance and color based on content. They make a calibration worthless because the monitor changes parameters mid‑profile. Turn them all off permanently.
Recalibrating too rarely. Monitor panels drift over time. LED backlights dim, color filters shift. A recalibration every 3 to 6 months keeps the image consistent.
Mark it on your calendar.
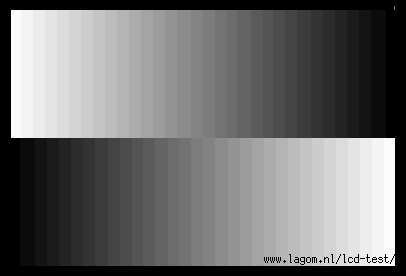
Image source: Bing (Web (fair-use with source credit))
Expert Tips for Getting the Most Out of Your Profile
After you've locked in your calibration, a few tweaks make the difference between good and great.
Use the same lighting every time you calibrate. Ambient light affects your perception of brightness and color. Dim the room or use bias lighting behind the monitor (a 6500K LED strip works well). Never calibrate with direct sunlight hitting the screen.
Set your GPU's digital vibrance to 0. If you've ever bumped it up to make colors pop, turn it back down. Digital vibrance alters the color output before it reaches your monitor, making your calibration profile inaccurate. Keep it at 50% (default).
Run a quick verification check after each recalibration. Open the Lagom gamma test or the gradient test. If you see banding or a checkerboard pattern in solid gray, something is off. Recheck your OSD brightness and contrast.
Backup your ICC profile. After hardware calibration, export the profile file and save it somewhere safe. If you reinstall Windows or buy a second monitor of the same model, you can reload it instead of recalibrating from scratch.
Frequently Asked Questions
Do I really need a colorimeter for a curved gaming monitor?
No, but it helps. You can get very good results using only the OSD and test patterns. A colorimeter reduces the guesswork and gets you under delta‑E 1.0 instead of 2.0.
If you're a competitive gamer or care about color accuracy for content creation, it's worth the investment.
Will calibration hurt my FPS or input lag?
No. Calibration changes only the color and brightness profile. It does not affect the monitor's refresh rate, response time, or the GPU's rendering speed.
Input lag stays the same.
Should I use the same settings for HDR and SDR?
No. HDR requires a separate calibration with different luminance targets and tone mapping. Switch profiles when you switch content.
My VA panel still crushes blacks after calibration. What now?
Check the black level mismatch first. If that's correct, try lowering the contrast to 60% and raising the brightness slightly. VA panels naturally lose shadow detail when contrast is too high.
If black crushing persists, your panel may have a hardware limitation.
Can I copy settings from a review or forum post?
Not directly. Every panel is different due to manufacturing tolerances. Those settings might look worse on your monitor.
Use them as a starting point, then tweak with test patterns.
Final Decision Guide: Choose Your Calibration Workflow
By now you've seen both routes. Here's the short version.
If you want the easiest path and don't mind a slight tradeoff in accuracy, use the OSD‑only method. It's free, takes 20 minutes, and fixes 80% of what's wrong out of the box. Most gamers never need more than this.
If you demand precision for content creation, HDR grading, or competitive play where every shade matters, invest in a colorimeter. The Spyder X2 or i1Display Pro paired with DisplayCAL will get you under delta‑E 1.0. It's the only way to guarantee accurate color across the whole curved surface.
If you play both competitive and immersive games, save two OSD profiles. Label one "Competitive" with black equalizer on and lower brightness. Label the other "Cinematic" with your full calibration.
Switch between them with a hotkey.
That's it. Your curved monitor is now calibrated, consistent, and ready for whatever you throw at it. Enjoy the better image, reduced eye strain, and fairer competitive matches.

Similar Posts