How to Connect Office Monitor to Laptop
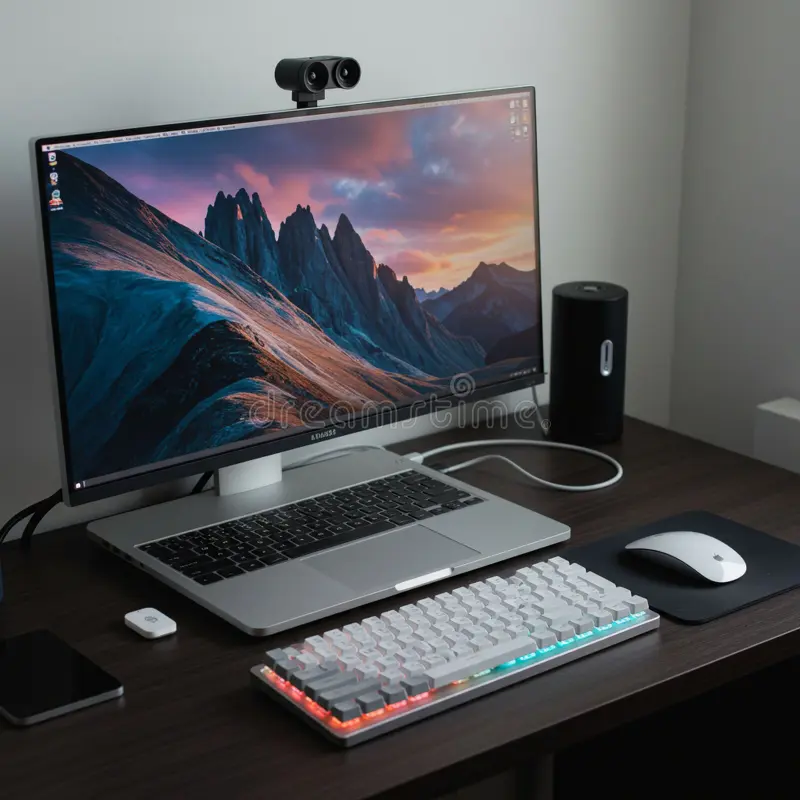
Figuring out how to connect office monitor to laptop shouldn't feel like solving a puzzle, but that's exactly what it feels like when you're staring at a tangle of cables and ports that don't seem to match. The good news is that most setups come down to a handful of common connection types, and once you know which one applies to your gear, the whole thing takes about two minutes.
The trick is matching the ports on your laptop to the ports on your monitor, then picking the right cable or adapter. HDMI, USB-C, DisplayPort, and even wireless options all work, but each one behaves a little differently depending on your hardware. Let's walk through it step by step so you can get your second screen up and running without the headache.
Quick Answer
Connect your laptop to an office monitor using a compatible cable. Match the ports on both devices first. HDMI and USB-C are the most common options in 2026.
Plug in the cable, select the correct input on the monitor, then configure display settings in your operating system.
What Ports Do You Actually Have?
Before you buy any cable or adapter, you need to know what you're working with. Grab your laptop and your monitor, then check the ports on both. This single step saves you from buying the wrong cable or discovering an incompatibility after everything's already set up.
Laptop ports to check
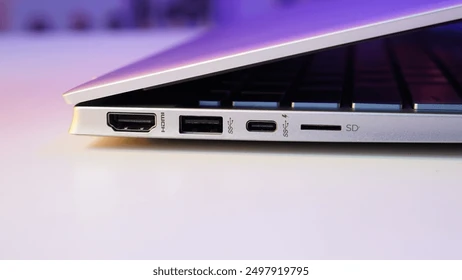
Look along the sides and possibly the back of your laptop. Here's what you're most likely to find:
- HDMI port, A trapezoid-shaped port, about 14mm wide. Common on business laptops and larger notebooks.
- USB-C / Thunderbolt, A small, oval port. This is the standard on most laptops made after 2020. It handles video, power, and data through one cable.
- DisplayPort, Looks similar to HDMI but with one corner cut at an angle. More common on gaming or workstation laptops.
- VGA, A blue, 15-pin D-shaped connector. Found on older laptops. Still hanging around in some offices.
- Mini DisplayPort, A smaller version of DisplayPort. Seen on some older MacBook models and compact Windows laptops.
If your laptop only has USB-C, don't worry. That single port can handle video output just fine, as long as it supports what's called "DisplayPort Alt Mode," which virtually all modern USB-C laptops do.
Monitor ports to match
Office monitors typically come with one or more of these:
- HDMI, The most universal option. Almost every monitor made in the last decade has at least one HDMI input.
- DisplayPort, Common on higher-resolution monitors and those designed for professional use.
- USB-C, Newer monitors include a USB-C port that can receive video and charge your laptop simultaneously.
- VGA, Found on older or budget monitors. Analog signal, so picture quality isn't as sharp.
When the ports don't match
This is where most people get stuck. Your laptop has USB-C but your monitor only has HDMI. Your laptop has HDMI but your monitor only has DisplayPort.
Here's how to handle the mismatch:
| Laptop Port | Monitor Port | Solution |
|---|---|---|
| USB-C | HDMI | USB-C to HDMI cable or adapter |
| USB-C | DisplayPort | USB-C to DisplayPort cable |
| HDMI | DisplayPort | HDMI to DisplayPort adapter (active adapter recommended) |
| HDMI | VGA | HDMI to VGA adapter (active adapter required) |
| VGA | HDMI | VGA to HDMI converter (active, with audio support) |
The key word here is "active." Passive adapters just rewire the pins, which works for some connections but not others. When you're converting between digital signal types (like HDMI to VGA), you need an active adapter that actually converts the signal.
Choosing the Right Cable or Adapter
Not all cables are created equal. The one you pick affects picture quality, refresh rate, and whether your laptop charges through the same connection. Here's a breakdown of your main options.
HDMI — the safe bet for most people
HDMI is the most reliable, widely compatible option. If both your laptop and monitor have HDMI ports, just grab a standard HDMI cable and you're done.
What HDMI gives you:
- Supports up to 4K resolution at 60Hz with HDMI 2.0 or newer
- Carries audio along with video, so monitor speakers work if available
- Plug and play with no adapter needed
- Cables are cheap, usually $10 to $20
One thing to check: look at the HDMI version your laptop and monitor support. HDMI 1.4 caps 4K at 30Hz, which feels sluggish when you're moving windows around. For smooth 4K at 60Hz, you need HDMI 2.0 on both ends.
Most laptops and monitors from 2018 onward support at least HDMI 2.0.
USB-C — the one-cable dream (when it works)
USB-C is the most convenient option if your monitor supports it. One cable handles video, data, and charging. No dock, no adapter, no mess.
What to know before you go USB-C:
- Your laptop's USB-C port must support DisplayPort Alt Mode (most do, but verify in your laptop's specs)
- The monitor needs a USB-C input that accepts video, not just a USB-C port for data
- USB-C cables vary widely. Make sure yours supports video, not just charging. Look for "Thunderbolt 3/4" or "DisplayPort Alt Mode" in the cable specs
- Power delivery matters. If you want the monitor to charge your laptop, the monitor needs to support USB-C Power Delivery, ideally 65W or higher for most office laptops
A good USB-C to USB-C cable that supports video and power delivery runs about $15 to $30. Don't grab the cheapest one off the shelf. Cheap cables often only support charging and will leave you staring at a blank screen.
DisplayPort — what it's good for
DisplayPort is the go-to for higher refresh rates and daisy-chaining multiple monitors. If you're connecting a high-resolution monitor (1440p or 4K) and want the best possible image quality, DisplayPort edges out HDMI in some scenarios.
DisplayPort strengths:
- Supports higher refresh rates at 4K (up to 120Hz with DisplayPort 1.4)
- Daisy-chain capability lets you connect multiple monitors in series through one cable
- Locking connector stays secure, which is nice in office environments where cables get bumped
The downside is that most laptops don't have full-size DisplayPort. You'll likely need a USB-C to DisplayPort cable or adapter, which adds a small cost but works reliably.
VGA and DVI — legacy options you might still encounter
If you're working with older office equipment, you might run into VGA or DVI connections. These still function, but they come with real limitations.
- VGA is analog, so the image won't be as sharp as digital connections. Fine for spreadsheets and email, not great for anything visual.
- DVI is digital but maxes out at 1920×1200 for single-link cables. Dual-link DVI supports higher resolutions but is rare on laptops.
If you're stuck with VGA or DVI, an active adapter to HDMI or DisplayPort is your best bet for a clean signal.
Step-by-Step: Connecting Your Monitor the Right Way
Now that you've identified your ports and picked the right cable, let's get everything connected. Follow these steps in order. Skipping ahead is how most problems happen.
Before you plug anything in
Take five seconds to check these things:
- Make sure your laptop is powered on and logged in. Some laptops detect external monitors better when the operating system is already running.
- Check that your monitor is plugged into power and turned on. Sounds obvious, but it gets overlooked.
- If you're using an adapter, make sure it's the right direction. USB-C to HDMI adapters are designed to go from laptop (USB-C) to monitor (HDMI). They don't work in reverse.
- Update your graphics drivers if you've been putting it off. Outdated drivers are a common cause of detection issues.
Making the physical connection
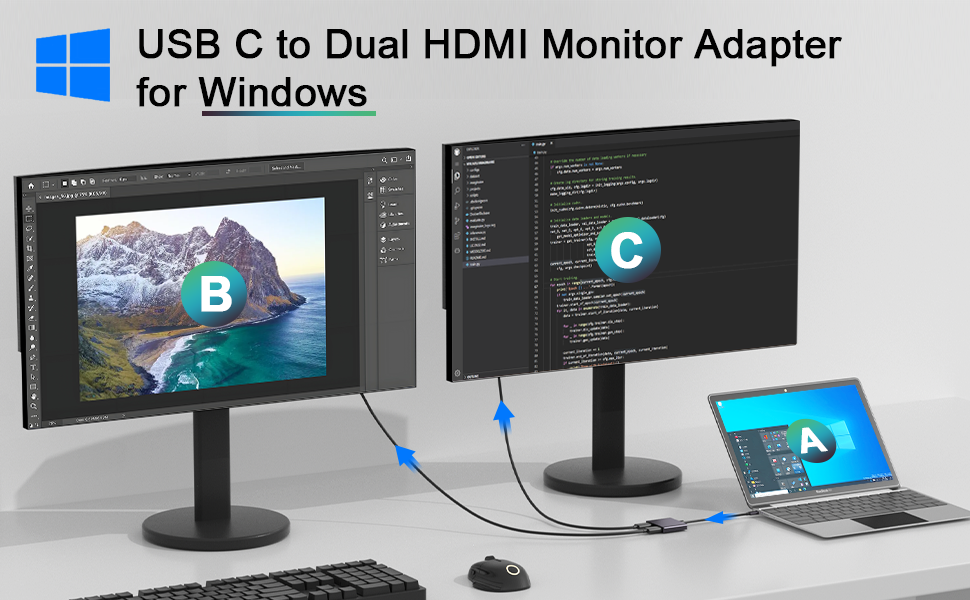
- Connect one end of the cable to your laptop's video output port.
- Connect the other end to the monitor's input port.
- Make sure both ends are fully seated. A loose connection causes flickering or intermittent signal loss.
- If using an adapter, connect the adapter to the laptop first, then attach the cable to the adapter.
Setting the correct input on your monitor
This is the step people miss most often. Your monitor might have multiple inputs (HDMI 1, HDMI 2, DisplayPort, USB-C), and it won't always switch to the right one automatically.
Look for a button on the monitor labeled "Input," "Source," or with an icon that looks like an arrow pointing into a box. Press it and select the input that matches the cable you plugged in. If you plugged into HDMI 1, select HDMI 1.
If nothing shows up, cycle through the inputs until you see your laptop screen.
Configuring display settings on Windows
Once the physical connection is made, Windows should detect the monitor within a few seconds. If it doesn't, press Windows key + P to open the projection menu and select "Extend" or "Duplicate."
For more control:
- Right-click on the desktop and select Display settings.
- You'll see two rectangles labeled 1 and 2. Click "Detect" if the second monitor isn't showing.
- Scroll down to Multiple displays and choose: , Duplicate these displays, Same image on both screens. Good for presentations.
, Extend these displays, Second screen acts as additional workspace. This is what most people want for productivity.
- Drag the display rectangles to match the physical arrangement of your screens. This makes your mouse move between them naturally.
- Set the resolution and scale for each monitor individually. If text looks blurry on the external monitor, adjust the scaling percentage.
Configuring display settings on Mac
macOS handles external monitors well, but the settings live in a different place than you might expect.
- Click the Apple menu and go to System Settings (or System Preferences on older macOS versions).
- Select Displays.
- If the monitor isn't detected, hold the Option click and look for the "Detect Displays" button.
- Choose between: , Mirror displays, Same image on both screens.
, Use as separate displays, Extended desktop mode.
- Arrange the displays by dragging the white menu bar to the screen you want as your primary display.
- Set the resolution and refresh rate for the external monitor. macOS usually picks the right defaults, but you can override them if needed.
Docking Stations: When One Cable Isn't Enough
A simple cable works great for a basic setup. But if you're connecting multiple monitors, external drives, a keyboard, mouse, and ethernet, a docking station cleans things up dramatically.
What a docking station actually does
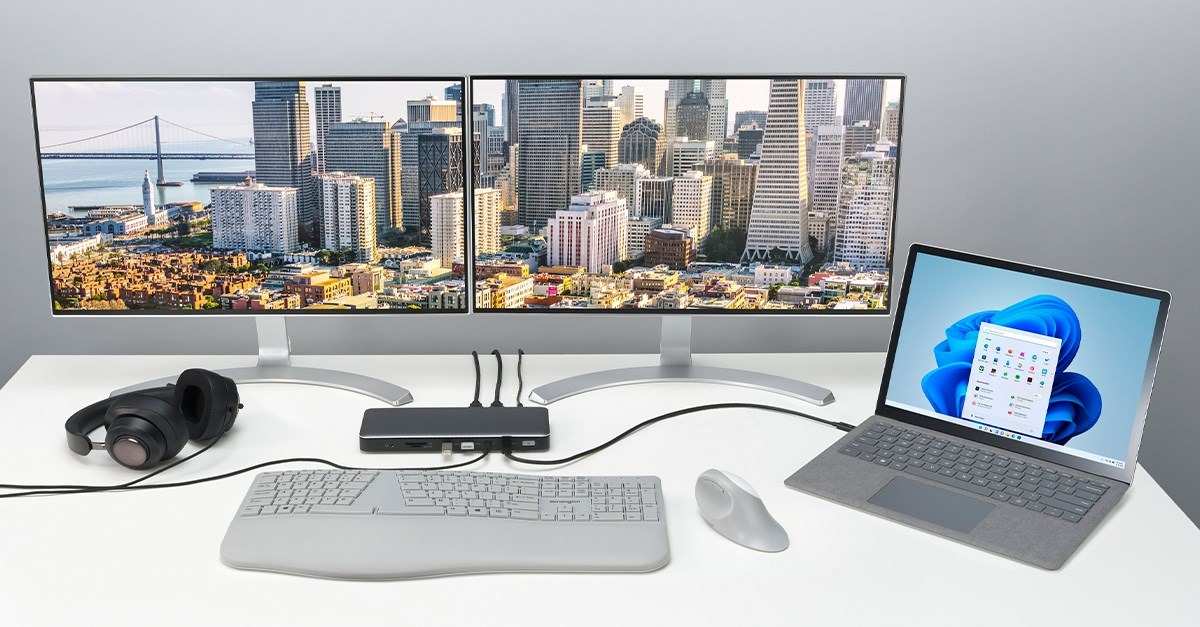
A docking station sits on your desk and connects to your laptop through a single cable, usually USB-C or Thunderbolt. It provides multiple video outputs, USB ports, audio, ethernet, and sometimes charging. You plug everything into the dock once, then connect your laptop with one cable when you sit down.
Think of it as a hub that turns your laptop into a full desktop workstation without plugging in a dozen different things every time.
When a dock makes sense for your setup
A docking station is worth the investment if:
- You use multiple external monitors
- You connect and disconnect your laptop from your desk frequently (hybrid workers, hot-desk environments)
- You have several peripherals that stay at your desk (keyboard, mouse, webcam, external storage)
- You want a single-cable connection for video, data, and charging
For a single external monitor with no extra peripherals, a simple cable is usually the better choice. A dock adds cost and complexity you don't need.
What to look for in a dock
Not all docks are equal. Here's what matters:
- Video outputs, Make sure the dock has the right ports for your monitor setup (HDMI, DisplayPort, or USB-C)
- Power delivery, If you want the dock to charge your laptop, look for at least 65W of power delivery through the upstream USB-C connection. Power-hungry laptops may need 90W or more
- Thunderbolt 4 vs USB-C, Thunderbolt 4 docks offer higher bandwidth, which matters for dual 4K monitors or high-resolution single displays. Standard USB-C docks work fine for a single 1440p or 4K monitor
- Number of USB ports, Count your peripherals and make sure the dock has enough ports
- Ethernet port, Useful if your office network relies on wired connections rather than Wi-Fi
Docking stations range from about $80 for a basic single-monitor USB-C dock to $300 or more for a Thunderbolt 4 dock that supports dual 4K displays. As of 2026, reputable options in the $120 to $200 range handle most office setups well.
Wireless Display Options
Not every setup needs a cable. If you're in a meeting room or just hate cable clutter, wireless display technology lets you mirror or extend your screen without plugging anything in.
When wireless works well
Wireless display is great for presentations, conference rooms, and temporary setups. Windows laptops can use Miracast, which is built into the operating system. Mac users can use Apple's AirPlay feature to connect to compatible displays.
To use Miracast on Windows, press Windows key + K and select the wireless display from the list. On Mac, click the AirPlay icon in the menu bar and choose your target display.
When to stick with a cable
Wireless display has real limitations. There's always some latency, which makes it feel sluggish when you're dragging windows or working with video. Resolution can be lower than what a cable provides.
And if the Wi-Fi network is congested, you'll get stuttering or dropped connections.
For daily productivity work with an external monitor sitting on your desk, a cable is still the better experience. Wireless is a convenience feature, not a replacement for a wired connection in a permanent setup.
Common Problems and How to Fix Them
Even when everything should work, it sometimes doesn't. Here are the most common issues and what actually fixes them.
"No signal" on the monitor
This is the number one complaint. The monitor is on, the cable is connected, but the screen stays black with a "No Signal" message.
Try these in order:
- Check that the monitor is set to the correct input source
- Unplug the cable from both ends and reconnect it firmly
- Try a different cable to rule out a faulty one
- Restart the laptop with the monitor connected
- Press Windows key + P and cycle through the display modes
If none of that works, the port itself might be the issue. Try a different video output on your laptop if one is available.
Blurry text or wrong resolution
If the display works but text looks fuzzy, the resolution or scaling is probably wrong. Right-click the desktop, go to Display settings, and make sure the resolution matches the monitor's native resolution. For most 27-inch office monitors, that's 2560×1440.
For 24-inch monitors, it's usually 1920×1080.
Scaling matters too. If text is too small or too large, adjust the scaling percentage in the same settings menu. 125% or 150% is common for high-resolution monitors.
Monitor detected but screen is black
Windows sees the monitor but nothing appears on it. This usually points to a display mode issue. Press Windows key + P and select "Extend" or "Second screen only." If that doesn't help, open Display settings and check that the monitor isn't set to a refresh rate it can't handle.
Lower the refresh rate to 60Hz as a test.
Laptop not charging through USB-C
If your monitor has USB-C with power delivery but your laptop isn't charging, the monitor might not supply enough wattage. Check the monitor's specs for its USB-C power delivery rating. Many office monitors only provide 15W or 30W, which is enough for some ultrabooks but not for power-hungry laptops.
In that case, keep using your laptop's dedicated charger alongside the video connection.
Display mirroring instead of extending
If both screens show the same thing and you want them to act as one continuous desktop, you're in mirror mode. Press Windows key + P and select "Extend." On Mac, go to Displays in System Settings and uncheck "Mirror displays."
Quick Reference: Cable and Port Comparison
Here's a side-by-side look at your main connection options:
| Connection Type | Max Resolution (Typical) | Audio Support | Charging | Best For |
|---|---|---|---|---|
| HDMI 2.0 | 4K at 60Hz | Yes | No | Universal compatibility |
| USB-C (with DP Alt Mode) | 4K at 60Hz | Yes | Up to 100W | Single-cable simplicity |
| DisplayPort 1.4 | 4K at 120Hz | Yes | No | High refresh rate, daisy-chaining |
| VGA | 1920×1200 (practical limit) | No | No | Legacy equipment only |
| Wireless (Miracast) | 1080p (typical) | Yes | No | Presentations, temporary use |
Frequently Asked Questions
Can I connect a monitor to a laptop with a USB-A port?
Standard USB-A ports don't carry video. You'd need a USB-A to HDMI adapter that uses DisplayLink technology, which requires a driver installation. It works but adds complexity.
A direct video output port is always preferable.
Why does my external monitor look blurry?
The most common cause is running at a non-native resolution. Check the monitor's recommended resolution in its manual or specs sheet, then set that exact resolution in your display settings. Scaling settings can also cause blur if they're not set correctly for the monitor size.
Do I need a special USB-C cable for video?
Yes. Not all USB-C cables support video output. Look for cables labeled as supporting "DisplayPort Alt Mode" or "Thunderbolt." Charging-only USB-C cables won't carry a video signal.
Can I close my laptop lid and use only the external monitor?
Yes. In Windows, go to Power Options and choose "Do nothing" when the lid is closed. On Mac, you need the laptop connected to power for clamshell mode to work.
This lets you use the laptop as a desktop with just the external display.
How many monitors can I connect to my laptop?
It depends on your laptop's graphics capability. Most modern business laptops support at least one external monitor. Higher-end models with Thunderbolt 4 can handle two or more.
Check your laptop's specifications for the official limit.

Similar Posts