Why Is My 144Hz Monitor Not Working
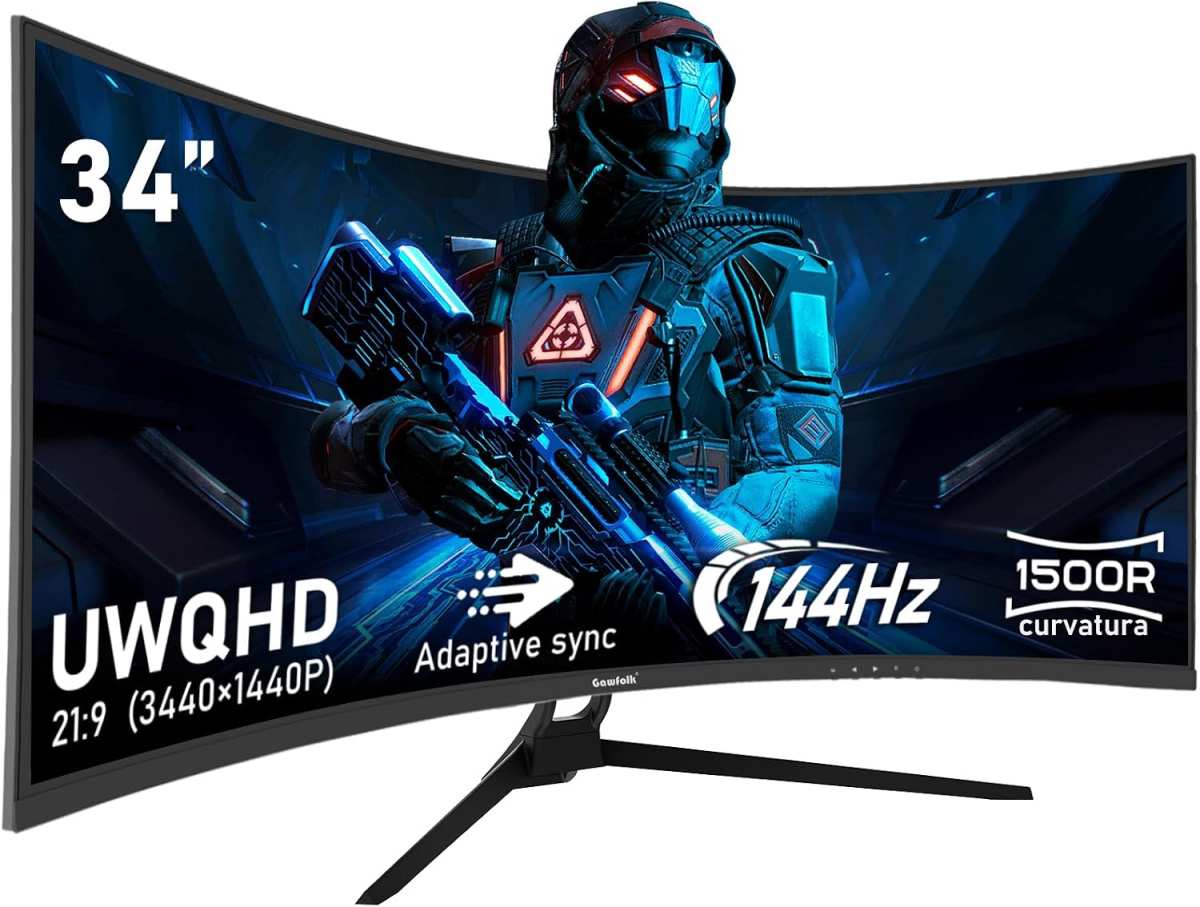
So you've got a 144Hz monitor, but it's stuck at 60Hz. Why is my 144hz monitor not working? The answer almost always comes down to one of a handful of things: the wrong cable, a hidden Windows setting, a monitor OSD toggle you didn't know existed, or a driver that reset your preferences after an update.
The good news is this is almost always fixable without opening your PC or buying new hardware. We just need to work through the chain from your GPU to your monitor, one link at a time. Per VESA specifications, even DisplayPort 1.2 can handle 144Hz at 1080p, so if you're not getting it, something in the chain is misconfigured.
Let's find out what.
The Quick Answer: Most Common Reasons Your 144Hz Monitor Is Stuck at 60Hz
Your 144Hz monitor likely isn't working because of the wrong cable. HDMI 1.4 cables cap out at 60Hz at most resolutions. Windows often defaults to 60Hz after a driver or feature update.
Your monitor's own on-screen display may have a toggle that needs enabling first. Check these three things before anything else.
Step 1: Check Your Cable — This Is the #1 Culprit
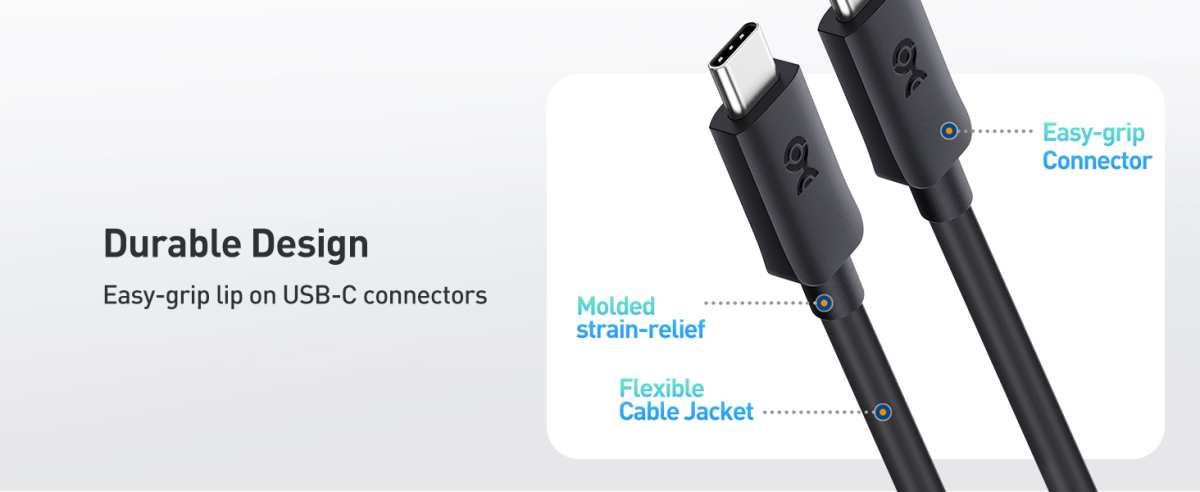
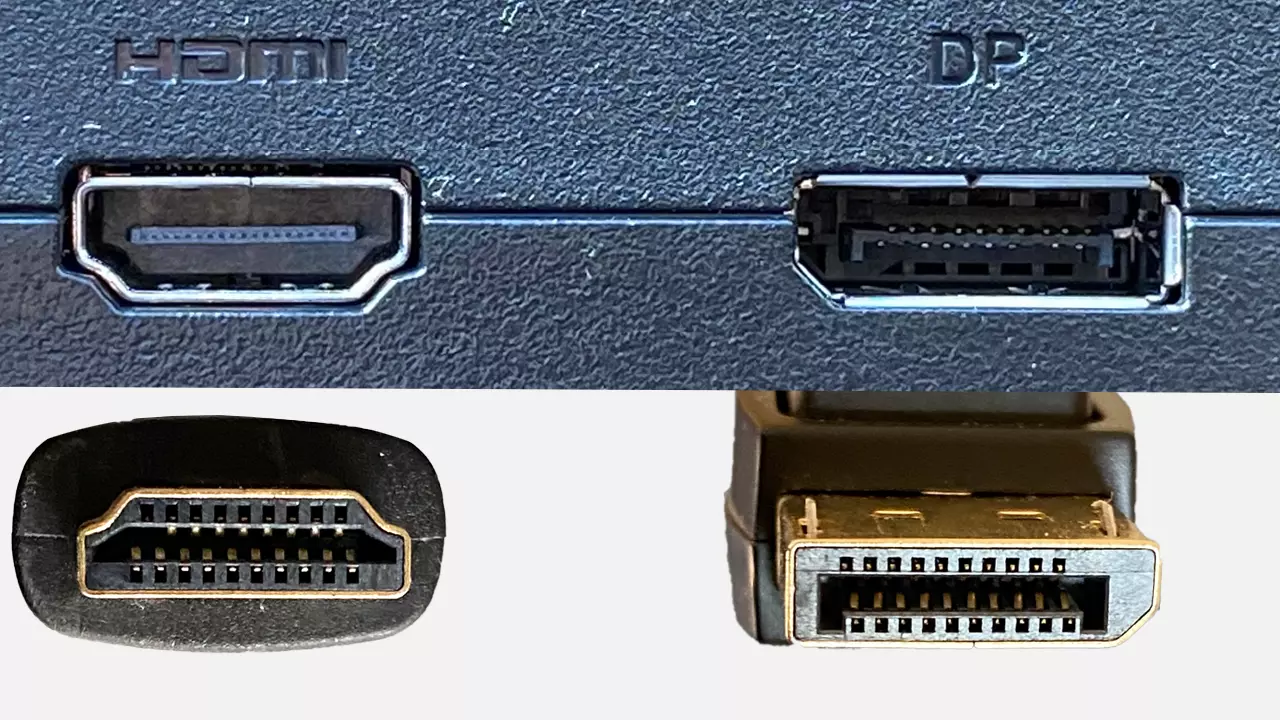
If there's one thing that causes this problem more than anything else, it's the cable. People grab whatever's in the drawer and assume all cables are the same. They're not.
Why the Cable Matters More Than You Think
Every cable has a maximum bandwidth. Push more data than the cable can handle, and the signal either drops down to a lower refresh rate or goes black entirely. A cable that works perfectly for 60Hz might not have the bandwidth for 144Hz at your resolution.
The thing is, cables don't usually say "60Hz max" on the packaging. They list version numbers like HDMI 2.0 or DisplayPort 1.4. You need to know what those versions mean for your specific setup.
Which Cable Do You Actually Need for 144Hz?
Here's the breakdown. Match your connection type and resolution to what you need.
| Connection Type | 1080p @ 144Hz | 1440p @ 144Hz | 4K @ 144Hz |
|---|---|---|---|
| HDMI 1.4 | No | No | No |
| HDMI 2.0 | Yes | Yes (8-bit color) | No (60Hz max) |
| HDMI 2.1 | Yes | Yes | Yes |
| DisplayPort 1.2 | Yes | Yes | No (60Hz max) |
| DisplayPort 1.3 / 1.4 | Yes | Yes | Yes (with DSC) |
| Dual-Link DVI-D | Yes (1080p only) | No | No |
| Single-Link DVI-D | No | No | No |
| USB-C (DP Alt Mode) | Depends on version | Depends on version | Depends on version |
A few things jump out from this table. If you're using HDMI 1.4, that's your problem right there. If you're trying to run 1440p at 144Hz over HDMI 2.0, you might hit a wall unless you drop the color depth to 8-bit.
And DVI? Forget about it unless it's Dual-Link and you're at 1080p.
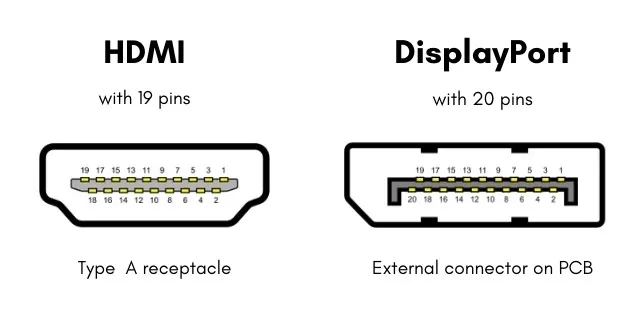
DisplayPort is generally the safest bet for 144Hz. Most 144Hz monitors ship with a DisplayPort cable in the box for exactly this reason.
How to Tell If Your Cable Is the Problem
Here's a quick diagnostic. Look at the cable itself. Sometimes the version is printed on the connector housing or along the cable jacket.
If it says "High Speed HDMI," that's HDMI 2.0. If it says "Ultra High Speed HDMI," that's HDMI 2.1.
For DisplayPort, look for "DP" with a version number. If there's no labeling at all, it's probably an older cable. Cheap no-name cables from a few years ago were often DP 1.2 at best, and some didn't even meet that spec reliably.
Try this. Swap in a known-good cable that you're confident supports the bandwidth you need. If 144Hz suddenly appears as an option, you've found your culprit.
Step 2: Check Your Monitor's On-Screen Display (OSD) Settings
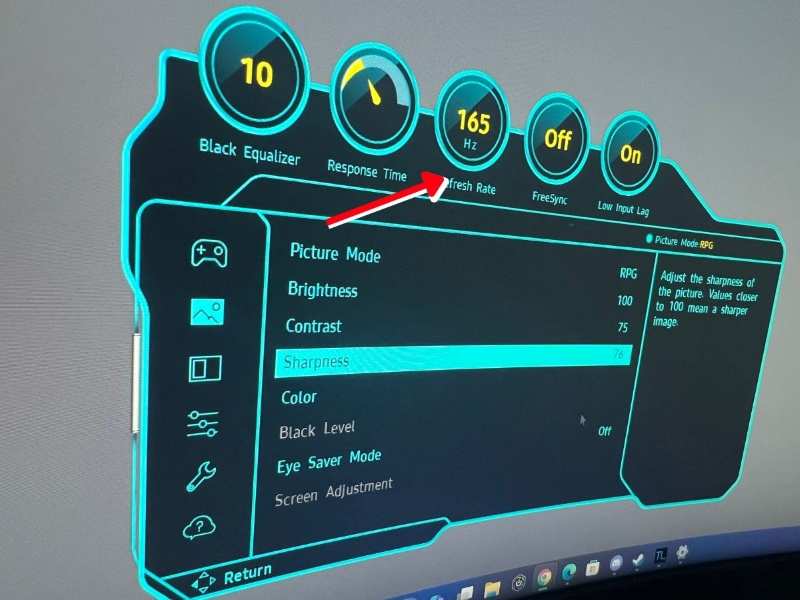
Image source: Bing (Web (fair-use with source credit))
This one catches people off guard. Your monitor has its own internal menu, the on-screen display, and some settings in there can lock you out of 144Hz even when everything else is correct.
Hidden Settings That Lock You to 60Hz
Some monitors ship with the maximum refresh rate capped in the OSD until you manually enable it. The monitor is technically capable of 144Hz, but the firmware won't allow it until you go into the menu and turn it on.
This is especially common with monitors that advertise "overclocking" to reach their rated refresh rate. A monitor that does 144Hz might actually be a 120Hz panel that's overclocked. The OSD overclocking toggle needs to be enabled for the GPU to see 144Hz as an available option.
Adaptive Sync / Overclocking Toggles in the OSD
Grab your monitor's physical buttons and open the OSD. Look for sections labeled something like:
- Game Settings or Gaming
- Overclocking or OC
- Adaptive Sync / FreeSync / G-Sync
- Refresh Rate or Max Refresh Rate
The exact naming varies by manufacturer. ASUS calls it "Overclocking" in some models. LG sometimes buries it under "Game Mode" or "Game Adjust." Dell and Samsung tend to put it in the "System" or "Setup" section.
If you find an overclocking toggle, enable it. Some monitors will ask you to confirm. Accept it, and then check your Windows display settings again.
The 144Hz option should now appear.
Also check which input port you're using. Some monitors only support 144Hz on specific ports. For example, HDMI 2 might support 144Hz while HDMI 1 is limited to 60Hz.
The manual will tell you which ports support the full refresh rate. It's a common oversight.
Step 3: Check Windows Display Settings
Windows doesn't always pick the highest available refresh rate on its own. After a driver update, a Windows feature update, or even just reconnecting your monitor, it can silently drop back to 60Hz.
Where to Find the Refresh Rate Option in Windows 10 and Windows 11
The path is straightforward in both versions.
Windows 11:
Right-click the desktop. Click Display settings. Scroll down and click Advanced display.
Under "Choose a refresh rate," open the dropdown.
Windows 10:
Right-click the desktop. Click Display settings. Scroll down and click Advanced display settings.
Then click Display adapter properties for Display 1. Go to the Monitor tab and select your refresh rate from the "Screen refresh rate" dropdown.
If you see 144Hz in the list, select it. If you don't see it, that's the problem we're solving.
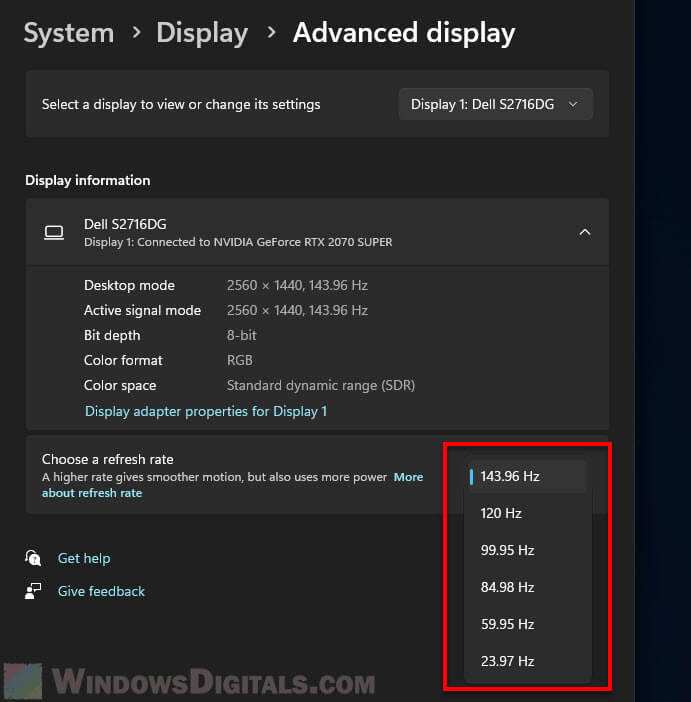
What to Do When 144Hz Doesn't Appear in the Dropdown
If 144Hz isn't listed, don't panic. Work through these checks.
- Make sure you're looking at the right display. If you have multiple monitors, click the correct one at the top of the Advanced Display settings page.
- Check the cable and port. Go back to Step 1. If the cable or port can't handle the bandwidth, Windows won't offer the option.
- Check the monitor OSD. Go back to Step 2. If the monitor's internal settings are capping the refresh rate, Windows won't see it.
- Lower the color depth. If you're at 1440p or 4K with 10-bit color, the bandwidth might be too high. Try switching to 8-bit color in your GPU control panel.
- Disable HDR. HDR changes the color format and eats bandwidth. Turn it off temporarily and see if 144Hz appears.
Sometimes the option is there but Windows just isn't showing it correctly. A quick restart with everything connected and powered on can force a fresh EDID handshake and make the option appear.
Step 4: Check Your GPU Control Panel
Windows settings are one layer. Your GPU driver is another. Sometimes the GPU control panel overrides what Windows shows, or it has its own refresh rate setting that needs to be configured separately.
NVIDIA Control Panel
Right-click the desktop and open NVIDIA Control Panel. Go to Change resolution under the Display section. On the right side, you'll see a list of resolutions and refresh rates.
Look for your native resolution with 144Hz next to it.
If it's not there, click Customize. Then Create Custom Resolution. You can manually set the refresh rate to 144Hz.
Test it. If the screen stays on, save it. If it goes black, wait 15 seconds and it'll revert.
Also check Set up G-Sync in the left sidebar. If you have a G-Sync or G-Sync Compatible monitor, make sure it's enabled here. Sometimes G-Sync won't engage if the refresh rate isn't set correctly first.
AMD Radeon Software
Open AMD Software: Adrenalin Edition. Click the Gear icon in the top right, then go to Display. You should see a Refresh Rate slider or dropdown.
Set it to 144Hz.
If you don't see the option, check that FreeSync is enabled for your monitor. AMD sometimes ties the maximum refresh rate to the FreeSync toggle. Also look for Pixel Format and make sure it's set to RGB 4:4:4 at 8-bit.
YCbCr formats reduce bandwidth but can cause compatibility headaches.
Intel Graphics Command Center
If you're using integrated graphics or an Intel Arc GPU, open the Intel Graphics Command Center. Go to Display and look for Refresh Rate. Set it to the highest available.
Intel's integrated graphics can be finicky with high refresh rates, especially at 1440p or above. Make sure your CPU's integrated graphics actually support the resolution and refresh rate you're targeting. Not all do.
Step 5: Check Color Format, Bit Depth, and HDR Settings
This is the sneaky one. Even if your cable, port, and settings all support 144Hz on paper, the way the signal is encoded can push the total bandwidth over the limit. Windows or your GPU driver then silently drops the refresh rate to compensate.
How Color Settings Steal Bandwidth From Your Refresh Rate
Every pixel needs data. More color information per pixel means more total data per frame. More frames per second also means more total data.
Multiply those together and you get the total bandwidth required.
Here's what the numbers look like for common setups:
| Resolution | Refresh Rate | Color Depth | Color Format | Required Bandwidth |
|---|---|---|---|---|
| 1080p | 144Hz | 8-bit | RGB | ~7.92 Gbps |
| 1440p | 144Hz | 8-bit | RGB | ~13.75 Gbps |
| 1440p | 144Hz | 10-bit | RGB | ~17.19 Gbps |
| 4K | 144Hz | 8-bit | RGB | ~25.82 Gbps |
| 4K | 144Hz | 10-bit | RGB | ~32.28 Gbps |
Now compare those numbers to the maximum bandwidth of your connection. HDMI 2.0 tops out at 14.4 Gbps. DisplayPort 1.2 maxes out at 17.28 Gbps.
If your required bandwidth exceeds what the connection can handle, something has to give.
The fix is usually to drop the color depth from 10-bit to 8-bit, or to switch from RGB to YCbCr 4:2:2. Both reduce the bandwidth enough to fit 144Hz within the limit.
In your GPU control panel, look for Pixel Format, Color Format, or Output Color Format. Set it to RGB, 8-bit, and Full Range if available. This gives you the best chance of hitting 144Hz without signal issues.
HDR Can Force You Back to 60Hz — Here's Why
When you enable HDR, the GPU switches to a wider color gamut and often 10-bit or 12-bit color depth. This increases the bandwidth requirement significantly. On connections with limited headroom, like HDMI 2.0 at 1440p, enabling HDR can push the signal past the limit and force a drop to 60Hz.
If you've got HDR turned on and you're missing the 144Hz option, try turning it off. Go to Windows Settings → System → Display → HDR and toggle it off. Then check your refresh rate again.
You can turn HDR back on later if you want, but you might need to accept a lower refresh rate while it's active, or upgrade to a cable and port with more bandwidth like HDMI 2.1 or DisplayPort 1.4 with DSC.
Step 6: Update or Roll Back Your GPU Driver
GPU driver updates can change which refresh rates your card reports to Windows. Sometimes a new driver introduces a bug. Sometimes an old driver simply doesn't support your monitor's EDID properly.
When a Driver Update Breaks 144Hz
This happens more often than you'd think. You update your NVIDIA or AMD driver, restart, and suddenly 144Hz is gone from the list. The driver may have reset your custom resolution profile, or it may have changed how it handles the EDID data from your monitor.
If this started right after a driver update, roll back. Open Device Manager, expand Display adapters, right-click your GPU, and select Properties. Go to the Driver tab and click Roll Back Driver if it's available.
If rollback isn't available, try a clean install of the latest driver. Both NVIDIA and AMD offer a "clean install" option in their installers. This wipes the old driver settings and starts fresh.
How to Do a Clean Driver Reinstall Using DDU
Display Driver Uninstaller is the nuclear option, but it works. Download DDU from the official Wagnardsoft site. Boot into Windows Safe Mode.
Run DDU and select Clean and restart.
After reboot, install the latest driver fresh from NVIDIA, AMD, or Intel. Don't use Windows Update for this. Go directly to the manufacturer's website.
Windows Update often delivers older or generic drivers that don't handle high refresh rates correctly.
Once the fresh driver is installed, check your refresh rate settings again. In most cases, 144Hz reappears.
Step 7: Check for EDID Handshake Problems
EDID is the data your monitor sends to your GPU to say "here's what I can do." If that handshake fails or gets corrupted, your GPU might not know 144Hz is even an option.
What Is EDID and Why Does It Matter?
EDID stands for Extended Display Identification Data. It's a small data block stored in the monitor's firmware. When you plug in a cable, the GPU reads this block to build the list of available resolutions and refresh rates.
If the EDID isn't read correctly, you might get a limited list. Some USB-C docks, adapters, and KVM switches are notorious for mangling EDID data. The GPU sees a generic monitor profile instead of your actual display.
Try connecting the monitor directly to the GPU with a single cable. Remove any adapters, splitters, or docks from the chain. If 144Hz appears, the intermediary device was the problem.
How to Use Custom Resolution Utility (CRU) to Fix EDID Issues
Custom Resolution Utility is a free tool that lets you edit the EDID data Windows sees. Download it from the ToastyX GitHub page. Open it and you'll see the current detailed resolution timings.
If 144Hz isn't listed under "Detailed resolutions," you can add it manually. Click Add and set your resolution with 144Hz. Use the "Automatic" timing standard for best compatibility.
Restart after making changes. If the screen doesn't come back, boot into Safe Mode and run CRU's reset-all.exe to restore the original data.
Use CRU carefully. Adding timings your monitor doesn't actually support can cause a black screen. Stick to standard timings for your resolution.
Step 8: Test for Hardware Defects
If you've worked through every software and settings fix and 144Hz still won't appear, it's time to isolate the hardware.
How to Isolate Whether It's the Cable, Monitor, or GPU
The fastest way to narrow it down is to swap one variable at a time.
- Try a different cable. Use a known-good DisplayPort 1.4 cable that you've confirmed works at 144Hz on another system.
- Try a different port. If your GPU has multiple DisplayPort outputs, switch to another one.
- Try a different input on the monitor. Some monitors have multiple DP or HDMI ports with different capabilities.
- Connect the monitor to a different PC or laptop. If 144Hz works on another system, the problem is your GPU or its drivers.
- Connect a different monitor to your PC. If another 144Hz monitor works fine, your original monitor may have a hardware fault.
This process of elimination tells you exactly which component is at fault. Most of the time it's the cable. Sometimes it's a dead port on the monitor.
When to RMA Your Monitor
If the monitor won't do 144Hz on any system, with any cable, and you've confirmed the OSD settings are correct, it's probably a hardware defect. Contact the manufacturer's support. Have your purchase receipt and the monitor's serial number ready.
Most reputable brands will replace the unit under warranty. Keep your original packaging if possible. It makes shipping safer.
Quick Reference: Cable and Port Compatibility Chart for 144Hz
Here's a condensed version of the compatibility table for quick reference. Bookmark this or keep it handy when troubleshooting.
| Port/Cable | 1080p 144Hz | 1440p 144Hz | 4K 144Hz | Notes |
|---|---|---|---|---|
| HDMI 1.4 | No | No | No | Too old, replace it |
| HDMI 2.0 | Yes | Yes (8-bit) | No | Common on older 144Hz monitors |
| HDMI 2.1 | Yes | Yes | Yes | Full bandwidth for all combos |
| DP 1.2 | Yes | Yes | No | Minimum for 1440p 144Hz |
| DP 1.4 | Yes | Yes | Yes (DSC) | Best all-around choice |
| Dual-Link DVI | Yes | No | No | Legacy, avoid if possible |
| USB-C (DP) | Varies | Varies | Varies | Check your laptop's DP alt mode version |
Common Mistakes People Make When Troubleshooting 144Hz Issues
- Using the cable that came in the box without checking the version. Some monitors ship with HDMI 2.0 cables even though the monitor supports 144Hz over DisplayPort. Always verify.
- Checking only Windows settings and ignoring the GPU control panel. Both need to agree. If the GPU panel is set to 60Hz, Windows won't show 144Hz.
- Forgetting to check which port on the monitor they're using. Not all ports support the same refresh rates.
- Assuming HDR and high refresh rate can coexist on limited bandwidth. They often can't, especially on HDMI 2.0.
- Not restarting after changing settings. Some changes need a full reboot to take effect, not just a display off and on.
- Buying expensive "gaming cables" thinking they'll fix the problem. A certified DP 1.4 cable for $10 works just as well as a $60 branded one. Look for VESA certification, not marketing.
Frequently Asked Questions
Can I run 144Hz over HDMI?
Yes, but only with HDMI 2.0 or higher for 1080p and 1440p. For 4K at 144Hz, you need HDMI 2.1. HDMI 1.4 cannot do 144Hz at any standard gaming resolution.
Why does my monitor say 144Hz in the OSD but Windows shows 60Hz?
This usually means the GPU isn't outputting a 144Hz signal. Check your GPU control panel settings and make sure the cable supports the bandwidth. The OSD shows what the monitor is set to accept, not what it's actually receiving.
Do I need DisplayPort for 144Hz?
Not always. HDMI 2.0 and 2.1 can handle 144Hz at common resolutions. But DisplayPort is the most reliable option, especially at 1440p and above.
Most monitors rated for 144Hz are designed with DisplayPort as the primary connection.
Will a longer cable cause 144Hz to stop working?
Signal degradation increases with cable length. For DisplayPort, stay under 3 meters for reliable 144Hz at 1440p or 4K. For HDMI, the same rule applies.
Active cables or fiber optic cables can extend the range if you need more length.
My monitor supports 165Hz but I only see 144Hz as an option. Why?
Some monitors cap at 144Hz by default and require you to enable an overclocking option in the monitor OSD to reach 165Hz. Check your monitor's on-screen display for an overclocking or refresh rate override setting.
Can a Windows update reset my refresh rate to 60Hz?
Yes. Major Windows feature updates can reset display settings, including refresh rate, to defaults. After any large update, check your display settings and GPU control panel to make sure 144Hz is still selected.
Final Checklist: Get Your 144Hz Working in Under 10 Minutes
Work through this quick sequence. Most people solve it by step 3.
- Confirm your cable is DisplayPort 1.2+ or HDMI 2.0+. Swap it if you're not sure. Cables are the single most common cause.
- Open your monitor OSD. Enable overclocking or Adaptive Sync if the option exists.
- Open Windows Advanced Display settings. Select 144Hz from the refresh rate dropdown.
- Open your GPU control panel. Set refresh rate to 144Hz there too. Make sure color format is RGB 8-bit.
- If it's still stuck, do a clean driver reinstall. Use DDU and install the latest driver from the GPU manufacturer's site.
That covers the entire chain from hardware to software. Nine times out of ten, your 144Hz monitor will be running at its full spec before you finish step 4.

Similar Posts