How to Use Portable Monitor for Gaming
Figuring out how to use a portable monitor for gaming feels simple until you plug everything in and get a blank screen. The problem almost never comes down to the monitor itself. It comes down to the port on your laptop, handheld, or console, plus the specific cable that bridges the two.
The fix is methodical, not expensive. You need to verify exactly what your source device outputs, pick the correct cable or adapter, configure your display settings, and handle power separately if needed.
Quick Answer
Connect a portable monitor for gaming by matching your device's video output to the monitor's input. Most modern laptops and handhelds use USB-C with DisplayPort Alt Mode for single-cable video and power. Older devices or consoles need an HDMI cable plus a separate power source for the monitor.
Set the resolution and refresh rate in your operating system's display settings after the physical connection. Confirm the actual refresh rate in a game or benchmark tool, not just the desktop.
The One Question That Determines Your Entire Setup
Before buying any cable or adapter, answer this one question: what kind of video output does your gaming device actually provide?
This single factor decides whether your setup takes one cable, two cables, or a specific adapter. Get it wrong and you'll stare at a black screen with no signal, no matter how expensive your portable monitor is.
Here's how the main device categories break down:
Laptop
Most modern gaming laptops (2021 onward) ship with at least one USB-C port that supports DisplayPort Alt Mode. This means that port can carry a full video signal. Some laptops label this port with a small DisplayPort or "D" icon.
Others bury the detail in the spec sheet.
If your laptop lacks DP Alt Mode on USB-C, you'll use the HDMI port instead. That costs you the convenience of single-cable operation. You'll still get a great portable display, just with two separate cables to manage.
Gaming Handheld (Steam Deck, ROG Ally, Legion Go, MSI Claw)
The Steam Deck's USB-C port supports DisplayPort Alt Mode at up to 1080p 120Hz or 4K 60Hz, depending on firmware revision. The ASUS ROG Ally Legion Go similarly support DP Alt Mode over their USB-C ports. These devices can drive a portable monitor directly with a single USB-C cable, though maximum refresh rate depends on the game's rendering load and the monitor's native spec.
Console
PS5 Xbox Series X|S all use full-size HDMI output. Nintendo Switch outputs through its USB-C port in docked mode but requires the official dock or a compatible USB-C hub. Plan on an HDMI connection plus a separate USB power source for the monitor itself.
Desktop PC
Desktop graphics cards output through DisplayPort full-size HDMI. You'll need a mini HDMI to HDMI cable or a full-size HDMI cable depending on the monitor's input. Single-cable USB-C video generally isn't an option unless your GPU has a USB-C output port, which is rare on discrete desktop cards as of 2026.
Quick reference: which output your device likely has
| Device | Primary Video Port | DP Alt Mode? | Single Cable Possible? |
|---|---|---|---|
| Gaming laptop (2021+) | USB-C | Most models | Yes, if DP Alt Mode confirmed |
| Older gaming laptop | HDMI | No (USB-C varies) | No, two cables needed |
| Steam Deck | USB-C | Yes | Yes, confirmed |
| ROG Ally / Legion Go | USB-C | Yes | Yes, confirmed |
| PS5 / Xbox Series X | HDMI | N/A | No, two cables needed |
| Desktop PC GPU | HDMI / DisplayPort | Usually no | No, two cables needed |
How to Check If Your Device Can Actually Output Video Over USB-C
Not every USB-C port carries video. Many budget laptops and some desktop motherboard USB-C ports are data and charging only. Plugging a portable monitor into one of those gives you nothing.
Here is how to know for certain before you spend money on cables.
Check the spec sheet
Look up your exact laptop or device model on the manufacturer's product page. Search for "DisplayPort over USB-C" DP Alt Mode" in the port description. ASUS Lenovo Acer all list this clearly if supported.
If the spec sheet says nothing about video output on USB-C, assume it does not support it.
Look for a port symbol
Some manufacturers print a small DisplayPort or thunderbolt symbol next to the relevant USB-C port. Thunderbolt 3 4 ports always carry DisplayPort signals, so any thunderbolt-equipped laptop outputs video over USB-C.
Plug it in and test
If you already own a USB-C to USB-C cable, connect your device to the monitor and switch the monitor to its USB-C input. If you get an image immediately, DP Alt Mode is confirmed. If you get a "No Signal" message on the monitor, you almost certainly lack DP Alt Mode on that port.
Fallback if DP Alt Mode is absent
Use an HDMI cable from your device's HDMI port to the monitor's mini HDMI or full-size HDMI input. This costs you the single-cable convenience. The actual gaming experience once set up is identical in visual quality and input lag.
Connecting to a Laptop: The Single-Cable Setup vs. Two-Cable Reality
Laptops are where portable monitor setups get interesting. When everything lines up, you close your laptop, run one USB-C cable to the portable display, and game. When it does not align, you end up juggling HDMI and power bricks.
Here is how each scenario works.
When single-cable works
Your laptop's USB-C port supports DP Alt Mode. You use a full-featured USB-C cable that carries both DisplayPort video and Power Delivery. The monitor receives video and charges your laptop simultaneously.
The cable that ships with many portable monitors handles this, but verify it is a full data cable, not a charge-only line.
Check that your laptop's USB-C port provides at least 15W output to the monitor. Most portable monitors draw between 7W and 15W. The math matters more when you flip the arrangement and the monitor powers the laptop.
That requires a monitor with 45W or higher PD pass-through, which is uncommon in the portable category.
When you need two cables
Your laptop's USB-C port lacks DP Alt Mode, or you want to use a higher refresh rate than USB-C bandwidth allows, or you simply grabbed a charge-only cable by mistake. In this case, run an HDMI cable from your laptop's HDMI port to the monitor's HDMI input, then connect the monitor's separate power cable or a USB power adapter to its power input.
Functionally, the result looks the same once you are in a game. Two cables are less tidy than one. They perform identically.
Display settings you need to adjust
Once the physical connection is made, open your operating system's display configuration. In Windows press Win+P and choose Extend or Second screen only. In macOS go to System Settings then Displays and enable extended desktop.
Set the resolution to the portable monitor's native spec (usually 1920×1080 for budget models or 2560×1440 for mid-range panels). Then open Advanced display settings in Windows and select the correct refresh rate. Many portable monitors support 100Hz 120Hz 144Hz but default to 60Hz on first connection.
You have to manually bump it up.
Laptop battery impact
Running an external display draws extra power from your laptop's GPU and adds screen power draw. Expect 15 to 25 percent shorter battery life during gaming when the portable monitor is connected. This is not a defect.
It is the cost of driving two screens.
Connecting to a Steam Deck, ROG Ally, or Other Handheld
A portable monitor paired with a gaming handheld is where this setup truly shines. Suddenly your Steam Deck has a screen you can actually see across a room or position at eye level on a desk. The connection process is similar across handhelds but the specifics vary.
Steam Deck setup
Connect a USB-C to USB-C cable from the Deck to the monitor's USB-C input. Under Settings, select Display and choose External Display Only or Mirror. Set resolution to 1080p.
The Deck supports up to 1080p 120Hz output to an external display as of late 2025 firmware.
Not every game will hit 120fps on the Deck's APU. Expect 60fps in most demanding titles. The monitor will display whatever frame rate the hardware can produce.
ROG Ally and Legion Go
Both the ASUS ROG Ally and Lenovo Legion Go use AMD APUs with more headroom for higher frame rates. Connect via USB-C to USB-C and set the refresh rate to match the monitor's panel (120Hz, 144Hz, or 165Hz depending on model). These handhelds can actually push close to 100fps in optimized settings at 1080p in some titles.
When performance does not hit the monitor's max refresh rate, you get the benefit of Adaptive Sync if the portable panel supports FreeSync. Turns a 78fps in-game frame rate into a smooth tear-free image. Double check your specific portable monitor's Adaptive Sync compatibility before relying on this.
Power considerations on handhelds
Gaming handhelds have small batteries. Running an external monitor adds load. If the monitor draws from the USB-C connection simultaneously, the Deck or Ally may drain faster than during normal handheld play entirely off the internal screen.
Some portable monitors include a separate USB-C power input specifically for this scenario. Plug a wall charger into the monitor's power input so the monitor itself runs off wall power instead of draining your handheld. Not every monitor isolates this well, so verify in the manual before relying on it.
MSI Claw and other Windows handhelds
Connect via USB-C to USB-C just like the handhelds above. Under Windows Display Settings select the portable monitor as Display 2 and set it to Extend or Show Only on 2. All the same cautions about USB-C DP Alt Mode and refresh rate selection above apply here too.
Getting the Right Refresh Rate: Why You're Stuck at 60Hz
You bought a 144Hz portable monitor. The desktop looks fine. You launch a game.
It feels exactly like your old 60Hz panel. Something forced the monitor down to 60Hz.
This is one of the most common frustrations with portable gaming setups and it usually traces to three causes.
Wrong cable bandwidth
USB-C cables are not all equivalent. A cable that charges your phone at full speed might carry DisplayPort at only HBR2 bandwidth. That caps 1080p at around 60Hz without compression.
Monitor-branded USB-C cables sold with portable displays handle 144Hz at 1080p without issue. Generic cables are a gamble.
Mini HDMI cables have similar bandwidth limits. Full-size HDMI 2.0 cables can do 1080p at 144Hz easy. Mini HDMI to full-size HDMI cables often use cheaper construction.
Swap cables first suspecting a bandwidth problem.
Monitor OSD refresh rate setting
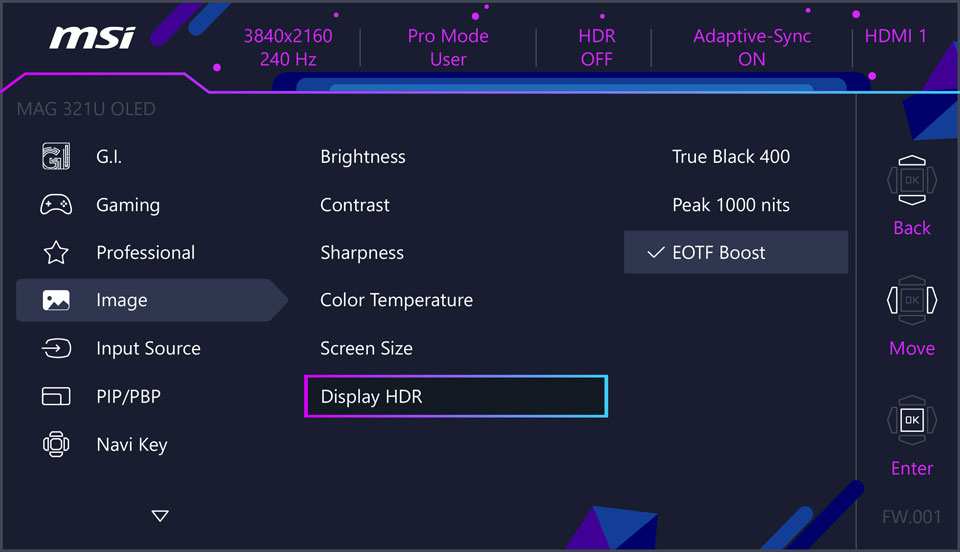
Some portable monitors default to 60Hz in their on-screen display menu even when the source pushes a higher rate. Open the monitor's OSD, usually by pressing a joystick or button on the back bezel panel edge, and find the refresh rate setting. Set it to the highest available.
Check again after applying.
Operating system and GPU driver settings
Windows often remembers the last display configuration. If you connected the portable monitor at 60Hz once and never changed it, Windows keeps that setting. Right click the desktop, click Display Settings, scroll to Advanced Display, and open the refresh rate dropdown.
Pick the highest available matching your monitor's spec.
NVIDIA GPU users open NVIDIA Control Panel, navigate to Change Resolution, set the refresh rate there as well. Panel-side OSD refresh rate and OS-level refresh rate must both be set correctly for the full refresh rate to actually function during gameplay.
Verify, don't assume
Use a tool like UFO Test or the frame rate counter in your game of choice. The desktop does not show refresh rate visually the way gameplay does. Confirm through the monitor's built-in OSD, which typically shows the active refresh signal on an information page.
Seeing "144Hz" on the monitor's info display confirms everything works end to end.
Power and Battery: How to Stop Your Setup From Dying Mid-Game
Portable monitors need power. Sometimes that power comes through the same USB-C cable carrying video. Sometimes it needs a separate source.
Getting power wrong means a monitor that randomly shuts off or a handheld that dies at twenty percent battery despite being plugged in.
The three arrangements to consider are the monitor drawing power from the source device, the source device charging from the monitor, and the monitor running off a wall adapter while the source device charges separately.
Monitor draws from source. The handheld's battery degrades faster. Budget lots.
Source charging from monitor. Requires a USB-C PD pass-through monitor rated at 45W or higher. You plug a wall adapter into the monitor's power input. The monitor passes charge back through the same USB-C cable to the source device.
This works beautifully if the monitor supports it. Many budget portables skip pass-through entirely and this arrangement fails.
Separate wall power for each device. Plug the monitor into its wall adapter. Plug the laptop or handheld into its own wall adapter. This is the most reliable approach but uses two wall outlets and two power bricks on the desk or floor around a hotel room.
Which arrangement is best for your scenario
Handheld users should favor separate wall power whenever possible. Handheld batteries are small and fast to drain. Plugging both the handheld and monitor into wall power keeps the entire session running indefinitely without worrying about battery levels.
Laptop users traveling light should try single-cable operation with PD pass-through first. Convenience wins. If the monitor's pass-through wattage is too low to charge the laptop while gaming (many gaming laptops need 100W+), fall back to the laptop's own charger plus a separate cable for the monitor.
Connecting to a Console (PS5, Xbox, Switch) on the Go
Consoles need HDMI. That means two cables minimum: one for video, one for monitor power. It is less elegant than a single USB-C connection.
It works reliably once you have the right pieces.
PS5 and Xbox Series X|S
Run a full-size HDMI cable from the console to the portable monitor's mini HDMI or full-size HDMI input. Plug the monitor's USB power cable into a wall adapter or a USB power bank rated at 15W or higher. Both consoles output up to 4K 120Hz, but most portable monitors cap at 1080p or 1440p.
The console will auto-negotiate down to the monitor's native resolution.
Set the console's video output to match the monitor's spec in the system settings. On PS5, go to Settings > Screen and Video > Video Output and manually set resolution if auto-detection picks the wrong value. On Xbox, navigate to Settings > General > TV & Display Options and select the correct resolution and refresh rate.
Nintendo Switch
The Switch is trickier. In handheld mode, it outputs video through its USB-C port but only when docked or connected to a compatible USB-C hub that supports DP Alt Mode. A direct USB-C to USB-C cable between a Switch and a portable monitor usually does not work without a dock or adapter in between.
The simplest path is using the official Nintendo Switch dock with an HDMI cable to the monitor. For a truly portable setup, a compact USB-C hub with HDMI output and PD charging passthrough works. Plug the hub into the Switch, run HDMI to the monitor, and feed power into the hub.
The Cable Problem Nobody Talks About
Cables cause more portable monitor headaches than any other single factor. The USB-C cable that charges your phone is not the same as one that carries a 144Hz DisplayPort signal. Using the wrong cable gives you a blank screen, a capped refresh rate, or intermittent flickering.
USB-C cable types you will encounter
Full-featured USB-C (USB 3.1 Gen 2 or higher with DP Alt Mode). Carries video, data, and power simultaneously. This is what you want for single-cable setups. Look for cables explicitly labeled as supporting DisplayPort Alt Mode or video output.
USB-C charge-only. Carries power only. No video, no data. These often come bundled with small electronics and power banks.
Plugging one into a portable monitor gives you a powered monitor with no image.
USB 2.0 USB-C. Carries data and power but lacks the bandwidth for high-refresh video. You might get a 60Hz image at 1080p. You will not get 120Hz or 144Hz.
Thunderbolt 3/4. Fully compatible with DP Alt Mode displays. If you have a Thunderbolt cable, it will drive any portable monitor that accepts USB-C video.
HDMI cable considerations
Mini HDMI to full-size HDMI cables are common with portable monitors. Bandwidth varies by cable quality. For 1080p 144Hz, you need at least an HDMI 2.0 rated cable.
For 1440p at high refresh rates, HDMI 2.1 is safer. Cheap bundled mini HDMI cables sometimes fail at higher refresh rates even when the monitor and source both support them.
How to test if your cable is the problem
Swap in a different cable of the same type. If the issue resolves, the original cable was the bottleneck. Keep one known-good USB-C full-featured cable and one known-good HDMI 2.0 cable in your travel bag.
This eliminates cable guesswork entirely.
Common Mistakes That Kill the Experience
Most portable monitor gaming frustrations trace back to a handful of repeatable errors. Recognizing them saves hours of troubleshooting.
Assuming every USB-C port outputs video. Many laptops have USB-C ports that handle data and charging only. Check the spec sheet before buying cables.
Using the cable that came in the box without verifying its type. Some budget portable monitors ship with charge-only USB-C cables. The monitor powers on but displays nothing. Swap to a full-featured cable.
Forgetting to change the refresh rate in OS settings. The monitor defaults to 60Hz. You have to manually select 120Hz or 144Hz in Windows display settings or your console's video output menu.
Ignoring power draw on handhelds. Running a portable monitor off a Steam Deck's USB-C port drains the battery fast. Use a monitor with separate power input and feed it from a wall adapter.
Expecting 4K on a 1080p panel. The monitor displays at its native resolution. A 4K signal from a console gets downscaled. Set the source output to the monitor's native resolution for the sharpest image.
Blocking ventilation on the monitor. Some portable monitors passively dissipate heat through the panel back. Laying it flat on a bed or blanket during a long session can cause thermal throttling or shutdowns. Use the folio stand or a VESA mount to keep the back exposed.
Real Setup Examples: What Actually Works in Practice
Seeing how these setups look in practice helps you plan your own configuration.
Dorm room laptop gaming
A college student connects a 15.6-inch 1080p 144Hz portable monitor to a gaming laptop via a single USB-C cable. The laptop's USB-C port supports DP Alt Mode and provides 15W to the monitor. The student sets the display to Extend, bumps refresh rate to 144Hz in Windows, and plays competitive shooters with the laptop screen as a secondary Discord and browser display.
Total cost beyond the laptop: roughly $120 for the monitor and a spare USB-C cable.
Hotel room console gaming
A traveler packs a 14-inch portable monitor, a full-size HDMI cable, and a compact USB wall adapter. At the hotel, they connect the PS5 to the monitor via HDMI and power the monitor from the wall adapter. The TV stays free for other guests.
The setup takes under five minutes. The monitor sits on the desk using its built-in folio stand.
Handheld on a desk
A Steam Deck owner uses a USB-C to USB-C cable to connect to a 1080p 120Hz portable monitor. A separate 45W USB-C charger plugs into the monitor's power input so the Deck charges while outputting video. The Deck outputs at 1080p 60Hz in demanding titles and up to 100fps in lighter games.
FreeSync on the monitor smooths out the variable frame rate.
Quick Decision Guide: Your Device, Your Cable, Your Settings
Use this flowchart to get from unboxing to gaming in the fewest steps.
Step 1: Identify your source device's video output. USB-C with DP Alt Mode, HDMI, or both.
Step 2: Check your monitor's inputs. USB-C, mini HDMI, full-size HDMI, or a combination.
Step 3: Pick the connection method.
- If both devices have USB-C with DP Alt Mode, use a full-featured USB-C to USB-C cable.
- If your source has HDMI only, use an HDMI to mini HDMI or HDMI to HDMI cable plus separate monitor power.
- If your source has USB-C without DP Alt Mode, fall back to HDMI.
Step 4: Configure display settings. Set resolution to the monitor's native spec. Set refresh rate to the panel's maximum. Enable Adaptive Sync if both source and monitor support it.
Step 5: Handle power. Single-cable setups power the monitor from the source. Add a wall adapter to the monitor's separate power input if the source battery drains too fast.
Step 6: Verify in-game. Confirm the active refresh rate through the monitor's OSD info page and an in-game frame counter.
Frequently Asked Questions
Can I use any USB-C cable to connect a portable monitor for gaming?
No. You need a full-featured USB-C cable that supports DisplayPort Alt Mode and adequate bandwidth. Charge-only cables carry power but no video signal.
USB 2.0 USB-C cables may cap you at 60Hz.
Does a portable monitor add input lag for gaming?
Quality portable monitors add roughly 5 to 15ms of processing lag depending on the panel and settings. Competitive players should enable any game mode or low-lag setting in the monitor's OSD. The added lag is negligible for casual and most competitive play.
Can I use a portable monitor with a phone for gaming?
Phones with USB-C DP Alt Mode output, such as Samsung Galaxy S series and some Google Pixel models, can drive a portable monitor. You will need a controller paired via Bluetooth for most games. Not all phones support video output, so verify your specific model first.
Do portable monitors work with the Nintendo Switch in handheld mode?
Not directly with a simple USB-C cable. The Switch requires its official dock or a compatible USB-C hub with HDMI output and PD charging. A direct USB-C to USB-C connection between the Switch and a portable monitor typically produces no signal.
What refresh rate should I look for in a portable gaming monitor?
120Hz is the practical sweet spot for most portable gaming setups as of 2026. It is widely supported by handhelds and laptops without demanding excessive cable bandwidth. 144Hz and 165Hz panels are available but require higher-quality cables and a source device that can actually push those frame rates.
How do I know if my laptop's USB-C port supports video output?
Check the manufacturer's spec sheet for "DisplayPort over USB-C" or "DP Alt Mode" next to the port description. Thunderbolt 3 and 4 ports always support video output. If the spec sheet is silent on video, assume the port does not support it.
Final Verdict: Is a Portable Monitor Worth It for Gaming?
A portable monitor earns its place in a gaming setup when you already own a capable source device and need a second screen that travels. It is not a replacement for a full-size desktop monitor at your primary battlestation. It is a supplement that turns a laptop or handheld into a more flexible gaming rig.
The value proposition is strongest for handheld gamers who want a bigger screen at a desk without buying a separate TV. It is also strong for travelers who game on a laptop or console and refuse to rely on whatever screen the hotel provides.
The setup is not always plug and play. Cable confusion, port limitations, and refresh rate configuration trip people up. Once you understand the decision tree, the process takes under ten minutes and works reliably session after session.
If your device has USB-C with DP Alt Mode, buy a quality full-featured cable and a portable monitor with at least 120Hz. If your device relies on HDMI, budget for a separate power source for the monitor. Either way, you end up with a genuinely portable gaming display that fits in a backpack and sets up anywhere.
The verdict section wraps up the core guidance. Everything needed to set up and run a portable monitor for gaming is covered above.

Similar Posts