How to Switch HDR on and Off in Monitor
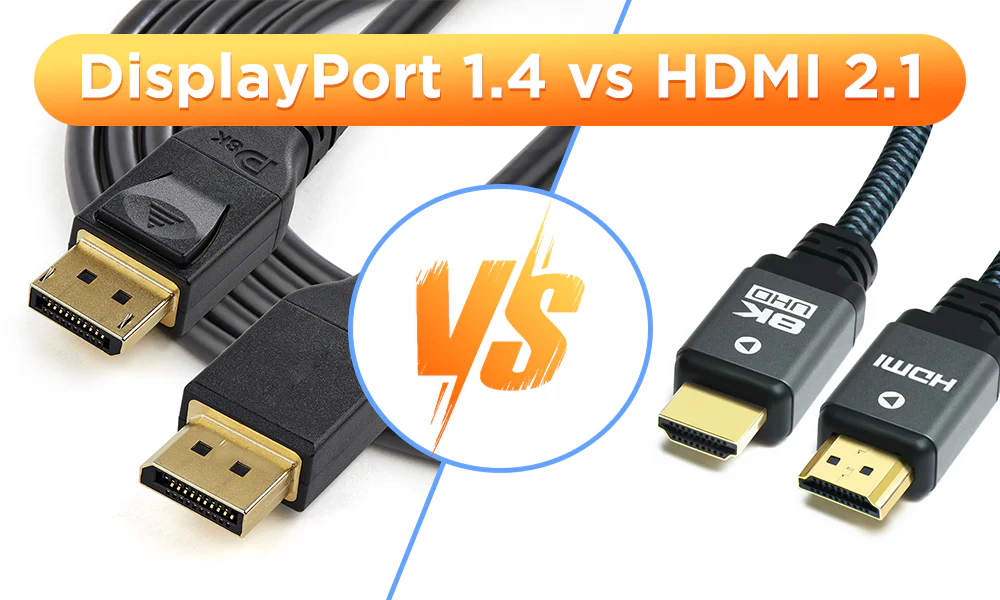

Image source: Wikimedia Commons / William Cho (CC BY-SA)
If you've ever tried to figure out how to switch HDR on and off in monitor settings and found yourself clicking through menus with no luck, you're not alone. The toggle sometimes hides in unexpected places, and even when you find it, the results might look worse than before you turned it on.
The good news is that switching HDR on and off is straightforward once you know where to look. The process involves your monitor's own on-screen display, your GPU's control panel, and Windows display settings working together. VESA's DisplayHDR standard defines the baseline requirements, but how each manufacturer implements it varies quite a bit.
Let's walk through exactly what to do.
Quick Answer: The Fastest Way to Switch HDR On and Off

Image source: Wikimedia Commons / Dietmar Rabich (CC BY-SA)
Open Settings > System > Display. Click on the monitor you want to adjust. Under the "Brightness and color" section, you'll see an HDR toggle if your setup supports it.
You can also press Win + Alt + B as a keyboard shortcut to toggle HDR on and off instantly. This shortcut works in Windows 10 and Windows 11.
If the toggle doesn't appear, the issue is usually your cable, port, or GPU settings. We'll cover that in the troubleshooting section below.
Does Your Setup Actually Support HDR? The Compatibility Checklist
Image source: Bing (Web (fair-use with source credit))
Before you start toggling settings, let's make sure your hardware can actually deliver an HDR signal. Not every monitor that advertises "HDR support" gives you a true HDR experience, and not every cable can carry the signal properly.
Monitor HDR Capability
Your monitor needs to support HDR at the hardware level. Look for one of these:
- VESA DisplayHDR certification (DisplayHDR 400, 600, 1000, or 1400)
- HDR10 or HDR10+ support listed in the specs
- Dolby Vision support (less common on PC monitors)
A monitor with DisplayHDR 400 can technically accept an HDR signal, but the visual improvement over SDR is minimal. DisplayHDR 600 and above start to show meaningful contrast and brightness improvements. DisplayHDR 1000 and 1400 are where HDR genuinely looks impressive.
Check your monitor's on-screen display menu. Most monitors with HDR support have a toggle or setting in the OSD that enables HDR mode. This is the first thing you need to turn on before Windows will even see the monitor as HDR-capable.
Cable and Port Bandwidth Requirements
HDR requires more bandwidth than SDR, especially at higher resolutions and refresh rates. Here's what you need:
| Resolution + Refresh Rate | HDMI 2.0 (18 Gbps) | HDMI 2.1 (48 Gbps) | DisplayPort 1.4 (32.4 Gbps) |
|---|---|---|---|
| 1080p 60Hz HDR | Yes | Yes | Yes |
| 1440p 60Hz HDR | Yes | Yes | Yes |
| 4K 60Hz HDR | Yes (4:2:0 chroma) | Yes (4:4:4) | Yes (4:4:4) |
| 4K 120Hz HDR | No | Yes | Yes (with DSC) |
| 4K 144Hz HDR | No | Yes | Yes (with DSC) |
If you're running 4K at 120Hz with HDR, you need either HDMI 2.1 or DisplayPort 1.4 with Display Stream Compression. HDMI 2.0 will force you to drop to 60Hz or use chroma subsampling, which degrades text clarity.
Use the cable that came with your monitor if possible. Many manufacturers include a cable rated for the maximum bandwidth their monitor supports. Third-party cables work fine too, but make sure they're certified for the standard you need.
GPU Support
Your graphics card needs to support HDR output. Here's the breakdown by manufacturer:
- NVIDIA: GeForce GTX 10-series (Pascal) and newer support HDR over DisplayPort 1.4 and HDMI 2.0b or later
- AMD: Radeon RX 400-series and newer support HDR; RDNA2 and RDNA3 architectures have the most reliable implementation
- Intel: Integrated graphics from 12th-gen Alder Lake and newer support HDR over DisplayPort and HDMI
If you're using a GPU older than these generations, you may not get an HDR output option at all. Driver updates can sometimes enable HDR on borderline hardware, but it's not guaranteed.
How to Enable HDR in Windows (Step by Step)
Now that you've confirmed your hardware supports it, here's the full process for enabling HDR. The order matters. If you skip a step, the toggle might not appear or HDR might not work correctly.
Step 1: Turn On HDR in Your Monitor's OSD
This is the step most people miss. Your monitor needs to be told to accept an HDR signal before Windows will offer the option.
Open your monitor's on-screen display menu using the physical buttons on the monitor. Look for one of these:
- An "HDR" toggle in the picture or display settings
- An "HDMI Ultra HD Deep Color" or "HDMI 2.0" setting
- A "DisplayHDR" mode option
- A color format setting that needs to be set to a specific mode
The exact wording varies by manufacturer. Dell monitors often call it "HDMI 2.0" or "DisplayHDR Mode." ASUS uses "HDR" in the gaming or picture menu. LG typically has it under "Picture" settings.
Samsung monitors may list it as "HDMI UHD Color."
Turn it on for the input you're using. If you're connected via DisplayPort, look for a DisplayPort-specific setting instead. Some monitors require you to restart after changing this.
Step 2: Set the Correct Color Format in Your GPU Control Panel
Your GPU needs to output the right color format for HDR to work properly. This step is critical and often overlooked.
For NVIDIA GPUs:
- Right-click on your desktop and open NVIDIA Control Panel
- Navigate to "Change resolution" under Display
- Select your monitor
- Under "Apply the following settings," set: , Color depth: 10 bpc (if available)
, Color format: RGB or YCbCr444
, Dynamic range: Full
- Click Apply
For AMD GPUs:
- Open AMD Radeon Software (Adrenalin Edition)
- Go to Settings > Display
- Ensure "Pixel Format" is set to RGB 4:4:4 (Full RGB)
- Color depth should be 10-bit if your monitor supports it
For Intel GPUs:
- Open Intel Graphics Command Center
- Go to Display > Color
- Set the color depth to the highest available (10-bit if supported)
- Ensure the color format is set to RGB
If you leave your GPU set to 8-bit color or YCbCr420, HDR either won't work or will look incorrect. The 10-bit color depth is what allows HDR's wider luminance and color information to reach your display.
Step 3: Toggle HDR in Windows Display Settings
Now Windows should recognize that your monitor supports HDR. Here's how to enable it:
- Open Settings (Win + I)
- Go to System > Display
- Select the correct monitor if you have multiple displays
- Scroll to the Brightness and color section (Windows 11) or Color section (Windows 10)
- Toggle Use HDR to On
In Windows 11, you'll also see an HDR submenu with additional options. In Windows 10, the toggle is labeled Play HDR games and apps.
If the toggle doesn't appear, go back and check steps 1 and 2. The most common cause is that the monitor's OSD HDR setting isn't enabled, or the GPU is outputting the wrong color format.
Step 4: Adjust SDR Content Brightness for Desktop Use
Once HDR is enabled, your desktop will look different. SDR content (which is most of what you see on the desktop) can appear dim or washed out because Windows is mapping SDR brightness into an HDR signal.
Windows provides an SDR content brightness slider to fix this:
- Stay in the HDR settings page
- Look for SDR content brightness (Windows 11) or SDR content appearance (Windows 10, if available)
- Adjust the slider until white backgrounds and SDR content look natural
A setting around 40-60 works for most monitors. If your monitor is very bright (600+ nits peak), you might need to push it higher. If it's a lower-brightness HDR monitor (DisplayHDR 400), keep it lower to avoid crushing detail.
This slider only affects how SDR content is displayed within the HDR signal. It doesn't change the actual HDR output for games or video.
How to Turn HDR Off (And When You Should)
Turning HDR off is just as important to know as turning it on. There are situations where HDR actively makes your experience worse.
Disabling HDR Through Windows Settings
The simplest way to turn HDR off:
- Go to Settings > System > Display
- Select your monitor
- Toggle Use HDR to Off
Your display will immediately switch back to SDR mode. The transition usually takes a second or two, and you might see the screen flicker briefly.
Using the Windows Shortcut
Press Win + Alt + B to toggle HDR on and off instantly. This works from anywhere, whether you're in a game, watching a video, or just on the desktop.
If the shortcut doesn't work, make sure it's enabled in Settings > Gaming > Xbox Game Bar. The HDR toggle is tied to the Xbox Game Bar in Windows 10 and Windows 11.
Turning It Off in the Monitor OSD
You can also disable HDR through your monitor's on-screen display. This is useful if:
- You want to force SDR at the hardware level
- Windows is stuck in HDR mode and you can't access settings quickly
- You're switching between devices and want a consistent SDR baseline
Go back to the same OSD menu where you enabled HDR and toggle it off. Some monitors will reset to SDR mode immediately. Others may require a restart.
When You Should Turn HDR Off
Here's a quick guide:
- Desktop productivity: Turn it off. SDR content looks better in SDR mode, and HDR can make text and UI elements look washed out
- Color-critical work (photo editing, design): Turn it off unless you've specifically calibrated your HDR workflow. Most SDR color standards assume SDR display characteristics
- Gaming with native HDR support: Leave it on. Games with native HDR rendering look significantly better
- Watching HDR video: Leave it on. HDR content is mastered for HDR displays
- Older games without HDR support: Turn it off. Windows' Auto HDR feature can help, but it's not always accurate
The general rule is simple. If the content was created for HDR, keep HDR on. If it wasn't, turn it off.
Switching back and forth takes seconds once you know the shortcut.
Why HDR Looks Washed Out on Your Desktop (And How to Fix It)
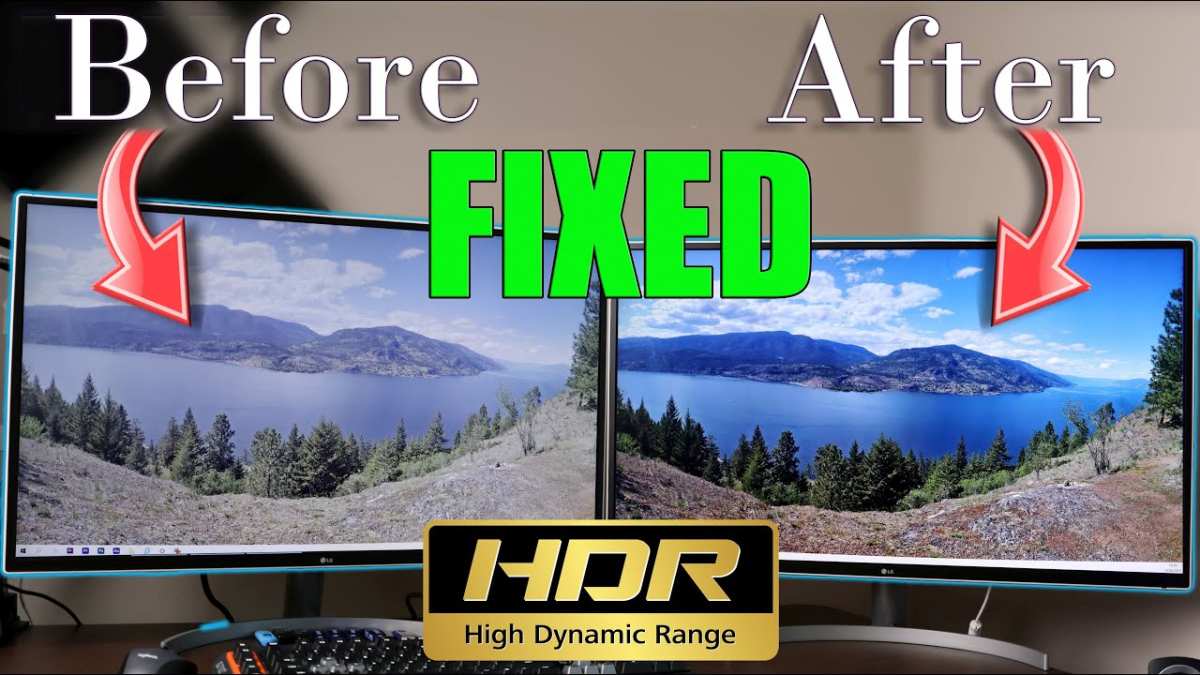
Image source: Bing (Web (fair-use with source credit))
This is the number one complaint people have after enabling HDR. Everything on the desktop looks faded, gray, or just wrong. You're not imagining it, and it doesn't mean your monitor is broken.
Why It Happens
SDR content is mastered for a specific brightness range, typically around 100 to 200 nits. When you enable HDR on your desktop, Windows maps that SDR content into an HDR signal that can reach 600, 1000, or even 4000 nits depending on your monitor's capabilities. Without proper mapping, SDR whites get compressed and look gray instead of white.
Windows handles this through a process called tone mapping. The SDR content brightness slider we mentioned earlier controls how bright SDR content appears within the HDR output window. If it's set too low, everything looks dim.
Too high, and you lose the dynamic range that makes HDR useful.
How to Fix It
Follow these steps in order:
- Adjust the SDR content brightness slider: Start at 50 and move up or down until white backgrounds in apps like your web browser look actually white, not gray
- Check your monitor's HDR mode: Some monitors have multiple HDR modes like "HDR Gaming," "HDR Movie," or "DisplayHDR." Try a different preset
- Disable local dimming if it's causing issues: On some monitors, aggressive local dimming makes SDR content look uneven
- Consider leaving HDR off for desktop work: Use the Win+Alt+B shortcut to toggle it off when you're not consuming HDR content
When Washed Out Colors Mean Something Else
If adjusting the SDR brightness slider doesn't help, you might have a deeper issue. Check these:
- Your GPU might be outputting Limited (16-235) color range instead of Full (0-255). Set it to Full in your GPU control panel
- Your monitor might be in the wrong color format. Make sure it's set to RGB, not YCbCr
- The EDID handshake might be failing. Try unplugging and replugging your cable, or restart your PC with HDR already enabled in the monitor OSD
HDR Not Showing Up? Troubleshooting the Missing Toggle
You've checked everything and the HDR toggle simply isn't there in Windows display settings. This is a common problem, and it almost always comes down to one of these causes.
Check Your Cable and Port
This is the most common culprit. Not every cable and port combination can carry an HDR signal.
- Make sure you're plugged into the correct port on your GPU, not your motherboard's video output
- If you're using an adapter (like USB-C to DisplayPort), make sure it supports DisplayPort 1.4 or at least 1.2 with enough bandwidth
- Try a different cable. Some older HDMI cables physically fit but don't have the bandwidth for HDR
- If your monitor has multiple inputs, make sure you've enabled HDR on the correct input in the OSD
Update Your GPU Drivers
Outdated drivers are the second most common cause of missing HDR support.
- NVIDIA: Download the latest driver from NVIDIA's website or use GeForce Experience. HDR support improved significantly in the 500-series drivers and later
- AMD: Use AMD Radeon Software to check for updates. HDR stability improved notably in Adrenalin 22.x and later versions
- Intel: Update through Intel Driver & Support Assistant. HDR support for Intel Arc and integrated graphics has been improving rapidly through driver updates
After updating, restart your PC before checking for the HDR toggle again.
Verify EDID Handshake
Your monitor communicates its capabilities to your PC through EDID (Extended Display Identification Data). Sometimes this handshake fails silently.
To check:
- Open your GPU control panel and look for color depth or format options
- If the options are limited (only 8-bit, only YCbCr420), the EDID handshake is likely failing
- Try turning off your monitor, unplugging the cable, waiting 10 seconds, then reconnecting
- If that doesn't work, boot into Windows with the monitor already set to HDR mode in its OSD
Some monitors require firmware updates to properly report HDR capabilities. Check your manufacturer's support page for firmware downloads and update instructions.
HDR10 vs HDR10+ vs Dolby Vision: Does It Matter for Monitors?
The format your monitor supports affects what HDR content it can properly display. Here's what you need to know.
The Core Difference
| Feature | HDR10 | HDR10+ | Dolby Vision |
|---|---|---|---|
| Metadata type | Static | Dynamic | Dynamic |
| Max brightness | 4000 nits | 4000 nits | 10000 nits |
| Color depth | 10-bit | 10-bit | 12-bit |
| Licensing | Royalty-free | Royalty-free (for content) | Licensed (fee required) |
| Monitor availability | Common | Rare | Rare |
HDR10 is the baseline. Every HDR monitor supports it. It uses static metadata, meaning the brightness and color settings are set once for the entire piece of content.
This works fine but isn't as precise as dynamic formats.
HDR10+ and Dolby Vision both use dynamic metadata, which adjusts brightness and color scene by scene. This means better detail in both shadows and highlights within the same frame. However, very few PC monitors support either format natively.
What This Means for You
For PC use, HDR10 is what you'll be working with 99% of the time. Windows uses HDR10 as its HDR output standard. Games that support HDR are almost always using HDR10.
Streaming apps like Netflix and YouTube on PC either use HDR10 or don't support HDR at all in the browser.
HDR10+ and Dolby Vision matter more for TV and console use. If you're connecting a PS5 or Xbox Series X to your monitor, those consoles support HDR10+ and Dolby Vision respectively. But most monitors can't take advantage of either.
DisplayHDR Certification
VESA's DisplayHDR certification is separate from HDR10. DisplayHDR tells you about the monitor's hardware capabilities. HDR10 tells you about the signal format it accepts.
A monitor can be DisplayHDR 400 certified and support HDR10. That means it can accept an HDR10 signal but won't look dramatically different from SDR because the peak brightness is only 400 nits and there's no local dimming. DisplayHDR 1000 with HDR10 support is where you get a genuinely impressive HDR experience.
Should You Leave HDR On All the Time?
The short answer is no, not if you're doing general desktop work. Here's why.
The Case for Leaving It Off
Your desktop, web browser, file explorer, and most productivity apps are all designed for SDR. When you run them in HDR mode, Windows has to map SDR signals into the HDR container. This process isn't perfect.
Colors can shift. Text rendering might look slightly different. Some apps handle the SDR-to-HDR conversion better than others.
If you're doing color-accurate work like photo editing or graphic design, you want a consistent SDR environment.
Many users report that leaving HDR on all the time causes eye strain during long work sessions. The constant remapping of SDR content can create an inconsistent viewing experience that tires your eyes faster than a pure SDR signal.
The Case for Leaving It On
HDR content is everywhere now. Most modern AAA games support HDR. Netflix, Disney+, and YouTube all offer HDR video.
Windows 11's Auto HDR feature can even add HDR-like effects to older SDR games.
If you leave HDR on and properly configure the SDR content brightness slider, the transition between SDR and HDR content is mostly seamless. You won't need to toggle back and forth when you switch from browsing to gaming.
The Win+Alt+B shortcut makes it easy to toggle on the fly. If your workflow involves mixed use, you might find it easier to leave HDR on and only turn it off when you notice issues.
The Practical Middle Ground
Here's what works for most people:
- Leave HDR on in Windows if you mostly game or watch video: The convenience outweighs the minor SDR color shift on the desktop
- Turn HDR off if you do color-critical work: Photo editing, video grading, and design work should happen in a calibrated SDR environment
- Use the shortcut: Win+Alt+ B lets you switch in under a second. Enable it and use it liberally
- Per-app settings: Some games let you toggle HDR independently. Check in-game display settings before relying on the Windows toggle
Common HDR Mistakes People Make
After reviewing user reports and manufacturer documentation, these are the mistakes we see most often.
Enabling HDR in Windows without turning it on in the monitor OSD first. The monitor needs to accept the HDR signal before Windows will offer the option. Always check the OSD first.
Using a cable that doesn't have enough bandwidth. That old HDMI cable from 2015 might work fine for SDR 4K60, but it may not handle HDR at the same resolution. Check the cable specs.
Setting color depth to 8-bit and expecting HDR to work. HDR requires 10-bit color depth minimum. If your GPU is set to 8-bit, Windows won't enable HDR output.
Ignoring the SDR content brightness slider. This single setting determines whether HDR desktop use is tolerable or terrible. Don't skip it.
Assuming a monitor with "HDR support" has a real HDR experience. Many budget monitors advertise HDR support but can't display it meaningfully due to low peak brightness and no local dimming. DisplayHDR 400 certification is essentially marketing for HDR input, not HDR performance.
Not updating monitor firmware. Several manufacturers have released firmware updates that fix HDR detection, improve EDID handshake reliability, or add missing HDR modes. Check your support page.
GPU-Specific HDR Settings You Shouldn't Skip
Your GPU control panel has settings that directly affect whether HDR works and how it looks. These get overlooked constantly.
NVIDIA Control Panel
Right-click your desktop and open NVIDIA Control Panel. Go to "Change resolution" under Display. Select your monitor and check these settings:
- Color depth: Set to 10 bpc if available. 8-bit won't carry proper HDR
- Color format: RGB or YCbCr444. Avoid YCbCr420 for desktop use
- Dynamic range: Full, not Limited
If you see "Ultra HD, HD, SD" under "Resolution," make sure you're selecting the native resolution. Some NVIDIA drivers hide HDR options if you're on a non-native resolution.
AMD Radeon Software
Open AMD Radeon Software (Adrenalin Edition). Go to Settings > Display. Key settings:
- Pixel Format: RGB 4:4:4 (Full RGB) for best text clarity and color accuracy
- Color Depth: 10-bit if your monitor supports it
AMD's HDR implementation has improved significantly in recent driver versions. If you're on an older driver and having issues, updating to the latest Adrenalin release often resolves HDR detection problems.
Intel Graphics Command Center
For Intel integrated and Arc graphics, open Intel Graphics Command Center. Navigate to Display > Color. Set:
- Color depth to the highest available (10-bit if supported)
- Color format to RGB
Intel's HDR support has been improving rapidly through driver updates. Arc GPUs now have solid HDR implementation, but older integrated graphics may have limited support.
Frequently Asked Questions
Why is there no HDR toggle in my Windows display settings?
The most common cause is that HDR isn't enabled in your monitor's OSD. Check your monitor's on-screen menu first. If it's already on, verify your cable supports enough bandwidth and your GPU is set to 10-bit color depth.
Does HDR work over HDMI 2.0?
Yes, but with limitations. HDMI 2.0 supports 4K 60Hz HDR with 4:2:0 chroma subsampling. For 4K 60Hz with full 4:4:4 color, you need HDMI 2.1 or DisplayPort 1.4.
Should I use HDR for photo editing?
No, not unless you've specifically calibrated your workflow for HDR. Most photo editing standards assume SDR display characteristics. Work in SDR mode and check HDR output separately if needed.
What does the Win+Alt+B shortcut do?
It toggles HDR on and off in Windows. It's tied to the Xbox Game Bar feature. If it doesn't work, make sure Xbox Game Bar is enabled in Settings > Gaming.
Can I use HDR with multiple monitors?
Yes, but only if each monitor independently supports HDR. You can enable HDR on one display while leaving another in SDR mode. Some GPU drivers handle multi-monitor HDR better than others.
NVIDIA and AMD have both improved this in recent driver releases.
Does Auto HDR in Windows 11 work with all games?
No. Auto HDR works with DirectX 11 and newer games running in fullscreen or borderless windowed mode. It doesn't work with DirectX 9 titles or some older games.
Results vary by game, and some look better with Auto HDR off.

Similar Posts