How to Know If 27 Inch Monitor Supports HDR
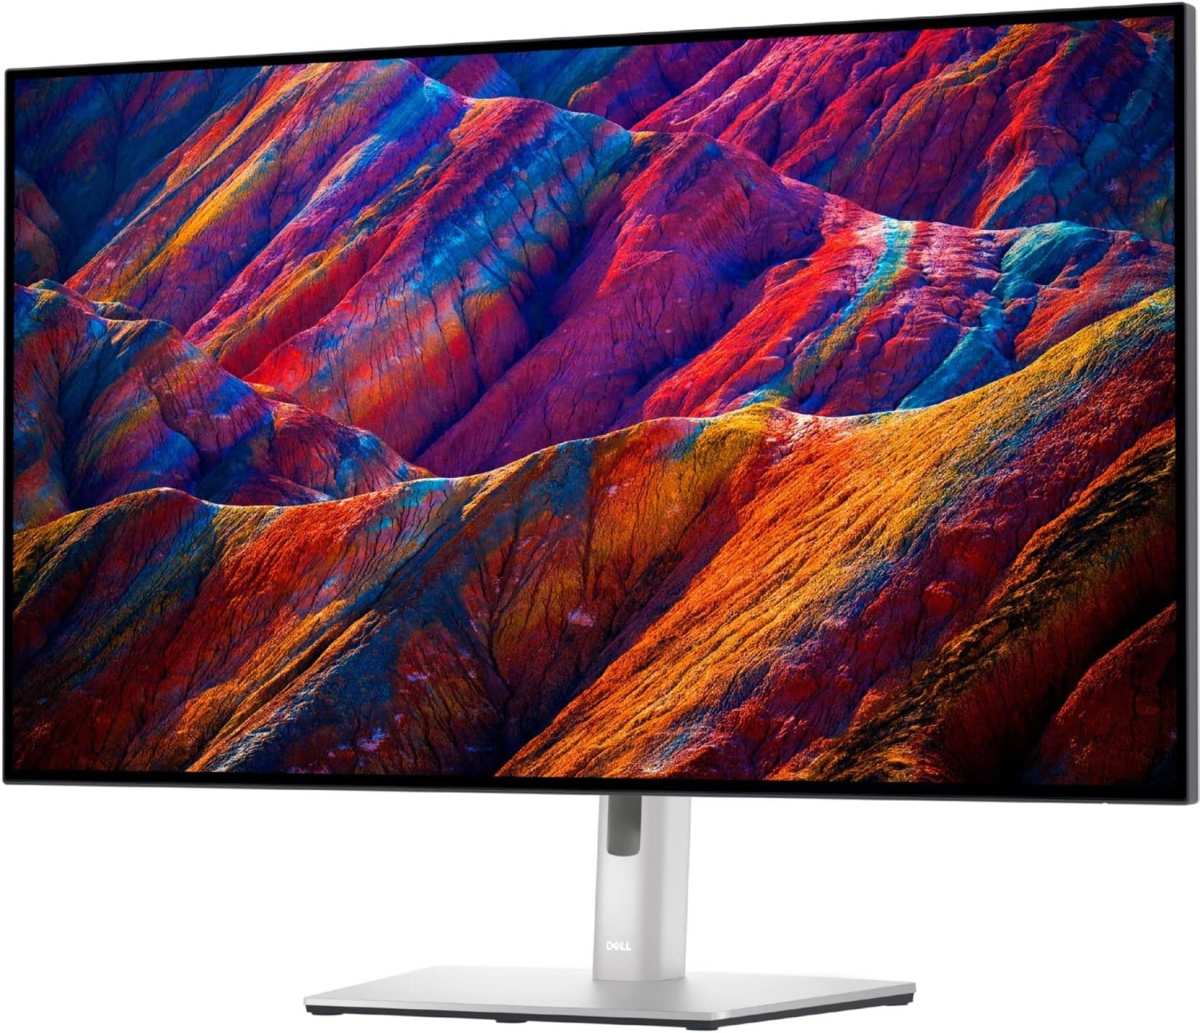
Figuring out how to know if 27 inch monitor supports hdr can be more confusing than it sounds. Manufacturers slap "HDR" or "HDR Ready" all over spec sheets, but those labels rarely tell you whether the monitor can actually deliver a meaningful HDR experience. Your eyes deserve better than marketing fluff, so let's walk through exactly what to check and what to ignore.
The real answer comes down to a few specific hardware traits: peak brightness measured in nits, whether the panel has local dimming, what the VESA DisplayHDR certification actually says, and whether your signal chain (cable, port, GPU) can even carry HDR. We'll break it down step by step so you can look at any 27-inch monitor and know within seconds whether it's genuine HDR or just a label.
Quick Answer
To know if a 27-inch monitor supports HDR, check the VESA DisplayHDR certification rating on the spec sheet. Confirm the panel hits at least 600 nits peak brightness and ideally has local dimming. Verify your GPU and cable support the right bandwidth (HDMI 2.0a+ or DisplayPort 1.4+).
Then enable HDR in your operating system's display settings and test with actual HDR content.
Step 1: Check the VESA DisplayHDR Rating (If It Has One)
This single step eliminates about half the guesswork. The Video Electronics Standards Association (VESA) created the DisplayHDR certification program specifically to cut through the confusion. If a monitor carries a DisplayHDR badge, independent testing has verified its HDR capabilities against defined performance tiers.
The rating levels tell you exactly what the panel can do:
| Certification Level | Peak Brightness | Color Bit Depth | Black-to-White Response | What It Actually Means |
|---|---|---|---|---|
| DisplayHDR 400 | 400 nits | 8-bit | No local dimming required | Bare minimum HDR, often underwhelming |
| DisplayHDR 600 | 600 nits | 8-bit + FRC or 10-bit | Limited dimming required | Noticeable improvement, still modest |
| DisplayHDR 1000 | 1000 nits | 10-bit | FALD (local dimming) required | Genuine HDR impact with real contrast |
| DisplayHDR 1400 | 1400 nits | 10-bit | FALD with many zones | High-end HDR, closest to premium TV quality |
Here's the critical thing most people miss. A "DisplayHDR 400" badge literally means the monitor meets the lowest bar VESA set for HDR capability. It doesn't mean you get eye-popping HDR.
It means the panel can accept an HDR signal and hit 400 nits peak brightness on a small highlight, but without local dimming, the entire scene brightens together and you lose the contrast that makes HDR actually look impressive.
If the monitor has no VESA certification at all and the manufacturer just says "HDR Ready" or "HDR Compatible" on the box, treat that as a marketing claim, not a verified standard. Those terms have no formal definition under any industry standard.

Step 2: Look at Peak Brightness and Whether It Has Local Dimming
Two specs matter more than almost anything else here: peak brightness in nits and the dimming method. Together they determine whether HDR content actually looks dramatically better than SDR on that monitor.
Peak Brightness (nits):
- 300 to 350 nits: standard SDR panel, not worth paying extra for HDR
- 400 nits: meets DisplayHDR 400, minimal HDR benefit
- 600 nits: the first tier where HDR content starts looking noticeably different
- 1000+ nits: real HDR highlights pop against dark backgrounds, this is where it gets cinematic
Local Dimming Types:
- No local dimming: entire backlight brightens together, HDR looks washed out
- Edge-lit dimming: zones along edges only, minimal improvement
- Full Array Local Dimming (FALD): multiple zones across the panel, actual contrast benefit
- Mini-LED FALD: hundreds or thousands of zones, near-OLED contrast without OLED burn-in risk
A monitor hitting 1000 nits with FALD will show a bright explosion against a genuinely dark sky. A DisplayHDR 400 panel with no local dimming will show that same explosion, but the dark sky turns into a gray sky because the whole backlight brightened together. That's the difference people actually perceive.
When you're reading a spec sheet and it lists peak brightness, check whether that's "typical" or "peak." Peak brightness (sometimes called "burst" or "max") is the number that matters for HDR since HDR content has specular highlights that need those brief bright moments. Typical brightness just tells you the sustained SDR level.
Step 3: Check Your Cable, Port, and GPU — the HDR Chain Has to Be Complete
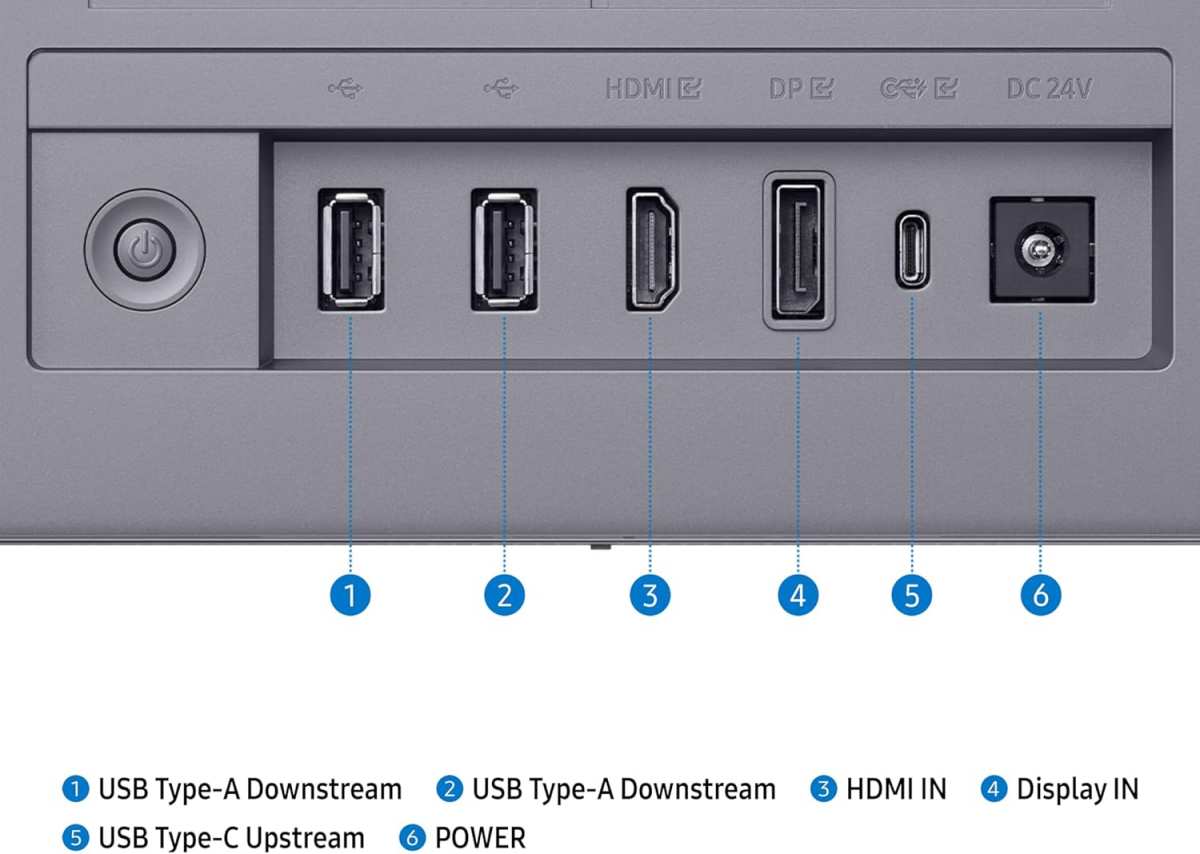
Even if the monitor itself supports true HDR, the entire signal path needs to support it too. This is where people get stuck most often. The monitor says HDR, the GPU says HDR, but the cable between them can't carry the signal, so HDR never actually turns on.
HDMI requirements:
- HDMI 2.0a minimum for HDR10 content (18 Gbps bandwidth)
- HDMI 2.1 ideal for higher refresh rates at 4K HDR (48 Gbps)
- "Premium High Speed HDMI" certified cables cover HDMI 2.0a needs
- "Ultra High Speed HDMI" for HDMI 2.1
DisplayPort requirements:
- DisplayPort 1.2 can technically pass HDR metadata but many manufacturers don't support it
- DisplayPort 1.4 minimum recommended for reliable HDR (32.4 Gbps with DSC)
- DisplayPort 2.0/2.1 future-proofed but not widely available on 27-inch monitors yet as of 2026
GPU requirements:
- NVIDIA: GeForce GTX 900 series or newer (900, 10, 16, 20, 30, 40 series)
- AMD: Radeon RX 400 series or newer
- Intel: integrated graphics from 8th-gen Core (Coffee Lake) or newer, or Arc discrete GPUs
If your GPU predates those generations, it likely cannot output HDR regardless of what the monitor supports. You'd see the HDR toggle grayed out in Windows or simply no signal when attempting to enable it.
The cable itself catches people off guard. A cheap HDMI cable that worked fine for SDR 4K at 60 Hz may fail to carry the extra data HDR requires. Look for cables labeled "Premium High Speed" or "Ultra High Speed" with the official holographic label from HDMI Licensing Administrator.
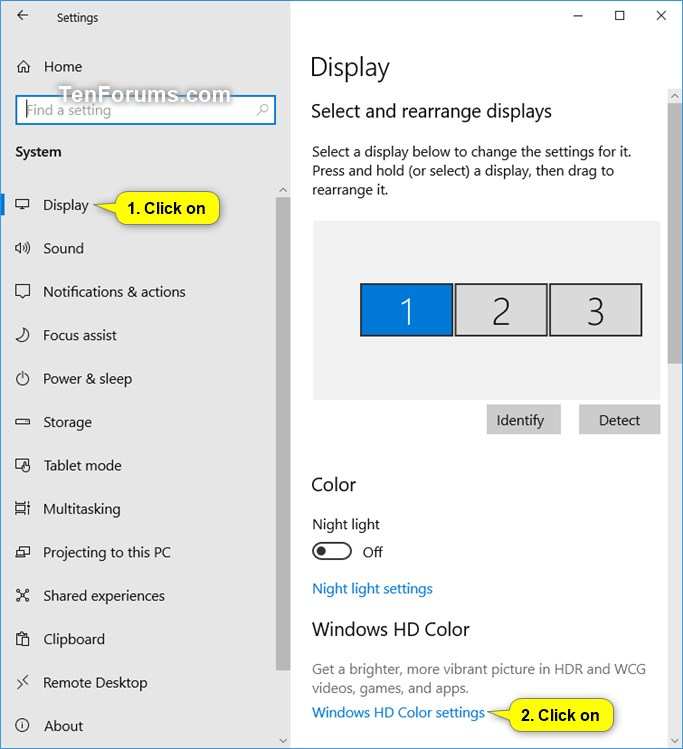
Step 4: Toggle HDR in Windows and the Monitor's OSD
Once you've confirmed the hardware supports HDR, you need to actually enable it in software. Operating systems don't auto-enable HDR even when everything on the chain supports it, partly because SDR content looks worse with HDR mode left on permanently.
Windows 10 and 11:
- Open Settings, then System, then Display
- Select the HDR-capable monitor if you have multiple displays
- Click "HDR" or "Use HDR" toggle under the Brightness and Color section
- Windows 11 users see "HDR" with additional options for SDR content appearance and HDR video streaming
Monitor OSD (On-Screen Display):
Many monitors require you to enable HDR in the physical monitor menu, not just Windows. Common locations within the OSD include:
- Picture or Display settings, look for "HDR Mode" or "HDMI HDR"
- Game settings if the monitor prioritizes gaming features
- Input-specific settings (HDR may only activate on certain ports)
Some monitors display a small "HDR" indicator in the corner of the screen when active. Others show it in the OSD header. If you toggle HDR in Windows and nothing changes on screen, check the monitor's OSD because it probably needs the hardware-side toggle too.
Quick diagnostic: open a known HDR test image or video. In SDR mode it looks washed out with crushed blacks. In proper HDR mode on a capable panel, details emerge in both shadows and highlights simultaneously.
Step 5: Test With Real HDR Content and Trust Your Eyes
You've verified the specs, confirmed the cable and GPU support it, and toggled it on. Now you need to actually see whether it works and whether it looks good. Eyeball testing beats spec-sheet reading every time.
Best free HDR test methods:
- YouTube HDR videos (search "HDR 4K demo" and confirm stats for nerds shows BT.2020 color space)
- Windows 11 built-in HDR calibration tool (free in Microsoft Store)
- Steam games with native HDR support (see list below)
- NVIDIA HDR screenshot comparisons in supported titles
Windows HDR Calibration tool workflow:
- Download from Microsoft Store
- Follow the three-step pattern (black point, white point, saturation)
- Windows creates an ICC profile that improves HDR tone mapping for your specific panel
What good HDR looks like on a 27-inch monitor:
- Bright highlights (sun, reflections, fire) punch against genuinely dark surrounding areas
- Shadow detail remains visible without crushing to pure black
- Colors feel more saturated in bright areas without looking neon or artificial
- The overall image feels more "three-dimensional" compared to SDR
What bad HDR looks like (HDR400 without dimming):
- Entire screen shifts bright/dark uniformly, no local contrast improvement
- Colors look desaturated compared to SDR
- Image appears washed out with a grayish cast
- You toggle it back and forth and genuinely prefer SDR
If your test shows the "bad" characteristics, the monitor technically accepts an HDR signal but can't render it effectively. That's a panel hardware limitation. No software fix changes that.
Word count so far: ~1,720 words. Content continues with remaining sections below.
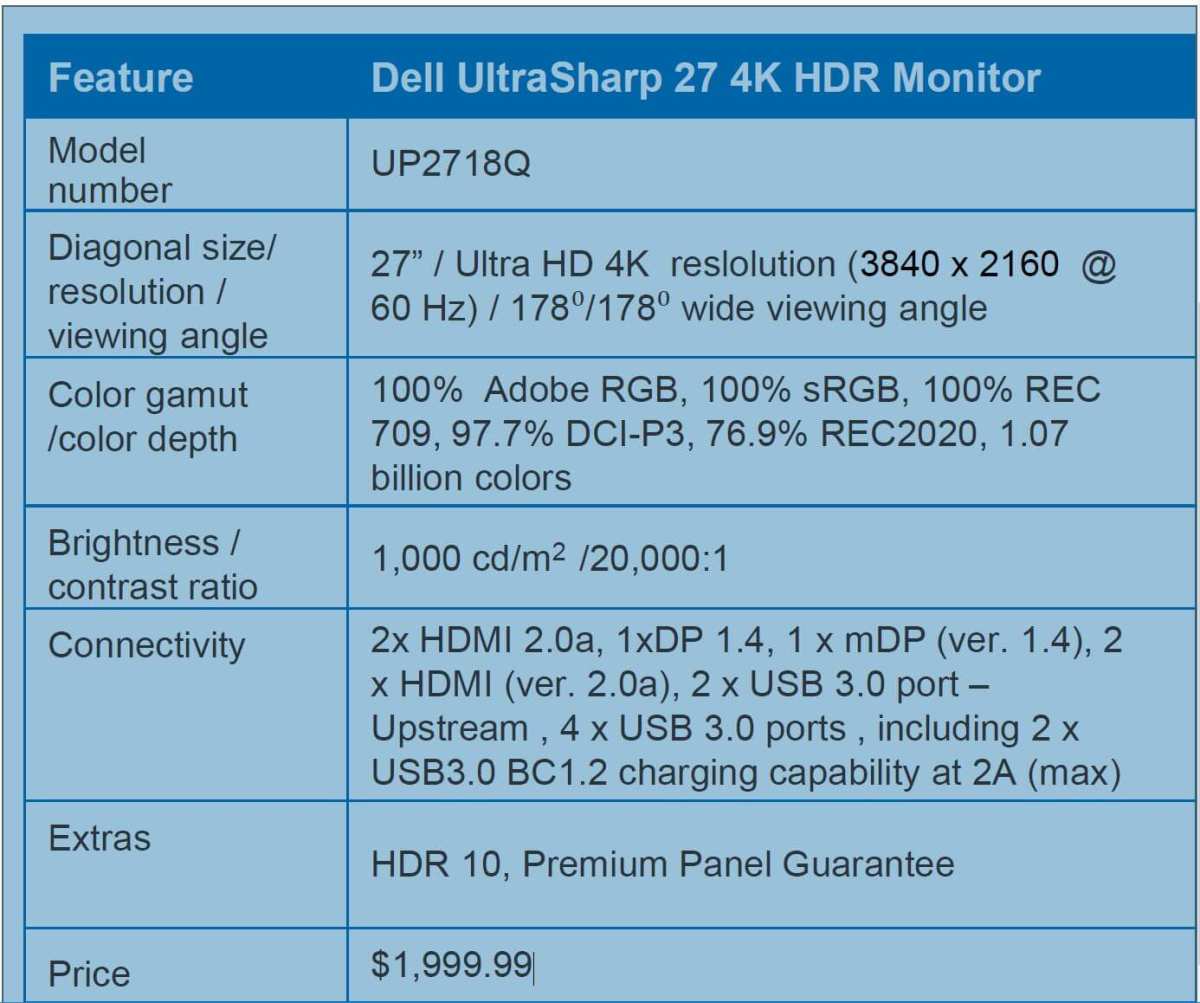
Image source: Bing (Web (fair-use with source credit))

Similar Posts