How to Fix Blurry Text on 27 Inch Monitor
Image source: Bing (Web (fair-use with source credit))
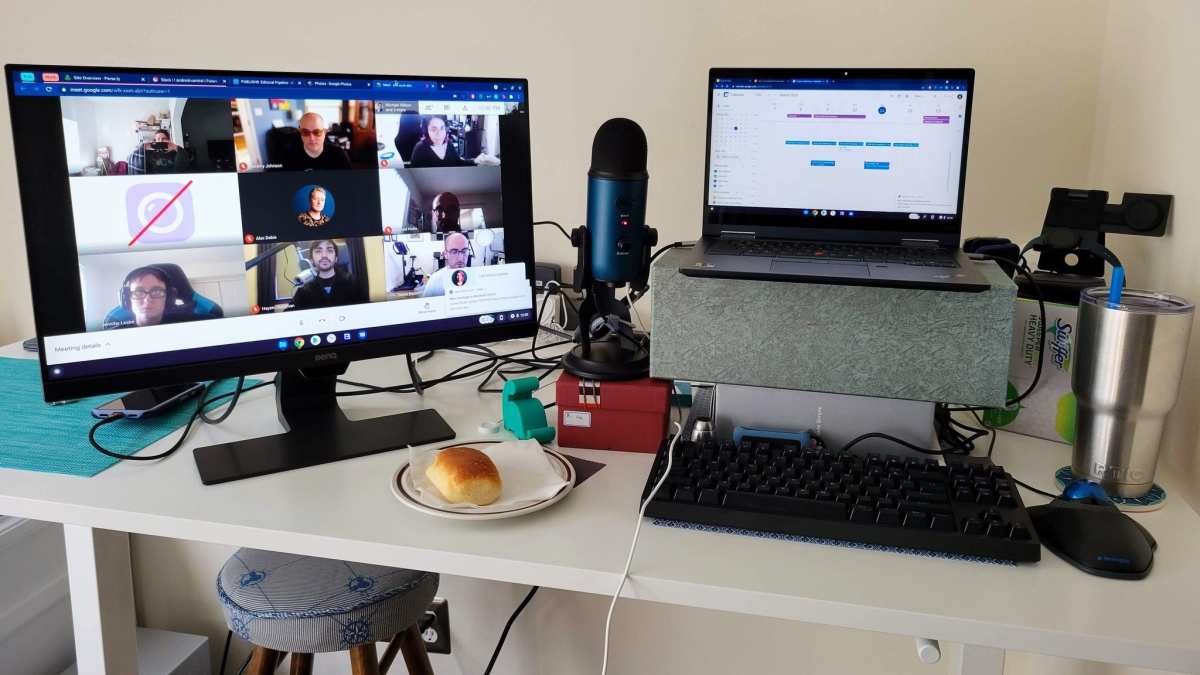
Learning how to fix blurry text on 27 inch monitor setups is easier than most people think. In most cases it is not a defective panel. It is a mismatch between the monitor's native resolution, the signal being sent, and how your operating system scales the image.
Get those three things aligned and the text snaps into focus almost immediately.
The tricky part is that 27 inches sits in an awkward middle ground. You have 1080p panels with low pixel density, 1440p panels that are the sweet spot, and 4K panels that need scaling to stay readable. Each scenario demands a slightly different fix.
Let us walk through the exact checks so you can zero in on the culprit and get crisp text today.
Quick Answer
How to fix blurry text on 27 inch monitor setups starts with verifying native resolution. Check that Windows or macOS outputs the panel's rated resolution. Second, set the correct scaling percentage for your resolution.
Third, run the ClearType tuner to match your panel's subpixel layout. Fourth, make sure your PC connects via DisplayPort or a quality HDMI cable. Fifth, update your graphics driver to the latest version.
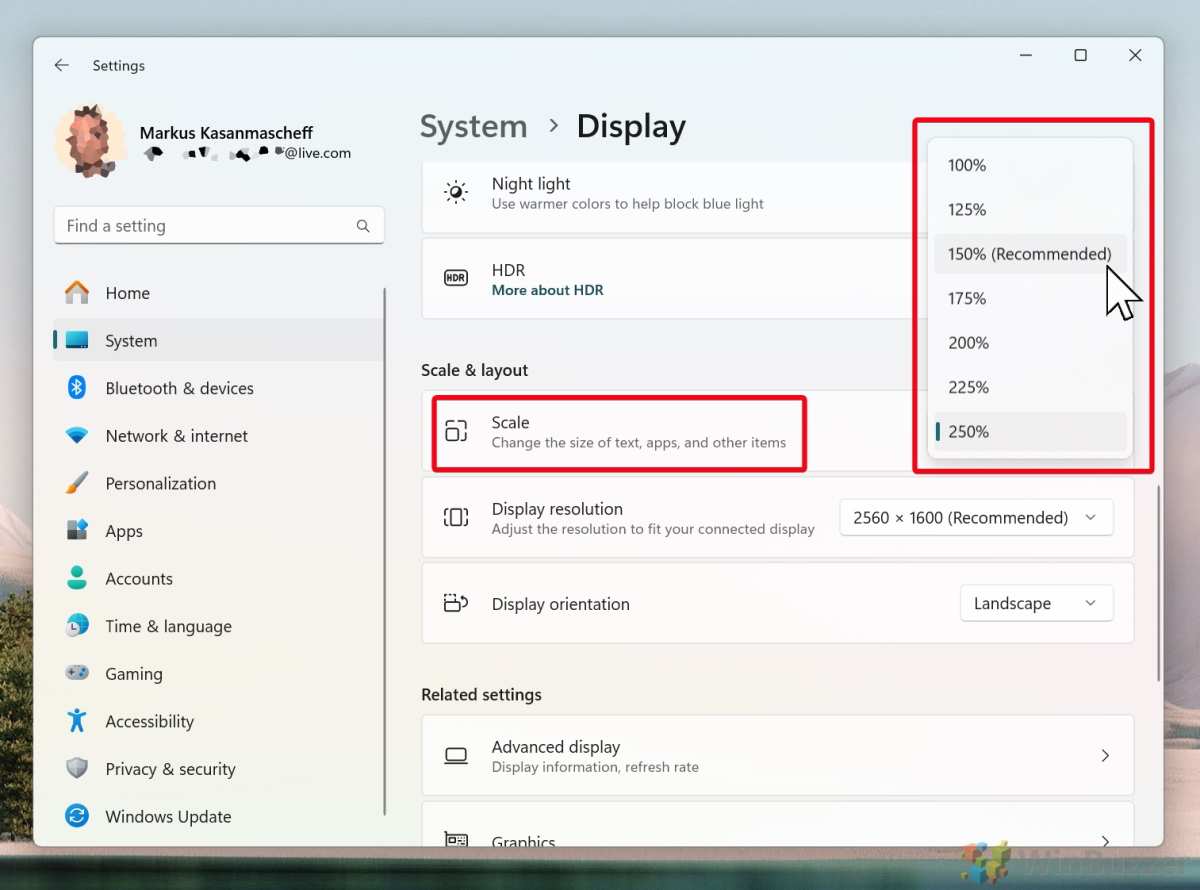
Image source: Bing (Web (fair-use with source credit))
The One Thing That Fixes Most Cases First
Scaling is the number one reason text looks soft on a 27-inch display. We see this constantly in editorial research. Someone upgrades from a 24-inch 1080p screen to a 27-inch 1440p panel and suddenly everything looks fuzzy.
They assume the monitor is bad. It is not. Windows is just rendering text at a size that does not pixel-align cleanly with the panel.
Open Settings > System > Display and look for the Scale dropdown. At 1440p on 27 inches, 125% is often the cleanest starting point. At 4K, most people need 150% to avoid eye strain.
At 1080p, keep it at 100% or you introduce blur from fractional scaling. The numbers matter. You want an integer or at most a simple fraction so the GPU maps cleanly to physical pixels.
If the recommended scale looks wrong, try one notch up or down. Compare the results in a text editor where you can see the difference side by side.
Is It the Resolution, the Cable, or the Settings?
Diagnosing where the blur originates saves you from replacing a perfectly good panel. The culprits almost always fall into one of five buckets: wrong resolution, bad scaling, incorrect cable, misconfigured subpixel rendering, or a stale GPU driver. Each one has a distinct signature.
A wrong resolution makes everything soft uniformly. Bad scaling creates uneven blur where some UI elements look fine and others look smeared. A bad cable can introduce noise or limit you to a lower refresh rate that indirectly affects edge clarity.
Subpixel rendering issues show up as colored fringing around letters, especially at small sizes. A stale driver simply hides the correct resolution option from your dropdown. When you know what you are looking at, you can skip three steps and go straight to the right fix.
Step 1: Check If You're Running at Native Resolution
Every LCD panel has exactly one native resolution. Send it that exact signal and every pixel lines up perfectly. Send it anything else and the monitor's scaler interpolates the image, which is where blur enters the picture.
On a 27-inch panel the most common native resolutions are 2560 by 1440 (1440p), 3840 by 2160 (4K), or 1920 by 1080 (1080p on budget models). If your display is set to anything below that number, text will look soft and there is no software trick that fully compensates. You need to match the signal to the panel exactly.
How to verify on Windows
Right-click the Desktop and select Display Settings. Scroll to the Display Resolution dropdown and make sure the option with "(Recommended)" next to it is selected. That tag indicates the GPU is reporting the panel's native resolution over the EDID handshake.
If you do not see the native option, that usually points to a cable or driver issue, which we cover in the steps below.
How to verify on macOS
Open System Settings > Displays. macOS handles resolution selection a little differently. Click "Show all resolutions" if available to see the full list. Pick the one that matches the panel's native spec, not a default scaled option.
On Macs with Retina-class panels, the OS uses pixel-doubled rendering by default to keep UI elements the same apparent size while drawing them at double the resolution. Disabling that can cause blur, so leave "Default for display" selected unless you have a specific reason to override it.
Step 2: Fix Scaling — The #1 Cause of Blurry Text at 27"
100% vs 125% vs 150% — Which to use
Scaling maps logical pixels to physical pixels on your panel. The math only comes out clean when the ratio is simple. Here is the quick reference for common 27-inch configurations:
| Resolution | PPI | Recommended Scale | Result |
|---|---|---|---|
| 1920×1080 | ~82 | 100% | Sharp but small UI |
| 2560×1440 | ~109 | 125% (or 100% if eyes allow) | Good balance of size and sharpness |
| 3840×2160 | ~163 | 150% | Crisp text, requires scaling |
At 100% on a 4K 27-inch screen, everything is razor sharp but tiny. You can read it at two feet if your vision is good. Most people cannot, and that is why scaling exists.
The danger zone is non-integer scaling. Setting a 4K panel to 133% for example forces the GPU to render at a fractional ratio and the result is uneven blur on text edges. Stick to 100%, 125%, 150%, or 200% whenever possible.
Those values give the GPU a clean grid to work with.
Why legacy apps still blur even when scaling is right
Windows scales modern UI elements just fine. The problem is that older applications, and some current Electron or Java-based apps, use bitmap-based rendering rather than vector text. When Windows upscales those bitmaps, the result looks smeared.
This is per-app behavior and you can override it. Right-click the program's executable, open Properties, go to the Compatibility tab, and click "Change high DPI settings." Check "Override high DPI scaling behavior" and select "System (Enhanced)" from the dropdown. This tells Windows to handle the scaling for the app instead of letting the app do it poorly.
Not every program responds well but many older utilities and games improve noticeably with this toggle.
Override scaling for stubborn apps
If System (Enhanced) fixes the fuzziness but makes the app window oversized, try "Application" mode instead in that same menu. That mode tells the app to handle its own scaling, which we just said is bad, except that some programs, particularly creative tools like Adobe's suite, implement their own high-DPI support better than Windows' generic handler. The right choice depends entirely on the specific program.
Test both options in a side-by-side comparison. The version with the cleanest text edges wins. There is no universal default.
Step 3: Calibrate ClearType (or Font Smoothing on Mac)
Windows uses a subpixel rendering technology called ClearType. It exploits the fact that each pixel on your monitor is actually three vertical subpixels: red, green, and blue. By addressing individual subpixels, ClearType can render text at a perceived resolution higher than the physical pixel count.
It works beautifully when the subpixel layout matches the rendering mode. It introduces color fringing when it does not.
Run the tuner by pressing the Windows key and typing "ClearType." Open the Adjust ClearType text panel. Windows walks you through a series of screens asking you to pick the text sample that looks best. Each screen optimizes for a different weight and contrast level.
The entire process takes about two minutes and the visual improvement is immediately noticeable if the defaults were not optimal.
Image source: Bing (Web (fair-use with source credit))
Step 4: Check Your Cable — This Gets Overlooked
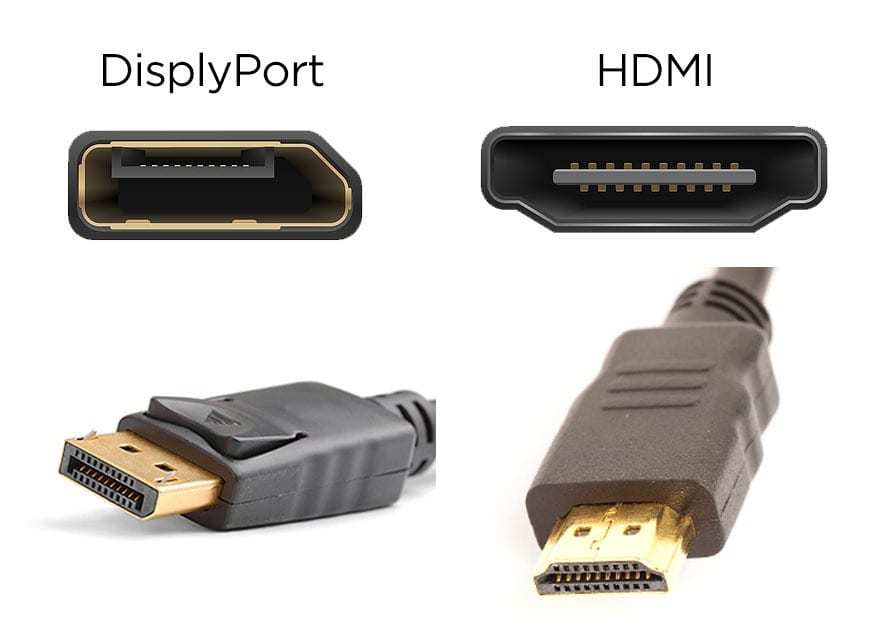
Image source: Bing (Web (fair-use with source credit))
HDMI vs DisplayPort vs USB-C — bandwidth matters
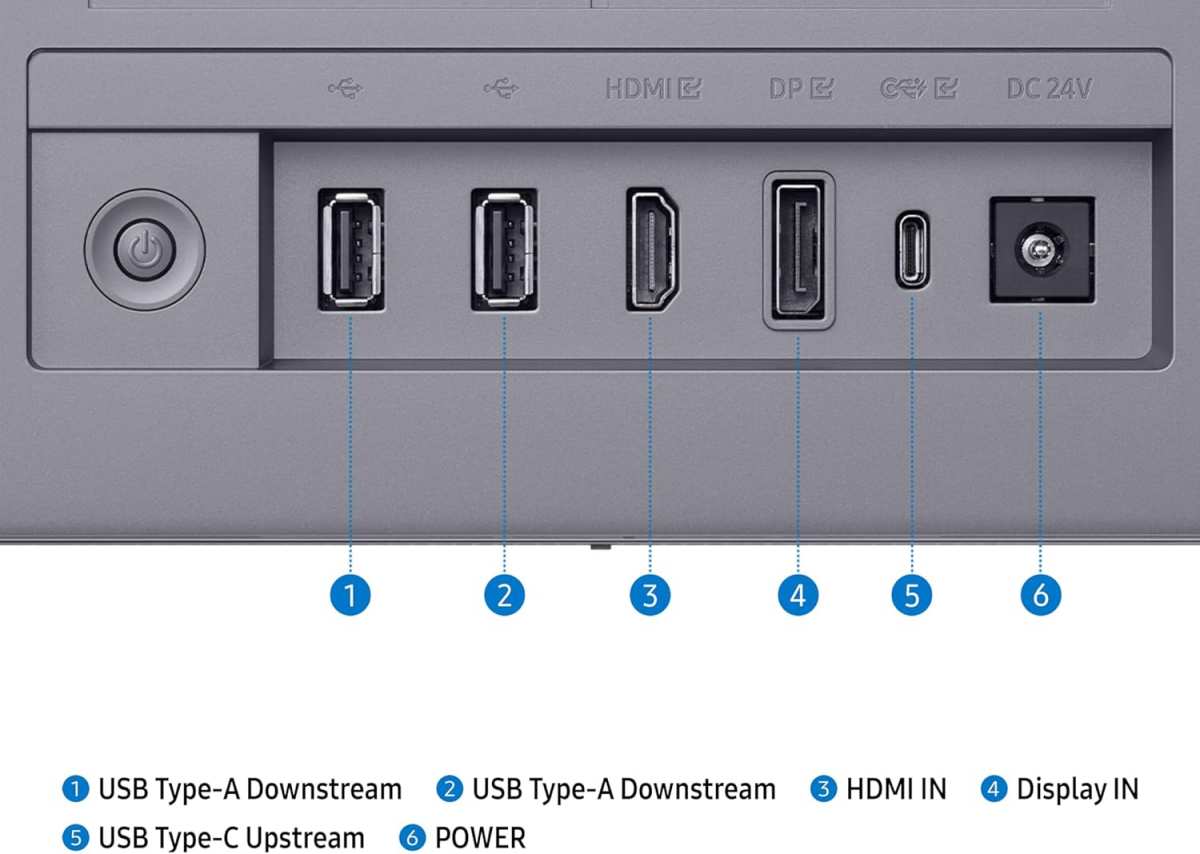
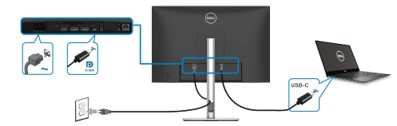
A cable that cannot carry enough bandwidth forces compromises. The GPU might drop to a lower resolution or compress the signal. Either option introduces blur.
At 27 inches you want one of these minimum cable specifications for clean native output:
| Cable Type | Minimum Version | Max Resolution at 60Hz |
|---|---|---|
| HDMI | 2.0 | 4K at 60 Hz |
| DisplayPort | 1.2 | 4K at 60 Hz |
| USB-C (DP Alt Mode) | DP 1.2+ | 4K at 60 Hz |
If your panel is 1080p you have more headroom and even HDMI 1.4 handles that resolution comfortably. The issue is that many people grab whatever cable came in the box with a monitor or reuse an old one from a previous setup. That cable might be HDMI 1.4, which cannot deliver 4K at 60 Hz.
Check the printing on the cable itself or look up the manufacturer's specs online. Swap in a verified HDMI 2.0 or DisplayPort 1.2 cable and see if the correct resolution options appear.
Bad or old cables that force wrong resolution
Beyond version, cable quality matters. A poorly shielded HDMI cable can introduce signal errors that the monitor compensates for by softening the image. A DisplayPort cable with a bent pin might negotiate a lower link rate and drop the available resolution.
If you are seeing the correct resolution selected in Windows but the image still looks soft, try a different cable before you try anything else. Borrow a known-good one or buy a certified cable that explicitly lists the bandwidth you need. They are not expensive and they eliminate a variable that is hard to diagnose purely by looking at settings.
Step 5: Update or Reinstall Your GPU Driver
An outdated graphics driver can prevent the GPU from reading the monitor's EDID correctly. That is the data block the monitor sends to tell the computer what resolutions and refresh rates it supports. When the driver cannot parse that data, it falls back to a safe, low resolution and you end up with a soft image at the software level.
Where to get the clean install
Always download drivers from the GPU manufacturer's own site. Use nvidia.com for GeForce cards, amd.com for Radeon, and intel.com for integrated Arc or UHD graphics. Some people grab drivers from Windows Update, and those often work, but they tend to be months behind the latest release and occasionally lack proper scaling logic for newer panels.
When you have a persistent text clarity issue, start with a clean driver install from the source.
When a driver update actually fixes text rendering
Driver updates occasionally include new EDID overrides that fix misreported panel capabilities. If your monitor is a recent model and your driver is more than six months old, an update may unlock the correct native resolution option that was previously hidden. This happens more often with new monitor launches than with established models but it is worth checking regardless of your hardware age.
Step 6: Adjust Your Monitor's On-Screen Display (OSD)
The OSD is the menu system built into the monitor itself. Most people never open it after initial setup. Several settings inside directly affect text sharpness.
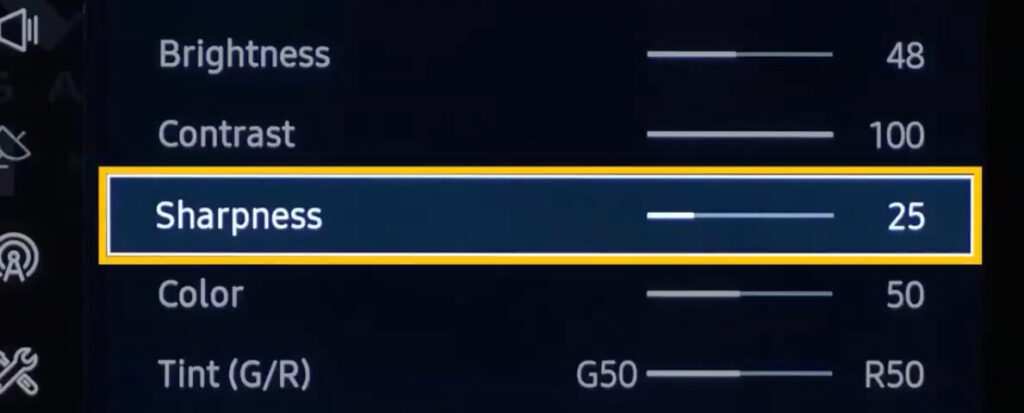
Image source: Bing (Web (fair-use with source credit))
Sharpness setting
Sharpness in the OSD controls edge enhancement, not the actual resolution. At the midpoint setting, typically 50 on a 0-100 scale, the monitor renders the incoming signal without adding artifacts. Cranking it above 60 adds artificial halos around text edges that some people mistake for clarity.
Setting it too low below 40 introduces softness that mimics a resolution problem. Leave it at the default midpoint unless you can see a clear improvement when adjusting it.
Overdrive and response time settings
Overdrive controls pixel transition speed. The sharpness setting has a much bigger impact on text rendering than overdrive. Leave overdrive at its normal or medium setting, as aggressive overdrive can introduce inverse ghosting that distorts moving text.
Focus your attention on the sharpness control first.
Reset to factory defaults
If you are not sure what changed in the OSD, reset to factory defaults via the menu. Then adjust only the sharpness back to its midpoint. This gives you a known baseline and eliminates any accumulated setting drift that may have occurred during previous troubleshooting attempts.
Quick Comparison: 27" 1080p vs 1440p vs 4K — Text Clarity Reality
PPI breakdown and what it means for your eyes
Pixels per inch is the single most important physical spec governing text sharpness at a given viewing distance. At the typical desk distance of two to three feet, here is how common 27-inch panels compare:
| Resolution | Pixel Density | Text Quality at Native |
|---|---|---|
| 1920×1080 (1080p) | ~82 PPI | Visible pixel grid, soft edges on small fonts |
| 2560×1440 (1440p) | ~109 PPI | Clean and sharp at 100-125% scaling |
| 3840×2160 (4K) | ~163 PPI | Extremely sharp, requires 150-200% scaling |
A 1080p panel at 27 inches looks noticeably softer than a 1440p at the same size because the physical pixels are larger. You can see individual pixel boundaries if you look closely. Going from 1080p to 1440p sharpens text immediately.
Going from 1440p to 4K sharpens it further but you pay for that in GPU load and the need for aggressive scaling.
Which resolution to pair with which scaling
For office use where you read documents and browse the web, 1440p at 27 inches with 125% scaling is the practical sweet spot. Text is sharp and readable without eye strain. 4K at 27 inches works well but only if you are comfortable with 150% or higher scaling. If you need 200% scaling, UI elements become very large and you lose screen real estate rapidly.
In that case a 32-inch 4K panel gives you the same sharpness at a more usable 100% scale factor.
Common Mistakes That Make Text Worse
Don't use VGA
VGA is an analog interface. It converts a digital signal to analog for transmission, then back to digital at the monitor. Every conversion step degrades edge clarity slightly.
The result is a softer image that no amount of sharpness adjustment in software can fix. The fix is simple: switch to a digital cable. Even a basic HDMI connection eliminates the analog conversion loss entirely, and DisplayPort handles the digital signal natively.
Once you move to a digital interface, you can run at the full native resolution without the softness and noise that VGA introduces. This is one of the quickest wins for any user with an aging setup.
Don't set custom resolutions without understanding timing
Modern monitors tolerate non‑standard timings fairly well, but older panels are particular. If you force a custom resolution via driver tools, you might select a timing parameter that the panel scales unevenly, producing blur. The safest approach is to stick with the standard resolution standards and only use custom resolutions if you understand CVT or CVT‑RB timing formulas.
Even then, verify the image quality at each setting before you make it permanent. Otherwise it is easy to wind up with a weird interpolation that looks worse than the native option.
Don't assume 4K is always sharper at this size
Yes, a 4K panel has the highest PPI. But if you scale it to 150% to keep text readable, the effective screen resolution becomes 2560 by 1440. That is the same logical resolution as a native 1440p display.
The extra physical pixels still help with subpixel rendering and fine detail. However, the difference between a native 1440p panel and a 4K panel at 150% scaling is far smaller than the difference between 1080p and 1440p. Budget matters.
If you primarily work with text, a good 1440p IPS panel often delivers a better overall experience than a 4K panel you have to scale aggressively to use comfortably.
Final Checklist: Fix Blurry Text in Under 10 Minutes
Run through these five checks in order and you will have covered approximately 90% of text blur scenarios.
- Verify the display is set to its native resolution in Windows or macOS
- Adjust scaling to an integer value: 100%, 125%, or 150%
- Run the ClearType tuner and pick the sharpest samples at each step
- Test with a different digital cable to rule out signal issues
- Reset the monitor OSD to factory defaults and leave sharpness at midpoint
Frequently Asked Questions
Why does my 27" monitor look worse than my laptop screen?
Your laptop almost certainly has a much higher PPI, often 200 or more. The 27-inch desktop panel we just covered here likely runs 82 to 109 PPI. Lower pixel density means visible pixels and softer text edges at the same viewing distance.
Fix scaling and ClearType before assuming the panel is at fault.
Will a DisplayPort cable fix blurriness if HDMI is already working?
It depends on the issue. If the current HDMI cable is an older version that caps out at a lower bandwidth, then yes, a DisplayPort 1.2 or HDMI 2.0 cable unlocks the full native resolution. If the current HDMI cable can already handle your native resolution, swapping to DisplayPort may not change text sharpness because the signal was already lossless.
They are both digital. The difference is more about bandwidth limits than signal quality at this stage.
Is blurry text a defect or do I need to adjust settings?
Almost never a defect. Uniform blur across the entire image points to a settings mismatch, not a panel failure. Actual panel defects usually show as stuck pixels, uneven backlighting, or localized clouding.
Run through the checklist above. If text is still blurry after you have verified the correct resolution, scaling, ClearType, and cable, then and only then consider whether the panel itself is faulty.
Does refresh rate affect text clarity?
Not directly. A 60 Hz panel and a 144 Hz panel render static text at the same sharpness when running at the same resolution. Higher refresh rates improve motion clarity in games and scrolling.
They do not make individual frames sharper. If you increased the refresh rate and text looks worse, you may have triggered an incompatible timing mode. Reset to the rated refresh rate for your resolution.
Why does text look fine in some apps but blurry in others?
Some apps are not DPI-aware. They render at a fixed resolution and let the OS scale the bitmap. The result is blur that only appears in those specific programs.
Use the Compatibility tab high-DPI override mentioned earlier on a per-app basis. This mostly affects older software. Modern browsers and office apps typically handle scaling properly on their own, but even current Electron-based apps sometimes struggle if the developer did not implement per-monitor DPI awareness.
That is why system-level fixes alone cannot solve every blurry-fonts situation.

Similar Posts