How to Fix 144Hz Monitor Stuck at 60hz
So you bought a 144Hz monitor, fired it up, and… it's running at 60Hz. Knowing how to fix a 144Hz monitor stuck at 60Hz is probably why you're here, and the good news is this is almost always fixable in under ten minutes. The bad news?
The solution depends on what cable you're using, where it's plugged in, and whether your software is set up correctly.
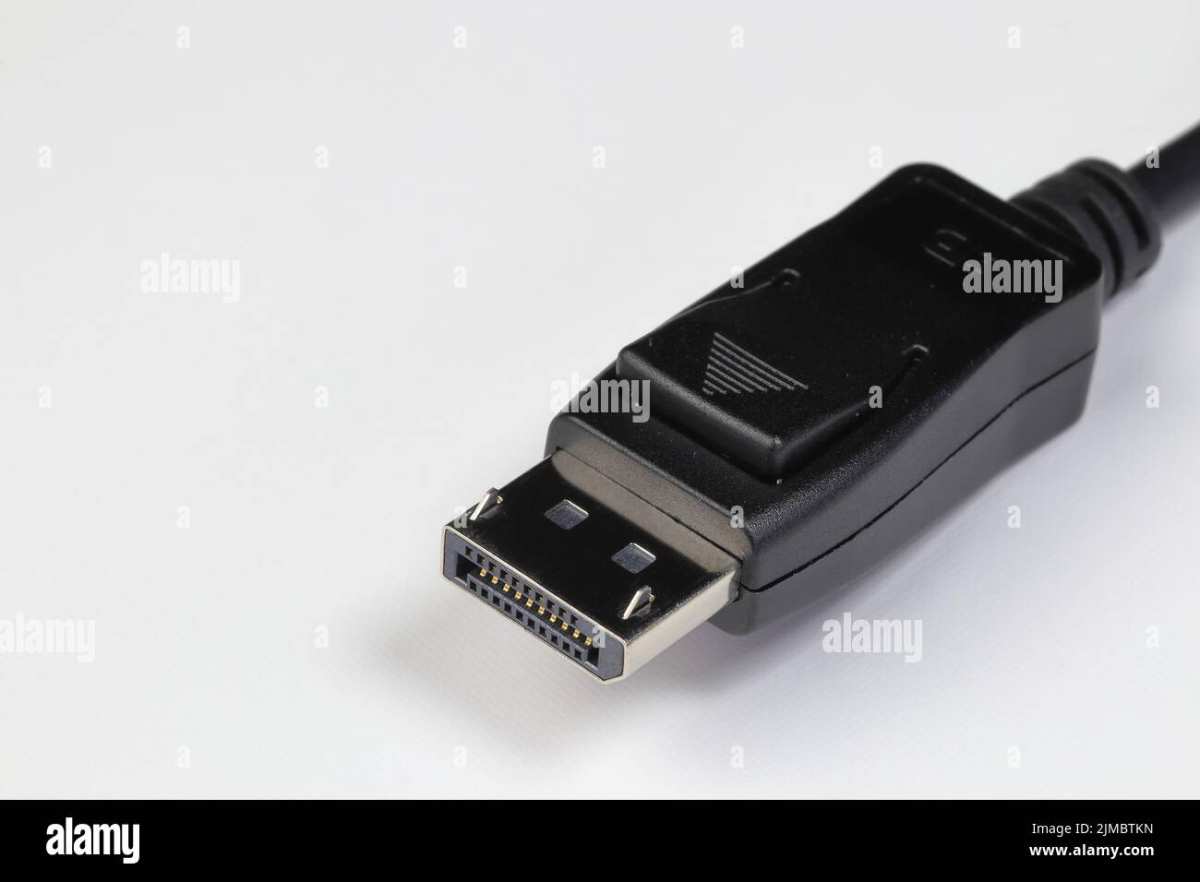
We've walked through every common cause across dozens of setups. The reality is that 144Hz requires specific hardware conditions. DisplayPort 1.2 or higher, for example, supports 144Hz at both 1080p and 1440p.
HDMI 2.0 can do it too, but HDMI 1.4 tops out at 60Hz at 1080p unless you drop to a lower color format. Let's go through the fixes step by step.
Quick Answer
Your monitor likely needs a DisplayPort cable or an HDMI 2.0 connection to hit 144Hz. Check that your cable plugs into your graphics card, not your motherboard. Then change the refresh rate in Windows Display Settings.
If the option doesn't show, your cable or port is the bottleneck.
Why Your 144Hz Monitor Is Stuck at 60Hz (And How to Actually Fix It)
Image source: Bing (Web (fair-use with source credit))
The single most common cause is simple. You're using a cable or port that physically cannot carry a 144Hz signal. It sounds obvious, but it catches almost everyone at least once.
Here's what's probably happening. Your monitor is perfectly capable of 144Hz. Your graphics card can output 144Hz.
But something in the chain between them, the cable, the port, the setting, the driver, is capping you at 60Hz. We're going to find exactly where that bottleneck is and eliminate it.
Along the way, we'll also cover the sneaky stuff. Things like being plugged into the wrong port on your PC, or your monitor's on-screen display hiding a setting you need to toggle. Let's start with the physical layer and work our way up.
The Real Reason This Happens More Than You Think
Per manufacturer specifications, a standard HDMI 1.4 cable maxes out at 60Hz for 1080p resolution with full RGB color. That's the default spec on many cables still sitting in drawers.
Even HDMI 2.0 cables can misbehave. If the cable is older, poorly shielded, or simply not rated for the full 18 Gbps bandwidth, the source and display will negotiate down to a safe 60Hz. It's a failsafe, and it works too well.
DisplayPort avoids most of these headaches. But only if you're actually using DisplayPort. And only if your cable meets at least the DisplayPort 1.2 specification.
We'll get into the specific cable-by-cable breakdown shortly.
First, Check This Before You Touch Any Settings
You're Probably Plugging Into the Wrong Port
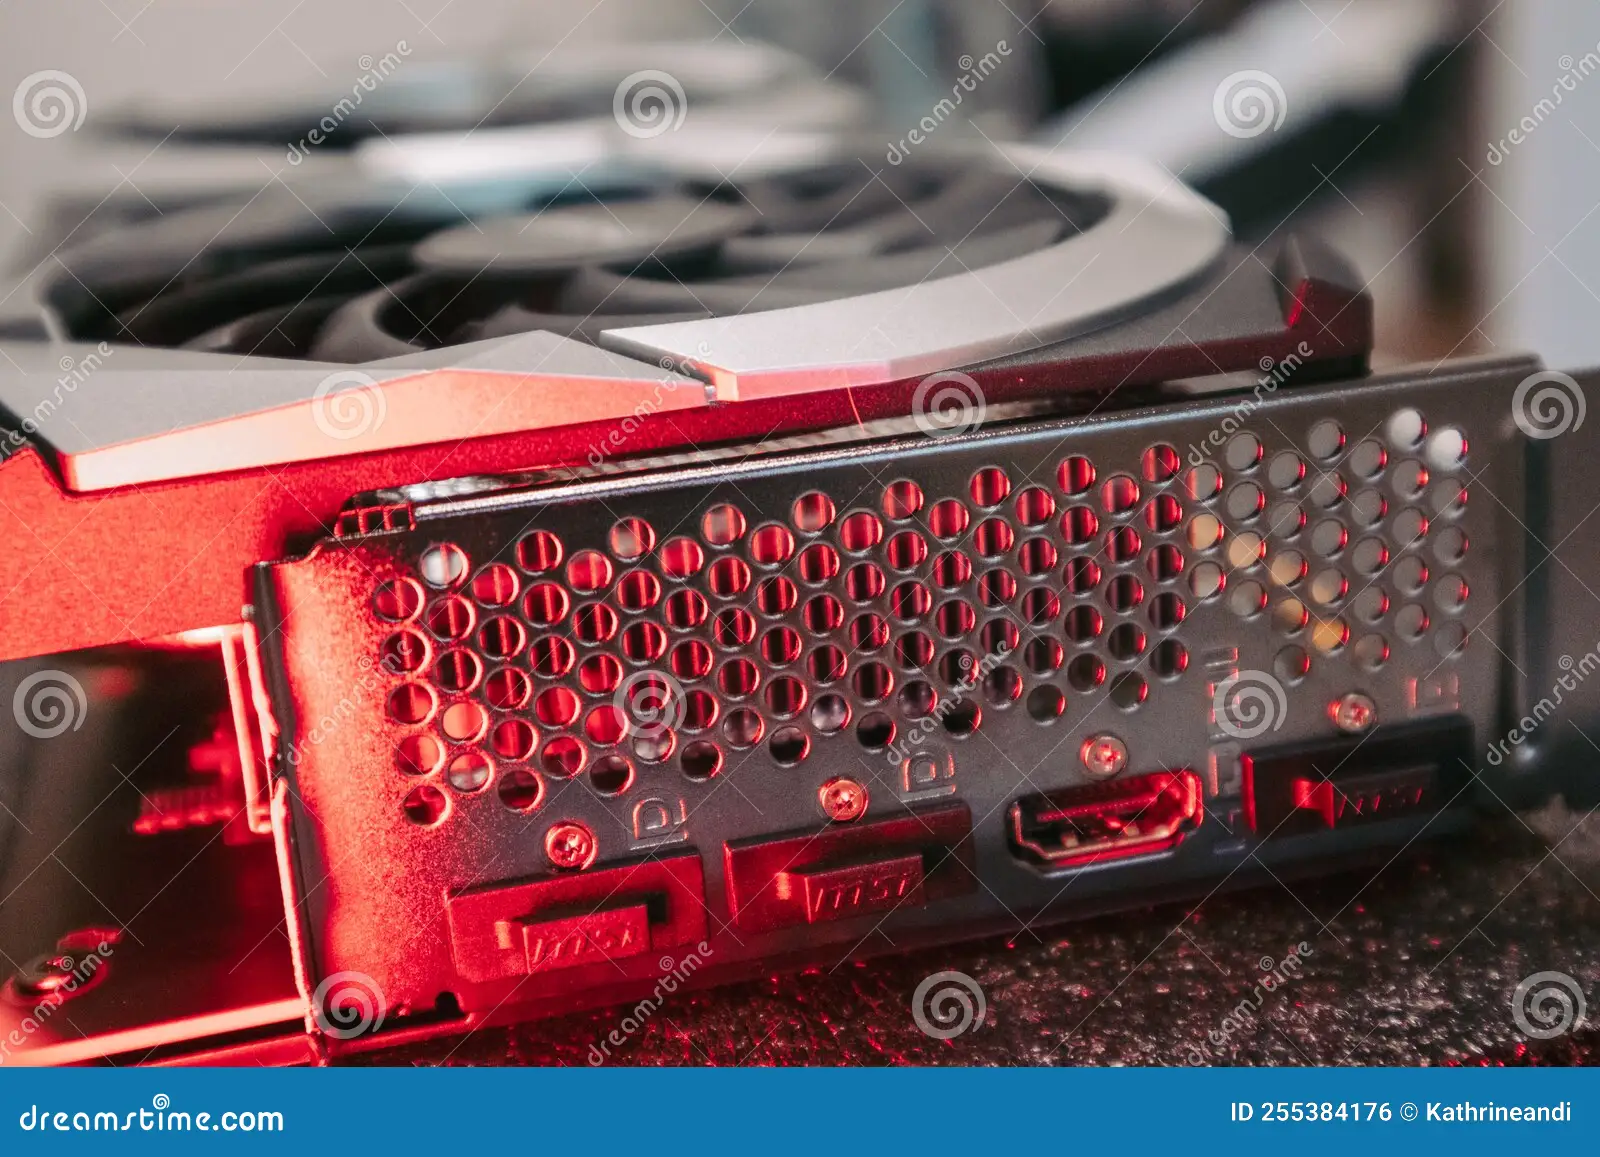
Image source: Bing (Web (fair-use with source credit))
This one is embarrassingly common, and if you've ever fallen for it, you're not alone. Your motherboard has video output ports. Your graphics card has video output ports.
They look identical from the outside. If your cable runs to the motherboard's HDMI or DisplayPort, you're using your CPU's integrated graphics. Not your dedicated GPU.
Integrated graphics often can't drive 144Hz reliably, especially at higher resolutions.
The fix? Trace your cable from the back of your monitor to your PC. Make sure it plugs into the horizontal slots lower on the back of the case, on the discrete graphics card, not the vertical cluster of ports near the top connected directly to the motherboard. On most builds, the GPU sits in the PCIe slot with its ports oriented horizontally.
If you plug into the GPU and the option still doesn't appear, your CPU might not have integrated graphics at all, which means those motherboard ports were never functional to begin with.
The Cable Is Likely the Bottleneck
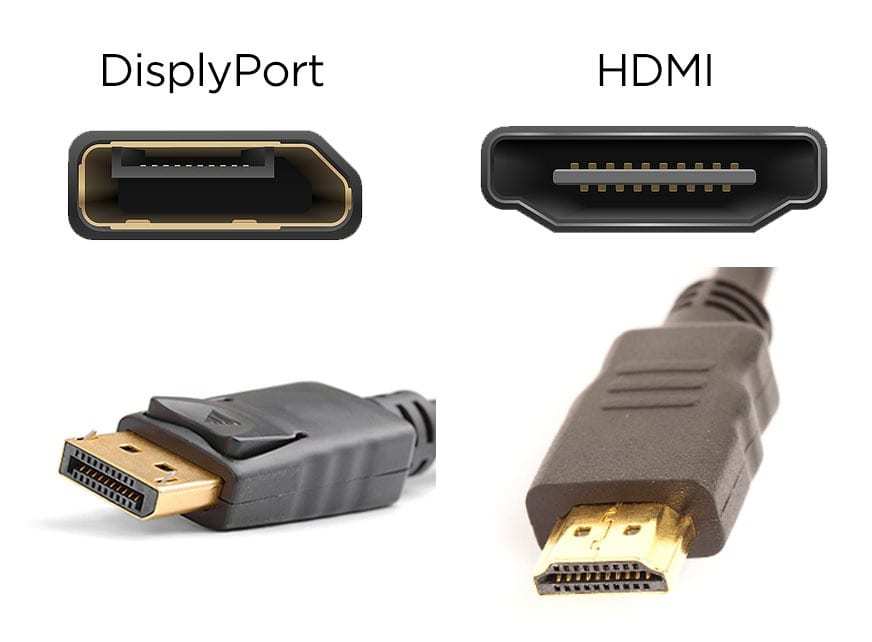
Image source: Bing (Web (fair-use with source credit))
Not all cables are created equal, and this is where most 144Hz problems live. Whether you're using DisplayPort or HDMI, the cable needs to support enough bandwidth for your desired resolution and refresh rate. If it doesn't, your GPU and monitor will automatically step down to a supported mode, and that is usually 60Hz.
Connection Type
Here's the realistic picture per VESA and HDMI Forum specifications:
| Connection Type | 1080p @ 144Hz | 1440p @ 144Hz | Notes |
|---|---|---|---|
| DisplayPort 1.2 | Yes | Yes | Minimum for 144Hz gaming |
| DisplayPort 1.4 | Yes | Yes | Best option, supports DSC for higher resolutions |
| HDMI 2.0 | Yes | Yes | Some monitors cap certain modes at 60Hz over HDMI |
| HDMI 1.4 | Limited* | No | May work at reduced color format; not reliable |
| Single-Link DVI-D | No | No | 60Hz only |
| Dual-Link DVI-D | Yes | No | Still used by some competitive players |
***HDMI 1.4 at 1080p/144Hz requires reduced blanking or 4:2:0 chroma subsampling. Results vary by monitor.*
Step 1: Verify Your Cable and Port Are Actually Capable of 144Hz
Here's your decision tree for the physical connection:
- If you're using DisplayPort: , Check that the cable is labeled DisplayPort 1.2 or higher (most cables manufactured after 2012 are at least 1.2).
, Confirm it's plugged into the GPU's DisplayPort output.
, Try a different DisplayPort cable if the option doesn't appear.
, Budget for a certified cable, they are reliable and under $15.
- If you're using HDMI: , You need an HDMI 2.0 (High Speed) cable at minimum for 1080p/144Hz or 1440p/144Hz.
, For 4K/144Hz, you need HDMI 2.1, labeled "Ultra High Speed HDMI."
, If your monitor defaults to 60Hz even on HDMI 2.0, try DisplayPort instead. Some monitors only expose their full refresh rate over DisplayPort.
- If you're using DVI: , It must be Dual-Link DVI-D. Single-Link physically cannot hit 144Hz. The connector has more pins; look for the full 24-pin layout.
, If you used an adapter or a DVI-to-HDMI dongle, you likely lose the 144Hz capability. Go direct cable.
- If you're using USB-C or Thunderbolt: , It must support DisplayPort Alt Mode. Many cheap USB-C hubs don't pass through enough bandwidth for 144Hz, so confirm the hub supports your target refresh rate before troubleshooting further.
Then: Change the Refresh Rate in Windows Display Settings
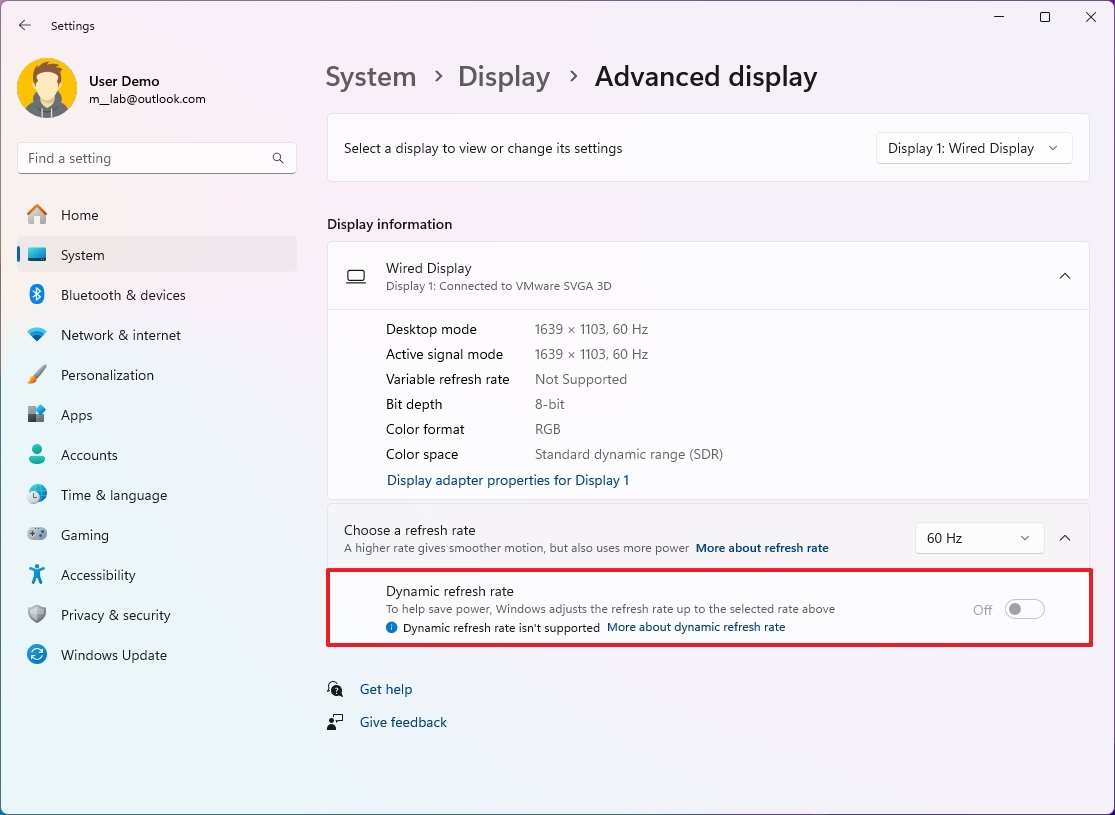
Image source: Bing (Web (fair-use with source credit))
Once your cable and port check out, it is time to tell Windows to actually output 144Hz. Or whatever your monitor's maximum refresh rate is.
Here's what to do:
- Right-click on your desktop and select Display settings.
- Scroll down and click Advanced display settings.
- Click Display adapter properties for Display 1.
- Go to the Monitor tab.
- Under Screen refresh rate, select 144 Hertz from the dropdown.
- Click OK and confirm.
If 144Hz appears in the dropdown, select it and you're done. If only 60Hz is listed, stay with us; the next sections cover what to do when Windows doesn't show your desired refresh rate.
On Windows 11 (updated interface):
Settings > System > Display > Advanced display > Choose a refresh rate
Same concept, slightly different navigation. If your monitor reports its correct capabilities, it shows up here.
If 144Hz Still Doesn't Appear
One critical thing to know: if you have multiple monitors connected at different refresh rates, Windows can sometimes limit the higher-refresh display. Especially if one monitor is 60Hz and you're duplicating displays rather than extending them. Switch to "Extend these displays" in the multi-monitor settings and see if the option unlocks.
Step 4: Set It in Your GPU Control Panel (NVIDIA or AMD)
NVIDIA Users
If 144Hz doesn't show in Windows Display Settings, the NVIDIA Control Panel takes over where Windows leaves off. Right-click your desktop and select NVIDIA Control Panel. Under Display on the left sidebar, click Change resolution.
Set your resolution to the native spec of your monitor, usually 1920×1080 or 2560×1440. Then set the Refresh rate dropdown to 144Hz. If 144Hz is missing, use the Customize button to create a custom resolution with a 144Hz timings setting, based on the established blanking intervals from VESA standards.
AMD Users
If you're running an AMD GPU, open AMD Adrenalin Software. Click the gear icon, then select Display from the tabs. Set your resolution and toggle the refresh rate.
On some driver versions, AMD lists refresh rates separately under each resolution. Go through the list if you don't see it immediately.
Step 5: Check Your Monitor's On-Screen Display Settings
This step gets overlooked constantly, and it shouldn't. Your monitor's on-screen display (OSD) has its own settings that can cap the refresh rate before the signal even reaches Windows. Some monitors ship with the refresh rate set to 60Hz by default, especially if the manufacturer wants to avoid support tickets from users with inadequate cables.
What to look for in the OSD:
- A setting labeled Refresh Rate, Overclocking, or Performance Mode
- An Adaptive Sync toggle that needs to be enabled for the full range
- A DisplayPort version selector (some monitors let you choose between DP 1.1 and DP 1.2)
On many monitors from brands like ASUS, Acer, and MSI, you'll find the refresh rate setting under the Game or Image menu in the OSD. If your monitor has an "overclocking" feature, you may need to enable it to unlock refresh rates above 60Hz. Some panels are technically 144Hz but ship at 60Hz until you explicitly tell the monitor to run at its rated speed.
After changing the OSD setting, wait a few seconds. The screen may flicker or go black briefly. Then revisit Windows Display Settings or your GPU control panel.
The 144Hz option should now appear.
Step 6: Update or Clean-Install Your GPU Drivers
Outdated or corrupted drivers are a common culprit when your desired refresh rate doesn't show up. Both NVIDIA and AMD regularly add monitor compatibility updates in driver patches. If you haven't updated in months, you're likely missing EDID profile fixes that tell your GPU what the monitor can actually do.
For NVIDIA users:
- Open NVIDIA GeForce Experience or visit the NVIDIA driver download page.
- Download the latest Game Ready driver for your GPU.
- During installation, select Custom (Advanced) and check Perform a clean installation.
- Restart your PC after installation completes.
For AMD users:
- Visit the AMD driver support page and download the latest Adrenalin Edition driver.
- During setup, choose Factory Reset to remove previous driver remnants.
- Restart and check your refresh rate options again.
If a clean driver install doesn't help, use Display Driver Uninstaller (DDU) in Safe Mode. DDU removes every trace of your previous GPU driver, including registry entries and leftover files that a standard uninstall misses. After running DDU, install the latest driver fresh.
This resolves EDID handshake failures that prevent 144Hz from appearing.
Step 7: When Nothing Else Works
If you've verified the cable, confirmed the GPU port, checked the OSD, and clean-installed drivers, and 144Hz still won't appear, you're likely dealing with one of these edge cases:
- EDID communication failure. Your monitor isn't telling your GPU what it's capable of. Try booting with the monitor powered on before the PC. Or use a tool like Custom Resolution Utility (CRU) to manually add a 144Hz profile.
- Adapter or dock in the chain. USB-C hubs, KVM switches, and DisplayPort adapters can strip out the bandwidth needed for 144Hz. Connect directly from GPU to monitor with a single cable to rule this out.
- Monitor firmware bug. Check the manufacturer's support page for firmware updates. Some early-production 144Hz monitors shipped with firmware that capped the refresh rate under certain conditions.
- Defective cable or port. Try a different cable. Try a different port on the GPU. Try the monitor on a different PC if possible. Hardware faults are rare but not impossible.
Quick Reference: Which Cable Actually Supports 144Hz at Your Resolution
| Resolution | Minimum Cable for 144Hz | Recommended |
|---|---|---|
| 1080p (1920×1080) | DisplayPort 1.2 or HDMI 2.0 | DisplayPort 1.4 |
| 1440p (2560×1440) | DisplayPort 1.2 or HDMI 2.0 | DisplayPort 1.4 |
| 4K (3840×2160) | HDMI 2.1 or DisplayPort 1.4 with DSC | DisplayPort 1.4 certified |
The Most People Get Wrong About This
Most guides tell you to "just change it in Windows settings." That advice assumes the option is available. In our research, the majority of cases where 144Hz is stuck at 60Hz come down to hardware limitations, not software settings. The cable, the port, or the monitor's own OSD is the bottleneck.
Windows can't offer a refresh rate that the hardware chain doesn't support.
Another common misconception is that any HDMI cable will work. It won't. If you're using an old HDMI cable from before 2012, it's almost certainly HDMI 1.4.
That cable physically cannot carry 144Hz at 1080p with full color. You need at least High Speed HDMI (2.0) for reliable 144Hz performance.
When to Stop Troubleshooting and Contact Support
If you've gone through every step above and 144Hz still won't appear, it's time to contact your monitor's manufacturer. You may have a panel with a defective scaler board or a GPU with a failing output port. Most reputable brands will replace the unit if it can't achieve its rated refresh rate under supported conditions.
Have your cable specs, GPU model, and driver version ready when you reach out.
Frequently Asked Questions
Does HDMI support 144Hz?
Yes, but only HDMI 2.0 and above. HDMI 2.0 supports 144Hz at 1080p and 1440p. For 4K at 144Hz, you need HDMI 2.1.
Older HDMI 1.4 cables are limited to 60Hz at 1080p with full RGB color.
Why is 144Hz not showing in Windows Display Settings?
The most common reasons are an incompatible cable, being plugged into the motherboard instead of the GPU, or outdated GPU drivers. Start by checking your cable type and port location, then update your drivers.
Can I use DVI for 144Hz?
Only Dual-Link DVI-D supports 144Hz, and only at 1080p. Single-Link DVI is capped at 60Hz. DisplayPort or HDMI 2.0 are better options for most modern setups.
Do I need a special cable for 144Hz?
You need a cable that supports enough bandwidth. For most 144Hz setups at 1080p or 1440p, a DisplayPort 1.2 or HDMI 2.0 cable works. For 4K at 144Hz, you need DisplayPort 1.4 or HDMI 2.1.
Will a USB-C hub work for 144Hz?
Only if the hub supports DisplayPort Alt Mode at sufficient bandwidth. Many cheap USB-C hubs cap out at 60Hz. Check the hub's specifications for explicit 144Hz support before relying on it.

Similar Posts