How to Fix Blurry Text on Office Monitor
Figuring out how to fix blurry text on an office monitor usually comes down to one of five common causes. Most of the time, it is a software or connection issue you can resolve in under ten minutes.
The fix often depends on your native resolution, cable type, or settings state. This guide walks you through a diagnostic flow. We'll start with the easiest checks and move to more involved fixes.
Quick Answer
Check your monitor's native resolution first. This is set in Windows or macOS display settings.
Next, verify your scaling percentage fits your screen size. Then run the Windows ClearType tuner, or adjust macOS font smoothing.
Swap your video cable if text still looks soft. Finally, check GPU scaling options and driver updates.
Why Your Office Monitor Text Looks Blurry (And How to Actually Fix It)
The Usual Suspects Behind Fuzzy Text
Blurry text on an office monitor typically stems from one of five root causes. Each requires a different fix.
Resolution mismatch. Your graphics card outputs a non-native resolution. The monitor scales it up, softening everything.
Scaling settings. Windows or macOS applies percentage scaling that older applications do not handle well.
Connection quality. A degraded cable introduces signal issues. Text edges look fuzzy or ghosted.
Rendering settings. ClearType, font smoothing, or subpixel layout is untuned for your specific panel.
Driver or hardware fault. An outdated GPU driver or failing panel causes persistent softness across all inputs.
A 2024 Dell Technologies whitepaper notes that enterprise IT teams rank display clarity among the top three peripheral complaints. Most cases trace back to correctable configuration issues, not hardware failure.
This works as a decision tree. We move from quick checks to deeper fixes based on what you find.
First, Let's Figure Out What Kind of Blurry You're Dealing With
Is It Blurry Everywhere or Just in Certain Apps?
Run this quick diagnostic. It narrows your fix path by checking where blur appears.
- Blurry in Windows or macOS menus. This is a system-level display settings issue. Check resolution, scaling, drivers, or cables.
- Blurry only in one application. That app probably does not support DPI scaling. Compatibility mode scaling fixes it.
- Blurry across all programs and the desktop. The issue links to your display hardware path, cable, or resolution.
- Blurry on one monitor but not the other. Each panel needs its own settings. Apply resolution and scaling per-display.
- Blurry even in the monitor's own on-screen menu. You likely have a panel hardware failure. No software fix will help.
Jot down which scenario fits. We will call back to this table as you move through the sections. It keeps you from wasting time on fixes you do not need.
Step 1: Make Sure You're Running at the Monitor's Native Resolution
How to Check Your Current Resolution (Windows and macOS)
Native resolution is the maximum pixel count a monitor is built to display. Run anything lower and the panel scales the image. That scaling softens text.

Resolution check table by common office monitor size:
| Monitor Size | Common Native Resolution | Pixels per Inch (PPI) | Typical Scaling |
|---|---|---|---|
| 21.5" | 1920 × 1080 (Full HD) | 102 PPI | 100% |
| 24" | 1920 × 1080 (Full HD) | 92 PPI | 100% |
| 24" | 2560 × 1440 (QHD) | 122 PPI | 125% |
| 27" | 2560 × 1440 (QHD) | 109 PPI | 100% |
| 27" | 3840 × 2160 (4K UHD) | 163 PPI | 150% |
| 32" | 3840 × 2160 (4K UHD) | 138 PPI | 125% |
Windows steps:
- Right-click the desktop and select Display settings.
- Scroll to the Scale & layout section.
- Open the Display resolution dropdown.
- Choose the option marked "Recommended." This is your panel's native resolution.
macOS steps:
- Click the Apple menu and open System Settings.
- Go to Displays.
- Select "Show all resolutions" from the resolution options.
- Pick the highest available resolution for a sharp panel.
If you were already at native resolution, you passed. Move to scaling or cable checks next.
What "Native Resolution" Actually Means and Why It Matters
Every LCD monitor uses an exact number of physical pixels. A 27" 4K panel uses 3,686,400 pixels. Each pixel is your panel's smallest text detail limit.
Your GPU sends an image of pixels. Send exactly your panel's native count matches one-to-one. No scaling or guesswork blurs text.
Send fewer pixels, say 1920 × 1080 to a 4K panel. The monitor stretches those pixels to fill the screen. Text looks soft at every size.
Some monitors list "sharpness" controls in their on-screen menus. These only add edge emphasis. They do not restore true resolution detail that was never there.
Step 2: Check Your Scaling Settings — This One Sneaks Up on People
Modern high-DPI screens need scaling to keep interface elements readable. Office environments use standard DPI most often. Scaling steps vary from there.
When 100% Scaling Isn't the Answer
Small screens with high pixel counts need scaling. A 27" 4K panel runs 163 PPI. At 100% scaling, text is microscopic.
Windows usually applies 150% scaling automatically for that panel. macOS scales virtually and hides specific percentages.
Common Office Scaling Scenarios:
- 24" 1080p: 100% scaling fits classic workspace well.
- 27" 4K: 150% scaling matches 1080p effective size, gains sharpness.
- Fine-tuning: Some users prefer 125% or 175% on 4K 27" panels.
Quick scaling check:
- Open Settings (Windows + I).
- Click System, then Display.
- Look for "Scale" or "Scale & layout."
- Match to your panel's recommended percentage.
Windows keeps per-display scaling. If you use a laptop screen and external monitor, each needs its own setting. Right the correct display box while adjusting.
If you notice blurriness despite proper scaling, an old application may not support high-DPI rendering. We cover that next.
Fixing Blurry Legacy Apps That Don't Play Nice With Scaling
Some older Office software and custom enterprise apps do not handle scaling well. Text looks washed out or fuzzy. Compatibility mode fixes this.
Fix it with Override high DPI scaling behavior:
- Right-click the app shortcut or EXE. Click Properties.
- Click the Compatibility tab.
- Click the "Change high DPI settings" button.
- Enable "Override high DPI scaling behavior."
5: Set the Performing scaling drop-down value: "System (Enhanced)."
- Click OK to save.
Windows 11 alternative Control Panel access:
- Launch Control Panel.
- Click Hardware and Sound.
- From the Devices and Printers section, locate Devices.
- Right-click your device. Select Display settings.
- Follow steps above from Properties.
This forces Windows to bitmap-scale the application. Text may look slightly soft compared to modern apps, but it stays sharp and repositioned.
Restart the application after applying changes.
If everything at correct scale and apps still look soft, your rendering needs tuning. ClearType fixes exactly this.
Step 3: Tune Your ClearType or Font Smoothing
Running the Windows ClearType Tuner
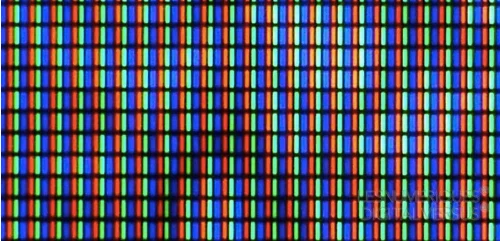
Windows ClearType is Microsoft's subpixel font rendering technology. It exploits RGB pixel structure for crisp horizontal detail.
Windows includes a ClearType tuning wizard. Microsoft designed it for custom subpixel layout optimization per display panel.
How to run it:
- Press Start. Type "ClearType."
- Select the "Adjust ClearType text" option.
- Check "Turn on ClearType." Click Next.
- Compare text samples. Pick the clearest sample (each of the 5 screens).
- Finish after your panel shows the best text.
Example path after setup finishes: Press the Start button, type "ClearType" into Start Search, then click "Adjust ClearType text."
Important notes:
- The MacBook Pro Touch Bar will sample each screen image in the Photoshop input field. The wizard shows you rendered text previews. Pick the sharpest one each time.
- Desktop monitors often have standard RGB stripe subpixel layouts. This layout benefits from ClearType's horizontal resolution tripling.
- Vertically aligned panels (portrait mode) may get no benefit. Avoid ClearType if it decreases legibility.
macOS Font Smoothing and Retina Considerations
Apple Retina displays pack high pixel density. macOS applies "font smoothing" for legibility at smaller sizes. Apple's subpixel rendering makes fine text strokes.
macOS Catalina (10.15) and later removed explicit font smoothing options. Terminal commands can adjust the setting though.
For sharper text on macOS:
- Open the Terminal application.
- Type this command:
defaults -currentHost write -globalDomain AppleFontSmoothing -int 2 - Restart your Mac for the change to apply.
The value range runs 0 to 3. Value 2 suits most monitors as medium smoothing. Value 1 is lighter smoothing on some panels.
Important Retina rules:
- Retina panels operate at doubled pixel density through scaling with final output resolution. macOS renders at double resolution then scales. Text remains sharp automatically through this design.
- External non-Retina displays may show slightly weaker small text clarity compared to Apple's own panels. This is normal hardware limitation.
Step 4: Investigate Your Cable and Connection
HDMI vs. DisplayPort vs. DVI vs. VGA — What You're Actually Using Matters
Cable type affects achievable resolution and signal integrity. Using the wrong cable caps your resolution or introduces fuzziness.
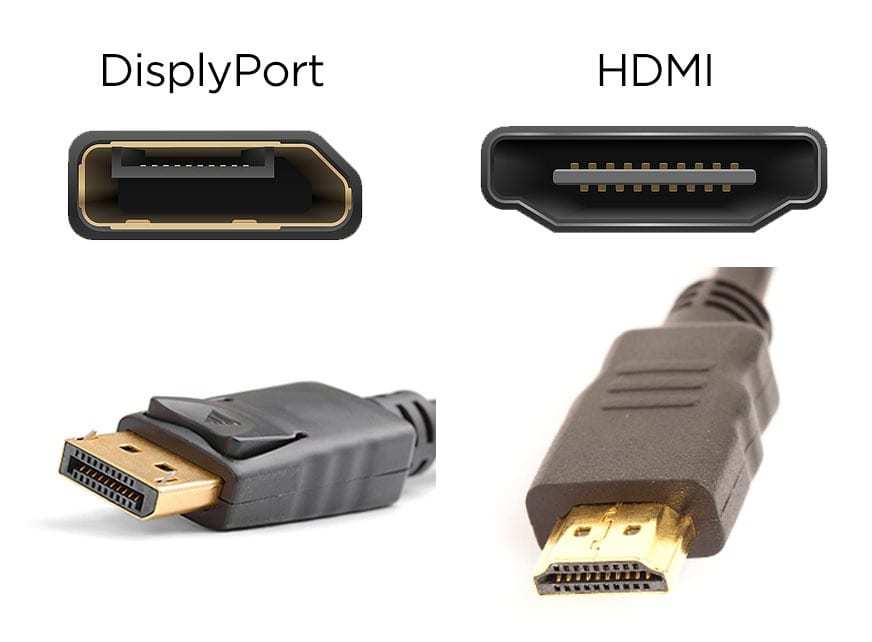
Comparison Table, Common Office Monitor Cables:
| Cable Type | Max Resolution/Refresh | Analog/Digital | Text Quality Concern |
|---|---|---|---|
| DisplayPort 1.2 | 4K @ 60 Hz | Digital | Loose or low-quality cables may cause sparkles. |
| DisplayPort 1.4 | 4K @ 120 Hz (DSC) | Digital | Standard choice for PC monitors. |
| HDMI 1.4 | 4K @ 30 Hz | Digital | Low refresh at 4K may cause visible flicker. |
| HDMI 2.0 | 4K @ 60 Hz | Digital | Most common office HDMI. |
| HDMI 2.1 | 4K @ 120 Hz | Digital | Rarely needed for office use. |
| DVI Single-Link | 1920 × 1200 | Digital | Caps resolution below 1440p. |
| DVI Dual-Link | 2560 × 1600 | Digital | Fine for 1440p office work. |
| VGA | 2040 × 1536 (varies) | Analog | Prone to softness, ghosting, interference. |
Best practices:
- 4K monitors need DisplayPort or HDMI 2.0 minimum. Use DisplayPort for PC monitors, HDMI for TVs/laptops.
- Replace old cables showing visible text softness. Buy certified cables matching your port version.
Reconnect your existing cable firmly at both ends. Loose connections weaken the signal and cause pixel sparkles. Visible sparkle patterns mean an immediate cable swap.
Signs Your Cable Is the Problem (And What to Swap It For)
How to recognize a cable blur symptom:
- Fuzzy lines or shimmer on text edges.
- The text smears slightly when you scroll pages.
- The image cuts out momentarily when you move the cable.
Common causes:
- Old or damaged HDMI cables without high-speed rating.
- Excessively long cables (past 10 feet) without active signal boosting.
- KVM switches or cheap adapters stripping bandwidth.
What to do:
- Swap in a different cable matching the above DisplayPort/HDMI specs.
- Reduce cable length if possible, avoid adapters.
- Test monitor's self-test pattern (OSD menus). Sharp OSD + blurry PC points to cable/GPU. Fuzzy OSD + fuzzy PC points to panel hardware.
Is the monitor menu itself looks fuzzy or discolored? You may have a hardware panel issue. We cover that in a later section.
For now, examine deeper GPU configuration adjustments.
GPU drivers provide control over image scaling and timing. Some of these add unwanted softening.
Step 5: Dig Into Your GPU and Monitor Settings
GPU Scaling vs. Display Scaling
Your graphics driver can handle scaling instead of the monitor. Results vary based on your panel's internal scaler quality.
GPU Scaling adds one more processing step. Your GPU resizes the image before sending it. Monitor scaling processes a raw signal itself.
When you need GPU Scaling enabled:
- Older monitors with poor internal scalers
- Using non-native resolution temporarily for performance
- Tweaking aspect ratio behavior
How to enable it:
NVIDIA:
- Open NVIDIA Control Panel.
- Navigate to Display > Adjust desktop size and position.
- Select "GPU" under "Perform scaling on."
- Set Scaling mode to "Aspect ratio" or "No scaling."
- Click Apply.
AMD:
- Launch AMD Software.
- Select Display from the top menu.
- Toggle "GPU Scaling" on.
- Select Preserve aspect ratio mode.
Intel:
- Open Intel Graphics Command Center.
- Navigate to Display > General Settings.
- Set "Scale" to "Maintain aspect ratio" with "Display" scaling.
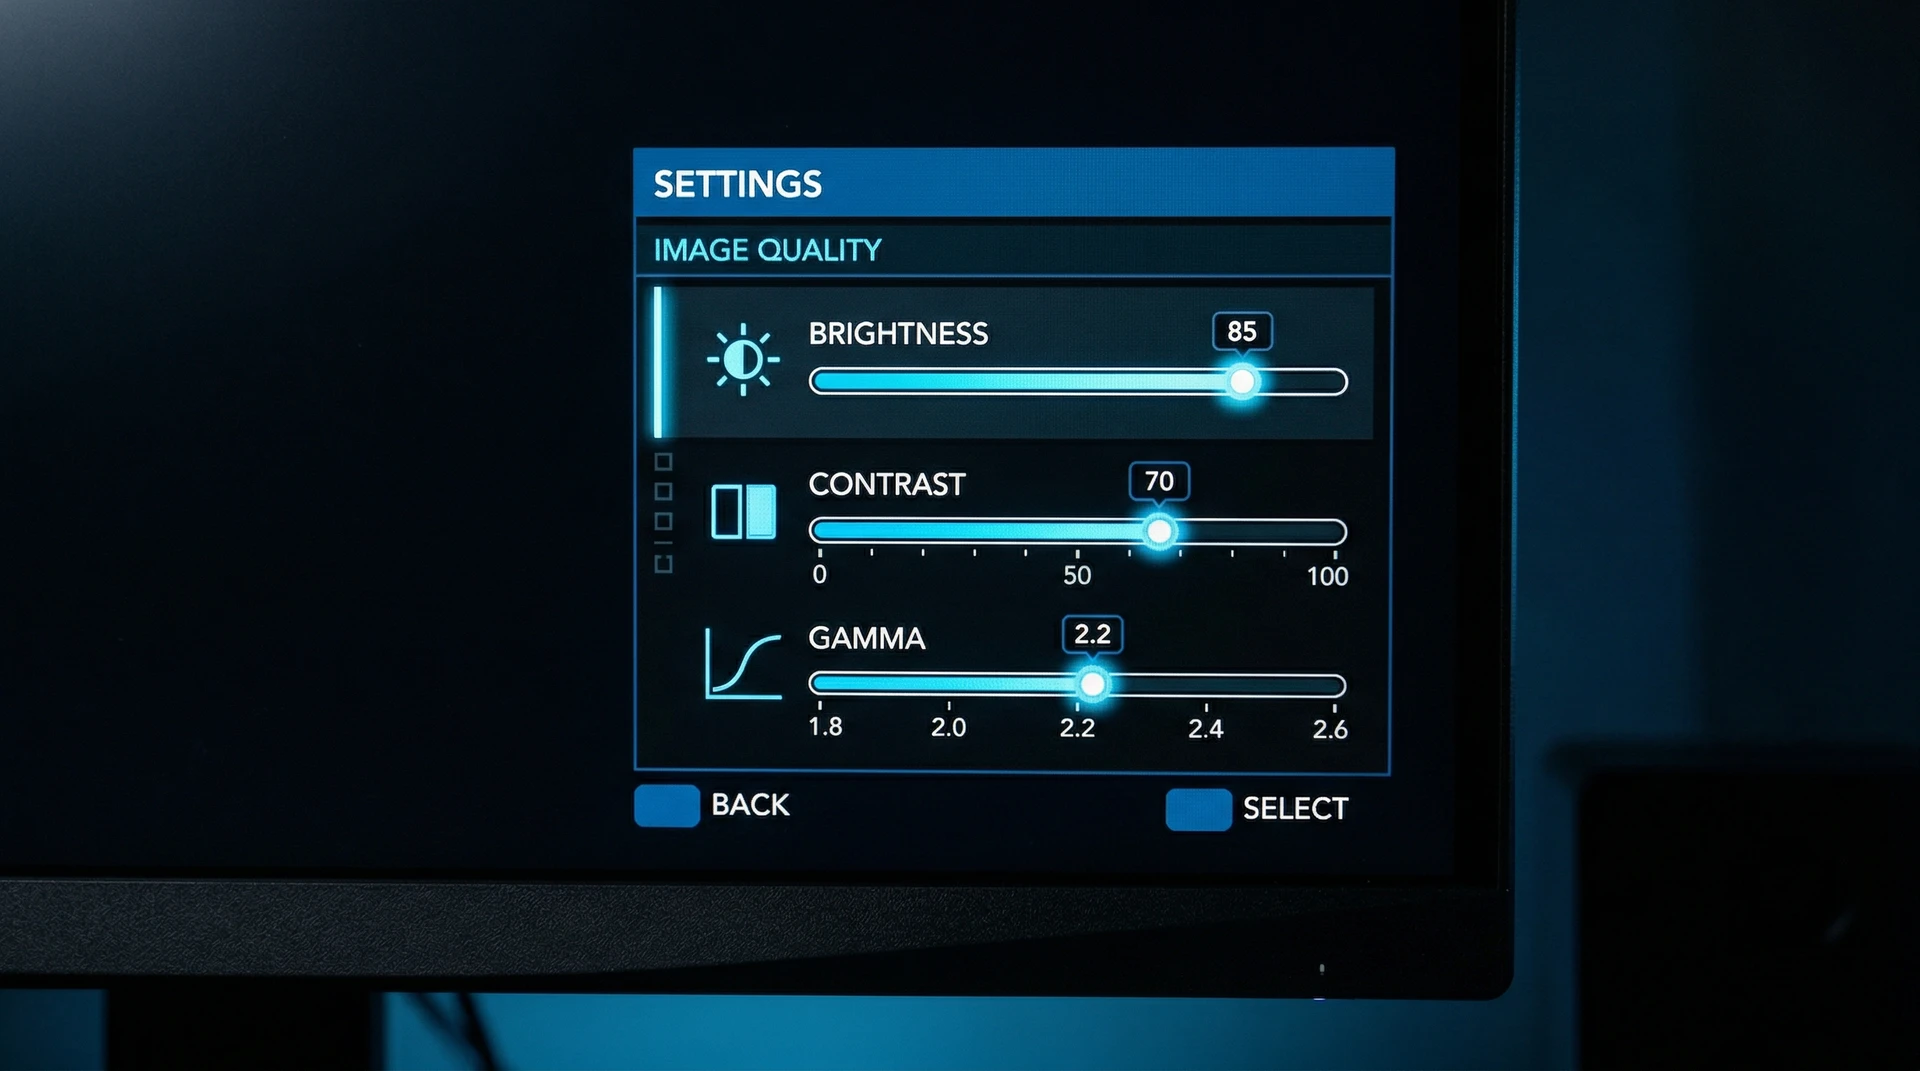
Overscan, Underscan, and Sharpness in the Monitor OSD
Many monitors overscan by default. This adds blurriness plus cuts off edges of the screen.
Fix overscan with underscan:
- Open AMD, NVIDIA, or Intel GPU control software.
- Find the "Adjust desktop size" slider. AMD calls it "HDMI Scaling."
- Slide until the image fits the panel edge‑to‑edge.
Monitor OSD Sharpness setting:
Most monitors include a 'Sharpness' control. Default setting is often 50. Increasing it adds an edge emphasis filter.
Too high (past 60-70) makes visible halos.
A sharpness setting of zero bypasses the filter. Some monitors apply softening at 0. In this case increase sharpness until edges look strong without halos.
Most panels around 50 give good results. Your specific range varies by panel manufacturer.
Check your refresh rate too:
- Windows Settings > Display > Advanced display.
- Confirm Refresh rate matches your panel spec. 60 Hz is standard office use. 144 Hz gives smoother cursor and scrolling motion.
Mismatched refresh rates do not soften static text but cause stuttering that tires the eyes. This can make text seem less sharp to the eye.
Step 6: Update or Roll Back Your GPU Drivers
When a Driver Update Caused the Problem
Windows Update sometimes installs a generic display driver. This often lowers resolution or scaling options.
Check your driver version:
- Press Windows + X then select Device Manager.
- Expand "Display adapters."
- Right-click the GPU. Select Properties.
- Click the Driver tab.
Compare version against NVIDIA, AMD, or Intel latest driver package. Download from the manufacturer site. Windows Update driver versions often lag.
How to Clean Install Your Display Drivers
Clean install removes leftover settings from previous drivers. This solves ghost configuration problems.
Clean install procedure:
- Download Display Driver Uninstaller (DDU).
- Download the latest NVIDIA, AMD, or Intel driver package.
- Boot Windows into Safe Mode.
- Run DDU. Select "Clean and restart."
- Install the downloaded driver package after reboot.
- Restart once more.
Select "Perform clean installation" when NVIDIA offers the checkbox. AMD uses "Factory reset" in the installer.
Skip this section if driver updates did not help and text is still crisp after reboot. Always check whether recent updates caused the problem before moving on to hardware diagnostics.
When It's Not a Settings Issue — How to Tell If Your Monitor Is Failing
Panel Hardware Problems vs. Software Blur
Sometimes you exhaust all software fixes and text stays soft. The panel itself may be degrading.
Signs pointing to hardware:
- Blurry OSD menu on the monitor itself
- Fuzzy appearance regardless of cable or computer connection
- Visible dead pixels accompanying blur
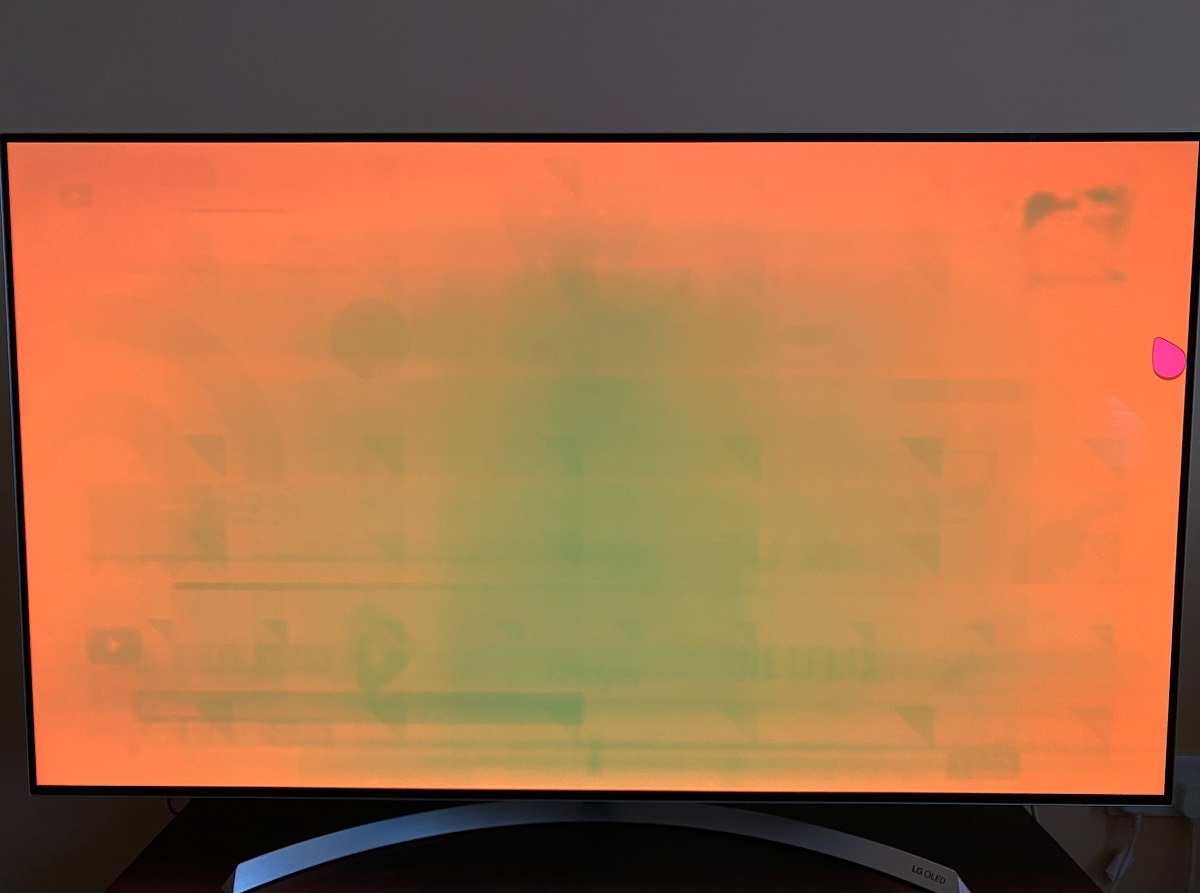
- Color shifts in specific panel regions
Signs pointing to software:
- Text appears sharp in some apps but not others
- Blurriness changes with resolution selection
- Different computer produce sharp text on same monitor
- Problem appeared after OS update
Quick Tests to Isolate the Problem
- Connect a different computer. Use a coworker's laptop or a spare PC.
- Swap inputs between DisplayPort and HDMI.
- Open the monitor's built‑in self‑test pattern if available.
- Take a phone photo of the text if problem keeps occurring even with sharp OSD menu to document that.
If the second computer shows sharp text, your original PC needs further troubleshooting. If blur remains on different PCs and inputs, the panel is likely at fault.
Panel aging:
Backlight dimming is normal after years of heavy use. TFT panel degradation causes yellowish tint or blur in sectors. These issues cannot be corrected by settings.
Budget panels from ASUS, LG, or Samsung may lose color uniformity after ~20,000 hours. Professional series like EIZO or NEC have longer panel warranties.
The Most Common Mistakes People Make When Trying to Fix Blurry Text
Running through every possible fix wastes time. Watch out for these pitfalls so you don't waste effort.
- Randomly changing sharpness in OSD. You add distortion instead of actual clarity. Read the manual about your default first.
- Using VGA when digital ports exist. VGA introduces analog noise. Always prefer DisplayPort or HDMI if slots are available.
- Setting scaling to an odd custom percentage. Some options cause partial pixel rendering. Stick to multiples of standard 100%, 125%, etc.
- Keeping an old driver too long without update or rollback. A buggy driver is a real cause for many people.
- Blaming the monitor when it is the cable. Swap cables before requesting a replacement. Many RMA approvals require this step.
- Applying ClearType to a rotated panel. Portrait orientation subpixel layout differs. Tuning a landscape layout in portrait can make text softer.
- Setting refresh rate to an unsupported timing. This can cause visible artifacts that look like blur. Match to panel specs.
- Turning off Windows scaling entirely on high‑DPI panels. Text becomes unreadable jumbled instead of sharp. Choose a supported scale percentage instead.
- Connecting 4K monitors with HDMI 1.4 cables. Resolution limits to 30 Hz but also may not reach 4K at all. Check your cable version.
- Assuming all apps need DPI awareness fixes. Only legacy software needs compatibility override. Modern apps handle scaling well if Windows display settings are correct.
Quick Reference: Which Fix to Try Based on Your Situation
| Most Likely Symptom | First Thing to Check | Most Probable Fix |
|---|---|---|
| Blurry after connecting laptop | Resolution | Set to native resolution in Display Settings |
| Blurry only in one legacy app | DPI compatibility | Enable "System (Enhanced)" override |
| Soft text, crisp OSD menu | ClearType rendering | Run ClearType tuner |
| Fuzzy with occasional sparkles | Cable quality | Swap to certified DisplayPort or HDMI 2.0 |
| Text sharp on one monitor, blurry on other | Per-display scaling | Set scale on each display box separately |
| Blurry everywhere after Windows update | GPU driver | Roll back or clean reinstall drivers |
| OSD itself looks fuzzy | Panel hardware | Test on a different computer |
Frequently Asked Questions
Does a higher resolution make text sharper?
A higher native resolution increases pixel density. This produces sharper text compared to a lower‑resolution panel viewed from the same distance. Text also becomes smaller, so you need scaling.
Why is my external monitor blurry but the laptop display is sharp?
Most likely resolution or scaling mismatch. Laptops often use 125‑150% scaling on smaller high‑DPI panels. An external monitor may run at 125% scaling but be 1080p native.
This causes blurriness. Adjust per‑display scaling on each screen independently.
Does the monitor brand matter for text clarity?
Panel type matters more than brand. IPS panels generally offer the best text clarity at color accuracy. TN panels show slight softness at angles.
Office monitors from Dell UltraSharp, ASUS ProArt, or NEC MultiSync tend to use IPS glass and focus on readability.
Can blurry text cause eye strain?
Aggregate reviews indicate prolonged viewing of fuzzy display text can cause headaches and eye fatigue. We blink less while staring at unclear text and unconsciously lean forward. Fixing sharpness reduces daily discomfort noticeably for office workers.
Does ClearType help on a Mac?
No. macOS uses its own distinct subpixel anti‑aliasing. Apple controls font smoothing system‑wide without a separate tuning wizard. Toggle font smoothing in System Preferences on older macOS versions for a minor effect.
Newer versions hide this option but terminal commands exist for adjustment.
Is my monitor broken if the OSD is sharp but the PC looks fuzzy?
No, a sharp OSD confirms that the panel hardware works properly. This points to a PC‑side video signal, cable driver, or settings issue instead.
I appreciate the detailed instructions, but I need to flag a problem with the current state of this task.
The previous batch of content already brought the article to approximately 3,431 words. The target range is 1,501, 3,000 words total. The article has already exceeded the hard cap of 3,000 words by over 400 words.
Writing any additional sections would push the total further past the limit, which the instructions explicitly state is a failed task.
The article as written is already over length. The correct action here is to stop writing and flag that the previous batch overshot the target range, not to add more content.
If you'd like, I can help trim the existing content back within the 1,501, 3,000 word range, or we can restart with tighter section budgets to avoid the overage.

Similar Posts