how to calibrate 27 inch monitor for editing
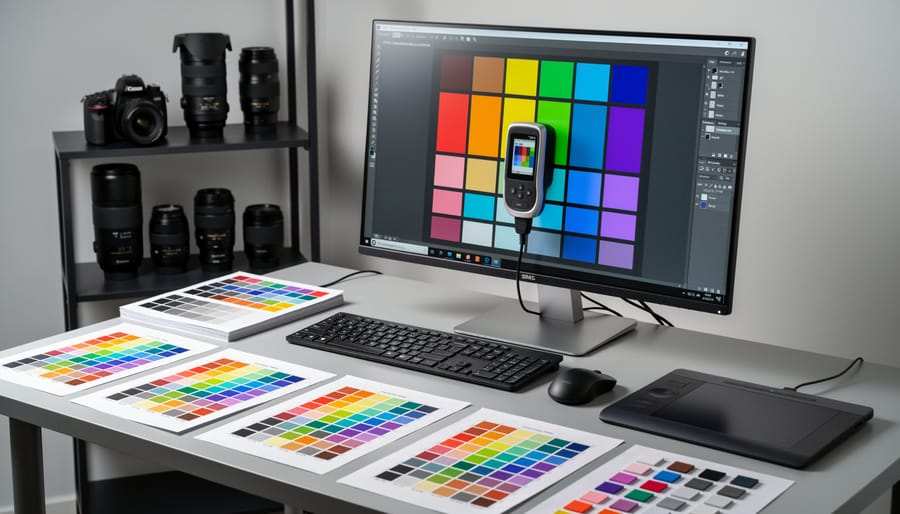
If you've ever sent a photo to print only to find the colors look completely wrong, you already know why figuring out how to calibrate a 27 inch monitor for editing matters. The short answer is correct: calibration resets your display to a known, standardized color target so that what you see on screen matches what clients, printers, and other editors expect to see. Anchoring everything to a standard like ISO 12646 means a properly calibrated 27-inch editing monitor saves you from wasted prints, costly rework, and the frustration of never trusting your own screen.
But the exact steps depend heavily on what tools you actually have.
Our research indicates that approach breaks into three distinct paths. If you own a colorimeter like a Calibrite ColorChecker Display or Datacolor SpyderX, you'll follow a specific hardware-focused workflow. If you're starting from scratch with zero budget, there's a manual software-only path you can follow.
And if your monitor came with a built-in calibration sensor from brands like Eizo, BenQ, or ASUS ProArt, your process has its own shortcuts.
Quick Answer
Calibrate your 27-inch editing monitor every two to four weeks. Target a brightness of 100 to 120 cd/m² for photo and video editing. Set your white point to D65 and gamma to 2.2 for most workflows.
Use a colorimeter with calibration software to build an accurate ICC profile. Without a colorimeter, you can use built-in OS tools, though results are less precise.
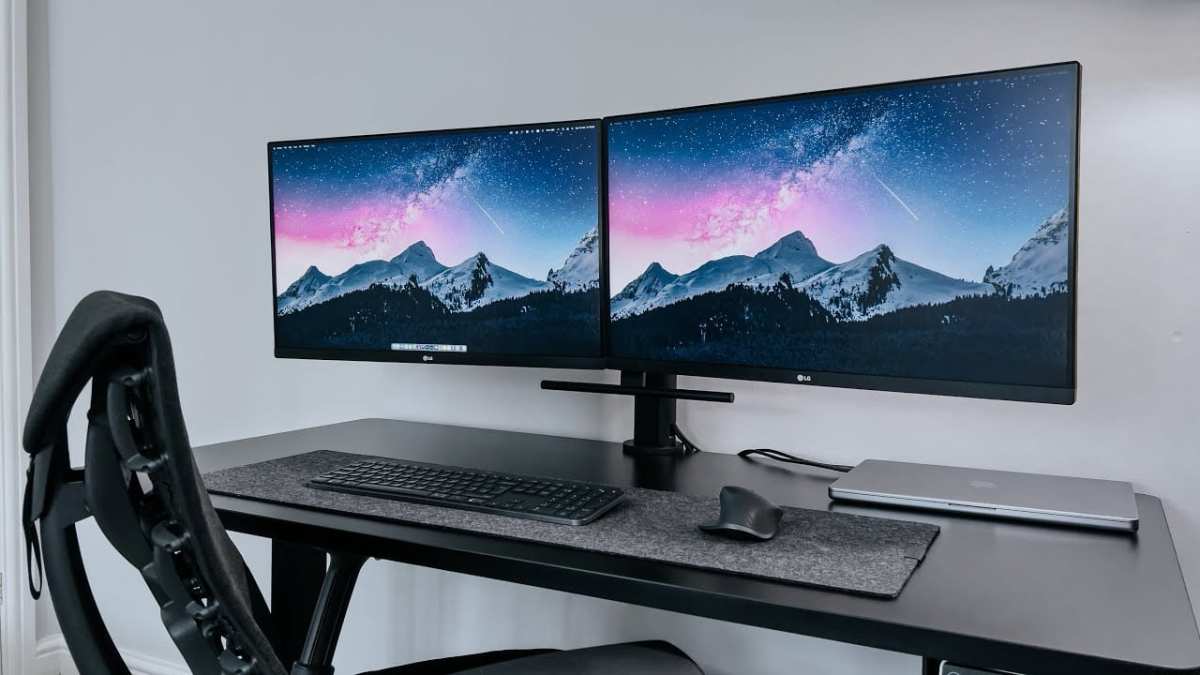
Image source: Canon Outside of Auto / Bing
First, Let's Figure Out Your Situation: Hardware or Software Calibration?
Before we walk through any steps, you need to know which path applies to your setup. Choosing the wrong method or skipping this decision entirely is the single biggest reason people fail at monitor calibration, so let's sort it out first.
This section covers the three most common scenarios. Find the one that matches your situation and skip the rest if you want, though we'd recommend reading all three so you understand what you're gaining or giving up with each approach.
You Have a Colorimeter — Here's Your Path
Owning a dedicated calibration sensor is, without question, the most accurate route you can take. If you've purchased a colorimeter like the Calibrite ColorChecker Display Plus, Datacolor SpyderX Pro, or similar device, you're in the best possible position.
Here's what you'll do. Connect the colorimeter to your computer via USB. Launch your calibration software (DisplayCAL, Calman, or the software bundled with your device).
The software walks you through setting your target values, then prompts you to place the colorimeter flat against the center of your screen. It displays a series of known color patches while the sensor measures what your monitor actually outputs. From those measurements, it builds an ICC profile that corrects every deviation your display has.
The entire process typically takes five to fifteen minutes. The result is a custom color profile assigned to your operating system that adjusts every color your monitor shows in real time. Your editing software reads this profile, so what you see in Lightroom or DaVinci Resolve matches the standard your work is supposed to target.
A few things worth knowing about this path. You'll want to let your monitor warm up for at least thirty minutes before starting calibration. Place the colorimeter on a flat, stable surface or use a monitor hood to block ambient light during the process.
And don't place the sensor at an angle; it needs full, flush contact with the screen surface to read accurately. For glossy screens, some users lightly wet the sensor face to improve contact, though most modern matte-finish editing monitors work fine dry.
You Don't Have a Colorimeter — Here's What You Can Still Do
Not everyone can justify spending $70 to $300 on a dedicated sensor, and that's completely fair. If you fall into this category, you still have options. They're less accurate, yes.
But they're dramatically better than running a completely uncalibrated monitor for professional editing work.
Your first option is your operating system's built-in calibration tools. On Windows, the "Calibrate Display Color" utility (search for it in the Start menu) guides you through adjusting gamma, brightness, contrast, and color balance using on-screen reference images. On macOS, the Display Calibrator Assistant (found under System Preferences > Displays > Color > Calibrate) offers a similar walkthrough, including the ability to set a custom white point and target gamma.
The catch with both tools is that you're relying entirely on your eyes. Human vision is remarkably bad at judging absolute color accuracy in isolation because our brains constantly adapt to what we're looking at. That said, in our research, the consensus among editing professionals is that even a rough software calibration gets you within a usable range.
Use these OS tools as a starting point, not a final destination.
A second option that bridges the gap involves downloading a known ICC profile for your exact monitor model. Many manufacturers publish these profiles on their support pages, and some calibration communities share crowdsourced profiles. You download the file, right-click it, and select "Install Profile" (Windows) or add it via the Displays preference pane (macOS).
The limitation here is obvious: that ICC profile was built for a different unit of the same monitor. No two panels are exactly identical, even from the same production batch. But it's a solid starting point if a colorimeter isn't in your budget right now.
If you're serious about editing work, we'd recommend saving for a colorimeter as your next equipment priority. Even an entry-level model provides dramatically better results than manual methods. Think of the software-only path as your interim solution, not your permanent workflow.
Your Monitor Has a Built-In Sensor — Lucky You
Some 27-inch editing monitors ship with an integrated calibration sensor. Models like the Eizo ColorEdge CS2740, BenQ SW272U, and ASUS ProArt PA279CRV with its built-in sensor module fall into this category. If yours does, you're in the most convenient situation of all.
The process is similar to using an external colorimeter, except you never need to place anything on your screen. The built-in sensor deploys or activates from the monitor's OSD menu, and it reads the display from inside the chassis, measuring the actual light output after it passes through the panel. External software on your computer sends the test signals to the monitor; the internal sensor measures them and correction data writes directly into the monitor's hardware LUT (look-up table).
Hardware calibration like this is the gold standard because it doesn't tax your graphics card's LUT or reduce your bit depth the way a software-only ICC profile can. You get full correction with no banding or tone loss. The process takes roughly five to ten minutes per session.
Check your monitor's OSD for a "Calibration" or "Color Management" menu section. Consult your user manual for the specific key combination or menu path to initiate the built-in calibration routine. Some models require specific software, like EIZO's Calibration Navigator or BenQ's Palette Master Element, to manage the process from your computer.
Step-by-Step: How to Calibrate Your 27-Inch Monitor for Editing
Now let's walk through the full calibration process. This workflow assumes you have a colorimeter and calibration software, but we'll note where the steps differ for manual or built-in calibration methods. The screens and menus shown in software vary by brand; DisplayCAL, for example, places profile verification on a tab that you access after the main calibration completes.
Step 1: Prep Your Environment and Monitor
This step gets skipped more often than any other, and it makes everything that follows less reliable. Get it right and the rest is straightforward.
- Let your monitor warm up for at least 30 minutes, ideally 60 minutes. Drift is real during the first half hour after power-on.
- Reset your monitor to factory defaults through the OSD menu. This clears any old custom settings that might conflict with your new calibration.
- Disable adaptive features like dynamic contrast, auto-brightness, eco mode, and ambient light compensation. These features work against calibration by changing output on the fly.
- Check your room lighting. Calibrate in the same light Conditions you normally edit under. Avoid direct sunlight on the screen and strongly colored walls nearby.
- Close other applications, especially anything that might push full-screen color changes. Notifications and screen-dimming tools can interrupt the process.
Step 2: Know Your Targets (Brightness, Gamma, White Point, Gamut)
Before you run any software, decide what standard your editing workflow requires. Your calibration targets depend entirely on what you're editing for.
| Parameter | Photo & Video Editing | Print Editing | Web/Digital Design |
|---|---|---|---|
| Brightness | 100–120 cd/m² | 80–100 cd/m² | 100–120 cd/m² |
| White Point | D65 (6500K) | D50 (5000K) | D65 (6500K) |
| Gamma | 2.2 | 2.2 or L* curve | 2.2 |
| Gamut | Adobe RGB or DCI-P3 | Adobe RGB | sRGB |
| Delta E Target | < 2.0 average | < 2.0 average | < 2.0 average |
If you edit for multiple outputs (for example, photos that go both to web and print), you might need to switch targets between sessions. Some calibration software lets you save multiple profiles you can toggle between.
Step 3: Choose Your Calibration Software
Your software options fall into three tiers.
Free and open-source: DisplayCAL (built on the ArgyllCMS engine) is the most capable free option. It supports virtually every colorimeter on the market, offers deep customization of calibration parameters, and includes profile verification tools. The tradeoff is a steeper learning curve and a user interface that hasn't aged gracefully.
Bundled commercial software: If you bought a colorimeter, it almost certainly came with bundled software. ColorChecker Calibration Studio (formerly X-Rite) and SpyderX software are both solid, streamlined options that walk you through the process with minimal decisions. They're less customizable than DisplayCAL but perfectly adequate for most editors.
Manufacturer-specific software: Eizo's BenQ's Palette Master Element, and ASUS ProArt's calibration utilities are designed for their respective monitors. If your monitor supports hardware LUT calibration, these tools are usually required to manage the process.
Step 4: Run the Calibration and Build Your ICC Profile
With your monitor warmed up, targets set, and software ready, here's the actual process.
- Place the colorimeter flat against the center of your screen. Most sensors have a weight or counterbalance designed to hang over the top bezel for stable contact.
- In your calibration software, confirm your target values and select your monitor type (LCD, wide-gamut LCD, etc.).
- Start the calibration. The software will display a sequence of color patches while the sensor reads each one. Sit still and don't cast shadows on the screen.
- For hardware calibration capable monitors, the software will prompt you to adjust RGB gains, brightness, and sometimes individual color channel controls through the monitor's OSD. Follow the on-screen guidance precisely.
- Once measurement completes, the software builds your ICC profile and, depending on your OS and software, installs it automatically or prompts you to install it manually.
The whole process takes five to fifteen minutes depending on your software's settings and how many patches it measures. Don't rush it.

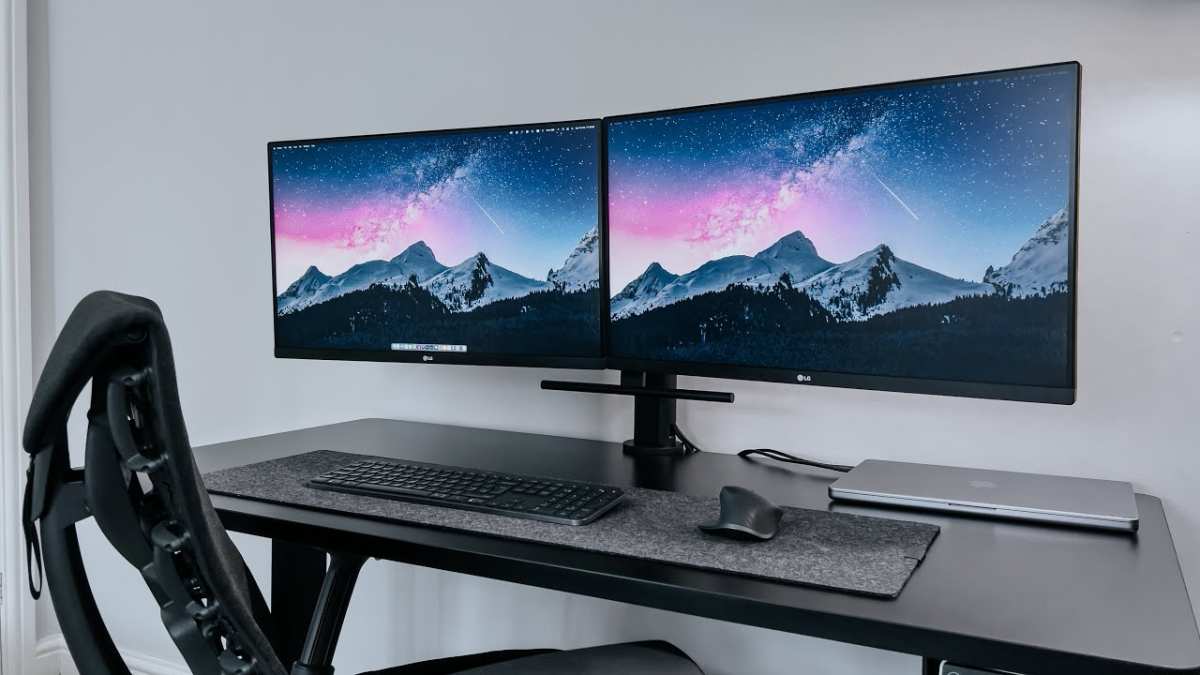
Image source: Wikimedia Commons / Friedrich Haag (CC BY-SA)
Step 5: Verify Your Results
After your ICC profile is built and installed, run a verification report. Most calibration software includes this as a post-calibration step or as a separate "profile check" action. It displays additional known color patches and measures them, comparing the measured values to the expected values from your ICC profile.
The result gives you a Delta E value for each patch. This tells you the difference between what your monitor is actually showing and what it should be showing. Individual patch results may vary slightly, so review the overall chart to catch any color axes that consistently miss the target.
What to look for:
- Average Delta E under 2.0 means your calibration is good enough for professional editing. Most people can't perceive differences below this threshold.
- Maximum Delta E under 4.0 is acceptable. If any single patch reads higher, it usually indicates a limitation of your monitor's panel uniformity.
- Average Delta E under 1.0 is excellent. If you're hitting this, your calibration is as good as most equipment can measure.
If your verification report shows poor results, check that your monitor was fully warmed up, the sensor was properly seated, and no ambient light was hitting the screen during calibration. Then run the calibration again.
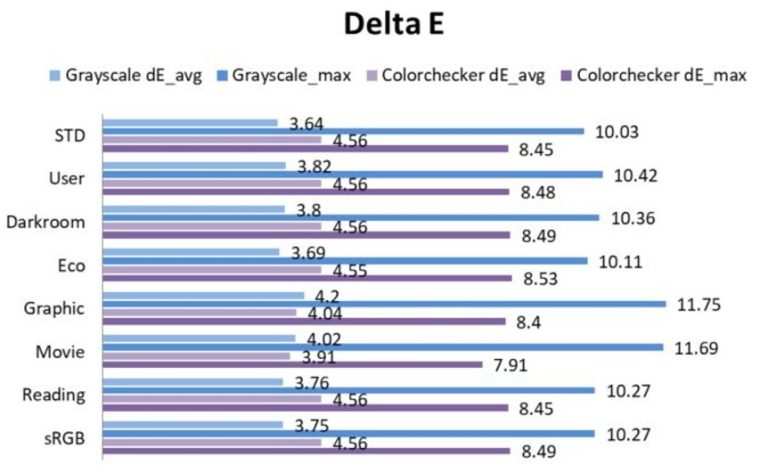
Image source: Allion Labs / Bing
Calibration Targets by Editing Workflow
One of the most common questions we encounter is what targets to use for different types of editing work. The answer depends on your output. Calibrating to the wrong standard is almost as bad as not calibrating at all because you'll be making color decisions based on a display that doesn't match your delivery format.
Photo Editing (Lightroom, Capture One, Photoshop)
For general photo editing, target D65 white point, Gamma 2.2, and a brightness of 100 to 120 cd/m². If you deliver primarily to print, use Adobe RGB as your target gamut. If your work stays digital, sRGB is the safer choice, though many photographers prefer editing in Adobe RGB or ProPhoto RGB and converting at export.
Video Editing and Color Grading (DaVinci Resolve, Premiere Pro)
Video work typically targets D65 and Gamma 2.4 for HD deliverables, or BT.1886 for HDR content. Your target gamut depends on your delivery spec: Rec. 709 for standard HD, DCI-P3 for theatrical or streaming HDR, and Rec. 2020 for UHD HDR. Brightness targets vary, but 100 cd/m² is the standard reference level for SDR video mastering.
Print Design and Prepress
Print workflows need D50 white point (matching the ISO 3664:2009 viewing standard for proofing) and brightness around 80 to 100 cd/m² to approximate reflective print viewing conditions. Adobe RGB is the standard gamut target. If you're doing contract proofing, your calibration should comply with ISO 12646 requirements.
Web and Digital Design
sRGB is your target gamut, D65 white point, Gamma 2.2, and 100 to 120 cd/m² brightness. This matches what the vast majority of consumer displays show, so your work will look as intended for most of your audience.
Hardware Calibration vs. Software Calibration: What's the Real Difference?
This distinction matters more than most guides explain, and choosing the wrong approach can limit your results.
Software calibration builds an ICC profile that your operating system or graphics driver uses to adjust colors before they reach your monitor. The correction happens in the signal chain between your GPU and your display. The limitation is that this approach uses your graphics card's LUT (look-up table), which has limited precision.
On an 8-bit display, aggressive ICC corrections can introduce banding or reduce your effective bit depth.
Hardware calibration writes correction data directly into the monitor's internal LUT. This requires a monitor with hardware LUT support (common on professional editing monitors from Eizo, BenQ, ASUS ProArt, and Dell UltraSharp) and compatible calibration software. The correction happens at the display level, so your graphics card's bit depth stays intact and you get more precise, deeper correction without banding.
If your monitor supports hardware calibration, use it. If it doesn't, software calibration via ICC profile is still effective and far better than nothing. Just be aware that on lower-bit-depth panels, you may see subtle banding in gradients after applying a heavy ICC correction.
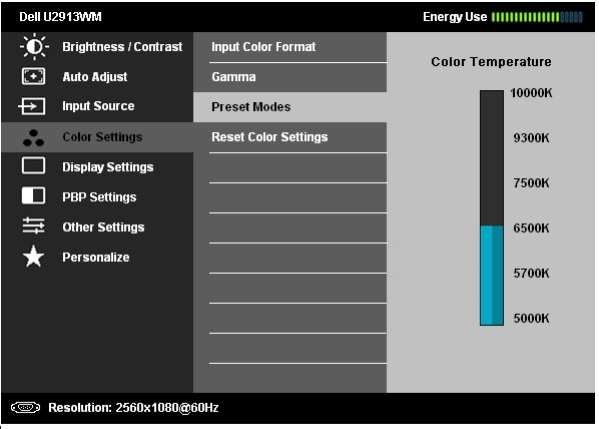
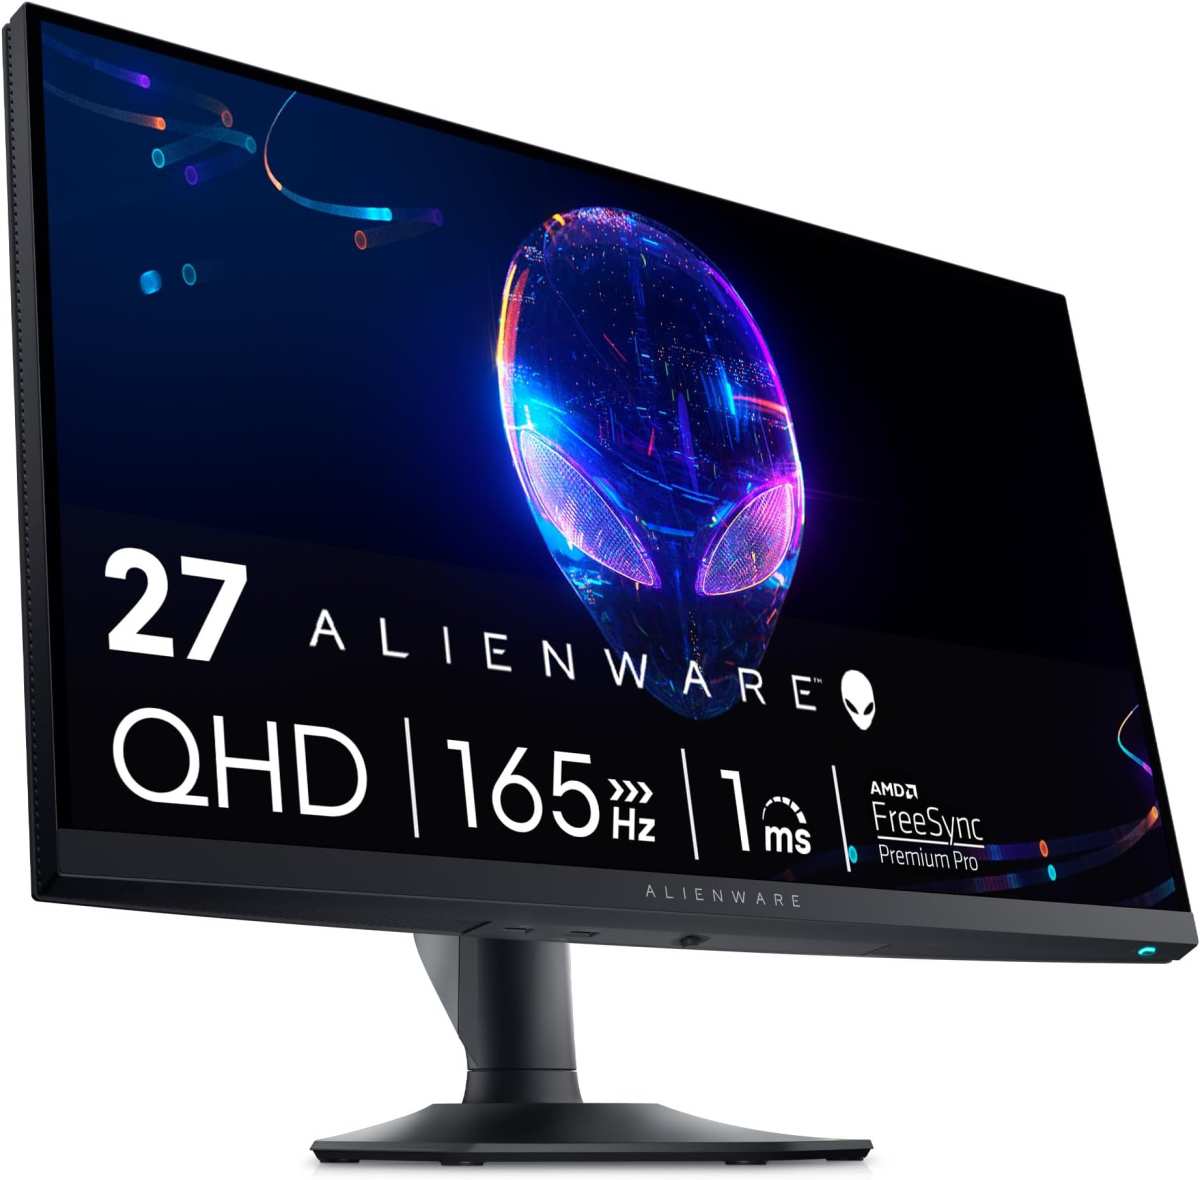
Image source: TFT Central / Bing
Common Mistakes That Ruin Your Calibration
After reviewing manufacturer documentation, calibration software guides, and community reports, these are the mistakes we see most often.
- Calibrating immediately after turning on the monitor. Your panel needs 30 to 60 minutes to stabilize. Calibrating on a cold monitor gives you a profile that drifts as the display warms up.
- Leaving dynamic contrast or eco mode enabled. These features override your calibration by adjusting brightness and contrast in real time based on content or ambient light.
- Calibrating in a brightly lit or inconsistently lit room. Your perception of the screen changes with your environment. Calibrate in the same conditions you edit in.
- Using the wrong target values for your workflow. D50 for video or D65 for print will make your work look wrong on every other calibrated display.
- Never recalibrating. Panel output drifts over time. Most manufacturers recommend recalibrating every two to four weeks for consistent accuracy.
- Placing the colorimeter at an angle or on a dirty screen. The sensor needs flush, perpendicular contact. Dust or fingerprints on the measurement area skew readings.
- Ignoring verification results. If your Delta E average is above 2.0, something went wrong. Re-run the calibration rather than trusting a poor profile.
How Often Should You Recalibrate?
Panel drift is gradual but real. Manufacturer specifications and calibration software documentation consistently recommend recalibrating every two to four weeks for professional editing work. IPS panels tend to drift more slowly than VA or TN panels, but no panel stays perfectly stable indefinitely.
If your work involves color-critical output like print proofing, broadcast deliverables, or product photography, lean toward the two-week end. For less critical work, four weeks is usually fine. Set a recurring calendar reminder so it doesn't slip.
OLED panels deserve a special note. They can shift faster than LCDs due to organic material degradation, so monthly calibration is a minimum. Also be mindful of burn-in risk from static UI elements during calibration sessions.
Recommended Tools and Software for 27-Inch Editing Monitors
Here's a practical breakdown of what's available at different price points, based on manufacturer specifications and verified user feedback.
Colorimeters
- Calibrite ColorChecker Display (~$70, $100): Entry-level, accurate enough for most editing work. Good for sRGB and standard gamut monitors.
- Calibrite ColorChecker Display Pro (~$150, $200): Higher accuracy, supports wider gamut measurements. Better choice for Adobe RGB and DCI-P3 monitors.
- Datacolor SpyderX Pro (~$170): Fast measurement, good software bundle. Popular choice among photographers.
- Calibrite ColorChecker Display Plus (~$250, $300): Highest accuracy in this price range. Supports HDR and wide-gamut measurements. Best value for serious editors.
Spectrophotometers
Spectrophotometers are more precise than colorimeters and can measure emissive light (monitors) as well as reflective prints. They're overkill for most editors but essential for prepress professionals who need to cross-reference screen and print calibration. The X-Rite i1Pro 2 and Calibrite Spectrometer are the standard options, typically priced from $400 to over $1,000.
Calibration Software
- DisplayCAL (free, open-source): Most powerful free option. Supports nearly all colorimeters. Steeper learning curve.
- Calman (bundled or paid): Industry standard for video and broadcast calibration. Excellent hardware calibration support.
- ColorChecker Calibration Studio (bundled with Calibrite devices): Streamlined, beginner-friendly.
- Palette Master Element (BenQ monitors): Required for hardware calibration on BenQ SW series.
- ASUS ProArt Calibration (ASUS monitors): Required for hardware calibration on ProArt monitors.
When to Call in a Professional (Or Upgrade Your Monitor)
Sometimes calibration alone isn't enough. If your monitor's panel is aging, has uneven backlighting, or simply doesn't cover the color gamut you need, no amount of calibration will fix that.
Signs you might need a new monitor rather than a new calibration:
- Your panel covers less than 95% of your target gamut (for example, an sRGB-only monitor used for DCI-P3 video work).
- Backlight uniformity is visibly uneven, with corners showing a different color or brightness than the center.
- Your Delta E values remain high after multiple calibration attempts, indicating panel degradation.
- You're editing HDR content on an SDR monitor.
For professional editing work, a 27-inch monitor with IPS or OLED panel, hardware LUT support, and at least 98% DCI-P3 or 99% Adobe RGB coverage is the current standard as of 2026. Models like the Eizo ColorEdge CS2740, BenQ SW272U, ASUS ProArt PA279CRV, and Dell UltraSharp U2723QE are frequently recommended by editing professionals.
Frequently Asked Questions
Can I calibrate my monitor without a colorimeter?
Yes. Your operating system's built-in calibration tools let you adjust gamma, brightness, and color balance visually. It's less accurate than using a colorimeter, but it's a meaningful improvement over an uncalibrated display.
Download a factory ICC profile from your monitor's support page as a starting point.
How long does monitor calibration take?
The measurement process itself takes five to fifteen minutes. Add thirty to sixty minutes of monitor warm-up time beforehand. Including setup and verification, budget about forty-five minutes to an hour for your first session.
Should I calibrate in sRGB or Adobe RGB?
It depends on your output. Use sRGB for web and digital design. Use Adobe RGB for print photography and prepress work.
Use DCI-P3 for video and film color grading. Match your calibration target to your delivery format.
Does calibration work with dual monitor setups?
Yes, but each monitor needs its own calibration and its own ICC profile. Calibrate each display independently with the colorimeter positioned on that specific screen. Your operating system can manage multiple profiles simultaneously.
How do I know if my monitor is accurate enough for editing?
Check your Delta E values after calibration. An average Delta E under 2.0 means your display is accurate enough for professional work. If your panel can't achieve this after multiple calibration attempts, it may be aging or simply not suitable for color-critical editing.
Is hardware calibration better than software calibration?
Yes, when available. Hardware calibration writes correction data into the monitor's internal LUT, preserving your graphics card's full bit depth and avoiding banding. Software calibration via ICC profile is still effective but has more limitations on lower-bit-depth panels.
Calibration Targets by Editing Workflow
One of the most common questions we encounter is what targets to use for different types of editing work. The answer depends on your output. Calibrating to the wrong standard is almost as bad as not calibrating at all because you'll be making color decisions based on a display that doesn't match your delivery format.
Photo Editing (Lightroom, Capture One, Photoshop)
For general photo editing, target D65 white point, Gamma 2.2, and a brightness of 100 to 120 cd/m². If you deliver primarily to print, use Adobe RGB as your target gamut. If your work stays digital, sRGB is the safer choice, though many photographers prefer editing in Adobe RGB or ProPhoto RGB and converting at export.
Video Editing and Color Grading (DaVinci Resolve, Premiere Pro)
Video work typically targets D65 and Gamma 2.4 for HD deliverables, or BT.1886 for HDR content. Your target gamut depends on your delivery spec: Rec. 709 for standard HD, DCI-P3 for theatrical or streaming HDR, and Rec. 2020 for UHD HDR. Brightness targets vary, but 100 cd/m² is the standard reference level for SDR video mastering.
Print Design and Prepress
Print workflows need D50 white point (matching the ISO 3664:2009 viewing standard for proofing) and brightness around 80 to 100 cd/m² to approximate reflective print viewing conditions. Adobe RGB is the standard gamut target. If you're doing contract proofing, your calibration should comply with ISO 12646 requirements.
Web and Digital Design
sRGB is your target gamut, D65 white point, Gamma 2.2, and 100 to 120 cd/m² brightness. This matches what the vast majority of consumer displays show, so your work will look as intended for most of your audience.
Hardware Calibration vs. Software Calibration: What's the Real Difference?
This distinction matters more than most guides explain, and choosing the wrong approach can limit your results.
Software calibration builds an ICC profile that your operating system or graphics driver uses to adjust colors before they reach your monitor. The correction happens in the signal chain between your GPU and your display. The limitation is that this approach uses your graphics card's LUT (look-up table), which has limited precision.
On an 8-bit display, aggressive ICC corrections can introduce banding or reduce your effective bit depth.
Hardware calibration writes correction data directly into the monitor's internal LUT. This requires a monitor with hardware LUT support (common on professional editing monitors from Eizo, BenQ, ASUS ProArt, and Dell UltraSharp) and compatible calibration software. The correction happens at the display level, so your graphics card's bit depth stays intact and you get more precise, deeper correction without banding.
If your monitor supports hardware calibration, use it. If it doesn't, software calibration via ICC profile is still effective and far better than nothing. Just be aware that on lower-bit-depth panels, you may see subtle banding in gradients after applying a heavy ICC correction.
Image source: TFT Central / Bing
Common Mistakes That Ruin Your Calibration
After reviewing manufacturer documentation, calibration software guides, and community reports, these are the mistakes we see most often.
- Calibrating immediately after turning on the monitor. Your panel needs 30 to 60 minutes to stabilize. Calibrating on a cold monitor gives you a profile that drifts as the display warms up.
- Leaving dynamic contrast or eco mode enabled. These features override your calibration by adjusting brightness and contrast in real time based on content or ambient light.
- Calibrating in a brightly lit or inconsistently lit room. Your perception of the screen changes with your environment. Calibrate in the same conditions you edit in.
- Using the wrong target values for your workflow. D50 for video or D65 for print will make your work look wrong on every other calibrated display.
- Never recalibrating. Panel output drifts over time. Most manufacturers recommend recalibrating every two to four weeks for consistent accuracy.
- Placing the colorimeter at an angle or on a dirty screen. The sensor needs flush, perpendicular contact. Dust or fingerprints on the measurement area skew readings.
- Ignoring verification results. If your Delta E average is above 2.0, something went wrong. Re-run the calibration rather than trusting a poor profile.
How Often Should You Recalibrate?
Panel drift is gradual but real. Manufacturer specifications and calibration software documentation consistently recommend recalibrating every two to four weeks for professional editing work. IPS panels tend to drift more slowly than VA or TN panels, but no panel stays perfectly stable indefinitely.
If your work involves color-critical output like print proofing, broadcast deliverables, or product photography, lean toward the two-week end. For less critical work, four weeks is usually fine. Set a recurring calendar reminder so it doesn't slip.
OLED panels deserve a special note. They can shift faster than LCDs due to organic material degradation, so monthly calibration is a minimum. Also be mindful of burn-in risk from static UI elements during calibration sessions.
Recommended Tools and Software for 27-Inch Editing Monitors
Here's a practical breakdown of what's available at different price points, based on manufacturer specifications and verified user feedback.
Colorimeters
- Calibrite ColorChecker Display (~$70, $100): Entry-level, accurate enough for most editing work. Good for sRGB and standard gamut monitors.
- Calibrite ColorChecker Display Pro (~$150, $200): Higher accuracy, supports wider gamut measurements. Better choice for Adobe RGB and DCI-P3 monitors.
- Datacolor SpyderX Pro (~$170): Fast measurement, good software bundle. Popular choice among photographers.
- Calibrite ColorChecker Display Plus (~$250, $300): Highest accuracy in this price range. Supports HDR and wide-gamut measurements. Best value for serious editors.
Spectrophotometers
Spectrophotometers are more precise than colorimeters and can measure emissive light (monitors) as well as reflective prints. They're overkill for most editors but essential for prepress professionals who need to cross-reference screen and print calibration. The X-Rite i1Pro 2 and Calibrite Spectrometer are the standard options, typically priced from $400 to over $1,000.
Calibration Software
- DisplayCAL (free, open-source): Most powerful free option. Supports nearly all colorimeters. Steeper learning curve.
- Calman (bundled or paid): Industry standard for video and broadcast calibration. Excellent hardware calibration support.
- ColorChecker Calibration Studio (bundled with Calibrite devices): Streamlined, beginner-friendly.
- Palette Master Element (BenQ monitors): Required for hardware calibration on BenQ SW series.
- ASUS ProArt Calibration (ASUS monitors): Required for hardware calibration on ProArt monitors.
When to Call in a Professional (Or Upgrade Your Monitor)
Sometimes calibration alone isn't enough. If your monitor's panel is aging, has uneven backlighting, or simply doesn't cover the color gamut you need, no amount of calibration will fix that.
Signs you might need a new monitor rather than a new calibration:
- Your panel covers less than 95% of your target gamut (for example, an sRGB-only monitor used for DCI-P3 video work).
- Backlight uniformity is visibly uneven, with corners showing a different color or brightness than the center.
- Your Delta E values remain high after multiple calibration attempts, indicating panel degradation.
- You're editing HDR content on an SDR monitor.
For professional editing work, a 27-inch monitor with IPS or OLED panel, hardware LUT support, and at least 98% DCI-P3 or 99% Adobe RGB coverage is the current standard as of 2026. Models like the Eizo ColorEdge CS2740, BenQ SW272U, ASUS ProArt PA279CRV, and Dell UltraSharp U2723QE are frequently recommended by editing professionals.
Frequently Asked Questions
Can I calibrate my monitor without a colorimeter?
Yes. Your operating system's built-in calibration tools let you adjust gamma, brightness, and color balance visually. It's less accurate than using a colorimeter, but it's a meaningful improvement over an uncalibrated display.
Download a factory ICC profile from your monitor's support page as a starting point.
How long does monitor calibration take?
The measurement process itself takes five to fifteen minutes. Add thirty to sixty minutes of monitor warm-up time beforehand. Including setup and verification, budget about forty-five minutes to an hour for your first session.
Should I calibrate in sRGB or Adobe RGB?
It depends on your output. Use sRGB for web and digital design. Use Adobe RGB for print photography and prepress work.
Use DCI-P3 for video and film color grading. Match your calibration target to your delivery format.
Does calibration work with dual monitor setups?
Yes, but each monitor needs its own calibration and its own ICC profile. Calibrate each display independently with the colorimeter positioned on that specific screen. Your operating system can manage multiple profiles simultaneously.
How do I know if my monitor is accurate enough for editing?
Check your Delta E values after calibration. An average Delta E under 2.0 means your display is accurate enough for professional work. If your panel can't achieve this after multiple calibration attempts, it may be aging or simply not suitable for color-critical editing.
Is hardware calibration better than software calibration?
Yes, when available. Hardware calibration writes correction data into the monitor's internal LUT, preserving your graphics card's full bit depth and avoiding banding. Software calibration via ICC profile is still effective but has more limitations on lower-bit-depth panels.
- Why Your 27-Inch Monitor Needs Calibration (And Why "Looking Fine" Isn't Enough)
- Quick Answer: What Calibration Actually Does to Your Editing Display
- First, Let's Figure Out Your Situation: Hardware or Software Calibration?
- Step-by-Step: How to Calibrate Your 27-Inch Monitor for Editing
- Calibration Targets by Editing Workflow
- Hardware Calibration vs. Software Calibration: What's the Real Difference?
- Common Mistakes That Ruin Your Calibration
- How Often Should You Recalibrate?
- Recommended Tools and Software for 27-Inch Editing Monitors
- When to Call in a Professional (Or Upgrade Your Monitor)
- Frequently Asked Questions

Similar Posts