How to Mount Office Monitor on Desk
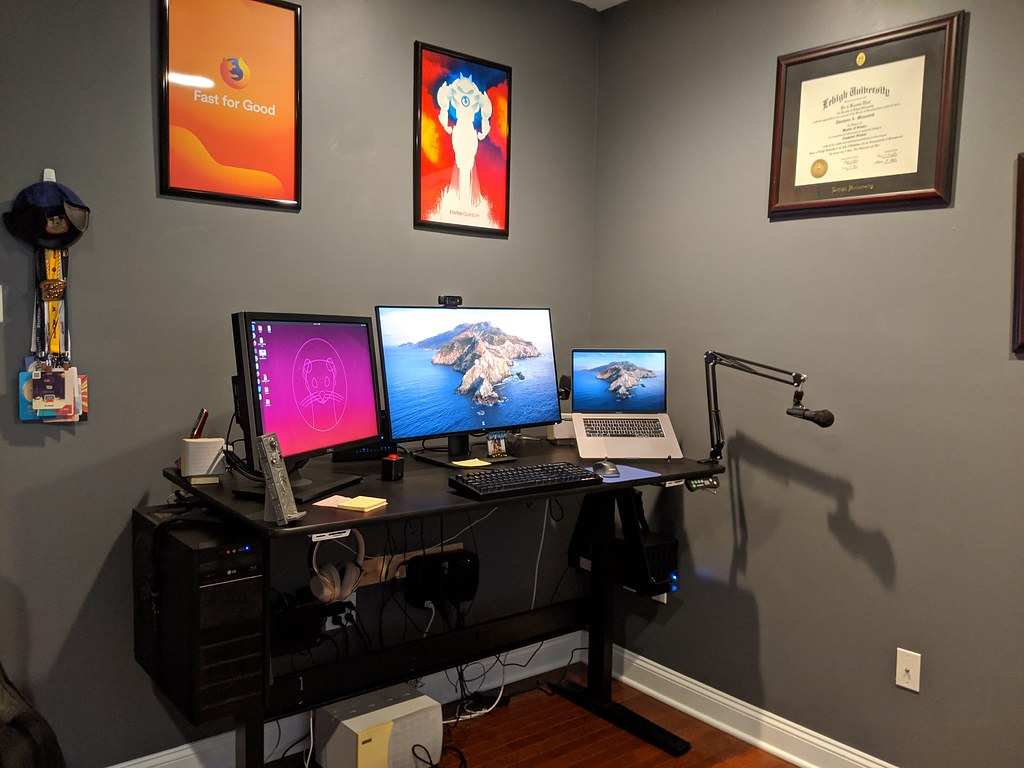
Learning how to mount office monitor on desk setups is one of the easiest ways to reclaim your workspace and fix your posture at the same time. The problem is that buying the wrong mount or installing it incorrectly leads to wobble, sagging, or even a monitor face-down on your keyboard. Most people grab the first arm they see online and skip the compatibility checks that actually matter.
The process itself is straightforward once you know what you're working with. The VESA FDMI standard, for instance, defines the mounting hole patterns on the back of most flat-panel displays, and matching that pattern to a compatible arm is the single most important step in the whole process. Everything else, from choosing your mount type to dialing in the gas spring tension, flows from getting that first decision right.
Quick Answer
Mount a monitor on your desk in five steps. First, check that your monitor has VESA mounting holes on the back. Second, pick a clamp, grommet, or wall mount based on your desk type and thickness.
Third, secure the mount base to your desk or wall. Fourth, attach the VESA plate to your monitor and hook it onto the arm. Fifth, adjust the height, tilt, and tension so the screen stays exactly where you put it.
Why Most People Get Monitor Mounting Wrong
The biggest mistake is treating this like a simple "buy a stick and screw it on" situation. It's not. Your desk material, the monitor's weight, the mounting hole pattern, and how much you need to adjust the screen throughout the day all determine which setup will actually work.
A clamp mount on a hollow laminate desk with a 32-inch panel is a disaster waiting to happen. The clamp crushes the desk surface, the arm sagges under the weight, and within a month you're staring at a monitor that slowly sinks to the desk no matter how many times you adjust it. Meanwhile, someone with a solid wood desk and a 24-inch monitor can get away with a budget gas-spring arm and never have an issue.
So before you spend a dime, you need to answer a handful of questions about your specific setup. That's what the next few sections walk through.
First Things First: Check Your Monitor and Desk Before You Buy Anything
This is the part everyone skips, and it's the part that causes every mounting headache. Two minutes of checking now saves you from returns, wobble, or a hole in your wall you didn't plan on.
Does Your Monitor Even Support a Mount?
Look at the back of your monitor. You should see either a square pattern of four threaded holes or a rectangular adapter plate attached with screws. That's the VESA mounting interface, and it's standardized under the Flat Display Mounting Interface (FDMI) specification.
The most common patterns are:
- 75 x 75mm. Found on smaller monitors, usually 19 to 24 inches.
- 100 x 100mm. The standard for most 24 to 32-inch office and gaming monitors.
- 200 x 200mm. Used on larger displays, typically 32 inches and up.
If you don't see those holes, some monitors hide them behind a plastic cover or the factory stand's adapter. Check your user manual. If your monitor truly lacks VESA mounting points, some third-party adapter plates can attach to the stand neck.
That said, these are a hit-or-miss solution, and a freestanding monitor riser is often the safer route in that case.
Also weigh your monitor with the factory stand removed. Not just the panel. You need the weight without the original base because that's what the arm will actually carry.
A typical 24-inch office monitor is around 3 to 5 kilograms. A 32-inch panel might be 6 to 9 kilograms. That number determines which arm you need.
What Kind of Desk Do You Actually Have?
Your desk determines which mount base you can use. Monitor mounts attach to your desk in three main ways, and each one has specific requirements.
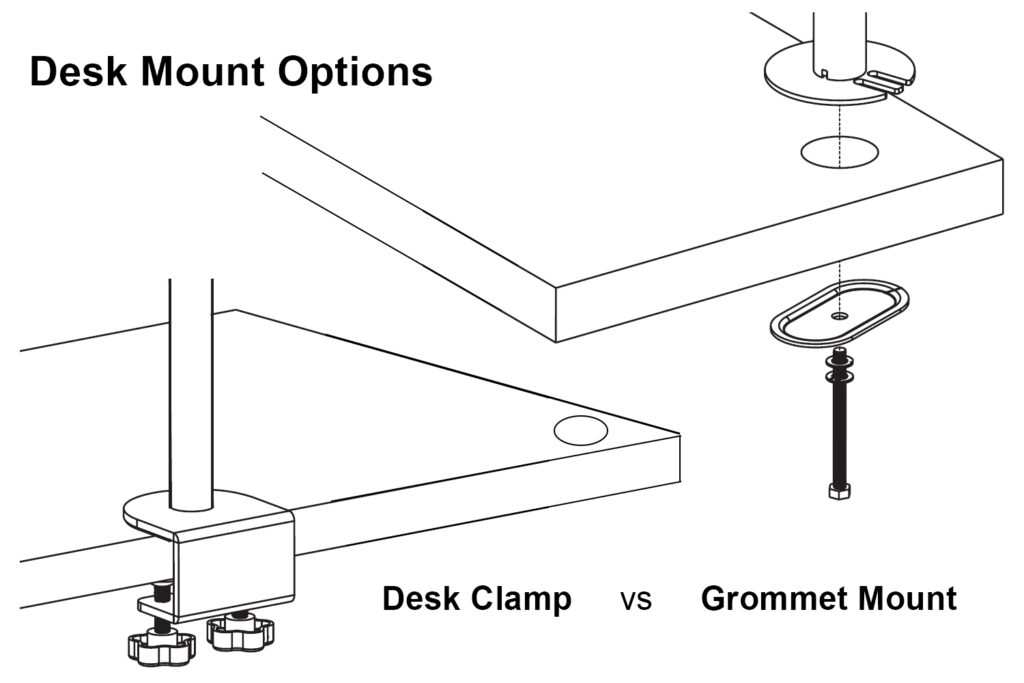
- Clamp mount. Grips the front edge of the desk. Needs a desk thickness between roughly 10 and 60 millimeters. Cannot overhang a hollow edge by more than about 80 millimeters without extra support.
- Grommet mount. Slides through a pre-drilled hole in the desk. Requires an existing hole or the willingness to drill one, typically 35 to 60 millimeters in diameter.
- Wall mount. Bypasses the desk entirely. Requires a stud, masonry anchor, or toggle bolt behind the wall surface.
Press on your desk surface. If it flexes, it's hollow-core or thin particleboard. Clamp mounts on that material can compress the surface over time and lose grip.
In that case, a reinforcement plate, a freestanding mount, or a grommet mount with a large backing washer distributes the load better.
Clamp Mount vs. Grommet Mount vs. Wall Mount: Which One Fits Your Situation
There's no universal "best" mount. The right one depends on your desk, your space, and what you can modify. Here's how each option works and who it's for.
Clamp Mount
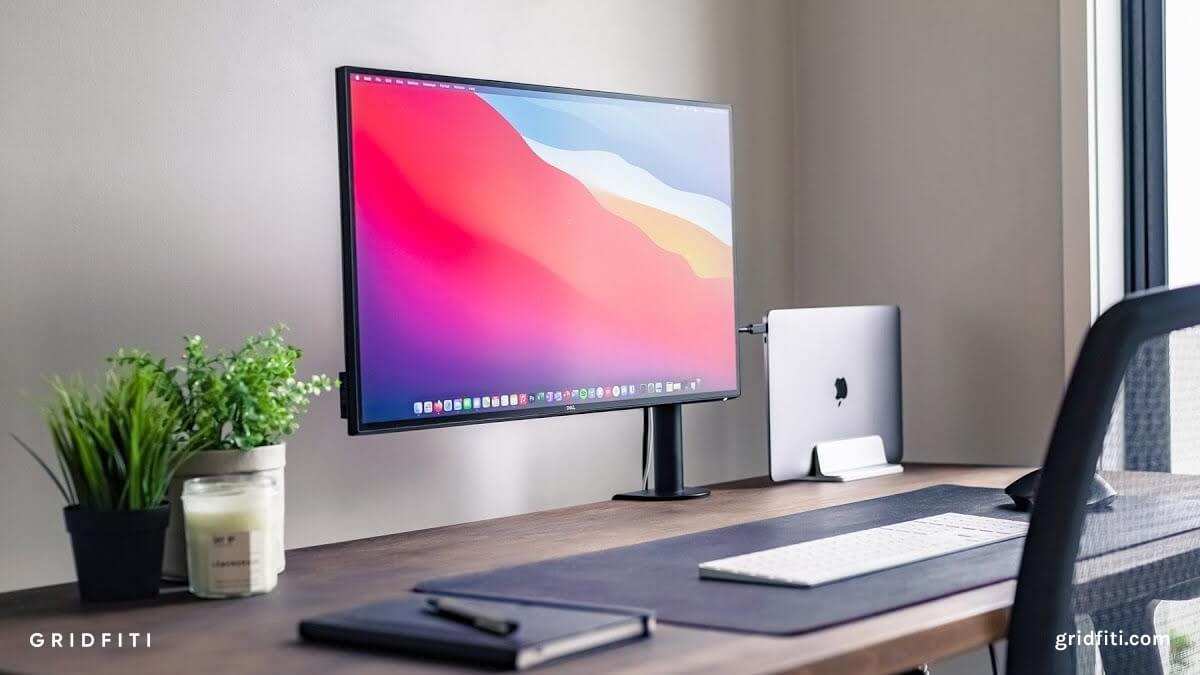
This is the go-to for most home office and rental setups. You tighten a C-shaped clamp onto the front edge of your desk, tighten a few bolts by hand or with an Allen key, and you're done. No drilling, no permanent marks, and you can remove it in under a minute if you move desks.
Best for: People who rent, solid wood or thick laminate desks, desk edges that are at least 10 millimeters thick, and anyone who wants a quick no-drill installation.
Watch out for: Hollow desks that compress under clamp pressure. If your desk has a thin edge and a hollow core, the clamp can crush the surface and lose grip within a few months. A reinforcement plate, sometimes called a desk protector or clamp spreader, prevents this by distributing force across a wider area.
Grommet Mount
A grommet mount slides through a round hole in your desk and is secured from underneath with a large washer and bolt. It's the most stable of the three options because it transfers force vertically through the desk rather than relying on edge grip.
Best for: Desks with pre-existing holes (many standing desks come with them), solid-surface desks where you're willing to drill, and heavier monitors that need maximum stability.
Watch out for: You need to drill a clean hole if one doesn't exist. That's permanent. If you're renting, check your lease.
Also, the grommet mount's position is fixed. You can't slide it along the desk edge the way you can reposition a clamp.
Wall Mount
A wall mount attaches to the wall behind your desk, completely bypassing the desk surface. This frees up maximum desk space and gives you the widest range of motion.
Best for: Studios, small desks with no usable edge, permanent installations, and setups where you want the monitor floating above the desk with nothing underneath.
Watch out for: You need to hit a stud or use appropriate anchors for your wall type. Drywall alone won't hold a monitor arm under tension. You also need to manage cables down the wall, which may require in-wall routing or a cable raceway.
Quick Comparison Table
| Feature | Clamp Mount | Grommet Mount | Wall Mount |
|---|---|---|---|
| Installation difficulty | Easy, no tools beyond Allen key | Moderate, may need drilling | Moderate to hard, needs stud/anchor |
| Desk damage risk | None | Permanent hole if drilling | None to desk |
| Stability | Good on solid desks | Excellent | Excellent |
| Adjustability after install | Slide along desk edge | Fixed position | Fixed position |
| Renter-friendly | Yes | Only if hole exists | Depends on landlord |
| Best desk thickness | 10 to 60mm | Any with hole | N/A |
| Typical price range | $25 to $150 | $30 to $160 | $20 to $120 |
How to Choose the Right Monitor Arm for Your Setup
Once you've picked your mount base type, you need to match the arm itself to your monitor and your daily use. Not all arms are created equal, and the cheap ones have a way of failing right at the worst moment.
Single vs. Dual Monitor Arms
If you're running one monitor, a single arm is all you need. If you're running two, you have two choices: two separate single arms or one dual-arm unit.
Two separate arms give you more flexibility in positioning each screen independently. A dual-arm unit is cleaner looking and only needs one clamp or grommet point, which matters if your desk edge space is tight.
For most dual-monitor office setups, two separate arms are the better call. You can angle each screen independently, and if one arm eventually needs replacing, you only swap one.
Gas Spring vs. Fixed Arm
Gas spring arms use a pneumatic cylinder that counterbalances the monitor's weight. You can push the screen up, down, left, right, and it stays put. Fixed arms use friction joints or mechanical pivots.
You loosen a knob, reposition, and tighten again.
Gas spring is the standard for office use in 2026. It's smoother, faster, and makes micro-adjustments effortless. Fixed arms are cheaper and fine for setups where you rarely move the screen, but most people end up adjusting more than they expect once the arm is on their desk.
Weight Capacity and VESA Compatibility
Every arm lists a weight range and a supported VESA pattern. Both need to match your monitor.
- Weight range. If your arm supports 2 to 9 kilograms and your monitor weighs 7 kilograms, you're fine. If your monitor weighs 10 kilograms, the arm will sag. Always stay within the rated range, ideally in the middle third of it for the smoothest feel.
- VESA pattern. If your monitor uses 100 x 100mm and the arm supports 75 x 75 and 100 x 100, you're good. Most modern arms cover both. Some ultrawide or large panels use 200 x 200mm, and not every arm supports that. Check before you buy.
A gas spring that's properly tensioned for your monitor's weight should hold the screen at any position without drifting up or down. If it drifts, the tension needs adjustment. Most arms have a small Allen key adjustment on the joint near the VESA plate.
Turning it clockwise increases counterbalance force. Turning it decreases it. Small quarter-turns are all you need.
Step-by-Step: How to Mount Your Monitor on the Desk
Now that you've matched your monitor, desk, and mount type, here's the actual installation. Set aside about 20 to 30 minutes. Most of that is cable routing and adjustment, not the physical mounting.
What You'll Need
- Your monitor arm (clamp or grommet base attached)
- The VESA mounting plate and hardware that came with the arm
- A Phillips head screwdriver or the Allen key included with your arm
- A tape measure
- A pencil (for marking grommet hole position if needed)
- A drill with a 35 to 40mm step bit or Forstner bit (grommet mount only, if no hole exists)
- A soft towel or blanket to lay the monitor face-down on
Step 1: Prepare Your Workspace
Clear your desk. Remove the monitor and its factory stand. Lay the monitor face-down on a soft, flat surface so the back panel is accessible and the screen is protected.
If you're removing a factory stand, there's usually a quick-release button or four screws holding the neck to the panel. Keep the factory screws in a bag in case you ever revert to the original stand.
Step 2: Attach the Base to Your Desk
For clamp mounts: Slide the clamp over the front edge of your desk at your desired position. Tighten the clamp bolt by hand first, then snug it with the Allen key. Don't overtighten on thin or laminate desks.
The clamp should be firm enough that the base doesn't rotate when you push on it.
For grommet mounts: If your desk has a pre-existing hole, slide the grommet bolt through from above and secure the backing plate and nut from underneath. If you need to drill, measure the hole position carefully. Center it where you want the monitor to sit.
Drill from both sides to avoid tear-out on laminate surfaces.
Step 3: Mount the VESA Plate to Your Monitor
Align the VESA plate with the mounting holes on the back of your monitor. Use the four bolts that came with your arm. Hand-tighten first, then snug with a screwdriver or Allen key.
Do not overtighten into the monitor. The threads in most monitor housings are shallow metal or plastic inserts. Over-torquing strips them, and then you've got a monitor with ruined mounting points.
Firm and snug is enough. The arm holds the monitor, not the bolts alone.
Step 4: Hook the Monitor Onto the Arm
Most gas spring arms have a quick-release VESA head. It's a plate with a dovetail or hook slot. Slide the VESA plate attached to your monitor down onto the arm's head until it clicks or seats firmly.
Lift the monitor by the arm, not by the panel, to test that it's locked in. If it slides off, the quick-release mechanism isn't engaged. Some arms have a small locking screw on the head.
Tighten that if yours has one.
Step 5: Adjust the Gas Spring Tension
If the monitor floats upward, the gas spring tension is too high. If it sinks down, the tension is too low. Locate the adjustment screw on the arm joint closest to the VESA plate.
Turn it in small increments, about a quarter turn at a time. Test by moving the monitor to your typical working height. A properly adjusted arm should hold the screen at any position without drifting up or down.
Step 6: Route Your Cables
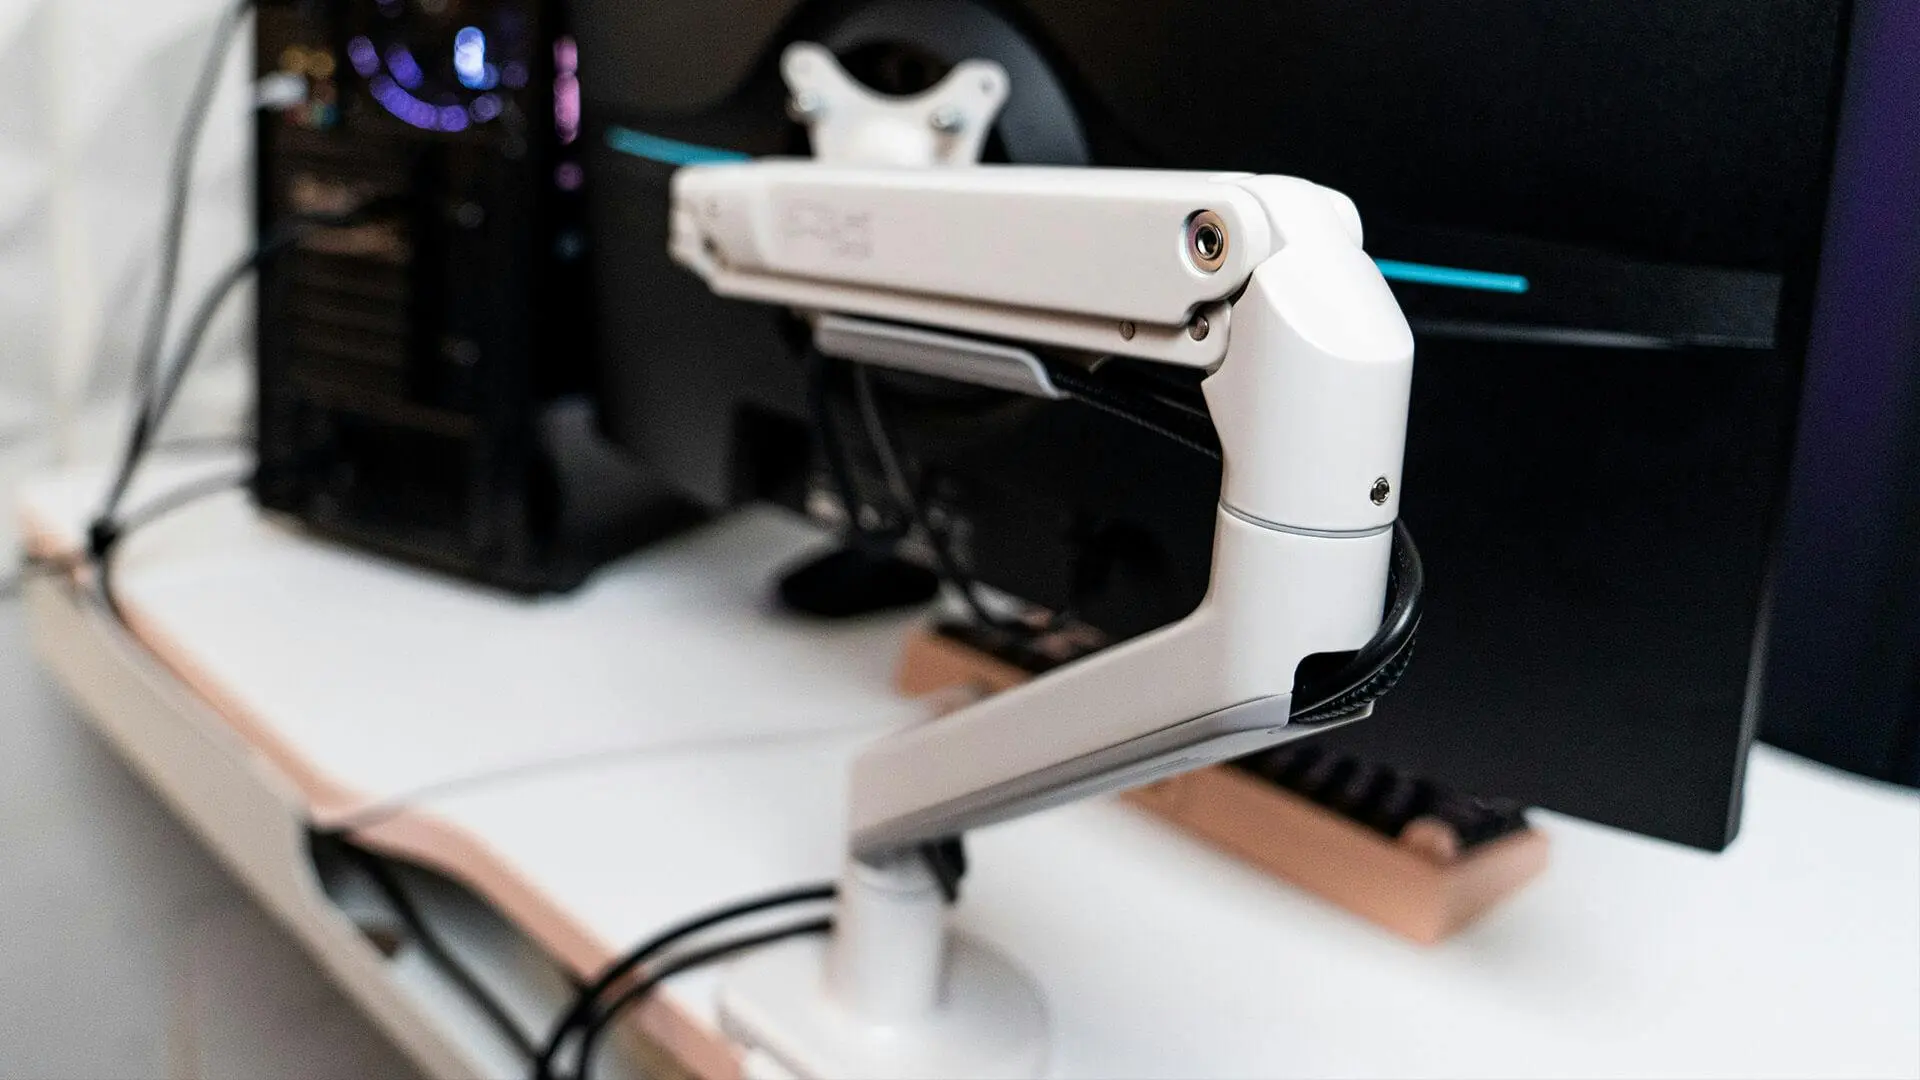
Most arms have cable channels built into the arms. Some are clips, some are covers. Run your power cable, DisplayPort or HDMI cable, and any USB cables through these channels.
Leave enough slack at the full extension of the arm so cables don't pull or snag when you adjust the monitor. A cable that's too tight will eventually damage the port on the back of the panel.
Step 7: Fine-Tune Your Ergonomic Position
Set the top of the screen at or slightly below eye level. The center of the screen should be about 15 to 20 degrees below your horizontal line of sight. The distance from your eyes to the screen should be roughly arm's length, about 50 to 70 centimeters.
If you're using a standing desk, adjust the monitor height for both sitting and standing positions. The arm should move smoothly between the two without needing to readjust the gas spring each time.
Common Mistakes That Cause Wobble, Sag, and Disaster
These are the errors that show up in negative reviews and warranty claims more than anything else.
- Exceeding the weight capacity. A 9-kilogram monitor on a 6-kilogram arm will sag eventually. The gas spring loses effectiveness over time under excess load.
- Clamping to a hollow desk without reinforcement. The clamp compresses the surface, the grip loosens, and the whole assembly slowly rotates. A metal spreader plate solves this.
- Over-tightening VESA bolts. Stripped threads in the monitor housing are permanent damage. Snug is enough.
- Ignoring cable slack. Cables that are too tight pull the monitor out of position and stress the ports over time.
- Mounting too far from the back edge. If the clamp is near the front of the desk, the arm's leverage multiplies the effective weight. Keep the mount within 15 to 20 centimeters of the back edge for best stability.
- Skipping the gas spring adjustment. An untensioned arm either floats the monitor to the top position or lets it sink. Either way, you're fighting the arm every time you look at the screen.
How Much Does a Good Monitor Mount Actually Cost?
Monitor arm pricing in 2026 breaks down into three tiers based on build quality, gas spring performance, and adjustability.
| Tier | Price Range | What You Get | Best For |
|---|---|---|---|
| Budget | $25 to $60 | Basic gas spring, single arm, limited tilt/swivel range, plastic cable covers | Single 24-inch monitor, light use, tight budget |
| Mid-range | $70 to $150 | Better gas spring, metal construction, full articulation, integrated cable management, quick-release VESA | Most office setups, dual monitors, standing desk pairing |
| Premium | $160 to $300+ | Heavy-duty gas spring, extended reach, ultrawide support, modular add-ons, lifetime warranty | Heavy panels, ultrawide monitors, professional workstations |
Aggregate user reviews suggest the sweet spot for most people is the $80 to $120 range. Arms in this bracket handle monitors up to 9 kilograms, offer full articulation, and last years without sag. Below $40, gas spring quality drops noticeably.
Above $200, you're paying for capacity and features most office users don't need.
Real-World Scenarios: What Works and What Doesn't
The Standing Desk User
If you're pairing a monitor arm with a sit-stand desk, mount the arm as far back on the desk edge as possible. This keeps the monitor stable when the desk is raised. A clamp mount at the back edge with a gas spring rated for your monitor weight is the standard recommendation.
Avoid placing the arm on the side of the desk. The leverage when the desk is at standing height amplifies any wobble.
The Renter Who Can't Drill
A clamp mount is your best friend here. No holes, no damage, no security deposit issues. If your rental desk is thin laminate, add a reinforcement plate between the clamp and the desk surface.
Some clamp mounts come with one. If yours doesn't, a steel plate about 100 by 150 millimeters and 3 millimeters thick works perfectly.
The Dual-Monitor Productivity Setup
Two separate single arms give you more flexibility than a dual-arm unit. You can angle each screen independently, and the setup looks cleaner. Mount both clamps near the back edge of the desk, spaced so the arms don't collide at full swivel.
For two 24-inch monitors, a desk at least 120 centimeters wide is the practical minimum.
The Tiny Desk Problem
If your desk is shallow, less than 60 centimeters front to back, a standard arm at full extension puts the monitor too close to your face. Look for a arm with a shorter horizontal reach, around 400 to 450 millimeters. A wall mount is another option if the desk sits against a wall.
It moves the mounting point off the desk entirely.
Maintenance: Keeping Your Mount Stable Long-Term
Monitor arms are mostly maintenance-free, but a few checks keep them solid.
- Re-tighten the clamp every six months. Wood and laminate compress slowly under clamp pressure. A quarter turn of the bolt restores grip.
- Check gas spring tension annually. If the monitor starts drifting up or down, adjust the tension screw by a quarter turn.
- Inspect VESA bolts once a year. Vibration and repeated adjustment can loosen them over time.
- Clean cable channels. Dust builds up in the clips and covers. A quick wipe keeps cables seated and looking clean.
The Decision Guide: What Should You Actually Do?
If you've read this far, you know the answer depends on your specific situation. Here's a quick way to land on the right setup.
If you rent and can't drill: Clamp mount with a reinforcement plate. Make sure your desk is at least 10 millimeters thick and solid enough that the clamp doesn't compress the surface.
If you have a standing desk: Clamp mount at the back edge. Pair it with a gas spring arm rated for your monitor's weight. This keeps the monitor stable at both sitting and standing heights.
If you run two monitors: Two separate single arms give you the best flexibility. Space the clamps so the arms don't collide when swiveled. A desk at least 120 centimeters wide handles two 24-inch panels comfortably.
If your desk is shallow or tiny: Look for a short-reach arm, around 400 millimeters, or consider a wall mount if the desk sits against a wall.
If you're on a tight budget: The $80 to $120 range is the sweet spot. You get a reliable gas spring, full articulation, and metal construction. Below $40, expect noticeable sag within a year.
Frequently Asked Questions
Can I mount a monitor without VESA holes?
Some monitors lack VESA mounting points entirely. Third-party adapter plates exist that attach to the factory stand neck, but compatibility is inconsistent. A freestanding monitor riser is often the more reliable solution for non-VESA panels.
Will a clamp mount damage my desk?
On a solid wood or thick laminate desk, no. On a hollow or thin laminate desk, the clamp can compress the surface over time. A reinforcement plate distributes the load and prevents damage.
How do I stop my monitor from sagging?
First, make sure the arm's weight capacity matches your monitor. Second, adjust the gas spring tension using the adjustment screw on the arm joint. A quarter turn at a time is all you need.
If the arm still sags after adjustment, the gas spring may be worn or the arm may be under-rated for the weight.
Is a monitor arm worth it for a single screen?
Yes. Even with one monitor, the desk space you reclaim and the ergonomic adjustability are significant. You can set the screen at the exact right height and angle for your body, and you can move it when you need to access the desk surface behind it.
Can I use a monitor arm on a glass desk?
It's not recommended. Clamp mounts concentrate force on a small area and can crack glass. Grommet mounts require drilling, which most glass desks can't handle.
A freestanding monitor riser or a wall mount are safer options for glass surfaces.
How long does installation take?
Most people complete the full installation in 20 to 30 minutes. The mounting itself takes about 10 minutes. Cable routing and gas spring adjustment take the rest.
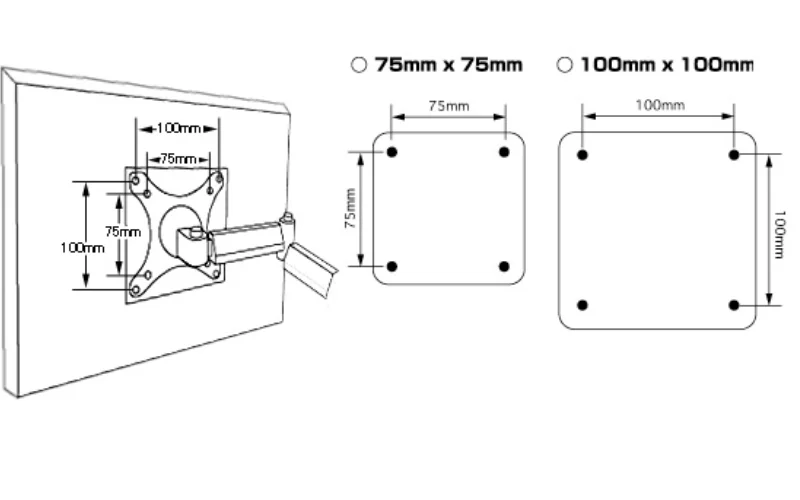
Image source: Bing (Web (fair-use with source credit))

Similar Posts