Why Are Ips Monitors Good for Editing
If you're shopping for a monitor specifically for photo or video editing, you've probably seen IPS panels recommended everywhere. So why are IPS monitors good for editing? It comes down to color accuracy, viewing angle consistency, and wide color gamut support that professionals actually rely on day to day.
These panels deliver reliable, predictable results whether you're retouching photos for print or grading video for broadcast.
IPS (In-Plane Switching) technology has been the standard choice in professional editing environments for well over a decade. Manufacturer specifications and independent testing consistently show IPS panels hitting Delta E values below 2, which means color differences are imperceptible to the human eye. That's the baseline that matters when your work needs to look accurate on client screens, in print, and across platforms.
The Quick Answer: What Makes IPS Panels Stand Out for Editing
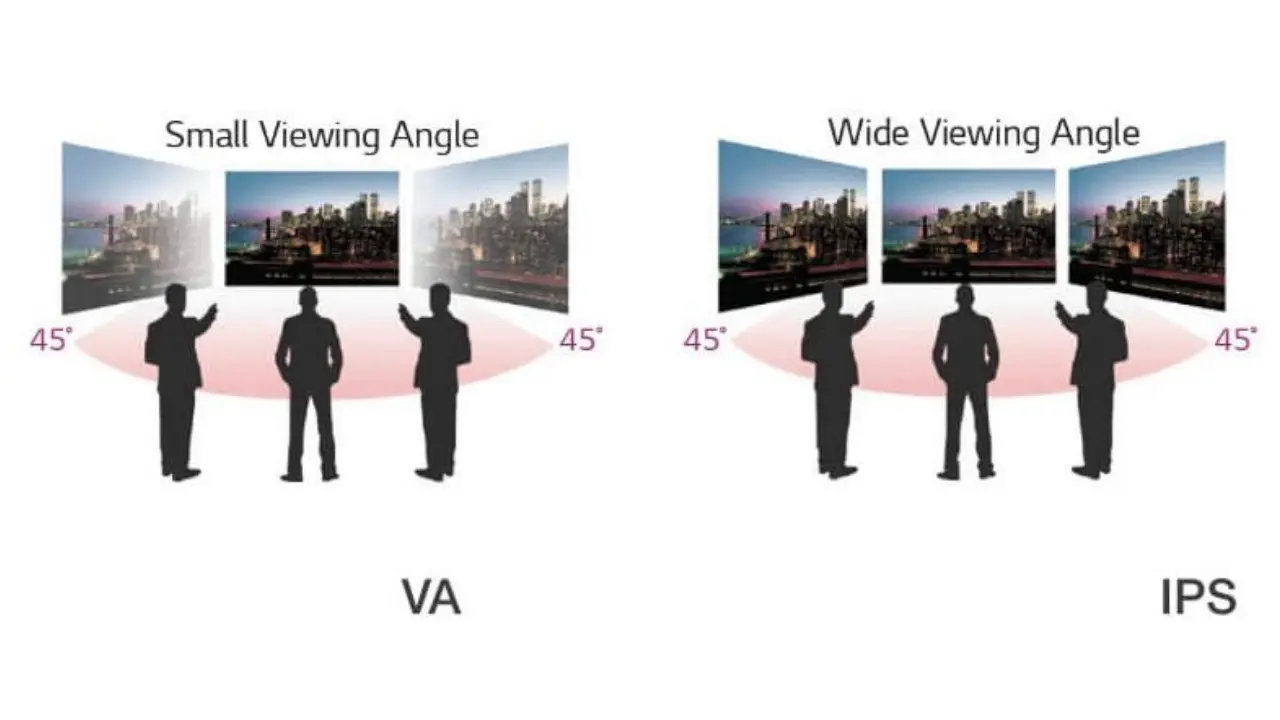
IPS monitors offer wide 178-degree viewing angles. Colors stay consistent even when you shift position. They support professional color gamuts like Adobe RGB and DCI-P3.
Most come factory calibrated for accurate color out of the box.
How IPS Technology Actually Works (And Why It Matters for Color)
IPS panels work differently from other LCD technologies. The liquid crystals inside are aligned parallel to the glass substrate. When voltage is applied, they rotate in-plane rather than tilting perpendicular to the panel.
This is where the name "In-Plane Switching" comes from.
That horizontal rotation is the key advantage. Light passing through the crystals stays more consistent across different angles. With TN (Twisted Nematic) panels, the crystals tilt vertically, which causes noticeable color shifts and contrast changes the moment you move off-center.
VA (Vertical Alignment) panels have their own issues with color shift at moderate angles.
For editing work, this translates directly into practical benefits:
- Color remains stable when you lean back in your chair or shift to one side. You don't have to park yourself dead center in the screen.
- Multiple people can view the same screen without the colors distorting for anyone off to the side, which is useful when a client sits next to you.
- Neutral tones stay neutral. There's no warm or cool tint creeping in when you move your head slightly.
As of 2026, most professional-grade IPS panels also use either true 10-bit depth or 8-bit plus FRC (frame rate control) dithering, giving you over a billion shades of color. That prevents banding in gradients, something that matters a lot when you're working with smooth skies, skin tones, or color transitions in video.
The Key Advantages of IPS Monitors for Photo and Video Editing
Let's break down the real reasons editing professionals keep coming back to IPS.
Wide and reliable viewing angles. The standard spec is 178 degrees horizontal and 178 degrees vertical. In practice, you'll see minimal color shift at 45 degrees in any direction. That's not just a comfort feature, it's a workflow advantage.
When you're editing for hours, you naturally move around. An IPS panel keeps your color decisions valid.
Accurate color reproduction. Professional IPS panels regularly cover 100% of sRGB, 95, 99% of Adobe RGB, and 95, 98% of DCI-P3, depending on the model. Factory calibration means you get Delta E < 2 performance right out of the box on mid-range and above models. That's the threshold where most people can't distinguish the difference between colors on screen versus the reference.
Color gamut flexibility for different workflows. If you're doing web-only work, sRGB coverage matters most. For print photography, Adobe RGB is the standard. For video and cinema, DCI-P3 is the target.
IPS panels are available across all these gamut levels, so you can match the panel to your actual output.
Hardware calibration support. Higher-end IPS monitors from brands like Eizo, ASUS ProArt, and BenQ's SW series support hardware calibration. That means the calibration profile gets stored on the monitor's internal LUT (look-up table) rather than relying on your graphics card. The result is more accurate color and no banding in gradients.
Consistency over time. IPS panels don't drift in color as quickly as some other panel types. With regular recalibration every few weeks, an IPS display will hold its accuracy for years of professional use.
Where IPS Panels Fall Short: Honest Drawbacks You Should Know
No display technology is perfect. IPS panels have real trade-offs that you should understand before committing.
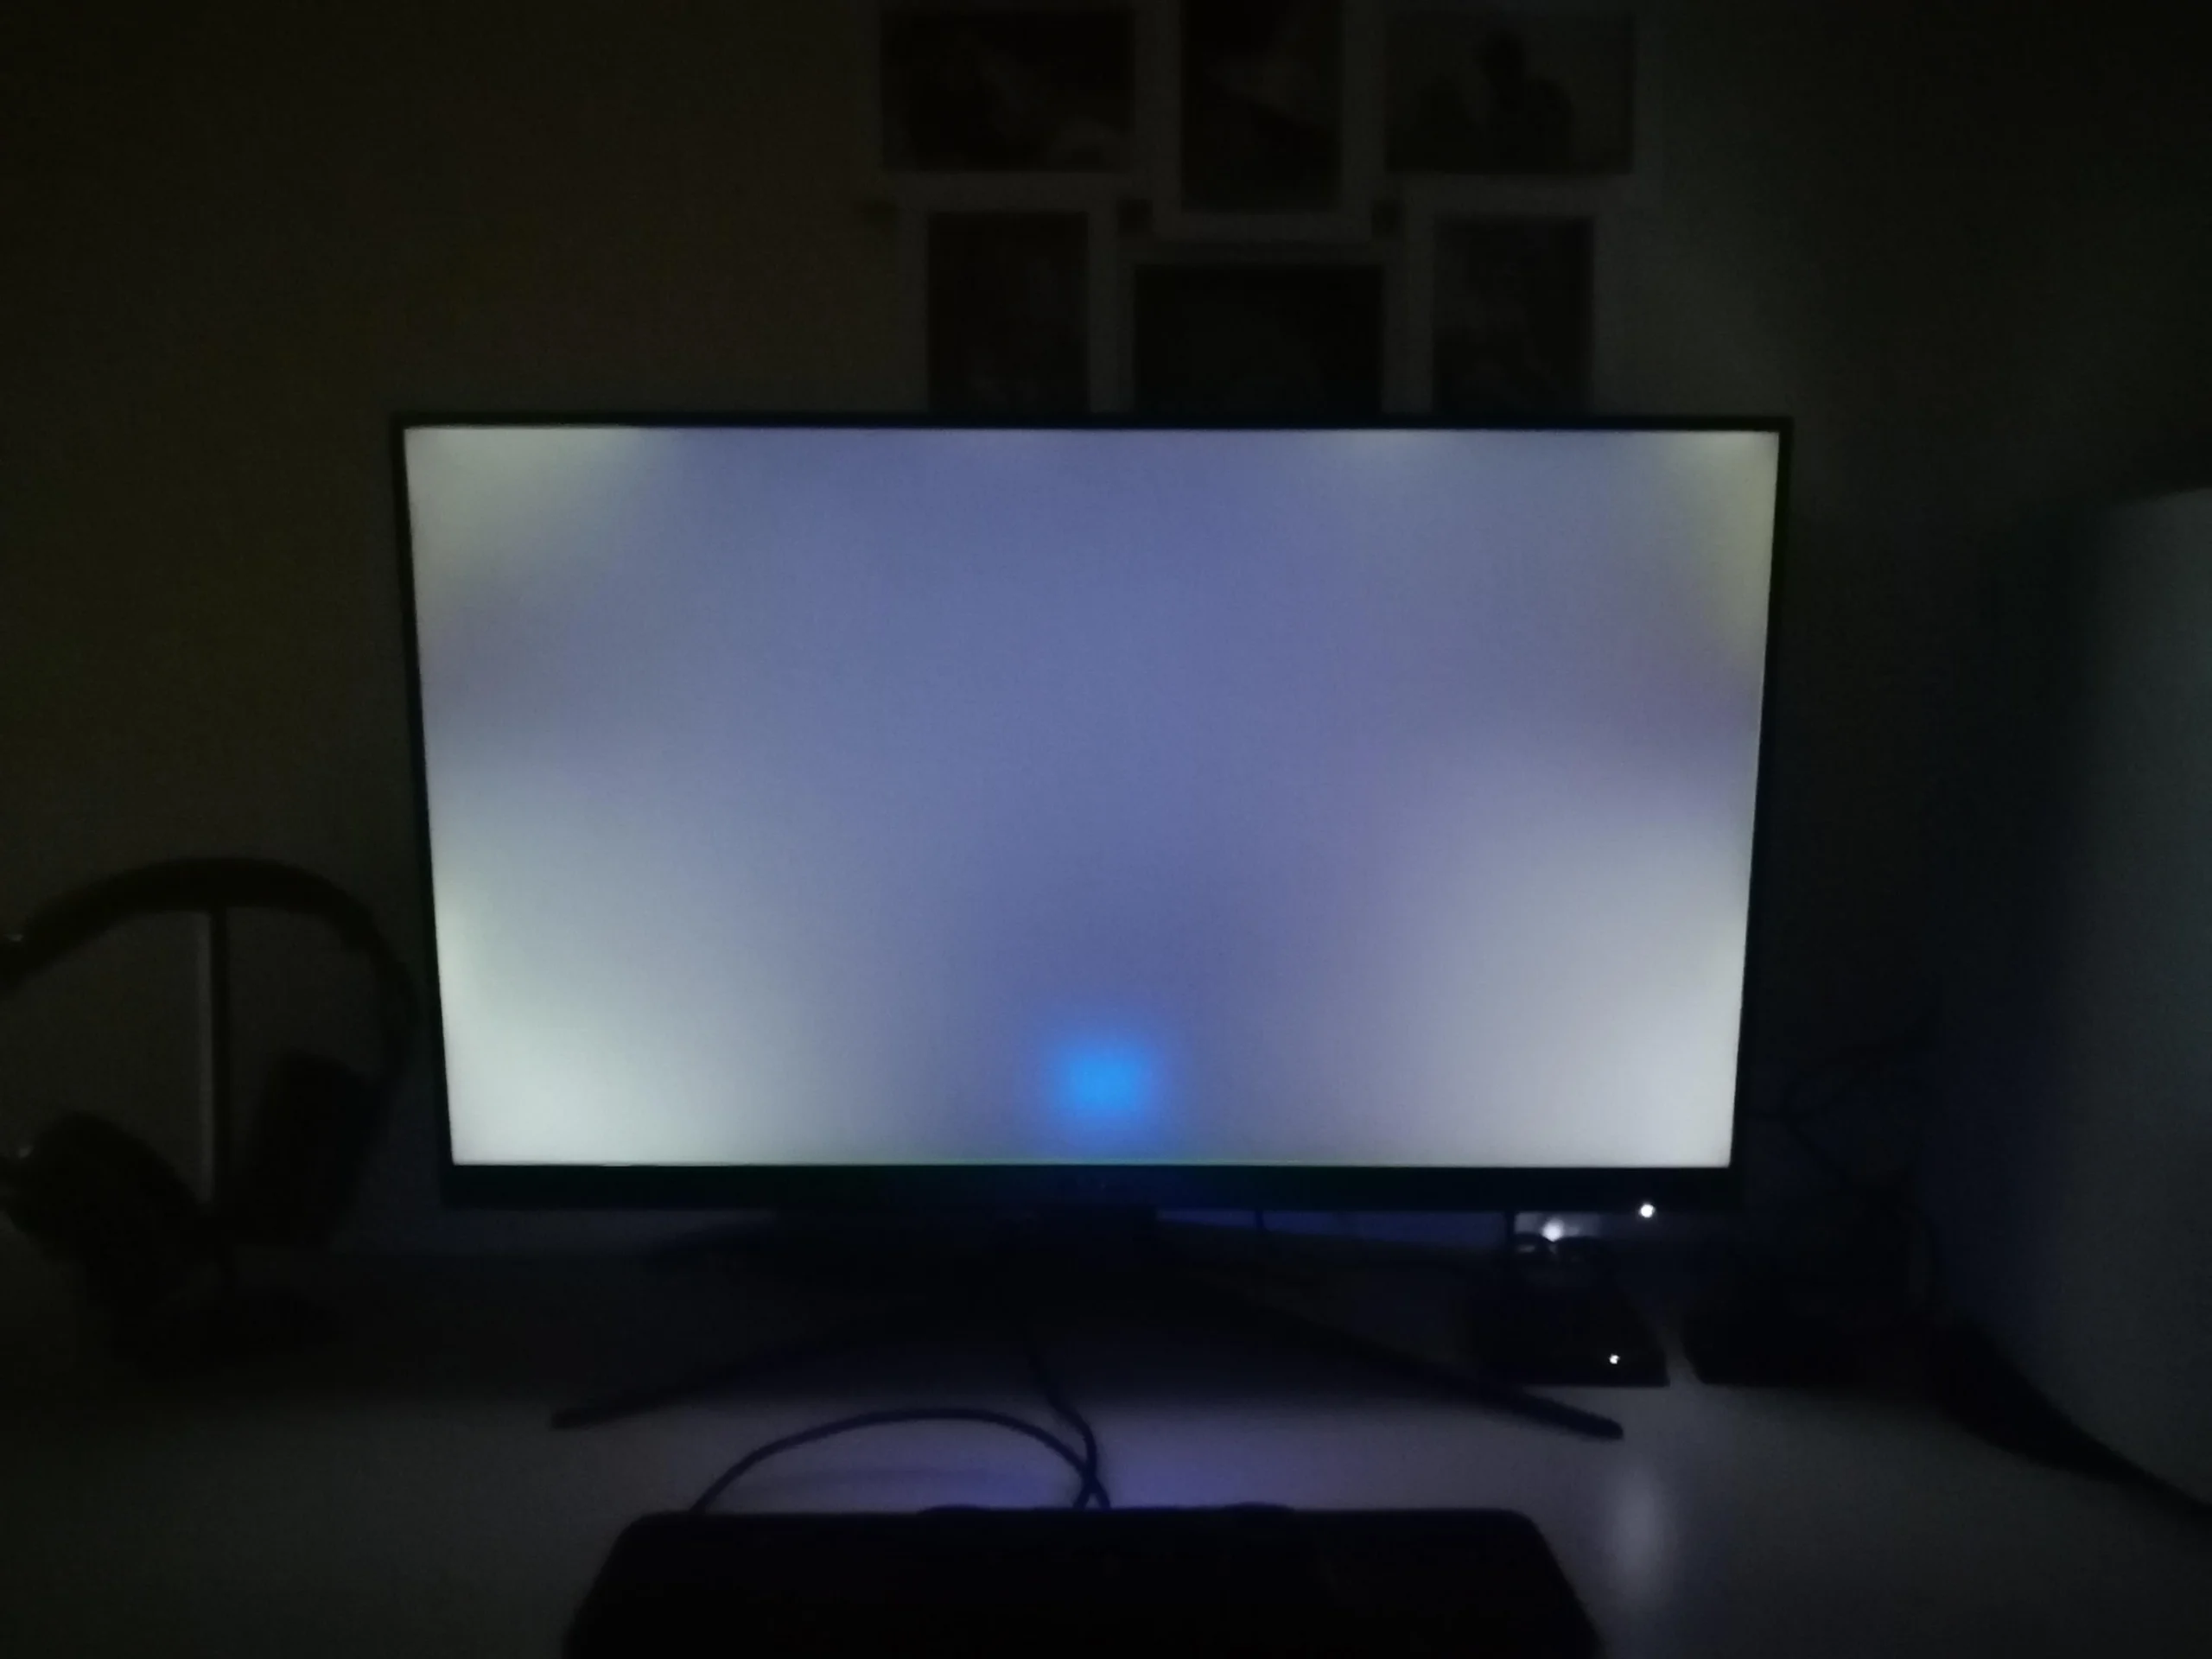
IPS glow. This is the most common complaint. When you view a dark screen in a dark room, you'll often see a silvery or warm glow bleeding in from the corners. It's a structural characteristic of how the crystals rotate in-plane.
It varies from unit to unit, which people in the community call the "IPS lottery." IPS Black technology (found in panels from AU Optronics) has improved this significantly, pushing contrast from the typical 1000:1 up to around 2000:1.
Lower native contrast than VA or OLED. Standard IPS panels sit around 1000:1 contrast ratio. VA panels hit 3000:1 or higher, and OLED delivers effectively infinite contrast. That means blacks on an IPS panel look more like very dark gray, especially in a dim room.
For video editors working with HDR content or graded footage that relies on deep blacks, this is a real limitation.
Higher cost for professional-grade models. A decent TN panel costs $150, $250. A good IPS editing monitor usually starts around $350, $500 and climbs to $1,500, $2,500 for reference-grade hardware with wide gamuts and built-in calibration sensors. You're paying for the color accuracy and consistency, but the entry point is higher.
Slower response times than TN. While this matters more for gaming than editing, it's worth noting. Typical IPS response times run 4, 8ms grey-to-grey. TN panels can hit 1ms.
If you're a video editor who also games on the same display, you might notice slight motion blur in fast scenes. Newer "Nano IPS" and "Fast IPS" panels have brought response times down to around 1ms, narrowing the gap.
Not ideal for true HDR. Without full-array local dimming (FALD), IPS panels can't deliver the extreme brightness and deep blacks that HDR content really needs. Mini-LED backlit IPS panels solve this, but they cost significantly more and add bulk. For standard SDR editing work, this doesn't matter at all.
For HDR mastering, OLED or FALD mini-LED are stronger choices.
IPS vs. TN vs. VA vs. OLED: Panel Types Compared for Editing Work
Not all LCD panels are created equal. Each type makes different trade-offs between color accuracy, speed, contrast, and price. Here's how they stack up for editing.
TN (Twisted Nematic) panels are the cheapest and fastest. They're common in budget monitors and high-refresh-rate gaming displays. The problem for editing is severe color shift at even slight angles.
Move your head two inches to the left and the white balance visibly changes. They typically cover only sRGB and struggle with accuracy. Avoid them for color-critical work.
VA (Vertical Alignment) panels offer much higher contrast, usually 3000:1 or better. Blacks look genuinely dark. The trade-off is color shift at moderate angles and slower response times.
VA panels work fine for general video editing where contrast matters, but they're not ideal when color accuracy across the screen is your priority.
IPS (In-Plane Switching) hits the sweet spot for most editing professionals. Wide viewing angles, accurate color, wide gamut availability, and consistent uniformity. The downsides are lower contrast than VA and potential IPS glow.
For the vast majority of photo and video editing work, IPS remains the recommendation.
OLED is the premium option with perfect blacks, infinite contrast, and excellent color. The concerns are burn-in risk with static UI elements (toolbars, timelines), higher price, and limited availability in larger sizes. OLED is excellent for HDR color grading.
For standard SDR editing, IPS offers better long-term reliability at a lower cost.
| Panel Type | Color Accuracy | Viewing Angles | Contrast | Response Time | Best For |
|---|---|---|---|---|---|
| IPS | Excellent | 178°/178° | ~1000:1 | 4–8ms (faster on Fast IPS) | Color-critical editing |
| TN | Poor to decent | Narrow, visible shift | ~1000:1 | 1ms | Budget use, gaming |
| VA | Good | Moderate shift at angles | ~3000:1 | Slower | General editing, media |
| OLED | Excellent | Wide | Infinite | Fast | HDR grading, premium work |
Who Should Choose an IPS Monitor for Editing?
If your work involves making color decisions that other people will see, IPS is the safe bet.
Photographers and retouchers benefit most from the wide viewing angles and color consistency. When you're adjusting white balance, skin tones, or color grading in Lightroom or Capture One, you need the colors to stay accurate across the entire frame. IPS panels deliver that.
Models like the ASUS ProArt PA279CRV or BenQ SW272U are popular because they cover Adobe RGB and come factory calibrated.
Video editors and colorists working in DaVinci Resolve, Premiere Pro, or Final Cut Pro need to trust what they see on screen. IPS panels with DCI-P3 coverage give you confidence that your grade translates correctly to broadcast or streaming displays. For HDR work specifically, you'd still want OLED or a FALD mini-LED, but for SDR editing, IPS handles the job reliably.
Graphic designers and illustrators will appreciate the sRGB accuracy and uniformity. When you're creating assets for web or app interfaces, sRGB coverage at 100% with good uniformity means your designs look consistent on other people's screens. Print designers working in CMYK workflows need Adobe RGB coverage plus the ability to soft-proof accurately.
Content creators and YouTubers who edit their own footage don't always need professional-grade accuracy, but a mid-range IPS panel still outperforms a cheap TN or VA display. You'll see more accurate colors in your final uploads, especially on platforms that support wide color gamut playback.
Who Doesn't't Need an IPS Panel (And Can Save Money Instead)?
Not everyone doing "editing" actually needs professional color accuracy. If you're editing documents, spreadsheets, code, or social media text posts, any modern IPS panel works fine, but you also don't need to pay a premium for wide gamuts or factory calibration.
Casual users who only need a general-purpose display can save money with a basic IPS monitor in the $150, $250 range. You still get the viewing angle benefits without paying for color gamut coverage or calibration features you won't use.
Gamers who occasionally edit might be better served by a Fast IPS panel with a high refresh rate. These give you reasonably good color while also delivering smooth gameplay. You sacrifice some color accuracy compared to a dedicated editing monitor, but you get a more versatile display at a lower combined cost.
People working exclusively in black and white don't need wide gamut coverage. If your workflow is monochrome photography or text-based work, a standard sRGB IPS panel is more than enough.
What Specs Actually Matter When Buying an IPS Editing Monitor
The spec sheet on a monitor listing can be overwhelming. Here's what actually matters for editing work and what's mostly marketing.
Color accuracy (Delta E). Look for Delta E < 2 out of the box. This means the difference between the displayed color and the reference is imperceptible to most people. Some professional monitors hit Delta E < 1.
This is the single most important spec for editing.
Color gamut coverage. For web-only work, 100% sRGB is sufficient. For print photography, look for at least 95% Adobe RGB. For video work, aim for 95% DCI-P3 or higher.
Don't confuse coverage with volume. Volume can exceed 100% (meaning the gamut extends beyond the standard), but coverage tells you how much of the target space the display actually reproduces.
Bit depth. 8-bit gives you 16.7 million colors. 10-bit gives you over a billion. True 10-bit panels are preferred for professional editing because they eliminate banding in smooth gradients. Many monitors advertise "10-bit" but are actually 8-bit with FRC dithering.
FRC works well enough for most work, but check the panel specifications carefully if you want true 10-bit.
Contrast ratio. Standard IPS sits around 1000:1. IPS Black panels from AU Optronics achieve roughly 2000:1. Higher contrast means deeper blacks and better shadow detail.
If you edit a lot of dark footage or low-key photography, IPS Black is worth the premium.
Resolution and size. For photo editing, 4K (3840×2160) at 27 inches gives you sharp detail without needing display scaling. At 32 inches, 4K gives you more workspace but requires scaling on most operating systems. 1440p works fine for general video editing, but 4K lets you see a full 1080p timeline with room for panels.
Factory calibration and hardware calibration. Factory calibration means the manufacturer has individually calibrated each unit before shipping. Hardware calibration means you can load a custom LUT directly into the monitor. Both features appear primarily on monitors priced above $500.
They're worth it if color accuracy is your livelihood.
Connectivity matters more than people think. USB-C with power delivery lets you connect a laptop with a single cable. Thunderbolt 4 is even better for daisy-chaining multiple displays. For video editing workflows with multiple monitors, having the right ports saves desk space and cable clutter.
How to Set Up and Calibrate an IPS Monitor for Accurate Editing
Buying a good IPS monitor is only half the equation. You need to set it up properly and maintain calibration over time.
Step 1: Let the monitor warm up. Turn it on at least 30 to 60 minutes before calibrating. Panel colors shift slightly when the backlight is cold. Most calibration guides recommend waiting a full hour for reference-grade work.
Step 2: Reset to factory defaults. Go into the on-screen display menu and reset everything. This clears any previous adjustments that might interfere with calibration.
Step 3: Choose the right preset. Most editing monitors have preset modes for sRGB, Adobe RGB, DCI-P3, or native color. Select the preset that matches your working color space. If you're working in sRGB, use the sRGB clamp to prevent the display from showing colors outside that gamut.
Step 4: Use a hardware colorimeter. Software-only calibration relies on your eyes, which vary from person to person and change with fatigue. A colorimeter like the Calibrite ColorChecker Display Pro or X-Rite i1Display Pro measures actual light output objectively. Attach it to the screen, run the calibration software, and let it create an ICC profile.
Step 5: Set the correct white point. For most digital work, D65 (6500K) is the standard white point. For print proofing, some workflows specify D50 (5000K). Your calibration software will ask which target to use.
Step 6: Adjust brightness to the right level. Aim for 120 cd/m² for SDR editing in a normally lit room. For print proofing, ISO 3664 specifies specific luminance levels depending on the viewing conditions.
Step 7: Recalibrate regularly. Panels drift over time as the backlight ages. Recalibrate every two to four weeks for professional work. Monthly is fine for enthusiasts and semi-professional use.

Common Mistakes People Make with IPS Monitors for Editing
Skipping calibration entirely. This is the biggest one. People spend $800 on a factory-calibrated IPS panel and never recalibrate it. Backlight output shifts over the first few months of use.
Without recalibration, even a premium monitor drifts away from accuracy within weeks.
Calibrating in a bright room. Ambient light affects how you perceive color on screen. Calibrate in the same lighting conditions you normally work in. For professional print proofing, ISO 3664 specifies D50 lighting at a specific luminance level.
For most people, a moderately lit room with neutral grey walls is sufficient.
Using the wrong color space preset. If you're editing for web but your monitor is set to Adobe RGB mode, you'll see oversaturated colors that won't exist on your audience's screens. Match the monitor's color space preset to your output target. Use sRGB clamp for web work.
Switch to Adobe RGB or DCI-P3 only when your workflow requires it.
Ignoring uniformity issues. IPS panels can have slight brightness or color uniformity variation across the screen. The center might be slightly warmer than the edges. Professional monitors with uniformity compensation correct for this.
Without it, you might make color decisions based on the center of the screen that don't hold up at the edges.
Buying based on specs alone. A monitor listing 99% Adobe RGB and Delta E < 2 sounds great on paper. Panel quality varies between units, even within the same model. Reading independent reviews and checking RTINGS.com or similar testing sources gives you a better idea of real-world performance than trusting the spec sheet.
Pricing Guide: What to Expect at Each Budget Level
Under $250: Basic IPS panels. You get good viewing angles and sRGB coverage. Color accuracy is decent but not professional-grade. These work fine for hobbyists and casual editing.
Look for models with at least 99% sRGB and an adjustable stand.
$350, $600: Mid-range professional IPS. This is where most serious editors should start. You get factory calibration, 95%+ Adobe RGB or DCI-P3 coverage, and better build quality. The ASUS ProArt PA279CRV, BenQ SW272U, and Dell UltraSharp U2723QE sit in this range.
They offer excellent value for the money.
$600, $1,200: High-end professional. You get hardware calibration support, wider gamuts, better uniformity compensation, and more robust OSD menus. Eizo ColorEdge CS series and higher-end BenQ SW models live here. These are designed for working professionals whose income depends on color accuracy.
$1,200, $3,000+: Reference and mastering displays. Eizo ColorEdge CG series, ASUS ProArt PA32UCG, and similar models offer built-in calibration sensors, 10-bit panels, and extreme gamut coverage. These are for post-production houses, colorists working on theatrical releases, and photographers doing high-end print work. Most individual editors don't need to spend this much.
Expert Tips for Getting the Most Out of an IPS Editing Display
Control your environment. Keep ambient light consistent and avoid direct sunlight hitting the screen. Use bias lighting behind the monitor (a 6500K LED strip) to reduce eye strain and improve perceived contrast. This is a cheap upgrade that makes a noticeable difference.
Use a monitor hood. If your desk is near a window or bright light source, a hood reduces glare and helps you see the screen accurately. Some professional monitors ship with them. Aftermarket hoods work just as well.
Check your graphics card LUT loading. Some operating systems or graphics drivers reset the calibration LUT on reboot or after resolution changes. Verify that your ICC profile loads correctly at startup. On Windows, use a calibration loader utility to ensure the profile persists.
Don't mix panel types for critical work. If you use a dual-monitor setup, try to match both displays. Judging color on an IPS panel while your reference is on a different technology creates inconsistency. At minimum, calibrate both to the same target.
Consider IPS Black for video work. If you edit a lot of footage with dark scenes, the improved contrast of IPS Black panels (around 2000:1 vs. 1000:1) helps you see shadow detail more clearly. The BenQ SW272U and newer ProArt models use this technology.
Final Verdict: Is an IPS Monitor Right for Your Editing Workflow?
For most people doing photo or video editing, an IPS monitor is the right choice. The combination of wide viewing angles, accurate color, and wide gamut availability makes it the most versatile panel technology for creative work. You get professional-grade accuracy without the burn-in risk or extreme cost of OLED.
If you're a photographer, graphic designer, or video editor working in SDR, an IPS panel in the $350, $600 range will serve you well for years. Invest in a colorimeter, calibrate regularly, and control your environment. That setup will outperform a poorly calibrated reference monitor costing three times as much.
If your work involves HDR grading or you need perfect blacks for theatrical delivery, look at OLED or FALD mini-LED alternatives. For everyone else, IPS remains the practical, proven standard that the editing community trusts.
Frequently Asked Questions
Can I use an IPS monitor for professional color grading?
Yes, for SDR color grading, an IPS panel with DCI-P3 coverage and proper calibration is widely used in professional environments. For HDR mastering, OLED or FALD displays are preferred because of their superior contrast and peak brightness capabilities.
How long do IPS monitors last before color accuracy degrades?
With regular recalibration every few weeks, a professional IPS monitor maintains accurate color for five to eight years of daily use. The backlight dims gradually over time, but calibration compensates for this shift until the brightness drops below usable levels.
Is IPS good for photo editing on a budget?
A basic IPS panel in the $150, $250 range with 99% sRGB coverage is perfectly adequate for hobbyist photo editing. You won't get Adobe RGB or hardware calibration at that price, but the viewing angle and color consistency advantages over TN panels are still significant.
Do I need to calibrate a factory-calibrated IPS monitor?
Factory calibration drifts over time. Recalibrate within the first week of purchase to establish a baseline, then recalibrate every two to four weeks for professional work. Monthly recalibration is sufficient for enthusiasts and semi-professional use.
What's the difference between IPS and IPS Black?
IPS Black is a panel technology developed by AU Optronics that improves native contrast from around 1000:1 to approximately 2000:1. This means deeper blacks and better shadow detail. It's particularly useful for video editors who work with dark footage or low-key content.

Similar Posts