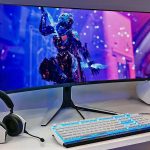
Why Are Budget Monitors Cheaper
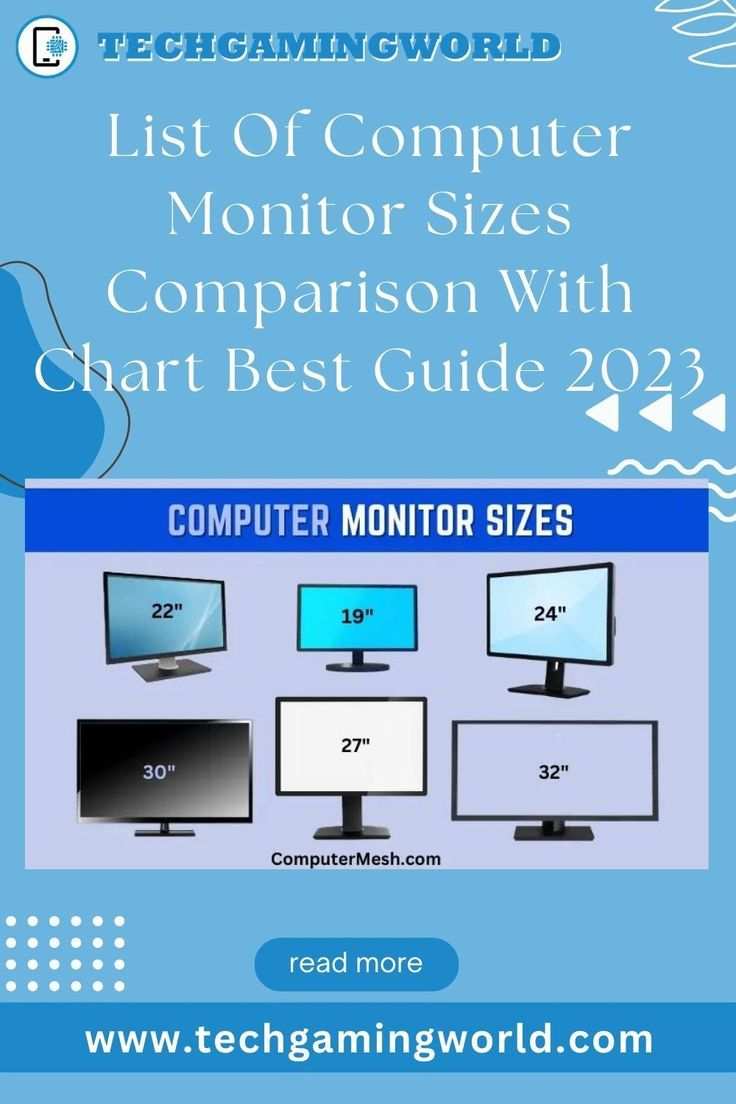
Image source: Bing (Web (fair-use with source credit))
If you've ever wondered why are budget monitors cheaper than their premium counterparts, the answer comes down to a handful of deliberate engineering and sourcing decisions. It's not one single shortcut. It's a chain of small compromises that add up to a significantly lower retail price.
The biggest factor is the panel itself, which accounts for roughly 60 to 70 percent of a monitor's total manufacturing cost. But panel grade is only part of the story. Build materials, factory calibration, port selection, and even the stand all play a role in where the savings come from.
Quick Answer
Budget monitors are cheaper because manufacturers use lower-binned panels, skip factory calibration, and cut costs on materials and features. The panel alone makes up most of the cost, so a lower-grade display immediately drops the price. Plastic housings, basic stands, and fewer ports further reduce the bill of materials.
You're not getting a defective product. You're getting a product built to a lower performance tier.
The Real Cost Breakdown Behind a Budget Monitor
A monitor's price isn't arbitrary. It reflects the actual cost of every component inside the box, plus the labor and quality control behind it. When you strip away the marketing, you're left with a bill of materials that tells the whole story.
The panel is the single most expensive part. A 24-inch 1080p IPS panel from a major supplier like AU Optronics or LG Display might cost a manufacturer anywhere from $30 to $70 depending on the grade. Premium panels with tight color accuracy and uniformity specifications sit at the top of that range.
Budget panels with looser tolerances sit at the bottom.
After the panel, the next cost drivers are the backlight assembly, the controller board (also called the scaler), the power supply, the housing, and the stand. Each of these gets cheaper when you simplify the design.
Here's a rough breakdown of where the money goes in a typical budget versus mid-range monitor:
| Component | Budget Monitor (% of BOM) | Mid-Range Monitor (% of BOM) |
|---|---|---|
| Panel (display) | 55-65% | 50-60% |
| Backlight assembly | 8-12% | 10-15% |
| Controller board / scaler | 5-8% | 8-12% |
| Power supply | 3-5% | 4-6% |
| Housing and stand | 5-8% | 8-12% |
| Cables, packaging, misc | 3-5% | 4-6% |
These percentages shift depending on the specific model and manufacturer, but the pattern holds. Budget monitors allocate a smaller share to everything except the panel, and even the panel itself is a cheaper unit.
The power supply is a good example. Many budget monitors use an external power brick instead of an internal supply. That's a meaningful cost saving because external bricks are commodity items.
They're cheaper to certify, cheaper to replace, and cheaper to ship.
Packaging matters more than people think. Thinner cardboard, molded pulp inserts instead of foam, and a smaller box all reduce shipping weight and volume. When you're moving tens of thousands of units, even a few cents per package adds up fast.
Where Manufacturers Cut Costs (And Where They Don't)
Cost-cutting in budget monitors isn't random. Manufacturers target specific areas where the savings are visible on a spreadsheet but less obvious to the end user. Some cuts you'll notice immediately.
Others won't show up until you've used the display for a few weeks.
Where they cut:
- Panel binning. Suppliers grade panels based on uniformity, color accuracy, and defect count. Budget monitors use lower-grade panels that didn't meet the tighter specs of premium lines.
- Factory calibration. Skipping per-unit calibration saves labor time and equipment cost. The monitor ships with default color profiles instead of a custom calibration report.
- Housing materials. Plastic replaces metal. Thin-walled injection-molded cases cost less and weigh less, but they feel less solid.
- Stand design. A fixed-tilt plastic stand costs a fraction of a height-adjustable metal stand with a cable management channel.
- Port selection. Fewer HDMI and DisplayPort connections mean a simpler controller board and less shielding.
- Quality control sampling. Instead of inspecting every unit, manufacturers test a statistical sample. That raises the chance of minor defects reaching customers.
Where they don't cut (as much):
- Basic functionality. A budget monitor still has to turn on, display an image, and not catch fire. Safety certifications like FCC, CE, and RoHS compliance are non-negotiable.
- Panel technology baseline. Even budget monitors in 2026 typically use IPS panels rather than TN, because IPS has become the commodity standard. You're not getting ancient technology, just a lower tier of current technology.
- Warranty support. Most budget monitors still carry at least a one-year warranty. The length may be shorter than a premium model's three-year coverage, but it's not zero.
The key insight is that manufacturers aren't trying to make a bad product. They're making a product that hits a specific price point while still meeting minimum performance expectations for the target buyer.
Panel Quality: The Biggest Price Driver
The panel is where the largest single cost difference lives, and it's also where the performance gap between budget and premium monitors is most visible. Understanding panel grading helps explain why two monitors with the same size and resolution can have wildly different prices.
Panel suppliers like LG Display, AU Optronics, BOE, and Innolux manufacture glass substrates in large batches. After production, each panel is tested and sorted into grades. This process is called binning.
Grade A panels have minimal backlight bleed, uniform brightness across the surface, tight color accuracy, and few or no dead pixels. These go into professional and premium consumer monitors.
Grade A- or B panels may have slightly uneven backlight, minor color deviation, or a small number of acceptable dead pixels per ISO 9241 standards. These are the panels that end up in budget and entry-level monitors.
The ISO 9241-302/303/305/307 standard defines pixel defect classes. Class I allows essentially zero defects and is expensive to achieve. Class II permits a small number of dead or stuck pixels, which is what most budget monitors fall under.
Class III allows even more.
This doesn't mean budget monitors are full of dead pixels. Most will look fine at first glance. But the uniformity and consistency aren't at the same level as a Grade A panel.
Color gamut coverage is another differentiator. A budget IPS panel might cover 95 to 98 percent of sRGB, which is perfectly adequate for everyday use. A premium panel might cover 99 to 100 percent of sRGB plus a significant portion of DCI-P3 or Adobe RGB.
That wider gamut requires better filtering and tighter manufacturing tolerances, both of which cost more.
Response time and refresh rate also factor in. Budget monitors often advertise 1ms MPRT (moving picture response time), which is a backlight-strobing measurement, not the more meaningful GtG (gray-to-gray) figure. A true 1ms GtG panel costs more to produce.
The budget panel might actually average 4 to 5ms GtG, which is still fine for casual use but not what competitive gamers want.
Build Quality, Stands, and Materials
Pick up a budget monitor and a premium monitor back to back, and the difference in build quality is immediately obvious. The budget unit feels lighter, the plastics are thinner, and the stand has a wobble that a more expensive model simply doesn't.
This isn't a flaw. It's a design choice driven by cost targets.
The housing on a budget monitor is almost always ABS plastic. It's lightweight, inexpensive to mold, and good enough for the job. Premium monitors often use a combination of metal and higher-grade plastics, sometimes with a matte finish that resists fingerprints better.
The stand is one of the most noticeable cost-cutting areas. Budget monitors typically ship with a tilt-only stand. You can angle the screen up or down, but you can't adjust the height, swivel it, or rotate it to portrait mode.
The stand base is often a small, lightweight footprint that can feel unstable on a deep desk.
Mid-range and premium monitors usually include a height-adjustable stand with tilt, swivel, and pivot. These stands have more moving parts, stronger springs, and a heavier base. They cost more to design and manufacture, but they're also one of the features users interact with every single day.

Image source: Bing (Web (fair-use with source credit))
VESA mount compatibility is worth checking. Some budget monitors include a 100x100mm VESA pattern, but others don't. If you plan to use a monitor arm, verify this before buying.
A missing VESA mount is a common omission at the lowest price points.
The bezel thickness also varies. Budget monitors sometimes have thicker bottom bezels because the controller board and port layout are housed there. Premium designs use thinner bezels by relocating electronics or using more compact components.
None of this means a budget monitor will fall apart. A well-made budget unit will last years under normal use. But the tactile experience, the adjustability, and the long-term durability all reflect the lower material investment.
Features That Disappear at Lower Price Points
Beyond the panel and the build, there's a long list of features that get trimmed as the price drops. Some of these you'll miss. Others you'll never notice.
Factory calibration. This is one of the first things to go. A factory-calibrated monitor ships with a measured Delta E (color deviation) of less than 2, sometimes less than 1. Budget monitors typically ship with no per-unit calibration, meaning the out-of-box color accuracy can vary significantly from unit to unit.
For photo editing or design work, this matters a lot. For browsing and office work, it barely registers.
Local dimming. Budget monitors almost never include full-array local dimming (FALD). Without it, the entire backlight is one zone, so dark scenes in movies look gray instead of truly black. This is a major reason budget monitors have less impressive contrast in real-world viewing.
Adaptive sync certification. Many budget monitors support AMD FreeSync, but fewer carry official NVIDIA G-Sync Compatible certification. The certification process costs money and requires passing specific tests. A budget monitor might work fine with G-Sync unofficially, but it's not guaranteed.
USB hub and USB-C connectivity. Premium monitors often include a built-in USB hub and a USB-C port that carries video, data, and power delivery up to 90W. Budget monitors rarely include either. You get video ports and maybe a headphone jack, but that's about it.
KVM switch. Some mid-range and premium monitors include a built-in KVM (keyboard, video, mouse) switch, letting you control two computers with one set of peripherals. This feature is almost nonexistent in budget models.
On-screen display controls. Budget monitors often use small, stiff buttons on the bottom edge instead of a joystick or touch-sensitive controls. Navigating the OSD menu is functional but not pleasant.
Speakers. When budget monitors include built-in speakers, they're usually low-power (2W or 3W) and sound thin. They exist for basic audio feedback, not for listening to music or watching movies.
The features that survive the cost-cutting process are the ones that users expect as table stakes: a working display, at least one HDMI port, and a power button. Everything else is negotiable.
Factory Calibration and Color Accuracy
Factory calibration is one of the most significant differentiators between budget and premium monitors, and it's also one of the least visible on a spec sheet. When a monitor is factory calibrated, each individual unit is measured and adjusted at the factory to hit specific color accuracy targets.
The standard metric is Delta E, which measures the difference between a displayed color and its true reference value. A Delta E below 1 is considered imperceptible to the human eye. A Delta E between 1 and 2 is excellent and suitable for professional color work.
A Delta E above 3 becomes noticeable, especially in skin tones and neutral grays.
Budget monitors typically ship without per-unit calibration. The manufacturer applies a generic profile at best. Aggregate review data from calibrated testing shows budget IPS monitors averaging between 2.5 and 4.5 Delta E out of the box.
That's fine for general use but not reliable for any task where color accuracy matters.
Premium monitors that undergo factory calibration often ship with Delta E below 1.5, sometimes below 1. They also include a printed calibration report showing the measured values for that specific unit. That report represents real labor and equipment time, which is why it adds cost.

Image source: Wikimedia Commons / Cappellettiariel (CC BY-SA)
If you're doing photo editing, video grading, or design work on a budget monitor, you can buy a hardware colorimeter and calibrate it yourself. Tools like the Calibrite ColorChecker Display or X-Rite i1Display can bring a budget panel's accuracy close to factory-calibrated levels. The catch is that the colorimeter itself costs $150 to $250, which defeats the savings of the budget monitor.
For everyone else, the out-of-box color on a budget monitor is perfectly watchable. You just shouldn't trust it for any work where getting the color exactly right is the point.
Connectivity, Ports, and Extras
Open the box of a budget monitor and you'll usually find one HDMI cable, a power brick, and a quick-start guide. That's about it. The port selection on the back of the unit reflects the same cost-conscious thinking.
A typical budget monitor includes one HDMI 1.4 port and one VGA or DVI port. Some add a second HDMI, but DisplayPort is rare at the lowest price points. USB-C with power delivery is almost unheard of on monitors under $150 as of 2026.
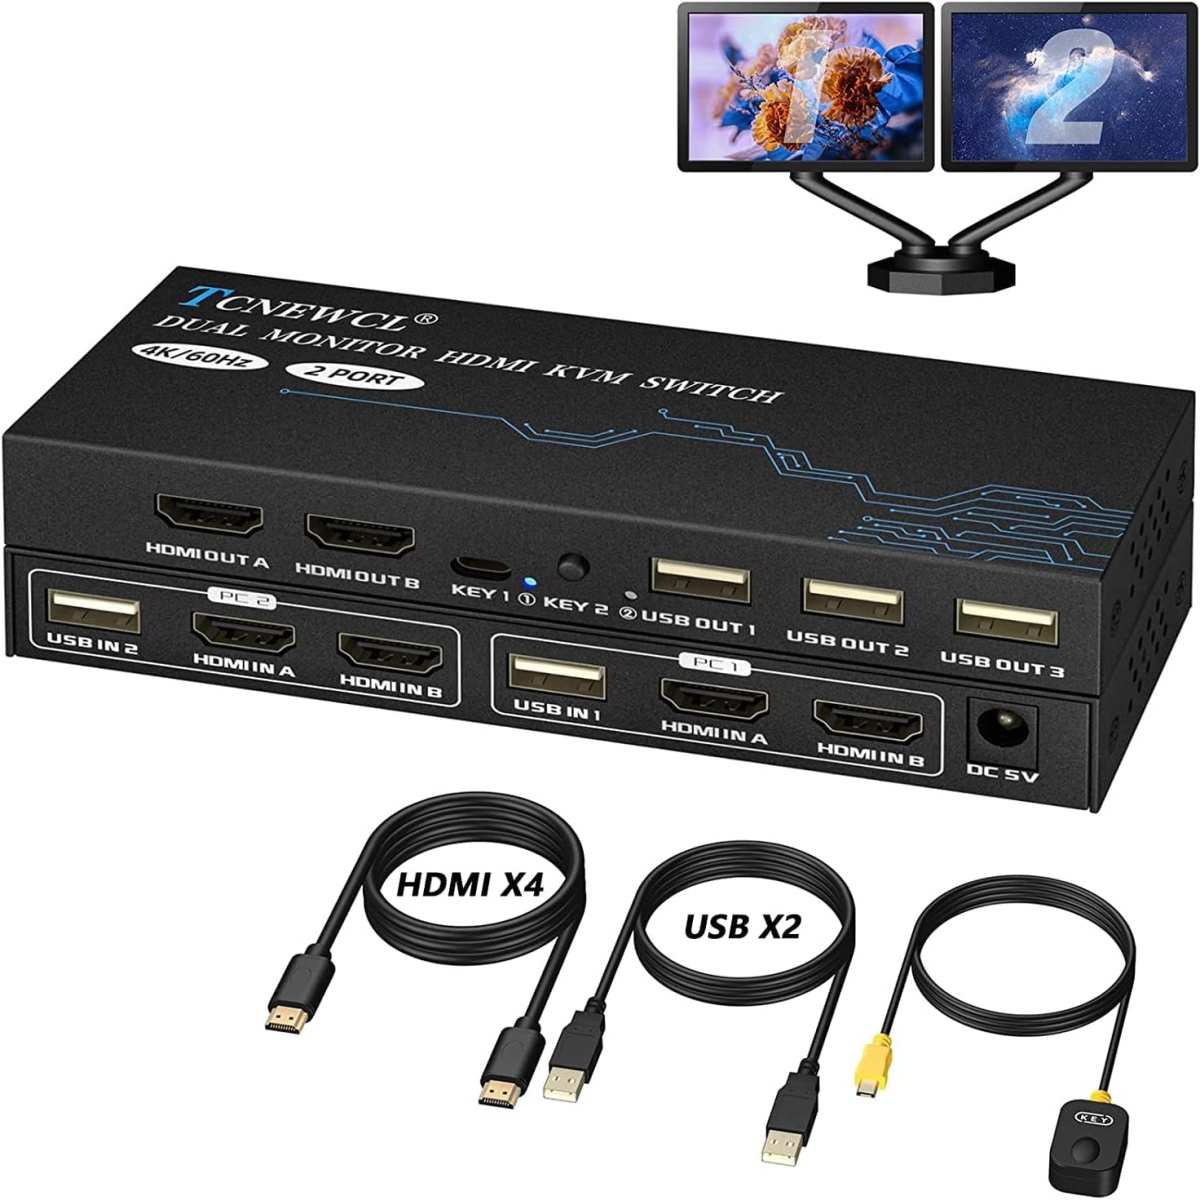
Image source: Bing (Web (fair-use with source credit))
This matters more than people expect. If you're connecting a laptop and a desktop to the same monitor, a single HDMI port means you're constantly swapping cables. A mid-range monitor with two HDMI ports and a DisplayPort lets you connect both and switch inputs through the OSD menu.
The controller board inside the monitor determines how many ports it can support. A simpler controller with fewer input channels is cheaper to produce. It also means fewer features like picture-in-picture or picture-by-picture, which require more processing power.
Audio output is another area where budget monitors cut corners. Many include a 3.5mm headphone jack but no built-in speakers. Those that do have speakers typically use small 2W drivers that sound thin and lack any bass response.
They're fine for system notifications and video calls, but that's the extent of it.
Premium monitors sometimes include a USB hub with downstream USB-A ports, letting you connect peripherals directly to the display. This is a genuine convenience feature that reduces cable clutter on your desk. Budget monitors skip it because the hub controller adds cost and complexity.
Budget vs. Mid-Range vs. Premium: Side-by-Side Comparison
The differences between tiers become clearest when you line them up directly. Here's how the three categories compare across the specs and features that actually affect daily use:
| Feature | Budget ($80-$150) | Mid-Range ($200-$400) | Premium ($500+) |
|---|---|---|---|
| Panel grade | Binned, looser tolerances | Grade A-, good uniformity | Grade A, tight tolerances |
| Factory calibration | None or generic | Sometimes included | Standard, per-unit report |
| Color gamut | 95-98% sRGB | 99-100% sRGB, some DCI-P3 | 99%+ DCI-P3 or Adobe RGB |
| Stand | Tilt-only, plastic | Height-adjustable, tilt, swivel | Full ergonomic, metal |
| Ports | 1 HDMI, 1 VGA/DVI | 2 HDMI, 1 DisplayPort | HDMI, DP, USB-C with PD |
| Speakers | None or basic 2W | 2-5W, decent quality | 5-10W, sometimes tuned |
| USB hub | Rare | Sometimes | Common |
| Local dimming | No | Edge-lit or basic FALD | FALD with many zones |
| Warranty | 1 year | 2-3 years | 3 years, sometimes 5 |
| Adaptive sync | FreeSync basic | FreeSync Premium, G-Sync Compatible | G-Sync Ultimate, full cert |
The jump from budget to mid-range is where you get the most noticeable improvement in daily use. The better stand alone is worth the price increase for most people. The jump from mid-range to premium is more specialized, targeting professionals and enthusiasts who need specific performance thresholds.
Who Should Actually Buy a Budget Monitor
A budget monitor is the right choice for a specific set of users and use cases. It's not a compromise for everyone, and it's not a bad product. It's a tool designed for particular needs.
Budget monitors are ideal for:
- Office productivity. Spreadsheets, email, web browsing, and document editing don't demand wide color gamut or factory calibration. A 24-inch 1080p budget IPS panel handles all of this comfortably.
- Students. If you need a monitor for essays, research, and video lectures, spending $100 instead of $300 makes practical sense.
- Secondary displays. A budget monitor works perfectly as a second screen for reference materials, chat windows, or system monitoring.
- Casual gaming. If you're playing single-player games at 60fps and don't need high refresh rates or adaptive sync certification, a budget monitor gets the job done.
- Point-of-sale and digital signage. These applications need a reliable display that turns on and shows content. They don't need color accuracy or premium build quality.
Budget monitors are not ideal for:
- Photo and video editing. Without factory calibration and wide gamut coverage, you can't trust what you see on screen.
- Competitive gaming. High refresh rates, low true GtG response times, and certified adaptive sync matter here.
- Professional design work. Color accuracy and uniformity are non-negotiable in this context.
The honest truth is that most people fall into the first group. If your monitor use is primarily productivity and media consumption, a budget monitor serves you well. The money you save can go toward a better keyboard, more RAM, or a faster SSD, all of which will improve your daily experience more than a pricier display.
Common Mistakes People Make When Shopping for Cheap Monitors
Shopping for a budget monitor comes with a few predictable pitfalls. Knowing them ahead of time saves you from buyer's remorse.
Ignoring the stand. A bad stand can make even a good panel frustrating to use. If the monitor doesn't tilt far enough or sits too low on your desk, you'll be hunching over it within a week. Check the stand specs before buying, and budget an extra $30 to $50 for a monitor arm if needed.
Chasing the biggest number. A 27-inch 1080p monitor sounds like a great deal until you realize the pixel density is only about 81 PPI. Text looks soft, and images lack sharpness. For 27 inches, 1440p is the sweet spot.
For 24 inches, 1080p is fine.
Assuming all IPS panels are equal. Panel technology is just the starting point. Two IPS monitors at the same price can have noticeably different color accuracy, uniformity, and backlight quality. Reading calibrated reviews before buying helps you avoid the worst offenders.
Overlooking dead pixel policies. Check the manufacturer's dead pixel policy before you buy. Some brands will only replace a monitor with five or more dead pixels. Others have a zero-tolerance policy.
This varies significantly and isn't always obvious from the product page.
Forgetting about return windows. Budget monitors have more unit-to-unit variation than premium models. If you get one with noticeable backlight bleed or a cluster of dead pixels, you want a hassle-free return process. Buy from a retailer with a solid return policy, not just the cheapest listing you can find.
Ignoring ergonomics entirely. A monitor that doesn't adjust to your eye level will cause neck and shoulder strain over time. This is a health consideration, not just a comfort one. If the included stand doesn't work for your setup, factor in the cost of a VESA arm or riser.
Expert Tips for Getting the Best Value
Getting the most out of a budget monitor purchase comes down to knowing what to prioritize and where to verify before you buy.
Check calibrated reviews, not just spec sheets. A manufacturer's claimed specs tell you almost nothing about real-world performance. Look for reviews that measure Delta E, backlight uniformity, and viewing angle shift with actual instruments.
Prioritize the stand or plan for a VESA arm. If the included stand doesn't adjust to your eye level, budget $30 to $50 for a basic monitor arm. Your neck will thank you.
Buy from a retailer with a solid return policy. Unit-to-unit variation is real with budget panels. A good return window lets you swap a unit with excessive backlight bleed or dead pixels without hassle.
Match the resolution to the screen size. 24 inches at 1080p is fine. 27 inches at 1080p looks soft. Don't let a bigger screen at a tempting price trick you into a worse experience.
Skip the cheapest no-name brand. Established brands like AOC, Dell, and Samsung offer budget lines with better quality control and warranty support than unbranded alternatives.
Final Verdict: When a Budget Monitor Makes Sense
A budget monitor makes sense when your use case is productivity, media consumption, or casual gaming. You're trading color accuracy, build quality, and features for a lower price, and for most people that's a fair trade.
If your work depends on color accuracy or you're a competitive gamer, spend more. Otherwise, a well-chosen budget monitor handles everyday tasks without issue. The savings are real, and the compromises are manageable as long as you know what you're getting into.
Frequently Asked Questions
Are budget monitors worth it?
Yes, for office work, browsing, and casual use. You get a functional display at a fraction of the cost. Just don't expect professional color accuracy or premium build quality.
What is the main difference between a cheap and expensive monitor?
The panel grade is the biggest factor. Expensive monitors use higher-binned panels with better uniformity, wider color gamut, and factory calibration. Build quality and features like USB-C and adjustable stands also improve at higher prices.
Do budget monitors have shorter lifespans?
Not necessarily. The panel and backlight in a budget monitor can last just as long as a premium one under normal use. The difference is in performance consistency and feature set, not necessarily longevity.
Can you edit photos on a budget monitor?
You can, but you shouldn't rely on it for accurate color work. Without factory calibration and wide gamut coverage, what you see on screen may not match the final output. A hardware colorizer can help, but that adds cost.
Is 1080p good enough for a 24-inch monitor?
Yes. At 24 inches, 1080p gives you a pixel density of about 92 PPI, which looks sharp for text and general use. It's a comfortable resolution for productivity without requiring a powerful graphics card.

Similar Posts