How to Use USB C Monitor as Primary Display

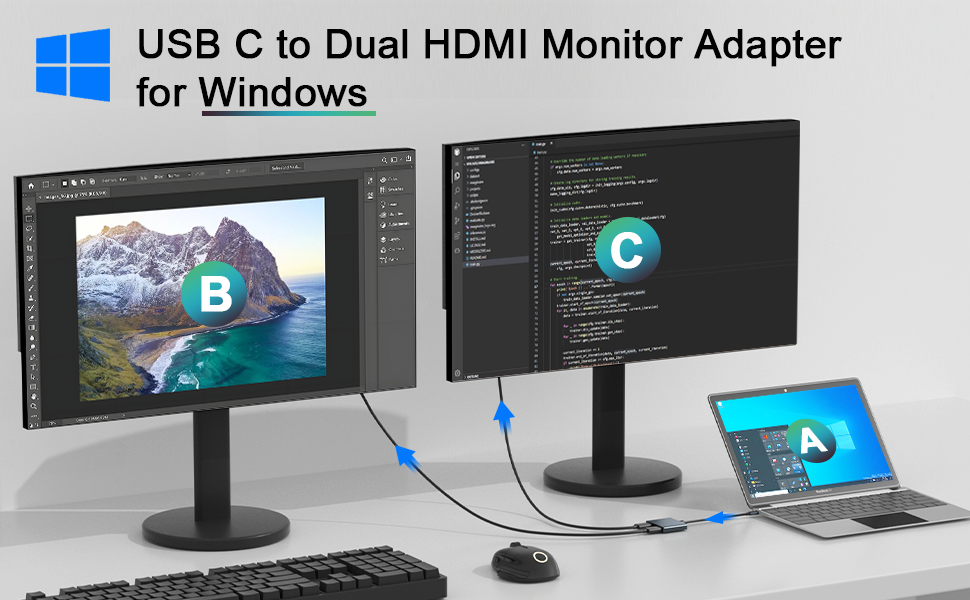
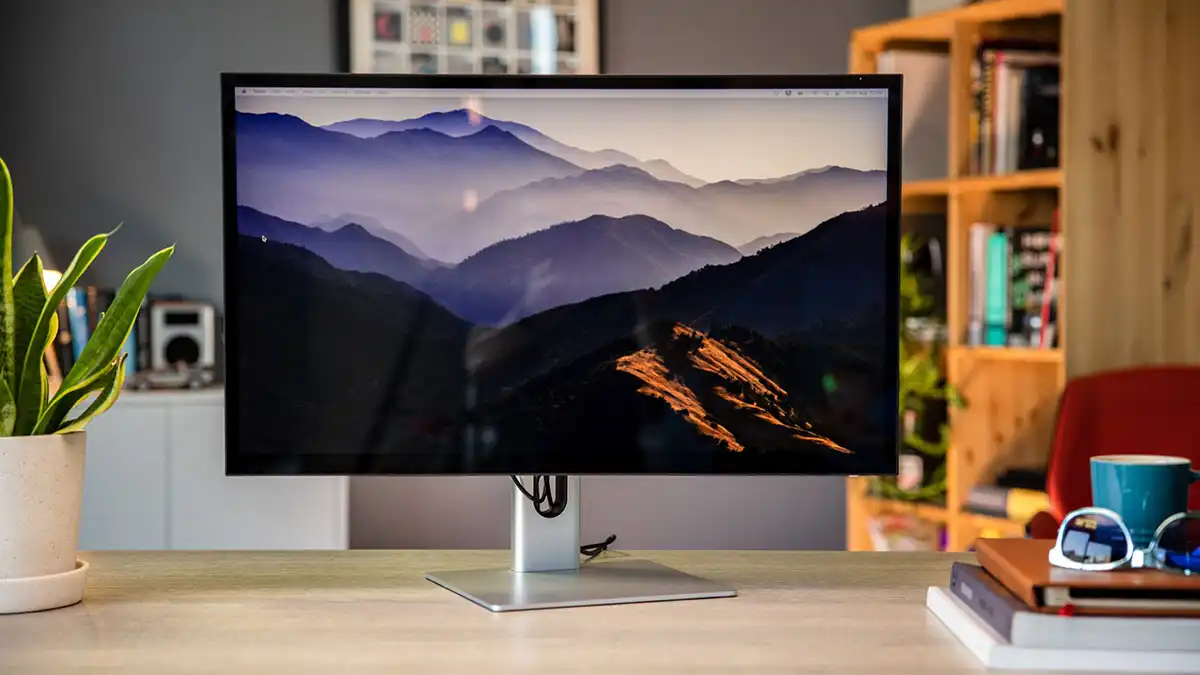
So you've got a USB-C monitor sitting on your desk and you're wondering if you can just make it your main screen. The short answer is yes, in most cases you absolutely can. But there are a few things that need to line up between your laptop, your cable, and your monitor before it all works smoothly.
The connection relies on a feature called DisplayPort Alt Mode, which lets a USB-C port carry a full video signal alongside data and power. Not every USB-C port supports it though, and not every cable can handle the signal. Let's walk through exactly how to get this working step by step.
Image source: Bing (Web (fair-use with source credit))
Quick Answer
You can use a USB-C monitor as your primary display. First, confirm your laptop's USB-C port supports video output through DisplayPort Alt Mode or Thunderbolt. Next, use a USB-C cable rated for video transmission.
Connect both devices, then configure the external monitor as your main display in your operating system settings. It usually takes under five minutes.
How USB-C Video Output Actually Works (And Why Your Port Might Not Support It)
USB-C is a connector shape, not a single standard. That's the part most people get frustrated by. A USB-C port on one laptop might handle 4K video and charge your machine at 100 watts.
The port on another laptop might only do data transfer and slow charging. They look identical from the outside, but they're doing very different things under the hood.
The key technology here is DisplayPort Alt Mode, or DP Alt Mode for short. It's a protocol defined by VESA that allows a USB-C connector to carry a DisplayPort video signal natively. Most laptops released after 2018 with a USB-C port support this, but it's not guaranteed.
Some manufacturers leave video output out to save costs or differentiate product lines.
Thunderbolt 3 and Thunderbolt 4 also support video output through the USB-C connector. Thunderbolt 4, as of 2026 the most common premium standard, mandates support for at least one external display. Intel's official Thunderbolt 4 spec requires 40Gbps bandwidth and DisplayPort 1.4 output.
That's a step above basic DP Alt Mode because it guarantees video capability.
USB4 is another standard you'll see on newer laptops. It's based on Thunderbolt 3 architecture and generally supports display output as well. But the specific capabilities depend entirely on how the laptop manufacturer implemented it.
Some USB4 implementations only support data transfer.
Here's a quick breakdown of what to expect from each standard:
| Standard | Video Output Support | Max Bandwidth | Notes |
|---|---|---|---|
| USB-C (data only) | No | 5–10Gbps | Common on budget laptops and phones |
| USB-C with DP Alt Mode | Yes (DP 1.4) | 5–20Gbps | Most common video-capable USB-C |
| Thunderbolt 3 | Yes (DP 1.4) | 40Gbps | Retina triangle logo on port |
| Thunderbolt 4 | Yes (DP 1.4, mandatory) | 40Gbps | Minimum one display guaranteed |
| USB4 | Varies by device | 20–40Gbps | Implementation depends on manufacturer |
The bottom line. Don't assume your USB-C port handles video. Always check your specific laptop model's specifications before troubleshooting cables or monitors.
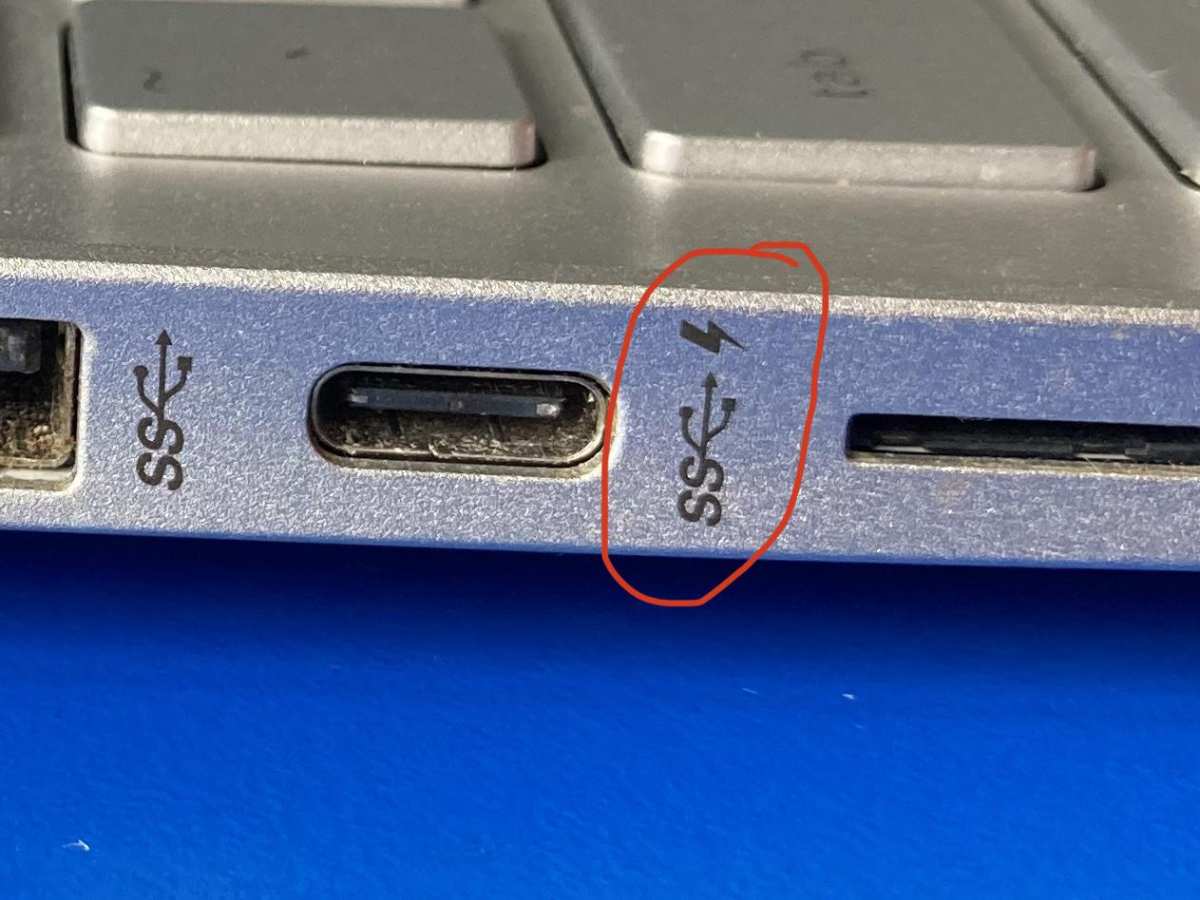
Image source: Bing (Web (fair-use with source credit))
Step 1: Check If Your Laptop's USB-C Port Supports Display Output
This is where most setups hit a wall. People plug everything in assuming it should work, then spend an hour wondering why the screen stays black. The issue is almost always at the port level.
How to verify your port supports video
1. Look for a symbol next to the port. Manufacturers print small icons beside USB-C ports to indicate capability. A lightning bolt means Thunderbolt.
A "D" shape with a "P" inside means DisplayPort. A small monitor icon means video output. If you see nothing next to the port, that's not a great sign, it might be data-only.
2. Check the laptop's spec sheet directly. Go to your manufacturer's product page for your exact model number. Look under "ports" or "connectivity" and search for phrases like "DisplayPort over USB-C", "USB-C with DP Alt Mode", or "Thunderbolt 4 with display support".
Relying on memory or assumptions here causes most of the frustration people report in forums.
3. Look in your system information. On Windows, open Device Manager and check under "Display adapters" and "Universal Serial Bus controllers". On macOS, go to Apple menu, then System Information, then Thunderbolt or Graphics/Displays.
If you see Thunderbolt controller listed, your port definitely supports video.
What if your port doesn't support video?
You're not out of options. You can still connect an external display using a USB-C hub or dock that includes its own DisplayLink chip. DisplayLink is a technology that compresses video through a standard USB data connection.
It works with data-only USB-C ports, but it requires a driver and uses your CPU rather than your GPU. It's fine for office work and web browsing. It's not ideal for gaming or color-critical video editing.
Here's a quick decision tree:
- Port has Thunderbolt or DP Alt Mode symbol: Go straight to cable selection.
- Port has no symbol but laptop is a business-class model (ThinkPad, Latitude, EliteBook): Check the spec sheet. Many business laptops include DP Alt Mode even without a printed icon.
- Port is on a budget or ultraportable laptop with only one USB-C port: There's a higher chance it's data-only. Verify before buying cables.
- Port confirmed data-only: Get a DisplayLink-compatible dock or use a different connection method entirely.
Step 2: Make Sure Your Cable Actually Carries a Video Signal
This catches more people than anything else. Most USB-C cables included with phones, power banks, or accessories are charge-only or data-only. They physically fit the port perfectly but carry zero video signal.
Plugging one in and getting "no signal" on the monitor doesn't mean anything is broken, it means the wrong cable is in play.
Cable types and what they support
| Cable Type | Charge | Data | Video Signal | Common Use Case |
|---|---|---|---|---|
| USB-C charge-only | Yes | No | No | Phones, earbuds, power banks |
| USB-C USB 2.0 data | Limited | 480Mbps | No | Older peripherals, mice |
| USB-C USB 3.2 data | Yes | 5–10Gbps | No (usually) | External SSDs, hubs |
| USB-C with DP Alt Mode | Yes | Varies | Yes (DP 1.4) | Direct monitor connection |
| Thunderbolt 3/4 cable | Yes | 40Gbps | Yes (DP 1.4) | Premium monitors, docks |
The safest approach is to use the cable that came with your USB-C monitor. Most manufacturers who sell USB-C monitors include a video-capable cable in the box because they know this is a common pain point. If you need a replacement, look for cables explicitly labeled "4K 60Hz" or "DisplayPort Alt Mode" in the product description.
Active vs. passive cables
For runs longer than two meters, or for 4K at higher refresh rates, active cables contain a small chip that boosts the signal. Passive cables work fine for shorter runs and standard 4K 60Hz output, which covers the vast majority of office and productivity setups.
Quick cable checklist
- Does the cable product listing mention video, DP Alt Mode, or 4K output?
- Is it rated for at least USB 3.2 Gen 1 (5Gbps) or higher?
- For Thunderbolt monitors, is it a certified Thunderbolt cable (look for the lightning bolt logo on packaging)?
- Avoid no-name cables from marketplace sellers without clear specs listed.
If you've got the right laptop port and the right cable and still get nothing on screen, the issue is usually at the monitor's input selection.
Step 3: Connect and Configure Your USB-C Monitor as the Primary Display
With the right port and cable confirmed, getting the physical connection working is straightforward. Configuring it properly in your operating system is where you'll set it as your primary display.
The connection order that works best
1. Turn on the monitor first. Let it fully boot before connecting anything. This helps the monitor announce its capabilities to your laptop during the handshake.
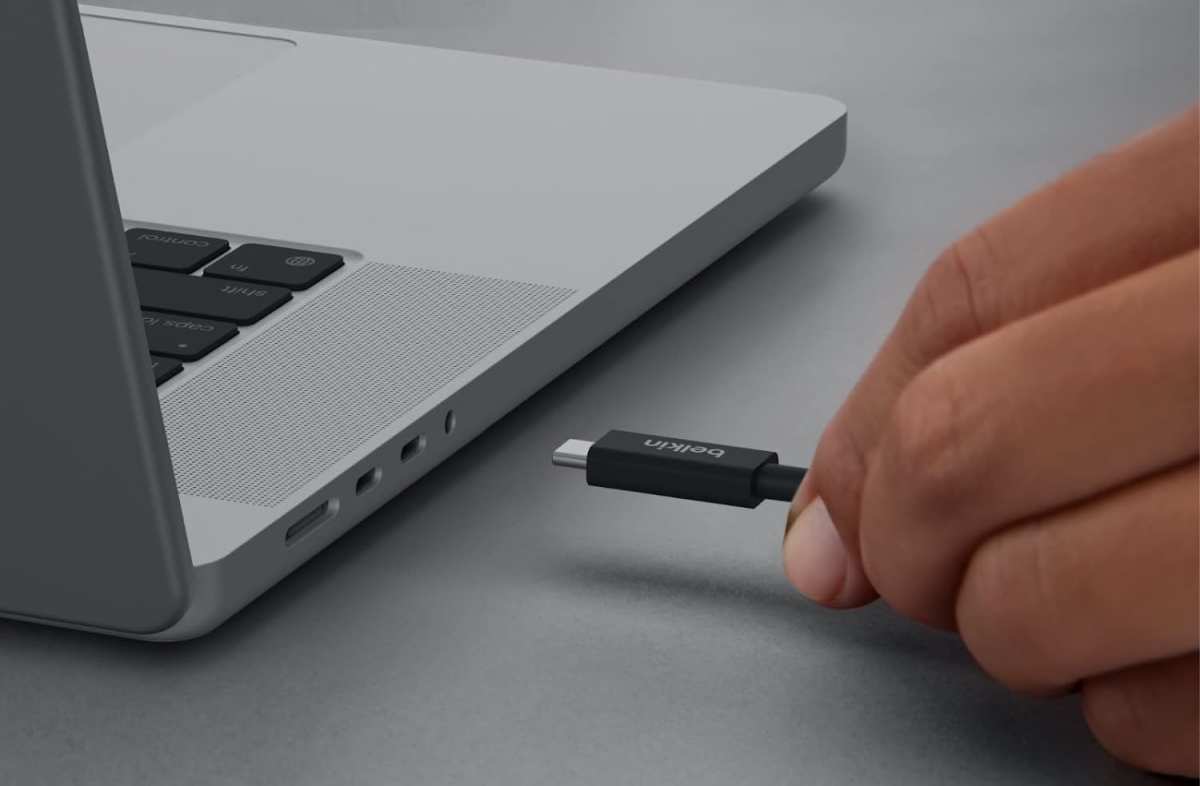
2. Plug the USB-C cable into the laptop, then into the monitor. On many monitors with multiple USB-C ports, only one supports video input. The other might be output-only or data-only.
Check your monitor's manual or the labels printed beside each port.
3. Select the correct input on the monitor if needed. Some monitors auto-detect the active input. Others require you to manually select USB-C via the on-screen display menu.
If you see "No Signal", this is almost always the first thing to check.
4. Wait for your laptop to detect the external display. On Windows, you'll usually see the screen flash briefly. On macOS, the display should mirror within a few seconds if everything is compatible.
Laptop doesn't detect the monitor at all?
Try these in order:
- Reseat the cable at both ends.
- Try the other USB-C port on your laptop if one exists.
- Restart the laptop with the monitor connected and powered on.
- Test with a different known video-capable cable.
- Update your GPU drivers (Intel Graphics Command Center on Windows, or Software Update on macOS).
Image source: Bing (Web (fair-use with source credit))
Windows Setup
1. Right-click the desktop background and select "Display settings". This opens the Windows display configuration page.
2. Click "Detect" if the USB-C monitor doesn't show up as display 2. Sometimes Windows needs a nudge.
3. Click on the numbered box representing your USB-C monitor. Each display gets a number. If you're not sure which is which, click "Identify" and the numbers will briefly appear on each screen.
4. Scroll down to "Multiple displays" and set the dropdown to "Extend these displays" or "Show only on 2" depending on whether you want dual-screen or single-screen use.
5. Check the box labeled "Make this my main display". This sets the USB-C monitor as your primary display where the taskbar, Start menu, and new application windows appear by default.
macOS Setup
1. Open System Settings (or System Preferences on older macOS versions).
2. Go to Displays. Your USB-C monitor should appear as a separate window.
3. Click "Arrangement" to see both displays represented as boxes. The white menu bar at the top of one box indicates the primary display.
4. Drag the white menu bar to the box representing your USB-C monitor. This immediately makes that display the primary screen.
5. If you're using mirror mode instead, uncheck "Mirror Displays" first to access arrangement options.
On Apple Silicon Macs (M1, M2, M3, M4), be aware that the base M1 chip only supports a single external display through Thunderbolt. M1 Pro, M1 Max, M2 Pro, M2 Max, and M3/M4 Pro and Max chips support multiple external displays. This is a chip-level limitation unrelated to your USB-C port or monitor.
Apple's official M1 technical specifications confirm single external display support on the base chip. If you have a base M1 Mac and need multiple monitors, you'll need a DisplayLink dock.
Step 4: Set the USB-C Monitor as Your Main Display
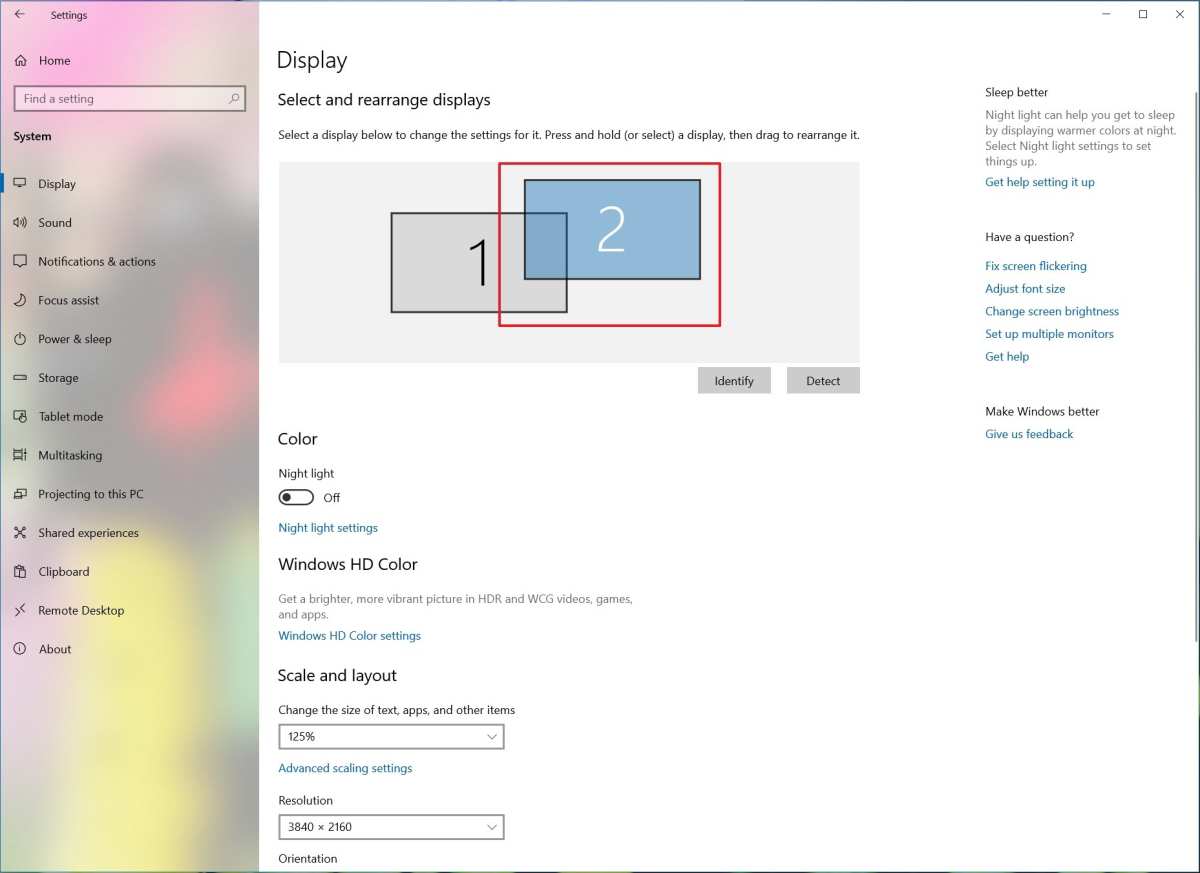
Image source: Bing (Web (fair-use with source credit))
Setting the monitor as your primary display is technically covered in the OS steps above, but there are a few additional configuration details most guides skip.
Adjusting resolution and refresh rate
After setting the external as primary, go back into your display settings and verify the resolution and refresh rate match the monitor's native specs. Running at a non-native resolution makes everything look soft or stretched.
On Windows: Display Settings, select the monitor, scroll to "Display resolution" and "Refresh rate". Pick the highest available option, which is almost always the native resolution.
On macOS: System Settings, Displays, select the monitor, and choose "Default for display" for best results. If you want a custom refresh rate, hold Option and click "Scaled" to see additional options.
Handling the laptop screen
If you're using the USB-C monitor as a primary display while keeping the laptop open as a secondary screen, the laptop display stays active beside the main monitor. If you want to close the laptop lid and use only the external display, make sure your power settings allow it.
On Windows: Control Panel, Power Options, "Choose what closing the lid does". Set it to "Do nothing" when plugged in. Then you can close the lid and the USB-C monitor stays active.
On macOS: macOS supports clamshell mode by default when the Mac is connected to power and an external display. Just close the lid and the system switches to external-only mode. The Mac must be plugged into power for this to work.
Application window management
Once the USB-C monitor is primary, new application windows will open on that display by default. Some apps remember which display they were last open on. If an app keeps opening on the wrong screen, drag it to the primary display, close it, and reopen it.
Windows and macOS both learn this preference over time.
Common Problems and How to Fix Them
Even when everything is technically compatible, things sometimes don't behave. Here are the most common issues people run into and what actually fixes them.
Monitor shows "no signal" despite being connected
This is the number one complaint, and it's almost always one of three things. First, the wrong monitor input is selected. Switch to the correct USB-C input via the monitor's menu.
Second, the cable is charge-only or data-only. Swap it for a certified video-capable USB-C cable. Third, the laptop's USB-C port doesn't support video output.
Go back and verify using the steps in Section 2.
Display detected but wrong resolution
On Windows, this usually means your GPU driver is outdated. Open Device Manager, find your graphics adapter under "Display adapters", right-click and select "Update driver". On macOS, try selecting a different resolution and then switching back to the native one.
If the correct resolution doesn't appear as an option, check whether your cable supports the bandwidth needed for that resolution and refresh rate.
Flickering or intermittent connection
This points to a cable issue more often than anything else. A cable with damaged internal wiring or a loose connection can cause intermittent video. Replace the cable and the flickering should stop.
If it doesn't, try a different USB-C port on your laptop or a different port on the monitor if one is available.
Laptop not charging through the monitor
USB-C monitors can deliver power back to the laptop through Power Delivery (PD), but the wattage varies significantly. Some monitors only supply 15 to 30 watts, which is enough to slow-charge most laptops but not fast-charge them. If your battery is draining while plugged into the monitor, the monitor's charging output is likely too low for your usage.
Check your monitor's specifications for the exact PD wattage it provides. Many productivity-focused monitors in the 2024 to 2026 range deliver between 60 and 90 watts, which is sufficient for most ultrabooks and business laptops. Power-hungry workstations and gaming laptops typically need 100 watts or more, which most monitors cannot supply.
USB-C vs. HDMI vs. DisplayPort: Which Connection Should You Use?
If your monitor and laptop support multiple connection types, here's how to choose between them.
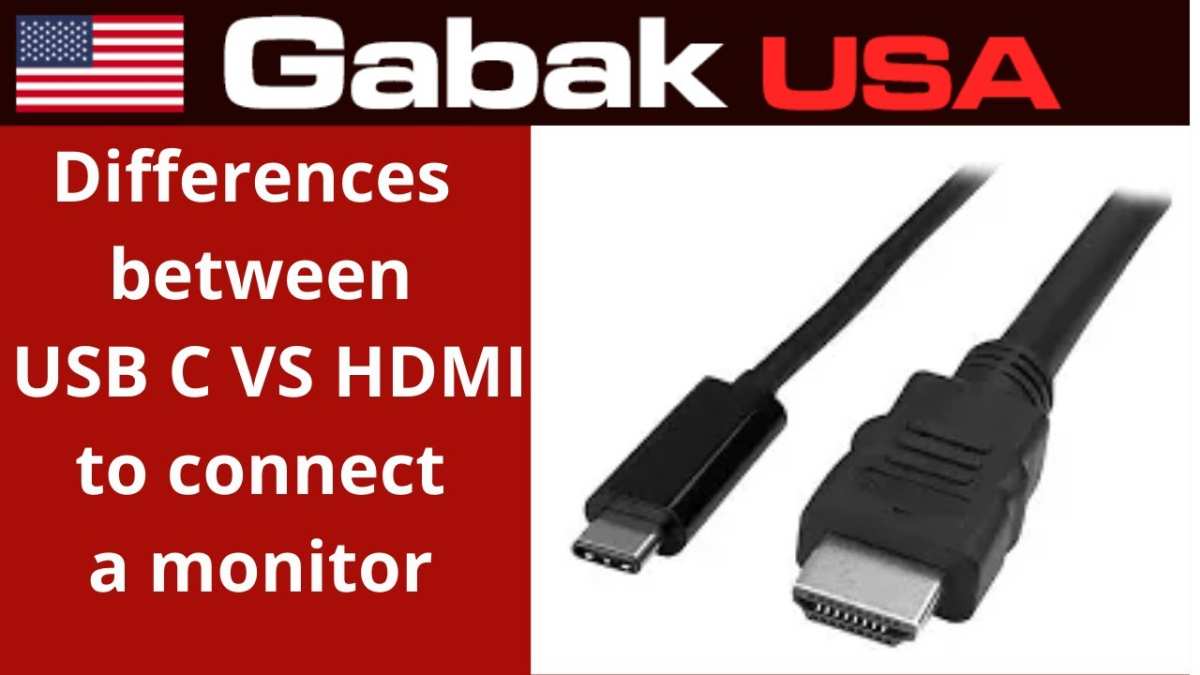
Image source: Bing (Web (fair-use with source credit))
USB-C: The single-cable solution
USB-C carries video, data, and power delivery through one cable. When it supports DP Alt Mode or Thunderbolt, it handles 4K 60Hz without any issues. The setup is ideal for clean desk configurations where you want minimal clutter.
For most people who use the monitor primarily with a laptop, USB-C is the most convenient option by far.
HDMI: The universal fallback
HDMI is everywhere. Every TV, most monitors, and nearly every laptop supports it. HDMI 2.0 supports 4K at 60Hz.
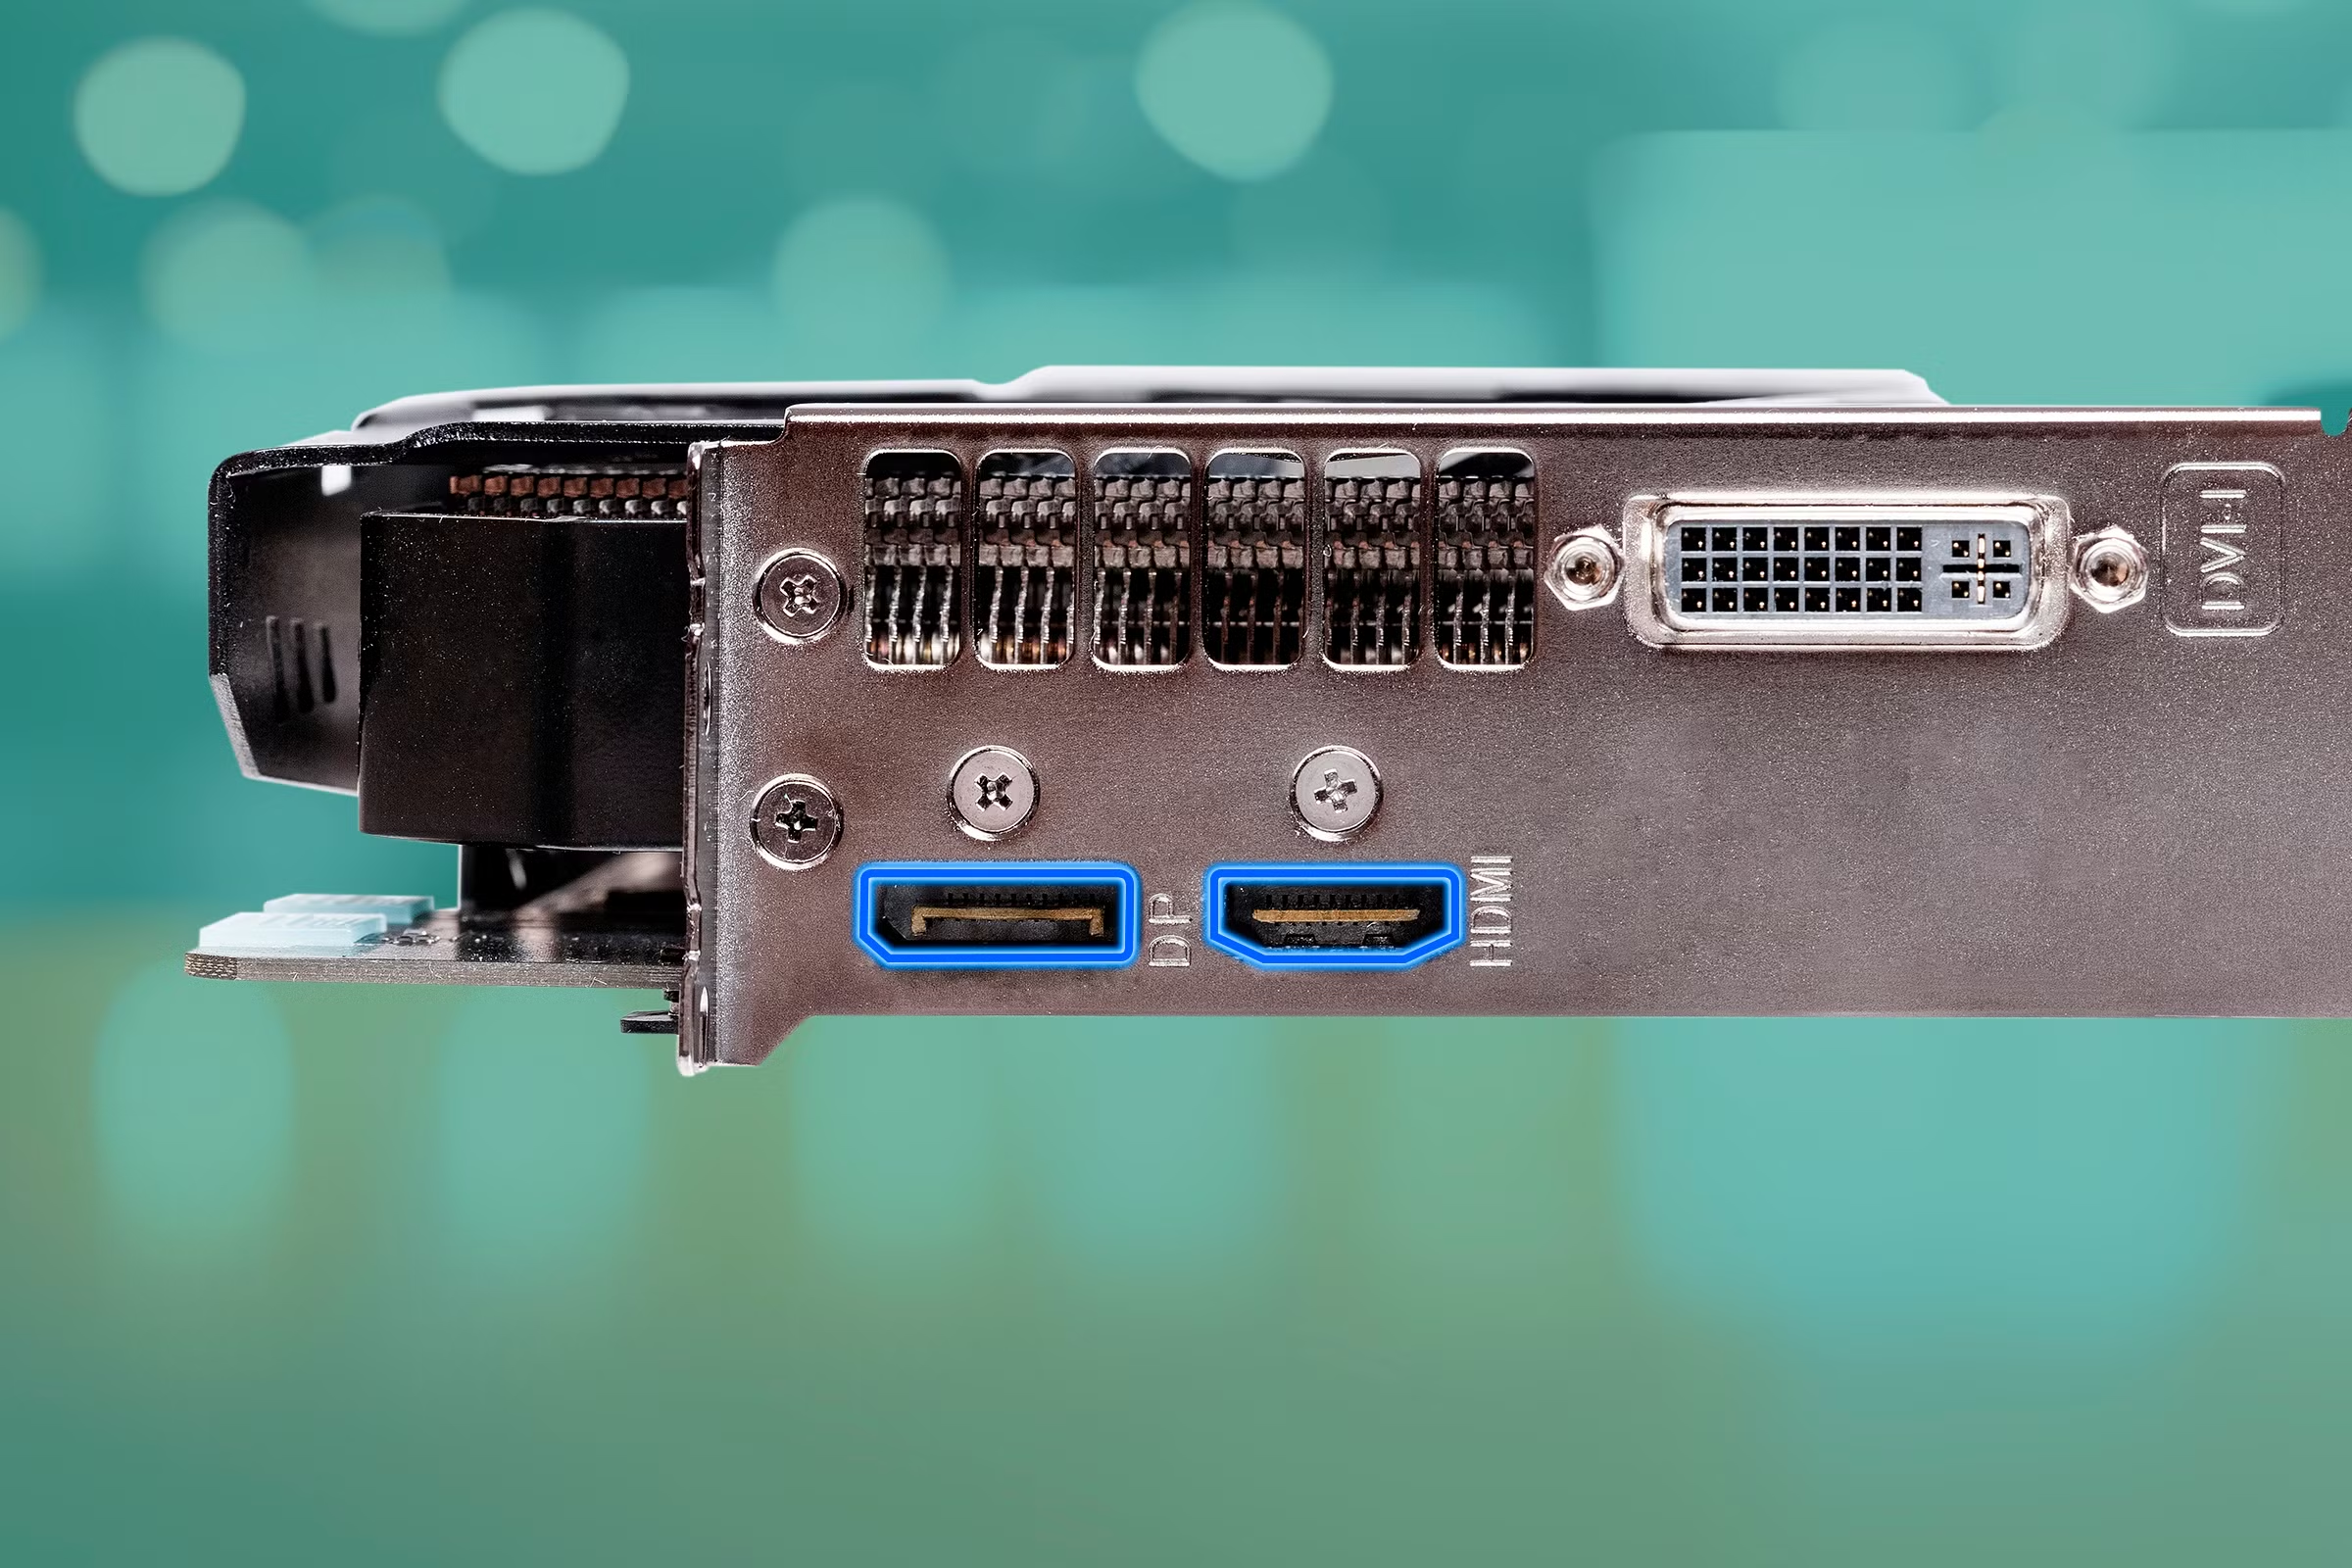
HDMI 2.1 supports 4K at 120Hz and higher. The downside is HDMI doesn't carry power delivery, and USB-C hubs and data connections don't flow through it either. HDMI is the best choice when you're connecting to a TV or when your USB-C port isn't video-capable.
DisplayPort: The enthusiast favorite
DisplayPort 1.4 supports 4K at 120Hz and includes features like Multi-Stream Transport (MST) for daisy-chaining multiple monitors. It's the preferred connection for gamers and creative professionals who need high refresh rates and color accuracy. DisplayPort doesn't carry power delivery either and is less common on laptops, so you'll often need a USB-C to DisplayPort cable or adapter.
Which should you pick?
| Feature | USB-C (DP Alt Mode) | HDMI 2.0 | DisplayPort 1.4 |
|---|---|---|---|
| Single cable for video + power | Yes | No | No |
| 4K 60Hz support | Yes | Yes | Yes |
| 4K 120Hz support | Depends on cable/Thunderbolt | No (needs HDMI 2.1) | Yes |
| Daisy-chaining (MST) | No | No | Yes |
| Power delivery to laptop | Yes (up to 100W+) | No | No |
| Universal compatibility | Growing but not universal | Very high | Common on monitors and desktops |
For a laptop-driven setup where you want one cable to rule them all, USB-C is the answer. For a desktop or gaming setup where you need maximum refresh rates and don't care about power delivery, DisplayPort is better. HDMI works as the universal fallback for everything else.
Who Benefits Most From a USB-C Primary Display Setup
Not everyone needs USB-C for their primary display. But for certain users, it solves a real problem.
Remote and hybrid workers
If you hot-desk or work from different locations, being able to plug one cable into a monitor and get video, charging, and peripherals through a single connection saves real time. USB-C monitors with built-in hubs mean your keyboard, mouse, and Ethernet connect through the monitor itself. One plug, and you're set.
Minimalist desk setups
Cable clutter is a real annoyance for people who care about a clean workspace. A USB-C monitor paired with a single cable replaces what would otherwise be a power cable, a video cable, and potentially a USB hub sitting on the desk.
Traveling professionals who use monitors on the road
Carrying a USB-C monitor for hotel room setups is increasingly common in 2026. Portable USB-C monitors from manufacturers like ASUS and Lenovo run off the laptop's USB-C port and require no external power adapter. That's a significant weight and bulk saving over carrying a full-size monitor with its own power brick.
People replacing an aging all-in-one or laptop screen
If your laptop's built-in display cracked or your older all-in-one is slowing down, a USB-C external monitor becomes a viable primary display replacement. A 24-inch USB-C monitor costs between $150 and $300 for a solid productivity panel. That's cheaper than many laptop screen repairs.
Mistakes People Make When Setting Up a USB-C Monitor
Assuming all USB-C ports are the same
This one causes more frustration than anything else. Budget laptops, phones, and Chromebooks frequently include USB-C ports that handle only data and charging. Expecting video output from a port that doesn't support it leads to unnecessary troubleshooting of cables and monitors that aren't the problem at all.
Using random USB-C cables for video
Bundled phone and accessory cables are almost never rated for display signal. They fit the port. They charge the device.
They just won't produce a picture. People grab whatever USB-C cable is at hand, plug in the monitor, get no signal, and conclude the setup is broken. Set aside a dedicated video-capable cable or use the one included with the monitor.
Forgetting to update GPU drivers
Windows in particular relies on up-to-date GPU drivers for external display detection. An Intel Iris Xe driver from early 2024 might not properly handshake with a USB-C monitor released later that year. Keeping GPU drivers current prevents half of the "display not detected" issues we've seen reported across support forums.
Not checking monitor input priority
Many USB-C monitors with built-in USB hubs assign video capability to only one of their USB-C ports. If you plug into the data-only USB-C port, the monitor charges your laptop and connects peripherals but shows no picture. Always verify which port on the monitor carries the video signal.
It's usually labeled or noted in the quick-start guide.
Ignoring monitor refresh rate configuration
The system often defaults to 30Hz on first connection, especially at higher resolutions. Everything feels sluggish and the mouse cursor trails across the screen. That's not a display defect.
It's just the refresh rate needing to be changed in the OS display settings. Always check and set it to the maximum the monitor supports.
Expert Tips for a Reliable USB-C Display Setup
Buy a cable you actually trust
A quality USB-C to USB-C cable rated for 4K 60Hz video costs between $12 and $25 from reputable cable manufacturers. It's a trivial investment if it saves you troubleshooting time. Look for cables that explicitly state support for DisplayPort Alt Mode or Thunderbolt in their product specifications.
Check for EDID handshake issues
If the display powers on but never shows an image, the Extended Display Identification Data (EDID) handshake failed. This can happen with certain monitor and GPU combinations, especially when using a USB-C dock in the chain. Try a direct USB-C to USB-C connection without any dock in between to isolate the problem.
Validate the monitor EDID with a free utility
Tools like SwitchResX (macOS) or Monitor Asset Manager (Windows) let you read the EDID data your monitor reports. If the data block is empty or garbled, the connection between the devices has a fundamental communication problem. That usually means a cable issue or a port that isn't carrying signal properly.
When to choose a dock over direct connection
If your laptop has only one video-capable USB-C port and you need more than one external display, a Thunderbolt or USB4 dock with MST support lets you drive multiple monitors from that single port. Direct USB-C to monitor for one display remains simpler and cleaner. Docks make sense when you need three or more displays or hardwired Ethernet alongside the external screen.
Real-World Scenarios: How Different Users Set This Up
Scenario 1. Office laptop to conference room monitor
A Lenovo ThinkPad T14 Gen 4 connected to a Dell U2723QE via a single USB-C cable. The ThinkPad's Thunderbolt 4 port sends video and receives 90W power simultaneously. The monitor's built-in USB hub connects the conference room's webcam and speakerphone.
When the meeting ends, the user unplugs one cable and walks away. Total meeting setup time is under thirty seconds.
Scenario 2. Mac mini on an LG UltraFine display
An M2 Mac mini paired with an LG UltraFine 4K display. The Mac mini's Thunderbolt 4 port drives the display through a single USB-C cable. macOS automatically configures the resolution and refresh rate without any manual adjustment. The display also provides 60W power delivery to the laptop, although the Mac mini is a desktop and wouldn't benefit from charging.
Total cable count on the desk: two, including the power cord.
Scenario 3. Gaming laptop using USB-C as secondary output
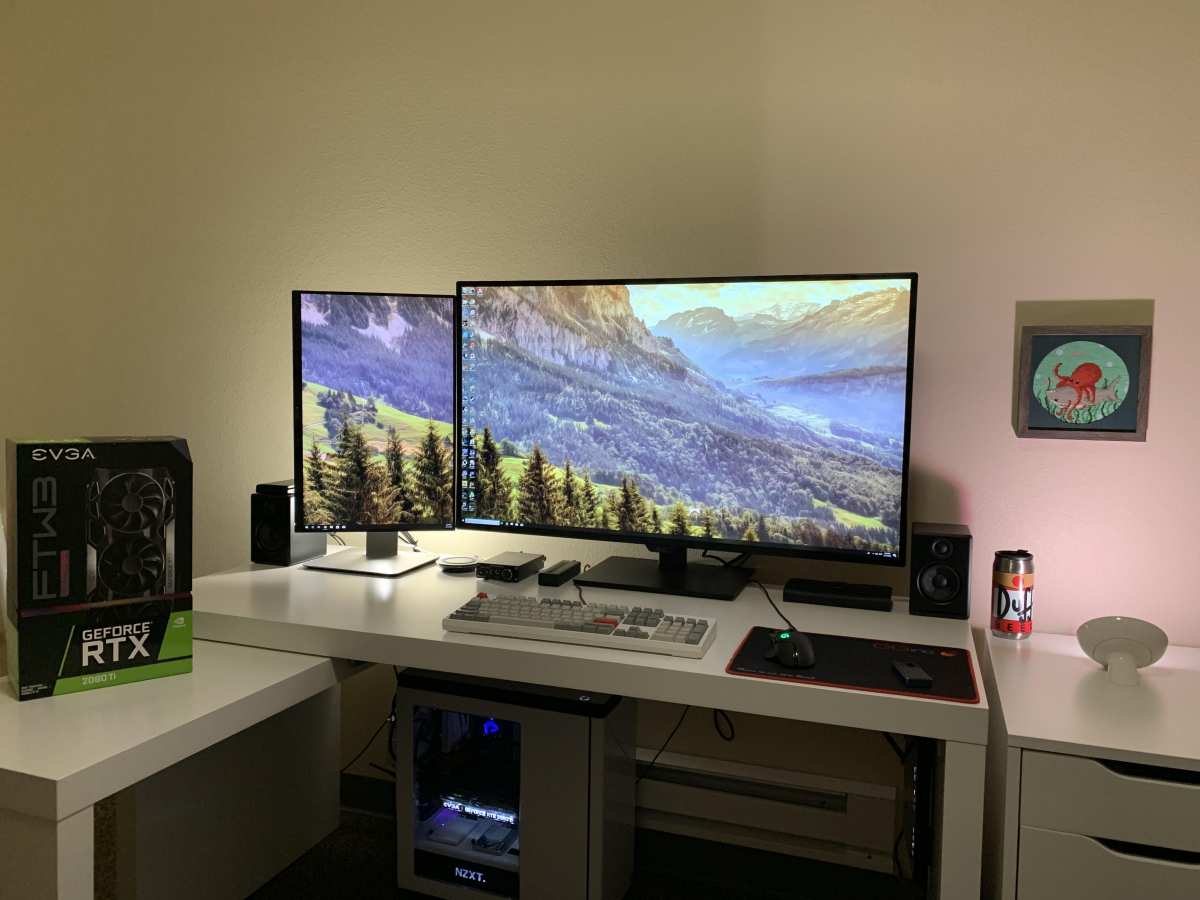
An ASUS ROG Strix with a direct Mini DisplayPort used for a high-refresh-rate gaming monitor and a USB-C connection to a 4K productivity screen. The gaming display runs at 165Hz via Mini DisplayPort. The USB-C monitor acts as the primary display for browsing, Discord, and streaming setup while gaming happens on the secondary high-refresh screen.
Display settings in Windows designate which is primary based on the user's preference.
Scenario 4. Portable monitor for mobile workflows
A freelancer using a 15.6-inch portable USB-C monitor from ASUS connected to a MacBook Air M3. The monitor draws power from the laptop's USB-C port and displays at 1080p 60Hz. Setup is travel-ready and fits in a laptop bag alongside the MacBook.
No separate power adapter is needed for the monitor.
Frequently Asked Questions
Can I use a USB-C monitor as my primary display if my laptop only has one USB-C port?
Yes. As long as that single USB-C port supports DisplayPort Alt Mode or Thunderbolt, you can use the external monitor as your primary display. The laptop's built-in screen can remain active as a secondary display or be turned off in display settings to save battery.
Why won't my USB-C monitor turn on with my laptop?
The most common cause is a charge-only USB-C cable. Switch to a cable rated for DisplayPort Alt Mode or Thunderbolt. Also confirm the monitor's input source is set to the correct USB-C port if the monitor has multiple.
Does USB-C monitor work with all laptops?
Not all. Laptops with data-only USB-C ports cannot output video through a direct USB-C connection. Check your laptop's specifications for "DisplayPort over USB-C" or "Thunderbolt" support.
If neither is listed, a DisplayLink dock is the workaround.
Can I daisy-chain multiple USB-C monitors?
Daisy-chaining, also called Multi-Stream Transport, typically requires DisplayPort 1.2 MST or Thunderbolt. Most consumer USB-C monitors don't support MST natively. Thunderbolt 4 docks and monitors can chain up to two 4K displays, but standard USB-C monitors usually cannot be chained to each other.
How do I make the external USB-C monitor my primary display on Windows 11?
Open Settings, then System, then Display. Click the numbered box representing the USB-C monitor. Scroll to the Multiple displays section and check "Make this my main display".
The taskbar, Start menu, and new application windows will default to that monitor.
Is USB-C better than HDMI for a primary monitor?
It depends on your needs. USB-C carries power and data alongside video, which reduces cable clutter. HDMI is more universally compatible across devices.
For laptops especially, USB-C is often the more convenient single-cable solution. For desktops and gaming, HDMI or DisplayPort may offer better bandwidth for high refresh rate displays.
Final Recommendation: Your Decision Guide Based on Your Setup
If your laptop has a Thunderbolt 4 or DP Alt Mode USB-C port, use a USB-C monitor as your primary display with a single video-capable cable. It's the cleanest, simplest setup for laptop users and handles power delivery alongside the video signal.
If your laptop only has a data-only USB-C port, pick up a DisplayLink-compatible dock. It works through standard USB, so you're not locked out entirely. Just install the DisplayLink driver and accept that it's optimized for productivity over gaming or video editing.
If you're running a desktop with a dedicated GPU, DisplayPort or HDMI still makes more sense for maximum performance. USB-C on desktops is a nice-to-have, not a necessity.
The setup steps are straightforward once you confirm compatibility at the port level. Check the port specs, grab the right cable, configure the display settings in your OS, and you're done. Most people can complete the entire process in under ten minutes.
Common Problems and How to Fix Them
Monitor shows "no signal" despite being connected
This is the number one complaint, and it's almost always one of three things. First, the wrong monitor input is selected. Switch to the correct USB-C input via the monitor's menu.
Second, the cable is charge-only or data-only. Swap it for a certified video-capable USB-C cable. Third, the laptop's USB-C port doesn't support video output.
Go back and verify using the steps in Section 2.
Display detected but wrong resolution
On Windows, this usually means your GPU driver is outdated. Open Device Manager, find your graphics adapter under "Display adapters", right-click and select "Update driver". On macOS, try selecting a different resolution and then switching back to the native one.
If the correct resolution doesn't appear as an option, check whether your cable supports the bandwidth needed for that resolution and refresh rate.
Flickering or intermittent connection
This points to a cable issue more often than anything else. A cable with damaged internal wiring or a loose connection can cause intermittent video. Replace the cable and the flickering should stop.
If it doesn't, try a different USB-C port on your laptop or a different port on the monitor if one is available.
Laptop not charging through the monitor
USB-C monitors can deliver power back to the laptop through Power Delivery (PD), but the wattage varies significantly. Some monitors only supply 15 to 30 watts, which is enough to slow-charge most laptops but not fast-charge them. If your battery is draining while plugged into the monitor, the monitor's charging output is likely too low for your usage.
Check your monitor's specifications for the exact PD wattage it provides. Many productivity-focused monitors in the 2024 to 2026 range deliver between 60 and 90 watts, which is sufficient for most ultrabooks and business laptops. Power-hungry workstations and gaming laptops typically need 100 watts or more, which most monitors cannot supply.
USB-C vs. HDMI vs. DisplayPort: Which Connection Should You Use?
If your monitor and laptop support multiple connection types, here's how to choose between them.
Image source: Bing (Web (fair-use with source credit))
USB-C: The single-cable solution
USB-C carries video, data, and power delivery through one cable. When it supports DP Alt Mode or Thunderbolt, it handles 4K 60Hz without any issues. The setup is ideal for clean desk configurations where you want minimal clutter.
For most people who use the monitor primarily with a laptop, USB-C is the most convenient option by far.
HDMI: The universal fallback
HDMI is everywhere. Every TV, most monitors, and nearly every laptop supports it. HDMI 2.0 supports 4K at 60Hz.
HDMI 2.1 supports 4K at 120Hz and higher. The downside is HDMI doesn't carry power delivery, and USB-C hubs and data connections don't flow through it either. HDMI is the best choice when you're connecting to a TV or when your USB-C port isn't video-capable.
DisplayPort: The enthusiast favorite
DisplayPort 1.4 supports 4K at 120Hz and includes features like Multi-Stream Transport (MST) for daisy-chaining multiple monitors. It's the preferred connection for gamers and creative professionals who need high refresh rates and color accuracy. DisplayPort doesn't carry power delivery either and is less common on laptops, so you'll often need a USB-C to DisplayPort cable or adapter.
Which should you pick?
| Feature | USB-C (DP Alt Mode) | HDMI 2.0 | DisplayPort 1.4 |
|---|---|---|---|
| Single cable for video + power | Yes | No | No |
| 4K 60Hz support | Yes | Yes | Yes |
| 4K 120Hz support | Depends on cable/Thunderbolt | No (needs HDMI 2.1) | Yes |
| Daisy-chaining (MST) | No | No | Yes |
| Power delivery to laptop | Yes (up to 100W+) | No | No |
| Universal compatibility | Growing but not universal | Very high | Common on monitors and desktops |
For a laptop-driven setup where you want one cable to rule them all, USB-C is the answer. For a desktop or gaming setup where you need maximum refresh rates and don't care about power delivery, DisplayPort is better. HDMI works as the universal fallback for everything else.
Who Benefits Most From a USB-C Primary Display Setup
Not everyone needs USB-C for their primary display. But for certain users, it solves a real problem.
Remote and hybrid workers
If you hot-desk or work from different locations, being able to plug one cable into a monitor and get video, charging, and peripherals through a single connection saves real time. USB-C monitors with built-in hubs mean your keyboard, mouse, and Ethernet connect through the monitor itself. One plug, and you're set.
Minimalist desk setups
Cable clutter is a real annoyance for people who care about a clean workspace. A USB-C monitor paired with a single cable replaces what would otherwise be a power cable, a video cable, and potentially a USB hub sitting on the desk.
Traveling professionals who use monitors on the road
Carrying a USB-C monitor for hotel room setups is increasingly common in 2026. Portable USB-C monitors from manufacturers like ASUS and Lenovo run off the laptop's USB-C port and require no external power adapter. That's a significant weight and bulk saving over carrying a full-size monitor with its own power brick.
People replacing an aging all-in-one or laptop screen
If your laptop's built-in display cracked or your older all-in-one is slowing down, a USB-C external monitor becomes a viable primary display replacement. A 24-inch USB-C monitor costs between $150 and $300 for a solid productivity panel. That's cheaper than many laptop screen repairs.
Mistakes People Make When Setting Up a USB-C Monitor
Assuming all USB-C ports are the same
This one causes more frustration than anything else. Budget laptops, phones, and Chromebooks frequently include USB-C ports that handle only data and charging. Expecting video output from a port that doesn't support it leads to unnecessary troubleshooting of cables and monitors that aren't the problem at all.
Using random USB-C cables for video
Bundled phone and accessory cables are almost never rated for display signal. They fit the port. They charge the device.
They just won't produce a picture. People grab whatever USB-C cable is at hand, plug in the monitor, get no signal, and conclude the setup is broken. Set aside a dedicated video-capable cable or use the one included with the monitor.
Forgetting to update GPU drivers
Windows in particular relies on up-to-date GPU drivers for external display detection. An Intel Iris Xe driver from early 2024 might not properly handshake with a USB-C monitor released later that year. Keeping GPU drivers current prevents half of the "display not detected" issues we've seen reported across support forums.
Not checking monitor input priority
Many USB-C monitors with built-in USB hubs assign video capability to only one of their USB-C ports. If you plug into the data-only USB-C port, the monitor charges your laptop and connects peripherals but shows no picture. Always verify which port on the monitor carries the video signal.
It's usually labeled or noted in the quick-start guide.
Ignoring monitor refresh rate configuration
The system often defaults to 30Hz on first connection, especially at higher resolutions. Everything feels sluggish and the mouse cursor trails across the screen. That's not a display defect.
It's just the refresh rate needing to be changed in the OS display settings. Always check and set it to the maximum the monitor supports.
Expert Tips for a Reliable USB-C Display Setup
Buy a cable you actually trust
A quality USB-C to USB-C cable rated for 4K 60Hz video costs between $12 and $25 from reputable cable manufacturers. It's a trivial investment if it saves you troubleshooting time. Look for cables that explicitly state support for DisplayPort Alt Mode or Thunderbolt in their product specifications.
Check for EDID handshake issues
If the display powers on but never shows an image, the Extended Display Identification Data (EDID) handshake failed. This can happen with certain monitor and GPU combinations, especially when using a USB-C dock in the chain. Try a direct USB-C to USB-C connection without any dock in between to isolate the problem.
Validate the monitor EDID with a free utility
Tools like SwitchResX (macOS) or Monitor Asset Manager (Windows) let you read the EDID data your monitor reports. If the data block is empty or garbled, the connection between the devices has a fundamental communication problem. That usually means a cable issue or a port that isn't carrying signal properly.
When to choose a dock over direct connection
If your laptop has only one video-capable USB-C port and you need more than one external display, a Thunderbolt or USB4 dock with MST support lets you drive multiple monitors from that single port. Direct USB-C to monitor for one display remains simpler and cleaner. Docks make sense when you need three or more displays or hardwired Ethernet alongside the external screen.
Real-World Scenarios: How Different Users Set This Up
Scenario 1: Office laptop to conference room monitor
A Lenovo ThinkPad T14 Gen 4 connected to a Dell U2723QE via a single USB-C cable. The ThinkPad's Thunderbolt 4 port sends video and receives 90W power simultaneously. The monitor's built-in USB hub connects the conference room webcam and speakerphone.
When the meeting ends, the user unplugs one cable and walks away. Total meeting setup time is under thirty seconds.
Scenario 2: Mac mini on a 4K display
An M2 Mac mini paired with an LG UltraFine 4K display. The Mac mini's Thunderbolt 4 port drives the display through a single USB-C cable. macOS automatically configures the resolution and refresh rate without any manual adjustment. The display also provides 60W power delivery, although the Mac mini is a desktop and doesn't need the charging.
Total cable count on the desk is two, including the power cord.
Scenario 3: Gaming laptop using USB-C as secondary output
An ASUS ROG Strix with a direct Mini DisplayPort used for a high-refresh-rate gaming monitor and a USB-C connection to a 4K productivity screen. The gaming display runs at 165Hz via Mini DisplayPort. The USB-C monitor acts as the primary display for browsing, Discord, and streaming setup while gaming happens on the secondary high-refresh screen.
Display settings in Windows designate which is primary based on the user's preference.
Scenario 4: Portable monitor for mobile workflows
A freelancer using a 15.6-inch portable USB-C monitor from ASUS connected to a MacBook Air M3. The monitor draws power from the laptop's USB-C port and displays at 1080p 60Hz. Setup is travel-ready and fits in a laptop bag alongside the MacBook.
No separate power adapter is needed for the monitor.
Frequently Asked Questions
Can I use a USB-C monitor as my primary display if my laptop only has one USB-C port?
Yes. As long as that single USB-C port supports DisplayPort Alt Mode or Thunderbolt, you can use the external monitor as your primary display. The laptop's built-in screen can remain active as a secondary display or be turned off in display settings to save battery.
Why won't my USB-C monitor turn on with my laptop?
The most common cause is a charge-only USB-C cable. Switch to a cable rated for DisplayPort Alt Mode or Thunderbolt. Also confirm the monitor's input source is set to the correct USB-C port if the monitor has multiple.
Does USB-C monitor work with all laptops?
Not all. Laptops with data-only USB-C ports cannot output video through a direct USB-C connection. Check your laptop's specifications for "DisplayPort over USB-C" or "Thunderbolt" support.
If neither is listed, a DisplayLink dock is the workaround.
Can I daisy-chain multiple USB-C monitors?
Daisy-chaining, also called Multi-Stream Transport, typically requires DisplayPort 1.2 MST or Thunderbolt. Most consumer USB-C monitors don't support MST natively. Thunderbolt 4 docks and monitors can chain up to two 4K displays, but standard USB-C monitors usually cannot be chained to each other.
How do I make the external USB-C monitor my primary display on Windows 11?
Open Settings, then System, then Display. Click the numbered box representing the USB-C monitor. Scroll to the Multiple displays section and check "Make this my main display".
The taskbar, Start menu, and new application windows will default to that monitor.
Is USB-C better than HDMI for a primary monitor?
It depends on your needs. USB-C carries power and data alongside video, which reduces cable clutter. HDMI is more universally compatible across devices.
For laptops especially, USB-C is often the more convenient single-cable solution. For desktops and gaming, HDMI or DisplayPort may offer better bandwidth for high refresh rate displays.
Final Recommendation: Your Decision Guide Based on Your Setup
If your laptop has a Thunderbolt 4 or DP Alt Mode USB-C port, use a USB-C monitor as your primary display with a single video-capable cable. It's the cleanest, simplest setup for laptop users and handles power delivery alongside the video signal.
If your laptop only has a data-only USB-C port, pick up a DisplayLink-compatible dock. It works through standard USB, so you're not locked out entirely. Just install the DisplayLink driver and accept that it's optimized for productivity over gaming or video editing.
If you're running a desktop with a dedicated GPU, DisplayPort or HDMI still makes more sense for maximum performance. USB-C on desktops is a nice-to-have, not a necessity.
The setup steps are straightforward once you confirm compatibility at the port level. Check the port specs, grab the right cable, configure the display settings in your OS, and you're done. Most people can complete the entire process in under ten minutes.

Similar Posts