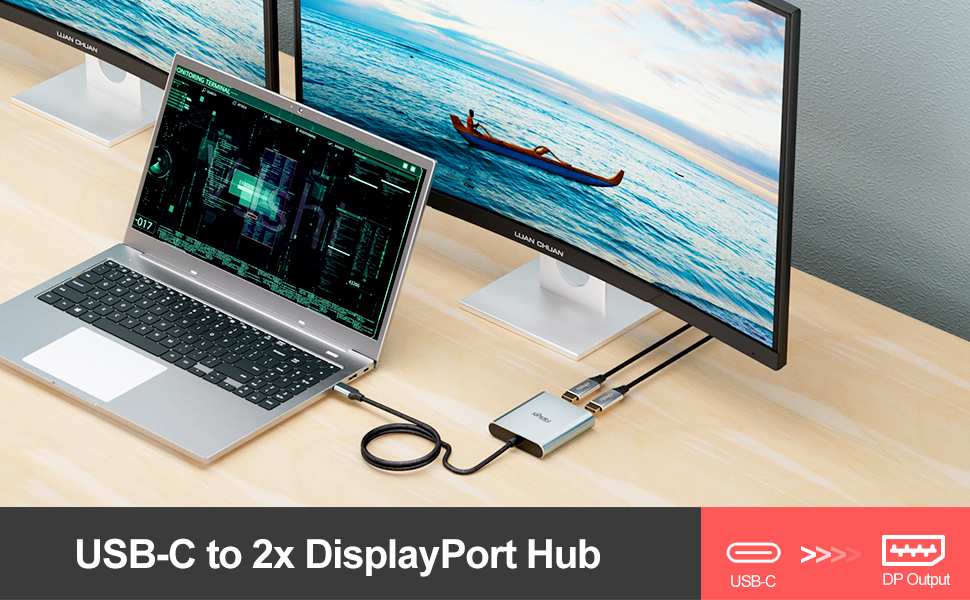
How to Use USB C Monitor for Gaming

Image source: Bing (Web (fair-use with source credit))
Figuring out how to use a USB-C monitor for gaming should be simple. You plug in a cable and the screen lights up. But anyone who's actually tried it knows the reality is messier.
Sometimes you get a black screen. Sometimes you're stuck at 60Hz on a 144Hz panel. Sometimes the monitor works but stops charging your laptop.
The problem isn't the monitor. It's that USB-C is a shape, not a single standard. The port on your device might support full DisplayPort video output, or it might only handle data and charging.
The difference between those two scenarios is the difference between a perfect gaming setup and a frustrating afternoon of troubleshooting.
Here's what actually matters: your port type, your cable, and your GPU. Get all three right and USB-C gaming works beautifully. Get any one of them wrong and you'll wonder why your expensive monitor underperforms.
Let's walk through each one.
Quick Answer
You can use a USB-C monitor for gaming if your device's USB-C port supports DisplayPort Alt Mode or Thunderbolt. Connect using a full-featured USB-C cable that carries video signal. Then configure your refresh rate and Adaptive Sync in your GPU's display settings.
The entire process takes about five minutes when your hardware supports it.
Why Your USB-C Monitor Might Not Work for Gaming (And How to Fix It)
The number one reason USB-C monitors fail for gaming comes down to port capability. Not every USB-C port can output video. Many laptops, especially budget models and business ultrabooks, ship with USB-C ports that only handle data transfer and charging.
They lack DisplayPort Alt Mode support entirely.
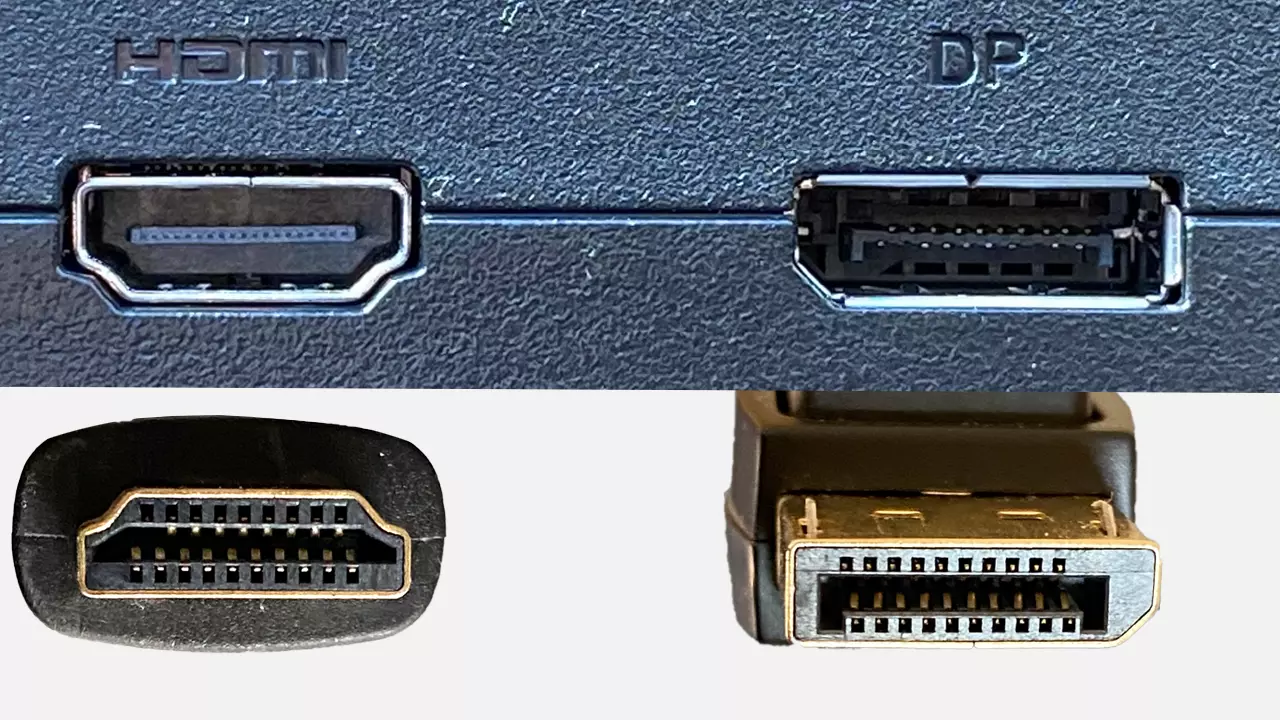
Here's how to check before you buy anything. Look at the symbols printed next to your USB-C port. A lightning bolt icon means Thunderbolt, which always supports video.
A "D" shaped logo or "DP" marking means DisplayPort Alt Mode is available. If you see only a battery icon or a USB symbol (SS or a trident shape), that port likely cannot output video at all.
The second most common issue is the cable. USB-C cables look identical from the outside but vary wildly inside. A cable that charges your phone perfectly might have zero video wiring.
You need a cable rated for DisplayPort Alt Mode or Thunderbolt to carry a video signal. We'll cover exactly which cable to use in the step-by-step section below.
The third issue is bandwidth. Even when your port and cable support video, the available bandwidth determines your maximum resolution and refresh rate. A USB 3.2 Gen 2 port with DP Alt Mode shares bandwidth between data and video.
This can cap your refresh rate or force you to drop resolution. Thunderbolt 4 and USB4 handle this more gracefully with their 40Gbps throughput.
The Three Things That Determine If USB-C Gaming Works
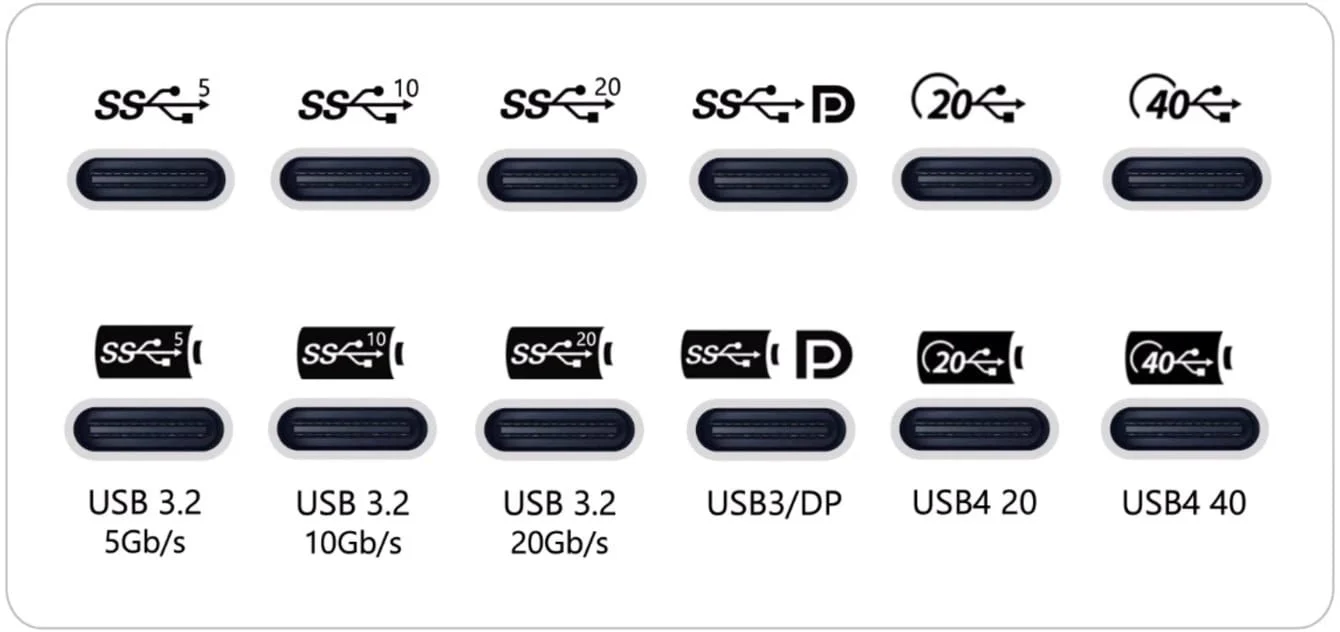
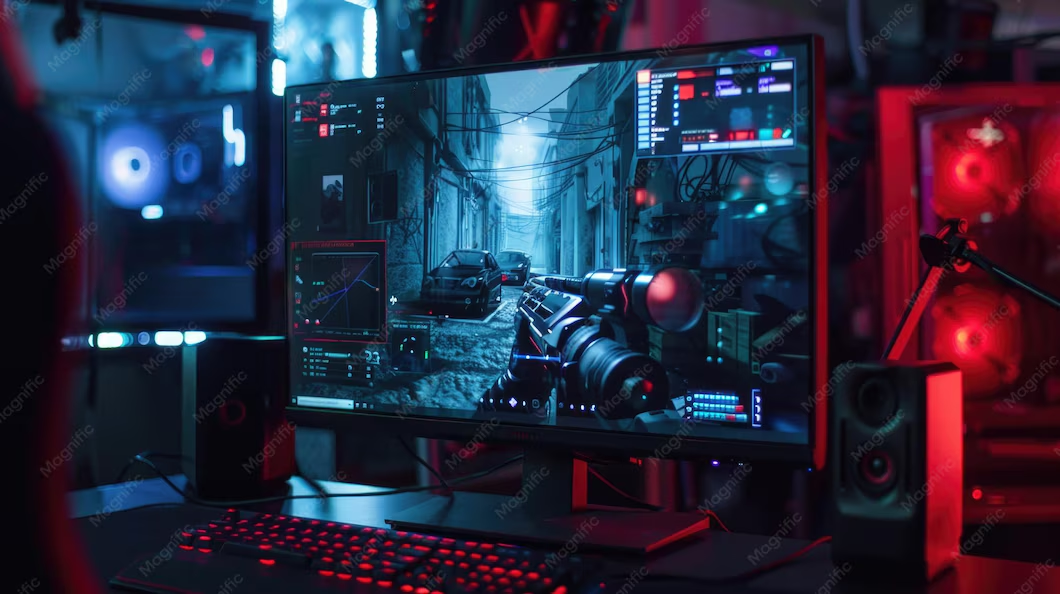
Image source: Bing (Web (fair-use with source credit))
Your USB-C port type (this is where most people get stuck)
Your device's USB-C port determines everything. There are essentially four categories you'll encounter, and only three of them support video output.
Thunderbolt 3 and Thunderbolt 4 ports offer the best experience. These provide 40Gbps of bandwidth and natively carry DisplayPort video signals. Most gaming laptops with Thunderbolt can drive a 4K 120Hz monitor or a 1440p 240Hz panel without breaking a sweat.
Look for the lightning bolt icon next to your port.
USB-C with DisplayPort Alt Mode is the most common video-capable setup. Many modern laptops support this, but it's not always clearly labeled. DP Alt Mode repurposes the USB-C pins to carry a full DisplayPort signal.
The bandwidth depends on the underlying USB generation. USB 3.2 Gen 2 with DP Alt Mode can typically handle 4K at 60Hz or 1440p at 144Hz.
USB4 ports behave similarly to Thunderbolt 4 for display purposes. They support DP tunneling and offer up to 40Gbps. These appear on newer laptops and desktops, particularly those with AMD Ryzen 6000 series processors and later.
Data-only or charging-only USB-C ports cannot output video under any circumstances. No cable or adapter will fix this. If your laptop only has these ports, you'll need to use HDMI or a native DisplayPort connection instead.
Here's a quick reference table to help you identify what you're working with:
| Port Type | Video Support | Max Typical Gaming Resolution/Refresh | Bandwidth |
|---|---|---|---|
| Thunderbolt 4 | Yes | 4K @ 120Hz or 1440p @ 240Hz | 40 Gbps |
| Thunderbolt 3 | Yes | 4K @ 120Hz or 1440p @ 240Hz | 40 Gbps |
| USB4 | Yes | 4K @ 120Hz or 1440p @ 240Hz | 40 Gbps |
| USB-C DP Alt Mode (Gen 2) | Yes | 1440p @ 144Hz or 4K @ 60Hz | 10 Gbps |
| USB-C DP Alt Mode (Gen 1) | Yes | 1080p @ 144Hz or 4K @ 30Hz | 5 Gbps |
| Data/Charging Only USB-C | No | N/A | N/A |
Your cable matters more than you think
This trips up more people than any other part of the process. USB-C cables are not created equal. Two cables can look identical, feel identical in build quality, and have completely different internal wiring.
A full-featured USB-C cable supports data transfer, charging, and video output simultaneously. These cables contain the necessary wiring for all 24 pins in the USB-C connector. They're often marketed as "Thunderbolt 4 certified" or "USB4 40Gbps" cables.
For DP Alt Mode specifically, look for cables explicitly labeled as supporting "DisplayPort Alt Mode" or "video output."
A charge-only USB-C cable or a USB 2.0 USB-C cable lacks the wiring needed for video. These are extremely common because they're cheaper to manufacture. The cable that comes in the box with a pair of earbuds or a phone charger is almost certainly charge-only.
Using one of these will give you power delivery but no display signal whatsoever.
A passive cable works fine for runs up to about 2 meters. Beyond that, signal degradation becomes a real problem, especially at higher resolutions and refresh rates. If you need a longer run, look for an active cable that includes signal conditioning electronics.
Here's the simplest rule. If your cable didn't come with a monitor or a Thunderbolt dock, and it didn't cost at least $15-20, assume it doesn't support video until you verify otherwise. Buy a cable from a reputable brand that explicitly states DP Alt Mode or Thunderbolt support in its product listing.
Your GPU and its role in the chain
Your graphics processor drives the display output, and it needs to support the resolution and refresh rate you want. This is rarely a problem with dedicated GPUs from the last five years, but integrated graphics can be a bottleneck.
NVIDIA GeForce GTX 10 series and newer support DP Alt Mode natively through their USB-C outputs (found on some laptops and desktop cards). You can configure refresh rate, resolution, G-Sync Compatible mode, and color settings through the NVIDIA Control Panel.
AMD Radeon RX 5000 series and newer handle DP Alt Mode well. AMD's Radeon Software lets you configure FreeSync over USB-C, adjust scaling, and set custom resolutions. Recent integrated graphics from AMD (Radeon 680M and 780M) also support USB-C video output, which is why handhelds like the ASUS ROG Ally work great with USB-C monitors.
Intel integrated graphics (UHD and Iris Xe) support DP Alt Mode through Intel's Graphics Command Center. However, older Intel integrated GPUs may struggle to push high resolutions at smooth frame rates in modern games. They're fine for desktop use and lighter gaming titles, but don't expect 4K 120fps in Cyberpunk.
One important note. On many laptops, the USB-C video output routes through the integrated GPU rather than the dedicated GPU. This means your NVIDIA or AMD discrete GPU renders the frame, then passes it through the integrated graphics to the USB-C port.
This "Optimus" or "MSHybrid" design adds a small amount of latency and can prevent G-Sync from working in some configurations. Check your laptop's documentation to see which GPU drives the USB-C output.
Step-by-Step: How to Connect and Configure Your USB-C Gaming Monitor
Step 1: Verify your device's USB-C port supports video
Before you plug anything in, confirm your port can actually output a display signal. Check the symbols next to the port on your laptop or device. A lightning bolt, DP logo, or USB4 badge means you're good.
If you're unsure, look up your exact laptop model's specifications on the manufacturer's website. Search for "DisplayPort over USB-C" or "DP Alt Mode" in the spec sheet.
On Windows, you can also check Device Manager. Expand "Display adapters" and note which GPU is listed. Then expand "Universal Serial Bus controllers." If you see "Thunderbolt" in the list, your port supports video output.
This isn't a guarantee, but it's a strong indicator.
On a Steam Deck or other handheld, USB-C video output is standard. These devices use a USB-C port with DP Alt Mode built in. You're good to go out of the box.
Step 2: Use the right cable
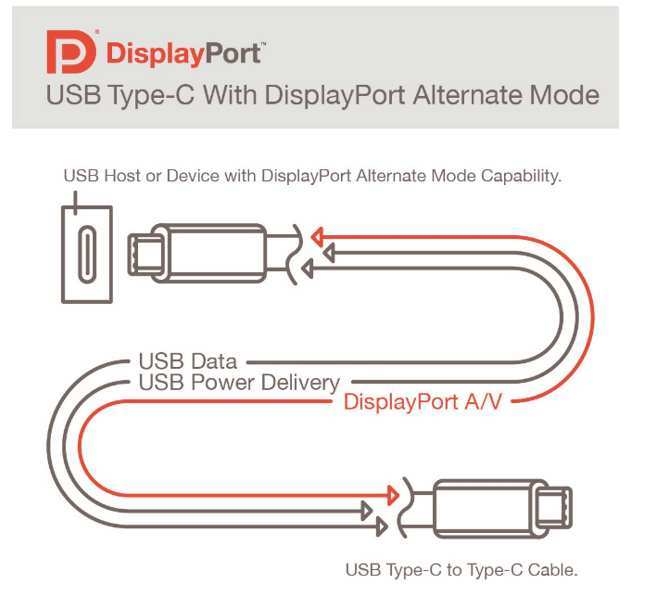
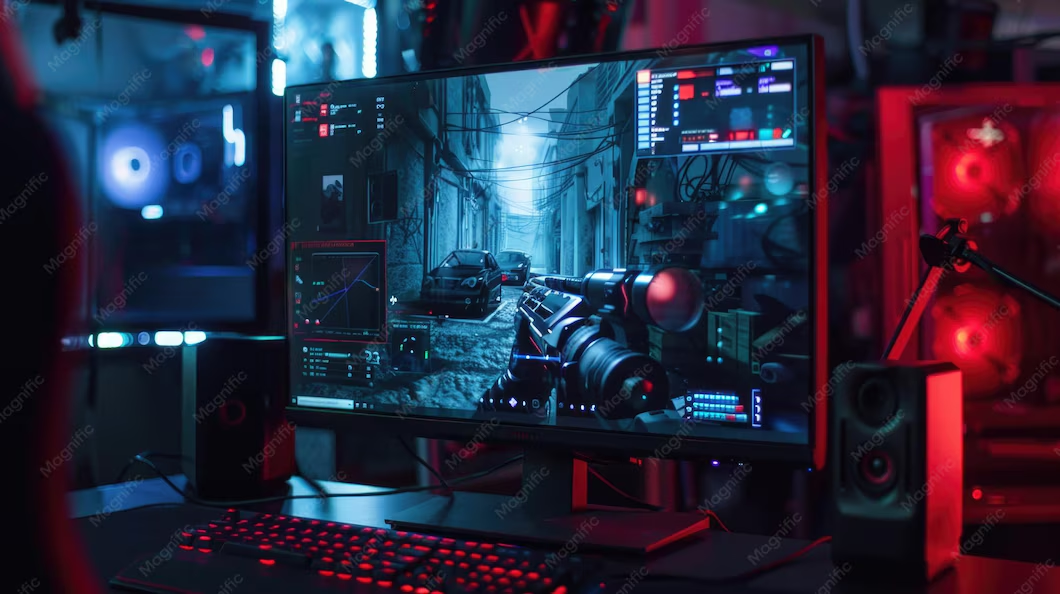
Image source: Bing (Web (fair-use with source credit))
Grab a cable that explicitly supports video output. For most USB-C gaming monitors, a certified Thunderbolt 4 cable or a USB-C cable rated for DP Alt Mode will work. If your monitor came with a cable in the box, use that one first.
Manufacturers typically include the correct cable with their displays.
Avoid using random cables from your drawer. That 3-foot white cable that came with your phone charger almost certainly does not carry video. If you need to buy one, brands like Anker, Cable Matters, and CalDigit make reliable options in the $15-30 range.
Look for "40Gbps" or "Thunderbolt 4" in the product name for the best compatibility.
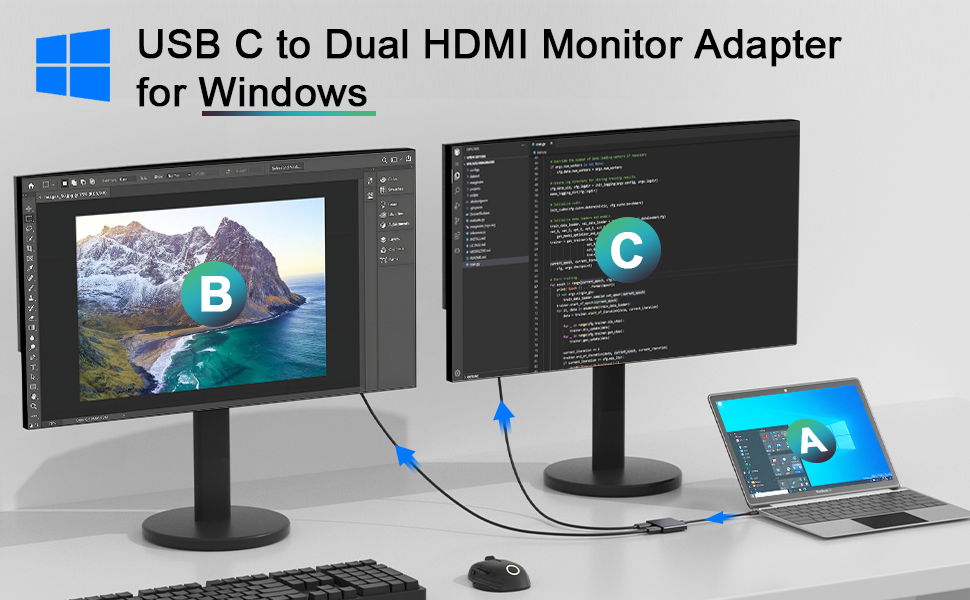
Connect one end to your device's USB-C port and the other to the monitor's USB-C input. The connection should click in firmly. If the monitor has multiple USB-C ports, check the manual to see which one supports video.
Some monitors have one data-only port and one video-capable port.
Step 3: Connect and configure display settings
Once connected, your device should detect the monitor automatically. On Windows, press Windows + P to open the display projection menu and select "Extend" or "Duplicate" depending on your preference. Right-click the desktop and choose "Display settings" to arrange the monitors and set which one is primary.
On macOS, open System Settings and navigate to Displays. The external monitor should appear automatically. Arrange the displays by dragging them into your preferred layout.
Note that macOS has more limited support for high refresh rates over USB-C compared to Windows, particularly on Apple Silicon Macs.
On Steam Deck, the external display is detected automatically when docked or connected via a USB-C hub. You can adjust the display mode in the Quick Settings menu.
If the monitor isn't detected at all, try these steps in order. First, try a different cable. Second, try a different USB-C port on your device if available.
Third, check if the monitor needs a firmware update. Fourth, restart your device with the monitor connected.
Step 4: Set your refresh rate and enable Adaptive Sync
This is where most people stop short. Windows often defaults external displays to 60Hz, even when the monitor supports 144Hz or higher. You need to manually change this.
On Windows, go to Settings > System > Display > Advanced display settings. Select the USB-C monitor from the dropdown. Click "Display adapter properties for Display X." In the Monitor tab, open the "Screen refresh rate" dropdown and select the highest available value.
If you only see 60Hz, your cable or port may not support higher refresh rates at the current resolution.
For NVIDIA GPUs, open the NVIDIA Control Panel and navigate to "Change resolution" under Display. Set the refresh rate there. Then go to "Set up G-Sync" and enable "G-Sync Compatible" if your monitor supports adaptive sync over USB-C.
For AMD GPUs, open AMD Software and navigate to the Display tab. Enable FreeSync if available. Adjust the refresh rate in the display settings section.
Not all monitors support Adaptive Sync over USB-C. Some only support it through native DisplayPort or HDMI connections. Check your monitor's manual or specifications page to confirm.
If Adaptive Sync isn't working over USB-C, you may need to use a different connection type for variable refresh rate gaming.
Step 5: Confirm power delivery is working
One of the big advantages of USB-C for gaming is that it can charge your device while you play. Most USB-C gaming monitors provide at least 65W of power delivery through the same cable that carries video. Some high-end models offer 90W or even 100W.
Check that your device is actually charging while connected to the monitor. On Windows, click the battery icon in the system tray to see the charging status. On a Steam Deck, the battery indicator in the top right shows whether it's charging.
If your device isn't charging, the monitor may not provide enough wattage. Gaming laptops with dedicated GPUs often require 130W or more to charge at full speed. A monitor providing 65W will charge slowly or maintain the battery level during gaming, but it won't charge the laptop faster than it drains under heavy load.
This is normal and not a defect.
Some monitors have a dedicated charging port or a higher-wattage USB-C output specifically for this purpose. Check your monitor's specifications. If you need faster charging, you may need to keep your laptop's original power adapter plugged in separately while using USB-C for video only.
Common Mistakes That Cause Black Screens, 60Hz Caps, and Lag
The most frequent mistake is using a charge-only or USB 2.0 cable. This produces exactly the symptoms people describe in forums. The monitor powers on, the backlight works, but there's no image.
The fix is simple once you know to look for it. Swap the cable for one rated for video output.
Another common issue is forgetting to change the refresh rate after connecting. Windows defaults to 60Hz for most external displays. Your 144Hz monitor will work perfectly at 60Hz, but you're leaving a lot of smoothness on the table.
Always check and set the refresh rate manually after connecting a new display.
Bandwidth limitations catch people off guard too. If you're running 4K resolution and only seeing 60Hz as an option on a monitor that supports 144Hz, your port or cable likely doesn't have enough bandwidth for 4K at high refresh rates. Try dropping to 1440p in your display settings.
You should then see higher refresh rate options become available.
Some users connect through a USB-C hub or dock and experience input lag. Not all docks handle gaming-grade latency well. For the best experience, connect directly from your device to the monitor.
If you must use a dock, make sure it's a Thunderbolt 4 dock rated for high-refresh display passthrough.
Finally, driver issues can cause detection problems and limited options. Make sure your GPU drivers are up to date. For NVIDIA, use GeForce Experience or download directly from NVIDIA's website.
For AMD, use the AMD Software app. For Intel integrated graphics, use the Intel Driver & Support Assistant.
Real Scenarios: What Works and What Doesn't
Scenario 1: Gaming laptop + USB-C gaming monitor
This is the ideal scenario. A gaming laptop with Thunderbolt 4 or DP Alt Mode connects directly to a USB-C gaming monitor with a single cable. You get video, power delivery, and data all through one connection.
Set the refresh rate to the monitor's maximum, enable Adaptive Sync, and you're gaming. Most modern gaming laptops from ASUS, Razer, Lenovo, and MSI support this without issues.
Scenario 2: Steam Deck docked to USB-C monitor
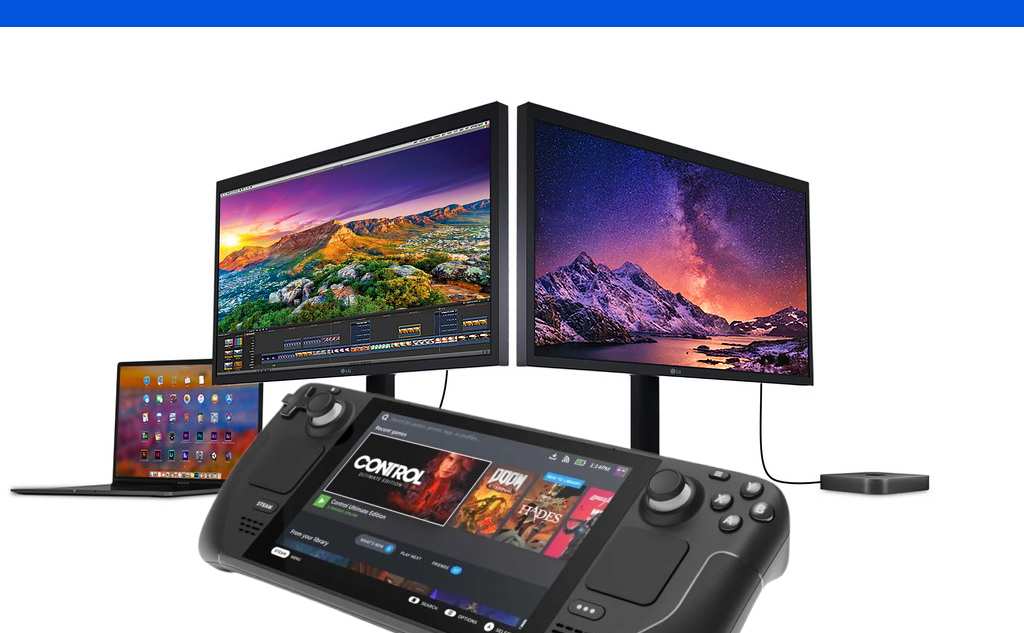
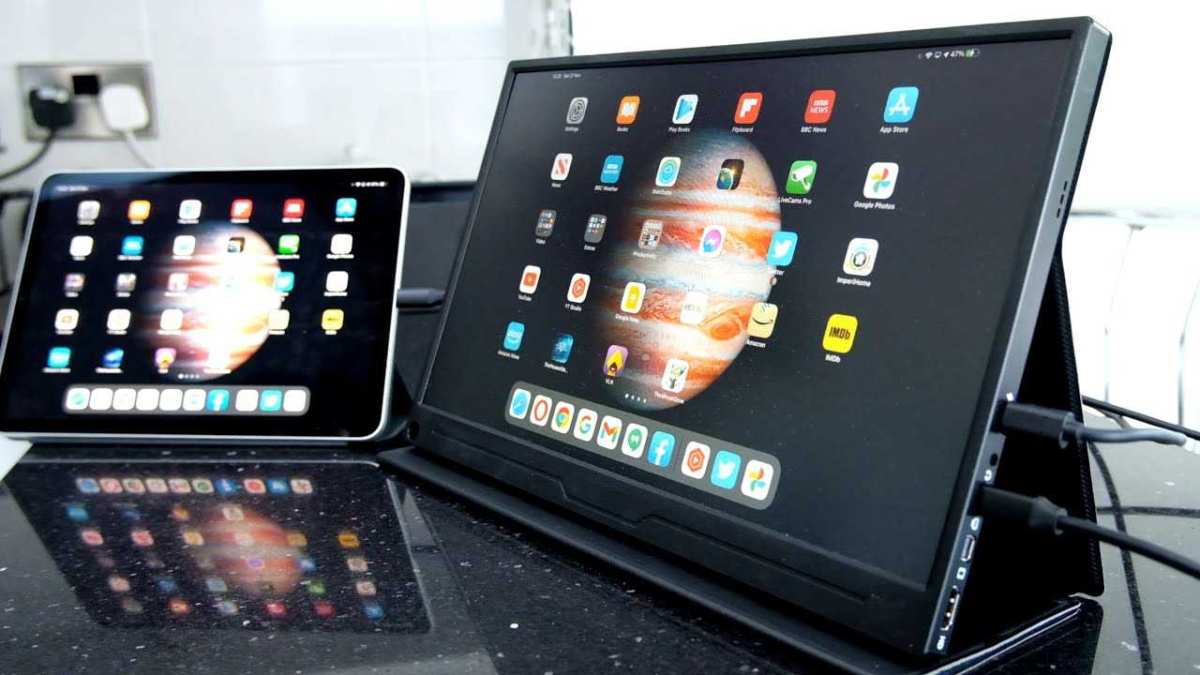
Image source: Bing (Web (fair-use with source credit))
The Steam Deck outputs video natively over USB-C. You can connect directly to a USB-C monitor with a single cable, or use a USB-C hub or dock for a more permanent desk setup. The Deck supports up to 4K at 60Hz or 1080p at 120Hz over USB-C.
Most games run at 1080p anyway on the Deck's hardware, so this works well. A dock like the official Steam Deck Dock or a third-party USB-C hub adds Ethernet, extra USB ports, and charging passthrough.
Scenario 3: Ultrabook with integrated graphics
This is where expectations need adjusting. An ultrabook with Intel Iris Xe graphics and DP Alt Mode can absolutely drive a USB-C monitor for gaming. But you're limited to lighter titles at reasonable frame rates.
Think indie games, esports titles like Valorant or League of Legends, and older AAA games. Don't expect 4K 120fps in demanding titles. The integrated GPU simply can't push that many pixels that fast.
Lower the resolution to 1080p and reduce in-game settings for the best experience.
Scenario 4: Desktop GPU with USB-C output
Some desktop graphics cards include a USB-C output port. NVIDIA's RTX 20 series Founders Edition cards had this, and some aftermarket cards from ASUS and other manufacturers include it too. If your desktop GPU has USB-C, it works the same way as a laptop's USB-C port for video output.
Connect directly to the monitor with a full-featured USB-C cable. Configure settings through your GPU's control panel as usual.
USB-C vs. HDMI vs. DisplayPort: Which Should You Actually Use for Gaming?
Side-by-side comparison
| Feature | USB-C (DP Alt Mode) | HDMI 2.1 | DisplayPort 1.4 |
|---|---|---|---|
| Max Bandwidth | 40 Gbps (TB4) / 10 Gbps (Gen 2) | 48 Gbps | 32.4 Gbps |
| 4K @ 120Hz | Yes (TB4/USB4) | Yes | Yes (with DSC) |
| 1440p @ 240Hz | Yes (TB4/USB4) | Yes | Yes |
| Power Delivery | Up to 240W | No | No |
| Cable Length (reliable) | 2m passive, 3m+ active | 3m passive | 3m passive |
| Adaptive Sync | Varies by monitor | Yes (VRR) | Yes (native) |
| Daisy Chaining | Yes (with MST) | No | Yes |
| Single Cable Setup | Yes (video + power + data) | No | No |
When USB-C wins
USB-C is the best choice when you want a clean, single-cable setup. If you're connecting a laptop to a monitor on a desk, running one cable for video, charging, and data is hard to beat. It's also ideal for portable setups.
A USB-C monitor and a single cable travel easily in a laptop bag.
USB-C also shines with handheld gaming devices. The Steam Deck, ASUS ROG Ally, and Lenovo Legion Go all use USB-C for video output natively. There's no HDMI port on these devices, so USB-C is your primary option for external displays.
When you should use HDMI or DisplayPort instead
Use native DisplayPort when you need guaranteed Adaptive Sync compatibility. While many USB-C monitors support FreeSync or G-Sync Compatible mode, DisplayPort remains the most reliable connection for variable refresh rate gaming. If you experience flickering or stuttering with Adaptive Sync over USB-C, switching to a native DisplayPort cable often resolves it.
HDMI 2.1 makes sense when your monitor doesn't have USB-C input, or when you're connecting to a TV. Most living room gaming setups use HDMI because TVs rarely include USB-C ports. HDMI 2.1 also supports higher bandwidth than DP 1.4, making it better for 4K at high refresh rates with full chroma sampling.
If your laptop only has HDMI and your monitor only has USB-C, a simple adapter cable works fine. Just make sure it's rated for the resolution and refresh rate you need.
Best USB-C Gaming Monitors Worth Buying
Several monitors stand out for USB-C gaming in 2026. The Dell S2722QC offers 4K at 60Hz with USB-C 65W power delivery at a reasonable price. The ASUS ROG Strix XG27ACS provides 1440p at 180Hz with full DP Alt Mode support, making it a strong choice for competitive gaming.
The LG 27GP950-B is a 4K 160Hz panel with USB-C connectivity that handles high refresh rates beautifully.
For portable options, the ASUS ROG Strix XG17AHPE is a 17.3-inch 240Hz portable monitor with USB-C input that pairs perfectly with gaming laptops. The Lenovo ThinkVision M14t adds touch capability for productivity alongside gaming use.
When shopping, look for monitors that explicitly list DP Alt Mode or Thunderbolt support in their specifications. Some monitors have USB-C ports that only handle data and charging, not video. Always verify before purchasing.
Expert Tips for Getting the Most Out of USB-C Gaming
Update your monitor's firmware regularly. Manufacturers frequently release updates that improve USB-C compatibility, add Adaptive Sync support over USB-C, or fix resolution and refresh rate issues. Check the manufacturer's support page every few months.
Use separate power delivery for power-hungry gaming laptops. If your laptop requires 130W or more, the 65-100W provided by most USB-C monitors won't keep up under full gaming load. Keep your laptop's original charger plugged in and use USB-C for video only.
This prevents battery drain during long gaming sessions.
Disable USB selective suspend in Windows power settings. This Windows feature can sometimes cut power to USB-C connections momentarily, causing display flickering or brief blackouts. Go to Power Options > Change plan settings > Change advanced power settings > USB settings and disable selective suspend.
Consider your monitor's USB hub capabilities. Many USB-C gaming monitors include USB-A ports that act as a hub through the USB-C connection. This lets you plug your mouse, keyboard, and headset into the monitor, reducing cable clutter.
Just remember that these ports share bandwidth with the video signal, so heavy USB data transfer can occasionally impact display performance.
For competitive gaming where every millisecond matters, test your setup. Use tools like the Blur Busters UFO test to check for motion clarity differences between USB-C and native DisplayPort connections on your specific hardware. In most cases, the difference is negligible.
But if you're chasing every advantage, it's worth verifying.
Frequently Asked Questions
Can I use any USB-C cable for a gaming monitor?
No. Many USB-C cables only support charging and data transfer without video output. You need a cable that explicitly supports DisplayPort Alt Mode or Thunderbolt.
Check the cable's specifications for "video output," "DP Alt Mode," or "Thunderbolt" before using it for a monitor connection.
Why is my USB-C monitor stuck at 60Hz?
This usually means your cable, port, or GPU driver isn't configured correctly. First, check your display settings and manually set a higher refresh rate. If higher options don't appear, your cable may not support the bandwidth needed.
Try a certified Thunderbolt 4 or USB4 cable. Also verify your GPU drivers are current.
Does USB-C add input lag compared to DisplayPort?
In most setups, the difference is negligible, typically under 1ms. USB-C carries the same DisplayPort signal internally, so the processing is identical. However, if you're routing through a USB-C hub or dock, that additional hardware can add a few milliseconds of latency.
For competitive gaming, connect directly to the monitor.
Can I daisy-chain multiple USB-C monitors?
Yes, if your monitors support DisplayPort Multi-Stream Transport (MST) and your GPU supports daisy-chaining over USB-C. Thunderbolt 4 and USB4 handle this well. However, bandwidth is shared across all displays, so running multiple high-resolution, high-refresh monitors may require lowering settings on one or both.
Will a USB-C monitor charge my laptop while gaming?
Most USB-C gaming monitors provide 65W to 100W of power delivery. This is sufficient for ultrabooks and most laptops at idle or light use. However, gaming laptops with dedicated GPUs often draw more power than the monitor can provide.
Your battery may drain slowly during intense gaming sessions even while connected. Keep your laptop's original charger handy for demanding games.
Does macOS support high refresh rates over USB-C?
macOS supports high refresh rates over USB-C, but support varies by Mac model and macOS version. Apple Silicon Macs generally handle external displays well, but some users report limited refresh rate options compared to Windows on identical hardware. Check your specific Mac's display support documentation and use a quality cable rated for your target resolution and refresh rate.
Final Verdict: Is USB-C Good Enough for Serious Gaming?
Yes, USB-C is absolutely good enough for serious gaming when your hardware supports it properly. The connection itself introduces no meaningful performance penalty compared to native DisplayPort or HDMI. You get the same resolution, the same refresh rate, and the same Adaptive Sync support.
The only real trade-off is bandwidth sharing on lower-spec ports, which can limit your options at extreme settings like 4K 240Hz.
For most gamers, USB-C is the smarter choice. The single-cable convenience of video plus charging plus data is a genuine quality-of-life improvement. You plug in one cable and you're done.
No separate power brick, no HDMI cable, no adapter dongle. It's cleaner, simpler, and it works.
The caveat is knowing your hardware. If your USB-C port supports DP Alt Mode or Thunderbolt, and you use the right cable, you'll have a great experience. If your port is data-only, no amount of troubleshooting will make it work.
Check your specs first, buy a proper cable, configure your refresh rate, and you'll be gaming on that USB-C monitor without any issues.
The Three Things That Determine If USB-C Gaming Works
This section was already covered in the first batch. The content on port types, cables, and GPU requirements appears earlier in the article. We'll move forward without duplication.
Step-by-Step: How to Connect and Configure Your USB-C Gaming Monitor
This section was also covered in the first batch. The five-step connection and configuration process appears earlier in the article.
Common Mistakes That Cause Black Screens, 60Hz Caps, and Lag
This section was covered in the first batch. The troubleshooting content for black screens, refresh rate caps, and input lag appears earlier in the article.
Real Scenarios: What Works and What Doesn't
This section was covered in the first batch. The four gaming scenarios appear earlier in the article.
Best USB-C Gaming Monitors Worth Buying
This section was covered in the first batch. The monitor recommendations appear earlier in the article.

Similar Posts