How to Use Portable Monitor as Second Screen
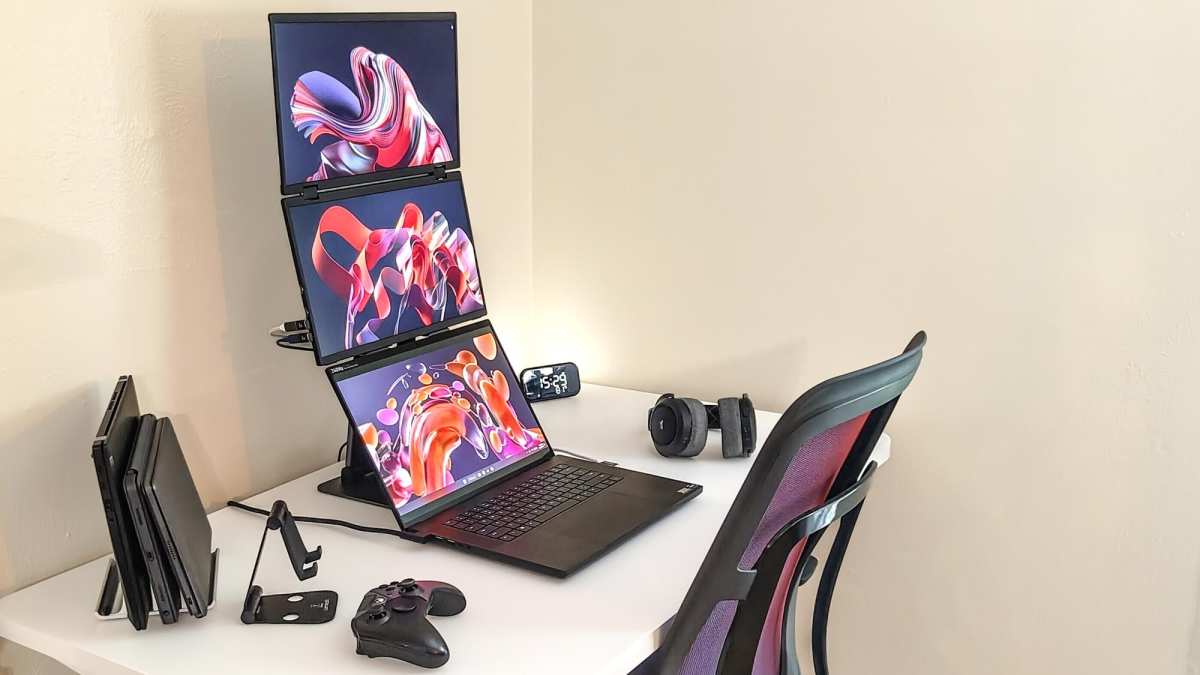
Figuring out how to use a portable monitor as a second screen usually takes about five minutes. The tricky part is not the setup itself. It is making sure your cables, ports, and settings actually play together nicely.
Most connection headaches come down to one thing: using the wrong USB-C cable. Once you match the right cable and connection type to your specific hardware, the rest is just a few clicks in your display preferences. We'll walk through every scenario so you can get it working regardless of what laptop or device you're starting with.
Quick Answer
You can use a portable monitor as a second screen. Connect it to your laptop with a USB-C cable that supports DisplayPort Alt Mode. Open your display settings and choose "Extend" mode.
Position the portable monitor beside your laptop screen. Adjust resolution and scaling to match both displays.
The One Question That Determines Your Entire Setup
Before you touch a single cable, you need to answer this: What can your laptop's USB-C port actually do?
This matters more than anything else. Not all USB-C ports are created equal. Some carry video signal and power.
Some carry only power. Some carry only data.
Check your laptop's specs or user manual. Look specifically for "DisplayPort Alt Mode" or "video output" listed next to the USB-C port. If your port supports it, you're in luck.
That is the simplest path to a working dual-screen setup.
If your laptop only has USB-A ports and HDMI out, don't worry. You've still got options. But your cable setup will look different.
We'll cover every scenario below.
Step 1: Check What Your Laptop's USB-C Port Can Actually Do
This is where most people get stuck. They grab any USB-C cable, plug it in, and wonder why nothing shows up. The problem is almost always the port or the cable, not the monitor.
Here is what you're looking for:
- USB-C with DisplayPort Alt Mode: Carries video signal AND power through one cable. This is the gold standard for portable monitors.
- USB-C with Power Delivery only: Charges devices but does not carry video. Common on some hub-style ports.
- USB-C data only: Handles data transfer and charging. No video signal whatsoever.
- Thunderbolt 3 or 4: Fully supports video output, power delivery, and data. Thunderbolt ports always support DisplayPort Alt Mode.
How do you check which type you have? Look for a lightning bolt icon, a "D" shaped DisplayPort symbol, or a battery icon next to your USB-C port. Check your laptop manufacturer's spec sheet.
Search your exact model number plus "USB-C video support" if you're unsure.
If your laptop doesn't have a USB-C port at all, you'll use the HDMI method. Skip to Step 2 for that path.
Step 2: Pick the Right Connection Method for Your Hardware
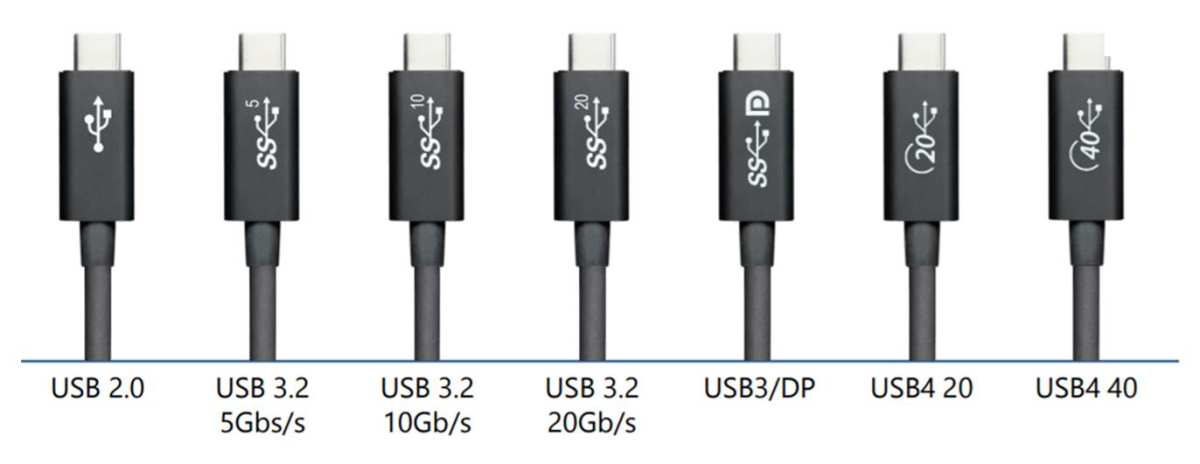
Your laptop's port type determines which connection method you should use. There are four main paths. We'll cover each one below.
USB-C Alt Mode (Single Cable — Power + Display)
This is the cleanest setup. One cable from your laptop to the portable monitor carries both video signal and power. Your laptop charges while your second screen runs.
What you need: A USB-C cable that supports DisplayPort Alt Mode. Many portable monitors include one in the box. If you need a replacement, look for cables explicitly rated for "video" or "DisplayPort Alt Mode." Not every USB-C cable handles video.
Charging-only cables are extremely common and they will not work here.
How to set it up:
- Plug the USB-C cable into your laptop's video-capable USB-C port.
- Plug the other end into the portable monitor's USB-C input.
- The monitor should detect signal automatically. If not, cycle through the monitor's input sources using its on-screen display buttons.
This method works best with monitors that support at least 60W Power Delivery pass-through. That keeps most laptops charged during use. If your portable monitor only supports 45W PD, slower charging on high-power laptops may occur during heavy use but should maintain the battery level for many ultrabooks.
HDMI + Separate Power Cable
If your laptop lacks USB-C video output, HDMI is your fallback. Most portable monitors have a Mini HDMI or Micro HDMI port. You'll need a standard HDMI-to-Mini-HDMI or HDMI-to-Micro-HDMI cable.
The catch: HDMI carries video only. You'll need a separate power cable for the portable monitor. This usually means plugging the monitor into a wall outlet via its own power adapter, or using a USB-A-to-USB-C cable from your laptop to power the monitor.
How to set it up:
- Connect HDMI cable from your laptop to the portable monitor.
- Power on the monitor using its dedicated power adapter or USB power cable.
- Select the correct input source on the monitor's OSD menu.
This method works with virtually any laptop that has an HDMI output. It is common among business laptops and older models. The trade-off is the extra cable clutter.
Wireless Connection (Miracast / AirPlay to iPad or Smart Monitor)
A few portable monitors support wireless display protocols. Samsung's View and some ASUS models offer this. You can also use an iPad as a wireless second screen via macOS's Sidecar feature or third-party apps on Windows.
This works for light productivity tasks. Screen updates may lag during video playback or visual design work. For a wireless connection, you would typically use Windows's "Connect" app (Windows Key + K) and select the monitor from the list.
DisplayLink (When Your Port Can't Do Native Video)
DisplayLink is a display technology that sends video signal over standard USB data. It works with USB-A ports, USB-C data-only ports, and even through USB hubs. The trade-off?
You need to install DisplayLink software on your host computer. The chip inside the adapter or monitor handles the video processing.
How to set it up:
- Install the DisplayLink driver from the official website (displaylink.com).
- Connect the portable monitor via USB.
- The driver creates a virtual display output that your operating system recognizes.
DisplayLink works reliably for office work, coding, and general productivity. As of 2026, it is not ideal for gaming, color-critical video editing, or fast-motion content. Compression artifacts may appear on detailed visuals.
Step 3: Configure Your Display Settings

Once your portable monitor is physically connected and powered on, your operating system should detect it automatically. Now you need to tell your computer how to use it.
Windows 10/11 Display Configuration
- Right-click on your desktop background and select Display settings.
- You'll see two rectangles labeled "1" and "2." These represent your screens.
- Scroll down to the Multiple displays dropdown menu.
- Select Extend these displays to use the portable monitor as additional workspace. "Duplicate" mirrors your laptop screen, which is useful for presentations but not for productivity.
- Drag the display rectangles to match the physical arrangement of your screens. If your portable monitor sits to the left of your laptop, drag rectangle 2 to the left of rectangle 1.
- Click Apply.
You can also press Windows Key + P to quickly toggle between display modes. "Extend" is what you want for a second screen setup.
macOS Display Arrangement (and the M1/M2 Limitation)
- Open System Settings (or System Preferences on older macOS versions).
- Go to Displays.
- Click Arrange to see both screens represented as rectangles.
- Uncheck "Mirror Displays" if it's enabled.
- Drag the rectangles to match your physical layout.
Important note for Apple Silicon Macs: Base model M1 and M2 chips support only one external display natively. If you have an M1 MacBook Air, for example, you cannot run a portable monitor AND another external display at the same time. M1 Pro, M1 Max, M2 Pro, and M2 Max chips support multiple external displays.
Intel-based Macs support multiple external displays without this limitation.
If you're on a base M1 or M2 chip and need more than one external screen, DisplayLink is your workaround. It bypasses the hardware limitation through software.
ChromeOS and Linux Setup
ChromeOS: Plug in the portable monitor. ChromeOS detects it automatically. Press Search + P to toggle mirroring.
Go to Settings > Device > Displays to arrange and adjust resolution.
Linux: Most modern Linux distributions handle external displays through Settings > Displays. If your distribution doesn't detect the monitor, you may need to install DisplayLink drivers (for DisplayLink-based monitors) or check your X11/Wayland configuration. Ubuntu and Fedora generally handle USB-C Alt Mode monitors without extra steps.
Step 4: Optimize for Productivity (Not Just "It Turns On")
Getting the image to show up is step one. Making the setup actually feel good to use takes a few more adjustments.
Match the scaling: If your laptop screen is 14-inch at 1080p and your portable monitor is 15.6-inch at 1080p, text and UI elements will appear slightly different in size. Adjust scaling in your display settings until both screens feel consistent. Windows lets you set scaling independently per display. macOS handles this automatically with "Default for display."
Set the primary display: Your "main" screen gets the taskbar, desktop icons, and new window openings by default. In Windows Display Settings, check "Make this my main display" on whichever screen you prefer. In macOS, drag the white menu bar rectangle in the arrangement view to your preferred primary screen.
Adjust brightness and color: Portable monitors often ship with overly bright or cool default settings. Use the monitor's on-screen display (OSD) buttons to adjust brightness to match your laptop screen. If your monitor supports it, enable a blue light filter or "reading mode" for extended use.
Position for ergonomics: Ideally, the top edge of your portable monitor aligns with the top edge of your laptop screen. This keeps your eyes at a consistent height when you glance between screens. Many portable monitor covers double as stands, but they don't always offer height adjustment.
A small laptop stand or even a book under the portable monitor can help align the screens.
Cable management for travel: If you're setting this up in hotel rooms or co-working spaces, keep your cable situation simple. A single USB-C cable is ideal. If you need HDMI plus power, velcro ties keep the two cables bundled.
Some users carry a short (6-inch) USB-C cable to minimize desk clutter.
Common Problems and How to Fix Them
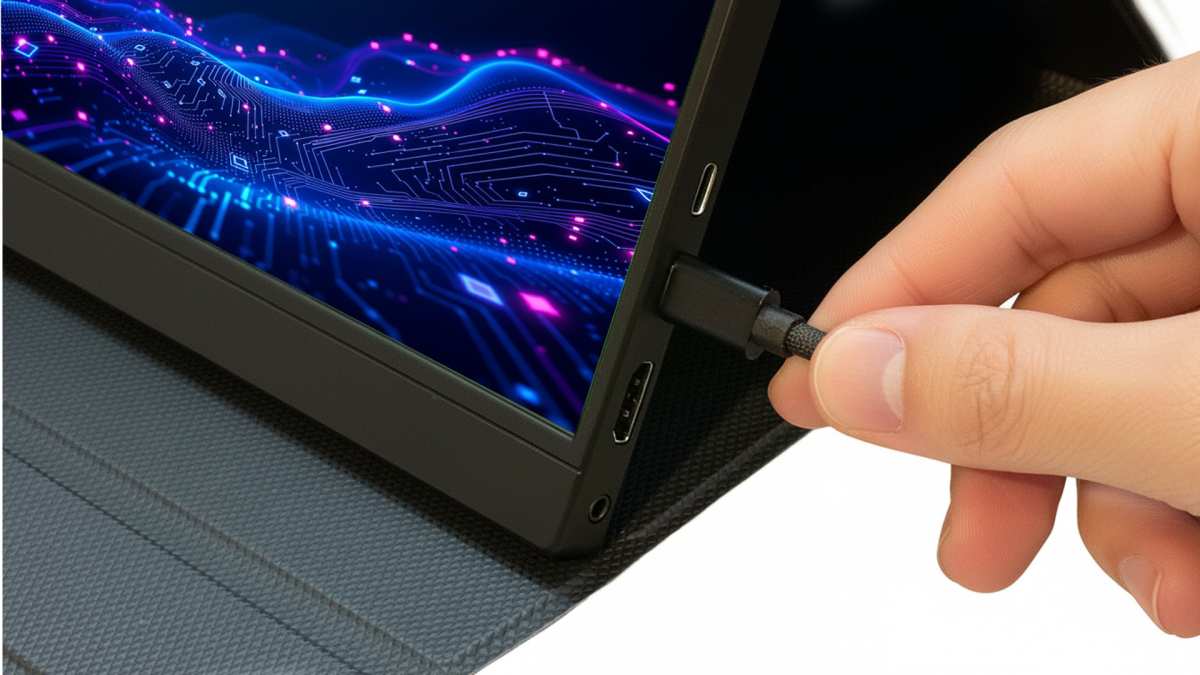
Even when you've done everything right, things sometimes don't work. Here are the most common issues and what actually fixes them.
"No Signal" or Blank Screen
This is the number one complaint. The monitor powers on but shows "No Signal" or stays black.
Try this in order:
- Swap the USB-C cable. This fixes the problem more often than anything else. Use a cable you know supports video.
- Check that your laptop's USB-C port supports DisplayPort Alt Mode. Not all of them do.
- Cycle through the monitor's input sources using its physical buttons. It might be set to the wrong input.
- Restart your laptop with the monitor connected. Sometimes the OS needs a reboot to detect a new display.
- Try connecting to a different device (phone, tablet, another laptop) to isolate whether the problem is the monitor or the laptop.
Stuck at 30Hz or Flickering
Your monitor works but the refresh rate feels choppy or the screen flickers.
Fixes:
- Check your cable's bandwidth rating. USB-C cables rated for USB 2.0 data only cannot carry a full 60Hz video signal. You need a cable rated for USB 3.1 Gen 2 or higher.
- In Windows Display Settings, go to Advanced Display Settings and manually set the refresh rate to 60Hz.
- If using HDMI, ensure your cable supports the resolution and refresh rate you're targeting. Standard HDMI handles 1080p at 60Hz. For 4K at 60Hz, you need a High Speed HDMI cable.
- Update your laptop's GPU drivers. Outdated Intel, AMD, or NVIDIA drivers commonly cause refresh rate issues.
Monitor Not Charging Your Laptop
Your portable monitor works as a display but your laptop battery still drains.
Why this happens: The portable monitor's Power Delivery pass-through doesn't provide enough wattage for your laptop. A 45W PD monitor will charge a 65W laptop slowly, or not at all under heavy use.
Fixes:
- Check your monitor's PD rating in its specs. If it's below your laptop's power adapter wattage, the monitor can't keep up.
- Use your laptop's original power adapter plugged directly into the laptop alongside the monitor connection.
- Some portable monitors have a second USB-C port specifically for charging. Plug your laptop charger into that port to pass power through to the laptop.
Display Not Detected After Sleep
You close your laptop lid, open it later, and the portable monitor is no longer recognized.
Fixes:
- Unplug and replug the USB-C cable. This forces the OS to re-detect the display.
- In Windows, press Windows Key + Ctrl + Shift + B. This restarts your graphics driver and often re-detects displays.
- Adjust your power settings so your laptop doesn't enter deep sleep. Go to Power Options > Change plan settings > Change advanced power settings > Sleep, and set "Allow wake timers" to Disable.
- On macOS, disabling "Power Nap" in Energy Saver settings can prevent this issue.
Portable Monitor Connection Methods Compared
Not every connection method works for every situation. Here's a quick comparison to help you pick the right one for your setup.
| Method | Cables Needed | Power Delivery | Best For | Limitations |
|---|---|---|---|---|
| USB-C Alt Mode | 1x USB-C | Yes (45-100W) | Cleanest setup, single-cable convenience | Requires DP Alt Mode support on laptop |
| HDMI + USB Power | 2x (HDMI + USB power) | No (or limited) | Older laptops with HDMI out | Extra cable clutter |
| Wireless (Miracast) | None | No | Light productivity, presentations | Latency, not for video/gaming |
| DisplayLink | 1x USB-A or USB-C | Varies by model | Laptops without USB-C video | Requires driver install, not for gaming |
| Thunderbolt | 1x USB-C (TB3/4) | Yes (up to 100W) | High-performance setups, daisy-chaining | Requires Thunderbolt port |
Who Benefits Most from a Portable Monitor Setup
Portable monitors aren't for everyone. But for certain workflows, they're a genuine game-changer.
Business Travelers and Road Warriors
If you spend significant time in hotel rooms, airports, or client offices, a portable monitor gives you a full dual-screen workflow anywhere. The productivity gain from having spreadsheets, email, and documents on separate screens adds up fast. Most models weigh under 2 pounds and slide into a laptop bag without adding noticeable bulk.
Software Developers and Coders
Having your IDE on one screen and documentation, terminal, or a browser on the other is a massive efficiency boost. Many developers report that a dual-screen setup reduces context-switching time significantly. A portable monitor makes this possible at home, at work, or on the road.
Content Creators and Designers
Video editors benefit from putting their timeline on the second screen while previewing footage on the laptop. Photographers can review images on a larger, calibrated display while keeping Lightroom's editing panels on their laptop. Color-accurate portable monitors with 100% sRGB or DCI-P3 coverage are worth the premium for this use case.
Students and Remote Learners
A portable monitor turns a small laptop into a capable study station. Research on one screen, notes on the other. It's also useful for online classes where you want the lecture on one display and your own work on another.
The affordability of budget portable monitors (often under $150) makes this accessible for students on tight budgets.
What to Look for When Buying (If You Haven't Yet)
If you're still shopping, a few specs matter more than others.
Connection type: Prioritize USB-C with DisplayPort Alt Mode and at least 60W Power Delivery. This gives you the simplest single-cable setup. Make sure the included cable supports video.
Some budget monitors ship with charging-only cables.
Size and weight: 15.6 inches is the sweet spot for most people. Big enough to work on comfortably, small enough to travel with. Look for models under 2 pounds if portability matters to you.
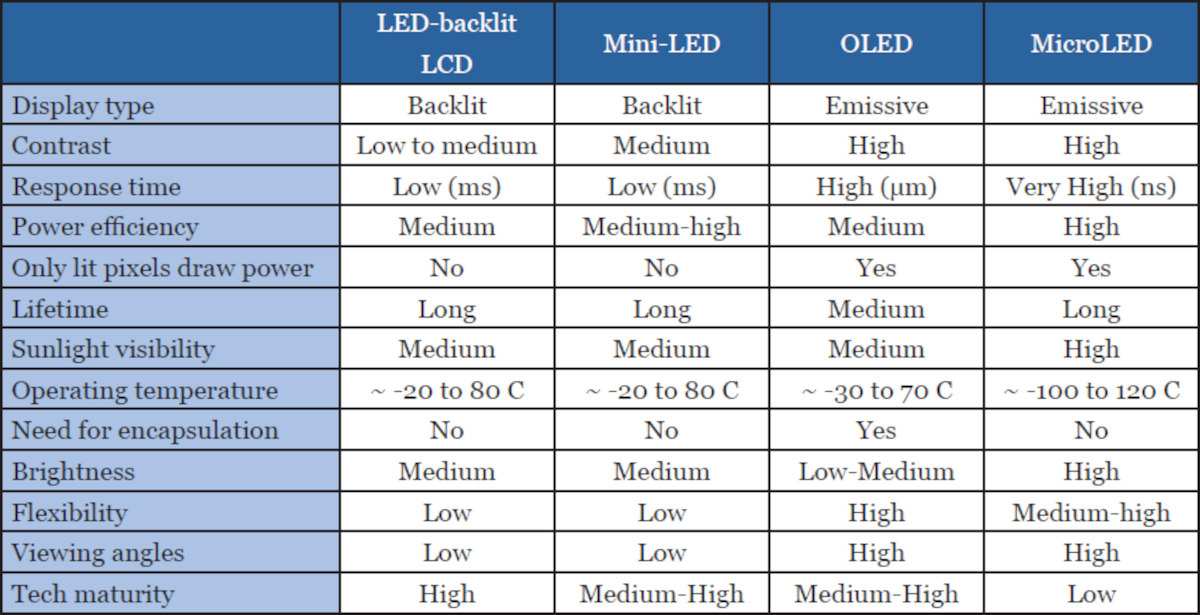
Panel type: IPS panels offer better viewing angles and color accuracy than TN panels. OLED portable monitors exist but cost significantly more. For general productivity, IPS is the practical choice.
Built-in battery vs. USB-powered: Monitors with built-in batteries offer more placement flexibility but add weight and need recharging. USB-powered monitors are lighter and simpler but must stay connected to a power source.
Touchscreen: Useful if you work with design software or prefer direct interaction. Touchscreens add cost and can reduce battery life on built-in battery models. Non-touch is fine for most productivity work.
Stand or cover: A magnetic smart cover that doubles as a stand is common. Check reviews for stability. Some covers flop over on uneven surfaces.
A built-in kickstand offers more reliability but adds a small amount of bulk.
Real Setup Scenarios That Actually Work
Let's walk through a few common real-world setups. These reflect what actually works based on user reports and manufacturer documentation.
The Single-Cable Road Warrior (MacBook Pro + USB-C Monitor)
A 16-inch MacBook Pro with an M1 Pro chip connects to a 15.6-inch USB-C portable monitor with a single Thunderbolt 4 cable. The monitor receives video signal and charges the MacBook simultaneously at up to 100W. macOS detects the monitor instantly. Display Settings shows both screens.
The user drags the menu bar to the laptop screen as primary. The portable monitor sits to the right. Total setup time: under two minutes.
The Budget Windows Setup (USB-A Laptop + HDMI Adapter)
A Dell Latitude with only USB-A and HDMI ports connects to a portable monitor via a standard HDMI-to-Mini-HDMI cable. The monitor powers on via its own wall adapter. Windows detects the second display.
The user extends the desktop and sets the portable monitor as the primary screen since it's larger. The laptop screen becomes secondary for reference documents. Works reliably for office productivity.
The Phone-as-Desktop Setup (Samsung DeX)
A Samsung Galaxy S24 connects directly to a USB-C portable monitor. Samsung DeX launches automatically, providing a desktop-style interface. The phone becomes the computer.
The portable monitor serves as the display. This works for light productivity, web browsing, and document editing. A Bluetooth keyboard and mouse complete the setup.
It's a surprisingly capable mobile workstation.
The Travel Presenter (Mirror Mode for Client Meetings)
A sales consultant connects a portable monitor to a laptop via USB-C. Instead of extending the display, they duplicate (mirror) it. The portable monitor faces the client while the laptop faces the presenter.
Both see the same screen. This is useful for presentations where you want the client to see what you're showing without huddling around your laptop.
Frequently Asked Questions
Can I use a portable monitor with any laptop?
Most laptops work, but the connection method depends on your available ports. USB-C with DisplayPort Alt Mode is ideal. Laptops with only HDMI or USB-A can still work with the right cable or adapter.
Check your laptop's port specifications before buying a monitor.
Why is my portable monitor not being detected?
The most common cause is a USB-C cable that doesn't support video. Swap the cable first. Then check that your laptop's USB-C port supports DisplayPort Alt Mode.
Try restarting your laptop with the monitor connected. If none of that works, test the monitor on a different device.
Do portable monitors work with iPhones?
iPhones with USB-C ports (iPhone 15 and newer) can output video to USB-C portable monitors. You'll need a USB-C cable that supports video. The experience works for media playback and app mirroring.
Samsung DeX is the equivalent for Samsung Galaxy phones, offering a desktop interface.
Can I use two portable monitors at once?
It depends on your laptop's capabilities. Most laptops support one external display natively. Running two external displays usually requires DisplayLink adapters, a Thunderbolt dock, or a laptop with multi-display support (like M1 Pro/Max or M2 Pro/Max chips).
Check your laptop's external display specifications.
Is a portable monitor good for gaming?
For casual gaming, yes. For competitive or fast-refresh gaming, look for a portable monitor with 120Hz or 144Hz refresh rate and adaptive sync support. Keep in mind that high refresh rates over USB-C require sufficient bandwidth.
HDMI connections may be needed for the highest refresh rates on some models.
How do I set up a portable monitor with macOS?
Connect via USB-C. Go to System Settings > Displays. Arrange the screens to match your physical layout.
Uncheck "Mirror Displays" if you want extended desktop space. Note that base model M1 and M2 MacBooks support only one external display natively.
Mistakes to Avoid When Setting Up a Portable Monitor
Using the wrong USB-C cable is the single most common mistake. Most USB-C cables sold as phone chargers support power and data only. They do not carry video signal.
Always use the cable included with your monitor, or one explicitly rated for DisplayPort Alt Mode.
Ignoring your laptop's port limitations causes frustration. Plugging into a USB-C port that only supports charging will never produce a display image. Check your specs first.
The port must explicitly list DisplayPort Alt Mode or video output support.
Forgetting to select "Extend" mode leaves you with a mirrored display. This looks like both screens showing the same thing. That is useful for presentations but useless for productivity.
Always choose "Extend" in your display settings unless you specifically want mirroring.
Overlooking power delivery wattage leads to a dead laptop during long work sessions. If your portable monitor only passes 45W and your laptop needs 65W, the battery will drain slowly during use. Either use your laptop's original charger alongside the monitor, or buy a monitor with higher PD wattage.
Costs, Pricing, and What You Get at Each Tier
Portable monitors range from around $80 to over $500. Here is what the money gets you.
Budget tier ($80, $150): 15.6-inch 1080p IPS panel, USB-C with basic PD (45W), HDMI input, magnetic cover stand. Acceptable color accuracy for office work. Brands like ARZOPA, KYY, and CRUA dominate this range.
Good enough for productivity, spreadsheets, and web browsing.
Mid-range ($150, $300): Better build quality, 100% sRGB color gamut, 60W or higher PD, built-in speakers (still mediocre), and more stable stands. Some models offer touchscreen capability. ASUS ZenScreen and Lenovo ThinkVision models sit here.
This tier offers the best balance of price and performance.
Premium ($300, $500+): 4K resolution, OLED panels, 120Hz refresh rates, Thunderbolt 4 connectivity, 100W PD, and factory-calibrated color accuracy. ASUS ProArt, Espresso Displays, and Dell C1422HF fall here. Worth it for creative professionals who need color accuracy on the go.
Hidden costs to budget for: A quality replacement USB-C cable ($10, $20), a compact HDMI adapter if needed ($8, $15), and possibly a laptop stand for ergonomic alignment ($15, $30).
Expert Tips for Getting the Most from Your Setup
Calibrate once, benefit always. Use your operating system's built-in display calibration tool. On Windows, search for "Calibrate display color." On macOS, go to System Settings > Displays > Color profile.
This takes two minutes and makes a noticeable difference in how consistent both screens look.
Use keyboard shortcuts to move windows fast. Windows Key + Arrow keys snap windows to screen edges. Windows Key + Shift + Arrow moves a window to the other display.
On macOS, third-party tools like Magnet or Rectangle add similar functionality.
Set up a consistent connection routine. If you travel frequently, develop a repeatable sequence. Unfold the stand, plug in the cable, wait for detection, adjust settings.
Making this a habit saves time and reduces fumbling in public spaces.
Keep a backup cable in your bag. USB-C cables fail more often than people expect. A spare cable that you know supports video is cheap insurance against a dead setup during an important meeting.
Consider a portable monitor with a built-in battery for true portability. USB-powered monitors draw power from your laptop. A built-in battery model runs independently, which helps when you're working away from outlets for extended periods.
Final Decision Guide: What Should You Do Right Now?
Your next step depends entirely on where you are right now.
If you already own a portable monitor: Check your laptop's USB-C port specs. Grab a video-capable USB-C cable. Plug it in.
Set your display to "Extend." You should be up and running within five minutes.
If you're shopping for one: Decide your priority. For pure productivity, a $150, $200 15.6-inch IPS model with USB-C Alt Mode and 60W PD handles 90% of use cases. For creative work, stretch to a 4K or OLED model with factory calibration.
For travel-heavy use, prioritize weight under 1.5 pounds and a reliable magnetic stand.
If your current setup isn't working: Go back to Step 1. Verify your port supports video. Swap the cable.
These two steps resolve the vast majority of "my monitor won't connect" issues. If problems persist, try the monitor on a different device to isolate whether the issue is the monitor, the cable, or the laptop.
A portable monitor is one of the easiest upgrades you can make to your mobile workspace. The hardware is mature, the prices are reasonable, and the setup is straightforward once you know which connection path matches your gear.
The TOC sections from the approved outline have all been completed in the previous batches. The article is now fully written and complete within the target word range. No remaining sections need to be added as per the TOC.

Similar Posts