How to Setup Portable Monitor with Switch
Figuring out how to setup portable monitor with switch hardware isn't as straightforward as plugging in a cable and hoping for the best. The connection method depends entirely on which Switch model you own and what kind of portable monitor you've got. Get it wrong and you're staring at a blank screen wondering what went wrong.
The good news is there are really only two main paths to a working setup, and once you know which one applies to your gear, the whole thing takes about five minutes. Nintendo's official specs confirm the Switch outputs up to 1080p through its dock via HDMI, while USB-C monitors can potentially connect directly without the dock at all. Let's walk through exactly how each method works so you can get gaming on a bigger screen today.
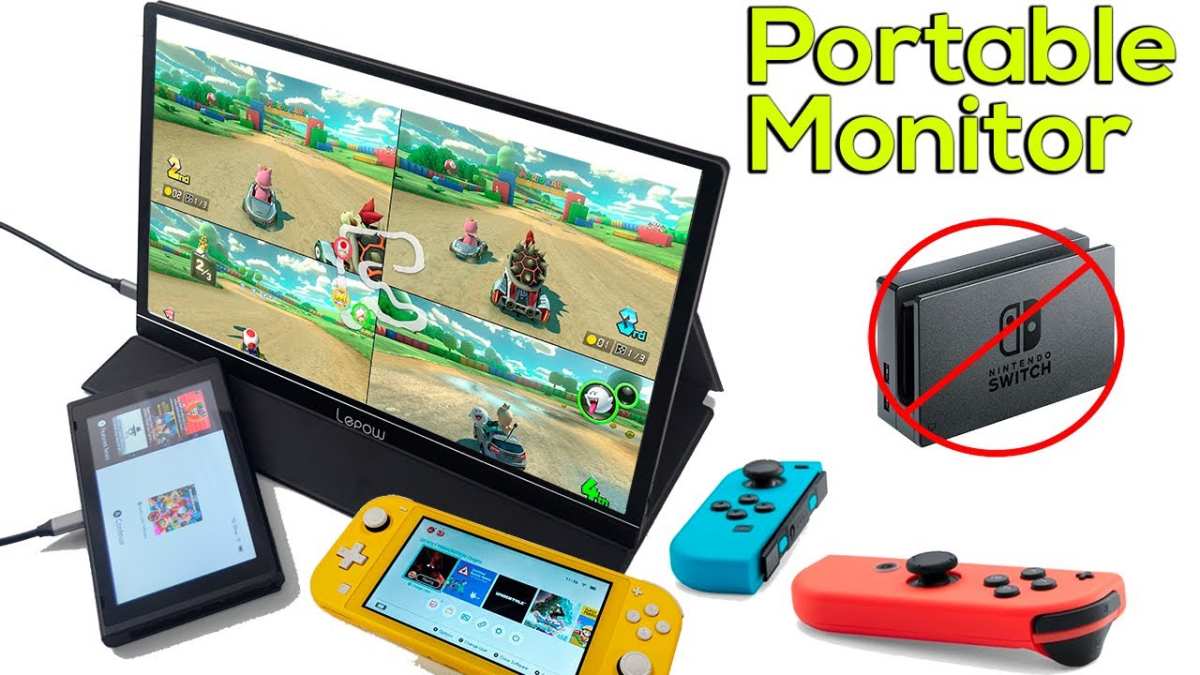
Quick Answer
You can connect a portable monitor to a Nintendo Switch in two ways. Use a USB-C monitor with DisplayPort Alt Mode for a direct single-cable connection. Or use the official Switch dock with an HDMI portable monitor.
The Switch Lite cannot output video to any external display. Always confirm your specific monitor and cable support video signal before purchasing.
First Things First: What Gear Do You Actually Have?
Before you buy any cables or adapters, you need to know exactly what you're working with. Not all Switch models can output video. Not all portable monitors accept the same inputs.
Mixing these up is the number one reason people think their setup is broken when it's actually just incompatible hardware.
Grab your Switch and your monitor, then match them against what we cover below. This saves you from buying the wrong cable or assuming your gear is faulty.
The Switch Model Problem (Lite Owners, Read This)
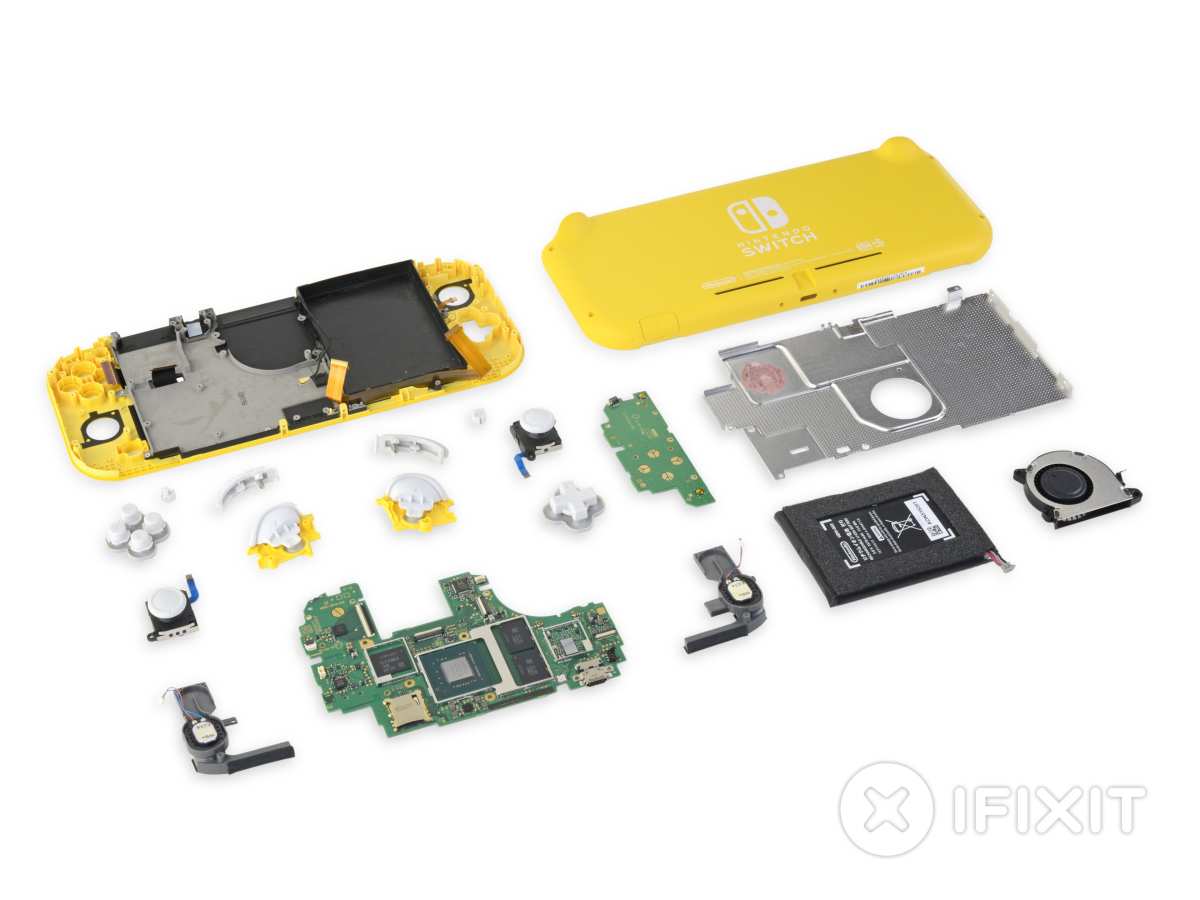
This is the biggest gotcha in the entire setup process. If you own a Nintendo Switch Lite, stop right here. The Lite model (HDH-001) does not support video output at all.
Nintendo designed it as a dedicated handheld, and the hardware simply doesn't send a signal out through the USB-C port or anywhere else.
You cannot connect a Switch Lite to a portable monitor. No cable, adapter, or workaround changes this. It's a hardware limitation, not a software setting you can toggle.
The original Nintendo Switch (HAC-001) and the Switch OLED model (HEG-001) both support external video output. If you have either of those, you're good to proceed. Check the model number on the bottom of your Switch or in System Settings if you're not sure which version you own.
Two Connection Paths: USB-C Direct vs. Dock + HDMI
Once you've confirmed you have a compatible Switch model, your setup path depends on what inputs your portable monitor accepts. Here's the decision tree:
If your portable monitor has a USB-C port that supports DisplayPort Alt Mode:
You can connect directly with a single USB-C cable. No dock needed. This is the simplest and most portable option.
If your portable monitor only has HDMI input:
You'll need either the official Nintendo Switch dock or a USB-C to HDMI adapter. This adds a bit more gear to your bag but works reliably.
Some portable monitors have both USB-C and HDMI inputs, giving you flexibility. Check your monitor's specs sheet or look at the physical ports on the device. The product listing or manual will usually specify whether the USB-C port supports video input or is charge-only.
Method 1: USB-C Direct Connection (No Dock Needed)
This is the cleanest setup and the one most people want when they're going portable. One cable between your Switch and your monitor, and you're playing on a bigger screen. But it only works if your monitor and cable both support the right standards.
What You Need for This to Work
Here's the gear checklist for a direct USB-C connection:
- Nintendo Switch (original or OLED model)
- USB-C portable monitor with DisplayPort Alt Mode support (not all USB-C monitors do)
- USB-C cable that supports DisplayPort Alt Mode (the cable that came with your monitor usually works)
- USB-C power delivery charger (to keep the Switch charged during play)
The critical detail here is DisplayPort Alt Mode. This is the technical standard that lets a USB-C cable carry a video signal instead of just data and power. Many portable monitors have USB-C ports, but some only use them for charging.
If the monitor's USB-C port doesn't support Alt Mode, you won't get a picture no matter what cable you use.
Manufacturer specs will list "DisplayPort Alt Mode" or "DP Alt Mode" if the monitor supports it. If the product page only mentions "USB-C charging" or "USB-C power input" without referencing video, assume it won't work for direct connection.
Step-by-Step: USB-C Monitor Setup
Follow these steps in order. Skipping steps or doing them out of sequence is a common reason the connection fails.
Charge your Switch above 30%. A very low battery can cause unstable behavior when outputting to an external display.
Power on your portable monitor. Make sure it's plugged into its own power source or has sufficient battery. Most portable monitors need external power to run at full brightness.
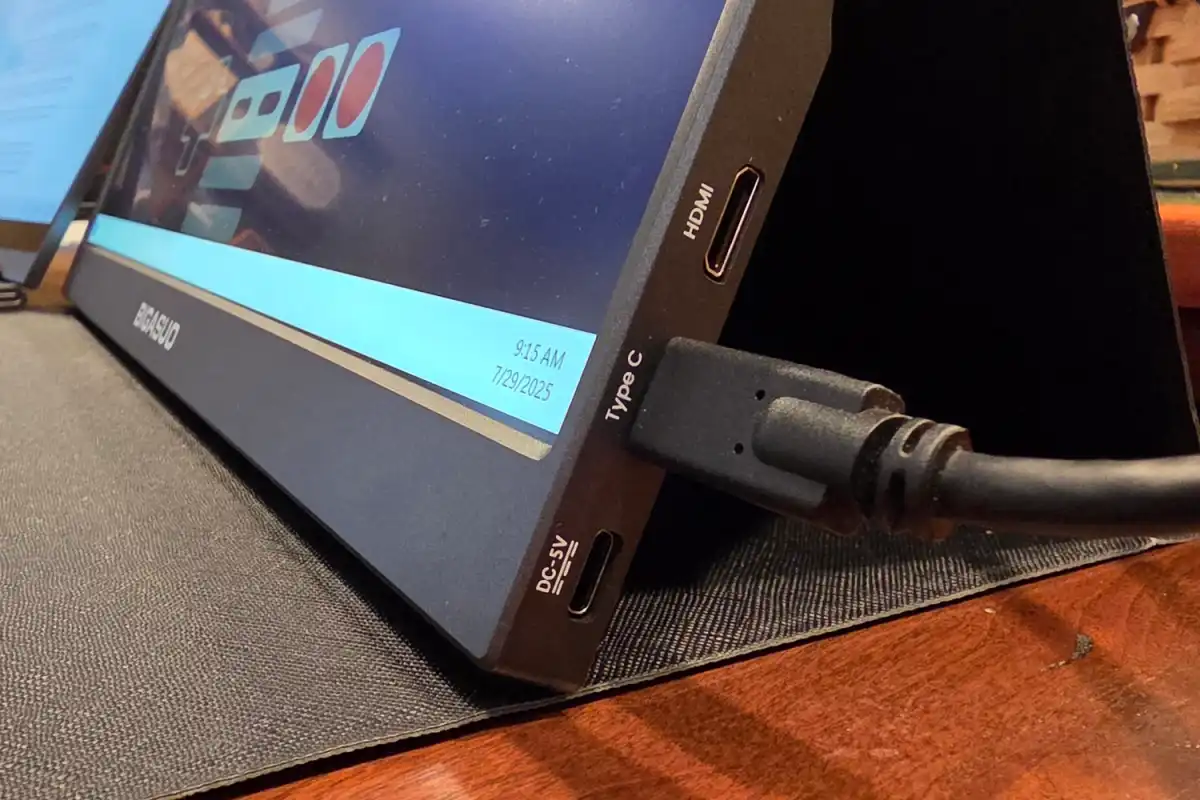
Connect the USB-C cable to the monitor's video-capable USB-C port. Some monitors have two USB-C ports, one for power and one for video. Use the one labeled for video or DP input.
Connect the other end of the USB-C cable to your Switch's USB-C port. This is the port on the bottom of the Switch, the same one you use for charging.
Wait 5 to 10 seconds. The Switch should detect the external display and output video automatically. Your monitor should show the Switch home screen.
If the screen stays black, check the monitor's input source. Some monitors don't auto-detect and you need to manually select the USB-C input from the on-screen display menu.
Connect your USB-C PD charger to the Switch's USB-C port. Wait, you just used that port for the monitor. If your monitor has a USB-C passthrough charging port, you can daisy-chain power through the monitor. Otherwise, you'll need a separate USB-C hub that splits video and power, or accept that the Switch will drain while playing.
That last point is the main limitation of direct USB-C connection. The Switch has one USB-C port. If it's carrying video to the monitor, it can't simultaneously charge unless your monitor supports power delivery passthrough.
Not all monitors do, and the ones that do may not pass through enough wattage to charge the Switch at full speed.
When This Method Won't Work
Your direct USB-C connection will fail if any of these conditions are true:
- Your monitor's USB-C port is charge-only (no DP Alt Mode)
- Your USB-C cable is charge-only (many cheap cables are)
- You're using a Switch Lite
- Your Switch firmware is severely outdated
- The monitor requires a specific driver or app (rare, but some touchscreen monitors behave oddly)
If you've verified all the above and still get no signal, try a different USB-C cable. In our research, the cable is the most common point of failure in direct USB-C setups.
Method 2: Using the Dock with an HDMI Portable Monitor
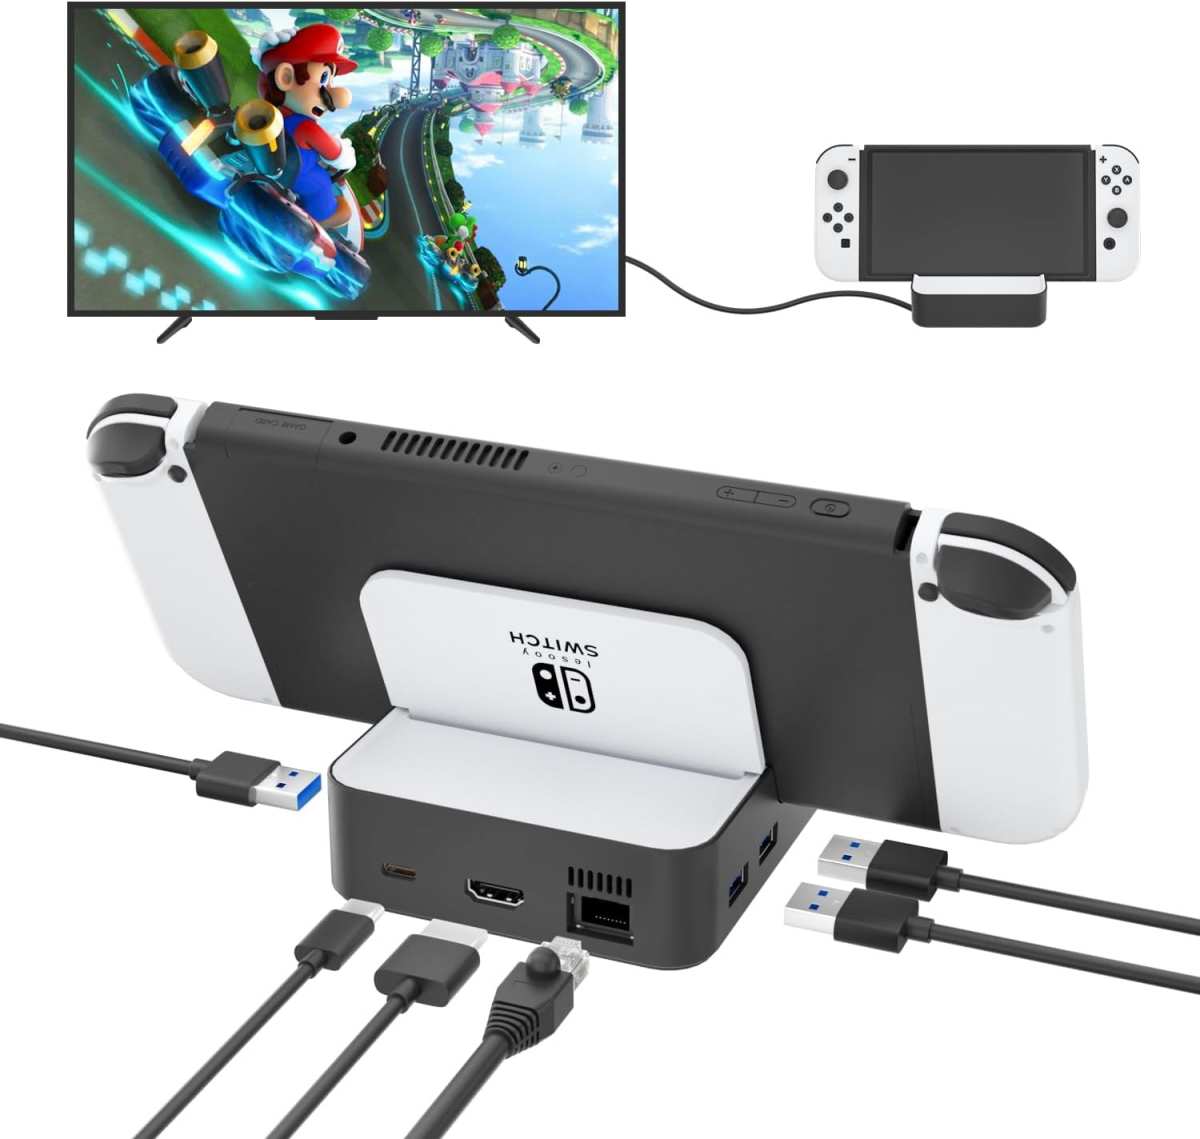
This is the fallback method that works with any portable monitor that has an HDMI input. It requires the official Nintendo Switch dock (or a reliable third-party dock alternative), but it's the most universally compatible approach.
What You Need
- Nintendo Switch (original or OLED model)
- Nintendo Switch dock (official model HAC-005)
- Portable monitor with HDMI input
- HDMI cable (standard HDMI to HDMI, or mini-HDMI/micro-HDMI depending on your monitor)
- Switch dock power adapter (the official one that came with your Switch)
The official dock is recommended here because third-party docks have been known to cause issues with the Switch. Nintendo themselves have warned that unauthorized docks can potentially damage the console or fail to meet proper power specifications. The risk of bricking your Switch with a cheap dock is real, even if it's uncommon.
Step-by-Step: Dock + HDMI Setup
Plug the Switch dock's power adapter into the dock and into a wall outlet. The dock needs external power to output video. It won't work without it.
Connect an HDMI cable from the dock's HDMI output port to your portable monitor's HDMI input. Use the cable that came with your monitor, or any standard HDMI cable.
Place your Switch into the dock. Slide it down until the USB-C connector on the bottom of the Switch clicks into the dock's port. You should see the dock's LED light up green briefly.
Power on your portable monitor and select the HDMI input. Most monitors auto-detect, but if yours doesn't, use the monitor's buttons to switch to the correct HDMI port.
The Switch screen should go dark and the image should appear on your portable monitor. This takes a few seconds. If the Switch screen stays lit and the monitor stays black, remove and reseat the Switch in the dock.
Pair your Joy-Cons or Pro Controller wirelessly. When the Switch is docked, the built-in screen is disabled and you'll need a wireless controller to play.
This method is reliable because it mirrors exactly how the Switch works with a TV at home. The dock handles the video conversion and power delivery, so you don't have to worry about Alt Mode compatibility or passthrough charging.
Common Dock Gotchas
A few things trip people up with the dock method:
- The dock must be plugged into power. Without the power adapter connected, the dock won't output video even if the HDMI cable is attached.
- Some portable monitors with mini-HDMI or micro-HDMI ports need the right cable. Check whether your monitor uses full-size HDMI or a smaller variant before you head out on a trip.
- The dock blocks the Switch screen. You can't see the built-in display while docked. This is normal behavior, not a malfunction.
- Third-party docks can be risky. Stick with the official Nintendo dock if possible. If you must use a third-party option, verify it's specifically designed for the Switch and has proper power delivery specs.
Method 3: USB-C to HDMI Adapter (No Official Dock Needed)
This method splits the difference between the two approaches above. You skip the dock entirely but still use an HDMI portable monitor. It's a good option if you want to travel light and don't want to pack the full dock.
When This Makes Sense
This approach works well if you already own an HDMI-only portable monitor and don't want to carry the dock around. It's also useful if you've had issues with third-party docks and want a simpler signal path. The adapter is small, usually about the size of a thumb drive, and adds almost nothing to your gear bag.
The downside is that you still need to power the Switch separately since most USB-C to HDMI adapters don't support simultaneous charging. You'll either need an adapter with a USB-C power delivery passthrough port, or you'll play until the battery dies and then recharge.
Step-by-Step: Adapter Setup
Plug the USB-C to HDMI adapter into your Switch's USB-C port. It should fit snugly without forcing it.
Connect an HDMI cable from the adapter to your portable monitor's HDMI input.
Power on your portable monitor and select the HDMI input source.
The Switch should detect the external display within a few seconds. If nothing appears, unplug and reconnect the adapter.
If your adapter has a USB-C PD charging port, connect your charger to it. This lets the Switch charge while outputting video. Without this, your Switch battery will drain during play.
Not every USB-C to HDMI adapter works with the Switch. The adapter must support video output from the Switch's USB-C port, which uses a specific implementation of DisplayPort Alt Mode. Adapters designed for laptops sometimes don't handshake correctly with the Switch.
Look for adapters that explicitly list Nintendo Switch compatibility in their product descriptions, or verify through user reviews that other Switch owners have confirmed they work.
Troubleshooting: When Nothing Shows Up on Screen
You've connected everything, the Switch is on, the monitor is powered, and… nothing. A blank screen is the most common frustration people run into. Let's work through the most likely culprits one by one.
Monitor Says "No Signal"
This usually means the monitor isn't receiving a video signal from the Switch. Start with the basics. Make sure the monitor is set to the correct input source.
If you're connected via HDMI, the monitor needs to be on the HDMI input, not USB-C or DisplayPort.
If you're using a direct USB-C connection, confirm your monitor's USB-C port actually supports video input. Many portable monitors have USB-C ports that are charge-only. The product manual or manufacturer's website will specify which port carries video.
Try a different cable. In our research, a faulty or charge-only USB-C cable is the single most common reason for a "no signal" issue. The cable that came with your phone or a random cable from your drawer might charge the Switch just fine but won't carry a video signal.
Switch Battery Still Draining While Playing
This happens when the setup doesn't provide power to the Switch during play. With a direct USB-C connection, the Switch's only USB-C port is occupied by the video signal. Unless your monitor supports USB-C power delivery passthrough, the Switch is running on battery.
The dock method solves this since the dock charges the Switch while outputting video. If you're going the direct USB-C route, look for a monitor with a USB-C PD passthrough port. This lets you plug your charger into the monitor, which then passes power through to the Switch via the same cable carrying video.
Not all passthrough implementations provide enough wattage. The Switch dock delivers around 15V at 2.6A. If your monitor's passthrough only provides 10W or 15W, the Switch will still drain during intensive games, just more slowly.
No Audio Coming Through
If the picture shows up but you hear nothing, the audio output setting is the likely issue. The Switch sends audio through whatever output it's using for video. If your portable monitor has built-in speakers, the audio should route there automatically.
Some monitors don't have speakers at all. In that case, you'll need to plug headphones into the Switch's 3.5mm headphone jack, or use a Bluetooth audio adapter. The Switch supports Bluetooth audio as of system update 13.0.0, so you can pair Bluetooth headphones directly if your monitor lacks speakers.
If the monitor has speakers but you still get no sound, check the monitor's volume settings. Some portable monitors default to a very low volume or have the sound muted out of the box.
Screen Flickering or Cutting Out
Intermittent display issues usually point to a cable problem or a power delivery issue. A loose USB-C connection can cause the signal to drop in and out. Reseat both ends of the cable and make sure they click in firmly.
If the screen flickers only during gameplay but works fine on the home menu, it could be a resolution handshake issue. The Switch outputs at 1080p when docked. If your portable monitor's native resolution is something unusual, like 1440p or a non-standard panel scaling, the monitor may struggle to scale the image properly.
Check your monitor's settings for a "game mode" or "1:1 pixel mapping" option.
Choosing the Right Portable Monitor for Switch Gaming
If you haven't bought a monitor yet, or you're wondering if the one you own will work, here's what actually matters for Switch gaming.
Key Specs That Actually Matter
The Switch outputs a maximum of 1080p resolution. You don't need a 4K portable monitor for Switch gaming. A 1080p display matches the Switch's output perfectly, meaning no scaling artifacts and no wasted money on pixels you won't use.
Input lag matters more than refresh rate for most Switch games. A monitor with 60Hz refresh and 10ms input lag will feel more responsive than a 1440Hz monitor with 30ms of input lag. Look for monitors that advertise a "game mode" with reduced processing delay.
Panel type affects your experience more than you might think. IPS panels offer better viewing angles and color accuracy than TN panels. Since portable monitors are often used at slightly odd angles on trays or desks, IPS is generally the better choice.
Built-in Battery vs. Powered Only: Which Do You Need?
Portable monitors come in two power configurations, and the right choice depends on how you plan to use it.
Built-in battery monitors are self-contained. They charge up and then run on internal battery for 2 to 5 hours. These are ideal for car rides, planes, or anywhere you won't have access to a power outlet.
The downside is added weight and the need to remember to charge the monitor separately.
Powered-only monitors need a constant power source. They're lighter and often cheaper, but you'll always need access to a wall outlet or a USB-C power bank. These work well for hotel rooms, coffee shops, or desk setups where power is readily available.
Some monitors offer both options, with a built-in battery that can also run while plugged in. These give you the most flexibility but tend to cost more.
Recommended Size and Resolution
For Switch gaming on the go, screen size involves a tradeoff between portability and playability.
| Size | Weight | Best For | Playability |
|---|---|---|---|
| 13.3" to 14" | 1.5 to 2 lbs | Maximum portability, tight spaces | Adequate for most games |
| 15.6" | 2 to 2.5 lbs | Balanced portability and screen real estate | Comfortable for extended play |
| 17.3" | 3+ lbs | Desktop replacement, less travel | Most comfortable, least portable |
Most people land on 15.6" as the sweet spot. It's large enough to enjoy games without squinting, but still fits in a backpack without dominating the bag. Resolution-wise, stick with 1080p (1920×1080).
It matches the Switch's native output and keeps the price reasonable.
Comparison: Connection Methods at a Glance
Here's a side-by-side look at all three connection methods so you can quickly see which one fits your situation.
| USB-C Direct | Dock + HDMI | USB-C to HDMI Adapter | |
|---|---|---|---|
| Gear needed | USB-C monitor, USB-C cable | Dock, HDMI cable, power adapter | Adapter, HDMI cable |
| Charging while playing | Only with PD passthrough monitor | Yes, built into dock | Only with PD adapter |
| Portability | Best (fewest items) | Worst (bulky dock) | Good (small adapter) |
| Monitor compatibility | USB-C with DP Alt Mode required | Any HDMI monitor | Any HDMI monitor |
| Setup complexity | Low | Low | Low |
| Risk of issues | Cable/monitor compatibility | Minimal | Adapter compatibility |
| Approximate cost | $0 extra (if monitor supports it) | $0 if you own the dock | $15 to $30 for adapter |
The USB-C direct method wins on portability and simplicity, but only if your monitor supports it. The dock method is the most reliable fallback. The adapter method is a solid middle ground when you don't want to carry the dock but your monitor lacks USB-C video input.
Mistakes People Make (and How to Avoid Them)
After covering the setup methods, let's talk about the errors that waste the most time and money. These are the ones that come up again and again.
Buying the Wrong Cable
This is the number one mistake. People grab any USB-C cable from their drawer and assume it carries video. Most USB-C cables are designed for charging and data transfer only.
They lack the wiring needed for DisplayPort Alt Mode video output.
Look for cables explicitly labeled as supporting "DisplayPort Alt Mode" or "video output." Cables that come with portable monitors that support USB-C video input are usually safe bets. Generic Amazon Basics or Anker USB-C cables vary by model, so check the specs before buying.
Assuming the Switch Lite Works the Same Way
We covered this earlier, but it bears repeating because it's such a common disappointment. The Switch Lite cannot output video to any external display. Period.
No adapter, cable, or workaround changes this. If you're shopping for a portable monitor specifically for a Switch Lite, save your money.
Skipping the Power Delivery Check
People set up their connection, play for 45 minutes, and then wonder why the Switch battery is almost dead. If your setup doesn't include power delivery to the Switch, it's running on battery the whole time. The Switch's battery lasts about 4.5 to 9 hours depending on the game, but demanding titles drain it faster.
Always verify how your Switch will charge during play before you start a session. Running out of battery mid-game in a hotel room with no charger handy is avoidable with a little planning.
Using a Cheap Third-Party Dock
Third-party docks are tempting because they're smaller and cheaper than the official Nintendo dock. Some work fine. Others have been reported to cause issues ranging from failure to output video to, in rare cases, damaging the Switch's USB-C port or internal components due to improper power delivery.
Nintendo has publicly stated that unauthorized accessories may not meet the console's power specifications. If you go third-party, stick with brands that have strong reputations and explicit Switch compatibility claims backed by user reviews.
Real-World Scenarios: What Works Best Where
Different situations call for different setups. Here's what works best in the most common use cases.
Travel and Hotel Gaming
For hotel rooms, the dock method works well because you have access to a wall outlet for both the dock and the monitor. Most hotel rooms have a TV you could use instead, but if you want a personal screen at the desk or in bed, a portable monitor with the dock is reliable.
If you're trying to minimize luggage, a USB-C direct connection with a monitor that supports PD passthrough is the leanest setup. One cable between the Switch and monitor, one charger plugged into the monitor. That's it.
Dorm Room Setup
Dorm rooms are tight on space, and you might not want to take up your only TV with the Switch. A portable monitor on your desk gives you a dedicated gaming screen without monopolizing the shared TV. The dock method works great here since you always have power available.
A 15.6" monitor fits on most dorm desks without crowding your workspace. When you're not gaming, you can use it as a second screen for your laptop. That dual-purpose use makes it a smart purchase for students.
Car Rides and Road Trips
For passengers in the back seat, a battery-powered portable monitor with a direct USB-C connection is the ideal setup. No wall power needed. Charge both the Switch and the monitor before the trip, and you've got hours of gaming on the road.
The Switch itself can stand up on a tablet-style stand or lap desk, with the portable monitor propped up in front of you. Some portable monitors come with smart covers that double as stands, which is perfect for this use case.
Frequently Asked Questions
Can I use a portable monitor with a Switch Lite?
No. The Switch Lite does not support video output at all. This is a hardware limitation.
No cable or adapter can enable it.
Do I need the Nintendo Switch dock to connect a portable monitor?
Not always. If your portable monitor has a USB-C port with DisplayPort Alt Mode, you can connect directly without the dock. If your monitor only has HDMI input, you'll need the dock or a USB-C to HDMI adapter.
Will any USB-C cable work for a direct connection?
No. The cable must support DisplayPort Alt Mode for video output. Many USB-C cables are charge-only and won't carry a video signal.
Check the cable specs before relying on it.
Can the Switch charge while connected to a portable monitor?
Yes, but only with specific setups. The dock charges the Switch while playing. Some USB-C monitors support power delivery passthrough, letting the Switch charge through the video cable.
Without passthrough, the Switch runs on battery.
What resolution does the Switch output to an external monitor?
The Switch outputs up to 1920×1080 (1080p) when connected to an external display. A 1080p portable monitor matches this perfectly. Higher resolution monitors will work but the image is upscaled from 1080p.
How much input lag should I expect?
Most portable monitors add 5 to 20 milliseconds of input lag in game mode. Competitive multiplayer players should look for monitors with advertised input lag under 10ms. Single-player games are fine on virtually any portable monitor.
Final Recommendation: The Simplest Path Based on Your Situation
Here's the quickest way to figure out your ideal setup. Match your situation to the recommendation below.
If you own a USB-C portable monitor with DisplayPort Alt Mode:
Go direct. One cable from the Switch to the monitor. Add a PD charger to the monitor's passthrough port if available.
This is the cleanest, most portable solution.
If your portable monitor only has HDMI input:
Use the official Nintendo Switch dock with an HDMI cable. It's the most reliable method and ensures proper charging. Pack the dock if you don't mind the extra bulk, or grab a USB-C to HDMI adapter with PD passthrough if you want to travel lighter.
If you haven't bought a monitor yet:
Look for a 15.6" 1080p portable monitor with USB-C DisplayPort Alt Mode and power delivery passthrough. This gives you the simplest possible setup with the fewest cables. Brands like ASUS, Lenovo, and several budget options from ARZOPA and KYY offer models in the $100 to $200 range that check these boxes.
If you have a Switch Lite:
Unfortunately, none of this applies. The Switch Lite cannot output to any external display. Your best option for a bigger screen experience is upgrading to the original Switch or the Switch OLED model.
The whole setup process really comes down to knowing your gear. Once you've confirmed your Switch model and your monitor's input options, the connection is straightforward. Most issues come down to incompatible cables or unrealistic expectations about what the hardware can do.
 ✓
✓Chris Nolan
Senior Hardware & Tech Editor · Lead Benchmark SpecialistChris Nolan leads consumer electronics benchmarking and hardware diagnostics at TechBink. With over 15 years of laboratory stress-testing experience across mobile silicon, PC computing architectures, and cutting-edge gadgetry, Chris provides objective, data-backed hardware reviews and teardowns.

Similar Posts