How to Switch Inputs on USB C Monitor
Figuring out how to switch inputs on a USB-C monitor shouldn't feel like solving a puzzle, but it often does. The process varies wildly depending on your monitor's brand, model, and how its on-screen display is designed. Some monitors make it dead simple.
Others bury the option three menus deep.
Here's the thing most guides skip: USB-C carries video through something called DisplayPort Alt Mode (or HDMI Alt Mode), and the way a monitor handles that signal path is fundamentally different from HDMI or DisplayPort inputs. As of 2026, there's no universal standard for how manufacturers implement input switching on USB-C displays. That's exactly why we put this guide together.
We'll walk you through the exact steps based on what you're working with, so you're not left pressing buttons at random.
Quick Answer
Most USB-C monitors let you switch inputs through a physical button or joystick on the monitor itself. Press it to open the on-screen display, then navigate to "Input Source" and select the port you want. Some monitors auto-switch to whichever source has an active signal.
If that's not working, your cable or port configuration is usually the culprit.
Why Switching Inputs on a USB-C Monitor Isn't Always Straightforward
USB-C monitors flip the script compared to traditional displays. With a standard HDMI or DisplayPort monitor, you've got dedicated physical inputs and typically a clearly labeled "Input" button. USB-C changes the equation because a single cable can carry video, data, and power delivery (PD) simultaneously, up to 100 watts in many cases.
That convenience creates confusion. Many users plug in via USB-C, see it working fine, then wonder why there's no obvious way to switch to their HDMI-connected desktop or gaming console. The short answer is that the input switching mechanism still exists, but it's managed through the OSD (On-Screen Display) rather than a dedicated hardware button on every model.
Here's where it gets trickier. Per the USB-IF specification, USB-C Alt Mode negotiation handles video handshakes differently than native DisplayPort or HDMI connections. Some monitors auto-detect and switch to the active source.
Others require manual selection every time. And a few budget models lock you into whichever source was active last, with no auto-switching at all.
The key variables that determine your experience:
- Monitor brand and firmware: Dell, LG, Samsung, and ASUS all use different OSD layouts for input selection.
- Single-source vs. multi-source models: Some USB-C monitors only accept one input at a time via USB-C, with no other ports.
- Cable capability: A USB-C cable that only supports charging won't carry video, period.
First, Identify What You're Working With
Before you start pressing buttons randomly, take 30 seconds to figure out what type of monitor you're dealing with. This saves a ton of frustration.
Does your monitor have a physical input button or joystick?
Look at the bottom bezel or the back edge of the monitor. Most USB-C monitors include some form of physical control.
If you see a small joystick nub (very common on Dell and Samsung monitors), that's your primary control. Click it in to open the OSD, then push it up/down/left to navigate.
If you see individual physical buttons (common on older or budget models from LG or ASUS), one of them is usually dedicated to input selection. It might be labeled with an icon that looks like an arrow pointing into a box, or simply say "Input."
If you see no physical buttons at all, your monitor likely uses a touch-sensitive panel on the bezel. Swipe or tap it to bring up the OSD.
Is your monitor a single-input or multi-input model?
This matters more than people realize. Some USB-C monitors, especially portable ones, only have a single USB-C port that doubles as the video input. If that's your situation, there's no input switching to do, you only have one source.
Multi-input USB-C monitors typically include one or two USB-C ports plus HDMI and sometimes DisplayPort. These are the ones where input switching actually applies.
Quick way to check: look at the back or bottom edge. If you see HDMI or DisplayPort connectors alongside USB-C, you've got multiple inputs to switch between.
What's your monitor brand and OSD system?
The brand determines the OSD layout, which is where most people get stuck. Here's a quick breakdown:
| Brand | OSD Control | Input Selection Location |
|---|---|---|
| Dell | Joystick (bottom bezel) | Main menu → Input Source |
| LG | Joystick or buttons | Input → Input List |
| Samsung | Joystick (rear or bottom) | Menu → Input |
| ASUS | Buttons (bottom/rear) | Input Select (often a hotkey) |
| BenQ | Buttons (bottom/rear) | Input → Input Source |
| HP | Buttons or joystick | Menu → Input Control |
| Lenovo | Varies by model | Menu → Display Input |
How to Switch Inputs: Step-by-Step by Monitor Type
No one-size-fits-all sequence works here because the physical controls and OSD layouts differ. Use the method that matches what you've got.
Method 1: Physical button or joystick (most common)
This works on the majority of USB-C monitors from Dell, Samsung, LG, and others. Here's the general sequence that covers most brands:
- Press the joystick inward (or press the menu/input button) to open the OSD.
- Navigate to "Input Source" or "Input" using the joystick or arrow buttons.
- Select your desired input: USB-C, HDMI 1, HDMI 2, DisplayPort, or USB-C 2 (if applicable).
- Confirm and exit. Most OSDs auto-close after a few seconds of inactivity.
On Dell monitors specifically, clicking the joystick in brings up a quick menu that often shows input sources right at the top. It's the fastest route.
On older LG models with physical buttons, you might need to press the "Input" button directly (usually the leftmost or rightmost button on the bottom bezel). That pulls up an instant input list without opening the full OSD.
Method 2: On-Screen Display (OSD) menu navigation
If there's no dedicated input button and the quick menu doesn't show input options, you'll need the full OSD:
- Open the OSD via joystick click or menu button.
- Go to the main settings/menu section (not the quick-access layer).
- Look for "Input," "Source," or "Display Input" in the list. On some BenQ monitors, it's under "System" rather than having its own top-level tab.
- Select the port you want to switch to.
- Confirm. Some monitors ask you to confirm the switch; others switch immediately.
A note on BenQ's newer models: they sometimes place the input option under "Display" → "Input" in the OSD hierarchy. It's not where most people expect it the first time around.
Method 3: Auto-detection and what to do when it fails
Many modern USB-C monitors support auto-input detection. The monitor senses which port has an active signal and switches to it automatically. Sounds great in theory.
In practice, it can be hit or miss.
When auto-switch works:
- You plug in your laptop via USB-C. The monitor wakes up and displays the laptop screen.
- You power on your gaming console connected via HDMI. The monitor switches over on its own.
When it doesn't:
- Both inputs show the active source, and the monitor sticks to whichever one was first detected.
- You switch devices, but the monitor doesn't wake up because it still sees a "connected" signal on the other port.
The fix for failed auto-switching is to disable auto-detection in the OSD (usually under Input settings) and switch manually instead. It's less convenient, but it's reliable.
Method 4: Hotkey shortcuts on select monitors
Some monitors let you assign a hotkey for input selection. ASUS monitors, for example, sometimes have a dedicated input button that cycles through available sources with each press. Certain Dell models let you configure a shortcut via the OSD's "Customizable Button" option (especially the P and U series, though the exact model lineup varies).
This is the fastest method when it's available, but it's not universal. Check your monitor's OSD under "System" or "Hotkey" settings to see if it's an option.
The Cable Problem That Looks Like an Input Problem
Here's the scenario we see constantly. Someone plugs their laptop into a USB-C monitor with a cable they had lying around. Nothing happens.
They assume the monitor is broken or they need to switch inputs. The real problem? The cable.
Not all USB-C cables carry video
This is the single biggest source of confusion. USB-C is a connector shape, not a capability standard. A cable can be USB-C and still only support charging or USB 2.0 data transfer.
No video at all.
Cables that do support video carry it through what's called "Alt Mode" (Alternate Mode). The relevant ones for monitors are:
- DisplayPort Alt Mode: The most common video-over-USB-C implementation.
- HDMI Alt Mode: Less common but found on some newer cables and monitors.
How to check if your cable supports Alt Mode
Look for markings on the cable itself. You want to see one of these symbols or labels:
- DisplayPort logo (a "D" with a "P" inside, or "DP")
- "4K" or "8K" rating (implies sufficient bandwidth for video)
- Thunderbolt 3 or 4 (Thunderbolt always supports video output, so it can be considered a reliable choice)
- "USB 3.1 Gen 2" or "USB 3.2" with video support mentioned
If the cable is unmarked or says "USB 2.0" or "Charging Cable," it almost certainly does not support video. You need a full-featured USB-C cable.
Manufacturer specifications verify that certified Thunderbolt 4 cables (typically rated for 40 Gbps) always support DisplayPort Alt Mode video. That's a safe choice if you're unsure.
Charging-only vs. full-featured USB-C cables
Here's a quick comparison that might save you a headache:
| Cable Type | Charging | Data | Video (Alt Mode) |
|---|---|---|---|
| Charging-only | Yes | No | No |
| USB 2.0 data cable | Yes | 480 Mbps | No |
| USB 3.1 Gen 1 | Yes | 5 Gbps | Sometimes |
| USB 3.1 Gen 2 | Yes | 10 Gbps | Often |
| Thunderbolt 3/4 | Up to 100W | 40 Gbps | Always |
The safe move for a USB-C monitor connection? Use a Thunderbolt-certified cable or a cable explicitly rated for your monitor's maximum resolution and refresh rate. A cable rated for 4K@60Hz will handle that resolution without issue.
Trying to push 4K@120Hz or higher over a cable not rated for it can cause flickering, black screens, or no signal at all.
When Your Monitor Won't Switch or Won't Detect the Signal
Sometimes you've got the right cable, you're pressing the right buttons, and things still aren't working. Here's a breakdown of the most common failure scenarios and what actually fixes them.
USB-C monitor stuck on one input
If your monitor refuses to acknowledge a second input, try this sequence:
- Disconnect the active source (the one currently displayed).
- Connect the new source via the desired port.
- Wait 3, 5 seconds. The monitor needs time to negotiate the signal.
- Manually switch via OSD if auto-detection doesn't engage.
The reason many USB-C monitors appear "stuck" is that some prioritize the USB-C connection over other ports when both are active (though behavior varies by design). Withdrawing the USB-C source forces the monitor to look elsewhere.
Monitor detects USB-C but not HDMI/DP (or vice versa)
This usually points to one of three issues:
- The cable on the non-USB-C source is faulty or loose. Swap it out.
- The port on the source device isn't outputting video. Some laptops disable HDMI output when USB-C is connected via a setting in the OS.
- The monitor's OSD has a port priority or auto-detection setting that needs adjustment. Check for "Input Auto Switch" or "Quick Start" settings in the OSD menus and experiment with toggling them off.
Mac not outputting video over USB-C
Macs can be particular. Here's what we've found in our research:
- M1/M2/M3 Macs generally work fine with USB-C Alt Mode monitors out of the box.
- Some Intel Macs require a DisplayPort Alt Mode that the monitor must specifically support.
- If using an adapter or hub, make sure it's rated for video pass-through. Many cheap USB-C hubs don't pass video signals.
- Restart the Mac with the monitor connected. macOS sometimes needs a fresh handshake. NVRAM/PRAM reset is occasionally necessary for stubborn cases. Try a known-good Thunderbolt cable before moving on to anything else.
Resolution or refresh rate mismatch after switching
You switch inputs and suddenly your display is running at a lower resolution or choppy refresh rate. This happens when the monitor applies different EDID (Extended Display Identification Data) profiles to different inputs. The fix is in your OS display settings:
- Windows: Right-click desktop → Display Settings → select the monitor → set resolution and refresh rate.
- Mac: System Settings → Displays → select resolution and refresh rate.
Some monitors also let you save per-input display profiles in the OSD, which prevents this issue entirely. Check under "Picture" or "Display" settings in your monitor's menu.
[Article continues with brand-specific reference section, cable recommendations, troubleshooting guide, and FAQ.]
Common Mistakes People Make When Switching USB-C Monitor Inputs
These are the errors we see over and over. Most of them are easy to avoid once you know they exist.
Using the wrong cable type. We covered this earlier, but it bears repeating. Grabbing a random USB-C cable from a drawer and assuming it carries video is the number one reason people think their monitor is broken. If the cable didn't come with the monitor or isn't explicitly rated for video, it probably doesn't support it.
Assuming auto-switch will handle everything. Auto-detection is convenient when it works. When it doesn't, people sit there wondering why their monitor won't respond. The reality is that auto-switch is unreliable on many monitors, especially when both sources are powered on simultaneously.
Manual switching via the OSD is almost always the more dependable option.
Not waiting long enough after switching. USB-C Alt Mode negotiation takes a few seconds. DisplayPort and HDMI handshakes add another moment. If you switch inputs and immediately assume something's wrong, give it 5, 10 seconds before troubleshooting.
Patience solves more "broken monitor" problems than any button combination.
Forcing a switch when the source device is in sleep mode. A laptop in sleep or hibernate mode may still register as connected but send no active video signal. The monitor sees a connection but gets nothing to display. Wake the source device fully, then switch inputs.
Built-in KVM vs. Manual Input Switching
Many newer USB-C monitors include KVM switch functionality. KVM stands for Keyboard, Video, Mouse, and it means the monitor's built-in USB hub can route your peripherals to whichever source device is active.
When your USB-C monitor acts like a KVM
If your monitor has a USB-B or USB-A upstream port alongside USB-C, it likely supports some form of USB switching. Here's how it typically works:
- Your keyboard and mouse plug into the monitor's USB-A downstream ports.
- When you switch from USB-C to HDMI, the monitor routes your peripherals to the device on the active input.
- Some monitors handle this automatically. Others require you to switch the USB upstream source separately from the video input.
Dell's P-series and U-series monitors often include a "USB KVM" option in the OSD. LG's UltraFine and UltraGear lines have similar support, though the implementation varies by model.
When you need an external KVM switch instead
If your monitor doesn't have KVM functionality, or if you're switching between more than two computers, an external KVM switch is the cleaner solution. These devices sit between your peripherals and your computers, letting you switch everything (video, USB, audio) with a single button press.
External KVM switches that support USB-C are becoming more common, though most still rely on HDMI or DisplayPort for video. If your setup requires USB-C at both ends, make sure the KVM explicitly supports USB-C Alt Mode pass-through.
USB-C Monitor Input Switching: Brand-Specific Quick Reference
We've pulled together the specifics for the most common USB-C monitor brands. Since manufacturers update their OSD layouts with new models and firmware revisions, we recommend checking your monitor's manual for the exact menu path. Here's what's typical across their current lineups.
Dell
Most Dell USB-C monitors (P-series, U-series, S-series) use a joystick on the bottom bezel. Click it in to open the quick menu, then select "Input Source." Dell's OSD typically shows all available inputs in a horizontal list. The USB-C port may be labeled "USB-C" or "Type-C." Some Dell monitors also let you assign input switching to a customizable button via the OSD's "Hotkey" settings.
LG
LG monitors (UltraGear, UltraFine, MyTouch series) typically use a joystick controller. Press it to open the OSD, navigate to "Input," then select "Input List." LG's OSD shows each port with its detected resolution and refresh rate, which helps you identify which source is which. Some LG models have a dedicated input button on the bottom edge that cycles through sources directly.
Samsung
Samsung's M-series and smart monitors use a joystick on the rear or bottom. The OSD path is usually Menu → Input → Source List. Samsung monitors with "Auto Source Detection" enabled will switch to whichever port detects a new active signal first.
If this causes unwanted switching, disable it in the Input menu and switch manually.
ASUS
ASUS monitors (ProArt, ROG, VY series) often have physical buttons rather than a joystick. Many models include a dedicated "Input Select" button (sometimes the leftmost button) that cycles through available sources with each press. ProArt models may place input selection under the "Input" or "System" menu in the OSD.
Some ROG models support input hotkeys configurable through the OSD.
BenQ
BenQ monitors (PD, SW, GW series) use physical buttons on the bottom or rear bezel. Input selection is typically found under the "Input" or "System" menu. Some BenQ models let you configure a quick-access input button.
The OSD on BenQ monitors tends to be more text-heavy than competitors, so look for "Input Source" or "Display Input" in the menu list.
HP
HP USB-C monitors (ZDisplay, E-series, OMEN) vary between joystick and button controls depending on the model. The OSD path is generally Menu → Input Control → Input Source. HP's Z-series displays often include KVM switching options in the same menu.
Some HP monitors support auto-switch, which can be toggled on or off in the Input settings.
Lenovo
Lenovo's ThinkVision USB-C monitors typically use a joystick on the rear or right edge. Input selection is under Menu → Display Input or Menu → Input. ThinkVision models with USB-C docking features often include KVM-like USB switching.
The OSD layout varies between the T-series, P-series, and L-series, so the exact menu path may differ.
Frequently Asked Questions
Can I switch inputs on a USB-C monitor without any buttons?
If your monitor has no physical controls at all, it likely relies entirely on auto-detection. Some portable USB-C monitors fall into this category. Your only option is to disconnect the active source and let the monitor detect the new one.
If that doesn't work, the monitor may not support manual input switching.
Why does my USB-C monitor keep switching back to the wrong input?
This usually means auto-detection is enabled and the monitor is prioritizing the wrong source. Disable auto-switch in the OSD and switch manually. Also check whether the "wrong" source device is sending a signal even in sleep mode, as some laptops maintain an active HDMI or DP output even when closed.
Do I need a special USB-C cable for input switching?
No. The cable doesn't affect input switching itself. What matters is that the cable supports video (Alt Mode) for the source you're trying to display.
Once the signal reaches the monitor, switching between inputs works the same regardless of cable type.
Can I use two USB-C inputs at the same time?
Some monitors have two USB-C ports, each capable of receiving a video signal. You can switch between them via the OSD. A few high-end models support Picture-by-Picture (PbP) mode, which displays both USB-C inputs side by side.
Check your monitor's OSD under "PbP" or "Multi-Input" settings.
Does USB-C input switching work differently on Mac vs. Windows?
The monitor's input switching mechanism is the same regardless of OS. However, macOS sometimes handles USB-C Alt Mode handshakes differently, especially with M-series Macs. If a Mac isn't detected after switching inputs, try disconnecting and reconnecting the USB-C cable, or restarting the Mac with the monitor connected.
How do I know which input my monitor is currently on?
Most OSDs display the active input name or number in the top corner of the menu. Some monitors also show a brief on-screen notification when you switch inputs. If your monitor has no OSD notification, check which port has an active cable connection and match it to the source device that's powered on.
USB-C Monitor vs. Traditional Monitor Input Switching
Switching inputs on a USB-C monitor follows the same core principle as a traditional HDMI or DisplayPort monitor. You select which physical port the monitor should display. The difference is in how the signal gets there and how the monitor negotiates it.
Traditional monitors receive video over dedicated HDMI or DisplayPort cables. Each port is independent. The monitor knows exactly what it's getting from each connection.
USB-C monitors receive video through Alt Mode, which repurposes the USB-C connector's pins to carry DisplayPort or HDMI signals. The monitor still treats this as a separate input in the OSD, but the negotiation process is more complex. The USB-C port has to establish a power delivery contract, determine which Alt Mode to use, and then lock onto the video signal.
That extra negotiation layer is why USB-C input switching sometimes feels slower or less reliable than flipping between HDMI ports.
USB-C vs. Thunderbolt Monitors
Thunderbolt 3 and 4 use the same USB-C connector but carry data differently. Thunderbolt always supports video output, so you never have to worry about Alt Mode compatibility. The trade-off is cost.
Thunderbolt monitors tend to be pricier, and the cable matters more.
If you're using a Thunderbolt monitor with a non-Thunderbolt USB-C source, the monitor may fall back to USB-C Alt Mode or not display anything at all. Check your monitor's specs to confirm it supports USB-C Alt Mode as a fallback. Not all Thunderbolt monitors do.
When to Use a Dock Instead of Switching Inputs
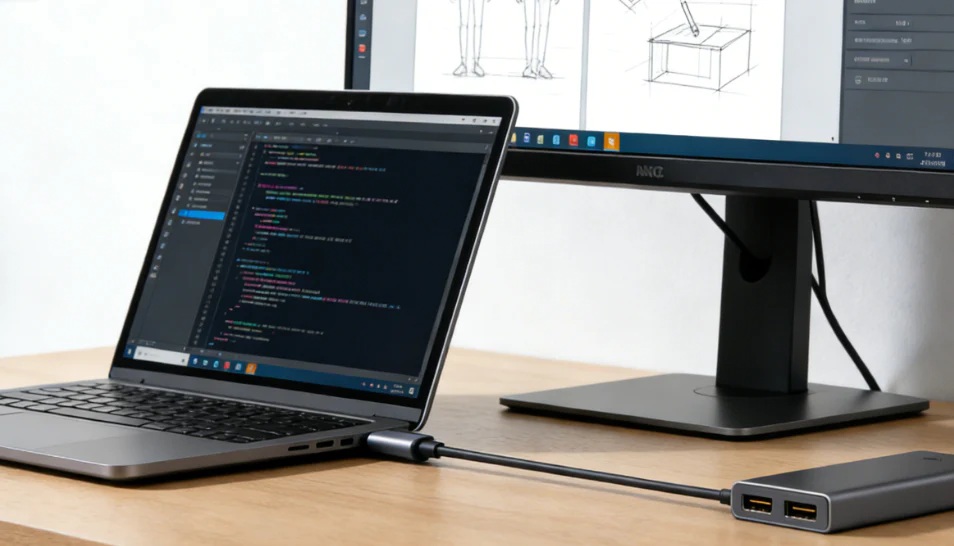
If you're constantly swapping between two or more computers on a single monitor, a USB-C dock or hub with video pass-through might be a better fit than manual input switching. A dock lets you connect all your peripherals and video sources through one cable to the monitor (or through the dock itself), and switching becomes a matter of connecting or disconnecting one laptop.
This setup works well for hybrid workers who use a work laptop and a personal desktop. It's less ideal if you need both sources displayed simultaneously, since most docks only pass through one video signal at a time.
Final Recommendation: The Fastest Path Based on Your Situation
Here's a quick decision guide based on what you're trying to do:
If you just plugged in a USB-C laptop and nothing shows up:
Check the cable first. If it's not rated for video, swap it for a Thunderbolt or USB 3.1 Gen 2 cable. Wait 5 seconds for the handshake.
If you want to switch between USB-C and HDMI:
Open the OSD via the joystick or menu button, go to Input Source, and select the port you want. Disable auto-switch if it keeps picking the wrong input.
If you're switching between two computers constantly:
Consider a monitor with built-in KVM or an external KVM switch. Manual OSD switching gets old fast when you do it multiple times a day.
If your monitor has no buttons and won't auto-switch:
Disconnect the active source, wait 3 seconds, then connect the new source. That forces the monitor to detect the new input.
The bottom line is that USB-C monitor input switching isn't complicated once you know your monitor's OSD layout and have the right cable. The cable is almost always the real problem.

Similar Posts