How to Update Drivers for USB C Monitor
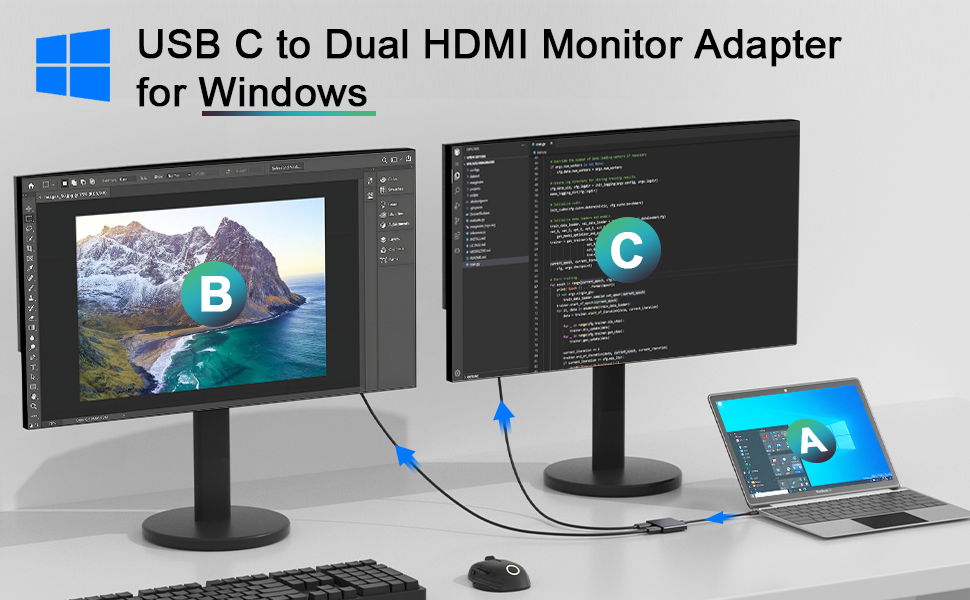
Image source: Bing (Web (fair-use with source credit))
Why Your USB-C Monitor Needs a Driver Update (And When It Doesn't)
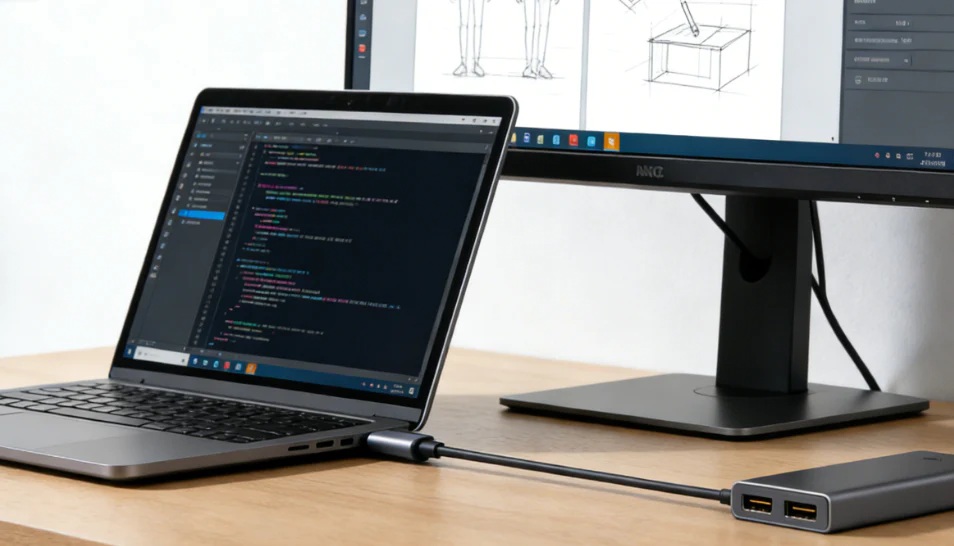
Learning how to update drivers for USB-C monitors isn't always straightforward because the fix depends on your operating system, your graphics hardware, and how the display is actually connected. Sometimes it's a quick Windows Update toggle. Other times you're downloading a specific INF file from your monitor's support page or updating your graphics driver package instead.
The connection itself relies on DisplayPort Alt Mode over USB-C, which carries video signals through the same cable that charges your laptop. USB-IF specifications confirm that DP Alt Mode 1.4 supports up to 4K at 120Hz or 8K at 30Hz, but you won't hit those numbers if the drivers or firmware are outdated. Let's figure out which update path matches your situation.
Quick Answer
To update drivers for your USB-C monitor, first identify your connection type and OS. On Windows, check Device Manager for the monitor entry and use "Update Driver." Alternatively, download the specific monitor driver from your manufacturer's support website. Often the real fix is updating your GPU driver from NVIDIA, AMD, or Intel.
For macOS, check System Settings for software updates. Confirm your resolution and refresh rate in Display Settings after updating.
The Decision Tree: Which Update Path Is Actually Right for Your Setup
Not every USB-C monitor issue requires the same fix. The right approach depends on your operating system, your GPU, and whether you're connecting directly or through a dock.
Here's how to figure out which path to follow:
- If you're on Windows and the monitor shows up as "Generic PnP Monitor": You likely need the manufacturer's specific driver file.
- If you're on Windows and the screen flickers or drops signal: Updating your GPU driver is more likely to fix it.
- If you're on macOS and the monitor isn't detected: Check for system updates first, then verify your cable supports DP Alt Mode.
- If you're connecting through a USB-C dock or hub: The dock's firmware might be the culprit, not the monitor driver.
- If the monitor works but USB ports on the monitor don't: You're probably missing the monitor's USB driver, not a display driver.
We'll walk through each of these scenarios step by step in the sections below.
First, Identify Your Connection Type (This Changes Everything)
Before touching any driver, you need to know how your monitor is actually talking to your computer. USB-C is just the connector shape. The protocol running over it determines everything.
- USB-C with DisplayPort Alt Mode: The most common setup. Your laptop sends a DisplayPort signal through the USB-C cable. This is what most USB-C monitors use.
- Thunderbolt 3 or 4: Common on MacBooks and premium Windows laptops. Thunderbolt carries DisplayPort data but uses a different driver stack. A Thunderbolt monitor won't always work with a plain USB-C cable.
- USB4: The newer standard combining Thunderbolt 3 protocol with USB-C. Found on laptops from 2023 onward. Backward compatible with Thunderbolt 3 devices in most cases.
Why does this matter? Because a Thunderbolt monitor needs Thunderbolt drivers, not just USB-C display drivers. And if your cable only supports USB 2.0 charging with no DP Alt Mode, no driver update in the world will make the display work.
Quick check: Look up your cable's specs. If it mentions "video," "DP Alt Mode," or "4K@60Hz," you're good. If it only says "charging" or "USB 2.0," that's your problem, not the driver.
Path 1: Windows Users — Update Through Device Manager or Manufacturer INF
This is the most common scenario. Most people running into USB-C monitor issues are on Windows 10 or 11.
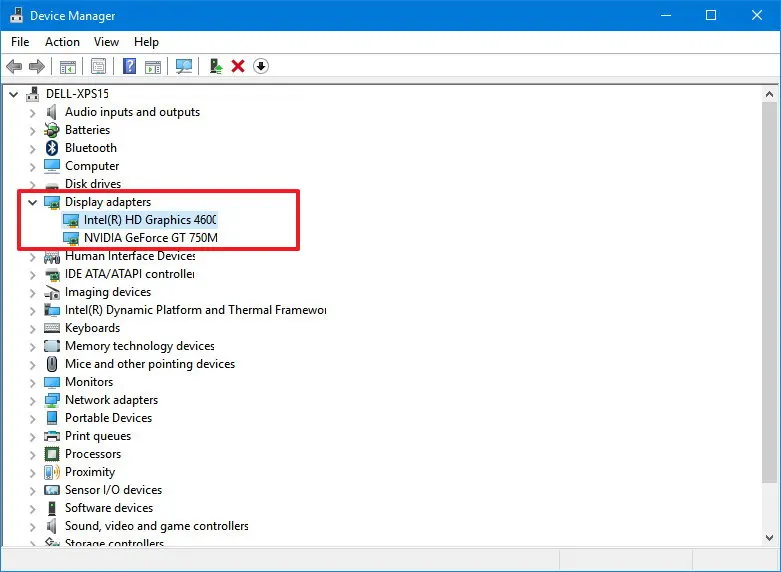
When Device Manager Is Enough
If Windows sees the monitor but it's showing as "Generic PnP Monitor" instead of the actual model name, try this built-in approach first:
- Right-click the Start button and open Device Manager.
- Expand the Monitors section.
- Right-click "Generic PnP Monitor" and select Update driver.
- Choose Search automatically for drivers.
Windows will look through its driver database. If it finds a better match, it installs it. This works more often than you'd think, especially after a major Windows Update.
If that doesn't help, go back and try:
- Update driver again, but this time select Browse my computer for drivers.
- Choose Let me pick from a list of available drivers.
- If your monitor model shows up in the list, select it and proceed.
When You Need the Manufacturer's Driver File
Device Manager won't always find the right driver. That's when you go straight to the source.
- Visit your monitor manufacturer's support page (Dell, LG, Samsung, ASUS, etc.).
- Enter your exact monitor model number.
- Look under "Drivers" or "Downloads" for a monitor driver or INF file.
- Download the file.
- In Device Manager, choose Browse my computer for drivers and point to the downloaded folder.
What this actually does: The INF file tells Windows the monitor's name, supported resolutions, color characteristics, and refresh rates. It's a small file, often under 10 MB, but it makes a difference in how Windows identifies and configures the display.
Path 2: Update Your GPU Driver Instead (Often the Real Fix)
Here's something a lot of people miss. The USB-C display connection is managed by your graphics driver, not just the monitor driver. If your GPU driver is outdated, the USB-C display output might not work correctly even with the right monitor driver installed.
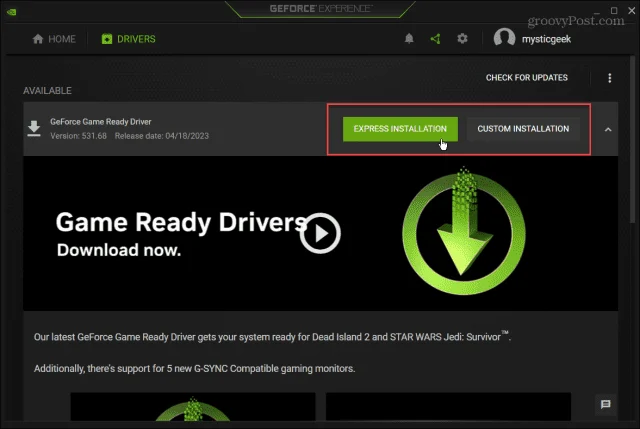
NVIDIA GPUs
- Download NVIDIA GeForce Experience or go to nvidia.com/drivers.
- Select your GPU model and OS.
- Download the latest Game Ready or Studio Driver.
- Install and restart your laptop.
NVIDIA's driver package includes USB-C and Thunderbolt display support. A driver update here often fixes flickering, resolution limits, and detection issues on USB-C monitors.
AMD GPUs
- Visit amd.com/support.
- Use the Auto-Detect tool or manually select your GPU.
- Download and install the latest Adrenalin Edition driver.
- Restart after installation.
Intel Integrated Graphics
- Download Intel Driver & Support Assistant from intel.com.
- Run the tool. It scans your system and recommends the right driver.
- Install and restart.
Intel's integrated graphics handle USB-C display output on most laptops. An outdated Intel driver is one of the most common causes of USB-C monitor issues on Windows ultrabooks. As of 2026, Intel's driver updates frequently include fixes for DisplayPort Alt Mode compatibility.
Path 3: macOS Users — What Actually Works
Apple handles things differently. macOS bundles most display drivers into system updates rather than offering separate monitor driver downloads.
Here's what to do when your USB-C monitor isn't behaving on a Mac:
- Click the Apple menu and open System Settings.
- Go to General > Software Update.
- Install any available updates, including supplemental updates.
Apple's display driver updates come through these system updates. There's no separate "monitor driver" to download from Dell or LG on macOS. The operating system manages the DisplayPort Alt Mode connection through its own graphics stack.
If the monitor still isn't detected after updating:
- Try a different USB-C cable. Some cables don't support DP Alt Mode.
- Check if your monitor needs a firmware update (more on that below).
- Reset the Mac's NVRAM by shutting down, then powering on while holding Option + Command + P + R for about 20 seconds.
M1, M2, M3, and M4 Macs generally handle USB-C monitors well out of the box. Intel Macs sometimes need a supplemental update after a major macOS upgrade.
Path 4: Linux Users — Kernel, xrandr, and EDID Overrides
Linux gives you more control but also more responsibility. USB-C monitor support depends heavily on the kernel version and your desktop environment.
First steps:
- Update your kernel. Newer kernels include better DisplayPort Alt Mode and USB4 support.
- Run
xrandrin the terminal to see if the monitor is detected. - If the monitor appears but at the wrong resolution, use
xrandr --output <name> --mode <resolution>to set it correctly.
When EDID data isn't read properly:
Sometimes the monitor's EDID (Extended Display Identification Data) doesn't get parsed correctly over USB-C. You can override it by placing a custom EDID file in /lib/firmware/ and adding a kernel parameter in your bootloader.
This is an advanced step. If you're not comfortable editing GRUB or systemd-boot configs, stick with kernel updates and xrandr commands first.
GNOME and KDE Plasma both offer display configuration panels that work with xrandr under the hood. Most desktop environments handle this without manual intervention on kernel 6.1 or newer.
Path 5: Don't Forget Dock and Hub Firmware
If you're connecting your USB-C monitor through a docking station or hub, there's another layer to consider. The dock itself has firmware, and outdated firmware causes display issues that look exactly like driver problems.
How to check:
- Identify your dock model (CalDigit, Anker, Plugable, Dell, etc.).
- Visit the manufacturer's support page.
- Look for a firmware update tool specific to your dock model.
- Run the update with the dock connected but the monitor disconnected if the tool recommends it.
Dell and Lenovo docks often have their own firmware update utilities. CalDigit provides a firmware update tool on their support site. These updates frequently fix USB-C display compatibility, especially after OS updates.
A common pattern: You update Windows, the dock firmware becomes incompatible, and the monitor stops working. People blame the monitor. The real fix is a dock firmware update.
Path 6: Monitor Firmware Updates (The One Most People Miss)
Your actual monitor has firmware running inside it. Manufacturers release firmware updates that fix compatibility issues, add features, and improve DisplayPort Alt Mode performance.
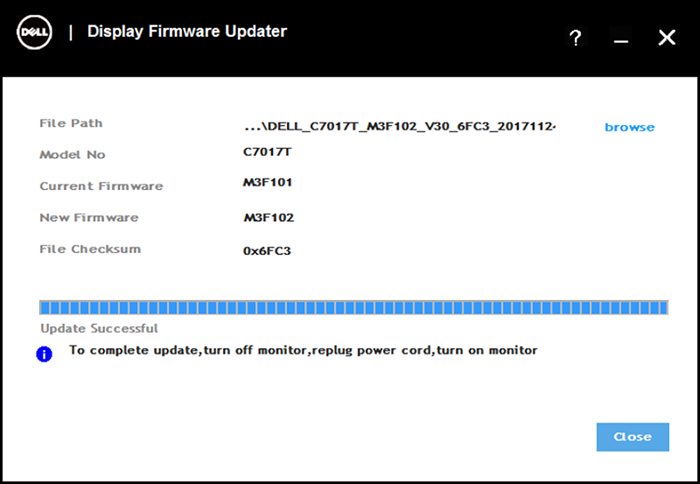
This is separate from the driver on your computer. The driver tells your OS how to talk to the monitor. The firmware tells the monitor how to operate internally.
How to update monitor firmware:
- Go to your monitor manufacturer's support page.
- Enter your exact model number.
- Look for "Firmware" in the downloads section.
- Download the firmware file and follow the manufacturer's instructions.
Most manufacturers require you to:
- Copy the firmware file to a FAT32-formatted USB flash drive.
- Plug the USB drive into the monitor's USB port.
- Use the monitor's on-screen display (OSD) menu to initiate the update.
Warning: Never interrupt a monitor firmware update. If power goes out or you unplug during the update, the monitor can become unusable. Use a UPS if possible, or make sure your laptop is fully charged and plugged in.
Dell, LG, and Samsung all provide firmware update instructions on their support sites. Some newer monitors support firmware updates over the USB-C connection itself, but USB flash drive remains the most reliable method.
Common Mistakes That Waste Your Time or Break Your Display
Let's talk about what goes wrong. These are the errors we see people make most often when updating USB-C monitor drivers.
Updating the wrong component: People update the monitor driver when they actually need a GPU driver update. Or they update the GPU driver when the dock firmware is the problem. Take thirty seconds to identify the right layer before you start downloading anything.
Using a charge-only USB-C cable: This is the number one cause of "my monitor won't detect" posts on support forums. Not all USB-C cables support DisplayPort Alt Mode. If your cable only handles power and USB 2.0 data, no driver update will fix the display connection.
Check your cable specs before troubleshooting drivers.
Interrupting a firmware update: Monitor firmware updates can take five to twenty minutes. If you unplug the monitor or cut power during the update, you can brick the display. Manufacturer documentation consistently warns against this.
Don't start a firmware update unless you have stable power and time to let it finish.
Ignoring Windows Update optional drivers: Windows hides some driver updates under "Optional updates." Your USB-C monitor driver might be sitting there waiting. Check Settings > Windows Update > Advanced options > Optional updates before downloading anything manually.
Forgetting to restart: Driver updates often need a full restart to take effect. A shutdown and cold boot is even better on some systems. Don't skip this step and then wonder why nothing changed.
Quick-Reference Table: Which Method Fixes Which Problem
| Problem | Most Likely Fix |
|---|---|
| Monitor shows as "Generic PnP Monitor" | Install manufacturer INF driver |
| Flickering or signal drops | Update GPU driver |
| Wrong resolution or refresh rate | Update GPU driver or install monitor INF |
| Monitor not detected at all | Check cable (DP Alt Mode support), then update dock firmware |
| USB ports on monitor not working | Install monitor USB driver or update monitor firmware |
| Audio not routing through monitor | Update GPU driver, check audio output settings |
| Works on one laptop but not another | Update GPU driver on the problematic laptop |
| Stopped working after OS update | Check for dock firmware update, then GPU driver update |
| Multi-monitor setup losing arrangement | Update GPU driver, reconfigure in Display Settings |
When You're Still Stuck — Escalation Steps
If you've tried the relevant path above and the monitor still isn't working properly, here's how to escalate.
Step 1: Try a different cable and a different USB-C port. This eliminates hardware variables. Use a cable you know supports DP Alt Mode and 4K video.
Step 2: Test the monitor on another computer. If it works elsewhere, the problem is your laptop's drivers or hardware. If it doesn't work on another computer either, the monitor itself may need service.
Step 3: Do a clean GPU driver install. Use Display Driver Uninstaller (DDU) in Safe Mode to completely remove the current GPU driver, then install the latest version fresh. This fixes corrupted driver stacks that normal updates don't touch.
Step 4: Check the monitor manufacturer's community forums. Dell, LG, and Samsung all have active user communities where specific monitor model issues get discussed. Someone else has probably hit the same problem.
Step 5: Contact manufacturer support. If the monitor is under warranty and none of the above works, it could be a hardware issue with the USB-C input board. Manufacturer support can arrange repair or replacement.
Frequently Asked Questions
Do USB-C monitors need drivers?
Most USB-C monitors work as plug-and-play devices using the operating system's built-in DisplayPort Alt Mode support. However, installing the manufacturer's specific driver or INF file can unlock the correct name, full resolution options, and proper refresh rate support.
How do I know if my USB-C cable supports video?
Check the cable's specifications for mentions of "DisplayPort Alt Mode," "video output," or specific resolution support like "4K@60Hz." Cables that only list "charging" or "USB 2.0" don't support video. Thunderbolt 4 cables universally support DP Alt Mode.
Is updating monitor firmware risky?
There is a small risk if the update is interrupted. A power loss or accidental disconnection during the firmware update can render the monitor unusable. Follow the manufacturer's instructions carefully and don't start the update unless you have stable power.
Why does my USB-C monitor work on one laptop but not another?
The laptops likely have different GPU drivers, different USB-C controller chips, or different Thunderbolt firmware versions. Update the GPU driver and check the Thunderbolt/USB4 settings in the laptop's BIOS or system settings.
Does macOS need separate monitor drivers?
No. macOS includes display drivers in the operating system. Updates come through Software Update. There are no separate monitor driver downloads for macOS from most manufacturers.
How long does a driver update take?
A typical driver update takes two to ten minutes including the download and installation. A restart adds another two to five minutes. Monitor firmware updates take longer, usually five to twenty minutes, and require careful attention to avoid interruption.

Similar Posts