How to Update Drivers for 4K Monitor
If you just plugged in a 4K monitor and something looks off, you're not alone. Learning how to update drivers for 4K monitor setups is the single most common fix for resolution caps, flickering screens, and missing refresh rate options. The good news is it's usually a quick fix once you know which driver actually needs updating.
Here's the thing most people get wrong. They try to update the "monitor driver" in Windows Device Manager, but the real culprit is almost always your graphics driver. Your GPU driver controls what resolution, refresh rate, and color format your display can output.
As of 2026, a clean GPU driver install resolves the vast majority of 4K display issues.
Quick Answer
Update your graphics driver, not your monitor driver. Download the latest driver from your GPU manufacturer's website. Install it using the clean install option.
Then verify your resolution and refresh rate in Windows Display Settings.
The Real Problem: It's Usually the GPU Driver, Not the Monitor Driver
Let's clear this up right away. When your 4K monitor isn't behaving, you might think the monitor itself needs a driver update. In most cases, that's not what's happening.
Your graphics processing unit (GPU) is the component that tells your monitor what to display and how to display it. The GPU driver is the software that lets your operating system communicate with that hardware. When that driver is outdated, corrupted, or generic, your 4K monitor can't reach its full potential.
Here's what typically goes wrong:
- Your monitor shows "Generic PnP Monitor" instead of its actual model name
- The resolution is stuck at 1920×1080 when your panel supports 3840×2160
- The refresh rate is capped at 30Hz or 60Hz when your monitor can do 120Hz or 144Hz
- HDR toggle is completely missing from Windows display settings
- You get flickering, black screens, or signal dropouts during use
All of these symptoms point back to the GPU driver. Windows will happily run your display on a basic Microsoft driver, but that generic driver doesn't know the full capabilities of your graphics hardware. It plays it safe with conservative settings.
Now, there are situations where the monitor itself needs attention. Some monitors require a specific INF driver file so Windows recognizes the correct model and color profile. A few monitors even need firmware updates from the manufacturer.
But those are secondary steps. Start with the GPU driver first.

Image source: Wikimedia Commons / geckzilla (CC BY)
First, Let's Figure Out What You're Working With
Before you download anything, you need to know three things. What GPU you have, what driver version you're currently running, and what cable and port you're using. Skipping this step is how people install the wrong driver and make things worse.
Identify Your GPU and Current Driver Version
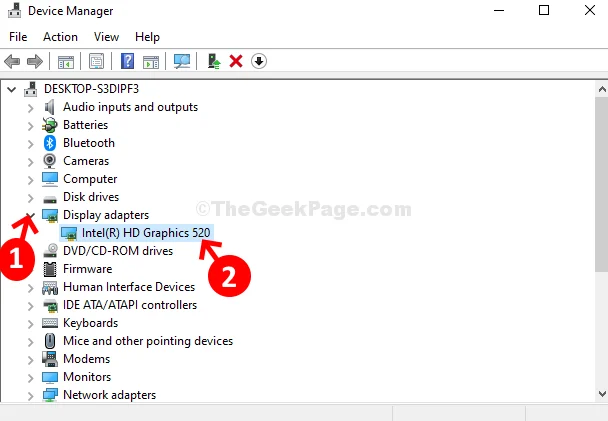
Open Device Manager on Windows. You can do this by right-clicking the Start button and selecting "Device Manager" from the menu. Expand the "Display adapters" section.
That's your GPU.
Right-click on the GPU name and select "Properties." Go to the "Driver" tab. You'll see the driver version and driver date right there. Write both of those down.
If you see "Microsoft Basic Display Adapter" instead of an actual GPU name, that tells you everything. Your proper GPU driver isn't installed at all. Windows is using its fallback driver, which won't support 4K properly.
For a more detailed look, you can use a free tool like GPU-Z. It shows your exact GPU model, driver version, BIOS version, and supported technologies. It's especially useful if Device Manager shows a vague name.
Check What Your Cable and Port Can Actually Handle
This catches people off guard constantly. You can have the latest GPU driver installed and still not get 4K at 60Hz if your cable or port doesn't have enough bandwidth.
Here's the quick breakdown:
| Connection Type | Max Bandwidth | 4K at 60Hz | 4K at 120Hz | 4K at 144Hz+ |
|---|---|---|---|---|
| HDMI 2.0 | 18 Gbps | Yes (8-bit color) | No | No |
| HDMI 2.1 | 48 Gbps | Yes | Yes (with DSC) | Yes (with DSC) |
| DisplayPort 1.2 | 21.6 Gbps | Yes | No | No |
| DisplayPort 1.4 | 32.4 Gbps | Yes | Yes (with DSC) | Limited |
| DisplayPort 2.1 | 77.3 Gbps (UHBR20) | Yes | Yes | Yes |
| USB-C (DP Alt Mode) | Varies by version | Usually yes | Depends on DP version | Rare |
If you're using an old HDMI 2.0 cable and wondering why you can't get 4K at 120Hz, that's your answer. The cable and port matter just as much as the driver.
Image source: Bing (Web (fair-use with source credit))
Path 1: You Have an NVIDIA GPU
NVIDIA makes this relatively straightforward. You have two solid options for updating your driver, and one nuclear option when things go sideways.
Quick Update Through GeForce Experience
If you already have NVIDIA GeForce Experience installed, this is the fastest route. Open the app, go to the "Drivers" tab, and click "Check for Updates." If a new driver is available, you'll see a download button.
Once it downloads, you'll get two install options. "Express Installation" handles everything automatically. "Custom Installation" gives you a checkbox for "Perform a clean install." Always check that box when you're troubleshooting display issues.
It removes the old driver settings before installing the new one.
GeForce Experience also lets you create a system restore point before installing. That's a good safety net. If the new driver causes problems, you can roll back.
The downside of GeForce Experience is that it's a background app that runs all the time. Some people prefer not to have it. If that's you, the manual download is just as good.
Manual Clean Install from NVIDIA's Website
Go to nvidia.com/drivers. Select your GPU series and operating system from the dropdown menus. Hit "Search" and download the latest driver package.
The file will be large, usually between 600MB and 1.2GB. Run the installer and choose "Custom (Advanced)" installation. On the next screen, check the box that says "Perform a clean installation." This does the same thing as the clean install option in GeForce Experience.
After the install finishes, restart your computer. Don't skip the restart. Display drivers load at boot, and a restart ensures the new driver is fully active.
When You Need DDU (Display Driver Uninstaller)
Sometimes a normal clean install isn't enough. If you're switching from AMD to NVIDIA, or if you've been through multiple driver versions with accumulating issues, you need a truly clean slate.
Display Driver Uninstaller, commonly called DDU, is a free tool that removes every trace of your graphics driver. It's the gold standard for fixing stubborn driver problems.
Here's the safe way to use it:
- Download DDU from its official page on the Guru3D website
- Download your new NVIDIA driver first, before removing anything
- Boot Windows into Safe Mode (hold Shift while clicking Restart, then navigate to Troubleshoot > Advanced Options > Startup Settings)
- Run DDU in Safe Mode and select "Clean and restart"
- After the restart, install the NVIDIA driver you downloaded earlier
- Restart one more time
DDU wipes out old driver files, registry entries, and settings that a normal uninstall leaves behind. It's especially useful if you're seeing error messages like "NVIDIA Driver Not Found" or "Windows has stopped this device" in Device Manager.
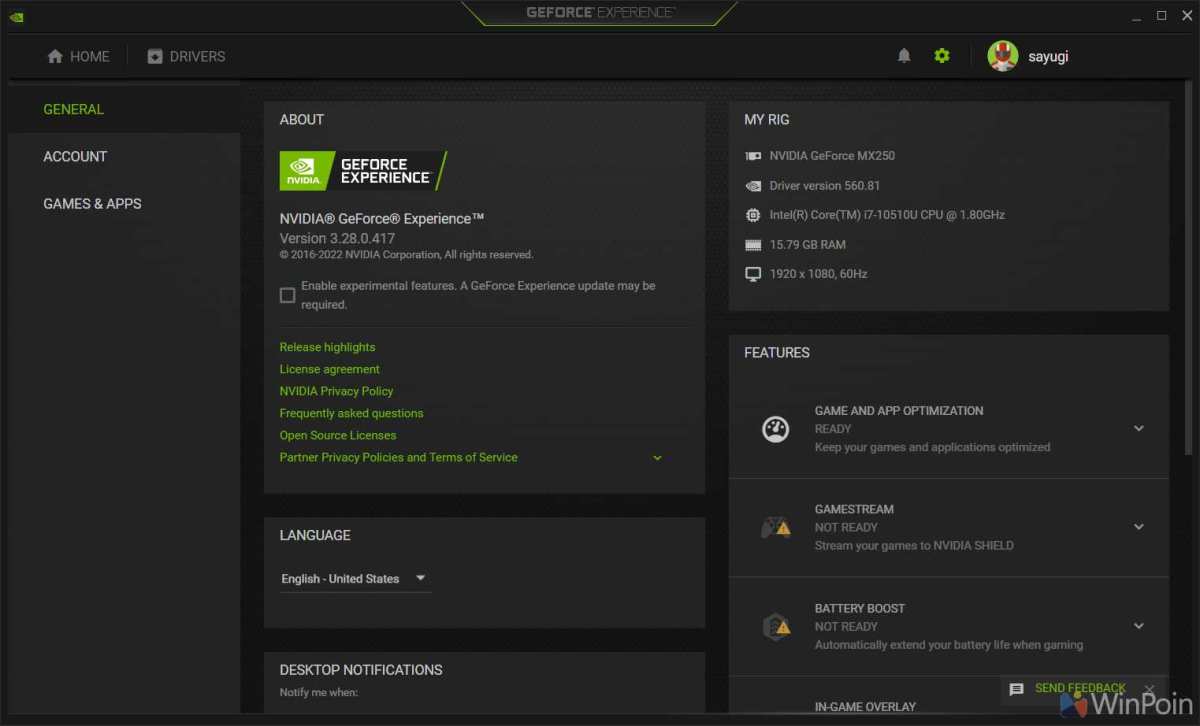
Image source: Bing (Web (fair-use with source credit))
Path 2: You Have an AMD GPU
AMD's driver ecosystem works similarly but with its own software suite. The process is just as reliable when done correctly.
AMD Adrenalin Software Update
AMD's driver package is called AMD Software: Adrenalin Edition. If you already have it installed, open it and look for the "Updates" section in the top-right area. It will tell you if a newer driver is available.
Click "Download" and then "Install." During installation, AMD gives you a "Factory Reset" option. This is AMD's equivalent of a clean install. It removes previous driver settings before applying the new one.
Enable it if you're troubleshooting.
The full Adrenalin suite also includes performance tuning, game recording, and streaming features. If you only want the driver without the extra features, AMD lets you choose a "Driver Only" install during the custom setup. That's a lighter option that some people prefer.
Manual Driver Download from AMD
Head to amd.com/en/support. Use the auto-detect tool, or manually select your GPU product line and model. Download the full driver package.
Run the installer and select "Custom Install" when prompted. You'll see options for the driver, the Adrenalin software, and other components. Check "Factory Reset" if you want a clean install.
Otherwise, the standard install will update your existing driver in place.
One thing to watch for. AMD occasionally releases "optional" drivers alongside their recommended ones. Optional drivers are newer but less thoroughly tested.
If stability matters more than having the absolute latest version, stick with the "Recommended" driver. If you need a fix for a specific game or application, the optional driver might include it.
Clean Install with DDU for AMD
The same DDU process works for AMD GPUs. Boot into Safe Mode, run DDU, select "AMD" from the dropdown, and click "Clean and restart." Then install your fresh AMD driver afterward.
This is particularly important if you're switching from NVIDIA to AMD, or vice versa. Leftover driver files from the old GPU brand can cause conflicts, crashes, or black screens. DDU eliminates that risk entirely.
Path 3: You Have an Intel Integrated GPU
Intel's integrated graphics have come a long way. Their 4K support is solid on modern processors, but the driver update process is a bit different from NVIDIA and AMD.
Intel Driver & Support Assistant
Intel offers a tool called the Intel Driver & Support Assistant, or DSA for short. It automatically detects your Intel hardware and recommends the right drivers. Install it from Intel's official support website, and it will scan your system.
The tool is lightweight and straightforward. It shows you which drivers are available, what version you currently have, and what the new version includes. Click "Install" and it handles the rest.
The catch is that Intel DSA only works with Intel hardware. If you have a laptop with both an Intel integrated GPU and a dedicated NVIDIA or AMD GPU, you'll need to update both. The Intel driver handles the integrated graphics, and the dedicated GPU driver handles the discrete graphics.
Manual Intel Arc / Iris Xe Driver Download
If you prefer manual downloads, go to Intel's driver download page. You can search by product name or use the automatic detection tool. Intel's graphics drivers cover their Arc discrete GPUs, Iris Xe integrated graphics, and older UHD Graphics.
Download the .exe file and run it. The installer will detect your compatible hardware and install the appropriate driver. Restart when prompted.
One important note for laptop users. Some laptop manufacturers customize Intel's drivers for their specific hardware. In those cases, the driver from your laptop manufacturer's support page might be more stable than the generic Intel driver.
Check both sources if you're unsure.
Path 4: Your Monitor Still Shows "Generic PnP Monitor"
If you've updated your GPU driver and everything still feels off, it's time to look at the monitor side of things. This step matters less often, but when it does, it matters a lot.
When and How to Install a Monitor-Specific INF Driver
Windows uses a generic driver for most monitors. That's fine for basic functionality. But some 4K monitors need a specific INF file so Windows recognizes the correct model name, color profile, and available resolutions.
You'll know you need this if Device Manager shows "Generic PnP Monitor" and your resolution or color options seem limited even after a GPU driver update. High-end monitors with wide color gamut panels or hardware calibration support almost always benefit from their specific driver.
Where to Find Your Monitor's Driver File
Check the support page on your monitor manufacturer's website. Look under "Downloads," "Drivers," or "Support." Brands like Dell, LG, Samsung, ASUS, BenQ, and ViewSonic all host driver files for their displays.
The file is usually a small .inf file, sometimes bundled with color profile files (.icm). Download it, right-click the .inf file, and select "Install." You may also need to go into Device Manager, right-click the monitor, select "Update driver," and point it to the folder where you extracted the files.
Monitor Firmware Updates (Yes, That's a Thing)
Some 4K monitors have firmware that can be updated by the user. This is less common, but it's worth checking. Firmware updates can fix EDID bugs, improve HDMI or DisplayPort compatibility, and add new features like improved HDR handling.
Visit your monitor manufacturer's support page and look for "Firmware" or "Software" downloads. The update process varies by brand. Some use a USB drive connected to the monitor's service port.
Others use a utility run from the computer. Follow the manufacturer's instructions exactly. A failed firmware update can brick your monitor's scaler board.
The Cable and Port Cheat Sheet You Need
This section saves people from the most frustrating troubleshooting experience in the 4K world. Your driver is fine, your monitor is fine, but you're still not getting the resolution or refresh rate you should be. The cable is the problem.
HDMI vs DisplayPort vs USB-C: What Supports What at 4K
Not all connections are created equal. Here's what each standard can handle at 4K resolution:
| Standard | Max 4K Refresh Rate | HDR Support | Notes |
|---|---|---|---|
| HDMI 2.0 | 60Hz | Yes (limited bandwidth) | Common on older GPUs and monitors |
| HDMI 2.1 | 120Hz (144Hz with DSC) | Yes | Requires compatible cable, GPU, and monitor |
| DisplayPort 1.2 | 60Hz | Yes | Still found on many current devices |
| DisplayPort 1.4 | 120Hz (with DSC) | Yes | Most common for PC gaming setups |
| DisplayPort 2.1 | 240Hz+ | Yes | Newest standard, limited hardware support |
| USB-C (DP Alt Mode) | Varies (usually 60Hz) | Varies | Depends on the DP version supported |
The key takeaway is simple. If you want 4K at 60Hz, almost any modern cable works. If you want 4K at 120Hz or higher, you need DisplayPort 1.4 or HDMI 2.1 on every link in the chain.
Your GPU, your cable, and your monitor all need to support the same standard.
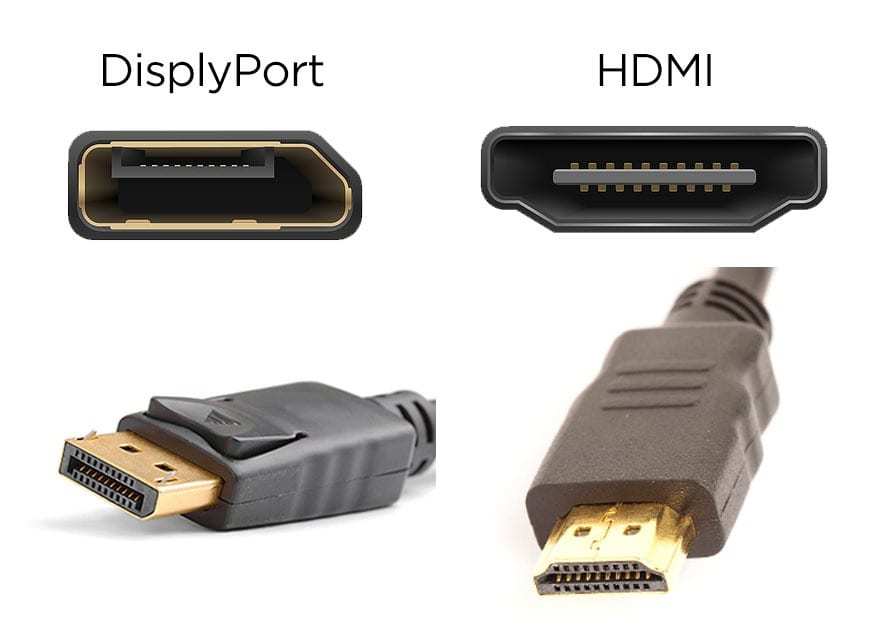
Image source: Bing (Web (fair-use with source credit))
Why Your "4K Monitor" Is Stuck at 30Hz
This is one of the most common complaints. You plug in a 4K monitor and the refresh rate is stuck at 30Hz. Everything looks sluggish.
The mouse cursor feels terrible. Video playback is choppy.
The most likely cause is your cable or port. HDMI 2.0 can do 4K at 60Hz, but only with 8-bit color and 4:4:4 chroma subsampling. If your cable is damaged or your port is an older HDMI 1.4 connection, the system falls back to 30Hz to stay within bandwidth limits.
Try a different cable first. Use a certified HDMI 2.1 or DisplayPort 1.4 cable. Then check your Windows display settings.
Go to Settings > System > Display > Advanced Display. Look at the "Refresh rate" dropdown. If 60Hz or higher is now available, the cable was the bottleneck.
If the higher refresh rate still doesn't show up, check your GPU control panel. NVIDIA Control Panel and AMD Adrenalin both have display settings where you can manually select the refresh rate and color format.
Common Mistakes That Make Things Worse
People make the same handful of mistakes over and over with driver updates. Here's what to avoid:
- Using third-party "driver updater" tools. These apps are often bundled with adware or malware. They install generic or incorrect drivers. Always download directly from NVIDIA, AMD, Intel, or your monitor manufacturer.
- Not restarting after installation. Display drivers load at boot. Skipping the restart means you're running a mix of old and new driver files. That causes instability.
- Installing the wrong driver for your GPU model. A driver for an RTX 4080 won't work on an RTX 3060. Double-check your GPU model in Device Manager before downloading.
- Ignoring the cable. You can install the perfect driver and still get terrible performance if your HDMI 2.0 cable can't carry enough bandwidth for 4K at 60Hz with full color.
- Not creating a restore point. Before any major driver change, open Windows System Restore and create a restore point. If the new driver causes crashes or black screens, you can boot into Safe Mode and roll back.
- Letting Windows Update overwrite your driver. Windows Update sometimes replaces your freshly installed GPU driver with an older Microsoft-approved version. You can pause updates temporarily during a driver install, or use a tool like wushowhide to hide the problematic update.
Quick Troubleshooting Checklist
If you're still having issues after updating your drivers, run through this checklist:
- Verify your GPU driver is the correct version for your specific GPU model
- Check that your cable supports the bandwidth you need (DP 1.4 or HDMI 2.1 for high refresh 4K)
- Confirm your monitor's input source is set correctly in its on-screen display menu
- Look in Windows Display Settings for the correct resolution and refresh rate options
- Check your GPU control panel for any custom resolution or color format settings that might be limiting output
- Try a different cable or port on your GPU to rule out hardware issues
- If using a USB-C connection, verify it supports Display Alt Mode (not all USB-C ports do)
- For laptops with dual graphics, make sure the 4K display is routed through the dedicated GPU, not the integrated one
When to Update vs When to Leave It Alone
Not every situation needs a driver update. If your 4K monitor is working at its full resolution and refresh rate with no flickering or color issues, you don't need to chase the latest driver version.
Update when you're experiencing a specific problem. Resolution capped, refresh rate missing, flickering, HDR not working, or color accuracy issues are all valid reasons. Also update when a new driver includes a fix for a game or application you use.
If everything works fine, leave it running. New drivers occasionally introduce new bugs. The "if it ain't broke, don't fix it" rule applies here more than most people realize.
Frequently Asked Questions
Do I need to download a driver for my 4K monitor itself?
Usually no. Windows handles most monitors with its built-in Plug and Play driver. You only need a monitor-specific driver if you want custom color profiles, hardware calibration support, or if Windows isn't recognizing the monitor correctly.
How do I know if my cable supports 4K at 60Hz or higher?
Look for certification labels on the cable. HDMI 2.1 cables are labeled "Ultra High Speed." DisplayPort 1.4 cables are often marked "DP8K" or "HBR3." If the cable has no markings, check the packaging or manufacturer specs.
Can a driver update fix a 4K monitor stuck at 1080p?
Yes, in most cases. An outdated or generic GPU driver often fails to communicate the monitor's full capabilities. A proper GPU driver install usually unlocks the correct 3840×2160 resolution option.
Should I use Windows Update or download drivers from the manufacturer?
Always download from the GPU manufacturer's website. Windows Update drivers are often months behind and may be older stable versions that lack recent fixes and optimizations.
What does DDU do that a normal uninstall doesn't?
DDU removes every trace of the graphics driver, including registry entries, leftover files, and settings that a standard uninstall leaves behind. It's the most thorough way to clean out old driver data before installing a fresh driver.
Expert Tips for Keeping Your 4K Display Running Smoothly
Once you've got everything working, a few habits will keep you out of trouble. These are simple but they prevent most repeat visits to the troubleshooting rabbit hole.
Set a driver check schedule. You don't need to update every month. Checking every three to six months is plenty for most users. Gamers and creative professionals might want to check more frequently, especially around major game releases or software updates.
Keep a known-good driver installer saved. If a new driver causes problems, you want to be able to roll back to the last version that worked. Save the installer file for your previous stable driver on your drive. That way you're not scrambling to find it when something breaks.
Use two cables if you can. Keeping a spare DisplayPort or HDMI 2.1 cable in your drawer saves hours of troubleshooting. Cables fail more often than people think. A different cable is the fastest way to rule out connection issues.
Don't mix driver sources. If you downloaded your GPU driver from NVIDIA, stick with NVIDIA for updates. Don't let Windows Update or a laptop manufacturer's support tool install a different version unless you have a specific reason. Mixing sources creates version conflicts that are hard to diagnose.
Watch your scaling when you update. Occasionally a driver reset will change your display scaling back to 100%. At 4K resolution on a 27-inch monitor, 100% scaling makes everything nearly unreadable. Set it to 150% or 200% right after the update if Windows doesn't preserve your preference.
For laptops with hybrid graphics, make sure your 4K external display is wired to the dedicated GPU if possible. Some laptop designs route external ports through the integrated GPU only. That can bottleneck performance even with the correct driver installed.
Check your laptop's technical specifications to confirm which GPU drives the display outputs.
Final Recommendation: The Decision Flow at a Glance
Let's bring it all together into a simple decision process you can follow the next time something looks wrong with your 4K display.
Is your resolution stuck below 3840×2160?
Update your GPU driver first. This is almost always the fix. Use the clean install option.
Is your refresh rate lower than your monitor supports?
Check your cable and port bandwidth before anything else. You might need a DisplayPort 1.4 or HDMI 2.1 cable to unlock the higher refresh rate even with the correct driver.
Does Device Manager show "Generic PnP Monitor"?
Download the specific monitor driver from your manufacturer's support page. This is a secondary step after the GPU driver update.
Is HDR missing from Windows settings?
You need both a compatible GPU driver and a cable/port with enough bandwidth. Update the driver first, then verify your connection supports HDR passthrough.
Did a new driver cause the problem?
Roll back to your previous driver using Device Manager or System Restore. Not every new driver plays nicely with every setup.
Have you updated everything and still have issues?
Try DDU for a completely clean driver installation. Rule out cable issues with a different certified cable. Check for a monitor firmware update from the manufacturer.
The pattern here is consistent. Start with the GPU driver, verify your physical connection, then move to monitor-specific fixes only if needed. That sequence solves the vast majority of 4K display problems without unnecessary steps.

Similar Posts