How to Setup Portable Monitor with MacBook
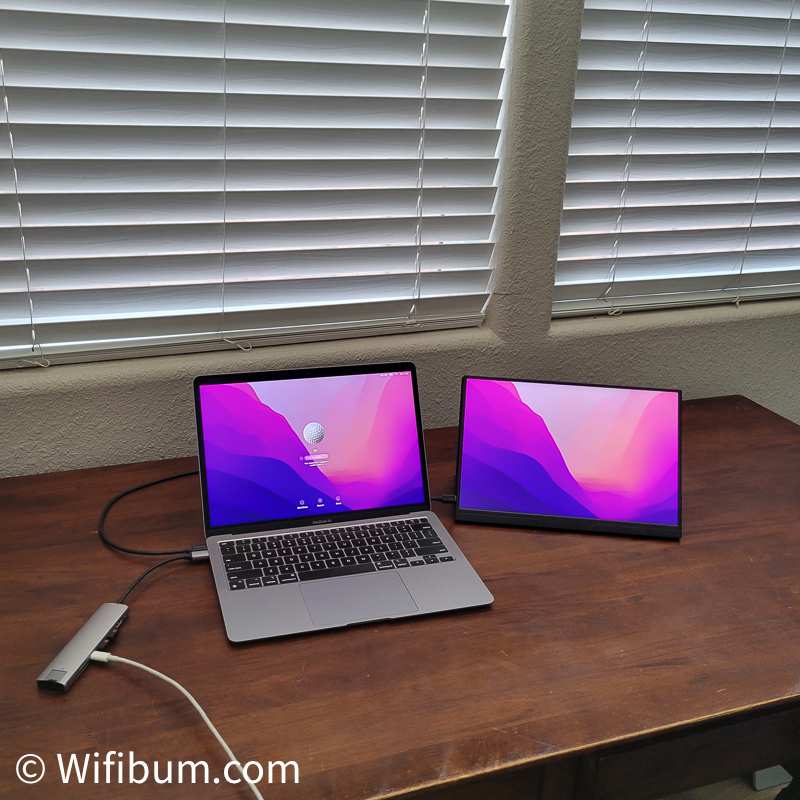
Figuring out how to setup portable monitor with MacBook can be frustrating when you just want to plug in and get to work. The good news is that most modern setups are genuinely plug and play. The catch is that the exact steps depend on what ports your MacBook has and what inputs your monitor accepts.
Most portable monitors from brands like ASUS, ARZOPA, and Lenovo connect via USB-C with DisplayPort Alt Mode, which carries video and power through a single cable. As of 2026, the vast majority of MacBook models sold in the last seven years support this natively. Let's walk through exactly what you need to check and do.
Quick Answer
Connect your portable monitor to your MacBook using a USB-C cable that supports DisplayPort Alt Mode. Open System Settings, go to Displays, and configure your arrangement. If your monitor uses HDMI, grab a USB-C to HDMI adapter.
Most setups work within two minutes.
Why Your Portable Monitor Might Not Work With Your MacBook (And How to Fix It)
The number one reason a portable monitor won't connect to a MacBook is using the wrong cable. Not every USB-C cable carries a video signal. Many are charging only.
They'll power your MacBook but send zero display data to the monitor.
Another common issue is the adapter. If you're using a cheap USB-C hub that lacks DisplayPort Alt Mode support, the video signal simply won't pass through. The same goes for older HDMI adapters that don't match your monitor's resolution spec.
Here's a quick troubleshooting table to save you time:
| Symptom | Likely Cause | Fix |
|---|---|---|
| Black screen, monitor powers on | Charging-only USB-C cable | Swap to a USB-C cable rated for DisplayPort Alt Mode |
| Monitor not detected at all | Hub doesn't support video passthrough | Connect directly or use a Thunderbolt dock |
| Blurry or wrong resolution | HDMI adapter limited to 30Hz at 4K | Use a 4K-capable adapter or switch to USB-C |
| MacBook won't charge through monitor | Monitor doesn't supply enough wattage (under 15W) | Use your MacBook's separate charger |
What You Need to Know Before You Plug Anything In
Your MacBook's Ports and Chip Determine Everything
Not all MacBooks handle external displays the same way. The chip inside your machine is the biggest factor.
Apple's M1 and M2 base chips officially support only one external display natively. The M1 Pro, M1 Max, M2 Pro, and M2 Max chips support two or more. Intel MacBooks from 2018 onward generally support at least one external display through Thunderbolt 3.
Here's why this matters. If you have a base M1 MacBook Air and you're already running a closed-clamshell setup with one external display, that's your limit. You won't be able to add a second portable monitor without a DisplayLink adapter.
To check your chip, click the Apple menu in the top left corner, then select "About This Mac." The first line tells you exactly what you're working with.
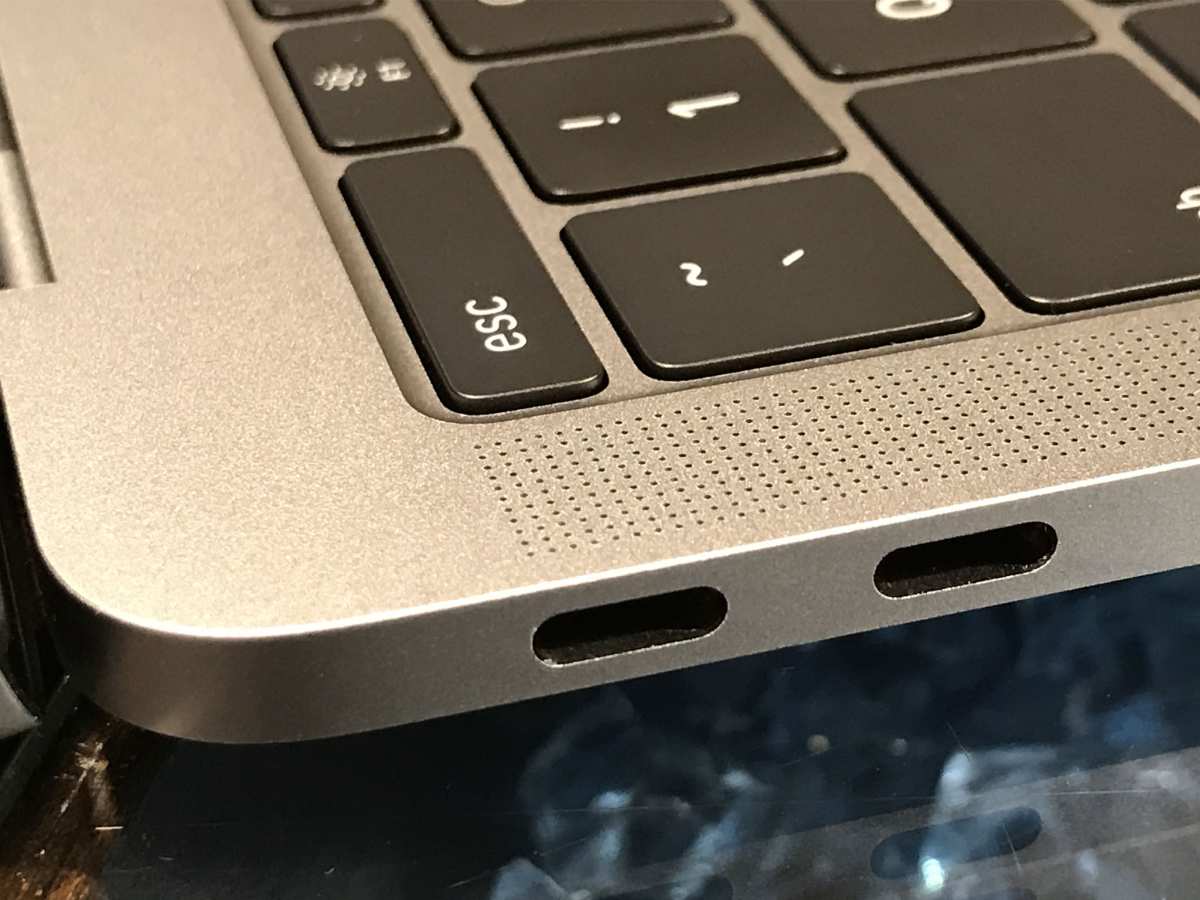
The port types matter too. MacBooks from 2016 to 2020 used Thunderbolt 3 over USB-C. These ports look identical to regular USB-C but support full video output.
MacBooks from 2021 onward use Thunderbolt 4 or Thunderbolt 5, which are backward compatible with every USB-C display protocol. The 2022 MacBook Air and 2024 MacBook Pro models also include a native HDMI port, which opens up a second connection path.
What Your Monitor Actually Accepts Matters Just as Much
Portable monitors generally fall into three categories based on their input options.
USB-C input (DisplayPort Alt Mode): This is the cleanest option. One cable from your MacBook to the monitor handles video and often power simultaneously. Most monitors in this category are from ASUS (ZenScreen line), ARZOPA, Lenovo (ThinkVision), and HP.
HDMI input only: Some budget portable monitors, especially older models, only accept HDMI. These require a USB-C to HDMI adapter on the MacBook side. They often need a separate power cable too.
Dual input (USB-C plus HDMI): Many mid-range portable monitors include both. This gives you flexibility. You can use USB-C for a single-cable setup or fall back to HDMI if your USB-C cable isn't cooperating.
Check the specs label on the back of your monitor or the product listing. Look specifically for "USB-C with DisplayPort Alt Mode" or simply "DP over USB-C." If it just says "USB-C" without mentioning DisplayPort, it might only support charging.
The Three Main Connection Methods
Method 1: Direct USB-C (One Cable, Cleanest Setup)
This is the ideal scenario. If your MacBook has a Thunderbolt or USB-C port and your monitor supports DisplayPort Alt Mode over USB-C, you only need one cable.
Use the cable that came with your monitor. If you need to buy a replacement, look for a USB-C 3.1 Gen 2 cable that explicitly lists "DisplayPort Alt Mode" or "4K 60Hz" in its specs. Cables rated for USB 2.0 data speeds won't carry video.
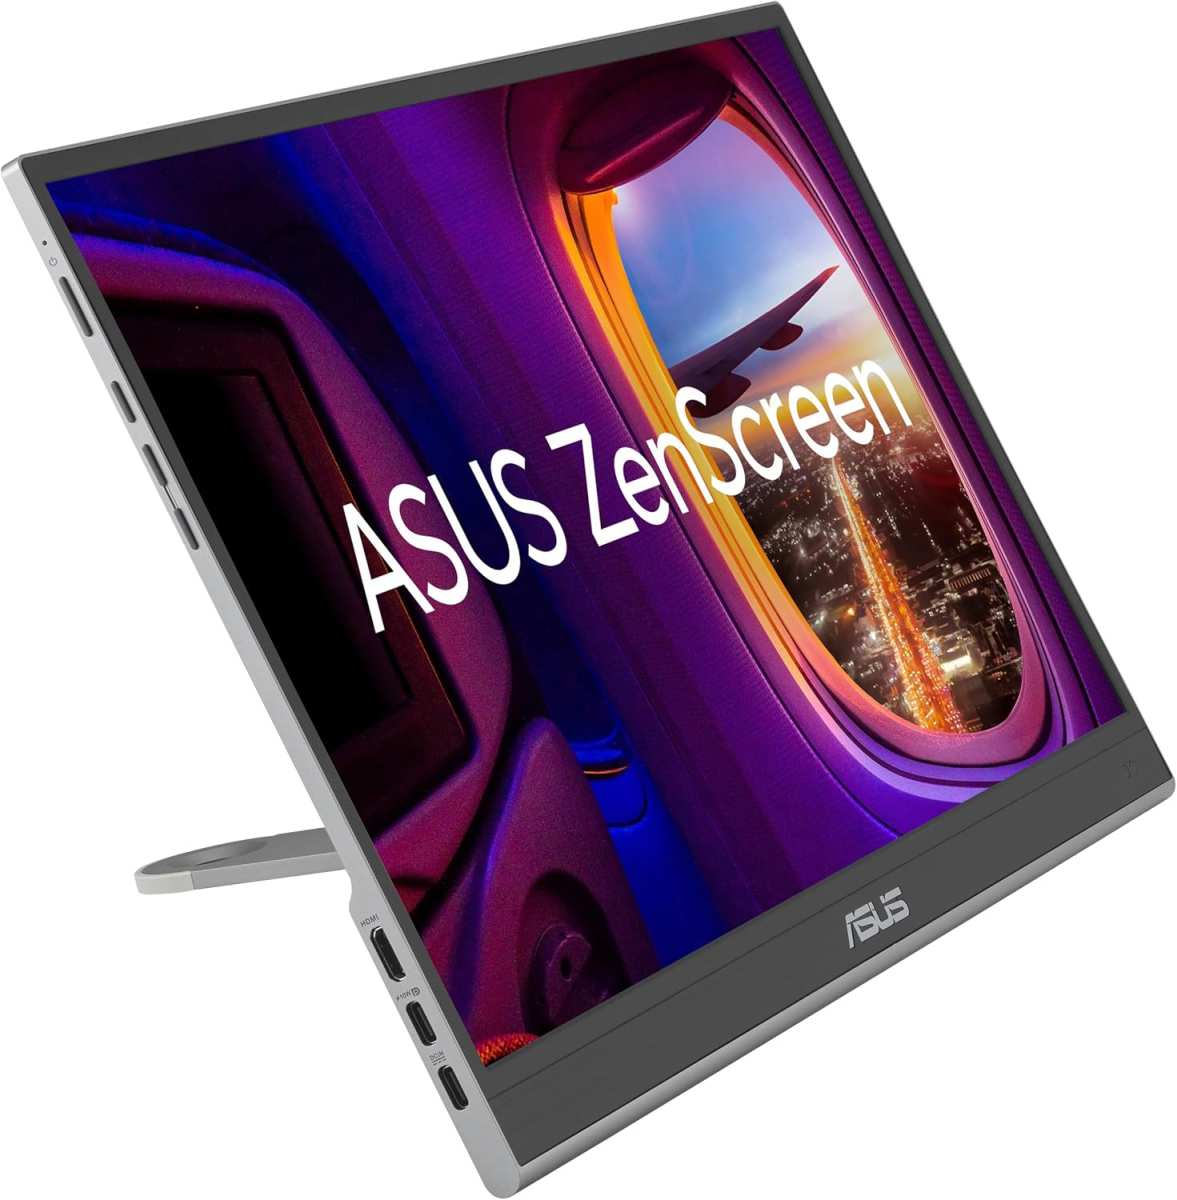
Here's what happens when you connect. Your MacBook detects the monitor as an external display. macOS extends your desktop by default. The monitor draws power from your MacBook through the same cable, though this only works if the monitor's power requirement is under about 20W.
Larger portable monitors, 17 inches and up, often need their own power brick.
Pros:
- Single cable for video and often power
- No adapter needed
- Best image quality path
Cons:
- Drains MacBook battery faster
- Won't work with charging-only USB-C cables
- Limited to one display on base M1/M2 chips
Method 2: HDMI (Reliable, Works With Almost Anything)
If your monitor only has HDMI input, or if you want to preserve your MacBook's battery, HDMI is the fallback.
You'll need a USB-C to HDMI adapter. Make sure it supports 4K at 60Hz if your monitor is 4K. Cheaper adapters often cap at 4K 30Hz, which feels sluggish when you're moving windows around.
MacBooks from 2022 onward (MacBook Air 13" 2022, MacBook Pro 14" and 16" from 2021+) have a built-in HDMI port. You can skip the adapter entirely and use a standard HDMI cable.
When using HDMI, the monitor will need its own power source. Most USB-C portable monitors can be powered through a separate USB-C power brick plugged into the monitor's second USB-C port or a dedicated power input.
Pros:
- Works with virtually every portable monitor
- Doesn't drain MacBook battery as fast
- Built-in HDMI on newer MacBooks
Cons:
- Requires an adapter on most MacBooks
- Often needs a separate power cable for the monitor
- Slightly more cable clutter
Method 3: DisplayLink Adapter (When Nothing Else Works)
DisplayLink is a technology that compresses video data and sends it over a standard USB data connection. It doesn't rely on your MacBook's native display output capabilities. This makes it the go-to solution when you've hit your Mac's display limit.
You'll need a DisplayLink-enabled docking station or adapter. Brands like Plugable and StarTech make reliable options. You also need to install the DisplayLink Manager software from the developer's website.
This method lets base M1 and M2 MacBooks run an external display beyond their native limit. It's also useful for older Intel MacBooks that lack Thunderbolt 3.
Pros:
- Bypasses Apple's native display limit
- Works over standard USB-A or USB-C data connections
- Supports multiple external displays
Cons:
- Requires software installation
- Slight latency compared to native connections
- Uses CPU resources, which can affect performance
- DisplayLink adapters cost $30 to $80
Step-by-Step: How to Set Up Your Portable Monitor
Step 1: Identify Your MacBook's Ports and Chip
Click the Apple menu, then "About This Mac." Note your chip (M1, M2, M3, M4, or Intel) and the year. Then look at the physical ports on your machine.
If you see a USB-C or Thunderbolt port, you can use USB-C video output. If you see an HDMI port (introduced on the 2022 MacBook Air and 2024 MacBook Pro), you have a direct HDMI option.
Write down your chip model. This determines how many external displays you can run natively.
Step 2: Check Your Monitor's Input Options
Look at the ports on your portable monitor. USB-C ports may be labeled "In" and "Out" or "PD" for power delivery. HDMI ports are standard size on most models, though some compact monitors use Mini HDMI.
If your monitor has both USB-C and HDMI, start with USB-C. It's the simpler path.
Step 3: Pick the Right Cable or Adapter
Match your MacBook's output to your monitor's input.
- MacBook USB-C to monitor USB-C: Use a USB-C cable rated for DisplayPort Alt Mode and 4K 60Hz.
- MacBook USB-C to monitor HDMI: Use a USB-C to HDMI adapter rated for 4K 60Hz, plus an HDMI cable.
- MacBook HDMI to monitor HDMI: Use a standard High Speed HDMI cable.
- MacBook USB-A to monitor (any): You'll need a DisplayLink adapter and the DisplayLink Manager software.
Avoid generic USB-C cables from unknown brands. Anker, Cable Matters, and Belkin make reliable options that explicitly list video support.
Step 4: Connect and Configure in macOS
Plug in the cable or adapter. Your MacBook should detect the monitor within a few seconds. If it doesn't, try these steps:
- Open System Settings, then Displays.
- Click "Detect Displays" if the monitor doesn't appear.
- Check that the cable is fully seated on both ends.
- Try a different cable to rule out a charging-only cable.
Once detected, macOS will extend your desktop by default. Your MacBook screen becomes the primary display with the menu bar, and the portable monitor acts as a secondary screen to the right.
Step 5: Arrange Your Displays to Match Your Desk
Go to System Settings, then Displays, then click "Arrange." You'll see two blue rectangles representing your screens. Drag them to match your physical setup.
If your portable monitor sits to the left of your MacBook, drag the secondary display rectangle to the left side of the primary. This way your mouse cursor moves between screens in the direction your actual monitors are positioned.
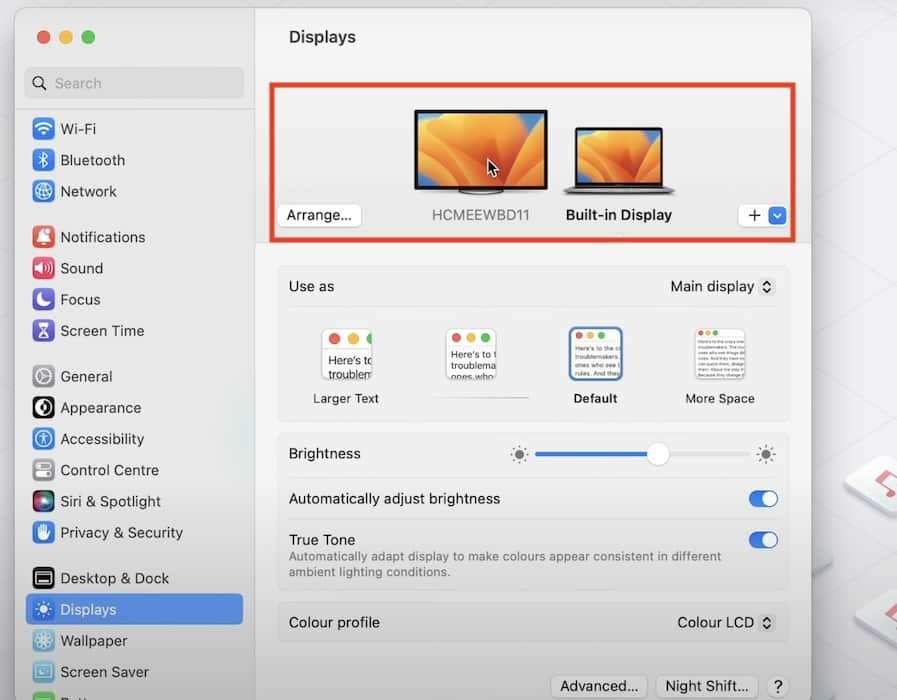
You can also drag the white menu bar to the top of the external display if you want that to be your primary screen. This is useful for clamshell mode where you close the MacBook lid and use only the external display.
For resolution and scaling, click on each display rectangle in the arrangement view and adjust the settings below. Most 15.6-inch portable monitors at 1080p look best at "Default for display." 4K portable monitors may need scaling adjusted to make text readable.
Common Problems and How to Solve Them
Black Screen After Connecting
This is almost always a cable issue. The monitor powers on because it's receiving electricity, but the video signal isn't getting through. Swap to a different USB-C cable that explicitly supports DisplayPort Alt Mode.
If you're using an adapter, make sure it's plugged in the right direction and fully seated.
Monitor Detected but Wrong Resolution
Go to System Settings, Displays, and select the external monitor. Choose "Show all resolutions" to see the full list. Pick the monitor's native resolution, which is usually the highest option.
For a 1080p monitor, that's 1920 x 1080. For 4K, it's 3840 x 2160.
Flickering or Display Dropouts
This often happens with HDMI adapters that don't support the bandwidth needed for your resolution and refresh rate. A 4K signal at 60Hz requires an HDMI 2.0 adapter at minimum. Older HDMI 1.4 adapters will flicker or drop to 30Hz.
Switch to a USB-C connection if possible, or upgrade your adapter.
MacBook Not Charging Through the Monitor
Many portable monitors with USB-C power pass-through only supply 10 to 15 watts. MacBook Pro models, especially the 14-inch and 16-inch, need 67 to 96 watts for full-speed charging. The monitor simply can't provide enough power.
Keep your MacBook's original charger plugged in separately for anything beyond a trickle charge.
Portable Monitor vs. iPad Sidecar vs. Software Solutions
You have options beyond a dedicated portable monitor. Here's how they compare:
| Method | Latency | Cost | Requires Extra Hardware | Works Offline |
|---|---|---|---|---|
| USB-C portable monitor | None | $80–$300 | Monitor + cable | Yes |
| iPad Sidecar | Low | $0 if you own an iPad | iPad | Yes (after initial setup) |
| Duet Display | Moderate | $10–$30/year | iPad or second device | No (needs Wi-Fi or USB) |
| Luna Display | Low | $130 one-time | Luna hardware dongle | Yes |
| DisplayLink adapter | Slight | $30–$80 adapter | Adapter + software | Yes (after driver install) |
A dedicated portable monitor gives you the best experience. No latency, no software dependencies, no Wi-Fi required. iPad Sidecar is excellent if you already own an iPad and want a free solution. Software options like Duet Display work in a pinch but introduce noticeable lag and need an active internet connection for initial setup.
Who Each Setup Method Is Best For
Direct USB-C: Best for most people. If your MacBook has Thunderbolt and your monitor has USB-C input, start here. It's the simplest, cleanest, and most reliable path.
HDMI: Best for older portable monitors or when you want to preserve MacBook battery life. Also the right choice if you're using a monitor that only has HDMI input.
DisplayLink: Best for base M1 or M2 MacBook users who need more than one external display. Also the right call for older Intel MacBooks without Thunderbolt 3.
iPad Sidecar: Best for people who already own an iPad and want a zero-cost second screen. Great for travel when you don't want to carry a separate monitor.
Expert Tips Most Guides Skip
Close the lid for maximum performance. If you're using your portable monitor as your only display with the MacBook lid closed (clamshell mode), your MacBook runs cooler and can sustain higher performance. Just make sure it's plugged into power.
Check your cable before blaming the monitor. In our research, the majority of "my monitor won't connect" complaints trace back to a charging-only USB-C cable. Before returning anything, try a different cable that's confirmed to support video.
Update your DisplayLink drivers regularly. If you're using a DisplayLink adapter, outdated drivers cause more problems than any other factor. Check the DisplayLink website for updates, especially after major macOS releases.
Mind the wattage on power pass-through. A portable monitor that supplies only 10W to your MacBook will drain the battery slowly even while "charging." For anything above a trickle, you need a monitor that supports at least 45W power delivery pass-through, or you keep your original charger connected.
M3 and M4 MacBook Air models support two external displays. But only when the lid is open. With the lid closed, they're still limited to one external display. This catches a lot of people off guard.
Frequently Asked Questions
How long does setup take?
Under two minutes if you have the right cable. Most connections are detected instantly by macOS. The only delay comes from installing DisplayLink drivers, which takes about five minutes.
Can I use any USB-C cable?
No. Many USB-C cables are charging only. You need a cable that supports DisplayPort Alt Mode for video transmission.
Check the cable specs before buying.
Why is my portable monitor dim?
Some monitors default to lower brightness when powered through USB-C to conserve energy. Check the monitor's on-screen display settings and turn brightness up manually.
Does it work with MacBook Air?
Yes. Every MacBook Air from 2018 onward supports at least one external display. M1 and M2 base models are limited to one.
M3 and M4 models support two with the lid open.
Can I daisy-chain two portable monitors?
Only with Thunderbolt monitors, which are rare in the portable category. Most portable monitors don't support daisy-chaining. Use a Thunderbolt dock with multiple outputs if you need two external screens.
Will this drain my MacBook battery?
Yes. Running an external display through USB-C draws power from your MacBook's battery. Expect 10 to 20 percent faster battery drain depending on the monitor's power draw.
Plug in your charger for extended use.
Common Mistakes to Avoid
Using a charging-only USB-C cable. This is the single most common mistake. The monitor lights up, but no image appears. Always check that your cable supports DisplayPort Alt Mode.
Forgetting to check your Mac's display limit. Base M1 and M2 chips only support one external display natively. Don't wonder why your second monitor won't turn on. Check your chip first.
Buying a cheap HDMI adapter that caps at 30Hz. Your mouse cursor will feel sluggish and dragging windows looks terrible. Spend a few extra dollars on an adapter rated for 4K 60Hz.
Ignoring macOS display arrangement settings. If your mouse moves in the wrong direction when crossing screens, your displays aren't arranged to match your physical setup. Fix it in System Settings under Displays.
Costs, Pricing, and What to Expect
Portable monitors range from about $80 for a basic 1080p 15.6-inch model to $350 or more for a 4K touchscreen with built-in battery. Most people find a solid 1080p option between $100 and $180.
USB-C cables that support video cost $10 to $20. A decent USB-C to HDMI adapter runs $15 to $30. DisplayLink adapters start around $30 and go up to $80 for multi-display models.
You don't need to spend a fortune. A $120 portable monitor with a $15 cable gives you a perfectly usable second screen for travel.
Final Recommendation: The Decision Guide
If your MacBook has a USB-C or Thunderbolt port and your monitor supports USB-C input, use a direct USB-C connection. It's the simplest path with the fewest things to go wrong.
If your monitor only has HDMI, grab a quality USB-C to HDMI adapter rated for 4K 60Hz. Keep your MacBook charger handy since HDMI connections don't supply power to your laptop.
If you have a base M1 or M2 MacBook and need more than one external display, go with a DisplayLink adapter. Install the driver first, then connect. It's the only reliable way around Apple's native display limit.
For most people, the answer is straightforward. Check your ports, grab the right cable, plug it in, and arrange your displays in macOS. You'll be up and running in under two minutes.

Similar Posts