How to Setup HDR Monitor for Gaming
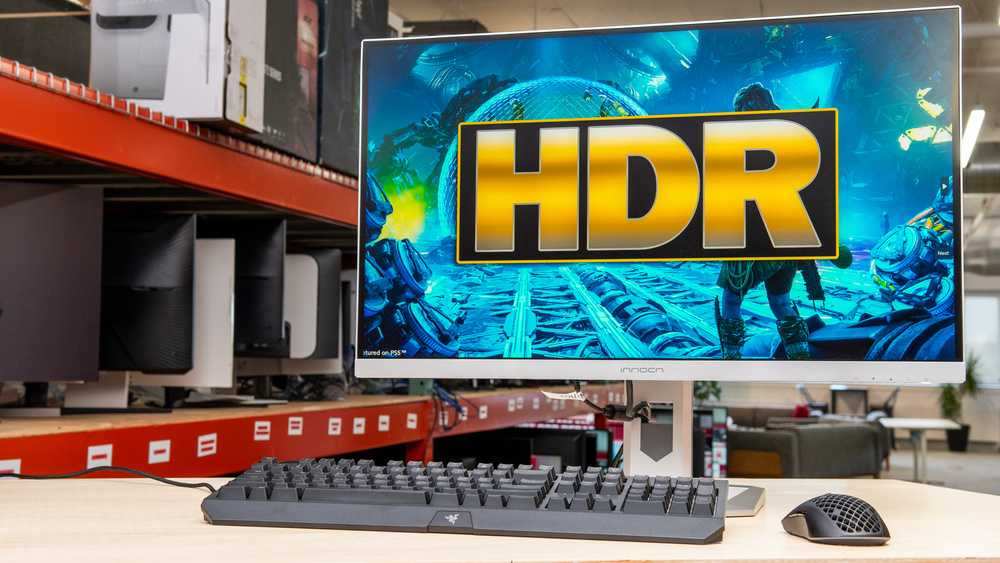
Figuring out how to setup hdr monitor for gaming trips up a lot of people who already bought the panel, connected everything, and assumed it'd just work. It usually doesn't. The desktop looks washed out, games keep rendering in SDR, or the signal flickers every time you alt-tab.
That's not a defective monitor. That's a series of settings that need to be turned on in the right order, across Windows, your GPU driver, and each game individually.
The good news is there's a clear path through it once you understand how the chain works. Windows gates HDR at the OS level. Your GPU driver decides how the signal gets encoded.
And every game has its own HDR toggle buried in its display menu. Miss any one of those and you won't get real HDR, regardless of how expensive your monitor is. Per VESA standards, even the entry-level DisplayHDR 400 spec requires 400 nits of peak brightness and wider color gamut coverage than standard SDR, so there's actual hardware involved, but only if the full chain is configured correctly.
Quick Answer
To setup HDR for gaming, first confirm your monitor has real HDR capability (DisplayHDR 400 or higher, ideally 600 or above). Use an HDMI 2.1 or DisplayPort 1.4+ cable. Enable HDR in Windows HD Color settings.
Set your GPU output to 10-bit color and full dynamic range. Then turn on HDR inside each game's own display settings and calibrate peak brightness and paper-white nits per title.
Image source: Bing (Web (fair-use with source credit))
Is Your Hardware Actually Ready for HDR Gaming?
Before touching a single setting, you need to verify your hardware can actually deliver an HDR signal from GPU to screen. Not every monitor labeled "HDR" gives you a meaningful HDR experience. This is where the decision tree starts, because the answer changes depending on what's on your desk.
Start with the monitor itself. Look up the exact model number, not just the marketing name. Manufacturers love slapping "HDR-ready" or "HDR support" on panels that barely qualify.
The meaningful indicator is the VESA DisplayHDR certification tier.
| Certification | Peak Brightness | Local Dimming | Color Gamut | Real HDR Experience |
|---|---|---|---|---|
| DisplayHDR 400 | 400 nits | Not required | ≥95% sRGB | Marginal; barely above SDR |
| DisplayHDR 600 | 600 nits | Required | ≥90% DCI-P3 | Noticeable improvement, good for gaming |
| DisplayHDR 1000 | 1,000 nits | Required | ≥90% DCI-P3 | Punchy highlights, strong HDR effect |
| DisplayHDR True Black (400/500/600) | Per-pixel (OLED) | Per-pixel | ≥90% DCI-P3 | Perfect blacks with simultaneous highlights |
A DisplayHDR 400 panel can technically accept an HDR signal, but aggregate reviews consistently report it looks close to SDR in practice. If you're on a 400-tier panel, HDR gaming will work, but don't expect the wow factor. OLED panels labeled with DisplayHDR True Black are a different category entirely.
They control brightness per pixel, so you get perfect blacks right next to bright highlights at the same time. That's the gold standard for gaming HDR as of 2026.
Next, check your GPU. NVIDIA GeForce GTX 10-series and newer support HDR output, but RTX 20-series and newer handle metadata more reliably. AMD Radeon RX 400-series and newer support HDR, with the RX 6000 and 7000 series offering the cleanest implementation.
Integrated graphics on modern Intel and AMD APUs can also drive an HDR signal, though bandwidth might be limited depending on the laptop or motherboard output.
The cable matters more than most people realize. Here's where the decision tree branches again.
If you're running 4K at 120Hz with HDR, you need HDMI 2.1 or DisplayPort 1.4 with DSC (Display Stream Compression). HDMI 2.0 tops out at 4K 60Hz with 4:2:0 chroma subsampling at 10-bit color, which means color detail gets compressed. That's technically HDR, but text and fine color gradients will look softer.
DisplayPort 1.4 gives you 4K 120Hz HDR at full 4:4:4 chroma if the GPU and monitor both support DSC.
For 1440p at high refresh rates with HDR, DisplayPort 1.4 or HDMI 2.0 both work. Some monitors only enable full HDR over one specific port, so check the manual. Plugging into HDMI 1 when HDMI 2 is the HDR-capable port is a classic mistake.
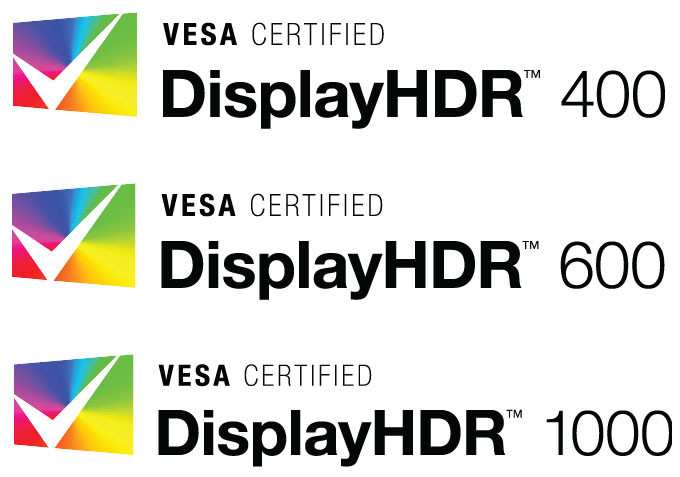
Image source: Bing (Web (fair-use with source credit))
Why HDR Still Looks Wrong on Most Gaming Setups (Even With an HDR Monitor)
The biggest frustration people run into is this: they enable HDR in Windows, launch a game, and it looks flat, gray, and washed out. Sometimes it looks worse than SDR. That's not HDR failing.
That's the setup being incomplete at one or more stages in the chain.
Here are the most common culprits.
Windows desktop looks washed out immediately after enabling HDR. This is expected behavior, not a defect. Windows maps your SDR desktop (designed for ~100 nits) into an HDR signal meant for 400 to 1,000+ nits. Without adjustment, SDR content appears dim and desaturated.
The fix lives in the same HDR settings panel. You need to adjust the SDR content brightness slider, which controls how bright non-HDR elements (your taskbar, browser windows, file explorer) appear while HDR is active.
Games stay in SDR even with Windows HDR on. Windows enabling HDR doesn't force every game into HDR mode. Most games have their own HDR toggle inside their display or graphics settings menu. If the game doesn't detect an HDR signal, it may not show the option at all, which points back to a GPU or cable issue.
HDR cuts out when alt-tabbing. Many games drop back to SDR on alt-tab and fail to restore HDR when you return to the game. This happens most often with exclusive fullscreen modes in older games. Switching to borderless fullscreen usually fixes it, and disabling the Windows "fullscreen optimizations" compatibility flag on the game's .exe can help with stubborn titles.
Wrong color format from the GPU. If your GPU is outputting YCbCr 4:2:2 or 4:2:0 instead of RGB 4:4:4 with full dynamic range, HDR content will look off, even if the HDR flag is technically active. Banding, crushed blacks, and muted reds or greens are the telltale signs.
Fake HDR monitors with DisplayHDR 400. Some monitors accept an HDR signal but lack the brightness or local dimming to actually show it. The image might look slightly different, but not better. If your monitor peaks at 350 nits without local dimming and only covers sRGB, you're getting a theoretical HDR signal without any of the visual benefit.
In that case, leaving HDR off often produces a better-looking image.
Understanding these failure points is what separates a working setup from a frustrating one. Each problem maps back to a specific layer in the chain, so fixing them is a matter of checking each layer systematically.
Turning On HDR in Windows Without Ruining Everything
Once you've confirmed your hardware is capable, the first real step is enabling HDR in Windows itself. The exact path differs slightly between Windows 10 and Windows 11, but the underlying settings are the same.
In Windows 11, go to Settings > System > Display > HDR. Toggle "Use HDR" to on. You'll also see toggles for "Use WCG and HDR" and "Auto HDR" (which handles upscaling SDR games into HDR space — more on that later).
In Windows 10, the path is Settings > System > Display > Windows HD Color, where you'll toggle "Play HDR games and apps."

Image source: Wikimedia Commons / Dietmar Rabich (CC BY-SA)
The moment you flip that switch, your desktop will look washed out. Don't panic. This is the single most common moment people think they've broken something.
What's happening is that Windows is now sending an HDR signal, but your SDR desktop elements (taskbar, browser, file explorer) are being mapped into that HDR container without any brightness adjustment.
Right below the HDR toggle in Windows 11, you'll find the "SDR content brightness" slider. Drag this up until your desktop looks normal again. For most monitors, this lands somewhere between 30 and 70, depending on your panel's peak brightness.
On a 400-nit panel, you'll likely set it lower. On a 1,000-nit panel, you'll push it higher. This slider only affects SDR content while HDR is active.
It doesn't change how HDR games render.
There's one more Windows-level setting worth checking. In the same HDR settings panel, look for "Display color format" or "Bit depth" if your monitor exposes it. You want 10-bit color output if your panel supports it.
Some monitors default to 8-bit even when HDR is enabled, which defeats the purpose. If 10-bit isn't available, that's a signal that your cable, port, or GPU output isn't configured correctly, and you'll need to fix that in the GPU control panel next.
Windows 11 also includes an "Auto HDR" toggle. This feature uses a DirectML model to upscale SDR games into HDR space. It works surprisingly well on some titles and looks worse on others.
The general rule: if a game has native HDR support, use that instead of Auto HDR. If a game only supports SDR, Auto HDR is worth trying, but be ready to turn it off if the image looks oversaturated or has blown-out highlights.
GPU-Side HDR Settings: NVIDIA Control Panel and AMD Radeon Software
Windows enabling HDR is only half the signal chain. Your GPU driver controls how the actual video signal gets encoded, and if these settings are wrong, you'll get a degraded HDR image even with everything else correct.
NVIDIA Control Panel
Open NVIDIA Control Panel and navigate to "Change resolution" under Display. Here's what to check.
Output color depth. Set this to 10 bpc (bits per channel) if your monitor supports it. If 10 bpc isn't available, your cable or port is likely the bottleneck. 8 bpc with dithering can approximate 10-bit, but native 10-bit is cleaner and eliminates most banding in HDR gradients.
Output color format. Set this to RGB. YCbCr 4:2:2 or 4:2:0 compresses chroma data, which is fine for video playback but introduces visible artifacts in games, especially around text and fine detail. RGB 4:4:4 gives you full color resolution.
Output dynamic range. Set this to "Full." "Limited" range (16-235) crushes your blacks and whites, which is the opposite of what HDR is supposed to do. This setting is the number one cause of washed-out HDR on NVIDIA setups.
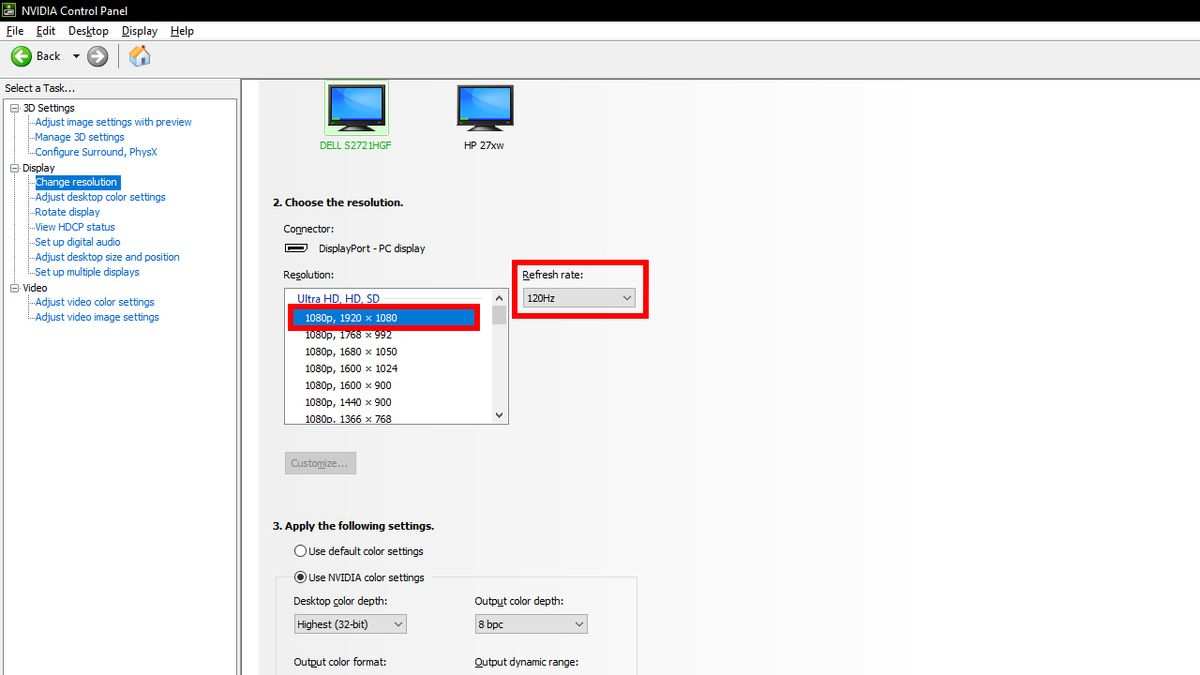
Image source: Bing (Web (fair-use with source credit))
AMD Radeon Software
Open AMD Software (Adrenalin Edition) and go to Settings > Display.
Pixel format. Select "RGB 4:4:4 Pixel Format PC Standard (Full RGB)." This is AMD's equivalent of the NVIDIA full dynamic range setting. The default is often YCbCr 4:2:2, which will make HDR look flat.
Color depth. Set to 10-bit if available. AMD's implementation is generally straightforward here, but some monitors only expose 10-bit over DisplayPort, not HDMI, so if the option is grayed out, try switching ports.
HDR toggle. AMD Software has its own HDR enable switch in the Display tab. This should be on, and it should match the Windows setting. If one is on and the other is off, you'll get inconsistent behavior.
When Driver Settings Override Windows
In some cases, the GPU driver settings take precedence over Windows. If you've set everything correctly in the control panel but HDR still looks wrong, try toggling the Windows HDR switch off and on again. This forces Windows to re-read the EDID (the data your monitor sends to the GPU about its capabilities) and re-establish the handshake.
If HDR still isn't working after all of this, update your GPU driver. HDR metadata handling has improved significantly across driver releases on both NVIDIA and AMD sides. A driver from early 2023 might handle HDR differently than one from late 2025.
This is especially relevant for newer games that use dynamic HDR metadata, which older drivers may not pass through correctly.
Getting HDR Working Per Game (The Step Most People Miss)
Here's where the chain either completes or falls apart. Windows HDR on plus correct GPU settings means your system is ready to output HDR. It does not mean your game is rendering in HDR.
Almost every game with HDR support has its own toggle, and it's almost always off by default.
Launch your game and head to the display or graphics settings menu. Look for an "HDR" toggle, sometimes labeled "HDR10" or "High Dynamic Range." Turn it on. If you don't see the option, the game either doesn't support HDR or it's not detecting an HDR signal from Windows.
Go back and verify the previous steps.
Once HDR is enabled in-game, you'll usually see calibration sliders. The two that matter most are peak brightness and paper-white nits.
Peak brightness tells the game how bright your monitor can actually get. Set this to match your monitor's spec. If your panel hits 600 nits, set it to 600.
If you set it too high, highlights clip and you lose detail in bright areas. Too low and the image looks dim and flat.
Paper-white nits controls the brightness of mid-tone UI elements like menus, HUD text, and white surfaces. This is a comfort setting. Most people land between 120 and 200 nits here, depending on room lighting and personal preference.
Higher values make the UI pop but can cause eye strain in dark rooms.
Some games handle this calibration well. Others have broken HDR implementations where the toggle does almost nothing, or where the calibration sliders don't actually map to real nits. Titles like Cyberpunk 2077, Forza Horizon 5, and Horizon Zero Dawn are frequently cited in aggregate reviews as having reliable HDR implementations.
Older games or smaller indie titles may have HDR that's technically present but visually underwhelming.
Using the Windows HDR Calibration App
Microsoft offers a free HDR Calibration app in the Microsoft Store. It walks you through setting minimum brightness, maximum brightness, and color saturation specifically for your panel. Once you complete the calibration, it creates a color profile that Windows and supported games reference for tone mapping.
This app is especially useful if your monitor's HDR mode doesn't look right out of the box. It won't fix a DisplayHDR 400 panel into looking like an OLED, but it can correct gamma and color balance issues that make HDR look washed out or overly dark.
Testing Your Setup
After configuring everything, test with a game you know has solid HDR. Load a scene with bright sunlight and deep shadows. You should see detail in both simultaneously.
Bright areas shouldn't be a blown-out white blob, and dark areas shouldn't be a crushed black mess. If either is happening, revisit the in-game peak brightness calibration.
If the image looks good in one game but wrong in another, that's a per-game calibration issue, not a system issue. Each game's HDR implementation is independent, so you'll need to calibrate each one individually. It's tedious, but it's the reality of HDR gaming as of 2026.
Auto HDR on Windows 11: When to Use It and When to Turn It Off
Auto HDR is Windows 11's answer to the problem of having an SDR-only game library and an HDR monitor. It analyzes the SDR image in real time and expands it into a wider brightness and color range. The result can be impressive, but it's not automatic perfection.
Use Auto HDR when the game has no native HDR support and you want a wider brightness range than SDR provides. Open-world games with varied lighting benefit the most. The effect in something like Skyrim or Fallout 4 is noticeably better than plain SDR.
Turn Auto HDR off when the game already has native HDR. The two systems will fight each other, producing oversaturated colors and blown-out highlights. Also disable it if you notice skin tones looking weird or neon colors clipping hard in darker scenes.
Some games just don't play nice with the upscaling algorithm.
You can toggle Auto HDR globally in Settings > System > Display > HDR, or per-game by clicking the Windows key + G to open the Game Bar and accessing the HDR quick settings from there.
OLED vs. Mini-LED vs. FALD LCD for Gaming HDR: What Changes Your Setup Approach
Your panel type dictates how aggressively you need to calibrate and what tradeoffs to expect.
OLED panels don't need local dimming configuration because every pixel controls its own brightness. Setup is straightforward. Enable HDR in Windows, set 10-bit RGB full in your GPU panel, calibrate per game.
The main concern is ABL (Automatic Brightness Limiter), which can cause full-screen bright scenes to dim suddenly. Burn-in is a real long-term consideration with static HUD elements, so use pixel-shift features and vary your content. Manufacturers like LG and ASUS include warranty coverage for burn-in on gaming OLEDs as of 2025, which is worth verifying before you buy.
Mini-LED monitors use thousands of small LED backlights divided into dimming zones, usually 384 to 1,152 on current models. The setup process is the same as above, but you'll want to test local dimming behavior in each game. Set local dimming to "High" or "Auto" for HDR content.
The trade-off is blooming, where bright objects on dark backgrounds create a visible halo. If blooming bothers you in a particular game, dropping local dimming to "Medium" is a compromise between contrast and halo visibility.
FALD (Full Array Local Dimming) LCD monitors operate similarly to Mini-LED but with fewer and larger zones, typically 16 to 96. The setup steps are identical, but blooming is more pronounced due to larger zone sizes. For HDR gaming, FALD monitors need local dimming set to "High" to get meaningful HDR contrast.
Edge-lit monitors without FALD zones provide almost no HDR benefit, which is where the DisplayHDR 400 plateau comes from.
Practical HDR Calibration Workflow (Full Decision Tree)
This is the complete sequence from unboxing to calibrated picture. Follow it in order, and stop at the branch that matches your situation.
Pre-flight check
- Monitor spec: DisplayHDR 600 or higher for meaningful HDR, True Black for OLED.
- Cable: HDMI 2.1 or DisplayPort 1.4 with DSC support.
- GPU: GTX 10-series / RX 400-series or newer, driver updated within last 6 months.
- Port: Verify which port on your monitor supports full HDR bandwidth (check the manual).
Step 1: Enable HDR in Windows
Settings > System > Display > HDR. Toggle "Use HDR" on. Adjust the SDR content brightness slider until your desktop looks normal.
Step 2: Set color format in GPU panel
NVIDIA: RGB, 10 bpc, Full dynamic range. AMD: RGB 4:4:4 Full RGB, 10-bit.
Step 3: Run Windows HDR Calibration app
Download from Microsoft Store. Follow the three-step process for min brightness, max brightness, and color saturation. Apply the generated color profile.
Step 4: Enable and calibrate in-game HDR
Launch each game. Find the HDR toggle in display settings. Set peak brightness to match your panel's nits rating.
Set paper-white to 120-200 nits based on comfort.
Step 5: Test
Run a scene with bright sky and dark shadows simultaneously. Verify no clipping in either extreme. If highlights blow out, lower in-game peak brightness.
If shadows crush black, your local dimming setting or panel may be the limitation.
Troubleshooting branches
Washed out desktop but games look fine. Your SDR brightness slider is too low. Increase it. This only affects desktop elements, not HDR game rendering.
No HDR option in game. Check Windows HDR is on, GPU is outputting 10-bit, and the correct port is being used. Some games require an HDR signal at launch to show the option. Restart the game after enabling Windows HDR.
HDR cuts out on alt-tab. Switch the game from exclusive fullscreen to borderless windowed. If the issue persists, disable fullscreen optimizations on the game .exe via Properties > Compatibility.
Flickering when HDR toggles on. This is usually a cable or port bandwidth issue. Try a different cable, preferably a certified Ultra High Speed HDMI 2.1 cable. Some monitors flicker briefly on signal renegotiation, which is normal, but persistent flickering points to a hardware handshake problem.
High-Value Pro Tips for Gaming HDR Setup
These are the things that separate a dialed-in HDR setup from a functional one.
Use borderless fullscreen for HDR persistence. Exclusive fullscreen is great for latency, but HDR support under exclusive fullscreen is inconsistent, especially in older engines. Borderless fullscreen preserves the HDR signal across alt-tabs more reliably. The latency penalty is negligible on modern systems with frame generation or high refresh rates.
Disable fullscreen optimizations for stubborn titles. Right-click the game executable, Properties > Compatibility > Disable fullscreen optimizations. This stops Windows from injecting its own compositor layer, which can interfere with HDR handshakes in some UWP and older Win32 games.
Keep local dimming on "High" or "Auto" for HDR content. Turning it off defeats the purpose of an HDR-capable LCD panel. If blooming bothers you in a specific game, adjust per game rather than disabling globally.
Update GPU drivers. HDR metadata handling has improved steadily across driver releases. As of 2025, NVIDIA's 500-series and AMD's Adrenalin 24.x and newer drivers handle dynamic HDR metadata more reliably than their predecessors. If a game's HDR looks wrong, a driver update is a legitimate first troubleshooting step.
Calibrate per game and save profiles. Every game's HDR implementation is different. What looks right in Cyberpunk 2077 will be wrong in Alan Wake 2. Most games save HDR calibration to their config files, so you only need to do it once per title unless a patch changes the rendering pipeline.
Let OLED monitors warm up. OLED panels can take 15-30 minutes to reach stable brightness output. If you calibrate immediately after powering on, your peak brightness reading might be slightly off. Run the monitor for a bit before fine-tuning.
Frequently Asked Questions
Do I need HDMI 2.1 for HDR gaming?
Not always. DisplayPort 1.4 supports 4K 120Hz HDR for most monitors. HDMI 2.1 is required for 4K 120Hz HDR on some monitors, particularly Samsung and LG gaming displays that lock certain features to HDMI 2.1.
For 1440p high refresh with HDR, either connection works fine.
Why does my desktop look washed out with HDR enabled?
Windows maps SDR desktop elements into an HDR container. Adjust the "SDR content brightness" slider in your HDR settings. This controls desktop brightness without affecting how HDR games render.
Should I use Auto HDR or native HDR?
Always prefer native HDR when the game supports it. Auto HDR is a fallback for SDR-only titles. Running Auto HDR on a natively HDR-enabled game will produce oversaturated and blown-out results.
Does DisplayHDR 400 count as real HDR?
Technically yes, it accepts an HDR signal. Practically, the visual difference over SDR is minimal. DisplayHDR 400 panels lack local dimming and have limited peak brightness.
You'll see more improvement from a good SDR image than from forcing HDR on a 400-tier panel.
Can I use HDR and G-Sync / FreeSync together?
Yes. G-Sync Compatible and FreeSDR (AMD's HDR-aware adaptive sync tier) are designed to work with HDR enabled. Just ensure your GPU driver and monitor firmware are current.
Some older FreeSync monitors drop HDR when adaptive sync activates, which is a firmware-level limitation.
How do I know if a game supports native HDR?
Check the game's display settings menu after enabling Windows HDR. If the HDR toggle doesn't appear, the game doesn't support native HDR. Websites like HDR game databases community-maintained on forums can also list supported titles, though they're not official sources.

Similar Posts