How to Setup Budget Monitor for Work
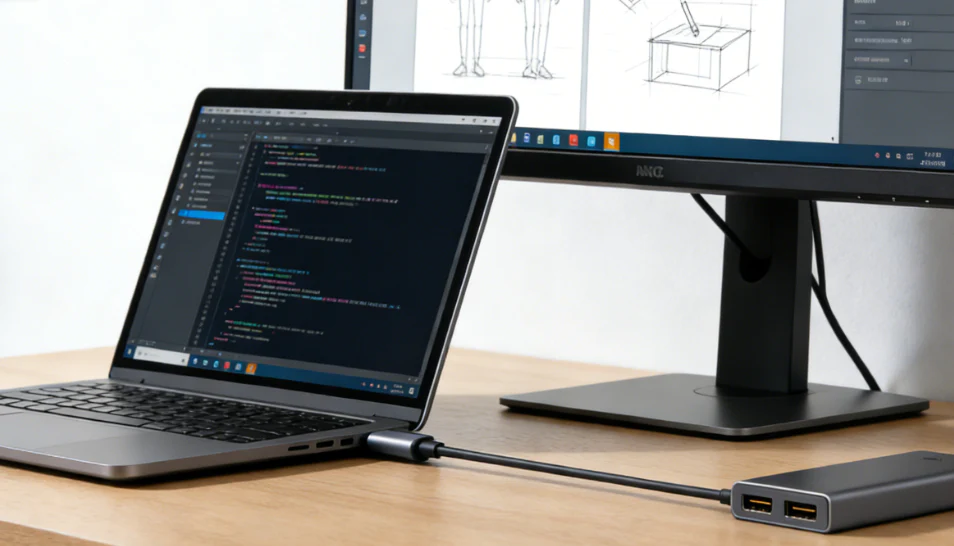

Image source: Wikimedia Commons / Mack Male from Edmonton, AB, Canada (CC BY-SA)
Learning how to setup budget monitor for work can feel overwhelming when every spec sheet throws numbers at you that don't mean much in real life. The truth is, most people buying a budget monitor aren't chasing the lowest price possible. They're trying to get a reliable second screen that makes their workday easier without accidentally buying something that causes eye strain, wobbles on the desk, or doesn't even plug into their laptop.
The good news is that as of 2026, budget monitors in the $120 to $180 range have gotten genuinely good. Manufacturer specs and aggregate review data confirm that IPS panels, flicker-free backlighting, and USB-C connectivity have trickled down from premium lines into affordable models. But getting the right one still depends on a few things specific to your situation.
Let's walk through those first, then get into the actual setup.
Image source: Wikimedia Commons / Mack Male from Edmonton, AB, Canada (CC BY-SA)
Quick Answer
Budget monitors for work setup in under 30 minutes. Pick screen size and resolution based on your desk and work type first. Check your laptop or desktop ports before buying.
Connect with the right cable. Adjust height, brightness, and display settings. Configure your OS to extend or duplicate the screen.
Why Most Budget Monitor Setups Disappoint (And How to Avoid It)
The number one complaint in budget monitor reviews isn't the screen itself. It's the setup. People buy a 27-inch 1080p panel because it's cheap and big, then wonder why text looks fuzzy.
Or they get a great IPS display but jam it on a stand they can't adjust, then wonder why their neck hurts after three days.
The second biggest problem is mismatched expectations. Not every budget monitor is built for the same job. A $130 24-inch IPS display with 99% sRGB coverage is excellent for coding and documents.
It's terrible if you assumed it would be a gaming display. A $100 27-inch VA panel gives you screen real estate but sacrifices the wide viewing angles you need if your monitor sits slightly off-center.
Here's what makes the difference between a budget monitor setup that works and one that frustrates you.
- Setup, not specs, causes most issues. You can have a good panel and still hate it if it's positioned wrong.
- Match the display to your work, not the review score. An "8/10 budget monitor" for gaming might be a 6/10 for photo editing. A "meh" rated display for general office use might be exactly what your spreadsheet workflow needs.
- Ergonomics matter more over time than resolution. Eye strain and neck pain will ruin a setup faster than a few missing pixels of sharpness.
The research is pretty clear on this too. Productivity studies on multi-monitor setups suggest meaningful efficiency gains from dual-screen configurations, with researchers attributing the gains largely to reduced need for window switching rather than to any single display technology. Those gains depend entirely on the display being actually comfortable to look at for 8 hours.
Start Here — Answer These 5 Questions First
Before you look at a single product page, answer these in order. They'll save you from buying the wrong thing.
1. What's your primary work type?
- Text-heavy (coding, writing, data entry, legal documents): Sharp text matters most. Focus on resolution relative to screen size and an IPS panel.
- Visual (design, photo editing, video): Color accuracy matters most. Look for 99% sRGB coverage minimum.
- Mixed (meetings, email, some creative work): Versatility matters. A solid all-rounder IPS at 27" 1440p is the sweet spot.
2. What device are you connecting?
- Modern laptop with USB-C or Thunderbolt: You can use a single-cable USB-C connection that also charges your device.
- Laptop with only HDMI: Simple HDMI cable works fine. You'll still need your laptop charger.
- Desktop PC: HDMI or DisplayPort depending on your graphics card outputs.
- Older laptop with VGA only: You'll need an active VGA-to-HDMI adapter.
Image source: Bing (Web (fair-use with source credit))
3. How much desk space do you actually have?
Measure your depth, not just width. This matters more than people think.
- Shallow desk (20" deep or less): Stick with 24" max. A 27" screen at that distance fills your entire field of vision uncomfortably.
- Standard desk (24-30" deep): 27" works well. You can push it back to a comfortable viewing distance.
- Deep desk or monitor arm setup: You can go up to 32" without issues.
4. Does your work require color accuracy, or are you just reading spreadsheets?
This single question eliminates about half your options. If color accuracy doesn't matter, you can save real money and stop paying attention to specs like Delta E and sRGB percentage.
5. What's your actual budget range?
- Under $100: 24" 1080p IPS. Good for most office work.
- $120 to $180: 24" 1080p or 27" 1440p IPS with better stands and connectivity.
- $180 to $250: 27" 1440p with USB-C, better color accuracy, and ergonomic adjustments.
Branch 1: If You're a Laptop User Who Wants One Cable
This is the cleanest setup and the most popular reason people buy a budget monitor right now. One USB-C cable handles video signal and charges your laptop simultaneously. No dock needed.
No extra power brick on your desk.
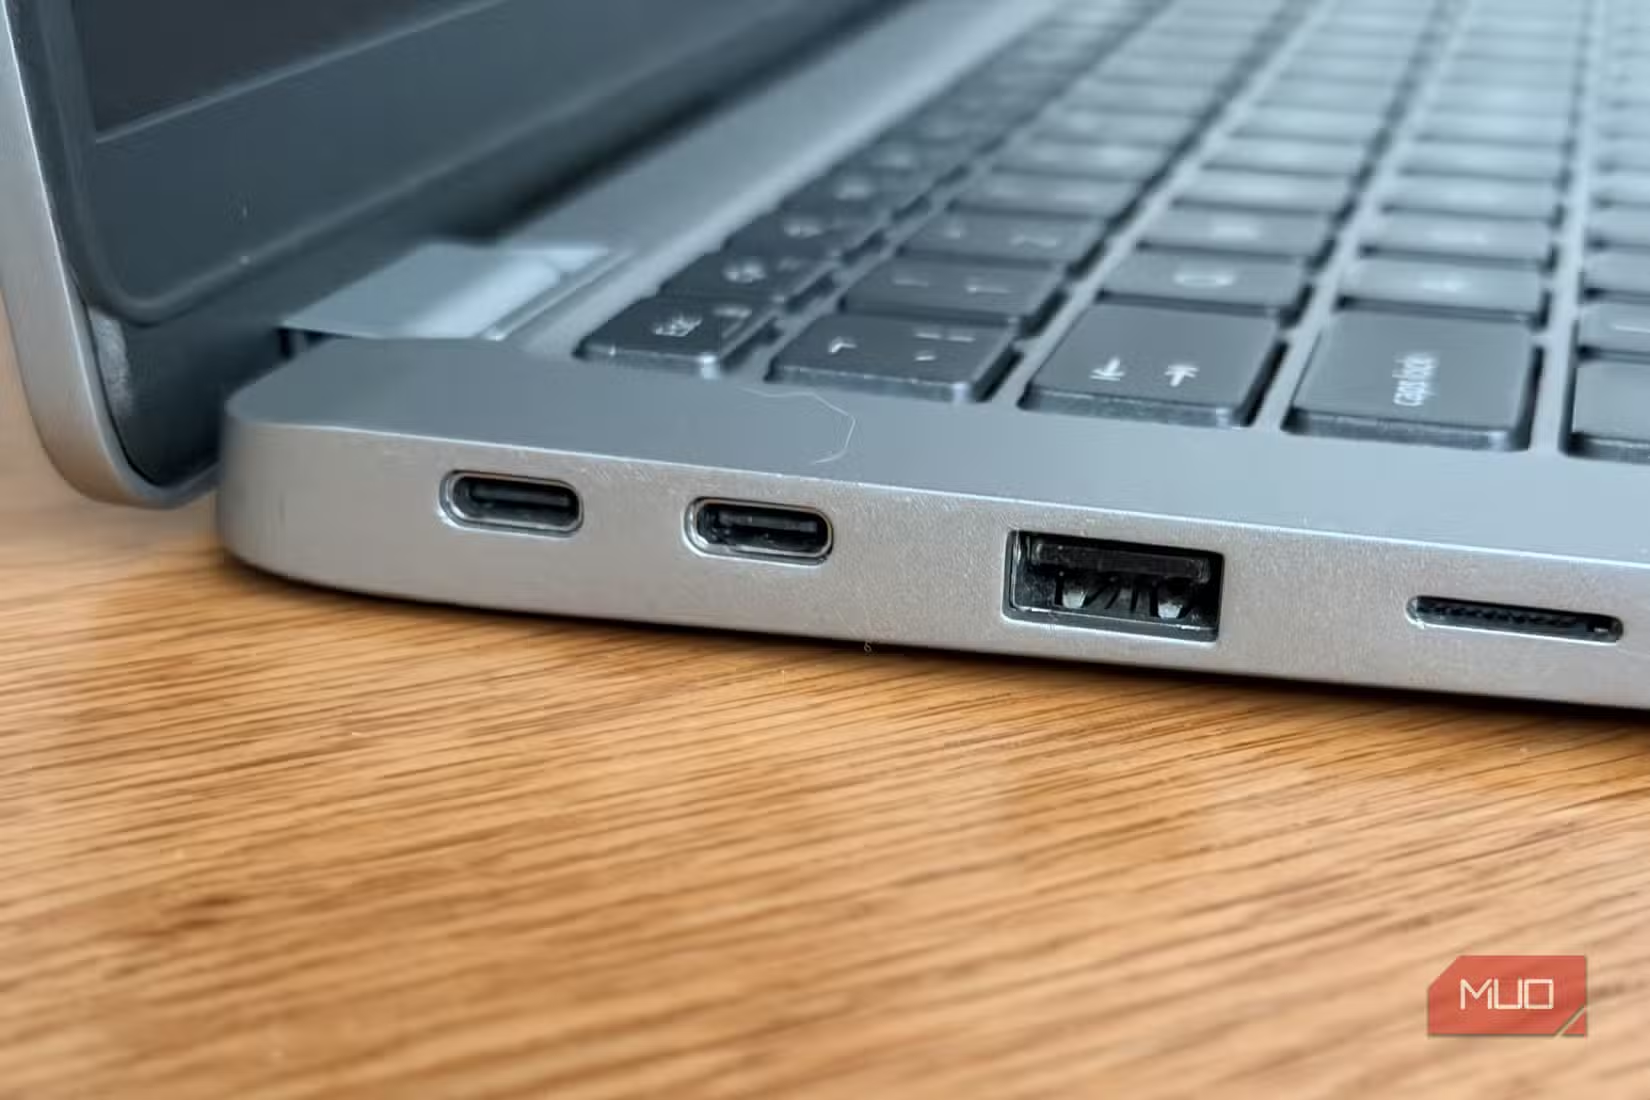
The catch is that your laptop has to support DisplayPort Alt Mode over USB-C. Most laptops made after 2019 do, but not all. Check your USB-C port for a small lightning bolt or "DP" symbol next to it.
If you see it, you're good.
You also need to pay attention to power delivery wattage. Most ultrabooks charge at 45W to 65W. If the monitor only delivers 15W or 30W, it won't keep up under heavy load, and your battery will still drain slowly during the workday.
Look for at least 65W power delivery for most laptop setups.
90W delivery is worth it for thicker laptops with discrete GPUs, like mobile workstations.
Budget monitors with USB-C and 65W PD have become common as of 2026. Models from Dell, LG, and ASUS in the $150 to $200 range routinely include this feature. The key is confirming that the USB-C port on a given monitor actually supports video input and not just data.
Branch 2: If You Need the Sharpest Text for Spreadsheets and Code
Text clarity comes down to pixel density. That's the relationship between screen resolution and physical size.
| Screen Size | 1080p (Full HD) | 1440p (QHD) |
|---|---|---|
| 24" | 91 PPI — Sharp enough | Uncommon size |
| 27" | 81 PPI — Visible pixel edges | 108 PPI — Noticeably crisper |
| 32" | 69 PPI — Text looks soft | 91 PPI — Acceptable sharpness |
PPI means pixels per inch. Higher is sharper. For coding, reading, and anything text-heavy, most people notice the difference between 81 PPI and 108 PPI within the first day.
That's why 27" is the popular recommendation for work. It's big enough to multitask comfortably, and at 1440p, text looks genuinely clean. If you're only sitting at 24", 1080p gets the job done fine.
Going larger than 27" at 1080p is where text quality drops below what most people find acceptable for reading.
Pair that with an IPS panel. IPS gives you consistent colors and brightness when you're reading documents in portrait mode. VA panels can shift colors noticeably when you rotate them.
Branch 3: If You Do Design or Photo Work But Can't Spend Much
This branch requires the most careful shopping because budget monitors often cut corners on color accuracy. You need to verify two specs before buying.
sRGB coverage of 99% minimum. This means the monitor can display nearly the full sRGB color space. A monitor with only 90% sRGB will make colors look muted, and you won't see the muted colors until you view your work on a properly calibrated screen elsewhere.
Delta E value below 2, ideally. Delta E measures color accuracy against a reference. Per ISO 9241-302 testing methodology, the difference becomes hard to notice at that threshold. Many budget monitors don't publish Delta E values.
When they do, that's a good sign the manufacturer actually tested it.
If a budget monitor doesn't list these specs, it wasn't designed for color work.
You should also look for hardware calibration support if possible, though that feature rarely appears below $250. At the budget level, software calibration through your operating system's built-in tools is your main option. It's not perfect, but it gets you much closer than running with factory defaults.
Branch 4: If You Just Want the Biggest Screen for the Least Money
This is a totally valid goal. More screen space means fewer overlapping windows, fewer alt-tabs, and a better experience for video calls where you want the call on one screen and your work on the other.
The practical limit for a budget monitor is 32" at 1080p, but only if you're sitting a normal arm's length away. At close range, you'll see individual pixels more easily. At a standard desk depth, most people find 27" 1440p acceptable at minimum, and 27" to be the size/quality sweet spot.
VA panels work better than you might expect for general office use. They offer deeper contrast, which actually helps text stand out against backgrounds. The downside is color shift at off-center angles, so buy a VA panel only if you're looking straight at the screen, not from an angle.
If size is your priority and your work isn't color-critical, don't let spec sheets scare you away from a 27" or even 32" VA panel that fits your budget. It'll serve you well for email, documents, browsing, and meetings.
Step-by-Step: Physical Setup and Connection
Let's get the monitor out of the box and running.
Check What Ports You Actually Have (Before Buying Anything)
Look at the sides of your laptop or the back of your desktop. Take a photo with your phone if needed.
- USB-C with a DP symbol or lightning bolt: Single-cable USB-C connection works.
- HDMI: Standard HDMI cable connection works.
- DisplayPort: Common on desktop PCs, less common on laptops.
- VGA only: You'll need an active adapter. Consider upgrading the laptop if possible.
This check determines which monitors even make sense to consider. If your laptop only has HDMI 1.4, it won't output 1440p at 75Hz. It'll cap at 60Hz at 1440p, which is fine for office work but good to know.
Choosing the Right Cable or Adapter
Most budget monitors include an HDMI cable in the box. If yours doesn't, any standard High Speed HDMI cable works fine for 1080p or 1440p at 60Hz. You do not need an expensive cable.
For USB-C connections, the cable situation is trickier. Some monitors include a USB-C cable that supports video. Many don't.
Verify before assuming you can just grab any USB-C cable and have video work.
Not all USB-C cables carry video. Charge-only USB-C cables are common. Look for cables labeled "Thunderbolt 3/4" or "USB 3.1 Gen 2 with DisplayPort Alt Mode."
If you're using a monitor arm, standard VESA 100x100mm mounting works for most 24" to 27" monitors. Some budget monitors use 75x75mm. Check the back of the monitor or the spec sheet before buying an arm.
Ergonomic Positioning Most People Get Wrong
Here's where most budget setups fail. The included stand on cheap monitors is often fixed height with minimal tilt adjustment. That puts the screen too low for most desks, and you end up hunching forward.
The top of the screen should sit at or slightly below your eye level. Your gaze should tilt slightly downward, about 10 to 20 degrees. Your neck should stay neutral.
For a typical sitting desk at 29" to 30" high, that means the center of a 24" monitor needs to be about 10" above the desk surface and a 27" monitor needs about 12". Most included stands only provide 4" to 6" of lift.
Options to fix this, from cheapest to most effective.
- Stack of books or a box. Free, ugly, but it works.
- A monitor riser shelf. $15 to $25. Sturdy and simple.
- A single monitor arm. $30 to $60. Frees desk space and gives full adjustment.
- A VESA arm with gas spring. $50 to $100. Best long-term solution.
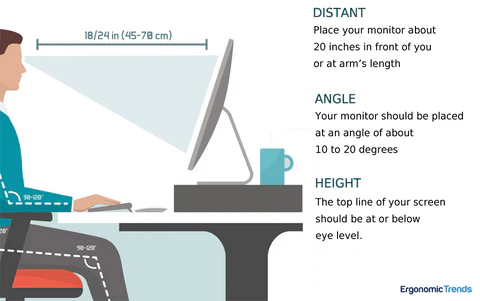
Image source: Bing (Web (fair-use with source credit))
Distance matters too. Sit about an arm's length from the screen. If you can touch it by extending your arm, you're too close.
Too far and you'll squint.
Turning It On and Configuring Display Settings
Power on the monitor first, then wake your computer. Your operating system should detect the display automatically. If it doesn't, check that the monitor is set to the correct input source using the buttons on the back or bottom edge.
On Windows, press Windows key + P to choose how the displays work together.
- Extend: The second screen adds more desktop space. This is what most people want.
- Duplicate: Same image on both screens. Useful for presentations.
- Second screen only: Turns off your laptop display. Rarely useful unless you're docked at a desk full-time.
On macOS, go to System Settings > Displays. Use the Arrangement tab to position the screens relative to each other. Match the physical layout so your mouse moves between them naturally.
Set the resolution to the monitor's native resolution. For 24" 1080p, that's 1920×1080. For 27" 1440p, that's 2560×1440.
Running at a non-native resolution makes everything look blurry.
Scaling is another setting to check. On a 27" 1440p display, 100% scaling works well for most people. On a 24" 1080p screen, 100% is almost always correct.
If text looks too small, increase scaling rather than dropping the resolution.
Set the refresh rate to the highest available. Most budget office monitors run at 60Hz, but some support 75Hz. The difference is subtle but noticeable when scrolling documents.
Check Display Settings > Advanced Display to confirm.
Matching Monitor Specs to Your Actual Work
Specs only matter in context. Here's how to translate them into real-world decisions.
Text-Heavy Work (Writing, Coding, Data, Legal)
Your priorities in order.
- Pixel density. 91 PPI or higher keeps text crisp at normal viewing distances.
- IPS panel. Consistent brightness across the screen and good viewing angles.
- Flicker-free backlighting. Reduces eye strain during long reading sessions.
- Matte screen finish. Cuts glare from overhead lights and windows.
You don't need high refresh rates, fast response times, or color accuracy beyond "looks normal." A 24" 1080p IPS at 60Hz with a flicker-free backlight is genuinely all you need for this work.
Creative Work on a Budget (Design, Photo Editing, Content)
Your priorities shift significantly.
- 99% sRGB coverage minimum. Non-negotiable for any color work.
- IPS panel with good uniformity. VA and TN panels shift colors at angles.
- 1440p resolution at 27". More pixels means finer detail in images and UI elements.
- Delta E below 2. Hard to find at budget prices, but some models deliver it.
You should also consider a monitor with a USB-C connection even for creative work. It keeps your desk cleaner and makes laptop docking simpler. The tradeoff is that USB-C monitors with good color accuracy tend to sit in the $180 to $250 range rather than true budget territory.
Multi-Tasking and Communication-Heavy Roles
If your day is mostly Slack, email, video calls, and a browser with 30 tabs, screen real estate matters more than color accuracy.
A 27" 1440p display gives you enough room to have a video call on one side and your work on the other without either feeling cramped. A VA panel is fine here since you're looking straight at the screen and the deeper contrast actually helps with readability.
Built-in speakers on budget monitors are almost universally bad. If you take calls regularly, use headphones or a separate speaker. Don't rely on the monitor's audio.
Real Budget Monitor Recommendations by Use Case
Here's where specific models help. These are well-reviewed options as of 2026 that represent good value in their categories.
| Use Case | Recommended Specs | Example Models | Price Range |
|---|---|---|---|
| General office, laptop USB-C | 24" 1080p IPS, USB-C 65W PD | Dell S2421HS, LG 24MP60G | $130 to $160 |
| Text-heavy productivity | 27" 1440p IPS, 75Hz | LG 27UL500, ASUS VY279HGE | $150 to $190 |
| Creative work on a budget | 27" 1440p IPS, 99% sRGB | BenQ GW2780, Dell S2721QS | $170 to $220 |
| Maximum screen size | 27" to 32" VA, 1080p or 1440p | Samsung S32A600N, Acer Nitro | $140 to $200 |
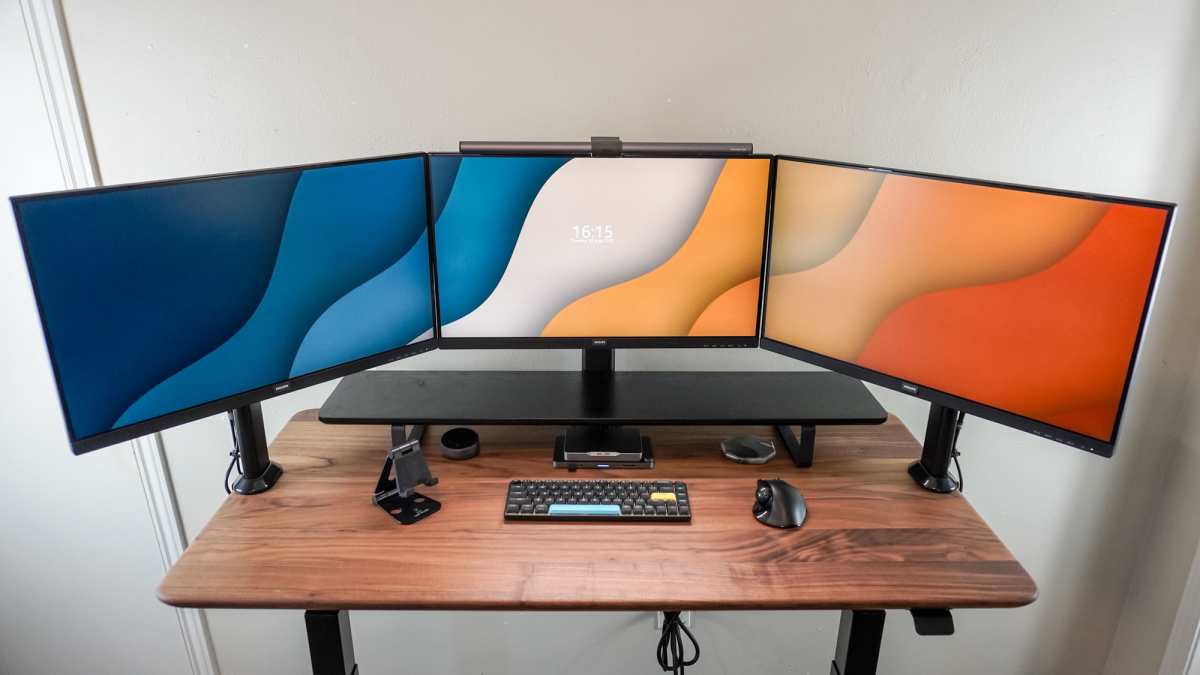
Image source: Bing (Web (fair-use with source credit))
These aren't the only good options. They're examples of what to look for. The monitor market moves fast, and new models appear every quarter.
Use the spec targets above rather than chasing a specific model number that might be discontinued by the time you read this.
Common Mistakes That Ruin a Budget Setup
After reviewing hundreds of user complaints and setup photos, these are the mistakes that come up over and over.
- Buying 27" at 1080p. The pixel density drops to 81 PPI and text looks soft. It's the single most common regret in budget monitor reviews.
- Ignoring the stand. A fixed-height stand on a standard desk puts the screen 4" to 6" too low. Your neck will remind you of this by Wednesday.
- Using the wrong USB-C cable. A charge-only cable won't carry video. Verify the cable supports DisplayPort Alt Mode before troubleshooting why your screen stays black.
- Running at non-native resolution. If you set a 1440p monitor to 1080p because text looks small, everything gets blurry. Increase scaling instead.
- Skipping the input source selection. The monitor might default to VGA or HDMI 1 when you're plugged into HDMI 2 or USB-C. Use the monitor's menu buttons to switch inputs.
- Not checking the dead pixel policy before buying. Some manufacturers accept one bright pixel as within spec. Others require three or more for an RMA. Know the policy before you open the box.
- Placing the monitor against a bright window. Glare kills perceived contrast and forces your eyes to work harder. Angle the screen or use curtains.
Long-Term Optimization and Eye Strain Prevention
Once your setup is running, a few adjustments make a real difference over weeks and months.
Enable the monitor's low blue light mode or use your operating system's night light feature. On Windows, it's in Display Settings > Night Light. On macOS, it's Display Settings > Night Shift.
Set it to reduce blue light during evening hours. This helps with sleep quality if you work late.
Adjust brightness to match your room. A monitor at 100% brightness in a dim room is like staring at a flashlight. Start at 40% to 50% and increase only if you're squinting.
Most office environments need 200 to 300 nits of brightness.
Take breaks using the 20-20-20 rule. Every 20 minutes, look at something 20 feet away for 20 seconds. It sounds trivial but it genuinely reduces eye fatigue over a full workday.
Clean the screen periodically with a microfiber cloth. Dust and fingerprints reduce perceived clarity and make you unconsciously lean forward to see better. Never use paper towels or household glass cleaner on LCD panels.
If you're using a monitor arm, check the tension every few months. Gas springs can loosen over time, and a slowly sinking arm will gradually put the screen back into a bad position without you noticing.
Final Setup Checklist
Before you call it done, run through this quick checklist.
- Monitor resolution set to native (1920×1080 or 2560×1440)
- Refresh rate set to maximum available (60Hz or 75Hz)
- Scaling adjusted so text is comfortable without lowering resolution
- Top of screen at or slightly below eye level
- Screen roughly an arm's length away
- Brightness at 40% to 60% for typical indoor lighting
- Blue light filter or night mode enabled for evening work
- Cable secured and not pulling on the monitor
- Input source confirmed and working
- Dead pixel check completed using a full-screen color test
If everything checks out, you're set. A good budget monitor setup should feel invisible within a week. You'll stop noticing the hardware and just enjoy having more room to work.
Frequently Asked Questions
How long does it take to set up a budget monitor?
The physical setup takes 10 to 15 minutes. Configuring display settings in your operating system takes another 5 to 10 minutes. Most people are fully up and running within 30 minutes of opening the box.
Is a 27-inch 1080p monitor good enough for office work?
It's usable but not ideal. At 81 PPI, text lacks crispness compared to a 24" 1080p or 27" 1440p display. If you primarily read documents, code, or work in spreadsheets, the softer text becomes noticeable within a few days.
Do I need a monitor arm for a budget monitor?
You don't need one, but it's the single best upgrade for ergonomics. Budget monitor stands are almost always too low and lack height adjustment. A $30 to $50 single monitor arm solves this and frees desk space.
Can I use any USB-C cable to connect my laptop to a monitor?
No. Many USB-C cables are charge-only and don't support video. You need a cable rated for DisplayPort Alt Mode or Thunderbolt.
Check the cable's specifications before assuming it'll carry a video signal.
What's the best budget monitor size for a dual-monitor setup?
24" works well for dual monitors on a standard desk. Two 24" displays side by side fit comfortably on a 55" to 60" wide desk. Going with 27" for dual monitors requires a wider desk and can feel overwhelming if you're not used to it.
Should I buy a refurbished monitor to save money?
Refurbished enterprise monitors from Dell Outlet or similar programs can be excellent value. Off-lease Dell P-series and HP Z-series monitors often sell for 40% to 60% less than new budget models while offering better build quality and ergonomic stands. Just verify the dead pixel policy and warranty terms before buying.
Troubleshooting: When Your Setup Doesn't Work
Even with the right gear, things sometimes don't cooperate. Here are the most common issues and what actually fixes them.
Monitor says "No Signal"
Check the input source first. Most budget monitors have a button or joystick on the back that cycles between HDMI, DisplayPort, and USB-C. It doesn't always auto-detect correctly.
If the input is correct, try a different cable. HDMI cables can fail internally without visible damage. If you're using an adapter, remove it and try a direct connection instead.
Screen looks blurry or stretched
You're almost certainly running at a non-native resolution. Right-click your desktop, go to Display Settings, and set the resolution to the monitor's native spec. For a 24" 1080p panel, that's 1920×1080.
For a 27" 1440p, that's 2560×1440.
If the resolution is correct but text still looks soft, check ClearType settings on Windows. On macOS, ensure the display is set for "Default for display" rather than a scaled option.
USB-C isn't carrying video
Not all USB-C ports support DisplayPort Alt Mode. Check your laptop's manual or look for a DP symbol next to the port. If your USB-C port only has a battery icon, it's charge-only.
Also verify the cable. Many USB-C cables bundled with phones and chargers are 2.0 data cables that don't carry video. You need a cable rated for USB 3.1 Gen 2 or Thunderbolt.
Colors look wrong out of the box
Factory calibration on budget monitors is hit or miss. Start by setting the monitor to its sRGB mode in the on-screen display menu. Most budget IPS panels have a preset that locks the color temperature and gamma to closer-to-accurate values.
For better accuracy, use your operating system's built-in calibration tool. Windows has a Color Calibration utility in the Display Settings. macOS has a Display Calibrator in System Settings. It's not a replacement for a hardware calibrator, but it's much better than factory defaults.
Monitor flickers at low brightness
This is usually PWM dimming. Some budget monitors use pulse-width modulation to reduce brightness at lower levels, which causes visible flicker sensitive people notice immediately. The fix is to keep brightness above 20% or buy a monitor specifically certified as flicker-free.
TÜV Rheinland flicker-free certification is a reliable indicator.
When to Upgrade Beyond Budget
A budget monitor handles most office work well. But there are situations where spending more makes a real difference.
If you're doing professional photo editing or design work for clients, a budget monitor will eventually hold you back. Color accuracy and uniformity at the budget level are good enough for learning and personal work. They're not good enough for deliverables that other people will view on calibrated screens.
If you're a developer working with complex IDEs and multiple panels, consider 4K at 27" or 32". The extra pixel density lets you fit more code on screen without scaling issues. Budget 4K monitors exist but often compromise on panel quality or connectivity.
If you game after work, a budget 60Hz IPS panel will feel sluggish compared to a 144Hz or 165Hz display. Gaming-focused budget monitors exist in the $150 to $200 range, but they often sacrifice color accuracy for speed. Decide which matters more.
Frequently Asked Questions
Can I mix a budget monitor with my laptop screen?
Yes. Set the external monitor as your primary display in Display Settings and use the laptop screen as secondary. This gives you the best of both worlds: a large main workspace and a smaller screen for reference material or communication apps.
Do budget monitors have good speakers?
Almost never. Built-in speakers on monitors under $250 are typically 2W to 5W and sound tinny. They're fine for notification sounds and quick calls.
For anything involving voice or music, use headphones or a separate speaker.
Is it worth buying a used enterprise monitor?
Often yes. Off-lease Dell UltraSharp and HP Z-series monitors sell for 40% to 60% less than new budget models. They typically have better ergonomic stands, more port options, and longer warranties.
Check Dell Outlet or Amazon Renewed and verify the dead pixel policy before purchasing.
How do I clean my monitor screen safely?
Use a microfiber cloth slightly dampened with distilled water. Never spray liquid directly on the screen. Never use paper towels, which can scratch the coating.
Household glass cleaners contain ammonia that damages anti-glare coatings.
What's the difference between 60Hz and 75Hz for office work?
It's subtle but real. Scrolling documents and moving windows feels slightly smoother at 75Hz. If the price difference is $10 or less, take the 75Hz option.
If it's $30 or more, 60Hz is perfectly fine for productivity work.
Should I use my monitor's built-in blue light filter or Windows Night Light?
Either works. Most people find the monitor's built-in low blue light mode slightly more effective because it reduces blue light at the source. Windows Night Light is more convenient because it can be scheduled to turn on automatically at sunset.
Use whichever you'll actually keep enabled.

Similar Posts