How to Fix Blurry Screen on Budget Monitor
If you're staring at a budget monitor that makes text look like it's been smeared with Vaseline, you're not alone, and you're probably not stuck with a bad screen. Figuring out how to fix blurry screen on budget monitor issues is almost never about the panel itself. It's usually a settings, cable, or resolution mismatch that's costing you clarity for free.
Most of the fixes cost nothing and take under two minutes. Let me walk you through the real causes in order of likelihood.
Quick Answer
Check your cable first. VGA and low-quality HDMI cables cause most budget monitor blur. Switch to a certified HDMI 2.0 or DisplayPort cable.
Then confirm Windows is running your monitor's native resolution. Run the ClearType text tuner to fix soft fonts.
Is It the Cable? (This Is the #1 Culprit on Budget Setups)
Here's what nobody tells you when they hand down a monitor or you grab one from a discount bin: the cable matters more than the panel in a surprising number of cases. Analog signals degrade. Digital signals handshake poorly.
And the cheap cable that came in the box is often the weakest link in your entire setup.
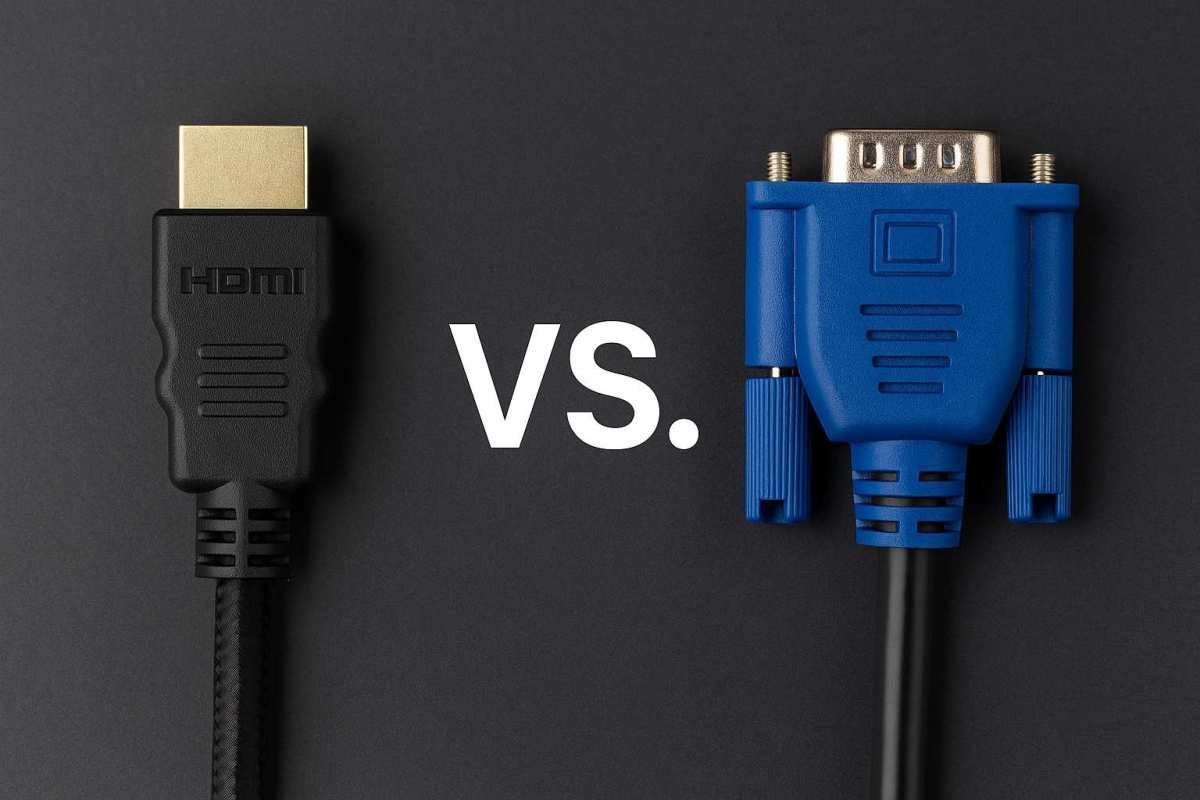
VGA is the biggest offender. If you're running a VGA cable from your GPU to a budget 1080p monitor, you're sending an analog signal that's susceptible to interference, especially on cables longer than six feet. The result is a soft, slightly fuzzy image that looks like you're viewing the screen through a cheap pair of glasses.
Manufacturer specifications for VGA signaling indicate degradation becomes visible at resolutions above 1080p on cables without proper shielding, which describes most budget VGA cables on the market.
Switching to HDMI or DisplayPort eliminates this entirely. These are digital signals. The image either renders correctly or it doesn't.
There's no analog fuzz creeping in.
If you're already on HDMI and still seeing blur, the cable itself might not support the bandwidth your resolution needs. This catches people off guard more than you'd think.
| Cable Type | Max Resolution at 60Hz | Signal Type | Common Budget Setup Issue |
|---|---|---|---|
| VGA | Technically 2048×1536, but soft above 1080p | Analog | Signal degradation, visible fuzz |
| HDMI 1.4 | 4K at 30Hz / 1440p at 60Hz | Digital | Insufficient for high-refresh 1080p gaming |
| HDMI 2.0 | 4K at 60Hz | Digital | Rarely the bottleneck for 1080p panels |
| DisplayPort 1.2 | 4K at 60Hz | Digital | Not typically a source of blur |
| DisplayPort 1.4 | 4K at 120Hz (with DSC) | Digital | Overkill, but zero blur risk |
What most people do is run a cable swap. Keep a known-good HDMI 2.0 cable around for troubleshooting. They cost under $8 and will save you hours of chasing software settings that aren't actually the problem.
Quick cable checklist
- If you're on VGA, switch to HDMI or DisplayPort immediately
- If you're on HDMI, confirm it's at least a High Speed HDMI cable (HDMI 1.4 minimum)
- If you're using an adapter (USB-C to HDMI, for example), make sure it supports your target resolution
- Try the other HDMI or DisplayPort input on your monitor if available
- Inspect the cable for bent pins or damage, especially on VGA connectors with their easily bent pins
Stop Running the Wrong Resolution
This is the most common software cause of blur, and it's shockingly easy to miss. Your monitor has exactly one resolution where it looks sharp. Every single other resolution gets scaled, interpolated, and softened.
Running at native resolution isn't a suggestion. It's a physical constraint of the LCD panel's fixed pixel grid.
For most budget monitors, that native resolution is 1920×1080 (Full HD). If someone changed it to 1600×900 or 1280×720, the monitor has to stretch or map those pixels across its 1080p grid, and the result is a universally blurry mess. Text suffers the most.
Lines lose their edges. Everything looks slightly out of focus.
Check your current resolution. Windows Settings → System → Display → Display Resolution. If it doesn't say "(Recommended)" next to it, that's your problem.
Select the recommended option and the screen snaps to sharp within a second or two.
How to verify native resolution
- Right-click the desktop and select "Display settings"
- Scroll to "Display resolution" and confirm the dropdown shows the Recommended option
- On a budget 27-inch panel, that's typically 2560×1440 (QHD), not 1920×1080
- If the recommended resolution doesn't appear, your GPU driver may not be installed correctly
There's a sneaky variant of this problem. Sometimes the resolution is technically correct, but Windows is applying GPU scaling that stretches a non-native signal to fill the screen. If you created a custom resolution in your GPU control panel and forced it, the panel will still interpolate and blur.
Custom Resolution Utility (CRU) can cause this too if an EDID override was applied and the panel is being driven at a non-native timing.
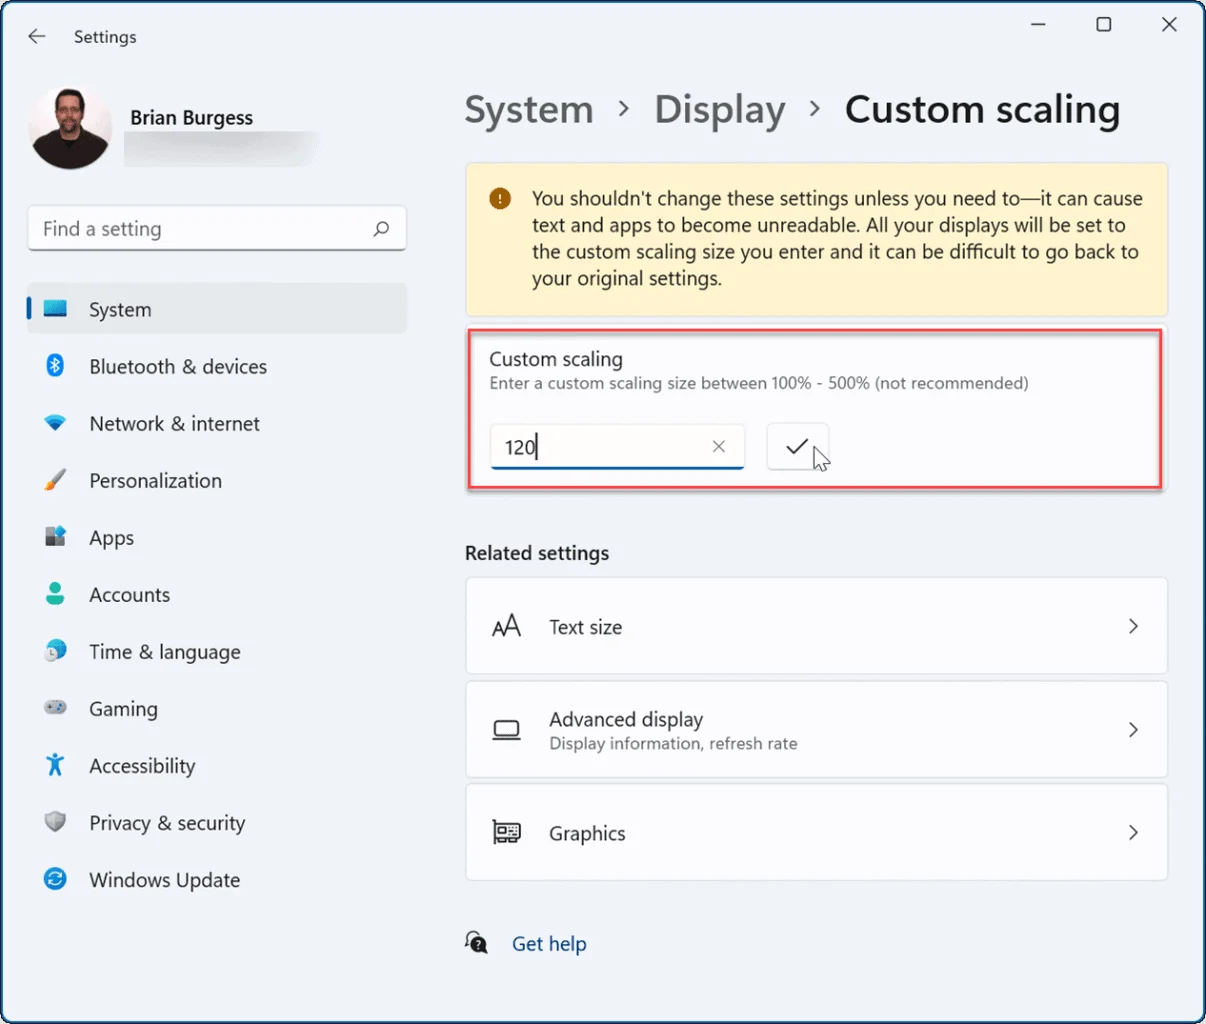
The safest bet is to reset. control panel → Adjust desktop size and position → set scaling to "Aspect Ratio" and perform a "Restore Defaults" if your GPU driver offers one. On NVIDIA, the Control Panel path is Display → Adjust desktop size and position. On AMD, it's Display → GPU Scaling, and turn it off if you've confirmed native resolution is active.
ClearType: The Underrated Sharpness Hack Nobody Tells You About
Even when your resolution is perfect and your cable is good, text can still look soft. That's not a hardware problem. It's a font rendering problem, and Windows has a tool specifically for fixing it.
Windows uses a rendering technology called ClearType to smooth fonts using your monitor's sub-pixel structure. Every LCD pixel is actually three vertical stripes: red, green, and blue. ClearType exploits this to make text appear sharper than the raw resolution should allow.
But here's the critical part: it only works when ClearType knows the correct sub-pixel order of your panel.
Most monitors use an RGB (red-green-blue) sub-pixel stripe. Some panels, especially cheaper ones from certain manufacturers, use BGR (blue-green-red). If ClearType is tuned for RGB but your panel is BGR, text looks noticeably softer and slightly fringed with color, particularly at small sizes.
How to run the ClearType Text Tuner
- Press the Windows key and type "ClearType"
- Open "Adjust ClearType text"
- Ensure "Turn on ClearType" is checked
- Click "Next" repeatedly, choosing the text sample that looks sharpest on each screen
- Complete all four or five comparison screens, and Windows saves that profile per display
Each screen asks you to pick which text sample looks clearest. The correct choice depends entirely on your specific panel. Don't rush through it.
Actually look at the samples and pick the one with the least color fringing and the crispest edges.
You should see an immediate difference. On a budget 1080p panel running a BGR layout, the improvement is dramatic. People who've had blurry text for months sometimes think they need a new monitor, just to find out a two-minute ClearType retune fixes it.
This carries across to a practical tip you'll encounter repeatedly: if you're using a monitor with an unusual sub-pixel layout, that diagnosis step matters more than you'd expect. That mismatched ClearType configuration might be the only reason your text doesn't look as sharp as the specs suggest it should.
Gaussian hinting hint
Some budget panels with non-standard sub-pixel structures respond better to third-party font rendering tools like MacType or BetterClearTypeTuner, which use Gaussian hinting tuned specifically for your display characteristics. However, the stock Windows tuner does the job for the vast majority of users. Start there.
Only explore third-party utilities if ClearType alone doesn't resolve it.
The other habit people develop when chasing blur is adjusting font size instead of fixing the underlying rendering. Increasing font size in applications masks the softness, but doesn't fix it. You're just making the blur bigger.
Focus on getting the rendering right first.
When Your GPU and Monitor Are Fighting Over Scaling
You've got the right resolution. The cable is solid. ClearType is dialed in.
And yet certain apps still look like they're rendering through a dirty window. The culprit here is almost always a conflict between GPU scaling and display scaling.
Here's what's happening behind the scenes. When an application renders at a resolution that doesn't match your desktop (think older programs, some games, or legacy business software), something has to decide how to scale that output to fill your screen. Windows can do it.
Your GPU driver can do it. Your monitor's internal scaler can do it. When two of these three are trying to do the job simultaneously, you get a double-scaled, blurry image.
How to fix GPU vs. display scaling conflict
For NVIDIA GPUs:
- Open NVIDIA Control Panel
- Navigate to Display → Adjust desktop size and position
- Under "Scaling," select "Aspect Ratio" or "No Scaling"
- Check "Override the scaling mode set by games and programs"
- Click Apply
For AMD GPUs:
- Open AMD Software (Adrenalin Edition)
- Navigate to Display
- Toggle GPU Scaling to Off (if your monitor handles scaling better) or On (if GPU scaling handles it more cleanly)
- Experiment with the "Preserve aspect ratio" or "Full panel" options
For Intel integrated graphics:
- Open Intel Graphics Command Center
- Navigate to Display → General Settings
- Set "Scaling" to "Maintain display scaling" or "Scale full screen" depending on which looks sharper
The most visible test is opening a program that previously looked soft. If it snaps crisp after the scaling fix, you've found the conflict. You'll notice this pattern most often with: older desktop applications, Java-based software, some emulators, and games running at non-native resolutions.
The hardware scaling influence also shows up in displays with non-native aspect ratios. If you've forced a 16:9 panel to display a 4:3 image without proper aspect correction, the scaler stretches and softens everything. Let your GPU handle the scaling instead of the monitor, and the result is significantly cleaner.
There's another layer worth mentioning. Windows 10 and 11 have a setting called "Let Windows try to fix apps so they're not blurry." It's in Settings → System → Display → Advanced scaling settings. When an app renders blurry because of DPI incompatibility, Windows applies virtualization and re-renders it at native resolution.
Leave this toggle on. It's genuinely useful for legacy desktop applications on high-DPI displays, where the DPI awareness issue is most pronounced at native panel density.
The Overdrive Trap: How Your Monitor's "Speed" Setting Makes Things Worse
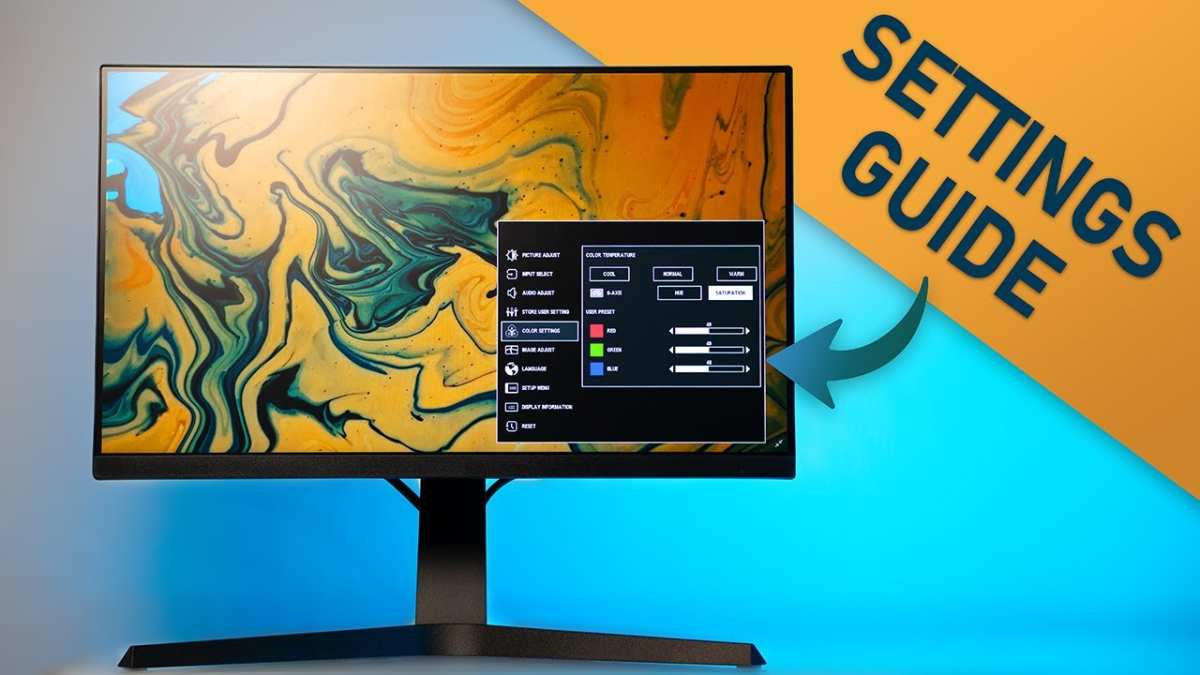
Image source: Bing (Web (fair-use with source credit))
Budget monitors love to advertise fast response times. 5ms, 1ms, "gaming-grade performance." But the setting that delivers those numbers can actively degrade your image quality if it's configured incorrectly. This one is especially frustrating because the setting sounds like it should help sharpness.
It doesn't. It hurts it.
What overdrive actually does
Overdrive (sometimes labeled "Response Time," "RTC," or "OD" in the monitor's OSD) applies a voltage boost to liquid crystals to make them change state faster. The result is reduced ghosting in motion. The tradeoff is a phenomenon called inverse ghosting or overshoot.
The pixels overshoot their target color and momentarily produce bright halos trailing behind moving objects. On budget panels with aggressive overdrive profiles, these halos are visible and distracting.
More importantly for blur perception, an overdrive setting that's too high creates a perception of smearing. The overshoot artifacts introduce additional transient information that the eye interprets as softness, even though the panel is technically faster than at lower settings.
How to find the right overdrive setting
Open your monitor's OSD. Navigate to the "Response Time," "Overdrive," or "OD" setting. Most budget monitors offer a multi-level adjustment, and the default is frequently set to the highest level, especially on monitors marketed for gaming.
Try setting it to the middle option, or the lowest setting that doesn't produce visible ghosting in a scrolling test. Blur Busters' UFO test pages are a reliable reference for evaluating this. The goal is the highest setting before inverse ghosting appears.
| Overdrive Level | Typical Effect on Budget Panels |
|---|---|
| Off / Slow | Slowest response, lowest overshoot, potential trailing in motion |
| Normal / Medium | Best balance for most static and mixed use |
| Fast / High | Visible inverse ghosting on many budget IPS and VA panels |
| Fastest / Extreme | Severe overshoot, brightest halos, perceived blur increase |
If you use your monitor for documents, browsing, and general productivity, "Normal" or "Medium" is almost always the sharpest option. The "Fast" and "Fastest" levels are theatrical extremes that look good in a spec sheet and bad on screen.
The sharpness slider is not your friend
Many overdrive-related OSD settings include a separate "Sharpness" slider. Resist the urge to crank it up when text looks soft. Monitor sharpness controls apply edge enhancement, a post-processing filter that adds artificial contrast around edges.
At moderate levels it looks slightly cranked. At high levels it introduces ringing artifacts, halos, and a harsh, brittle quality that ruins text rendering. Leave it at or near the default, usually 50 on a 0-100 scale.
When It's Actually a PPI Problem (The 27" 1080p Reality Check)
Sometimes the blur isn't a defect or a setting. Sometimes the hardware itself is the limitation. This is the hardest truth about budget monitors, and it's one that specs on a product page don't make obvious.
Pixel density determines how sharp a screen looks at a given viewing distance. More pixels packed into the same physical area means finer detail and crisper text. When the pixel density drops below a certain threshold, no amount of software tuning will make the image look truly sharp at normal desk viewing distance, around 24 to 30 inches from your eyes.
The 27-inch 1080p problem
A 27-inch monitor running 1920×1080 has a pixel density of approximately 81.6 pixels per inch. At desk viewing distance, this is visibly soft compared to a 24-inch 1080p panel running at 91.8 PPI. The difference is immediately obvious when you place them side by side.
Text shows visible pixelation. Edges lack the crispness you'd expect from modern displays.
This configuration is common in budget setups because 27-inch 1080p monitors are among the cheapest large displays available. The specs look great on paper: big screen, high resolution. But the pixel density tells a different story.
You're spreading the same number of pixels across a larger area, and physics doesn't care about marketing.
In aggregate user reports from monitor enthusiast communities, the 27" 1080p softness complaint is one of the most frequently cited regrets among first-time budget buyers. The panel works fine at couch distance as a media display. At desk distance, the low PPI is a genuine limitation.
The better budget resolution choices
For a desk-use desktop monitor, you'll find:
- 24" 1080p = 91.8 PPI. Comfortable at 100% scaling for most users.
- 27" 1440p = 108.8 PPI. Noticeably sharper than either 1080p option. Requires 125%+ scaling in Windows, which most apps handle well as of 2026.
- 27" 1080p = 81.6 PPI. Visible pixelation at desk distance. Better suited to media consumption than text work.
If you already own a 27" 1080p panel and the softness bothers you at your normal viewing distance, the reliable move is to sit slightly farther back. Text clarity that was distracting at 24 inches can appear acceptable at 30+ inches, where the lower density becomes less perceptible.
Could It Be the Coating? (Why Cheap Matte Panels Look Grainy)
Some budget monitors look slightly grainy even when everything else is configured correctly. The culprit is often the anti-glare coating applied to the panel surface, and it's an industry-wide compromise that gets worse at lower price points.
How anti-glare coatings work
Matte coatings diffuse ambient light reflections so you're not staring at your own face in a dark screen side effect. The diffusion layer, a micro-textured surface treatment, scatters incoming light across many angles instead of reflecting it as a mirror would. The tradeoff adds a subtle grain or sparkle effect to the display surface.
On premium monitors with finely tuned coatings, this effect is minimal and difficult to perceive. On budget panels where coating quality is an afterthought, it's visible.
Some IPS panels exhibit what the community calls "IPS glow": a brightening in the corners visible in dark scenes that should not be confused with coating grain. That's a separate issue related to the panel's light guide plate.
Anti-glare coating types
Budget monitors typically use a heavier, coarser texture. Aggressive coatings produce more apparent grain visible at normal viewing distance, especially on solid white backgrounds or light web pages. It resembles a very fine screen door effect that you can't quite focus past.
There's unfortunately no software fix for this. The coating is a physical characteristic of the panel surface. The actual only mitigation is sitting slightly farther back, adjusting your ambient lighting to reduce your perception of the grain, or living with it.
Given that budget matte monitors with heavy coatings deliver wide viewing angles and very good color accuracy for their price, for many users this tradeoff is worth making.
How to identify coating grain versus other issues
Coating grain is uniform across the entire screen. It doesn't change when you adjust resolution, scaling, or cable type. If your blur changes when you address those settings, the coating isn't the problem.
If the grain persists after all corrective steps, it's a fixed characteristic of your display panel.
When to Worry: Signs the Panel Itself Is Faulty
After addressing cables, resolution, scaling, ClearType, overdrive, and coating grain, you might still be seeing blur. That's when it's time to consider a defective panel. This is relatively rare, but it happens, and knowing the signs saves you from chasing software fixes on hardware that needs replacement.
Signs pointing to a hardware defect
- The blur is localized to one area of the screen
- It persists across multiple inputs, cables, and connected devices
- Individual pixels appear stuck or dead in clusters
- There's visible banding or uneven backlight bleed beyond normal IPS glow
- The OSD menu itself looks distorted or soft
- Dead sub-pixels (stuck red, green, or blue dots) are visible at your viewing distance
If the OSD menu rendered by the monitor's internal processor looks distorted, the problem is definitely in the hardware. The OSD generates directly on the panel, bypassing your GPU, cable, and scaling entirely. A distorted OSD indicates a panel or controller issue.
The next step is to connect a different known-good source to the monitor. If the distortion persists with another device, contact the manufacturer or retailer. Most monitor warranties cover dead pixel clusters and panel defects within the return window.
Warranty coverage for panel defects
Many manufacturers have dead pixel policies that specify a minimum number of defective pixels before a panel qualifies for replacement. Check your warranty terms carefully. Some require three or more bright pixels in a specific zone before approving an RMA.
Decision Flow: Walk Through Your Specific Situation
Use this quick decision tree to narrow down your exact fix.
Are you using a VGA cable? → Switch to HDMI or DisplayPort immediately. Problem solved in most cases.
Is your resolution set to native? → Check Display Settings. Select "(Recommended)" resolution. Reassess clarity.
Does text look soft but the image is otherwise fine? → Run the ClearType Text Tuner. Complete all screens.
Do specific apps look blurry but the desktop is sharp? → Check GPU scaling settings. Toggle "Override scaling mode" or the "Fix blurry apps" toggle in Advanced scaling settings.
Does the OSD menu itself look distorted? → Likely a panel defect. Test with a second known-good source. Contact support if distortion persists.
Is you monitor a 27" 1080p panel? → You're dealing with a PPI limitation. Sit slightly farther back, or consider a 1440p upgrade at your next purchase.
Frequently Asked Question
Can a driver update blur my display?
Yes. A major GPU driver update can reset your resolution, refresh rate, or scaling settings. Open your GPU control panel after any driver update and verify that native resolution and scaling are still correct.
A clean driver installation using Display Driver Uninstaller (DDU) followed by a fresh driver install also resolves EDID handshake issues that cause resolution mismatches. After reinstalling, reapply ClearType settings per display.
Does refresh rate affect text clarity?
No, moving between 60Hz, 75Hz, or higher doesn't degrade static image sharpness in our research. Higher refresh rates only affect motion smoothness, which is perceived as blur in fast-moving content. For text work, 60Hz is fine.
Why is my monitor fine for games but blurry in Windows?
GPU drivers often apply different scaling configurations to fullscreen applications versus the Windows desktop. The games you play may be running at native resolution in fullscreen mode, bypassing Windows scaling. In contrast, the desktop is subject to Windows scaling.
Open your GPU control panel and verify scaling mode is set to "Aspect ratio" with "Override" unchecked (or checked, depending on what looks correct). Then ensure desktop scaling is at 100% for a 24" 1080p panel or the percentage that renders sharpest for your size and resolution.
How do I fix blur on a second monitor but not the primary?
Two-monitor setups frequently assign different scaling or ClearType profiles to each display. Open ClearType settings again and ensure "Turn on ClearType" is globally enabled. The tuner allows you to cycle through each monitor during the configuration wizard.
Verify each display is at its native resolution. Check that both are connected via the same cable type, VGA plus HDMI combinations cause mismatched image quality.
Frequently Asked Questions
Is it worth buying a 0 monitor in 2026?
Budget monitors under $150 are genuinely good for general office use, browsing, and media. A 24" IPS 1080p panel handles those tasks well. If you spend your day reading text, consider stretching to a 27" 1440p model in the $180 to $250 range for the extra pixel density.
Does a blue light filter or reading mode affect sharpness?
Most blue light modes only adjust color temperature and do not affect sharpness. However, some budget monitors use a "Low Blue Light" mode that dims the backlight and introduces slight dimming uniformity issues, which you may perceive as softness.
Will adjusting the contrast fix text blur?
Contrast affects the difference between the lightest and darkest tones. It does not change text rendering or resolution. Leave contrast at the factory default, usually 70 to 80 percent.
Is my monitor broken if the corners look soft?
Some softness in the corners is common on budget IPS panels due to the diffuser layer. If the softness is uniform and consistent, and the center is sharp, the panel is normal. If the blur is uneven, patchy, or changes with pressure to the bezel, that indicates a hardware issue worth pursuing with the manufacturer.

Similar Posts