How to Fix Screen Flickering on 4K Monitor
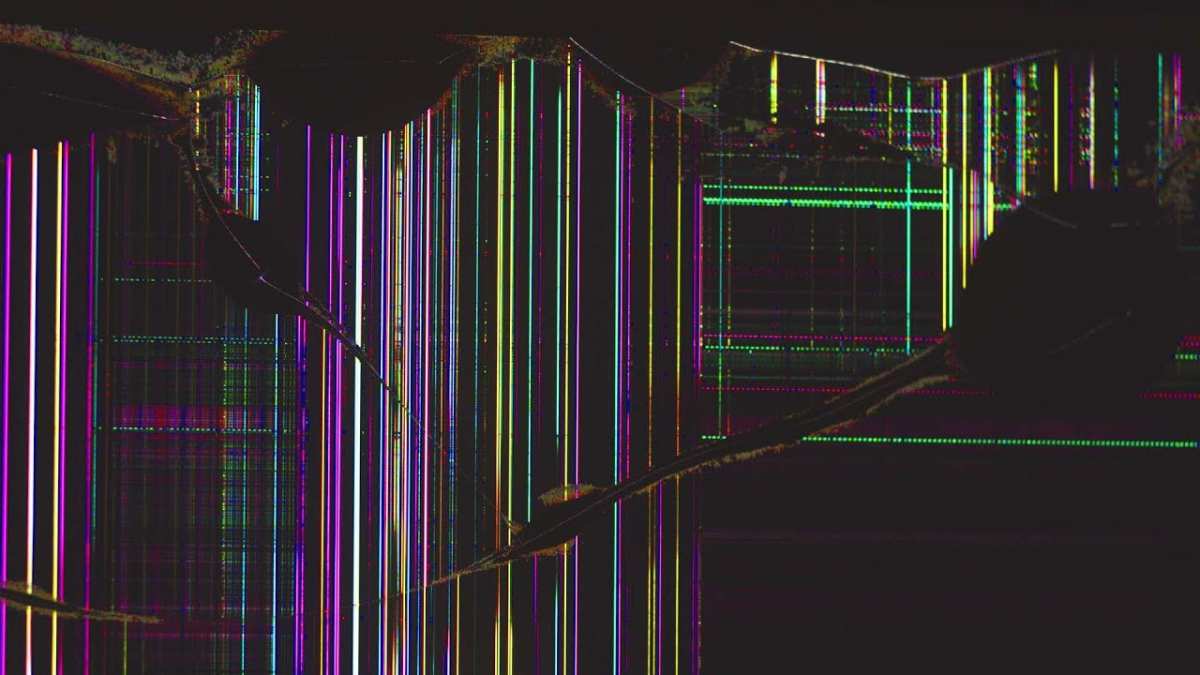
Image source: Bing (Web (fair-use with source credit))
If you're here, your 4K monitor is doing that annoying thing where the screen flashes, blinks, or strobes at the worst possible moment. Learning how to fix screen flickering on a 4K monitor starts with understanding that the cause is almost always one of five things: a bad cable, a refresh rate mismatch, a driver issue, an adaptive sync conflict, or a hardware fault. The good news is that most of these are fixable in under ten minutes without opening anything up or spending a dime.
4K at high refresh rates pushes a lot of data through a single cable. We're talking 3840×2160 pixels, potentially at 120Hz or 144Hz, which means the margin for error on cable quality and bandwidth is razor-thin. Per VESA specifications, even a slightly damaged DisplayPort cable can cause intermittent flickering that looks like a software problem but is purely physical.
Let's walk through this step by step, starting with the most common fix.
The 30-Second Diagnostic: Start Here Before You Do Anything
Before you start swapping cables and reinstalling drivers, take thirty seconds to observe what's actually happening. The pattern of your flickering tells you a lot about where to look first.
Ask yourself these three questions:
- When does it flicker? Only in games, only on the desktop, or all the time?
- Does it stop if you wiggle the cable? If yes, you've already found your problem.
- Did it start after a specific change? A driver update, a new monitor, a Windows update, or just moving your desk around?
If the flickering is constant and happens even in the monitor's own on-screen display menu, that points to a hardware or backlight issue. If it only happens inside Windows or macOS, it's almost certainly a software or settings problem. If it only happens under load (gaming, rendering), suspect the GPU driver or power delivery.
Write down what you observe. It'll save you from going in circles later.
Quick Answer
Check your cable connection first. Reseat both ends or swap to a certified DisplayPort 1.4 or HDMI 2.1 cable. Next, verify your refresh rate matches your monitor's native spec in Windows display settings.
If flickering persists, disable G-Sync or FreeSync temporarily to rule out adaptive sync conflicts. Then roll back or clean-install your GPU driver. If none of that works, update your monitor's firmware from the manufacturer's support page.
Step 1: Check Your Cable — This Fixes More Flickering Than You'd Think
This is the one nobody wants to hear because it feels too simple. But aggregate user reports across monitor communities consistently show that a loose, damaged, or under-spec cable is the single most common cause of 4K flickering.
Here's the thing. Not all cables that look the same actually are. A cable that handles 4K at 60Hz over HDMI might completely fall apart at 4K over 120Hz.
The bandwidth requirements nearly double.
Bandwidth requirements you need to know:
| Resolution and Refresh | Minimum Cable Standard | Bandwidth Needed |
|---|---|---|
| 4K at 60Hz | HDMI 2.0 or DP 1.2 | ~12.5 Gbps |
| 4K at 60Hz with HDR | HDMI 2.0a or DP 1.4 | ~18 Gbps |
| 4K at 120Hz | HDMI 2.1 or DP 1.4 with DSC | ~25+ Gbps |
| 4K at 144Hz | DP 1.4 with DSC or DP 2.0 | ~32+ Gbps |
If you're running a 4K 144Hz monitor with a random HDMI cable that came in the box two years ago, there's a real chance it's not rated for that bandwidth. Especially if it's a no-name cable that didn't go through HDMI Licensing Administrator certification.
What to do right now:
- Unplug the cable from both the monitor and the GPU. Inspect the pins for bent or damaged connectors.
- Reconnect firmly. DisplayPort cables have a latch, make sure it clicks.
- If the flickering persists, swap to a different cable you know works. Ideally a VESA-certified DisplayPort 1.4 cable or an Ultra High Speed HDMI cable.
- Try a different port on your GPU if one is available.
Don't overlook electromagnetic interference either. If your power cable or a phone charger is sitting right against your display cable, move it away. It's rare, but it happens.
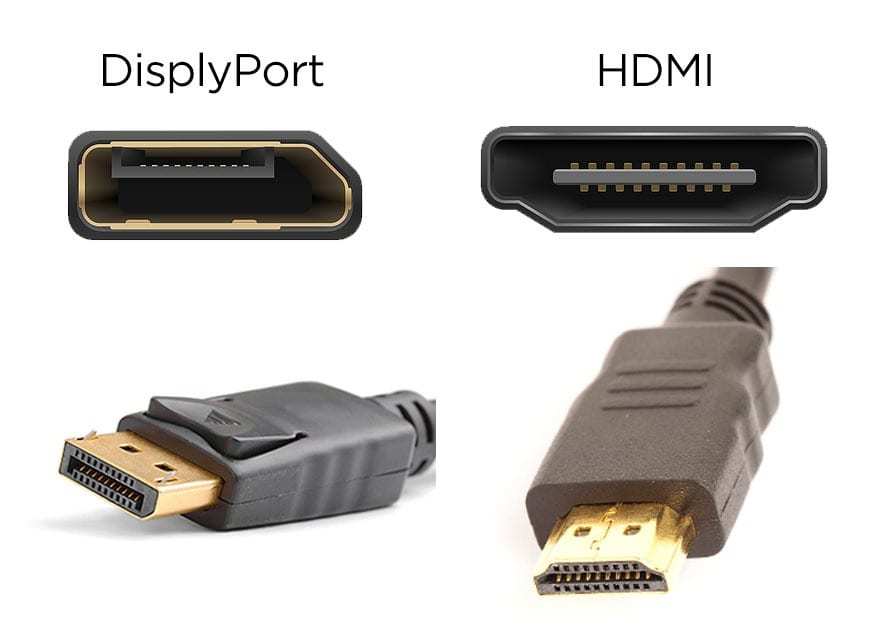
Image source: Bing (Web (fair-use with source credit))
Step 2: Isolate the Problem — Is It the Monitor, the GPU, or the Software?
Now that you've ruled out the cable, it's time to figure out which component is actually responsible. This step saves you from reinstalling drivers when the problem is the monitor, or from RMAing the monitor when the problem is the GPU.
Run through these isolation tests:
- Open the monitor's built-in OSD menu. Navigate through the on-screen display using the buttons on the monitor itself. If the OSD flickers too, the problem is the monitor hardware, not your PC.
- Connect a different source. Plug in a laptop, a game console, or anything else with a display output. If the flickering follows the monitor, it's the monitor. If it stops, the problem is your PC or GPU.
- Boot into Safe Mode. In Windows, hold Shift while clicking Restart, then navigate to Safe Mode. Safe Mode loads a basic display driver. If flickering stops in Safe Mode, it's a driver or software conflict.
- Try a different port on your GPU. If you're using DisplayPort, switch to HDMI temporarily (or vice versa). If the flickering moves with the port, the port itself might be the issue.
This process of elimination takes about five minutes and tells you exactly where to focus the rest of your troubleshooting. Skip it and you'll waste an hour reinstalling GPU drivers when the real problem was a failing backlight.
Step 3: Refresh Rate and Resolution Mismatches That Cause Flickering
Your 4K monitor has a native refresh rate. It might be 60Hz, 120Hz, or 144Hz depending on the model. If Windows is set to a refresh rate the monitor doesn't handle well at its current resolution, you'll get flickering, black screen flashing, or intermittent signal loss.
This is especially common after a Windows update or a driver reinstall, because Windows sometimes resets the refresh rate to 60Hz or picks an unsupported timing.
How to check and fix your refresh rate:
- Right-click your desktop and select Display settings.
- Scroll down and click Advanced display settings.
- Click Display adapter properties for Display 1 (or whichever display is flickering).
- Go to the Monitor tab.
- Under Screen refresh rate, select the highest rate available. For most 4K monitors, that's 60Hz. For newer 4K gaming monitors, it might be 120Hz or 144Hz.
- Click Apply and confirm.
If the flickering stops at 60Hz but returns at 120Hz or 144Hz, your cable likely can't handle the bandwidth. Refer back to the bandwidth table in Step 1.
Also check these related settings:
- Color depth. If your monitor supports 10-bit color but your GPU is outputting at a mode the cable can't handle, drop it to 8-bit temporarily to test.
- HDR. Toggle HDR off in Windows display settings. Some monitors flicker when switching between SDR and HDR modes.
- Resolution. Confirm you're actually running at 3840×2160 and not a non-native resolution. Non-native resolutions cause scaling artifacts that can look like flickering.
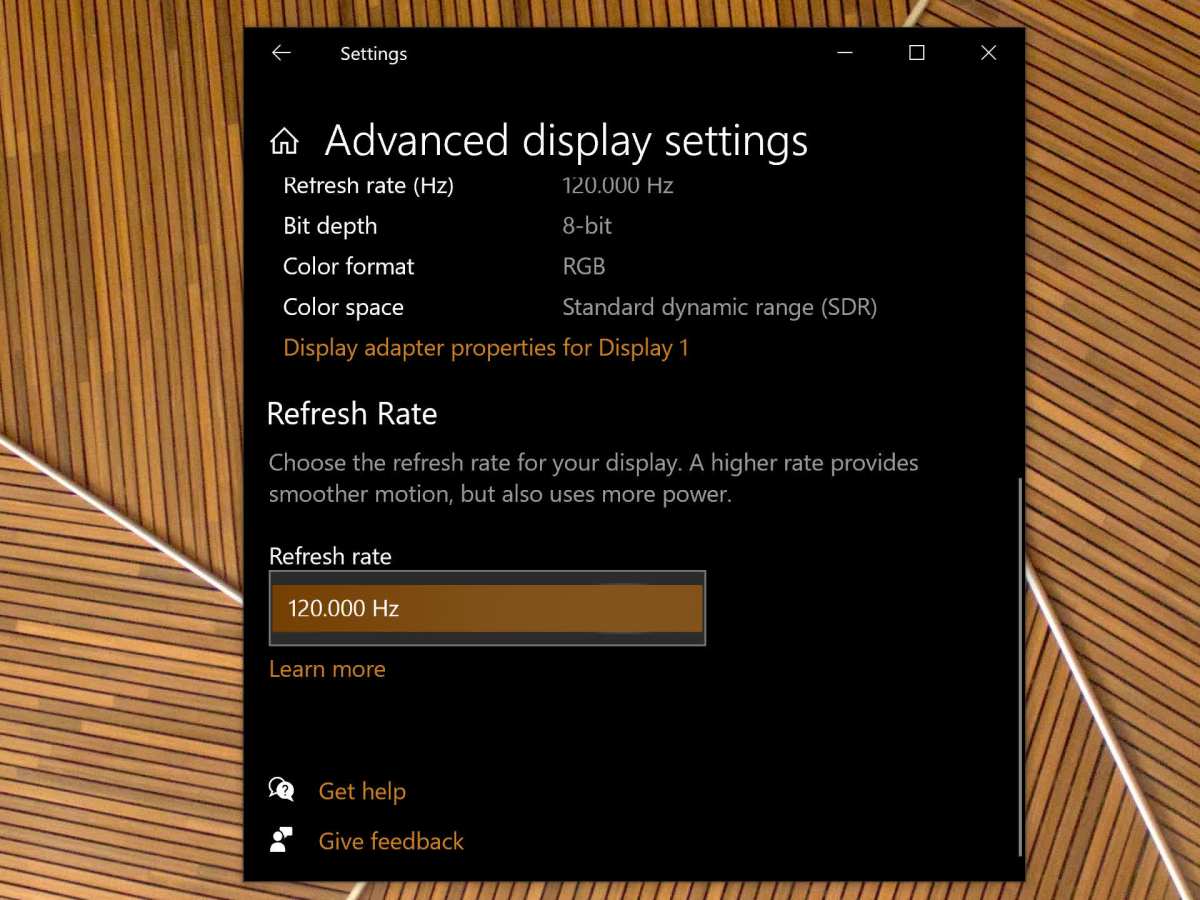
Image source: Bing (Web (fair-use with source credit))
Step 4: Adaptive Sync Conflicts — G-Sync, FreeSync, and When They Backfire
Adaptive sync technologies like NVIDIA G-Sync and AMD FreeSync are great when they work. When they don't, they cause a very specific type of flickering that's easy to mistake for a hardware problem.
The most common scenario: you have a monitor that supports FreeSync, but you're using an NVIDIA GPU. NVIDIA does support "G-Sync Compatible" mode on many FreeSync monitors, but the implementation isn't always smooth. At low frame rates (below the monitor's VRR range), the flickering can be pronounced.
This is called low framerate compensation (LRR) flicker, and it's a known issue on certain panel types, especially VA panels.
How to test if adaptive sync is your problem:
- Open NVIDIA Control Panel (right-click desktop) or AMD Radeon Software.
- Navigate to Display → Set up G-Sync (NVIDIA) or Display → AMD FreeSync (AMD).
- Disable the adaptive sync feature.
- Restart your computer.
- Test for flickering.
If the flickering stops, adaptive sync was the culprit. You can try re-enabling it with these adjustments:
- Cap your frame rate 3, 5 frames below your monitor's maximum refresh rate using NVIDIA's frame rate limiter or RTSS (RivaTuner Statistics Server). This prevents the sync from hitting the ceiling and bouncing.
- Enable V-Sync in combination with G-Sync in the NVIDIA Control Panel. This sounds counterintuitive, but NVIDIA recommends it. V-Sync acts as a fallback when frame rates exceed the G-Sync range.
- Check your monitor's VRR range. If your monitor only supports FreeSync from 48Hz to 144Hz, frame rates below 48 will cause flicker. Enable LFC if your monitor supports it.
If you're on a laptop with hybrid graphics (integrated + discrete GPU), adaptive sync might be routed through the iGPU, which can cause its own flickering issues. Check your laptop manufacturer's documentation to see which output ports are wired to which GPU.
Step 5: GPU Drivers — Rollback, Clean Install, and Known Bug Patterns
GPU drivers are the silent culprit behind a huge percentage of flickering reports. Both NVIDIA and AMD have shipped driver versions that introduced flickering on specific monitor models, particularly at high refresh rates over DisplayPort.
When to suspect a driver issue:
- Flickering started right after a driver update.
- Flickering happens on the desktop and in applications but not in the BIOS or Safe Mode.
- You recently updated to a new GPU and installed fresh drivers.
- Flickering is accompanied by occasional black screen flashes (signal drop and reconnect).
How to clean-install your GPU drivers the right way:
- Download Display Driver Uninstaller (DDU) from the official Wagnardsoft site.
- Download the latest (or a known-stable older) driver from NVIDIA or AMD. Have it ready on your desktop.
- Boot into Safe Mode. This is important. DDU works best when no display driver is actively running.
- Run DDU. Select Clean and restart for your GPU brand.
- After the restart, install the driver you downloaded. Choose Custom installation and check Perform a clean install (NVIDIA) or Factory reset (AMD) if available.
- Restart again normally.
If the latest driver still causes flickering:
Roll back to the previous version. In Device Manager, expand Display adapters, right-click your GPU, select Properties → Driver → Roll Back Driver. If that option is grayed out, download an older driver version directly from NVIDIA's or AMD's driver archive and install it manually.
As of 2026, both NVIDIA and AMD maintain public driver release notes that occasionally acknowledge known flickering issues. Check the "Known Issues" section of the release notes for your driver version before installing. If your monitor model is listed, wait for the next driver update or roll back to the version that worked.
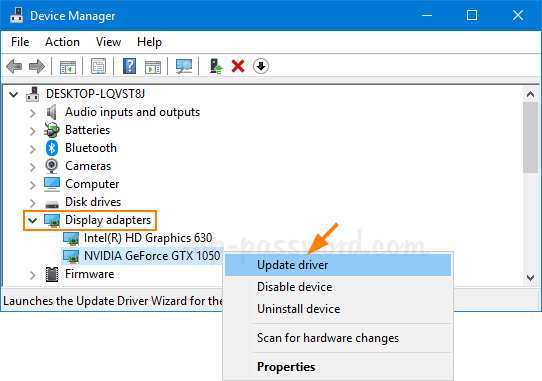
Image source: Bing (Web (fair-use with source credit))
Step 6: Monitor Firmware and Settings Most People Never Check
Here's something that catches a lot of people off guard. Your monitor runs its own internal firmware, just like your phone or your router. And just like those devices, firmware bugs can cause flickering that no amount of driver tweaking on the PC side will fix.
Monitor manufacturers like Dell, LG, Samsung, and ASUS periodically release firmware updates that address known issues. These include EDID timing problems, HDR handshake failures, and yes, flickering at specific refresh rates. The problem is that most people never check for these updates because it doesn't occur to them that a monitor needs updating.
How to check for a firmware update:
- Find your exact monitor model number. It's on a sticker on the back of the unit.
- Go to the manufacturer's support page. Dell Support, LG Support, Samsung Support, or ASUS Support.
- Enter your model number and navigate to the Downloads or Drivers section.
- Look for Firmware or Software updates. If one is available, download it.
- Follow the manufacturer's instructions exactly. Most require a USB drive formatted to FAT32 with the update file, or a direct USB-B connection from your PC.
Important warning: Do not interrupt a firmware update. If power goes out or the USB cable disconnects mid-update, your monitor can become bricked. That means it won't turn on at all.
Use a UPS if possible, or make sure your laptop is fully charged and plugged in.
While you're in the monitor's OSD, also check these settings:
- Reset to factory defaults. Sometimes a setting got changed accidentally during setup. A factory reset clears everything.
- Response time overdrive. If set to the highest level, some monitors exhibit inverse ghosting or pixel overshoot that looks like flickering. Set it to the middle option.
- Eco mode or dynamic brightness. These features adjust backlight intensity based on screen content. They cause visible brightness shifts that many people mistake for flickering. Turn them off.
- Input source auto-switch. If your monitor is set to auto-detect the input source, it might briefly flicker when it switches between ports. Set it manually to the port you're using.
Step 7: USB-C, Docks, and Hubs — The Hidden Bandwidth Bottleneck
If you're connecting your 4K monitor through a USB-C hub, a docking station, or a daisy chain, you've added an extra layer of complexity that can absolutely cause flickering.
Not all USB-C ports support DisplayPort Alt Mode. And even the ones that do have bandwidth limits shared across all the other devices connected through the same dock. Your keyboard, mouse, external drive, and ethernet adapter are all competing for the same pipe.
The most common dock-related flickering scenarios:
- You're running 4K at 60Hz through a dock, but the dock also has a second monitor connected. The combined bandwidth exceeds what the USB-C connection can handle.
- Your dock uses DisplayLink technology instead of native DisplayPort Alt Mode. DisplayLink is software-dependent and can cause flickering if the DisplayLink driver is outdated or conflicts with your GPU driver.
- The dock's firmware is out of date. Yes, docks have firmware too.
- You're using a USB-C cable that doesn't support Thunderbolt or full-speed DP Alt Mode. Not all USB-C cables are created equal.
How to test if the dock is the problem:
- Bypass the dock entirely. Connect your monitor directly to your GPU using a standard DisplayPort or HDMI cable.
- If the flickering stops, the dock is the bottleneck.
- If you must use the dock, try reducing the refresh rate to 30Hz temporarily. If that stops the flickering, bandwidth is the issue.
- Update the dock's firmware from the manufacturer's website.
- If your dock has multiple display outputs, try a different one. Some ports on a dock have more bandwidth allocated than others.
For Mac users specifically, there's a known issue with certain USB-C hubs and 4K displays at 60Hz. macOS requires a specific timing signal that some third-party hubs don't handle correctly. If you're on a Mac and experiencing flickering through a hub, try a different hub brand or connect directly.
When Flickering Means Hardware Failure (And What to Do About It)
If you've gone through every software and settings fix above and the flickering persists, you're likely dealing with a hardware problem. This is the scenario nobody wants, but it's better to know than to keep chasing software ghosts.
Signs that point to hardware failure:
- Flickering appears in the monitor's own OSD menu, not just from a PC source.
- Flickering is accompanied by a buzzing or clicking sound from the monitor.
- The screen flickers more when brightness is set above 80%. This often indicates a failing LED backlight or power inverter.
- Specific areas of the screen flicker while the rest is stable. This suggests a panel driver failure.
- The monitor takes longer and longer to turn on, or flickers for the first few minutes and then stabilizes. Classic sign of aging capacitors in the power supply.
What you can try before giving up:
- Test with a different power outlet. Power fluctuations can cause flickering that mimics hardware failure.
- Try a different power cable if your monitor uses a detachable one.
- Let the monitor sit unplugged from power for 30 minutes. This drains residual charge and can reset a protection circuit that's tripped.
If none of that helps, check your warranty. Most monitor manufacturers offer a three-year warranty, and backlight or panel failure is typically covered. Contact the manufacturer's support line with your serial number and a description of the issue.
They'll usually ask you to run through a few diagnostic steps, then issue an RMA if the problem is confirmed.
Don't open the monitor yourself. The internal power supply holds a charge even when unplugged, and opening the casing voids your warranty immediately.
Flickering Scenarios by Setup Type — Quick Reference Guide
Different setups have different weak points. Here's a quick reference based on the most common configurations we've seen in aggregate troubleshooting reports.
Single 4K monitor, 60Hz, HDMI:
Most likely cause is a loose or under-spec cable. HDMI 2.0 handles this easily, so unless the cable is damaged, check refresh rate settings in Windows.
Single 4K monitor, 120Hz or 144Hz, DisplayPort:
Cable quality is critical here. You need a VESA-certified DP 1.4 cable. Also check that adaptive sync isn't causing low-framerate flicker.
Dual monitor setup (one 4K, one 1080p or 1440p):
Mixed resolution setups can cause flickering on the 4K display if the GPU is struggling with different timing signals. Try setting both monitors to the same refresh rate temporarily to test.
Laptop + 4K monitor via USB-C dock:
Bandwidth limitation or dock firmware issue. Bypass the dock to confirm.
Mac with 4K external display:
Check that you're using a cable and adapter that support the full bandwidth. Some USB-C to HDMI adapters only support 4K at 30Hz, which causes visible stuttering that looks like flickering.
Gaming under load:
If flickering only happens during gaming, it's usually GPU driver, adaptive sync, or power delivery. Monitor your GPU temperatures. Overheating can cause output instability.
Common Mistakes That Make Flickering Worse
A few things people do instinctively that actually make the problem worse.
Don't keep swapping drivers randomly. If you install three different GPU driver versions in one day without using DDU between each install, you'll end up with a corrupted driver stack that causes more problems than it solves. Always use DDU for a clean slate.
Don't ignore the cable because "it looks fine." Internal damage to a cable isn't visible from the outside. A cable that works perfectly for 1080p might fail completely at 4K high refresh rates. Swap it even if it looks okay.
Don't set the refresh rate higher than your monitor supports. Some custom resolution utilities let you push refresh rates beyond spec. This can cause immediate flickering and, in rare cases, can damage the panel's timing controller.
Don't assume it's the GPU. People blame the GPU first because it's the most expensive component. But in our research, the cable is the more common culprit by a significant margin. Start cheap and work your way up.
Don't leave dynamic contrast or eco mode enabled. These features modulate the backlight in real time. The brightness shifts look exactly like flickering and will drive you crazy if you're trying to diagnose a separate issue.
Frequently Asked Questions
Can a bad HDMI cable cause screen flickering?
Yes, absolutely. A damaged or under-spec HDMI cable is one of the most common causes of flickering, especially at 4K resolution. If the cable can't handle the bandwidth required for your resolution and refresh rate, the signal drops and reconnects, which appears as flickering or brief blackouts.
Why does my 4K monitor flicker only in games?
This usually points to an adaptive sync conflict or a GPU driver issue. Try disabling G-Sync or FreeSync temporarily. If that stops the flickering, cap your frame rate a few FPS below your monitor's maximum refresh rate and re-enable adaptive sync.
Does screen flickering damage the monitor?
The flickering itself won't damage the monitor, but if it's caused by a failing power supply or backlight, continuing to use it can accelerate the failure. If flickering is persistent and not resolved by cable or software fixes, get it checked under warranty.
How do I know if my cable supports 4K at 120Hz?
Look for certification markings on the cable. For HDMI, you need an "Ultra High Speed HDMI" cable (HDMI 2.1). For DisplayPort, you need a VESA-certified DP 1.4 cable rated for HBR3.
If the cable has no markings, assume it doesn't support it.
Can Windows updates cause monitor flickering?
Yes. Windows updates have been known to reset display settings, change the refresh rate, or install a generic display driver that conflicts with your GPU driver. If flickering started after a Windows update, check your display settings and reinstall your GPU driver.
Is flickering covered under monitor warranty?
In most cases, yes. Persistent flickering that isn't caused by user damage or a connected device is typically covered under the manufacturer's warranty. Most major brands offer three years of coverage.
Contact support with your serial number and a description of the issue.
When to Call It and Contact Support
If you've worked through every step above and the flickering hasn't stopped, it's time to contact the manufacturer. Don't feel bad about it. Some issues genuinely require professional repair or replacement.
Before you call, have this information ready:
- Your monitor's exact model number and serial number.
- A description of when the flickering happens and how often.
- A list of the troubleshooting steps you've already completed.
- Photos or video of the flickering if possible. This helps support teams diagnose faster.
Most manufacturers will walk you through a few final checks, then issue a warranty claim if the issue is confirmed. Keep your purchase receipt accessible. Warranty coverage typically starts from the original purchase date.

Similar Posts