How to Mount Dual Monitors on Wall
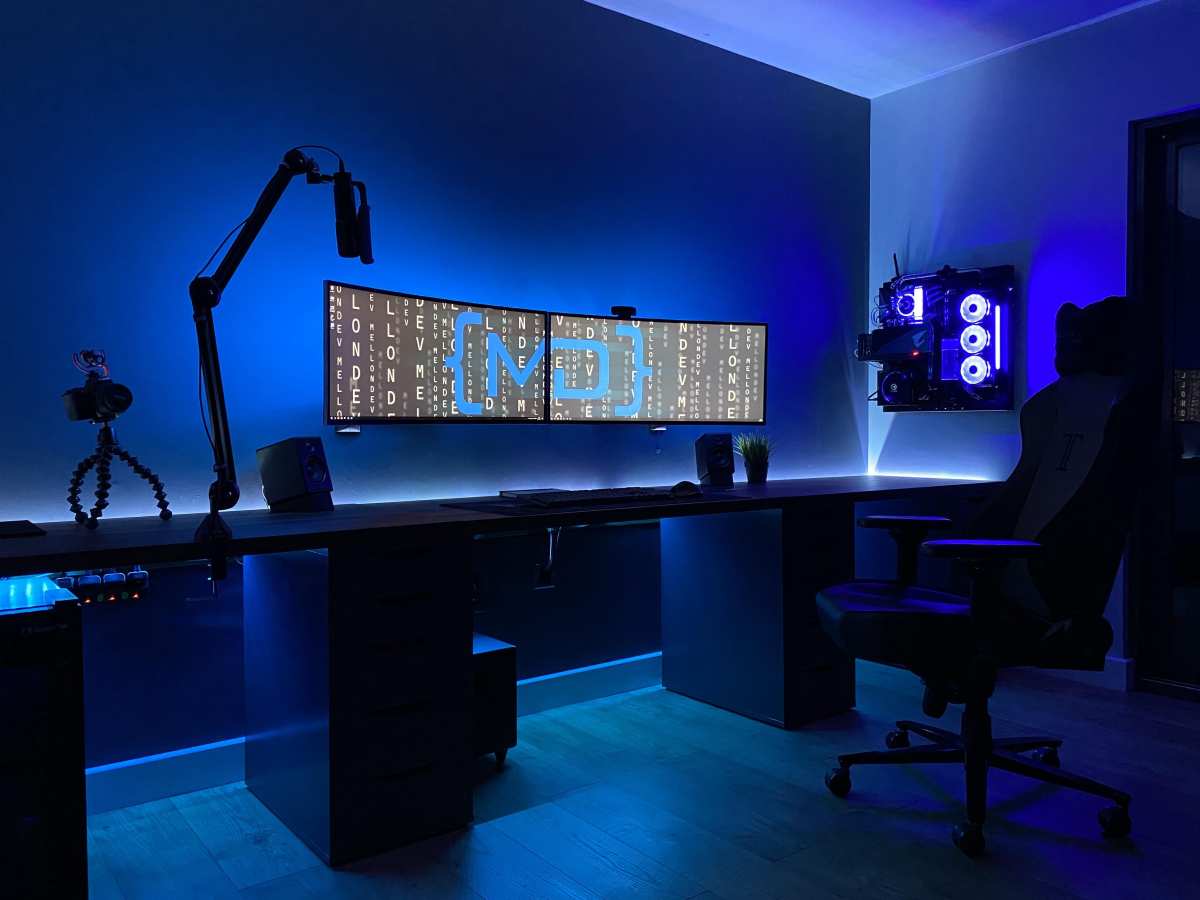
If you're wondering how to mount dual monitors on wall, the short answer is simpler than you think but the details matter more than most guides admit. You need the right mount, a solid connection to the structure behind your wall, and a clear plan before you drill a single hole. Get this right and you'll reclaim desk space, improve your posture, and build a setup that looks clean from day one.
Everything hinges on three things: understanding what kind of wall you're drilling into, confirming your monitors match the mount's VESA pattern, and never trusting drywall alone to hold the weight. According to the VESA Flat Display Mounting Interface Standard (fdmi.org), the majority of consumer monitors use a 100x100mm pattern, but always check your specific model because a mismatch can halt the whole project.
Quick Answer
To mount dual monitors on a wall, locate studs in the wall and secure a dual-arm wall mount using lag bolts. Attach the VESA mounting plates to the back of each monitor. Hang the monitors onto the arms and adjust the tension, height, and angle.
The process usually takes 45 to 90 minutes and requires a stud finder, level, drill, and a few hand tools.
Image source: Bing (Web (fair-use with source credit))
Is Wall-Mounting Dual Monitors Right for Your Setup?
Before you buy anything or pick up a drill, take a honest look at your situation. Wall-mounting dual monitors is not always the default best choice, and forcing it into the wrong room or the wrong workspace causes headaches later.
Here's what makes this approach work well:
- You want your desk surface completely clear. Wall mounts eliminate monitor stands entirely, which frees up a surprising amount of usable space.
- Your wall construction allows solid anchoring. If you have wood or metal studs behind drywall, a masonry wall, or concrete block, you're in good shape.
- You're allowed to drill into the wall. Renters and corporate offices often can't, or need written approval first.
- You value adjustability. A good full-motion dual arm lets you pull monitors forward, push them flat against the wall, tilt them, and switch between landscape and portrait orientation.
Here's where it gets trickier:
- Your wall is plaster and lath with no accessible studs. You can still do it with the right anchors, but the margin for error shrinks significantly.
- Your monitors are very heavy or oversized. Many dual arms top out around 17.6 lbs (8 kg) per arm for standard models. A 34" ultrawide pushes that limit.
- You frequently rearrange your desk. Desk-mounted arms are faster to reposition. Wall mounts are semi-permanent.
Measure the width of your monitors side by side including bezels, then compare that to the span of the mount's arms when fully extended. If your combined monitor width exceeds the arm span, you'll end up with a gap or you won't be able to push them flush together. This is one of the most common buying mistakes.
Understanding Wall Types, Studs, and What You're Actually Drilling Into
The wall you're looking at is not just a flat surface. Behind that drywall, plaster, or masonry is a structure that determines everything about how securely your mount will hold over the coming years.
Drywall on wood studs (most common in US homes)
Wood studs, typically 2×4 lumber spaced 16 inches on-center, are ideal. You drive lag bolts directly into the stud and get a connection that easily handles the weight of two monitors plus the mount. The mount's wall plate usually spans two studs for stability.
Metal studs (common in offices and commercial buildings)
Metal studs can't hold lag bolts the way wood can. You need toggle bolts, snap toggles, or anchors rated specifically for steel studs. The weight capacity drops, so check your mount's rated load and don't assume it matches the wood-stud number.
Concrete, brick, or block (common in UK homes and basements)
Masonry walls require a carbide-tipped masonry bit, sleeve anchors or wedge anchors, and patience. Drilling is slower. The finished connection is incredibly strong, but you lose the flexibility to adjust hole positions once that anchor is set.
Plaster and lath (older homes)
This is the trickiest combination. The plaster is brittle and can crack if you overtighten. The lath behind it splinters.
Finding studs is critical here, and using a stud finder with deep-scan mode is almost mandatory. If you can only hit one stud and need a second anchor point, use a heavy-duty toggle bolt rated for the remaining load.
US stud spacing is most often 16 inches on-center. UK timber-frame construction can use 600mm spacing. If your mount's hole spacing does not line up with your stud spacing, you still need to hit at least one solid stud and supplement the other points with appropriate wall anchors.
Choosing the Right Dual Monitor Wall Mount for Your Monitors
Not all dual monitor wall mounts are built the same. The wrong choice leads to arms that slowly droop, monitors you can't align, or a mount that simply won't attach to your wall.
Full-motion (articulating) mounts
Each arm extends, swivels, tilts, and sometimes rotates. These give you the most flexibility for positioning and are ideal if you frequently adjust your viewing angle. Look for gas spring arms that let you dial in the tension for each monitor's weight.
Fixed or low-profile mounts
These hold the monitors close to the wall with minimal or no movement. They're simpler, usually cheaper, and very stable once installed. If you set your position once and leave it, a fixed mount keeps the cleanest look.
Single vertical pole with two arms
A single post attached to the wall branches into two arms. This reduces the number of holes you drill into the wall plate and keeps the profile compact.
Key specs to verify before buying
| Spec | Why It Matters |
|---|---|
| VESA pattern match | Check both your monitors (common: 75x75mm, 100x100mm, 200x200mm) |
| Weight capacity per arm | Weigh each monitor without its stand and confirm both are under the limit |
| Monitor size range | Most arms support 13" to 32"; ultrawides need verification |
| Arm extension distance | Determines how far you can pull screens toward you |
| Wall plate hole spacing | Must align reasonably with your stud spacing |
| Quick-release plates | Make it far easier to remove a monitor later |
Aggregate reviews consistently point to Ergotron, WALI, and VIVO as reliable brands across different price tiers. Availability and specific models change, so check current listings and cross-reference your monitor specs against the latest manufacturer documentation at the time of purchase.
Tools, Hardware, and Materials You'll Need
Having everything on hand before you start prevents that frustrating mid-project hardware store run. Here's what a typical installation needs.
Essential tools
- Stud finder with AC/wire detection (the wire detection prevents a dangerous surprise)
- Level, at least 24 inches long
- Power drill with adjustable clutch
- Drill bit set including a pilot bit appropriate for your wall material
- 3/16" or 1/4" masonry bit (only for concrete/brick)
- Socket wrench or ratchet for lag bolts
- Tape measure and pencil
Common hardware included with the mount
- Wall plate and mounting arms
- VESA mounting plates
- Lag bolts (for wood studs)
- Washers
- VESA screws in multiple lengths
- Allen wrench or hex keys
You may need to purchase separately
- Drywall anchors or toggle bolts (if not anchoring fully into studs)
- Concrete sleeve anchors (for masonry walls)
- Extra lag bolts if the included ones are too short for your wall depth
- Cable management clips or raceways
One practical note: many mounts ship with generic cheap Allen keys that strip easily. A quality hex key set or a hex bit for your drill saves teeth and temper.
How to Find and Mark Stud Placement (Without Guessing)
This is the single most consequential step in the whole process. A mount thats only anchored into drywall will fail. The monitors might hold for a week, maybe a month, but gravity always wins.
Start by using your stud finder along the wall at the height where the center of your mount will sit. Scan slowly and mark the edges of each stud with a pencil, not just a single point. Studs are typically 1.5 inches wide, so marking both edges gives you the true center.
After locating two studs (or one stud if your mount uses a single-point design with secondary anchors), verify spacing. Measure center-to-center and confirm it's 16 inches (or 24 inches in some newer construction).
If the studs don't align with your ideal monitor position, you have two options. Shift the mount left or right so the wall plate captures the studs. Or, if only one stud lines up, use that as your primary anchor point and use rated toggle bolts for the remaining holes.
Use your level to draw a light horizontal reference line at the height where the top of the wall plate will sit. This keeps the mount from ending up slightly crooked, which is almost impossible to fully correct once the monitors are hanging.
Double-check with AC-wire detection on your stud finder. Drilling into a live electrical line behind drywall is a serious hazard that every year catches people off guard. Scanning for live wiring before you drill is not optional.
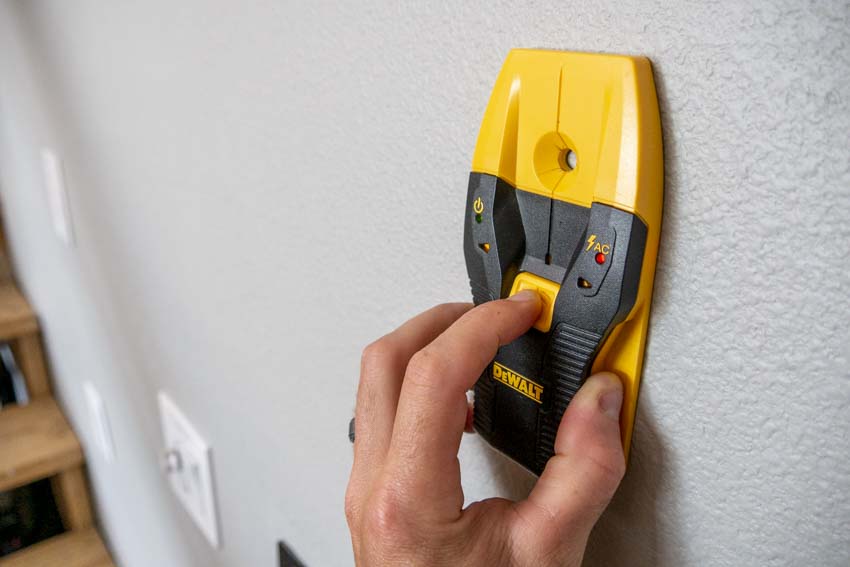
Image source: Bing (Web (fair-use with source credit))
Mark your pilot hole locations based on the wall plate holes and confirm they land on the stud centers you marked. If you're anchoring into a stud at every point, the mount's rigidity will be excellent.
Step-by-Step: Mounting the Wall Plate and Bracket
With your studs located and pilot marks ready, you're now at the point where preparation pays off. Take your time here because mistakes in this step are hard to undo without visible patchwork on the wall.
Step 1: Drill pilot holes. Using a drill bit slightly smaller than the shank of your lag bolts, drill into each marked stud location. For wood studs, a 3/16" pilot bit works for most 1/4" lag bolts. Drill to a depth about 1/4 inch shorter than the bolt length so the threads grip fully.
Step 2: Position the wall plate. Hold the wall plate against the wall, aligned with your horizontal reference line and pilot holes. Have a second set of hands or use a temporary support (a stack of books or a small clamp) because the plate plus arms get heavy fast.
Step 3: Drive the first lag bolt. Start with the top-center or the bolt closest to your primary stud. Snug it finger-tight first, then drive it about three-quarters of the way. Don't fully tighten until all bolts are started.
This leaves room to make micro-adjustments.
Step 4: Confirm level before final tightening. Place your level on top of the wall plate. If it's off, loosen the bolts slightly, shift the plate, and re-check. Many installers skip this because the plate looks level by eye.
It rarely is.
Step 5: Drive all lag bolts to full torque. Use a socket wrench and tighten each bolt firmly. You want solid contact without crushing the drywall surface. If the plate starts to dimple the drywall, you've gone too far.
Step 6: Attach the mounting arms to the wall plate. Most designs use a hook, a slide-in groove, or bolts that secure the arm assembly to the already-mounted plate. Follow your manufacturer's instructions for the specific locking mechanism.
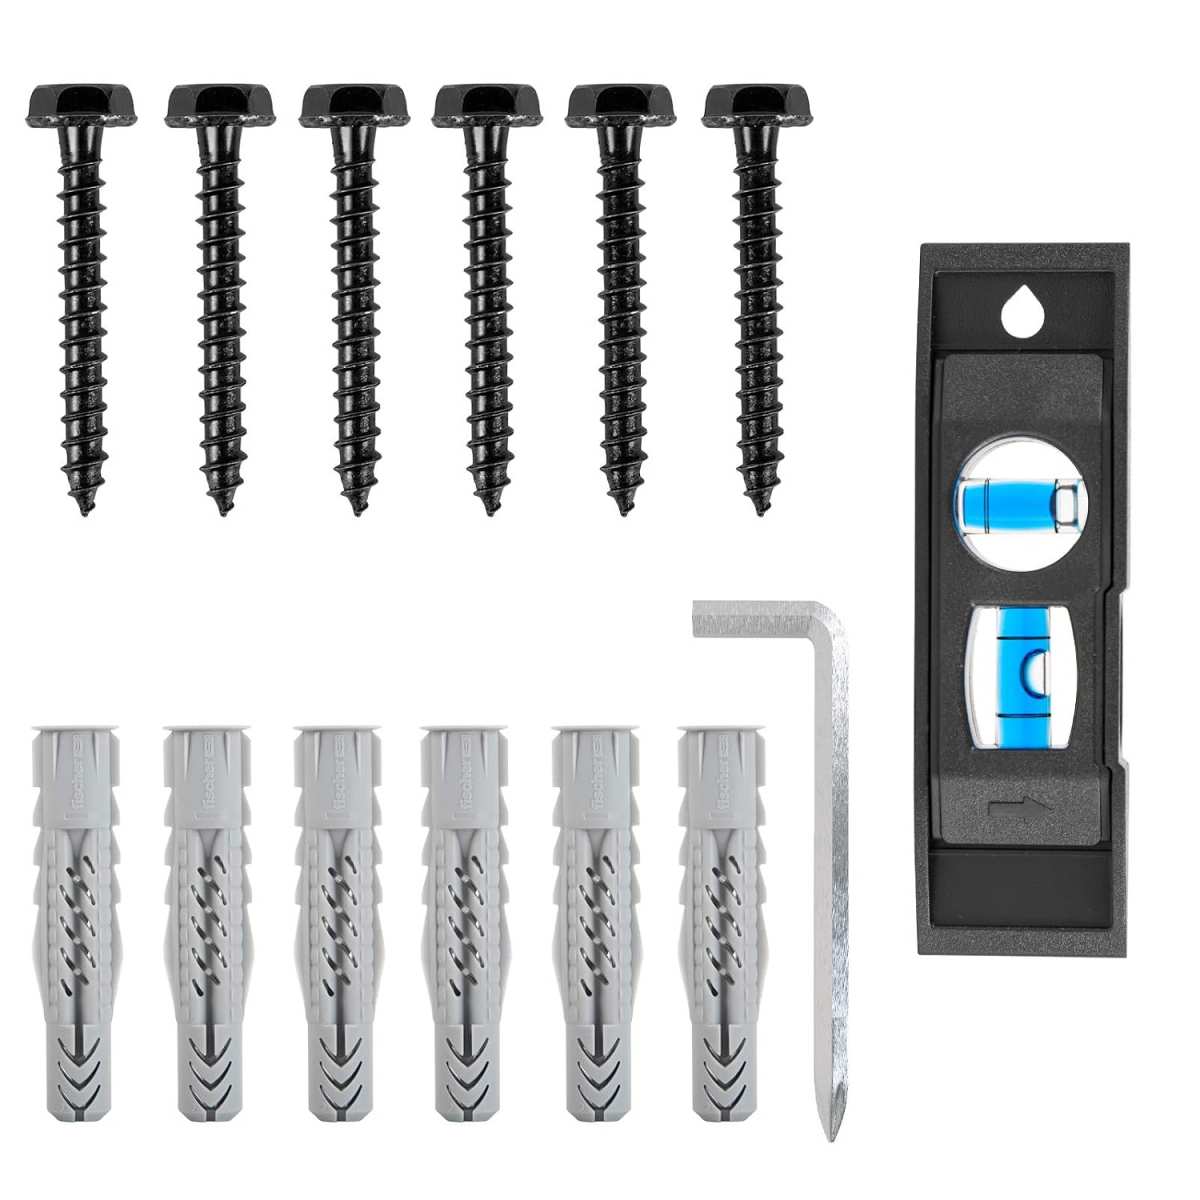
Image source: Bing (Web (fair-use with source credit))
If one of your anchor points lands on drywall instead of a stud, use a snap toggle or heavy-duty toggle bolt rated for at least twice the expected load at that point. Standard plastic sleeve anchors in drywall alone are not sufficient for an articulating arm that extends outward, because the leverage multiplies the force on the wall.
Step-by-Step: Attaching VESA Plates and Hanging Your Monitors
Now you work on the back of each monitor. This part is easier with a helper and a soft surface to lay the screen face-down on.
Step 1: Remove the existing monitor stand. Most factory stands unscrew or unclip from the VESA mount area. Check for a release button or four screws in a square pattern. Keep the stand in a drawer if you ever want to revert to a desk setup.
Step 2: Confirm the VESA hole pattern. Measure the distance between the mounting holes on the back of the monitor, center to center both horizontally and vertically. Common sizes are 75x75mm and 100x100mm. Larger monitors may use 200x200mm.
Your mount's VESA plate must match.
Step 3: Attach the VESA mounting plate to the monitor. Use the screws provided with your mount, selecting the correct length. Too short and they won't grip. Too long and they can crack the internal housing.
Most mounts ship with multiple screw lengths for this reason. Tighten them in an alternating cross pattern to seat the plate evenly.
Step 4: Hang the first monitor onto the arm. Most arms use a hook-and-drop system where the plate seats onto a bracket. Some require you to tighten a locking screw after hanging. Let the monitor settle and observe whether it holds position or starts to droop.
If it drops, the gas spring tension needs adjustment before you attach the second monitor.
Step 5: Repeat with the second monitor. Once both are hanging, step back and check rough alignment. Don't worry about precision yet. The next section covers fine-tuning.
Adjusting Arm Tension, Height, and Alignment
With both monitors hung, the setup usually doesn't look right on the first try. Arms sag, screens sit at different heights, and one side floats higher. This is where you dial everything in.
Gas spring tension adjustment
Gas spring arms use an internal spring counterbalance that needs to match the weight of the monitor on that arm. Most mounts adjust with an Allen key at the pivot point near the wall plate or at the middle joint.
- If the monitor drifts upward: the spring tension is too high. Loosen the adjustment screw slightly.
- If the monitor sinks: the tension is too low. Tighten the screw.
- Adjust in small increments, about a quarter-turn at a time, then wait and observe. The spring takes a moment to stabilize.
Aligning monitor height and spacing
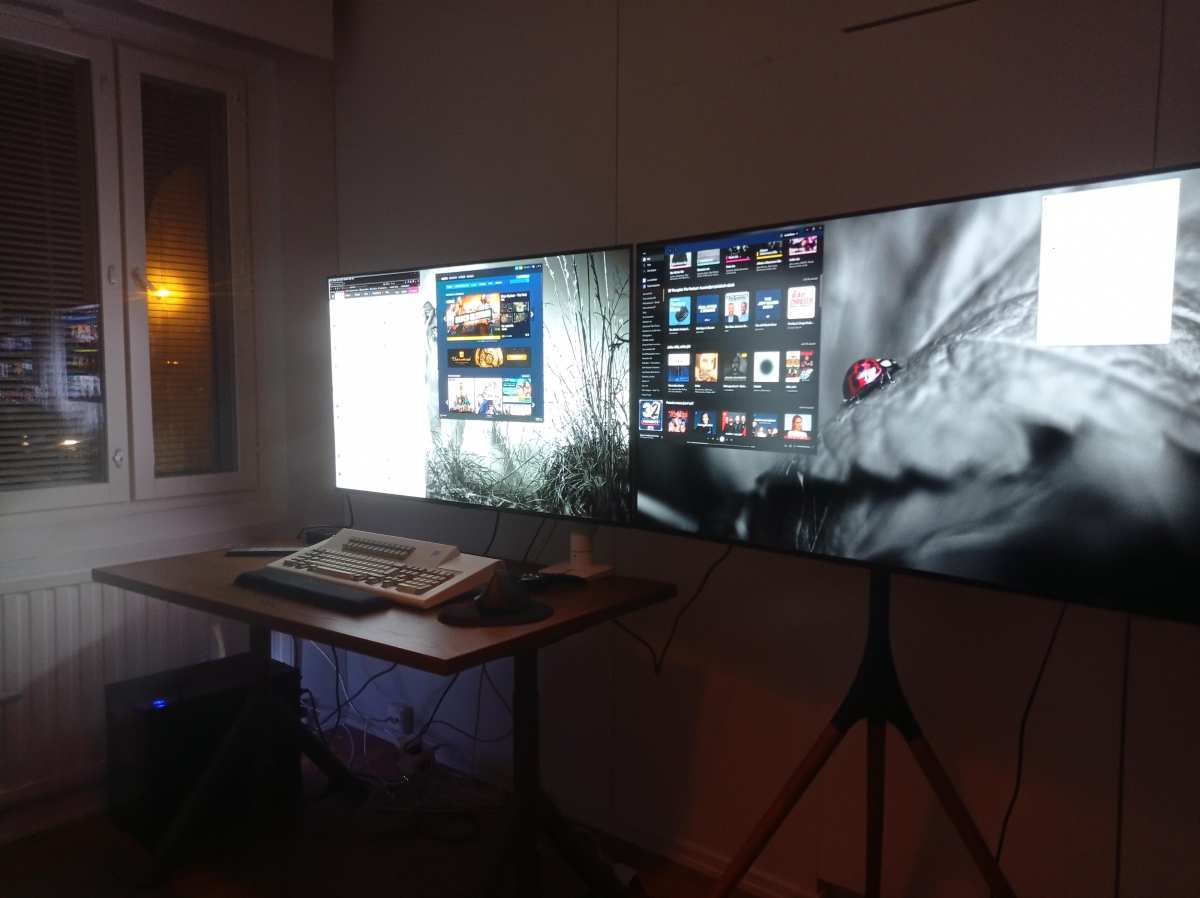
Look at the bezels where the two monitors meet. They should be at the same height and, ideally, nearly touching or with only a consistent small gap. Most arms let you raise, lower, and tilt each side independently.
Adjust one monitor first to your preferred height (top of the screen roughly at eye level), then match the second monitor to it.
Fine-tuning swivel and tilt
Angle each screen slightly inward so the viewing surface faces directly at your seated position. For most dual setups, a slight inward swivel of 5 to 10 degrees per side reduces neck strain during extended use.
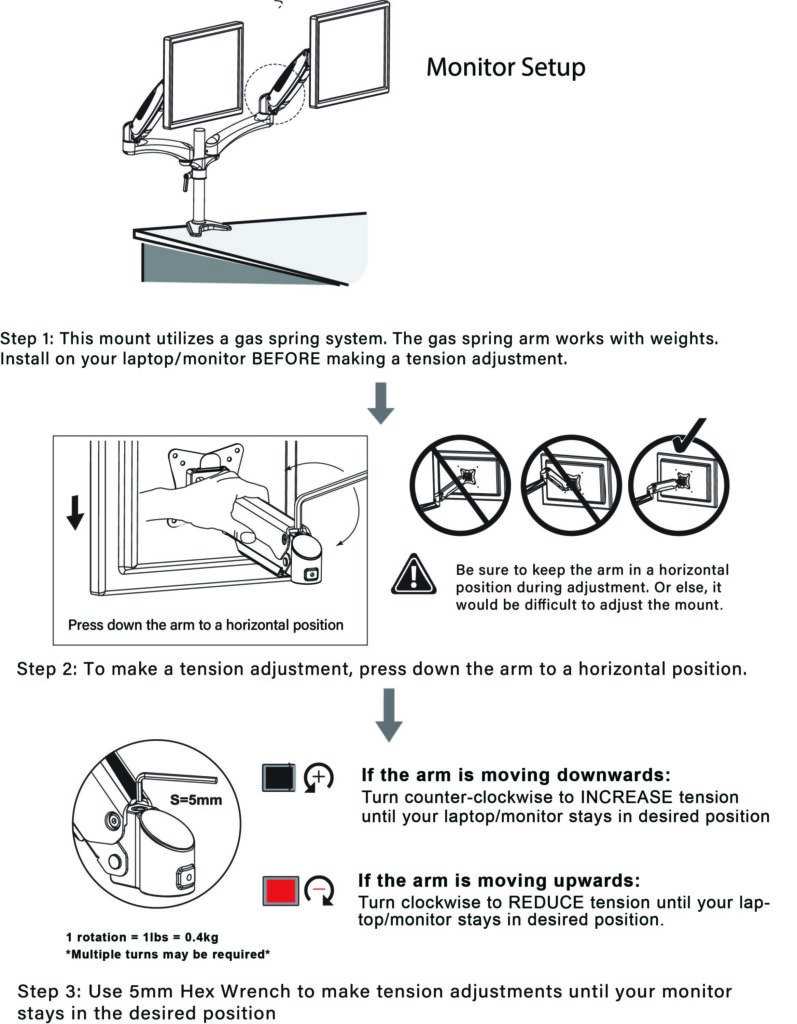
Image source: Bing (Web (fair-use with source credit))
A common frustration is that one arm holds position while the other slowly drifts over a few weeks. This is almost always a tension issue, not a defect. Re-check spring tension after the first week of use and re-adjust as needed.
Cable Management for a Clean Finished Look
Visible cables pulling down from wall-mounted monitors kill the clean aesthetic that's usually the whole point of going wall-mounted. The good news is that most arms include some form of cable routing built in, but you'll need to supplement it.
Built-in clips on the arm. Many articulating arms have snap-on clips or slots along the upper arm that hold power and video cables. Route the cables through these starting from the monitor back and working toward the wall. Leave enough slack at each pivot point to allow full extension without pulling.
Wall-channel raceways. For the run from the arm down to the wall outlet or along the wall to a central hub, adhesive-backed cable raceways keep everything invisible. Paintable plastic channels blend into most wall colors.
Cable length matters. Standard 6-foot power cables are often too short once you route them along an arm that extends 16 to 20 inches from the wall. Measure the total path including the arm length plus vertical drop before you buy longer cables. A 10-foot cable gives comfortable margin.
Label both ends. If you ever need to disconnect a monitor, labeled cables save 20 minutes of tracing. Simple masking tape with "Monitor L" and "Monitor R" does the job.
One trick that experienced installers use: bundle the power and video cables together with a short piece of spiral wrap or Velcro strap every 12 inches along the arm. It keeps the bundle from swinging when you adjust the monitor position.
Common Visual and Structural Mistakes That Cause Monitors to Sag or Tilt
Even a well-chosen mount setup can go wrong if certain details get overlooked. Here's what aggregate reviews and installation forums report most often.
Overloading one arm. Two identical monitors on a dual arm rarely cause trouble. But pairing a heavy 27" with a lightweight 23" on the same mount puts unequal demand on each spring. If the tension range on one arm can't handle the lighter monitor, that screen will float upward constantly.
Ignoring the wall plate torque over time. Lag bolts can loosen slightly after the first few weeks as the wall material compresses under load. Schedule a re-tightening check at the 30-day mark. A quick pass with the socket wrench takes two minutes and prevents gradual lean.
Using the wrong screws for the VESA plate. This is the hidden killer of many installations. Screws that are too long can press against internal components behind the monitor housing. Always measure the depth of the threaded insert before choosing screw length.
Mounting too high. Wall-mounted setups often end up positioned higher than desk-mounted ones because the installer lines the mount up with the center of the wall. That puts the top edge of the screen well above eye level. The top third of your screen should be at or just below your horizontal seated gaze.
You're looking slightly downward at the center of the screen, and that's healthy posture.
Forgetting about glare. Once the monitors are hung flat against the wall, overhead lighting or windows can create frustrating reflections that didn't exist with a desk stand. The articulating arms help here. A few degrees of tilt adjustment can cut glare significantly.
When Wall Mounting Isn't the Right Move
Wall mounting works beautifully in many setups, but it's not universal. If you're in a rental with strict no-drilling rules, a desk-mounted dual arm gives you the same ergonomic benefits without landlord issues. If your monitors are mismatched in size by more than 4 inches diagonally, aligning them on a single mount becomes awkward and the weight imbalance causes constant tension problems.
In those cases, two separate single-arm mounts on the wall or a desk clamp setup often works better.
Expert Tips Most Installation Guides Leave Out
- Pre-assemble the arms on the floor before mounting the wall plate. It's far easier to understand the range of motion when you're not holding a drill.
- Take a photo of your stud marks and pilot holes before attaching the plate. If you ever remove the mount, you'll know exactly where the structural points are for future use.
- Set your monitor refresh rate and resolution before fine-tuning arm position. A screen that's still flickering or showing the wrong resolution makes it hard to judge alignment accurately.
Frequently Asked Questions
Can I mount dual monitors on drywall without studs?
You can, but only with heavy-duty toggle bolts rated for the combined weight, and only with fixed or short-reach arms. Full-motion arms create leverage that drywall alone cannot handle safely over time. Stud anchoring is strongly recommended.
How high should I mount dual monitors on the wall?
Position the mount so the top third of each screen sits at your seated eye level. For most adults, that puts the center of the screen roughly 45 to 50 inches from the floor, but adjust based on your chair height and desk.
Do both monitors need to be the same size?
No, but matching sizes makes alignment significantly easier. If you mix sizes, expect to spend extra time adjusting height and tilt, and verify that each arm's weight capacity covers the specific monitor on it.
How long does the full installation take?
Most people finish in 45 to 90 minutes. First-time installations tend to run longer because of stud-finding and alignment adjustments. Rushing the leveling step is the most common reason people end up redoing holes.

Similar Posts