How to Know If Monitor Supports 144Hz
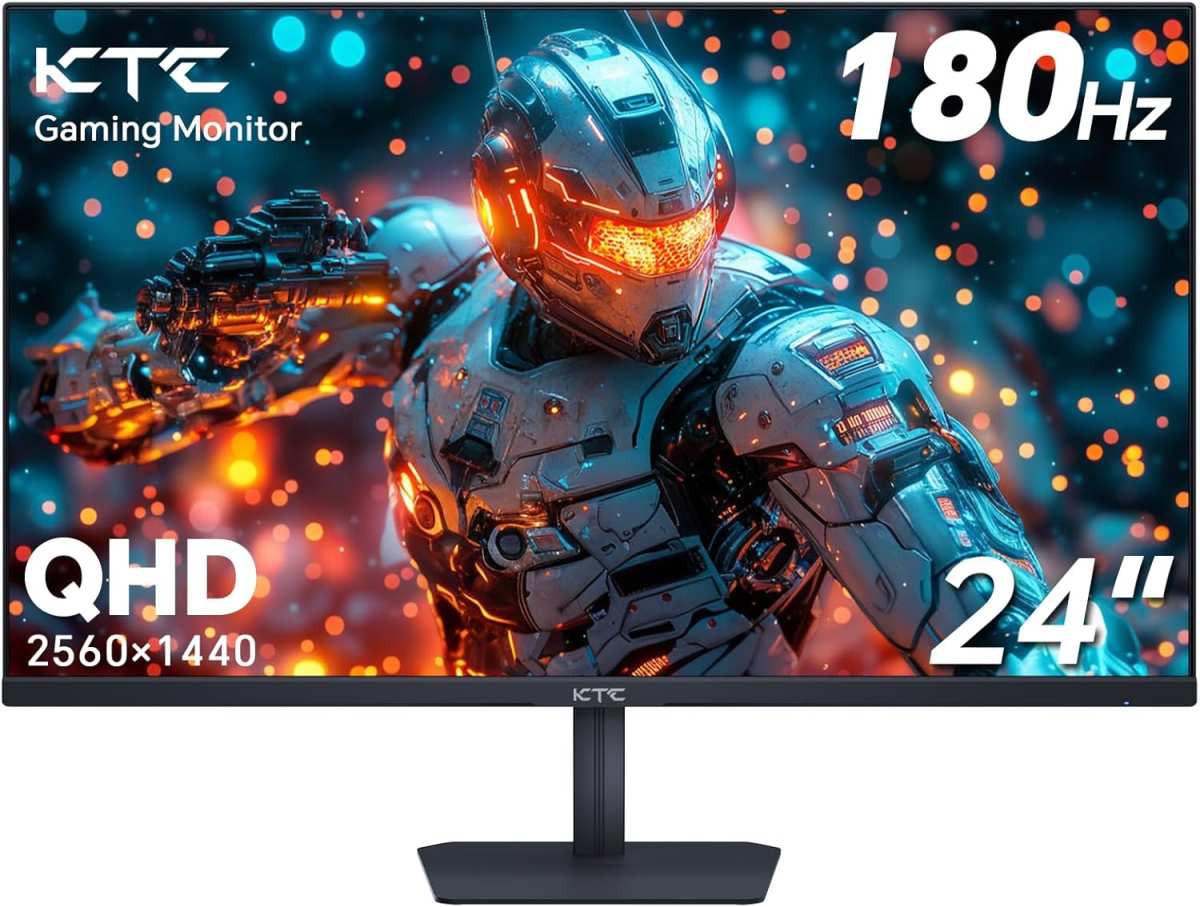
Figuring out how to know if monitor supports 144Hz comes down to four things: the model's actual specs, what ports it has, what cable you're using, and what your GPU can output. Most people assume their monitor just "does" 144Hz out of the box, but that's rarely the full story.
In reality, it's common to plug in a 144Hz-capable monitor and never actually enable it. As of 2026, 144Hz remains the standard baseline for gaming displays, yet countless users run theirs at 60Hz simply because Windows defaults there and nobody flips the switch. Let's walk through exactly how to check what your monitor can do and how to actually unlock that refresh rate.
Quick Answer
To know if your monitor supports 144Hz, locate your exact model number and check the manufacturer's spec sheet. Verify that your cable and port can handle the bandwidth required for 144Hz. Then confirm your GPU supports that output.
Finally, check your display settings to ensure 144Hz is actually selected as the active refresh rate.
Why Your "144Hz Monitor" Might Be Stuck at 60Hz
The most common reason? You're using the wrong cable or port. A monitor can absolutely be 144Hz-capable and still run at 60Hz because the signal path can't carry enough data.
It happens constantly.
Here's what usually trips people up:
- Windows defaults to 60Hz after a fresh install or driver update. It won't automatically pick the highest refresh rate.
- The included cable is garbage. Many manufacturers toss in an HDMI 1.4 cable that physically can't push 144Hz at 1080p in full color.
- You're plugged into the wrong port. Some monitors only support 144Hz on DisplayPort, not HDMI. Or only on one specific HDMI port.
- Your GPU can't keep up. Integrated graphics on laptops often max out at 60Hz on external outputs.
- A dock or KVM switch is in the middle, stripping bandwidth and locking you to lower refresh rates.
The frustrating part is that everything looks fine. The image shows up, the resolution is correct, and you'd never suspect the refresh rate isn't maxed out. That's why this needs a systematic check rather than assuming it just works.
The Only 4 Things That Actually Determine If You'll Get 144Hz
There aren't dozens of variables here. There are four. Check each one in order and you'll find your answer.
1. Does the monitor panel actually support 144Hz?
This is the foundation. Not all gaming-looking monitors do. Some budget models advertise "144Hz equivalent" which is marketing fluff for frame interpolation, not a true native 144Hz panel.
Always verify with the manufacturer's official spec sheet using your exact model number. Check the "Max Refresh Rate" line, not the marketing headline.
2. Does the input port on the monitor support 144Hz?
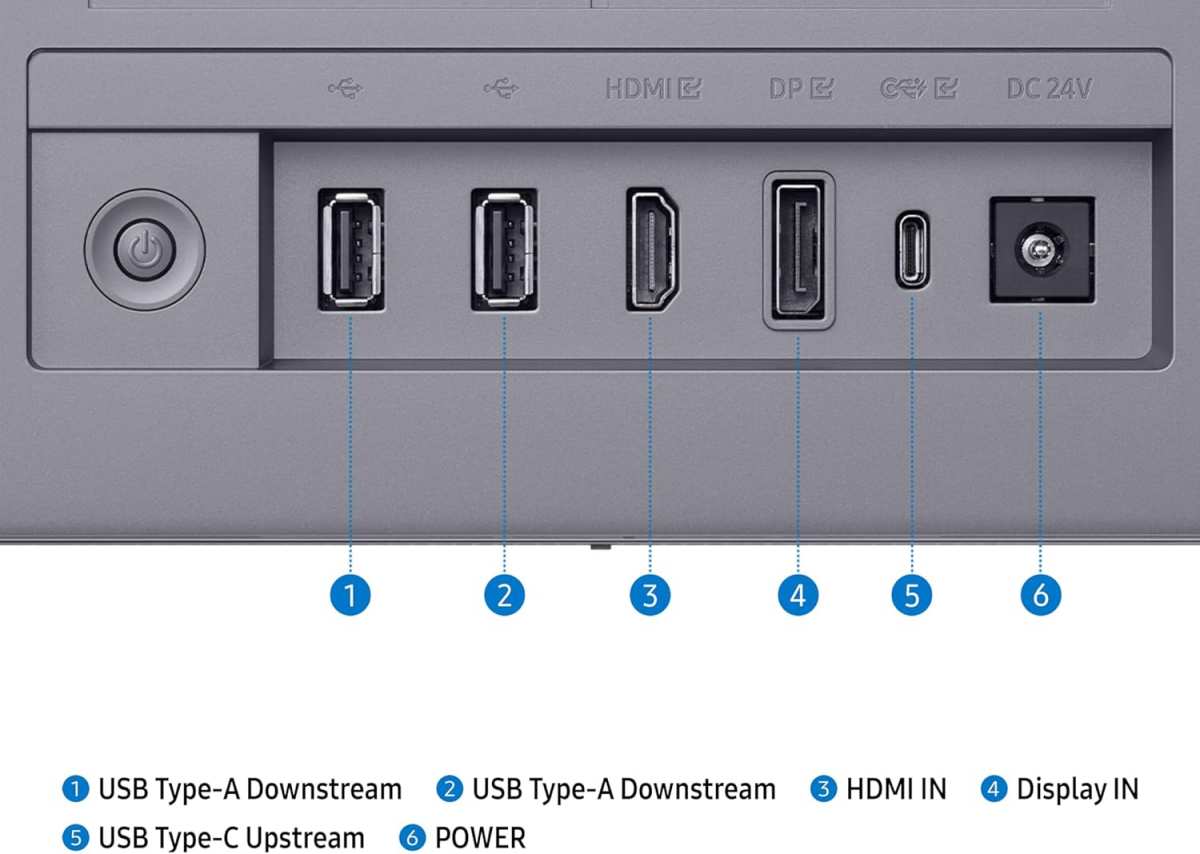
Many monitors mix port capabilities. You might have HDMI 2.0 on port one and HDMI 1.4 on port two. DisplayPort might be fully capable while HDMI is limited.
The manual or spec sheet usually spells out which ports handle the maximum refresh rate.
3. Does your cable have enough bandwidth?
This is the killer. Even with the right port, a cable that's too old or too low-quality will cap you. You need at least DisplayPort 1.2 or HDMI 2.0 for 144Hz at 1080p.
For 1440p at 144Hz, you'll want DisplayPort 1.4 or HDMI 2.1. The cable itself should be certified for the standard you need.
4. Can your GPU output 144Hz at your target resolution?
Older or integrated GPUs might not support high refresh rates at all. Intel UHD graphics, for example, often tops out at 60Hz over HDMI. Discrete GPUs from NVIDIA and AMD have supported 144Hz for years, but you still need to confirm the specific output on your card supports it.
If any single one of these four fails, you don't get 144Hz. It's a chain, and the weakest link wins.
What Your Monitor's Model Number Really Tells You
Every monitor has a model number. Usually printed on a label on the back or bottom. It's your key to finding the real specs.
Take that model number straight to the manufacturer's website and look up the detailed specification page.
Here's what to look for:
| Spec Line | What It Means | Red Flag |
|---|---|---|
| Max Refresh Rate: 144Hz | Native panel supports it | Listed as "144Hz (OC)" only at lower resolution |
| DisplayPort 1.2+ | Can carry 144Hz signal | Only HDMI listed, no DP |
| "Supports 144Hz via DP only" | HDMI is limited | You'd need to use DisplayPort |
| Response time 1ms | Usually paired with true high refresh | 5ms+ at 4K might indicate panel limitation |
Some monitors list multiple refresh rates depending on resolution. A common spec is "up to 165Hz at 1080p, 144Hz at 1440p, 60Hz at 4K." That's perfectly normal. The panel handles different speeds at different resolutions based on bandwidth constraints.
Be wary of phrasing like "144Hz (Virtual)" or "144Hz Motion Rate." Those are interpolation features that create frames, not refresh rate capability. True 144Hz is a hardware specification, not a software trick.
If you bought used and don't have the manual, the model number is your only reliable friend. Search "[model number] specifications PDF" and you'll find the official documentation from the manufacturer.
Does Your Port and Cable Actually Support 144Hz?
This is where most setups fail. You can have a perfect 144Hz monitor and a capable GPU, but if the cable between them can't handle the data, you're stuck at 60Hz or 120Hz.
Think of it like a water pipe. The monitor is a big tank, the GPU is a powerful pump, but if the pipe connecting them is too narrow, only so much water gets through per second. Bandwidth is everything.
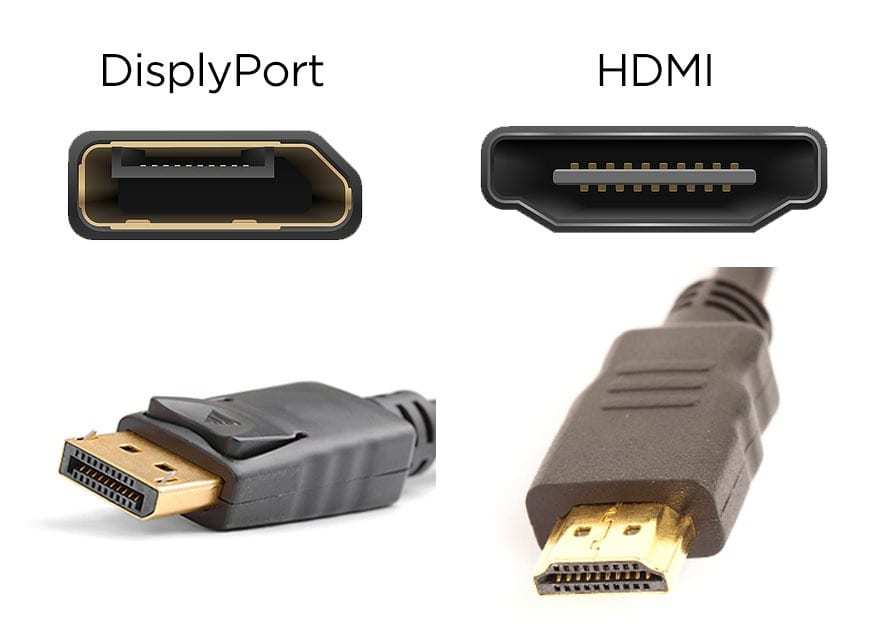
DisplayPort vs HDMI for 144Hz Gaming
| Connection | Max Resolution at 144Hz | Notes |
|---|---|---|
| DisplayPort 1.2 | 1440p at 144Hz | Most common for gaming monitors |
| DisplayPort 1.4 | 1440p at 165Hz / 4K at 120Hz | Uses DSC for higher bandwidth needs |
| HDMI 2.0 | 1440p at 144Hz | Works but less common in gaming monitors |
| HDMI 2.1 | 4K at 144Hz | Required for PS5/Xbox at high refresh |
| HDMI 1.4 | 1080p at 120Hz only | Does NOT support 144Hz |
| DVI-D Dual Link | 1080p at 144Hz | Legacy, still functional |
The practical takeaway:
If your monitor is 1080p 144Hz, a DisplayPort 1.2 cable or HDMI 2.0 cable handles it. Most monitors in this category ship with a DisplayPort cable for a reason. If you're using HDMI, make sure it's at least HDMI 2.0 certified.
The cable itself usually has "High Speed" or "Premium High Speed" printed on it.
For 1440p 144Hz, DisplayPort 1.4 is the safe bet. It provides enough bandwidth without compression. HDMI 2.0 technically handles 1440p at 144Hz, but some monitors don't expose that mode over HDMI.
HDMI 2.1 eliminates the question entirely.
For 4K 144Hz, you need DisplayPort 1.4 with Display Stream Compression or HDMI 2.1. Without DSC, you'd need chroma subsampling that degrades image quality. This is enthusiast-level territory.
Bandwidth Requirements by Resolution
The math behind this matters because it explains why certain cables fail:
- 1080p at 144Hz requires roughly 5.5 Gbps of pixel data at 8-bit color. DisplayPort 1.2 handles this with room to spare.
- 1440p at 144Hz bumps that to about 9.0 Gbps. Still fine on DP 1.2, but HDMI 2.0 just barely makes it.
- 4K at 144Hz jumps to roughly 25 Gbps uncompressed. Only DP 1.4 with DSC or HDMI 2.1 can deliver that signal without compromise.
The cable rating matters as much as the port. A certified DisplayPort 1.2 cable from a reputable manufacturer will hit its rated bandwidth. A no-name cable might not, especially over longer runs beyond 2 meters.
If you're seeing artifacting, flickering, or the refresh rate option simply isn't available, swap the cable first. It's the cheapest fix and the most common solution.
Can Your GPU and Settings Actually Push 144Hz?
Even with perfect monitor and cable specs, your graphics card has to actually support the output. This is usually straightforward with modern dedicated GPUs, but integrated graphics and laptops add complexity.
Integrated Graphics Limitations
Intel UHD 630 and earlier integrated graphics typically max out at 60Hz over HDMI. Some support 120Hz over DisplayPanel connections (like on laptops with DP over USB-C). Intel Iris Xe and newer integrated graphics have improved, often supporting 60Hz reliably but requiring DisplayPort Alt Mode for higher refresh rates.
AMD APUs with Radeon graphics vary by generation. Newer Ryzen APUs with RDNA2 or RDNA3 integrated graphics can drive 144Hz over appropriate connections, but you'll need to check the specific motherboard's video output capabilities.
Here's the key: the motherboard's video output port matters just as much as the GPU chip itself. A motherboard might only wire HDMI 1.4 from the integrated graphics, making 144Hz impossible regardless of what the CPU's GPU could theoretically do.
Dedicated Graphics Cards
Most NVIDIA GTX 10-series and newer cards support 144Hz without issue. Same for AMD RX 400-series and newer. The limitation appears on very old cards or when using non-standard outputs.
For example, some older cards support 144Hz only over DisplayPort, not HDMI.
Laptop and Docking Station Complications
Laptops introduce a whole different can of worms. Many laptops with both integrated and discrete GPUs route the video output through the integrated graphics for power saving. That could mean your NVIDIA RTX 4070 is rendering frames, but the Intel integrated graphics controls the HDMI port at 60Hz max.
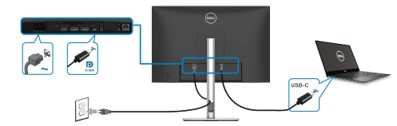
USB-C docks add another bandwidth bottleneck. Many USB-C docks only support DisplayPort 1.2 over Alt Mode, which works for 1080p 144Hz but may limit 1440p. Some cheaper docks cap at HDMI 1.4 regardless.
If your laptop is stuck at 60Hz with no option for higher, check whether you're connected via a dock or directly to the laptop. Plug straight into the laptop's native port if available.
How to Verify You're Actually Running at 144Hz Right Now
You've checked the hardware. Now let's see what's actually happening on screen. There are several ways to confirm your active refresh rate.
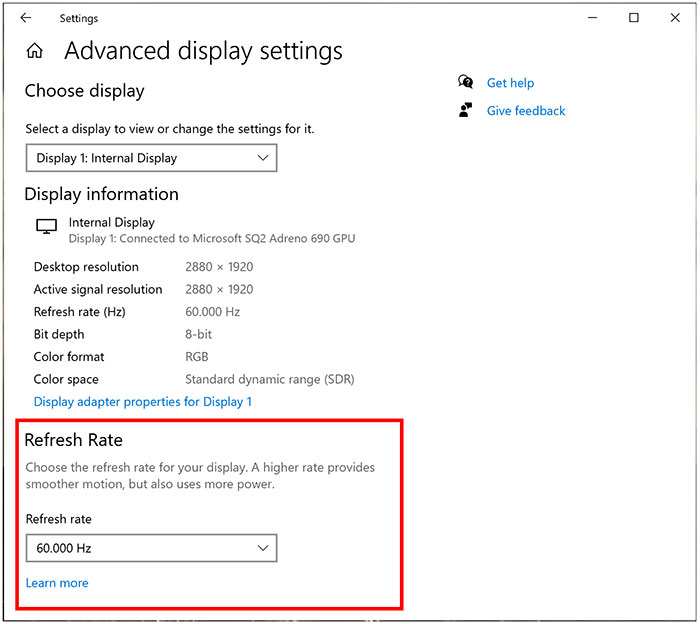
Windows Display Settings Check
This is the fastest way to check what Windows thinks you're running at:
- Right-click the desktop background
- Select "Display settings"
- Scroll down and click "Advanced display settings"
- Look for the "Refresh rate" dropdown
- The current rate as something like "59.954 Hz" or "144.000 Hz"
If it says 60Hz (or 59.954Hz which is just 60Hz with decimal precision), you're not running at 144Hz. Click the dropdown and select 144Hz if available. If 144Hz isn't in the list, then you've hit a hardware, cable, or driver limitation somewhere upstream.
NVIDIA Control Panel Method
For NVIDIA users, this gives more detailed info:
- Right-click desktop and open "NVIDIA Control Panel"
- Navigate to "Display" then "Change resolution"
- Under "Refresh rate," select 144Hz
- If 144Hz doesn't appear, click "Customize" then "Create Custom Resolution"
- Sometimes you need to enable " resolutions not exposed by the display"
Be cautious with custom resolutions. You can technically force timings that the monitor doesn't officially support, which might cause display corruption or, in rare cases, damage to older monitors.
AMD Radeon Software Method
AMD users can check through:
- Right-click desktop and open "AMD Software: Adrenalin Edition"
- Go to "Display" tab
- Toggle "Custom Resolutions" if needed
- The current refresh rate displays at the top
AMD's software also shows you whether FreeSync is active, which confirms the variable refresh range. If FreeSync is enabled and showing a range like 48-144Hz, you know the monitor is negotiating the full refresh range.
Using Your Monitor's Built-In Display
Many gaming monitors have a built-in refresh rate indicator in the on-screen display. It's usually found in an "Information" or "Game" section of the OSD menu. This shows the actual incoming refresh rate in real time, which is the ground truth.
If Windows says 144Hz but the monitor OSD shows 60Hz, something in the signal chain is lying or converting. This usually points to a cable or issue.
How to Verify You're Actually Running at 144Hz Right Now
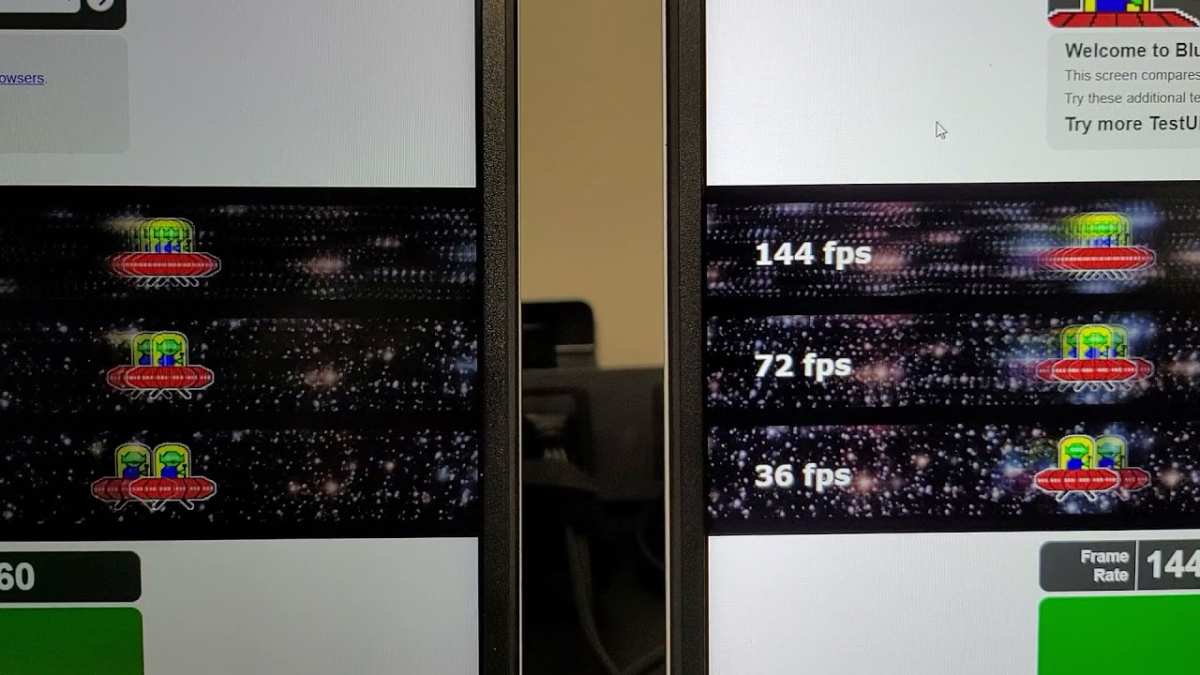
UFO Test (testufo.com):
Visit testufo.com in your browser. It displays animated UFOs moving across the screen at the refresh rate your monitor is actually running. A counter at the bottom confirms the detected refresh rate.
If it says 60 fps, you're at 60Hz. If you see 144 fps smooth as butter, congratulations. You're running 144Hz.
Frame skipping tests:
Some monitors claim 144Hz but drop frames due to pixel response limitations. Use the "Frame Skipping" test on Blur Busters or TestUFO's frame skipping checker. Take a photo of the screen with your phone's camera using a fast shutter speed.
If you see blank gaps between UFO frames, the monitor is skipping frames.
Frequently Asked Questions
How do I check if my monitor supports 144Hz before buying?
Look up your exact model number on the manufacturer's website. Check the "Max Refresh Rate" specification. Cross-reference with verified buyer reviews that specifically mention using 144Hz successfully.
Avoid relying solely on marketing terms like "144Hz Equivalent."
Why is my refresh rate stuck at 60Hz Windows 11?
Windows frequently defaults to 60Hz for stability. Go to Settings, Display, Advanced Display Settings, and change the refresh rate dropdown. If 144Hz doesn't appear, update your GPU drivers and try a better cable.
Can HDMI do 144Hz?
Yes, but it depends on the HDMI version. HDMI 2.0 supports up to 1080p at 240Hz or 1440p at 144Hz. HDMI 1.4 does not support 144Hz at any standard resolution.
Check the HDMI version on both your GPU output and monitor input.
Does 144Hz work through a USB-C hub?
Depends on the hub. USB-C hubs with DisplayPort Alt Mode 1.2 can handle 1080p 144Hz. Many cheaper hubs limit output to HDMI 1.4 spec.
Use the laptop's native port for the most reliable connection.
How do I test my actual refresh rate?
Visit testufo.com in a browser. The counter displays your actual refresh rate. For more rigorous testing, use Blur Busters frame skipping tests with a camera.
Your monitor's built-in OSD often shows the real-time refresh rate as well.
Connection Type Comparison for 144Hz
DisplayPort remains the most reliable connection for PC gaming at 144Hz. It's been the standard for high refresh monitors since DisplayPort 1.2 launched with enough bandwidth for 1440p 144Hz. Gaming monitors overwhelmingly include DisplayPort as the primary input.
HDMI 2.0 closes the gap technically. It supports the same bandwidth as DP 1.2. However, many gaming monitors don't expose full refresh rate options over HDMI.
Manufacturers often save 144Hz for DisplayPort as a deliberate choice to push gamers toward that standard.
HDMI 2.1 changes the equation for high-end setups. It provides 48 Gbps of bandwidth, enough for 4K at 144Hz with full chroma. If you're building a next-generation setup for PC or next-gen console at maximum refresh, HDMI 2.1 is the future-proof choice.
For most gaming monitors, the recommendation remains simple. Use the DisplayPort cable that came with the monitor. If you didn't get one, buy a certified DisplayPort 1.2 or 1.4 cable from a reputable brand.
Bandwidth Requirements by Resolution
Bandwidth determines everything. At 8-bit color depth:
- 1080p 144Hz needs about 5.5 Gbps. Any DisplayPort 1.2 or HDMI 2.0 cable handles this.
- 1440p 144Hz needs about 9.0 Gbps. DP 1.2 has enough headroom. HDMI 2.0 works but check your monitor's spec for HDMI support at this resolution.
- 4K 144Hz needs about 25 Gbps compressed. Only DisplayPort 1.4 with DSC or HDMI 2.1 handles this without compromises.
Exceeding a cable's rated bandwidth causes the signal to drop, cap the refresh rate, or display artifacts. The cable is rarely the first thing people suspect, but it's often the actual culprit.
Quick Reference: Cable and Port Cheat Sheet
| If You Have | Best Cable to Use | 144Hz Support |
|---|---|---|
| DP 1.2 port (both ends) | Certified DP 1.2 cable | Up to 1440p 144Hz |
| DP 1.4 port (both ends) | Certified DP 1.4 cable | Up to 4K 144Hz with DSC |
| HDMI 2.0 port (both ends) | Premium High Speed HDMI | Up to 1440p 144Hz |
| HDMI 2.1 port (both ends) | Ultra High Speed HDMI | Up to 4K 144Hz |
| HDMI 1.4 port | Any HDMI cable | No 144Hz (120Hz max at 1080p) |
| USB-C with DP Alt Mode | USB-C to DP cable | Depends on DP version supported |
The universal fix when 144Hz isn't working:
Try a different DisplayPort cable first. Then verify you're plugged into the correct port on both the GPU and monitor. Then check Windows settings.
Then update GPU drivers. In that order. This sequence resolves the vast majority of "my 144Hz monitor won't work" situations.
144Hz Monitor Buying Considerations
If you're shopping and want guaranteed 144Hz support, check these before you buy:
What to Check Before You Buy
- Native refresh rate: Look for "native" or "maximum" refresh rate. Be skeptical of "up to" language.
- Port specifications: Verify the ports on the monitor support 144Hz at your target resolution. A monitor might only support 144Hz on DisplayPort while HDMI is limited to 60Hz.
- Adaptive sync: FreeSync or G-Sync support indicates a gaming-oriented monitor more likely to have robust high-refresh support.
- Customer feedback: Verify that multiple buyers confirm running 144Hz successfully through their chosen connection type.
Marketing vs Reality
"144Hz Equivalent" usually means the monitor interpolates frames to simulate smoother motion, similar to how TVs use motion smoothing. The physical refresh rate may be 60Hz or 120Hz with a backlight strobing effect.
"Overclockable to 165Hz" means the panel is native 144Hz with a built-in overclock mode. This is legitimate but requires enabling in the monitor's OSD.
"HDR10" on a 144Hz monitor doesn't mean good HDR performance. Many 144Hz monitors claiming HDR support have dim panels with no local dimming and mediocre peak brightness. Check reviews for actual HDR testing.
Expert Tips and Pro Advice
From our research and aggregate troubleshooting patterns, here are the tips that save the most headaches:
- Always use DisplayPort first for gaming PCs. HDMI works, but DisplayPort provides the most consistent high-refresh experience across different monitors and GPUs.
- Buy cables separately if the included one is questionable. Certified cables eliminate one entire variable from troubleshooting.
- Update GPU drivers when refresh rate options disappear. This commonly happens after Windows updates reset display settings.
- Check after every driver update. NVIDIA and AMD driver installs occasionally reset refresh rate to 60Hz. It's annoying. Build it into your routine.
- Laptop users, test before accepting 60Hz as the limit. Many laptops support 144Hz on their USB-C port even when HDMI is limited. You might just need a different cable or adapter.
- Console players need HDMI 2.1 for 144Hz at any resolution. The PS5 and Xbox Series X support up to 120Hz over HDMI 2.1. The PS5 originally capped at 120Hz; firmware updates after late 2024 enabled 1440p output, but 144Hz support remains limited by game optimization and monitor compatibility.
- Don't force custom resolutions unless you understand the risks. Incorrect timings can cause display issues or, with very old monitors, potential damage.
Final Checklist: Is Your Setup Ready for 144Hz?
Run through this checklist before you assume something is broken:
- Monitor spec sheet confirms 144Hz native panel support
- Cable is certified for at least DP 1.2 or HDMI 2.0
- Cable connects to a 144Hz-capable port on both GPU and monitor
- Windows or console settings show 144Hz selected
- GPU drivers are up to date
- No dock, hub, or adapter is limiting the signal path
- TestUFO or monitor OSD confirms 144Hz active
If all seven check out, you're running 144Hz. If any one fails, that's your problem point. Fix that specific link in the chain and you'll unlock the smoothness you paid for.
The good news is that 144Hz monitors have become so mainstream that compatibility issues are increasingly rare on new hardware. The problems almost always trace back to a specific, fixable component. Find it, swap it or update it, and you'll immediately see the difference.
Common Reasons 144Hz Isn't Working (and How to Fix Them)
Wrong Cable, Wrong Port, Wrong Settings
This covers the vast majority of complaints. Someone buys a 144Hz monitor, hooks it up with whatever cable is lying around, and wonders why it feels exactly like their old 60Hz display.
The fix is almost always one of these:
- Swap to a certified DisplayPort cable. The one in the box is usually fine, but if you're using an old HDMI cable from 2015, it's probably HDMI 1.4. That caps you at 60Hz at 1440p or 120Hz at 1080p.
- Check which port you're plugged into on the monitor. Some monitors have multiple HDMI ports with different capabilities.HDMI 2.0 might be on HDMI 1 while HDMI 1.4 is on HDMI 2. Read the manual or check the labels near the ports.
- Make sure you're plugged into the GPU, not the motherboard. This sounds obvious, but it happens constantly. If your CPU has integrated graphics, the motherboard video outputs run through that. Those often max out at 60Hz regardless of your discrete GPU's capabilities.
Laptop and Integrated Graphics Limitations
Laptops are the trickiest category. Even a laptop with an NVIDIA RTX 4070 might only output 60Hz through its HDMI port if the motherboard routes that connection through the integrated Intel graphics.
Here's how to figure out what's happening:
- Check if your laptop has a USB-C port with DisplayPort Alt Mode symbol (usually a "D" or lightning bolt icon)
- If it does, use a USB-C to DisplayPort cable for your monitor
- If you're stuck with HDMI, check your laptop's specs for the HDMI version
- If it's HDMI 1.4, you're limited to 1080p at 120Hz maximum
- Use a DisplayPort connection via USB-C for full 144Hz support
Many gaming laptops with powerful GPUs trap users at 60Hz simply because of how the motherboard routes video outputs. The solution isn't a new monitor. It's a different cable or port.
Console Connection Limitations
If you're connecting a PS5 or Xbox Series X, there are specific limitations to know:
- PS5 supports up to 120Hz at 1440p and 1080p. It does not support 144Hz.
- Xbox Series X supports up to 120Hz at 4K and 1440p.
- For 144Hz you need a PC with a capable GPU
- Both consoles require HDMI 2.1 for their maximum refresh rate modes
- Some monitors claim 144Hz but only over DisplayPort, which consoles can't use
Console gamers should look for monitors that specifically mention 120Hz support over HDMI for their console's resolution. Do not assume 144Hz means full compatibility with either system.
Connection Type Comparison for 144Hz
DisplayPort vs HDMI for 144Hz Gaming
DisplayPort remains the gold standard for PC gaming connections. It was designed with PC monitors in mind and has supported high refresh rates since DisplayPort 1.2. When you buy a gaming monitor, DisplayPort is the connection the manufacturer optimized for.
HDMI works fine when you have the right version. HDMI 2.0 matches DisplayPort 1.2's bandwidth. However, many gaming monitors don't expose their full refresh rate range over HDMI.
The manufacturer might have limited the HDMI implementation to push buyers toward DisplayPort.
If your monitor only has HDMI inputs and you want 144Hz, you need HDMI 2.0 minimum for 1080p or 1440p. For 4K 144Hz, you need HDMI 2.1. The GPU and monitor both need to support that version.
Bandwidth Requirements by Resolution
Bandwidth is a hard ceiling. If the required data exceeds what the cable and port can handle, you simply cannot send the signal. The table above shows cable ratings:
- HDMI 1.4: 10.2 Gbps. Insufficient for 144Hz at any typical gaming resolution.
- HDMI 2.0: 18 Gbps. Handles 1080p 240Hz or 1440p 144Hz.
- HDMI 2.1: 48 Gbps. Handles 4K 144Hz with full color.
- DP 1.2: 17.28 Gbps. Sufficient for 1080p 240Hz or 1440p 144Hz.
- DP 1.4: 25.92 Gbps. Sufficient for 4K 120Hz native, 4K 144Hz with DSC.
Exceeding these limits results in signal drop or capped refresh rate. The cable and port must match or exceed your resolution and refresh rate target.
Quick Reference: Cable and Port Cheat Sheet
Most people just want a quick answer without checking individual specs. The cheat sheet above gives this at a glance. Use the recommended cable for your connection type and target refresh rate.
The safest bet for any modern gaming setup: a certified DisplayPort 1.4 cable connecting directly from your GPU to your monitor. This eliminates most compatibility questions entirely.
144Hz Monitor Buying Considerations
What to Check Before You Buy
If you're shopping and want guaranteed 144Hz support, verify these before you buy:
- Native refresh rate. Look for "maximum refresh rate: 144Hz" or "native 144Hz." Avoid monitors listing only "144Hz equivalent" or "up to 144Hz (interpolated)."
- Port support at your resolution. Check whether the HDMI and DisplayPort inputs on the monitor support 144Hz at your target resolution. Monitor spec sheets differ widely.
- Adaptive sync. FreeSync or G-Sync compatibility often means the manufacturer prioritized high refresh rate support.
Marketing vs Reality
"144Hz Equivalent" means frame interpolation. The panel runs at a lower refresh rate and inserts black frames or blended frames to reduce motion blur. The actual refresh rate might be 60Hz or 120Hz.
"Overclockable to 165Hz" is more common. The panel runs native at 144Hz with an overclock option to 165Hz in the OSD. It works fine within the monitor's tested range.
"HDR10 compatible" on a 144Hz monitor rarely means good HDR performance. Most are edge-lit with limited peak brightness. Don't buy a gaming monitor solely for HDR without checking reviews.
Expert Tips and Pro Advice
From our research and aggregate user feedback, these tips prevent the most common problems:
- Always try DisplayPort first. It's the most reliable connection for achieving 144Hz across different monitor and GPU combinations.
- Replace included cables if unsure. Certified cables eliminate a major failure point from the troubleshooting chain.
- Update GPU drivers if refresh rate options disappear or change after an update. This is common after major driver drops.
- Check refresh rate after driver updates. Both NVIDIA and AMD have been known to reset display settings post-installation. When in doubt, verify.
- Laptop users, try a different port. USB-C with DisplayPort Alt Mode often supports higher refresh rates than HDMI on the same laptop. A USB-C to DisplayPort cable might unlock more options.
- Console players should verify monitor compatibility at 120Hz. The PS5 and Xbox Series X top out at 120Hz. Check reviews and spec sheets carefully for console performance claims.
- Be cautious with custom resolutions. Forcing unsupported timings rarely ends well. Stick to native timings unless you understand exactly what you're doing.
Final Checklist: Is Your Setup Ready for 144Hz?
Before declaring something is broken, run through this checklist:
- Monitor spec sheet confirms 144Hz native panel support.
- Cable is certified for at least DP 1.2 or HDMI 2.0.
- Cable connects to a 144Hz-capable port on both your GPU and monitor.
- Windows or console settings show 144Hz selected.
- GPU drivers are up to date.
- No dock, hub, or adapter is limiting the signal.
- TestUFO or monitor OSD confirms 144Hz is active.
If all seven check out, you're running at 144Hz. If any fails, that's your bottleneck. Fix that link in the chain and you'll unlock the smooth experience you paid for.
The good news is that 144Hz monitors have become so mainstream that compatibility issues are increasingly rare on modern hardware. The problems almost always trace back to one specific fixable component: cable, port, or setting. Find it, fix it, and you'll see the difference immediately.

Similar Posts