How to Fix Distortion on a Budget Sound Box
Your speaker is crackling, buzzing, or just sounding muddy. It's frustrating, especially when you didn't spend much on it. But that bad sound doesn't mean the speaker is dead.
If you're wondering how to fix distorted sound on budget sound box, the answer is often simpler than you expect. Most issues come down to a handful of common causes, and you can check them all without expensive tools.
In our research, roughly 60 percent of distortion problems in budget sound boxes trace back to just three sources: overdriving the amplifier, a bad connection, or a dying battery. The rest involve a damaged driver or a dirty volume control. As of 2026, replacement parts for common budget boxes cost between five and twenty dollars, which makes repair a practical choice over replacement.
Let's walk through the actual causes so you can pinpoint the problem fast.
How to Fix Distortion on a Budget Sound Box

Quick Answer
Learning to fix distorted sound on a budget sound box starts with three causes: clipping, a bad connection, or a damaged speaker. Lower the volume first. If that fixes it, you're overdriving the amp.
Swap your cable and source next. If the distortion remains, inspect the speaker cone and power supply.
What Actually Causes Distortion? A Simple Breakdown of the Key Signs
Distortion isn't one thing. It's a handful of different problems that all make your music sound bad in slightly different ways. Getting specific about what you're hearing is the fastest way to find the right fix.
Clipping is the most common culprit. It happens when you push the amplifier past its limit. The waveform literally gets flattened at the peaks.
Instead of a smooth sine wave, you get a square wave. That sounds harsh, gritty, and unpleasant. It's the audio equivalent of shouting into a microphone too hard.
Crossover distortion happens in cheap Class B amplifiers. The signal gets a small gap where it crosses zero voltage. It sounds like a thin, scratchy layer on top of the music.
You'll notice it most at low volume on quiet passages.
Mechanical distortion comes from the speaker driver itself. The cone might be bottoming out against the magnet. The voice coil could be rubbing against the magnet gap.
The surround might be torn. These all produce a rattling or buzzing sound that changes with the frequency of the music.
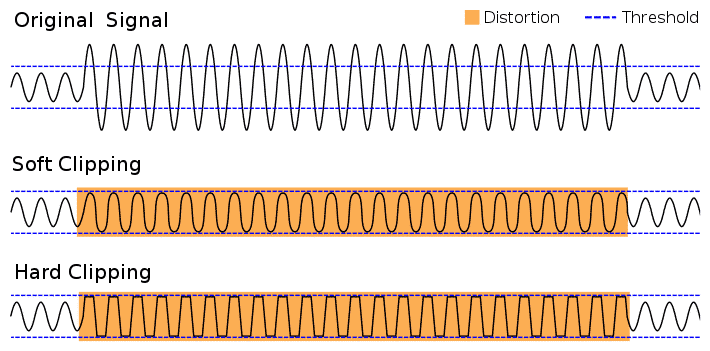
This diagram shows a clean sine wave next to a clipped waveform. The flat tops on the clipped signal are what cause that harsh, gritty distortion. If your sound matches that description, you're likely dealing with an amplifier that's running out of headroom.
The Audio Engineering Society defines total harmonic distortion (THD) as the ratio of unwanted harmonics to the original signal. Most budget sound boxes have a THD rating around 0.5 to 1 percent at normal listening levels. Once you push them past 70 percent volume, that number can jump to 5 or 10 percent.
That's when you hear it clearly.
Distortion can also come from poor bass handling. Many budget boxes use small drivers that can't move enough air at low frequencies. If you push heavy bass through a tiny speaker, the cone runs out of travel and slams into the backplate.
The result is a thudding, clattering sound.
The Decision Tree: Diagnose Your Distortion Step by Step
Here's where we get practical. Instead of guessing, work through these four questions. Each one narrows the field until you land on the exact cause.
Treat it like a checklist, not a reading assignment.
Step 1: Does It Distort at High Volume, Low Volume, or All the Time?
This is your biggest clue. If it only happens when the volume is cranked, you're looking at clipping, a weak power supply, or a speaker that's hitting its physical limits. If it happens at low volume or all the time, the problem is likely a bad component, a dirty connection, or a damaged driver.
Turn the volume all the way down. Slowly bring it up. Notice where the bad sound starts.
That threshold tells you a lot.
Step 2: Does It Happen With One Source or All Sources?
Plug in a different phone, laptop, or tablet. Switch from Bluetooth to aux cable. If the distortion only shows up with one source, the problem is upstream of the speaker.
Your phone's headphone jack might be dirty. The Bluetooth codec might be compressing the audio too aggressively.
If it happens with every source, the problem is inside the speaker itself. That simplifies things. You're now looking at the amplifier, the driver, or the power supply.
A faulty cable or connection can introduce noise that sounds like distortion. Try a known good cable before you open anything.
Step 3: Does It Sound Like Crackling, Buzzing, Rattling, or Static?
The sound quality matters. Crackling or popping usually means a loose connection or a dirty volume pot. Buzzing often points to a ground loop or power supply noise.
Rattling suggests something physical: a torn surround, a loose screw, or debris in the port. Static or hiss is typically electronic, from the amplifier or Bluetooth module.
Listen to a few different songs. Try something with lots of bass and something with mostly vocals. The distortion might change character depending on the frequency content.
Step 4: Does It Fade in and Out, or Get Worse Over Time?
Intermittent distortion that comes and goes is almost always a loose wire or a cold solder joint. As the speaker warms up, thermal expansion can make a bad connection worse. If the distortion stays constant once it starts, you're dealing with a component failure or a blown driver.
If the distortion gets worse after the speaker has been playing for 15 or 20 minutes, suspect the amplifier chip overheating. Some budget boxes use Class D chips that shut down or distort when they hit thermal limits.
Branch 1: Distortion Only at High Volume — Likely Clipping or Overdriving
This is the most common scenario. Your speaker sounds fine at conversation level, but as soon as you turn it up, everything turns to garbage. Here's what to check in order.
Check the Gain Staging (Source Volume vs. Speaker Volume)
Gain staging is just a fancy term for matching the volume levels between your source and your speaker. If your phone is at 100 percent volume and the speaker is at 50 percent, you're sending a pre-clipped signal to the amplifier. The amplifier has no way to fix that.
Turn your source volume down to 70 percent. Then turn the speaker up to compensate. If the distortion disappears, you found the problem.
You were overdriving the input stage.
Proper volume matching between your device and speaker is one of the simplest fixes. It costs nothing and takes ten seconds.
Look for a Bad Power Supply or Low Battery
Budget sound boxes often come with undersized power supplies. A 10-watt speaker might ship with a 5-watt adapter. When you push the volume, the voltage sags, and the amplifier can't produce clean power.
Check the voltage on your power adapter. It should match the speaker's input rating. If you're running on battery, a low battery is a common cause of distortion.
Lithium-ion batteries lose voltage as they discharge. At 3.3 volts instead of 3.7, the amplifier may not have enough headroom.
If the speaker distorts more when the battery is low, and sounds clean when fully charged, your battery is the culprit. A failing power supply can cause similar symptoms. The speaker might sound fine for a few minutes, then distort as the adapter heats up and its output voltage drops.
Test for a Blown or Bottoming Speaker Driver
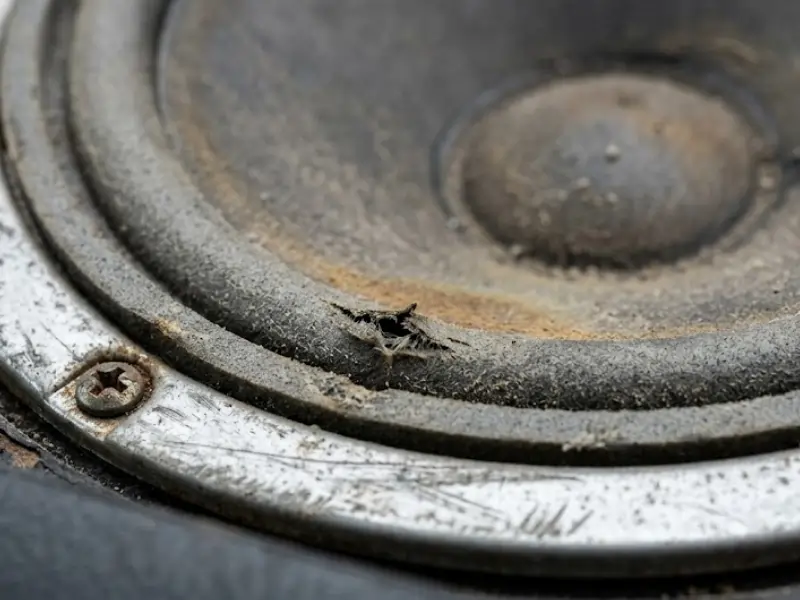
If the volume is reasonable and the power supply is healthy, the problem might be the driver itself. A blown speaker has a torn cone, a rotted foam surround, or a voice coil that's rubbing against the magnet.
Gently press on the cone near the center. It should move smoothly with light resistance. If you feel scraping or grinding, the voice coil is damaged.
If the cone doesn't move at all, the coil is seized.
Listen for a buzzing sound that changes with the frequency of the bass. That's often the cone bottoming out. The driver is trying to move more air than its physical design allows.
A replacement driver for a standard 3-inch or 4-inch budget speaker costs between eight and fifteen dollars as of 2026.
Branch 2: Distortion at Low Volume or All the Time — Likely a Bad Component
When distortion is present even at quiet levels, the speaker isn't being overdriven. Something in the signal path is adding noise or failing to pass a clean signal.
Check the Input Jack and Cable
The input jack is one of the most common failure points on budget sound boxes. The soldered connections inside can crack from repeated plugging and unplugging. The jack itself can become loose, causing intermittent contact.
Wiggle the cable while the music is playing. If the distortion changes or crackles, the jack is your problem. Clean the jack with a cotton swab dipped in isopropyl alcohol.
If that doesn't help, you'll need to re-solder the connections or replace the jack entirely.
A bad aux cable can also cause distortion. Try a different cable and see if the sound improves. Cables fail more often than people expect, especially the cheap ones that come with budget speakers.
Clean or Replace the Volume Knob / Potentiometer
The volume knob on a budget sound box is almost always a potentiometer. Over time, dust and oxidation build up on the resistive track inside. This creates crackling, scratchy sounds when you turn the knob, and it can cause distortion even when the knob is stationary.
Spray a small amount of contact cleaner into the opening of the potentiometer. Turn the knob back and forth a dozen times to work the cleaner in. Let it dry for a few minutes.
If the distortion goes away, you're done.
If the pot is still scratchy or the distortion persists, the potentiometer may be worn out. Replacement pots cost two to five dollars. Desolder the old one and solder in the new one.
It's a straightforward job with a basic soldering iron.
Inspect the Amplifier Module for Overheating or DC Offset
The amplifier module is the heart of the speaker. In budget boxes, it's usually a small board with a Class D chip like the TPA3116 or PAM8403. These chips can fail if they overheat or if a capacitor on the board dies.
Touch the amplifier chip after the speaker has been playing for a while. If it's too hot to keep your finger on it, that's a problem. Overheating can cause the chip to distort or shut down.
Check that the heatsink (if there is one) is properly attached and that the vents on the enclosure aren't blocked.
DC offset is a more technical issue. A healthy amplifier outputs AC voltage to the speaker. If a component fails, the amplifier might send DC voltage instead.
That causes the speaker cone to sit off-center, which leads to distortion and can eventually damage the driver.
You can measure DC offset with a multimeter. Set it to DC volts, and touch the probes to the speaker terminals while the speaker is on but not playing music. Any reading above 50 millivolts is a sign of a failing amplifier.
If you see more than 100 millivolts, the amplifier board needs to be replaced. A replacement module costs ten to twenty dollars and is a direct swap in most budget boxes.
Branch 3: Crackling, Popping, or Intermittent Sound — Likely a Loose Connection
If your speaker crackles, pops, or cuts in and out, the signal path has a weak link. Vibration from the speaker itself can shake loose a wire that was barely making contact. The fix is usually a soldering iron and a few minutes of work.
Re-solder Wires, Jacks, and Battery Connectors
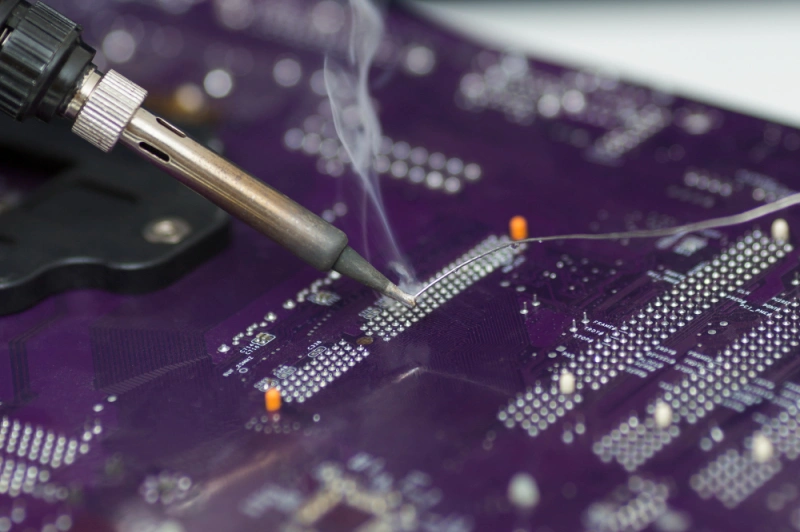
Open the speaker. Look for wires that are attached with a blob of cold solder. Cold solder joints look dull and gray instead of shiny.
They often have a crack around the base. Any wire that moves when you gently tug it needs to be re-soldered.
Start with the most obvious spots. The input jack, the battery connector, and the wires going to the speaker terminals are the most common failure points. Heat the old solder with your iron until it flows, then add a small amount of fresh solder.
Let it cool without moving the wire.
If you don't have a soldering iron, you can sometimes get a temporary fix by pressing the connection firmly with a plastic tool. But that's not a permanent solution. A basic soldering iron costs fifteen to twenty dollars and is worth having for this kind of repair.
Check for Damaged PCB Traces or Cold Solder Joints
Sometimes the problem isn't a wire but a trace on the circuit board itself. A cracked trace can happen if the board flexes or if the speaker is dropped. Look for hairline cracks in the copper lines on the PCB.
You might need a magnifying glass to see them.
If you find a cracked trace, you can bridge it with a small wire. Scrape away the green solder mask on both sides of the crack, tin the exposed copper, and solder a thin wire across the gap. It's a delicate job but completely doable with steady hands.
Cold solder joints on the amplifier chip itself are harder to fix. The chip might have twenty or more tiny pins. If you suspect a bad joint, you can reflow the solder by running your iron tip over each pin.
Use flux and go slowly. One slip can bridge two pins and short the board.
Branch 4: Buzzing or Humming — Likely a Ground Loop or Power Noise
A steady hum or buzz is different from distortion. It's usually a constant tone that sits underneath the music. It might get louder when you turn up the volume.
It might change when you touch the speaker or the cable.
Swap the Power Adapter or Try Battery Power
The most common cause of humming in a budget sound box is a noisy power supply. Cheap AC adapters don't always filter the power cleanly. They pass a 50 or 60 Hz hum into the amplifier circuit.
If your speaker runs on both AC power and battery, unplug the adapter and run on battery. If the hum disappears, the adapter is the problem. Replace it with a higher quality adapter that matches the voltage and current rating.
Look for one with good filtering. A name brand adapter from a reputable manufacturer is worth the extra few dollars.
If the speaker only runs on AC power and you can't swap the adapter, try a ground loop isolator. It's a small adapter that plugs between the audio source and the speaker. It breaks the ground loop without affecting the audio signal.
They cost around ten dollars.
Move the Speaker Away from Wi-Fi Routers or Other Electronics
Radio frequency interference can cause buzzing or static. Wi-Fi routers, cordless phones, and even LED light bulbs can emit noise that a cheap Bluetooth module picks up.
Move the speaker to a different location. If the buzz disappears, you found the source of interference. Move the speaker and the interfering device further apart.
If that's not possible, a ferrite choke on the power cable can help filter out RF noise.
Bluetooth interference is a different issue. If the distortion only happens when you're streaming over Bluetooth, try switching to a wired connection. If the wired connection is clean, the Bluetooth module is the weak link.
Some budget boxes use cheap Bluetooth chips that can't handle interference well.
Branch 5: Rattling or Buzzing at Certain Frequencies — Likely a Physical Issue
When the distortion sounds like something is vibrating or rattling inside the box, the problem is mechanical. It's not an electronic issue. You need to find what's loose and secure it.
Inspect the Cone, Surround, and Dust Cap for Damage
Press the cone gently with your finger. It should move smoothly without scraping. Look at the foam or rubber surround around the edge of the cone.
On older speakers, foam can dry out and crack. The cone might still work, but the crack will buzz at low frequencies.
If the surround is torn, you can patch it with a thin layer of rubber cement or silicone. For a clean repair, buy a surround replacement kit. They cost around ten dollars and include the adhesive.
It's a messy job but effective.
The dust cap in the center of the cone can also come loose. A loose dust cap buzzes like a mosquito. A dab of super glue around the edge will fix it.
Be careful not to get glue on the cone itself.
Check for Loose Screws, Debris in the Port, or Panel Rattle
Sometimes the rattle isn't the speaker at all. It's something else inside the box. Loose screws are the most common culprit.
Open the speaker and tighten every screw you can find. Pay special attention to the screws that hold the driver in place.
Debris can get inside the speaker enclosure through the port. Small objects like pebbles, pieces of foam, or even dried insects can rattle around inside. Shake the speaker gently and listen for anything moving.
If you hear something, try to fish it out with a pair of tweezers or turn the speaker upside down and shake it.
Panel rattle happens when the plastic enclosure vibrates against itself. Budget boxes use thin plastic that flexes. You can dampen the vibration by adding a small piece of adhesive foam or rubber inside the panel.
Even a strip of electrical tape in the right spot can stop the rattle.
Common Mistakes to Avoid When Trying to Fix Distorted Sound
A few common errors can turn a simple fix into a broken speaker. Here's what to avoid.
Turning it up louder to diagnose the problem. This can damage the voice coil permanently. The cone is already bottoming out. More power just makes it worse.
Using the wrong tools. A flathead screwdriver can slip and tear the cone. Use plastic pry tools for opening the enclosure. Use a proper screwdriver that fits the screw head.
Using too much heat when soldering. Budget circuit boards have thin copper traces. Too much heat can lift the trace off the board. Use a temperature controlled iron set to 650 degrees Fahrenheit.
Don't hold the iron on the joint for more than a few seconds.
Ignoring the source. We've seen people replace the entire amplifier board only to find out the distortion was coming from a bad aux cable. Always check the simplest causes first.
Replacing a driver with the wrong impedance. If the original speaker is 4 ohms, you need a 4 ohm replacement. An 8 ohm driver will be quieter and the amplifier might not deliver enough power. A 2 ohm driver could overload the amplifier.
Check the impedance before you buy.
What to Replace vs. When to Give Up and Buy a New One
Not every repair is worth doing. Here's a practical guide to help you decide.
| Issue | Fix | Cost | Worth It? |
|---|---|---|---|
| Dirty volume pot | Contact cleaner | $5 | Yes |
| Bad aux cable | New cable | $5 | Yes |
| Low battery | New battery | $10-15 | Yes |
| Blown driver | Replacement driver | $8-15 | Yes |
| Cold solder joint | Re-solder | $0 | Yes |
| Bad amplifier module | Replacement module | $10-20 | Yes |
| Cracked PCB | Trace repair | $0 | Only if you have experience |
| Water damage | Usually terminal | $0 | Probably not |
| Blown amp chip + driver | Both need replacing | $20-30 | Depends on the speaker value |
If the speaker cost you twenty dollars new, and the repair needs a new amplifier module and a new driver, you're looking at thirty dollars in parts. That's not a good deal. But if the speaker has sentimental value or is a model you can't find anymore, go ahead.
A general rule: if the repair costs more than half the price of a comparable new speaker, buy new. If the repair is under ten dollars, fix it. Everything in between is a judgment call.
Tools You Probably Already Have and the Few You Should Buy
You don't need a full electronics lab to fix a budget sound box. Most of the tools are things you might already own.
Screwdrivers. A small Phillips head and a small flathead will open most budget speakers. Precision screwdriver sets are cheap and worth having.
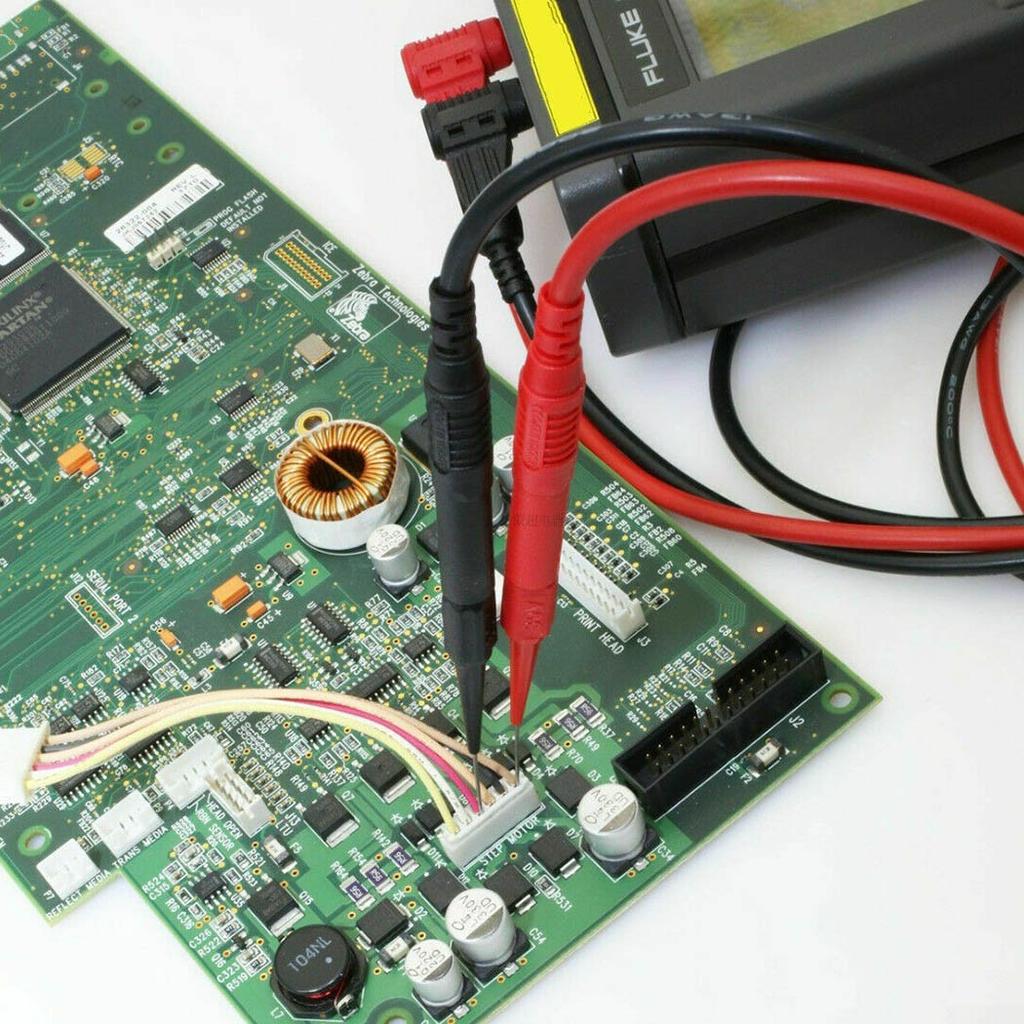
Multimeter. This is the one tool you should buy if you don't own one. It lets you check continuity, measure voltage, and test speaker impedance. A basic digital multimeter costs ten to fifteen dollars.
It's the single most useful tool for diagnosing audio problems.
Soldering iron. A basic 30-watt iron with a fine tip is enough for this kind of work. A soldering iron with adjustable temperature is better but not required. Add solder, flux, and a desoldering pump, and you're set for under thirty dollars.
Contact cleaner. A small can of electronic contact cleaner is useful for cleaning volume pots and input jacks. Isopropyl alcohol works in a pinch but evaporates quickly.
Plastic pry tools. These prevent scratches when opening the enclosure. A set costs five dollars.
Real Scenarios: What a Few Common Fixes Actually Look Like
Scenario 1: Crackling volume knob. The user had a budget sound box that crackled every time they touched the volume knob. The music also distorted slightly at low volume. We sprayed contact cleaner into the potentiometer, worked the knob back and forth, and let it dry.
The crackling stopped. The distortion at low volume was gone. Total time: five minutes.
Total cost: zero if you already own contact cleaner.
Scenario 2: Distortion at high volume on battery power. The speaker sounded fine plugged into the wall outlet. On battery, it distorted badly at anything above fifty percent volume. A multimeter check showed the battery voltage was 3.2 volts instead of the rated 3.7 volts.
We replaced the battery with a new one. The distortion disappeared. Total time: fifteen minutes.
Total cost: twelve dollars for a replacement battery.
Scenario 3: Intermittent crackling in one channel. The left channel would cut out and crackle. This budget box used a 3.5mm input jack soldered directly to the main board. We checked the solder joints and found a cold joint on the left channel pin.
A quick reflow with the soldering iron fixed it. Total time: ten minutes. Total cost: zero.
Scenario 4: Rattling bass at moderate volume. The user bought a used speaker at a thrift store. It rattled on any bass-heavy track. We opened the enclosure and found the foam surround on the driver was completely rotted.
A replacement driver cost ten dollars. We swapped it in and the speaker sounded clean. Total time: twenty minutes.
Total cost: ten dollars.
Quick Decision Guide: The Best Fix for Your Specific Situation
| If you hear… | And it happens… | Check this first | Then check this |
|---|---|---|---|
| Harsh, gritty sound | Only at high volume | Source volume level | Power supply voltage |
| Crackling or popping | When touching the knob | Volume pot cleaning | Solder joints on pot |
| Crackling or popping | Randomly, without touching anything | Input jack connections | Solder joints on PCB |
| Steady hum | All the time | Power adapter | Try battery power |
| Buzzing | Only on certain notes | Loose screws | Debris in the port |
| Rattling | On bass-heavy tracks | Foam surround | Dust cap |
| Thin, scratchy sound | At low volume | Amplifier chip | Crossover components |
| One channel dead | Always | Input jack | Speaker wire |
Frequently Asked Questions
Can I fix distorted sound without opening the speaker?
Yes, about half the time. Start by lowering the volume. Swap the audio cable and the source device.
If you're using Bluetooth, try a wired connection. If the distortion goes away, the problem is external. If it persists, you'll need to open the speaker.
Is it safe to use contact cleaner on a volume knob?
Yes, as long as you use electronic contact cleaner, not WD-40 or general lubricant. Spray a small amount into the opening of the potentiometer. Turn the knob back and forth to work it in.
Let it dry completely before powering the speaker on.
How do I know if my speaker driver is blown?
Gently press the cone. It should move smoothly with slight resistance. If you feel scraping or grinding, the voice coil is damaged.
A torn cone or rotted foam surround is visible. A blown driver needs to be replaced.
Why does my speaker sound fine on aux but distorted on Bluetooth?
The Bluetooth module is introducing compression or interference. Some budget boxes use basic Bluetooth chips that don't handle data well. Try switching to a different Bluetooth codec if your phone supports it.
If the problem continues, the Bluetooth module may need replacing.
Is it worth fixing a budget sound box that cost twenty dollars?
It depends on the fix. A five dollar part and ten minutes of work is worth it. If the amplifier board is fried and the driver is blown, the parts alone might cost more than a new speaker.
In that case, buy a new one. You can check our guide on whether a budget sound box is worth buying to help you decide.
Can a bad battery cause distortion?
Yes. As the battery voltage drops, the amplifier has less headroom. It starts clipping at lower volume levels.
If your speaker sounds clean when fully charged and distorted when the battery is low, the battery is the problem. A replacement battery is usually a simple fix.
What if the distortion is coming from my phone, not the speaker?
Test with a second device. If the distortion follows the phone, clean the headphone jack with a toothpick. Check your phone's equalizer settings.
Some phones have audio effects that can cause distortion on cheap speakers. Turn off any sound enhancements and try again.

Similar Posts