How to Enable HDR on Monitor
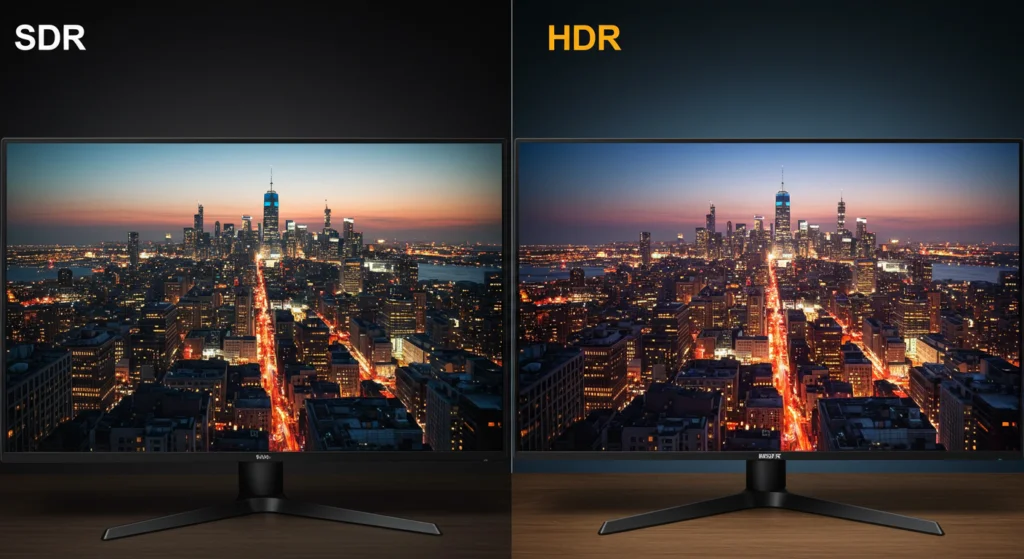
Figuring out how to enable HDR on your monitor shouldn't feel like solving a puzzle, but it often does. You flip a switch in Windows, and suddenly everything looks washed out, or the option doesn't even appear in the first place. The reality is that HDR requires every link in the chain to be correct: your monitor's hardware, the cable, your GPU output, and your operating system settings.
The good news is that once you understand how the pieces fit together, it's straightforward. As of 2026, both Windows 10 and Windows 11 handle HDR natively, and modern GPUs from NVIDIA, AMD, and Intel support HDR output. You just need to follow the right sequence.
Image source: Bing (Web (fair-use with source credit))
Quick Answer
To enable HDR on your monitor, first confirm your monitor supports it via specs or its OSD menu. Then use a DisplayPort 1.4 or HDMI 2.0 or better cable. Next, enable HDR in Windows Display Settings.
After that, configure your GPU control panel for 10-bit color and full dynamic range. You can run the Windows HDR Calibration tool for best results. All steps must work together.
Why HDR Might Not Be Working (Even Though Your Monitor Supports It)
The single biggest reason HDR fails to activate is that one component in the chain doesn't support it. Your monitor might be HDR-capable, but if you're using an old HDMI 1.4 cable, Windows won't show the HDR toggle. Same thing if you've plugged your display into the motherboard video output instead of your dedicated GPU.
Another common culprit is the monitor's own on-screen display settings. Many monitors require you to explicitly enable HDR mode in the OSD before the PC even recognizes it's there. Some also need you to turn on a specific setting like "HDMI UHD Color" or "DisplayPort 1.4 Mode" before the HDR signal can pass through.
Then there's the driver side. Outdated GPU drivers can prevent Windows from detecting HDR capability entirely. If you haven't updated your NVIDIA, AMD, or Intel drivers in months, that's worth checking before anything else.
The frustrating part is that the error messages (or lack thereof) don't tell you which piece is missing. Windows simply doesn't show the HDR option, and you're left wondering what's wrong.
Here's a quick checklist of what you need for HDR to actually work:
- Monitor with true HDR support (DisplayHDR 400 or better, or equivalent)
- DisplayPort 1.4, HDMI 2.0, or HDMI 2.1 cable (not HDMI 1.4)
- Dedicated GPU as the video source (not motherboard output)
- Updated GPU drivers
- HDR enabled in the monitor's OSD
- HDR toggled on in Windows
Skip any one of those, and HDR won't engage. No exceptions.
The Quick Checklist: What You Need Before You Start
Before diving into settings, let's verify your setup actually supports HDR at all. Plenty of monitors are marketed as "HDR compatible" or "HDR ready," which sounds impressive until you realize that often just means they accept an HDR signal but can't display it in any meaningful way.
Your monitor needs one of these:
- VESA DisplayHDR certification (400, 600, 1000, or 1400)
- OLED panel with genuine HDR capability (like those from LG Display or Samsung Dolby Vision panels)
- Monitor with a dedicated HDR toggle in the OSD (not just "HDR Effect" mode)
Your cable needs to meet minimum bandwidth:
| Cable Standard | Maximum Bandwidth | HDR Support |
|---|---|---|
| HDMI 1.4 | 10.2 Gbps | HDR at 1080p only, limited |
| HDMI 2.0 | 18 Gbps | HDR at 4K 60Hz |
| HDMI 2.1 | 48 Gbps | HDR at 4K 120Hz+ |
| DisplayPort 1.2 | 17.28 Gbps | HDR at 1440p 60Hz |
| DisplayPort 1.4 | 25.92 Gbps | HDR at 4K 120Hz (with DSC) |
Your GPU needs to support HDR output:
- NVIDIA GeForce GTX 10-series or newer
- AMD Radeon RX 400-series or newer
- Intel integrated graphics from 8th generation Core or newer (with appropriate driver)
If your setup meets all three requirements, you can move straight to the step-by-step process. If you're not sure about your monitor's HDR capability, that's what the next section covers.
Step 1: Check Your Monitor's Actual HDR Capability
This is where most people skip ahead, and it's where most problems start. You need to know exactly what your monitor can do before you start flipping settings.
Understanding DisplayHDR Certifications
VESA's DisplayHDR certification gives us a standardized way to measure what a monitor can actually deliver. The number tells you the peak brightness in nits, but it also dictates other requirements like color gamut and local dimming. Here's what each level means in practice:
| Certification | Peak Brightness | Backlight Type | Color Gamut | Real HDR Experience |
|---|---|---|---|---|
| DisplayHDR 400 | 400 nits | Edge-lit | ~95% sRGB | Barely perceptible vs SDR |
| DisplayHDR 600 | 600 nits | Edge-lit or FALD | 90%+ DCI-P3 | Noticeably better |
| DisplayHDR 1000 | 1000 nits | Full array local dimming | 90%+ DCI-P3 | Genuinely impressive |
| DisplayHDR 1400 | 1400 nits | Full array local dimming | 95%+ DCI-P3 | Excellent |
DisplayHDR 400 monitors will technically accept and display HDR content, but the difference from SDR is marginal. The panel can't get bright enough, and without local dimming, blacks don't get deep enough to create meaningful contrast. If you have one of these, managing expectations matters.
On the other end, DisplayHDR 1000 and above can produce genuinely eye-opening HDR. Bright highlights pop, shadow detail is preserved, and the wider color gamut puts SDR to shame. That's the experience people think of when they hear "HDR."
OLED monitors sidestep the DisplayHDR rating entirely because their per-pixel emission means true blacks and essentially infinite contrast. An OLED at 600 nits peak brightness often looks more impressive than an LCD at 1000 nits because of that contrast advantage.
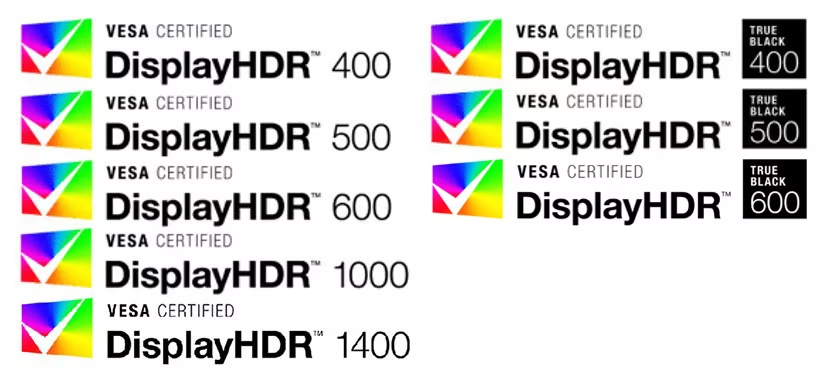
Image source: Bing (Web (fair-use with source credit))
How to Find Your Monitor's HDR Specs
Check the OSD first. Grab your monitor's physical buttons and navigate the menu. Look for an "HDR," "HDR Mode," or "HDMI UHD Color" setting. If you see it, your monitor supports at least basic HDR passthrough.
Take a photo of the menu options for reference.
Look up your model number. Every monitor has a model number, usually on a sticker on the back or bottom. Search for it on the manufacturer's website and check the specifications page. Look for mentions of "HDR10," "DisplayHDR," "HDMI 2.0," or peak brightness ratings.
Check third-party reviews. Sites like rtings.com test monitors independently and report actual measured HDR performance. A monitor claiming DisplayHDR 600 might only hit 500 nits in testing. Reviews tell you what the hardware actually delivers versus what the marketing promises.
If your monitor has no HDR certification and no HDR toggle in the OSD, it doesn't support true HDR. Some monitors have an "HDR Effect" mode that simulates HDR processing on SDR content. It's not the same thing, and it usually just cranks up contrast and saturation in an unnatural way.
In that case, you can skip the rest of this guide. You'll need a monitor with actual HDR support to proceed.
Assuming your monitor does support HDR, let's get it configured.
Step 2: Enable HDR in Your Monitor's OSD First
Windows won't detect HDR capability unless the monitor itself reports it. That means you need to enable HDR in the monitor's on-screen display before your PC even knows it can send an HDR signal.
Common OSD HDR Settings by Brand
Every manufacturer organizes this differently, but the general pattern is the same. You're looking for one of these:
- Dell / Alienware: Display → HDR Mode → On (sometimes under "Brightness and Color")
- LG: Picture → Additional Settings → HDR10 → On (or "HDR Effect" for simulation mode)
- Samsung: Picture → Expert Settings → HDR+ Mode → On (on newer models) or "HDMI UHD Color" → On for the correct input
- ASUS: Image → HDR → On (requires specific input port on some models)
- Acer: Picture → HDR → On
- BenQ: Picture → HDR → On (may be labeled "HDRi" on some models)
- MSI: Gaming → HDR → On (or under "Professional" depending on model)
- Gigabyte / AORUS: Picture → HDR → On
Some monitors have multiple HDR modes. You might see "HDR10," "HDR Game," "HDR Movie," or "HDR Effect." Use "HDR10" or the standard "HDR" option for true HDR. The "Effect" variants are usually software simulation, not actual HDR.
What If There's No HDR Toggle in the OSD?
Don't panic. Some monitors handle things differently.
Auto-detection: Some monitors automatically switch to HDR mode when they receive an HDR signal. In this case, there's no manual toggle. You enable HDR in Windows, and the monitor switches on its own.
Input-specific settings: On Samsung and LG monitors especially, you may need to enable "HDMI UHD Color" or "Deep Color" on the specific input you're using. This setting is usually in the same menu area as HDR, sometimes under "Connection" or "Input settings." Without it, the input port won't accept the higher bandwidth HDR signal, even if the monitor supports HDR on other ports.
Firmware updates: A few monitors required firmware updates to add or fix HDR support. Check the manufacturer's support page for your exact model and see if a firmware update is available.
The wrong port: Some monitors only support HDR on DisplayPort, or only on one specific HDMI port. Check your manual. If you have an HDMI 2.0 monitor but your cable is in the HDMI 1.4 port (some monitors mix port versions), HDR won't work.
Once you've found and enabled HDR in the OSD, move on to the cable check. It seems basic, but cable issues are one of the most common reasons HDR refuses to activate.
Step 3: Verify Your Cable and Connection
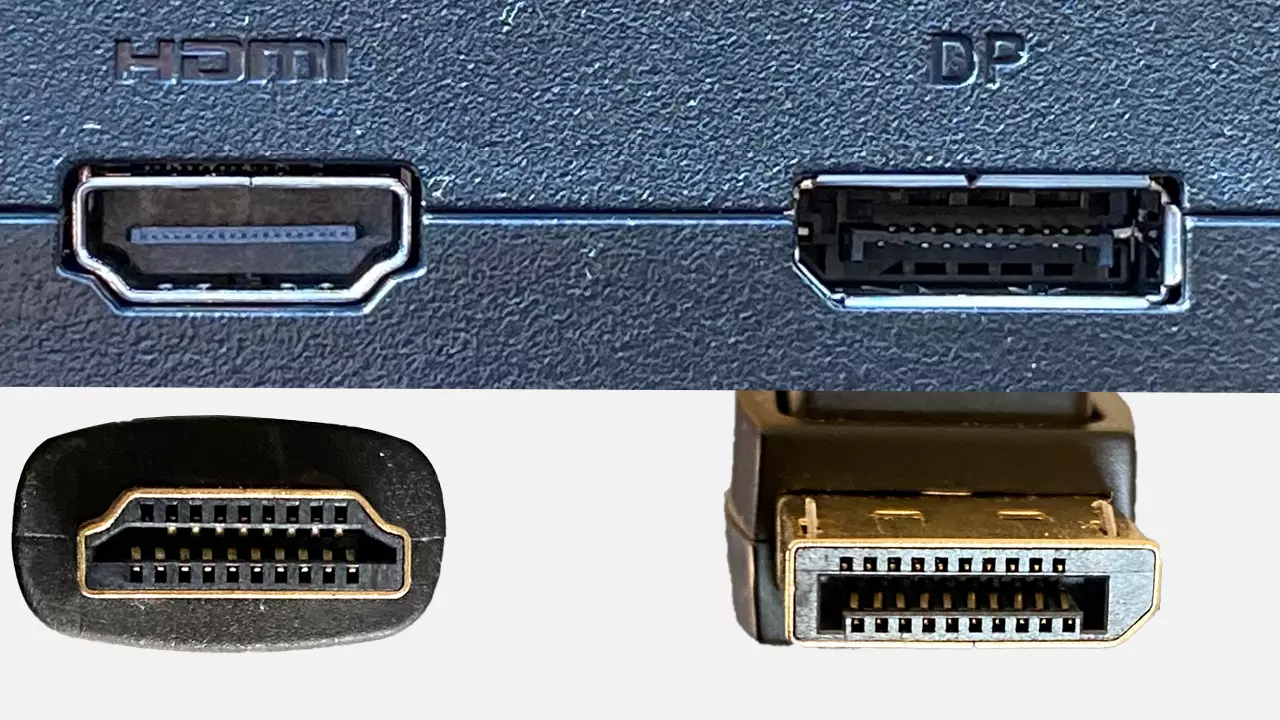
Image source: Bing (Web (fair-use with source credit))
You've probably got a cable plugged in already. The question is whether it's the right cable. HDR requires more bandwidth than SDR at the same resolution and refresh rate.
An old or cheap cable will silently fail to deliver the HDR signal, and Windows will never know the monitor supports it.
Cable Requirements for HDR
| Resolution + Refresh Rate | Minimum Cable Standard | Notes |
|---|---|---|
| 1920×1080 @ 60Hz + HDR | HDMI 2.0 or DP 1.2 | No issues here |
| 2560×1440 @ 60Hz + HDR | HDMI 2.0 or DP 1.2 | Works fine |
| 2560×1440 @ 144Hz + HDR | DisplayPort 1.4 | HDMI 2.0 caps at 1440p 60Hz with HDR |
| 3840×2160 @ 60Hz + HDR | HDMI 2.0 or DP 1.4 | Both handle this |
| 3840×2160 @ 120Hz + HDR | HDMI 2.1 or DP 1.4 with DSC | Bandwidth is tight |
Display Stream Compression (DSC) is a visually lossless compression standard that lets DisplayPort 1.4 push 4K 120Hz HDR. Both your GPU and monitor need to support it for this to work. Most GPUs from NVIDIA RTX 20-series onward and AMD RX 5000-series onward support DSC.
Common Cable Mistakes
Using an old HDMI 1.4 cable. HDMI 1.4 can technically pass HDR at 1080p or below, but it lacks the bandwidth for 4K HDR. If you're running 1440p or 4K, you'll see no HDR option at all, or the image will flicker when you toggle it. The cable itself looks identical to newer HDMI cables, so you need to check the packaging or labeling for "High Speed HDMI" or "Premium High Speed HDMI" certification.
Plugging into the motherboard video output. If you have a dedicated GPU (which most desktop gamers do), your rear I/O panel has two sets of video outputs: one on the motherboard and one on the graphics card. HDR requires the GPU output. Plugging into the motherboard sends the signal through the CPU's integrated graphics, which may not support HDR on your OS, or may lack the bandwidth.
Always use the GPU ports.
Cheap DisplayPort cables that don't meet spec. Not all DP cables are created equal. A cable rated for DP 1.2 won't carry a DP 1.4 signal, even if it physically fits. Look for "DisplayPort 1.4" or "DP 1.4" printed on the cable itself.
If the cable is unlabeled and came in the monitor box, it's probably fine. If it's a no-name cable from five years ago, it might not be.
Not enabling "HDMI UHD Color" or equivalent on the monitor. This catches people constantly. Your monitor has an HDR toggle, you have the right cable, but the HDMI port itself is set to a limited mode that doesn't accept HDR signal. Dig into the OSD and look for "HDMI UHD Color," "Deep Color," "Enhanced Format," or similar wording.
Enable it for the input you're using.
Image source: Bing (Web (fair-use with source credit))
If your cable checks out and you're plugged into the correct port on your GPU, it's time to move into Windows settings.
Step 4: Enable HDR in Windows
Now that your monitor OSD is configured and your cable checks out, it's time to flip the switch in Windows. This part is straightforward, but the HDR toggle only appears when every upstream requirement is met. If it's still missing, go back and verify your cable and OSD settings.
Windows 11
Windows 11 has the most polished HDR implementation as of 2026. Microsoft improved the SDR content handling and added Auto HDR for gaming.
- Right-click on your desktop background
- Select Display settings
- Click the display you want to configure (if you have multiple monitors)
- Under Brightness and color, you'll see a toggle labeled Use HDR
- Toggle it On
- Click into the HDR section that expands below it to fine-tune: , HDR/SDR brightness balance: Controls SDR content brightness when HDR is active
, SDR content brightness: Fine-tunes how non-HDR apps look
, Use HDR: Master toggle (same as above)
, Use WCG content: Enables wide color gamet if your display supports it
- If you want Auto HDR for older games, find Auto HDR under the same section and toggle it On
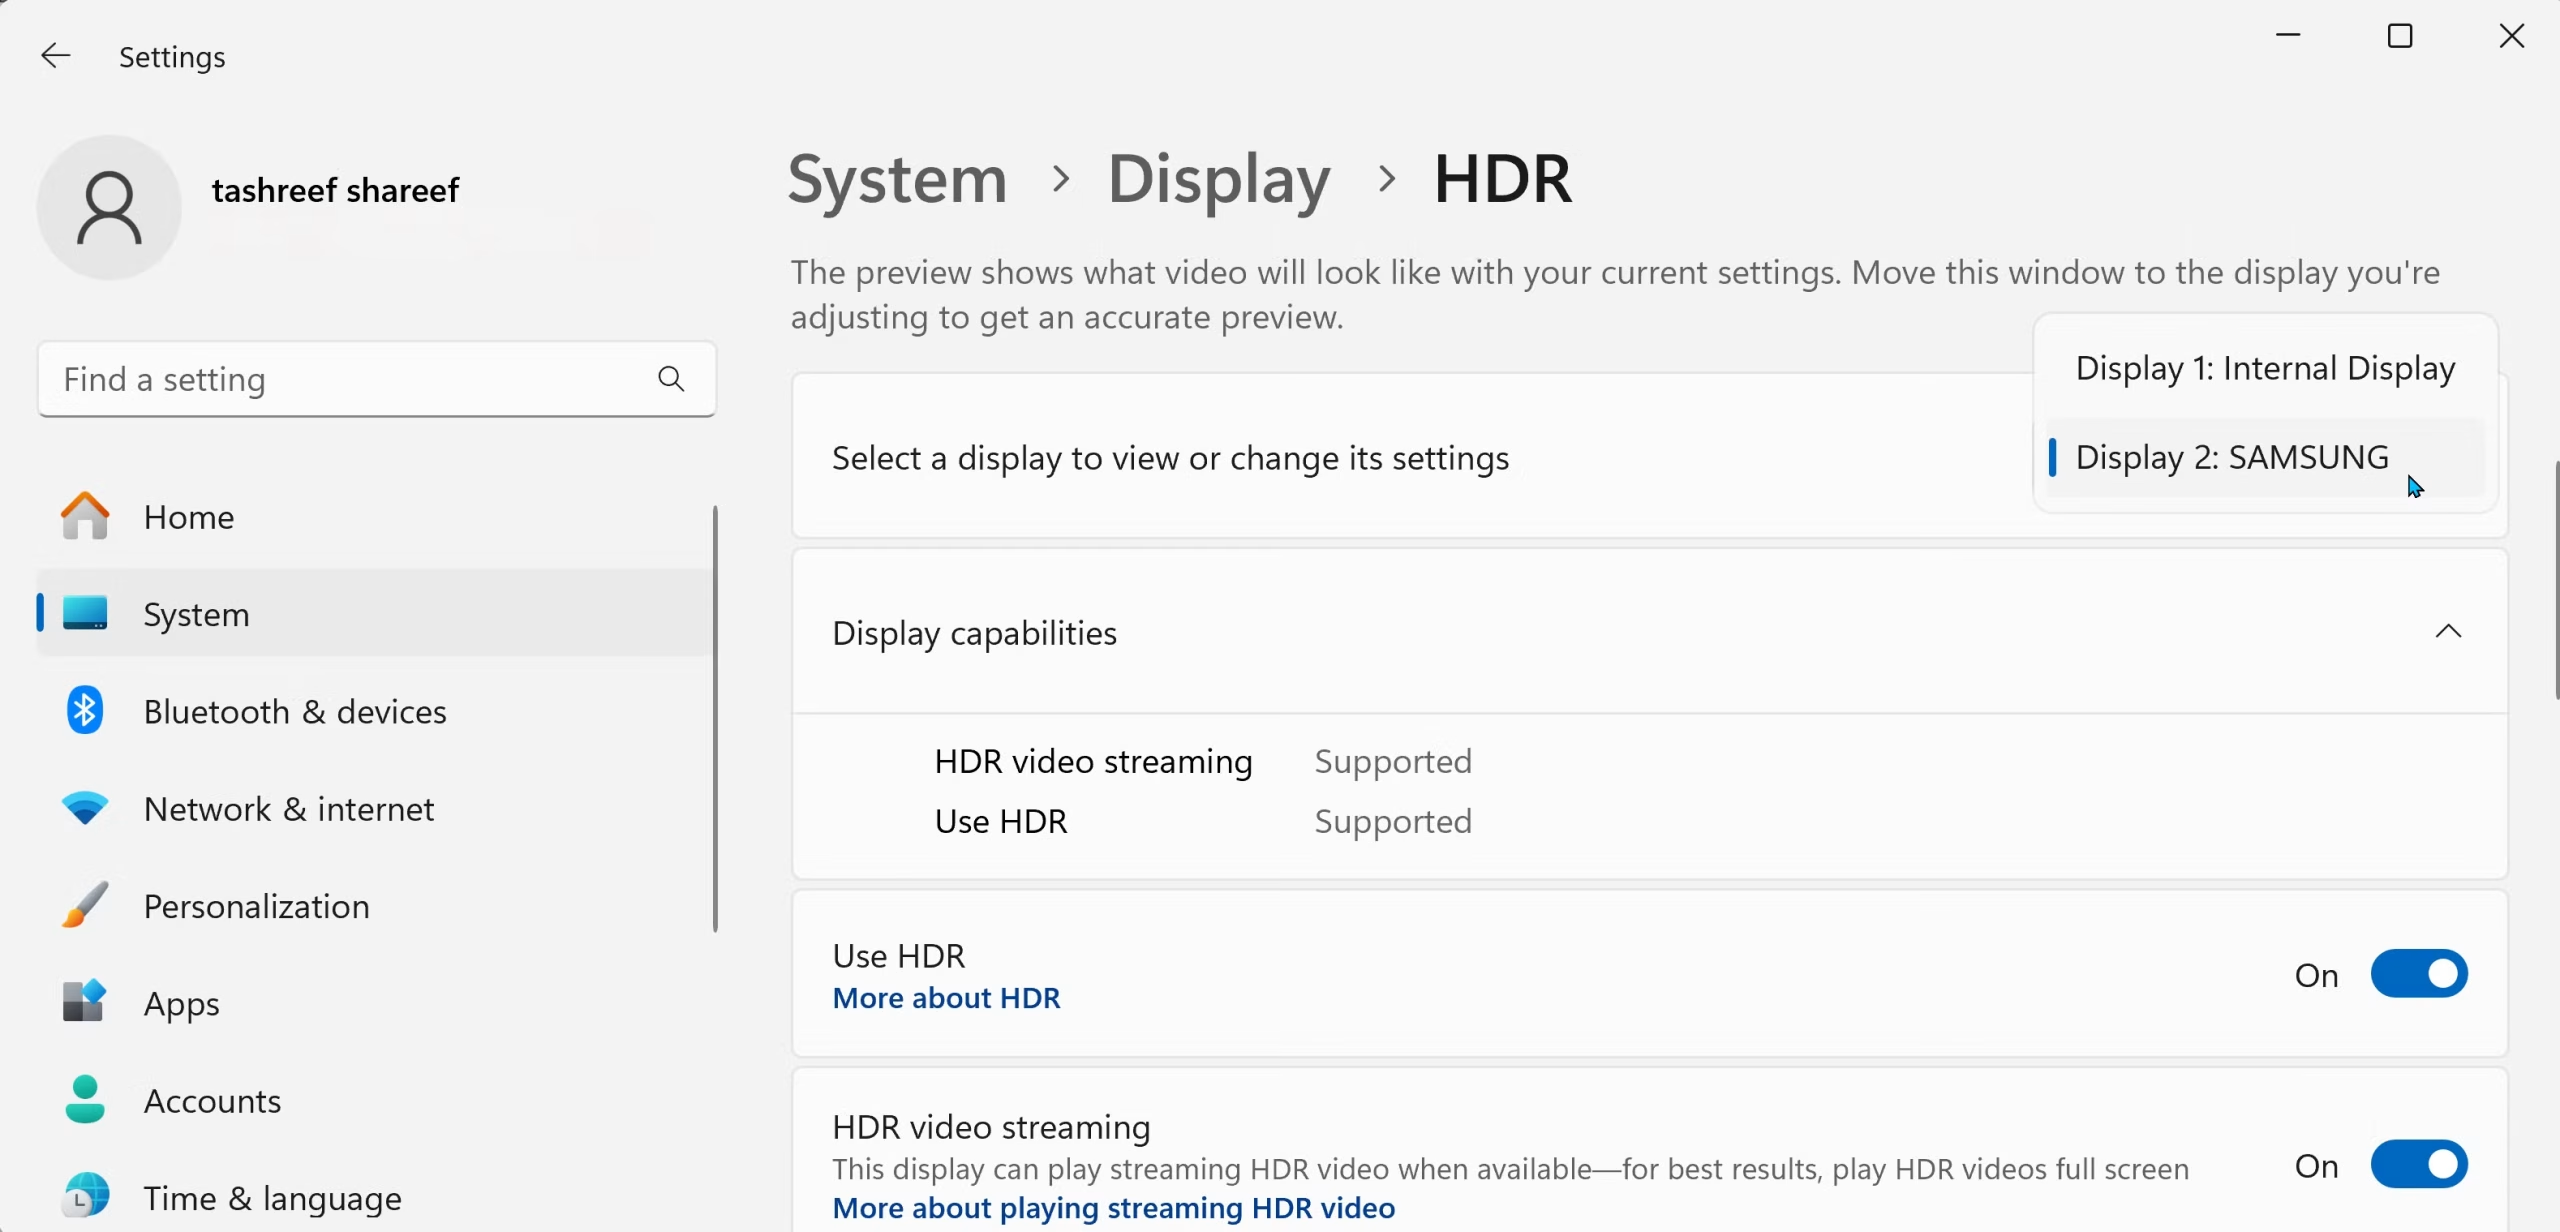
Image source: Bing (Web (fair-use with source credit))
Windows 10
Windows 10's HDR support works but feels rougher around the edges. The UI is less intuitive, and SDR content handling isn't as refined.
- Right-click on your desktop background
- Select Display settings
- Scroll down and click Windows HD Color settings
- Under Display capabilities, you'll see if HDR is supported
- Toggle Play HDR games and apps to On
- Adjust the SDR content brightness slider as needed
Windows 10 groups HDR under the "Windows HD Color" branding, which confuses people who search for "HDR settings." Same feature, different menu name.
What If the HDR Toggle Is Missing?
Go back through the checklist. The toggle appears only when:
- Your monitor reports HDR support via EDID (enabled in OSD)
- Your cable carries enough bandwidth
- Your GPU outputs signal from the correct port
- Your GPU drivers are up to date
Update your GPU drivers first. Then check your cable. Then verify the monitor OSD.
Those three things fix 90% of "missing HDR toggle" cases.
Step 5: Configure HDR in Your GPU Control Panel
Windows can toggle HDR on, but your GPU control panel handles the deeper settings. Color depth, dynamic range, and output format all live here. If these are wrong, HDR will look washed out or banded even when Windows thinks it's working.
NVIDIA Control Panel
- Right-click desktop → NVIDIA Control Panel
- Navigate to Display → Change resolution
- Select the HDR-capable display
- Scroll to 3. Apply the following settings and enable it
- Set these: , Output color depth: 10 bpc (maximum available)
, Output color format: RGB or YCbCr444
, Output dynamic range: Full
- Click Apply
If 10 bpc isn't available, your cable doesn't support the bandwidth. Drop to 8 bpc and accept some banding, or upgrade your cable. Running HDR at 8-bit causes visible gradients, especially in dark scenes.
AMD Radeon Software
- Right-click desktop → AMD Software: Adrenalin Edition
- Click the Display tab
- Find the toggle for HDR and enable it
- Set Color Depth to 10-bit if available
- Ensure Pixel Format is set to RGB 4:4:4 Full
AMD's interface varies slightly between driver versions, but the HDR toggle stays in the Display tab. Some older versions buried it under "Color" or "Display Color." If you can't find it, update your drivers.
Intel Graphics Command Center
- Right-click desktop → Intel Graphics Command Center
- Navigate to Display → Color
- Enable HDR if the option appears
- Set Color Depth to 10-bit if supported
Intel integrated graphics support HDR on 10th-gen Core processors and newer. If your CPU is older, the option may not appear regardless of your monitor's capability. Driver updates occasionally add or fix HDR support for Intel iGPUs.
Step 6: Calibrate HDR So It Actually Looks Good
HDR out of the box rarely looks its default. Windows defaults tend to leave SDR content looking dim, and HDR content can appear either too bright or lacking punch. Calibration fixes both.
The Windows HDR Calibration Tool
Microsoft released a free calibration app that makes a noticeable difference. Here's how to use it.
- Open the Microsoft Store on your PC
- Search for Windows HDR Calibration
- Install and open the app
- You'll see three adjustment screens: , Minimum brightness: Drag the slider until the pattern barely disappears into black. This sets your black point.
, Maximum brightness: Drag until the bright elements clip, then back off slightly. This sets your white point.
, Color saturation: Adjust to your preference. Slight boost usually looks good without going overboard.
- Click Finish to save the calibration profile
The app writes an ICC-like profile that adjusts HDR rendering system-wide. It won't fix a bad display, but it ensures your decent display is performing at its best.
Manual Adjustments Worth Making
HDR/SDR brightness balance slider lives in Windows 11's HDR settings. It controls how bright your desktop, browsers, and other SDR apps look while HDR mode is active. Start at 50.
If the desktop looks too dim, bump it up. If HDR content looks washed out compared to SDR, lower it.
Monitor OSD brightness may interact with Windows calibration. If HDR content looks too bright after calibration, lower the monitor's overall brightness. The two aren't always perfectly coordinated.
In-game HDR settings exist in most modern games. Always use these to fine-tune. They typically include a peak brightness slider, white point adjustment, and paper-white brightness for UI elements.
The game knows its own HDR intent better than Windows does.
Running HDR without calibration is like using a monitor straight out of the box. It works. It just doesn't look its best.
Why Does HDR Look Washed Out on the Desktop?
Windows maps SDR content into the HDR signal for the entire desktop. The result is that your desktop background, browser windows, and text all look dim and desaturated. This isn't a bug.
It's a known limitation of how Windows handles the SDR-to-HDR conversion.
The HDR/SDR brightness balance slider helps. Raising it to 60 or 70 makes SDR content look closer to normal. But you lose some of the dynamic range advantage in HDR content in the process.
It's a tradeoff.
Some users prefer to leave HDR off entirely and only enable it when launching games or movies. You can toggle HDR on and off in Windows 11's quick settings panel (click the notification area icons in the taskbar, and the HDR toggle appears if available).
For DisplayHDR 400 monitors, the washed-out desktop might be the most noticeable thing about HDR mode. Without meaningful brightness advantage, the calibration overhead often isn't worth it for daily use.
Should You Use Auto HDR for Older Games?
Auto HDR in Windows 11 takes SDR games and applies an HDR-like effect automatically. It works on most DirectX 11 and newer games. The results vary, but when it works well, it's a genuine upgrade.
Turn on Auto HDR if:
- You're playing a game without native HDR support
- The game looks noticeably better with the effect applied
- Colors don't appear oversaturated or unnatural
Turn off Auto HDR if:
- The game has its own native HDR option. Use that instead.
- UI elements become hard to read or washed out
- Skin tones look unnatural or colors appear oversaturated
- You notice performance impact (usually minimal, but it exists)
Auto HDR is a software approximation. It can't recreate true HDR rendering where the game engine calculates lighting in a wider range. Think of it as a decent post-process filter rather than real HDR.
Is HDR Worth It for Your Monitor?
Honest answer: it depends entirely on your hardware.
DisplayHDR 400 monitors. Don't bother. The difference from SDR is negligible. You're better off keeping SDR and enjoying accurate colors without the calibration hassle.
DisplayHDR 600 monitors. Worth enabling for gaming and movies. The improvement is noticeable, but don't expect a transformative experience.
DisplayHDR 1000 and above. Absolutely worth it. HDR content looks dramatically better. The wider contrast range makes games and movies feel more immersive.
OLED monitors with HDR. The best HDR experience available on desktop. Perfect blacks combined with bright highlights create an SLED-backlit display can't match. If you're using an OLED with HDR, the effort to set it up correctly is well worth it.
Refresh rate trade-offs. Some monitors drop from 144Hz to 60Hz when HDR is enabled at 4K. This is a bandwidth limitation. Check your monitor's specs.
If you only get 60Hz with HDR on a 144Hz monitor, using DisplayPort 1.4 with DSC or upgrading to HDMI 2.1 might fix it.
Common Mistakes That Prevent HDR From Working
Using the wrong cable. HDMI 1.4 doesn't have the bandwidth for 4K HDR. You need at least HDMI 2.0 or DisplayPort 1.4. The cable looks the same, so check the labeling or packaging.
Plugging into the motherboard instead of the GPU. Your rear I/O has video ports on both the motherboard and the graphics card. HDR requires the dedicated GPU. If you're plugged into the motherboard, you're using the CPU's integrated graphics, which may not support HDR output.
Not enabling HDR in the monitor OSD first. Windows won't show the HDR toggle unless the monitor reports HDR capability. That report comes from the monitor's own settings menu. Enable HDR there before touching Windows.
Outdated GPU drivers. HDR support has improved significantly in recent driver branches. If you haven't updated in months, you might be missing fixes that enable proper HDR detection and output.
Confusing "HDR Effect" with real HDR. Many monitors have an "HDR Effect" mode in the OSD. This is a software simulation that cranks contrast and saturation. It's not true HDR.
Look for "HDR10" or just "HDR" for actual HDR support.
Expecting DisplayHDR 400 to look impressive. It won't. The certification only requires 400 nits peak brightness with no local dimming. The difference from SDR is minimal.
Manage your expectations accordingly.
Not setting 10-bit color depth. HDR at 8-bit causes visible banding, especially in gradients and dark scenes. Set your GPU output to 10 bpc if your hardware supports it.
Quick Decision Guide: Is Your Setup HDR-Ready?
Use this to quickly figure out where you stand.
| Your Situation | What to Do |
|---|---|
| Monitor has DisplayHDR 600+ and DP 1.4 or HDMI 2.1 | You're good. Follow the steps above. |
| Monitor has DisplayHDR 400 | HDR will work but barely looks different from SDR. |
| Monitor has no HDR certification but says "HDR compatible" | Likely just accepts HDR signal. Poor actual performance. |
| Using HDMI 1.4 cable | Upgrade to HDMI 2.0 or DisplayPort 1.4. |
| HDR toggle missing in Windows | Update GPU drivers. Check cable. Check monitor OSD. |
| HDR looks washed out on desktop | Normal. Adjust HDR/SDR brightness balance slider. |
| HDR looks bad in a specific game | Check in-game HDR settings. Try turning off Auto HDR. |
Frequently Asked Questions
Does HDR increase input lag?
HDR processing adds negligible latency on modern monitors. The signal processing time is typically under 1 millisecond. You won't notice any difference in competitive gaming.
The bigger concern is that some monitors drop to 60Hz when HDR is enabled, which feels less smooth than high refresh rate SDR.
Why does HDR look dimmer than SDR on my desktop?
Windows maps SDR content into an HDR container, which can make the desktop appear dimmer. Use the HDR/SDR brightness balance slider in Windows 11 to compensate. Raising it to 60 or 70 usually restores normal-looking SDR brightness.
Alternatively, keep HDR off and enable it only when needed.
Can I use HDR with multiple monitors?
Yes, but with caveats. Both monitors need to support HDR for the option to appear on either. If only one monitor supports HDR, Windows may still show the toggle, but enabling it can cause issues on the non-HDR display.
Some users report that HDR only works on the primary display in multi-monitor setups.
Do I need a special streaming app for HDR content?
Netflix requires the Windows app and a Premium plan for HDR playback. Disney+ works through the Windows app or Edge browser. YouTube HDR works in Chrome or Edge on Windows 11.
Local HDR video files play through apps like MPC-HC or VLC with madVR, though setup varies.
Does Auto HDR work on Windows 10?
No. Auto HDR is exclusive to Windows 11. Windows 10 users need games with native HDR support to get HDR rendering.
If Auto HDR matters to you, upgrading to Windows 11 is worthwhile for that feature alone.
Will HDR work through a USB-C or Thunderbolt connection?
It depends. USB-C with DisplayPort Alt Mode can carry HDR if the adapter and monitor support it. Thunderbolt 3 and 4 docks with DisplayPort 1.4 output also support HDR.
However, many cheaper USB-C hubs only support HDMI 1.4 or limited bandwidth, which breaks HDR. Check your dock's specifications for DisplayPort 1.4 or HDMI 2.0+ support.
Final Thoughts
Enabling HDR on your monitor isn't a single switch. It's a chain: monitor hardware, cable, GPU output, Windows settings, and content. Every link has to be correct, or HDR simply won't work.
If you've followed every step and HDR still doesn't look right, your monitor's HDR implementation might just be weak. DisplayHDR 400 and many "HDR-compatible" monitors deliver a barely noticeable improvement over SDR. That's a hardware limitation, not a settings problem.
For monitors with DisplayHDR 600 or higher, or OLED panels, HDR can look genuinely stunning. It just takes a bit of setup and calibration to get there.

Similar Posts































