How to Calibrate HDR Monitor
Figuring out how to calibrate HDR monitor setups can feel like a guessing game. You toggle HDR on, the desktop looks washed out, games clip highlights, and movies don't pop the way they should. The problem usually isn't the panel.
It's that HDR needs a different calibration approach than SDR, and most guides skip that distinction entirely.
The good news is that proper HDR calibration follows a clear process once you know your panel type, your target brightness, and which tools to use. Whether you're editing video, gaming, or just want Netflix to look right, this guide walks you through each decision point so you get accurate HDR without the trial and error.
Quick Answer
Calibrate your HDR monitor in three stages. First, enable HDR in your OS and set correct GPU output settings. Second, use a calibration tool (software or hardware colorimeter) to set peak brightness, black point, and color gamut targets.
Third, fine-tune per-app or per-game HDR settings for your specific content. Most users see a noticeable improvement after just the first two stages.
Why HDR Calibration Is More Complicated Than You Think
SDR calibration has one gamma curve, one brightness target, and one color space. HDR throws all of that out the window. You're now dealing with the PQ curve (SMPTE ST 2084), metadata that tells the display how to map content, and peak brightness targets that vary wildly between panels.
A 400-nit HDR400 panel and a 1400-nit HDR1400 panel need completely different calibration targets. The same ICC profile won't work on both. Even the connection matters.
HDMI 2.1 at full bandwidth behaves differently than DisplayPort 1.4 with DSC, and your GPU driver interprets the EDID data from each path slightly differently.
Here's what makes this a decision-tree topic rather than a one-size-fits-all checklist. Your calibration path depends on your panel technology, your operating system, whether you have a hardware colorimeter, and what you're actually using the monitor for. A video editor targeting DCI-P3 reference needs a different workflow than someone who just wants Cyberpunk 2077 to look right.
The Three Paths: Which Calibration Workflow Fits Your Situation
Not everyone needs the same calibration depth. Pick the path that matches your use case and available tools.
Path 1: Software-Only (Windows HDR Calibration App)
This is the free, no-hardware-required route. Microsoft's HDR Calibration app (available on the Microsoft Store as of 2026) walks you through setting black point, peak brightness, and color saturation using on-screen sliders. It generates an ICC profile that Windows applies system-level.
Best for: Casual HDR gaming, movie viewing, general use.
Limitations: No actual luminance measurement. You're judging by eye, which introduces subjectivity. Not suitable for color-critical work.
Path 2: Hardware Colorimeter + Calibration Software
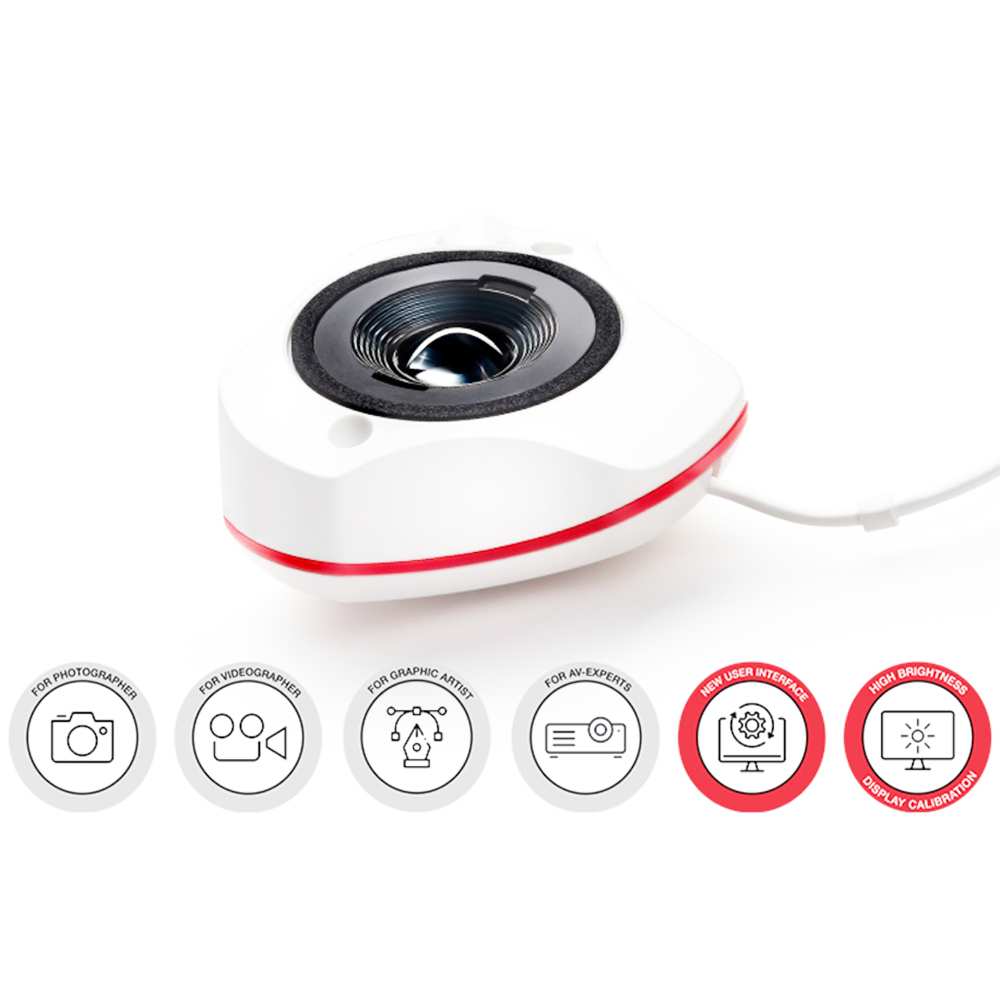
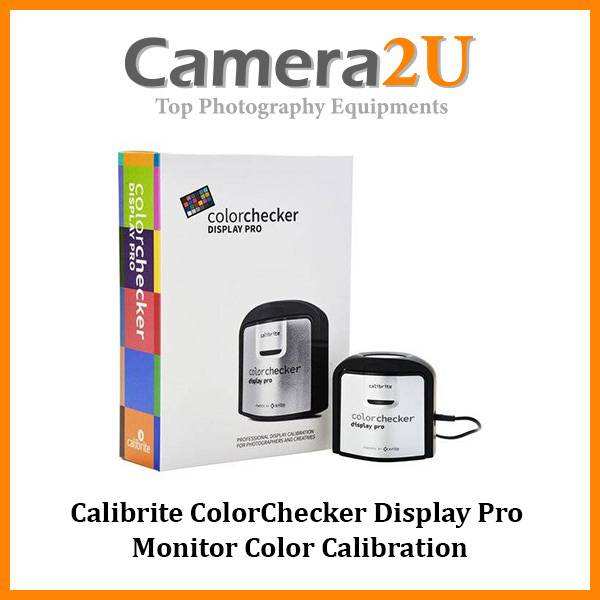
This is the professional route. You use a device like the Calibrite ColorChecker Display Pro or X-Rite i1Display Pro Plus to physically measure what your panel outputs. Software like CalMAN, DisplayCAL, or Portrait Displays then builds an accurate ICC profile based on real data.
Best for: Photo/video editing, content creation, anyone who needs verified accuracy.
Limitations: Cost ($150 to $700+ for hardware and software). Some colorimeters struggle with extreme HDR brightness on OLED panels.
Path 3: Per-Game and Per-App HDR Tuning
Many HDR games and apps have their own calibration screens with paper white, peak brightness, and tone mapping sliders. This is often the final step after system-level calibration, and for some users it's the only step they need.
Best for: Gaming-focused users, console HDR calibration.
Limitations: Settings don't carry across titles. You're recalibrating each time a new game ships.
| Path | Cost | Accuracy | Best For |
|---|---|---|---|
| Software-only | Free | Moderate | Gaming, movies, general use |
| Hardware colorimeter | $150 to $700+ | High | Professional content creation |
| Per-game tuning | Free | Variable | Console gaming, quick fixes |
Before You Start: What You Need and How to Prep Your Monitor
Preparation matters more than most people realize. Skipping these steps leads to calibration results that drift within weeks.
Tools you'll need (depending on your path):
- Hardware colorimeter (Calibrite ColorChecker Display Pro, X-Rite i1Display Pro Plus, or Datacolor SpyderX 2)
- Calibration software (DisplayCAL for free, CalMAN or Portrait Displays for professional work)
- A stable monitor position (no direct sunlight hitting the panel during measurement)
- Your monitor's factory calibration report (if provided)
Monitor prep steps:
- Warm up the panel for at least 30 minutes. OLED panels especially need time to reach stable luminance output.
- Reset your monitor to factory defaults. Clear any custom picture modes, dynamic contrast, or auto-brightness features.
- Disable any ambient light adaptive features. These interfere with consistent HDR output.
- Confirm your cable and port support full HDR bandwidth. HDMI 2.1 or DisplayPort 1.4 minimum for 4K HDR at 10-bit.
- Set your GPU output to the correct color depth and format. For Nvidia, that's 10-bit, RGB or YCbCr 4:4:4, full dynamic range in the Nvidia Control Panel. For AMD, check Radeon Software under Display settings.
Step-by-Step: Calibrating HDR on Windows (The Most Common Setup)
Windows 11 is the primary HDR desktop platform as of 2026, and the workflow here applies to most PC users. If you're on Windows 10, the steps are similar but the HDR toggle lives in a slightly different location.
Step 1: Enable HDR and Set Your GPU Output Correctly
Open Settings > System > Display > HDR. Toggle "Use HDR" on. If the toggle is grayed out, your cable, port, or GPU doesn't support HDR output, or your monitor's EDID isn't reporting HDR capability correctly.
Now check your GPU control panel. For Nvidia: right-click desktop > Nvidia Control Panel > Change resolution > Output color depth (set to 10-bit if available) > Output color format (RGB or YCbCr 4:4:4) > Dynamic range (Full). For AMD: open Radeon Software > Display > Color depth and pixel format settings.
This step alone fixes a surprising number of "HDR looks bad" complaints. Incorrect GPU output settings cause crushed blacks, banding, or a flat image before you even touch calibration.
Step 2: Warm Up Your Panel and Reset to Factory Defaults
Let your monitor run for 30 minutes minimum with HDR enabled. Display a mid-gray field or just leave it on a normal desktop. This stabilizes the backlight and panel temperature.
Then reset your monitor's OSD (on-screen display) to factory defaults. Turn off dynamic contrast, local dimming auto-adjust, eco mode, and any "smart" brightness features. These features fight against calibration by constantly shifting output.
Step 3: Run the Windows HDR Calibration App
Download the "Windows HDR Calibration" app from the Microsoft Store. It's free and takes about five minutes.
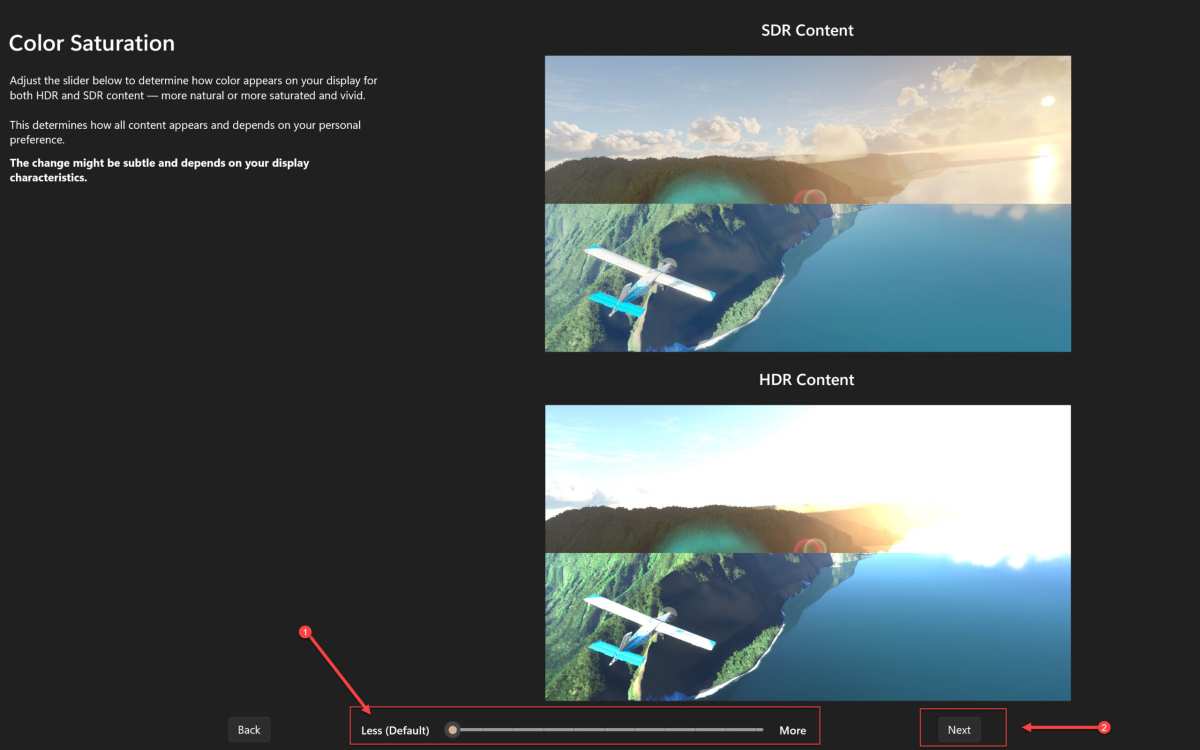
The app walks you through three adjustments:
- Black point: Adjust until the pattern just barely disappears into black. This sets your shadow detail floor.
- Peak brightness: Adjust until the highlight pattern stops clipping. This tells Windows your panel's actual max nits.
- Color saturation: Adjust to where colors look vivid but not oversaturated.
The app generates an ICC profile and applies it automatically. You can verify it's active by checking Color Management in Windows Settings.
Step 4: Create an ICC Profile (If Using a Colorimeter)
If you're using a hardware colorimeter, this is where you move beyond software-only calibration. Launch your calibration software (DisplayCAL is free and capable; CalMAN and Portrait Displays are professional-grade options).
Select your colorimeter when prompted. Set these targets:
- White point: D65 (6500K)
- EOTF: PQ (SMPTE ST 2084)
- Peak luminance: Your panel's actual sustained peak brightness (check your monitor's spec sheet, not the marketing number)
- Black level: As low as your panel reads (0.0001 nits for OLED, higher for LED backlit)
Place the colorimeter on the panel as instructed by your software. Run the measurement sequence. The software builds an ICC profile based on what your panel actually outputs, not what the EDID claims.
Step 5: Verify and Fine-Tune with Real Content
Open HDR test patterns (available free from sources like the AVIA HDR test pattern suite or YouTube HDR demo clips). Check that shadow detail is visible without being lifted, highlights don't clip prematurely, and skin tones look natural.
Then open your most-used HDR games and apps. Adjust their internal HDR sliders (paper white, peak brightness) to match your calibrated system target. Most games recommend setting paper white between 200 and 300 nits for comfortable desktop viewing, with peak brightness matching your panel's calibrated max.
Step-by-Step: Calibrating HDR on macOS
macOS handles HDR differently than Windows, and the calibration options are more limited. Apple's built-in ColorSync manages color management, and the system applies tone mapping automatically on HDR displays.
On a Mac with an HDR-capable display (Pro Display XDR, or an external HDR monitor via Thunderbolt), open System Settings > Displays. You'll see a "HDR" toggle or a reference mode selection. Apple's reference modes (HDR Video, HDR Cinema, etc.) are pre-calibrated targets for specific workflows.
For custom calibration, you'll need a hardware colorimeter and software like DisplayCAL or CalMAN. macOS doesn't have a built-in HDR calibration app equivalent to Microsoft's. The process involves creating a custom ICC profile using your colorimeter, then loading it via ColorSync Utility.
One important note. macOS applies its own tone mapping on top of ICC profiles for HDR content. This means your calibration profile affects SDR content directly but only partially influences HDR output. Apple's system-level tone mapping takes priority in HDR mode, which limits how much manual calibration you can apply.
For most Mac users, selecting the correct reference mode and ensuring your GPU output is set correctly gets you 80% of the way there. Hardware calibration is mainly needed for professional color-critical work.
Step-by-Step: Console HDR Calibration (PS5 / Xbox Series X)
Console HDR calibration is simpler than PC but follows the same principles. Both Sony and Microsoft provide built-in calibration tools in their system settings.
PS5: Go to Settings > Screen and Video > Video Output > Adjust HDR. The system walks you through three screens: black point (adjust until the sun icon disappears), peak brightness (adjust until the sun icon is barely visible), and mid-tone (a paper white adjustment on newer firmware versions).
Xbox Series X/S: Go to Settings > General > TV & Display Options > Calibrate TV > HDR games calibration. Microsoft's tool is more detailed, with separate adjustments for max luminance, min luminance, and color balance.
Both tools are software-only. No hardware colorimeter support. The calibration applies system-wide and affects all HDR games and apps.
Individual games may still have their own HDR settings that need adjustment on top of the system calibration.
One common mistake is calibrating with the console's HDR off or with an incorrect HDMI input selected. Make sure your TV or monitor is in the correct HDMI mode (often labeled "Enhanced" or "HDR" in the display's input settings) before running calibration.
Common Mistakes That Ruin HDR Calibration
These are the errors we see most often, and they're easy to avoid once you know to look for them.
Calibrating with HDR disabled. This sounds obvious, but people do it. You need to be in HDR mode when you calibrate. SDR calibration settings don't translate to HDR.
Leaving dynamic features enabled. Dynamic contrast, auto brightness, local dimming auto-adjust, and eco modes all shift your panel's output in real time. They fight calibration. Turn them off before you start.
Using the wrong peak brightness target. Your monitor's spec sheet says "1000 nits peak." That's usually a burst measurement on a small window. Sustained full-screen brightness is often 30% to 50% lower. Calibrate to what your panel can actually hold, not the marketing number.
Ignoring GPU output settings. 8-bit color depth, limited dynamic range, or incorrect color format in your GPU control panel causes banding and crushed blacks. This isn't a calibration issue. It's a signal path issue.
Calibrating a cold panel. OLED and Mini-LED panels shift luminance as they warm up. Give the display at least 30 minutes of operation before taking measurements.
Forgetting per-game settings. System-level calibration sets the foundation. But most HDR games have their own paper white and peak brightness sliders. You need to adjust these after system calibration, or highlights and UI brightness will feel off.
How Different Panel Types Change the Calibration Process
Your panel technology determines what's achievable and which calibration targets make sense. Here's how the main HDR panel types differ.
OLED
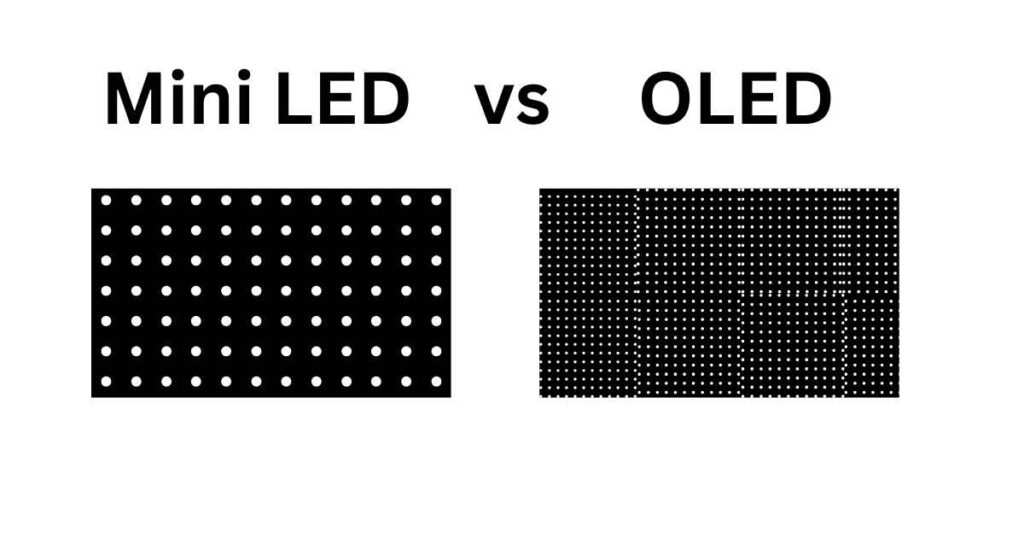
OLED panels deliver true per-pixel black levels (effectively 0.0001 nits). This makes black point calibration essentially automatic. The challenge is peak brightness.
Most consumer OLEDs sustain 600 to 800 nits full-screen, with burst peaks around 1000 nits on small windows.
Color accuracy out of the box is typically excellent on OLED. Calibration mainly involves setting the correct peak luminance target and verifying the EOTF tracking. QD-OLED panels add a wider native color gamut, which requires gamut mapping for DCI-P3 content.
Watch for ABL (Automatic Brightness Limiting). OLED panels reduce brightness on large bright areas. Your calibration needs to account for sustained, not burst, measurements.
Mini-LED / FALD
Mini-LED panels with full-array local dimming offer higher sustained brightness (1000 to 2000+ nits) but introduce halo artifacts around bright objects on dark backgrounds. Black levels depend on the number of dimming zones. A 576-zone panel looks different from a 1152-zone panel in near-black scenes.
Calibration should focus on peak brightness accuracy and color gamut coverage. Black point calibration is less critical since local dimming handles that dynamically. Verify that your local dimming setting is consistent during calibration, as different modes change the behavior.
Edge-Lit LED
Edge-lit HDR panels are the most limited. They lack local dimming or have very few zones. HDR performance is constrained, and calibration can only do so much.
Peak brightness targets should be conservative (400 to 600 nits). Color accuracy is the main thing calibration can improve on these panels.
When to Recalibrate and How to Keep HDR Looking Right Long-Term
HDR calibration isn't a one-and-done task. Panels drift over time, firmware updates can change behavior, and OS updates sometimes reset your settings.
Recalibration schedule:
- OLED panels: Every 25 to 50 hours of use for professional work. Monthly for general use. OLED luminance degrades gradually, shifting your white balance and peak brightness.
- Mini-LED / LED backlit: Every 100+ hours for professional work. Quarterly for general use. LED backlights are more stable but still shift over time.
- After any firmware update: Check your settings. Some monitor firmware updates reset calibration data or change tone mapping behavior.
- After GPU driver updates: Occasionally, driver updates reset color depth or dynamic range settings. Verify your GPU control panel settings after major updates.
Long-term maintenance tips:
- Keep a record of your calibration settings and ICC profiles. If something resets, you can reload quickly.
- Use your monitor's built-in calibration memory slots if available. Many professional monitors store multiple profiles.
- Watch for Windows updates that reset HDR toggles. Microsoft has pushed updates that disable HDR or reset the calibration app profile.
- If you use a colorimeter, recalibrate the colorimeter itself annually. Colorimeters can drift over time.
Frequently Asked Questions
Can I calibrate HDR without a colorimeter?
Yes. The Windows HDR Calibration app and console built-in tools work without hardware. You won't get measurement-verified accuracy, but you'll see a significant improvement over uncalibrated HDR.
For professional work, a colorimeter is necessary.
Does HDR calibration affect SDR content?
It can. When HDR is enabled in Windows, SDR content is tone-mapped into the HDR signal. The Windows HDR Calibration app includes an SDR content brightness slider that controls how SDR content appears within the HDR desktop.
Adjust this separately from your HDR calibration.
Why does my HDR calibration look different in every game?
Each game engine implements its own tone mapping and HDR rendering. System-level calibration sets the signal output, but the game's internal HDR settings (paper white, peak brightness) determine how that signal is interpreted. You need to calibrate each game individually after system calibration.
Is VESA DisplayHDR certification a guarantee of accuracy?
No. DisplayHDR certification validates that the panel meets specific brightness, color gamut, and bit depth thresholds. It doesn't guarantee out-of-box color accuracy.
A DisplayHDR 1000 monitor can still have a Delta E of 5 or more without calibration. Calibration is always needed for accurate HDR.
How do I know if my ICC profile is actually being applied?
Open Color Management in Windows Settings and check that your profile is set as the default. Some applications (particularly full-screen games) bypass the Windows color management system entirely. In those cases, calibration at the GPU driver level or per-game settings is more effective than ICC profiles.
Should I calibrate HDR for photo editing?
Only if your workflow specifically involves HDR content. For standard SDR photo editing (sRGB or Adobe RGB), keep HDR disabled and calibrate in SDR mode. If you're editing HDR images for HDR delivery, calibrate in HDR mode using your target color space (usually DCI-P3 or Rec. 2020) with a hardware colorimeter.
Final Recommendation: Which Path Should You Take?
If you're gaming or watching HDR content casually, start with the Windows HDR Calibration app or your console's built-in tool. It's free, takes five minutes, and fixes the most common HDR issues. That's Path 1, and for most people it's enough.
If you're doing photo editing, video color grading, or any work where color accuracy matters, invest in a hardware colorimeter and use Path 2. The Calibrite ColorChecker Display Pro paired with DisplayCAL gets you professional results for under $200 total. CalMAN is worth the investment if you're doing this professionally.
If you're primarily a gamer who wants each title to look its best, Path 3 (per-game tuning) is your go-to. Do the system-level calibration first, then spend two minutes in each game's HDR settings menu. That combination gives you the best results with the least ongoing effort.
The one thing not to do is nothing. Uncalibrated HDR is why so many people think HDR looks worse than SDR. A few minutes of proper calibration changes that completely.
Step-by-Step: Calibrating HDR on macOS
macOS handles HDR differently than Windows, and the calibration options are more limited. Apple's built-in ColorSync manages color management, and the system applies tone mapping automatically on HDR displays.
On a Mac with an HDR-capable display (Pro Display XDR, or an external HDR monitor via Thunderbolt), open System Settings > Displays. You'll see an HDR toggle or a reference mode selection. Apple's reference modes (HDR Video, HDR Cinema, etc.) are pre-calibrated targets for specific workflows.
For custom calibration, you'll need a hardware colorimeter and software like DisplayCAL or CalMAN. macOS doesn't have a built-in HDR calibration app equivalent to Microsoft's. The process involves creating a custom ICC profile using your colorimeter, then loading it via ColorSync Utility.
One important note. macOS applies its own tone mapping on top of ICC profiles for HDR content. This means your calibration profile affects SDR content directly but only partially influences HDR output. Apple's system-level tone mapping takes priority in HDR mode, which limits how much manual calibration you can apply.
For most Mac users, selecting the correct reference mode and ensuring your GPU output is set correctly gets you 80% of the way there. Hardware calibration is mainly needed for professional color-critical work.
Step-by-Step: Console HDR Calibration (PS5 / Xbox Series X)
Console HDR calibration is simpler than PC but follows the same principles. Both Sony and Microsoft provide built-in calibration tools in their system settings.
PS5: Go to Settings > Screen and Video > Video Output > Adjust HDR. The system walks you through three screens: black point (adjust until the sun icon disappears), peak brightness (adjust until the sun icon is barely visible), and mid-tone (a paper white adjustment on newer firmware versions).
Xbox Series X/S: Go to Settings > General > TV & Display Options > Calibrate TV > HDR games calibration. Microsoft's tool is more detailed, with separate adjustments for max luminance, min luminance, and color balance.
Both tools are software-only. No hardware colorimeter support. The calibration applies system-wide and affects all HDR games and apps.
Individual games may still have their own HDR settings that need adjustment on top of the system calibration.
One common mistake is calibrating with the console's HDR off or with an incorrect HDMI input selected. Make sure your TV or monitor is in the correct HDMI mode (often labeled "Enhanced" or "HDR" in the display's input settings) before running calibration.
Common Mistakes That Ruin HDR Calibration
These are the errors we see most often, and they're easy to avoid once you know to look for them.
Calibrating with HDR disabled. This sounds obvious, but people do it. You need to be in HDR mode when you calibrate. SDR calibration settings don't translate to HDR.
Leaving dynamic features enabled. Dynamic contrast, auto brightness, local dimming auto-adjust, and eco modes all shift your panel's output in real time. They fight calibration. Turn them off before you start.
Using the wrong peak brightness target. Your monitor's spec sheet says "1000 nits peak." That's usually a burst measurement on a small window. Sustained full-screen brightness is often 30% to 50% lower. Calibrate to what your panel can actually hold, not the marketing number.
Ignoring GPU output settings. 8-bit color depth, limited dynamic range, or incorrect color format in your GPU control panel causes banding and crushed blacks. This isn't a calibration issue. It's a signal path issue.
Calibrating a cold panel. OLED and Mini-LED panels shift luminance as they warm up. Give the display at least 30 minutes of operation before taking measurements.
Forgetting per-game settings. System-level calibration sets the foundation. But most HDR games have their own paper white and peak brightness sliders. You need to adjust these after system calibration, or highlights and UI brightness will feel off.
How Different Panel Types Change the Calibration Process
Your panel technology determines what's achievable and which calibration targets make sense. Here's how the main HDR panel types differ.
OLED
OLED panels deliver true per-pixel black levels (effectively 0.0001 nits). This makes black point calibration essentially automatic. The challenge is peak brightness.
Most consumer OLEDs sustain 600 to 800 nits full-screen, with burst peaks around 1000 nits on small windows.
Color accuracy out of the box is typically excellent on OLED. Calibration mainly involves setting the correct peak luminance target and verifying the EOTF tracking. QD-OLED panels add a wider native color gamut, which requires gamut mapping for DCI-P3 content.
Watch for ABL (Automatic Brightness Limiting). OLED panels reduce brightness on large bright areas. Your calibration needs to account for sustained, not burst, measurements.
Mini-LED / FALD
Mini-LED panels with full-array local dimming offer higher sustained brightness (1000 to 2000+ nits) but introduce halo artifacts around bright objects on dark backgrounds. Black levels depend on the number of dimming zones. A 576-zone panel looks different from a 1152-zone panel in near-black scenes.
Calibration should focus on peak brightness accuracy and color gamut coverage. Black point calibration is less critical since local dimming handles that dynamically. Verify that your local dimming setting is consistent during calibration, as different modes change the behavior.
Edge-Lit LED
Edge-lit HDR panels are the most limited. They lack local dimming or have very few zones. HDR performance is constrained, and calibration can only do so much.
Peak brightness targets should be conservative (400 to 600 nits). Color accuracy is the main thing calibration can improve on these panels.
When to Recalibrate and How to Keep HDR Looking Right Long-Term
HDR calibration isn't a one-and-done task. Panels drift over time, firmware updates can change behavior, and OS updates sometimes reset your settings.
Recalibration schedule:
- OLED panels: Every 25 to 50 hours of use for professional work. Monthly for general use. OLED luminance degrades gradually, shifting your white balance and peak brightness.
- Mini-LED / LED backlit: Every 100+ hours for professional work. Quarterly for general use. LED backlights are more stable but still shift over time.
- After any firmware update: Check your settings. Some monitor firmware updates reset calibration data or change tone mapping behavior.
- After GPU driver updates: Occasionally, driver updates reset color depth or dynamic range settings. Verify your GPU control panel settings after major updates.
Long-term maintenance tips:
- Keep a record of your calibration settings and ICC profiles. If something resets, you can reload quickly.
- Use your monitor's built-in calibration memory slots if available. Many professional monitors store multiple profiles.
- Watch for Windows updates that reset HDR toggles. Microsoft has pushed updates that disable HDR or reset the calibration app profile.
- If you use a colorimeter, recalibrate the colorimeter itself annually. Colorimeters can drift over time.
Frequently Asked Questions
Can I calibrate HDR without a colorimeter?
Yes. The Windows HDR Calibration app and console built-in tools work without hardware. You won't get measurement-verified accuracy, but you'll see a significant improvement over uncalibrated HDR.
For professional work, a colorimeter is necessary.
Does HDR calibration affect SDR content?
It can. When HDR is enabled in Windows, SDR content is tone-mapped into the HDR signal. The Windows HDR Calibration app includes an SDR content brightness slider that controls how SDR content appears within the HDR desktop.
Adjust this separately from your HDR calibration.
Why does my HDR calibration look different in every game?
Each game engine implements its own tone mapping and HDR rendering. System-level calibration sets the signal output, but the game's internal HDR settings (paper white, peak brightness) determine how that signal is interpreted. You need to calibrate each game individually after system calibration.
Is VESA DisplayHDR certification a guarantee of accuracy?
No. DisplayHDR certification validates that the panel meets specific brightness, color gamut, and bit depth thresholds. It doesn't guarantee out-of-box color accuracy.
A DisplayHDR 1000 monitor can still have a Delta E of 5 or more without calibration. Calibration is always needed for accurate HDR.
How do I know if my ICC profile is actually being applied?
Open Color Management in Windows Settings and check that your profile is set as the default. Some applications (particularly full-screen games) bypass the Windows color management system entirely. In those cases, calibration at the GPU driver level or per-game settings is more effective than ICC profiles.
Should I calibrate HDR for photo editing?
Only if your workflow specifically involves HDR content. For standard SDR photo editing (sRGB or Adobe RGB), keep HDR disabled and calibrate in SDR mode. If you're editing HDR images for HDR delivery, calibrate in HDR mode using your target color space (usually DCI-P3 or Rec. 2020) with a hardware colorimeter.
Final Recommendation: Which Path Should You Take?
If you're gaming or watching HDR content casually, start with the Windows HDR Calibration app or your console's built-in tool. It's free, takes five minutes, and fixes the most common HDR issues. That's Path 1, and for most people it's enough.
If you're doing photo editing, video color grading, or any work where color accuracy matters, invest in a hardware colorimeter and use Path 2. The Calibrite ColorChecker Display Pro paired with DisplayCAL gets you professional results for under $200 total. CalMAN is worth the investment if you're doing this professionally.
If you're primarily a gamer who wants each title to look its best, Path 3 (per-game tuning) is your go-to. Do the system-level calibration first, then spend two minutes in each game's HDR settings menu. That combination gives you the best results with the least ongoing effort.
The one thing not to do is nothing. Uncalibrated HDR is why so many people think HDR looks worse than SDR. A few minutes of proper calibration changes that completely.

Similar Posts































