How to Disable Touch Function on Touchscreen Monitor
Image source: Bing (Web (fair-use with source credit))
You're staring at a screen that keeps reacting to every accidental brush of your hand, and you just want it to stop. Figuring out how to disable touch function on touchscreen monitor hardware isn't straightforward because the right method depends entirely on what you're working with. Your monitor brand, connection type, operating system, and whether you need a temporary or permanent fix all change the answer.
Touch controllers communicate with your operating system through the HID over USB device class standard, which means the touch signal travels along a specific hardware path you can interrupt at different points. As of 2026, most standalone touchscreen monitors still rely on USB-HID for touch data, even when video arrives through DisplayPort or HDMI. Let's walk through the decision tree so you land on the right fix the first time.
Quick Answer
You can disable touch on a touchscreen monitor through several methods. The fastest way on Windows is Device Manager: open Human Interface Devices, find "HID-compliant touch screen," right-click, and select Disable. For a permanent hardware-level fix, disconnect the USB touch cable from your monitor if it uses a separate data cable.
Some monitors also offer a touch toggle in their on-screen display menu. Linux users can use the xinput command-line tool to disable the touch device.
Why Touchscreen Monitors Keep Detecting Touch When You Don't Want Them To
Here's the core problem. Your touchscreen monitor is doing exactly what it was designed to do. The projected capacitive (PCAP) digitizer layer embedded in the panel is constantly scanning for electrical changes caused by skin contact.
It doesn't know the difference between an intentional tap and your forearm resting on the bezel while you type.
The touch controller polls the digitizer at between 100 and 250 Hz, which means it checks for input up to 250 times per second. Every single poll cycle generates data that gets sent to your operating system. Your OS then translates those coordinates into cursor movements, clicks, or gestures.
There's no built-in "ignore accidental contact" layer at the hardware level. That's all handled by software, and software-level palm rejection is imperfect at best.
This is why the frustration feels so persistent. You're not dealing with a malfunction. You're dealing with a sensor that's working perfectly in a context that no longer serves you.
How Touch Input Actually Flows From Your Screen to the OS
Understanding the signal chain makes every fix below make more sense. Touch doesn't just magically reach your operating system. It follows a specific hardware path, and you can interrupt it at several points.
The hardware chain: digitizer → controller → USB/HDMI/USB-C → operating system
The projected capacitive sensor layer sits beneath your display glass. When your finger approaches, it distorts the electrical field at that point. The touch controller chip, usually bonded to the panel's flex cable or mounted on a small PCB behind the glass, detects that distortion and calculates X/Y coordinates.
The controller then packages those coordinates into a standard HID report descriptor. This is a formatted data packet that any operating system can interpret without custom drivers. The report gets transmitted over USB, regardless of how your video signal arrives at the monitor.
This is the key insight. Video and touch are almost always separate data streams, even when they share a single cable.
Why some monitors expose touch separately from video
Your monitor might use DisplayPort or HDMI for video and a completely separate USB-A to USB-B cable for touch data. This is the most common configuration on standalone touchscreen monitors in the 15-inch to 27-inch range. The touch cable looks like a standard USB printer cable, and it's the easiest thing to disconnect if you want a permanent physical fix.
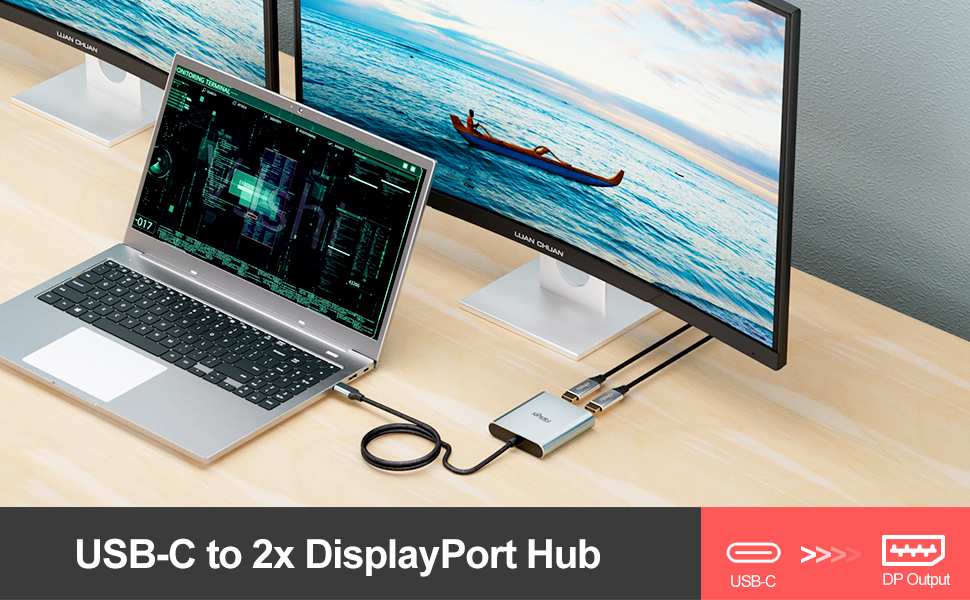
Other monitors, especially newer USB-C models, carry both video and touch data over a single USB-C cable using USB Alternate Mode. The video signal uses the high-speed lanes, and the touch HID data runs over the USB 2.0 differential pairs within the same connector. Disabling touch here is trickier because you can't just unplug a separate cable without also killing your display.
A smaller number of monitors, particularly those using DisplayLink chips for video, also carry touch data over the same USB connection. DisplayLink is a display compression protocol that runs entirely over USB, so both video and touch share one data path. These monitors almost always require a software-level disable because the USB connection is all-or-nothing.
DisplayPort + USB split vs. USB-C Alt Mode vs. proprietary setups
Here's a quick breakdown of what you're likely dealing with:
| Setup Type | Video Cable | Touch Cable | Easiest Disable Method |
|---|---|---|---|
| DisplayPort + USB-B | DisplayPort | USB-A to USB-B | Unplug USB-B cable |
| HDMI + USB-B | HDMI | USB-A to USB-B | Unplug USB-B cable |
| USB-C (Alt Mode) | USB-C (combined) | USB-C (combined) | Device Manager or OSD |
| USB-C (DisplayLink) | USB-C (combined) | USB-C (combined) | Device Manager or software |
| Proprietary (e.g., Wacom Cintiq) | USB-C or HDMI | USB-A or proprietary | OEM utility or Device Manager |
If you're not sure which setup you have, look at the back of your monitor. If you see a separate USB-B port (the square-ish printer-style connector) in addition to your video input, you've got a split setup. That USB-B cable is your touch data line, and pulling it is the simplest permanent fix available.
Before You Start: Identify Your Connection and Setup Type
Don't skip this step. Picking the wrong method wastes time and can leave you thinking the fix didn't work when you just targeted the wrong layer of the signal chain.
How to check what cable carries your touch signal
Look at every cable connected to your monitor. Count them. If you see two cables going from the monitor to your computer, one is almost certainly for video and the other is for touch data (and possibly the monitor's USB hub).
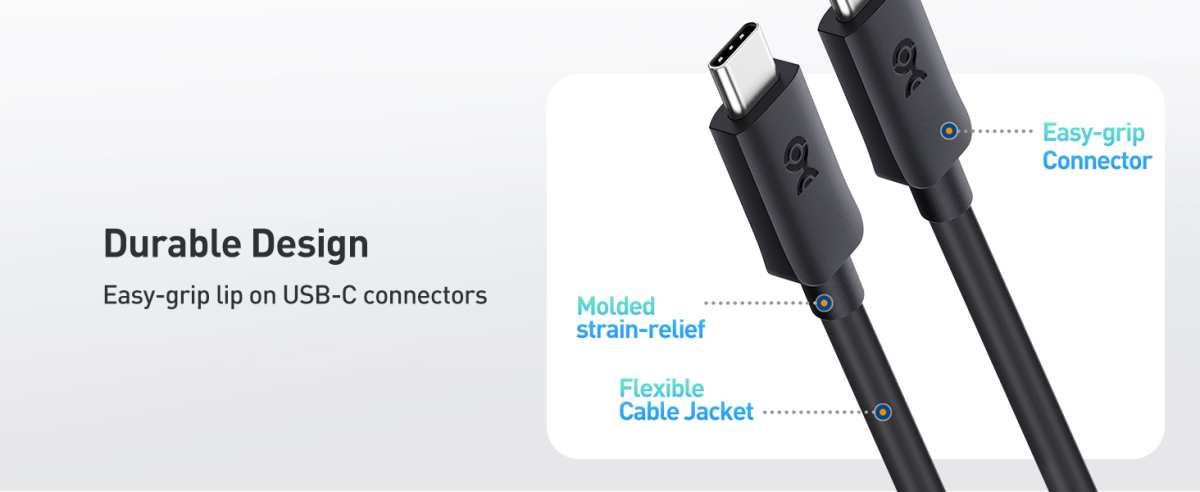
The touch cable will be USB-A to USB-B, USB-A to USB-C, or micro-USB to USB-A.
If you only see one cable, it's likely a single USB-C connection carrying everything. In that case, you can't physically disconnect touch without also disconnecting your display. You'll need a software or firmware method.
You can also check in your operating system. On Windows, open Device Manager and look under "Human Interface Devices." If you see "HID-compliant touch screen" listed, your touch controller is communicating over USB. If you don't see it, the touch might be handled through a proprietary driver or the connection type isn't exposing it as standard HID.
The five setup combinations you might actually have
1. DisplayPort video + USB-B touch cable. This is common on monitors from Dell, ASUS, and LG. The DisplayPort handles video only.
The USB-B cable carries touch data and sometimes powers a USB hub built into the monitor. Pulling the USB-B cable kills touch but also kills any USB ports on the monitor.
2. HDMI video + USB-B touch cable. Functionally identical to the DisplayPort setup above, just with HDMI for video. Same tradeoff: lose the USB-B cable and you lose touch plus any monitor USB ports.
3. Single USB-C Alt Mode cable. The USB-C connection carries DisplayPort Alt Mode video, USB 2.0 data for touch, and sometimes USB Power Delivery for charging. This is common on newer portable touchscreen monitors and many all-in-one PCs.
You can't physically separate touch from video here.
4. Single USB-C DisplayLink cable. DisplayLink compresses video and sends it over standard USB data channels. Touch data rides along in the same USB connection.
These monitors require DisplayLink drivers. Software disable is your only option.
5. Proprietary or OEM-specific connection. Wacom Cintiq displays, Huion pen displays, and XP-Pen tablets often use custom controllers that may or may not expose themselves as standard HID devices. Some require brand-specific utilities to disable touch.
Check the manufacturer's support documentation for your specific model.
Why this matters for which method will actually work
If you have a split setup (DisplayPort/HDMI + USB-B), the physical disconnect method is instant, permanent, and foolproof. No software toggle, no registry hack, no startup script needed. Just unplug the cable.
If you have a single-cable USB-C setup, you're limited to software or firmware methods. Device Manager disable works but may not survive a reboot. OSD toggles are more reliable but not available on every monitor.
Registry edits and startup scripts add complexity but give you persistence.
The wrong method for your setup either won't work at all or will create new problems. A USB-C user who follows advice to "just unplug the USB cable" will lose their display. A split-setup user who spends twenty minutes editing the registry could have just pulled a cable instead.
Match the method to your hardware. Everything else follows from that.
Method 1: Device Manager Disable (Windows) — Quick but Often Temporary
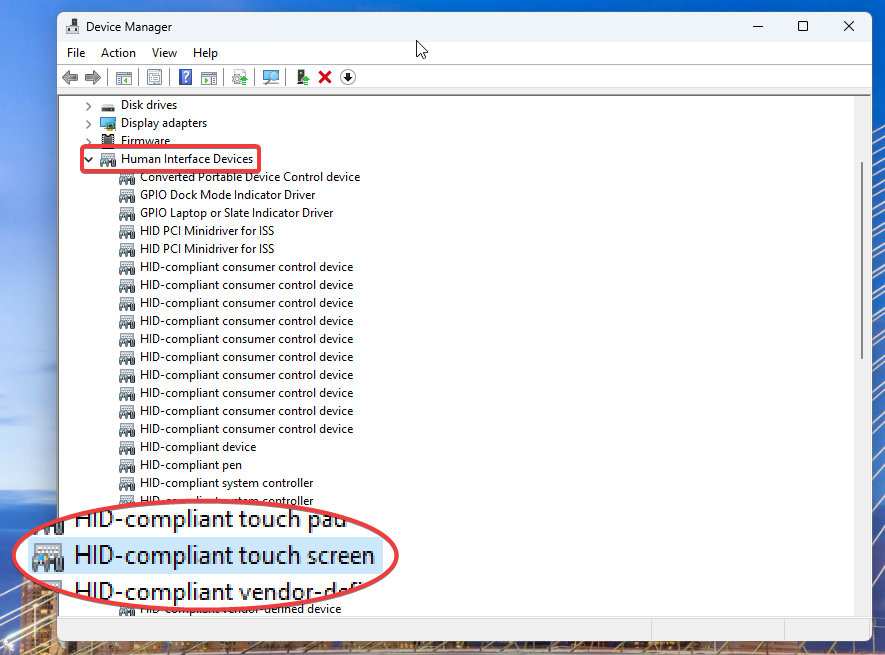
Image source: Bing (Web (fair-use with source credit))
This is the first thing most people try, and it works. The catch is that "works" comes with an asterisk the size of a billboard.
Step-by-step walkthrough
- Right-click the Windows Start button and select Device Manager.
- Expand the Human Interface Devices section.
- Look for HID-compliant touch screen. There may be more than one HID entry here. If you see multiple touch screen entries, you may need to disable the correct one. Right-click the first, select Disable device, and test whether touch stops. If it doesn't, re-enable it and try the next one.
- Confirm the prompt. Touch is now disabled.
That's it. Four clicks and your screen stops responding to touch. You can verify by tapping the screen.
Nothing should happen.
To re-enable later, follow the same steps but select Enable device instead.
When this works and when it silently fails
Device Manager disable works reliably on monitors that expose their touch controller as a standard USB-HID device. This covers the vast majority of consumer touchscreen monitors from Dell, LG, ASUS, Samsung, Acer, and HP.
It fails silently in a few scenarios:
- DisplayLink monitors. The touch controller may not appear as a separate HID entry because it's managed by the DisplayLink driver stack. Disabling the DisplayLink device kills your display, not just touch.
- Proprietary controllers. Wacom, Huion, and XP-Pen devices often use their own driver software. The touch function may be controlled through the manufacturer's utility rather than the generic HID entry.
- Monitors with firmware-level touch lock. Some commercial and kiosk monitors handle touch disable in firmware. The HID entry exists but disabling it in Windows has no effect because the firmware is the authoritative layer.
If you don't see "HID-compliant touch screen" in Device Manager at all, your touch controller is likely managed by proprietary software. Skip to the manufacturer utility section below.
The reboot/reconnect problem nobody warns you about
Here's where most people get frustrated. Device Manager disable is not always persistent across all hardware configurations. Several events can re-enable touch without your input:
- Rebooting your computer. Windows re-enumerates all Plug and Play devices at boot. The touch controller gets re-detected and re-enabled automatically.
- Disconnecting and reconnecting the monitor. Power cycling the monitor or unplugging the USB cable triggers a new PnP enumeration cycle.
- Windows Update. A driver update or a cumulative update can reset device states. Your touchscreen comes back to life after an update you didn't even notice.
- Fast Startup. Windows 10 and 11 use Fast Startup by default, which is a hybrid shutdown. Device states can be restored from the hibernation file rather than doing a clean re-enumeration.
If you need touch to stay disabled across reboots, Device Manager alone won't cut it. You'll need one of the persistence methods covered later in this guide, or you can use a startup script that runs the disable command automatically.
For a one-time fix, like when you're cleaning the screen or giving a presentation and don't want accidental taps, Device Manager is perfect. It's fast, it's reversible, and it requires zero technical knowledge beyond right-clicking the right entry.
Method 2: Monitor OSD Firmware Toggle — When Your Monitor Has It Built In
Some monitors let you kill touch right from the on-screen display menu. No operating system dependency, no scripts, no cable pulling. If your monitor supports this, it's the cleanest solution available.
Which brands include a touch on/off option in the OSD
Not every touchscreen monitor offers this. Budget models almost never do. The feature tends to appear on commercial, industrial, and professional-grade displays where input lockout is a genuine workflow requirement.
Brands and product lines that have included touch toggles in their OSD:
- EIZO (FlexScan EV series, S-series)
- Dell (some P-series and C-series models)
- ASUS (ProArt PA series, certain ROG models)
- HP (EliteDisplay, ZDisplay lines)
- ELO Touch Solutions (commercial and kiosk panels)
- Advantech (industrial HMI displays)
If you're using a consumer-grade portable touchscreen monitor from brands like ARZOPA, KYY, or similar budget options, you almost certainly won't find an OSD toggle. These panels route touch through a standard USB connection with no firmware-level control.
How to navigate to it on common models
The menu path varies by manufacturer. On EIZO FlexScan models, you'll typically find it under Menu → System → Touch Input → Off. On Dell monitors with the feature, look under Menu → Display Settings → Touch Toggle.
ASUS ProArt models sometimes bury it in Menu → System Setup → Touch Panel.
If you can't find it, check your monitor's user manual and search for "touch" in the index. Some monitors label the setting as "Touch Control," "Touch Function," or "Touch Mode" rather than a simple on/off toggle.
The advantage: it survives reboots and reconnects
When you disable touch through the OSD, the setting is stored in the monitor's internal firmware memory. It doesn't depend on your computer's operating system, your USB connection state, or whether you've rebooted. The monitor itself stops reporting touch events to whatever device is connected.
This makes the OSD method the most reliable software-adjacent option. It works regardless of which computer you plug into. It works if you switch between a Windows PC and a Mac.
It even works if you connect a different machine entirely.
The downside is availability. If your monitor doesn't have this option, you can't add it. It's a hardware feature, not a downloadable utility.
Method 3: Disconnect the Touch USB Cable — The Foolproof Physical Method

Image source: Wikimedia Commons / Alistair Paterson (CC BY-SA)
This is the nuclear option, and it works every single time. If your monitor uses a separate USB cable for touch data, just unplug it. Touch dies instantly.
No software, no settings, no scripts.
How to identify the touch data cable vs. the video cable
Look at the back of your monitor. You'll see some combination of these ports:
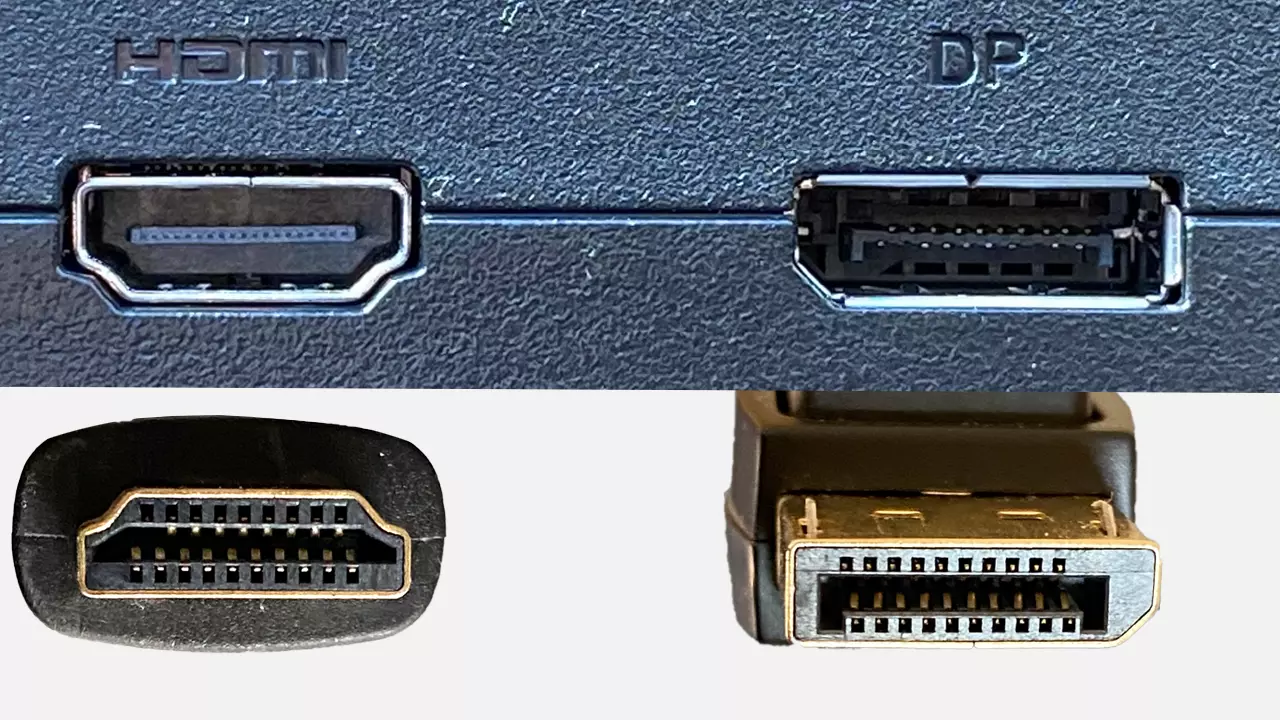
- DisplayPort (rectangular, slightly wider than HDMI, one corner notched)
- HDMI (trapezoid shape, common on nearly every monitor)
- USB-B (square-ish, slightly rounded top, the "printer cable" connector)
- USB-C (small oval, reversible)
If you see a USB-B cable running from your monitor to your computer, that's your touch data cable. It might also power a USB hub built into the monitor, so be aware that any USB devices plugged into the monitor's downstream ports will also lose connectivity.
On some monitors, the touch data runs over a micro-USB or mini-USB connector instead of USB-B. The principle is the same. Follow the cable from the monitor's USB upstream port to your computer and disconnect it.
USB-B uplink vs. integrated USB-C — what to look for
If your monitor connects via a single USB-C cable, you can't use this method without also killing your display. USB-C Alt Mode carries both video and touch data on the same cable. Pulling it blacks out your screen entirely.
Some USB-C monitors have a separate USB-B port for touch in addition to the USB-C video connection. This is less common but does exist on certain professional models. Check your monitor's port layout carefully before assuming you're stuck with a single-cable setup.
When this is the only option that makes sense
Physical disconnect is ideal when:
- You never use touch and want it gone permanently
- You're deploying a monitor in a kiosk or display setting where touch should be impossible
- Software methods keep failing or resetting
- You're troubleshooting a phantom touch issue and want to isolate whether it's a hardware defect
The tradeoff is real, though. Losing the USB upstream cable also loses any USB hub functionality your monitor provides. If you use the monitor's downstream USB ports for peripherals, you'll need to plug those devices directly into your computer instead.
Method 4: Advanced Software Locks — Registry, Group Policy, and PowerShell
When Device Manager doesn't stick and your monitor lacks an OSD toggle, you can force the issue at a deeper software level. These methods add persistence but require more care.
Registry key approach with proper warnings
Windows stores touch-related configuration in the registry. You can create a key that prevents touch input from being processed:
- Open regedit as Administrator.
- Navigate to
HKEY_LOCAL_MACHINE\SOFTWARE\Microsoft\Windows\CurrentVersion\Touch. - Create a new DWORD (32-bit) Value named
TouchGate. - Set the value to
0to disable touch. - Reboot for the change to take effect.
Warning: Editing the registry incorrectly can cause system instability. Create a System Restore point before making changes. If something goes wrong, you can boot into Safe Mode and delete the value you created.
This method is less commonly documented than Device Manager, and its effectiveness varies by Windows version and hardware configuration. Some users report it works reliably on Windows 10 but not on Windows 11, or vice versa. Test it on your specific setup before relying on it.
Group Policy path for shared or managed machines
If you're managing multiple computers in a business or educational environment, Group Policy is the right tool. It enforces the disable across all managed machines and prevents users from re-enabling touch.
The relevant policy lives at:
Computer Configuration → Administrative Templates → Windows Components → Touch and Handwriting
Look for a policy named "Turn off touch input" or similar. Enable it, and touch is disabled system-wide for all users on that machine.
This requires Windows Pro, Enterprise, or Education editions. Windows Home doesn't include the Group Policy Editor by default.
PowerShell one-liner using Disable-PnpDevice
PowerShell gives you a command-line way to disable the touch device, which you can then automate:
Disable-PnpDevice -InstanceId (Get-PnpDevice -Class "Touch" | Select-Object -ExpandProperty InstanceId) -Confirm:$false
Run this in an elevated PowerShell window. It finds the touch device by its device class and disables it without prompting for confirmation.
The -Confirm:$false flag suppresses the confirmation prompt. Without it, PowerShell asks you to confirm the action before proceeding.
Making it stick with a startup script
To survive reboots, save the PowerShell command as a .ps1 file and create a scheduled task that runs it at system startup:
- Save the command as
disable-touch.ps1in a permanent location (e.g.,C:\Scripts\). - Open Task Scheduler.
- Create a new task with a trigger set to "At startup."
- Set the action to run
powershell.exewith the argument-ExecutionPolicy Bypass -File "C:\Scripts\disable-touch.ps1". - Run with highest privileges.
This ensures touch is disabled every time your computer boots, regardless of what Windows Update or PnP enumeration does.
Method 5: BIOS/UEFI Disable — For 2-in-1s and AIO Machines
This method applies to devices where the touchscreen is built into the computer itself, not a standalone monitor. Think 2-in-1 laptops like the Lenovo Yoga or HP Spectre x360, or all-in-one desktops like the HP Envy AiO or Lenovo AIO series.
When this applies to your hardware
If your touchscreen is part of the computer and you can't physically disconnect a cable, the BIOS or UEFI firmware may offer a touch disable option. This is the lowest-level software method available, and it prevents touch from being active even before the operating system loads.
This is useful when:
- You dock your 2-in-1 in clamshell mode and the screen presses against the keyboard
- You use an all-in-one in a presentation setting and want to prevent audience interaction
- You're troubleshooting and want to rule out software causes
Finding the touch input toggle in firmware
Restart your computer and enter BIOS/UEFI setup. The key varies by manufacturer:
- Lenovo: F1 or F2 during boot
- HP: F10 during boot
- Dell: F2 during boot
- ASUS: F2 or Del during boot
Once inside, look under Advanced, System Configuration, or Input Device settings. You may find an option labeled "Touch Screen,""Touch Input," or "Internal Pointing Device." Set it to Disabled.
Not every BIOS includes this option. Consumer laptops are more likely to omit it than business-class models. If you can't find it, your firmware may not support touch disable at the BIOS level.
What to do if the option doesn't exist
If your BIOS doesn't have a touch toggle, fall back to Device Manager or the PowerShell startup script method. On 2-in-1 devices, you can also try Tablet Mode settings in Windows. Some Lenovo Yoga models respond to a "lid close" or "tent mode" signal that automatically disables touch and keyboard input.
You can also check the manufacturer's proprietary software. Lenovo Vantage, HP Support Assistant, and Dell Power Manager sometimes include input device toggles that aren't available in the BIOS.
Method 6: Linux Workarounds — xinput and Session Persistence

Image source: Wikimedia Commons / Alv Erteynsteyn (CC BY-SA)
Linux doesn't have a Device Manager equivalent with a right-click disable option. You'll need the command line, but the fix is straightforward.
Using xinput to find and disable the touch device
Open a terminal and run:
xinput list
This shows every input device X.Org recognizes. Look for an entry containing "touch" in the name. It might be listed as "ELAN Touchscreen," "Wacom Touch," or something similar.
Note the device ID number next to it.
Then disable it:
xinput disable <device-id>
Replace <device-id> with the number from the previous command. Touch stops immediately.
Why it resets and how to make it survive a reboot
The xinput disable command only affects the current X.Org session. Reboot, log out, or restart the display manager, and touch comes back. To make it persistent, add the command to your startup applications or create a systemd service.
For a simpler approach, add the disable command to your desktop environment's autostart settings. In GNOME, you can place it in ~/.config/autostart/. Create a file called disable-touch.desktop with:
[Desktop Entry]
Type=Application
Exec=xinput disable <device-id>
Hidden=false
Name=Disable Touch
Comment=Disables touchscreen input
For a system-wide approach, create a systemd service or a udev rule that runs the command at device detection.
For Mac Users: Why You're Mostly Out of Luck With a Software Toggle
macOS doesn't include a built-in way to disable touch on external touch monitors. Apple's own hardware doesn't include external touchscreen monitors, so the operating system never needed this feature.
Third-party tools exist but are limited. Some users report success with Touch Blocker or similar utilities that intercept input events. These tools aren't always reliable across macOS updates.
Your best option on a Mac is the physical disconnect method if your monitor supports it. If you're on a single-cable USB-C setup, you may need to use a USB-C cable that only carries video (no data pairs), though this requires specific hardware and isn't guaranteed to work.
Method Comparison: Permanence, Difficulty, and Reliability at a Glance
| Method | Temp/Persistent | Difficulty | Reliability | Reversible |
|---|---|---|---|---|
| Device Manager disable | Temp (until reboot/reconnect) | Easy | Medium | Yes |
| OSD firmware toggle | Persistent | Easy | High | Yes |
| Physical USB disconnect | Persistent | Easy | High | Yes (reconnect) |
| Group Policy / Registry | Persistent | Medium | High | Yes |
| PowerShell + startup script | Persistent | Medium-Hard | High | Yes (remove script) |
| BIOS/UEFI disable | Persistent | Medium | Very High | Yes |
| xinput disable (Linux) | Temp session | Medium | Medium | Yes |
When Each Situation Calls for Which Method
Artist using a pen display: Device Manager or the manufacturer's utility. You'll want to toggle touch on and off depending on whether you're drawing or using the mouse.
Kiosk or POS operators: OSD lockout or physical disconnect. You need something that survives reboots and can't be easily reversed by end users.
Laptop in clamshell mode: Device Manager works, or just dock and ignore the built-in screen. Some 2-in-1s auto-detect clamshell mode and disable touch automatically.
Meeting room display: OSD toggle for quick on/off during presentations. A startup script works if you want it permanently disabled.
Linux workstation: xinput plus a systemd service or autostart script. Test the device ID first since it can change between kernel versions.
Temporary fix for cleaning the screen: Device Manager is fine. Don't overthink it. Re-enable when you're done.
Common Mistakes That Waste Your Time
Disabling the wrong HID device is the most common error. You might kill your mouse or keyboard instead of the touchscreen. Always verify which device you're disabling by testing touch after each attempt.
Expecting Device Manager disable to survive a reboot frustrates people constantly. If you need persistence, use a startup script or the physical disconnect method.
Assuming USB-C touch dies when video stays is another trap. USB-C Alt Mode carries both signals on one cable. Disconnecting USB-C kills your display, not just touch.
Windows Update can re-enable your disabled touchscreen after a driver update. If touch suddenly comes back after being disabled, check Update History for recent driver installs.
How to Reverse Any Method Safely
Re-enabling is almost always the same process in reverse. Device Manager: right-click and Enable. Physical disconnect: plug the cable back in.
Registry: delete the value you created or set it to 1. xinput: run xinput enable <device-id>.
The one exception is BIOS/UEFI disable. You'll need to reboot back into firmware setup and re-enable the touch option. Some BIOS versions require a full shutdown (not just restart) for changes to take effect.
Frequently Asked Questions
Will disabling touch save any measurable power on a battery-powered laptop?
The power savings are minimal. The touch controller draws very small current, typically under 100 mW. You might gain a few minutes of battery life at best.
Will a screen protector or film disable touch?
No. Standard screen protectors don't block the capacitive field. You'd need a thick, non-conductive physical barrier to prevent touch detection, which would also make the screen unusable.
What about accidental touch detection while cleaning the screen?
Disable touch through Device Manager before cleaning. Re-enable it afterward. Some monitors have a dedicated "cleaning mode" in the OSD that temporarily locks touch input.
Can I disable touch for only certain applications or windows?
Not natively in Windows. Third-party tools like AutoHotkey can create workarounds, but they're fragile and not recommended for most users.
Does disabling touch affect stylus or pen input?
On most monitors, yes. Pen input often uses the same digitizer layer as touch. Disabling the HID touch device may also disable pen input.
Check your manufacturer's documentation for your specific model.
My touchscreen shows as two HID devices in Device Manager. Which one do I disable?
Disable one at a time and test. The correct entry will stop touch input when disabled. Re-enable it and try the other if you picked wrong.
One entry is often a firmware or calibration interface rather than the actual touch input device.
Will Windows Update re-enable my disabled touchscreen?
Yes, it can. Driver updates or cumulative updates may reset device states. Use a startup script if you need the disable to survive updates.
Bottom Line: Pick the Method That Matches Your Situation
If you have a separate USB cable for touch, just unplug it. That's the fastest, most reliable fix and it works on every operating system. No software to configure, no scripts to maintain, no registry to edit.
If you're on a single-cable USB-C setup, Device Manager is your quick fix for temporary needs. For persistence, use a startup script or check your monitor's OSD for a firmware toggle. Linux users should get comfortable with xinput and autostart entries.
Mac users with external touch monitors have the fewest options, so physical disconnect or third-party utilities are the realistic path.
The right answer depends on your hardware. Now you know how to figure out which method fits.

Similar Posts