How to Calibrate USB C Monitor
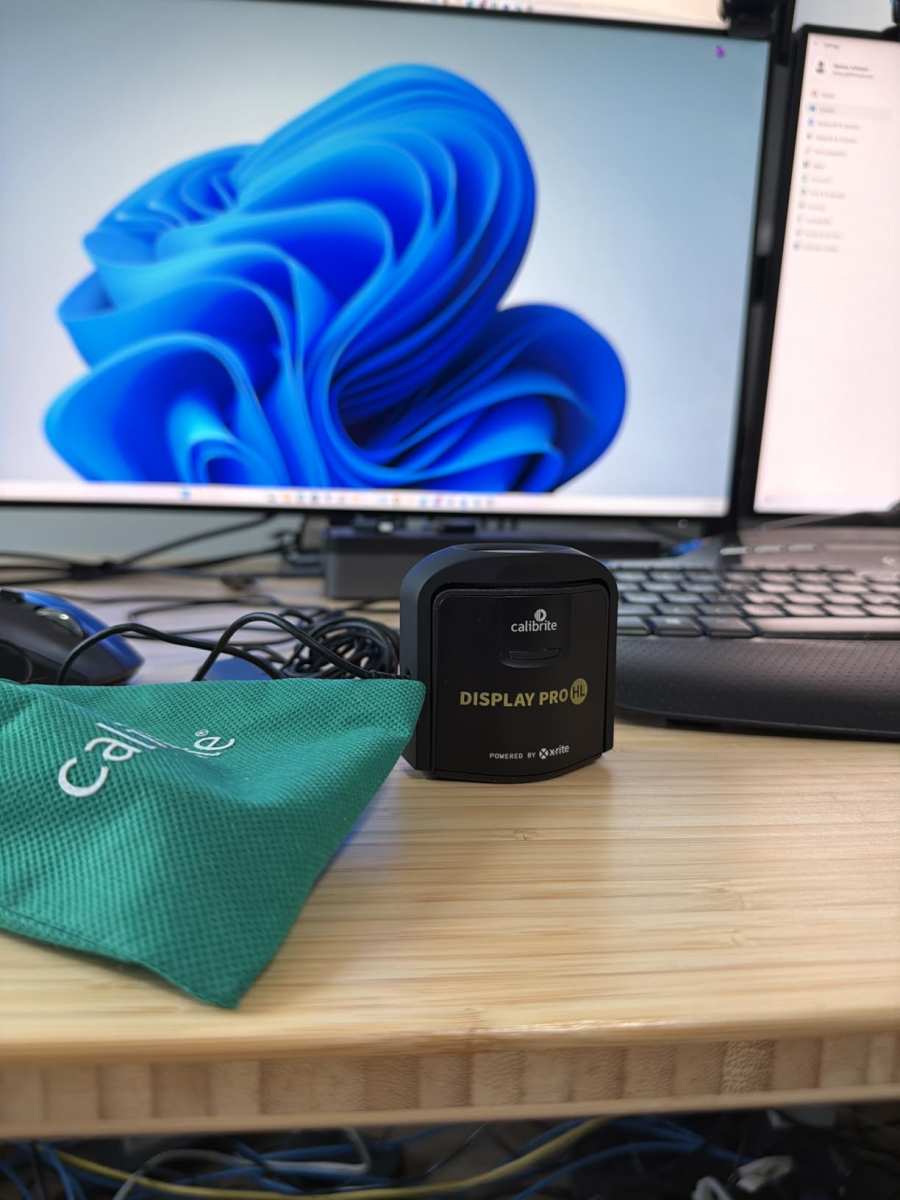
Image source: Bing (Web (fair-use with source credit))
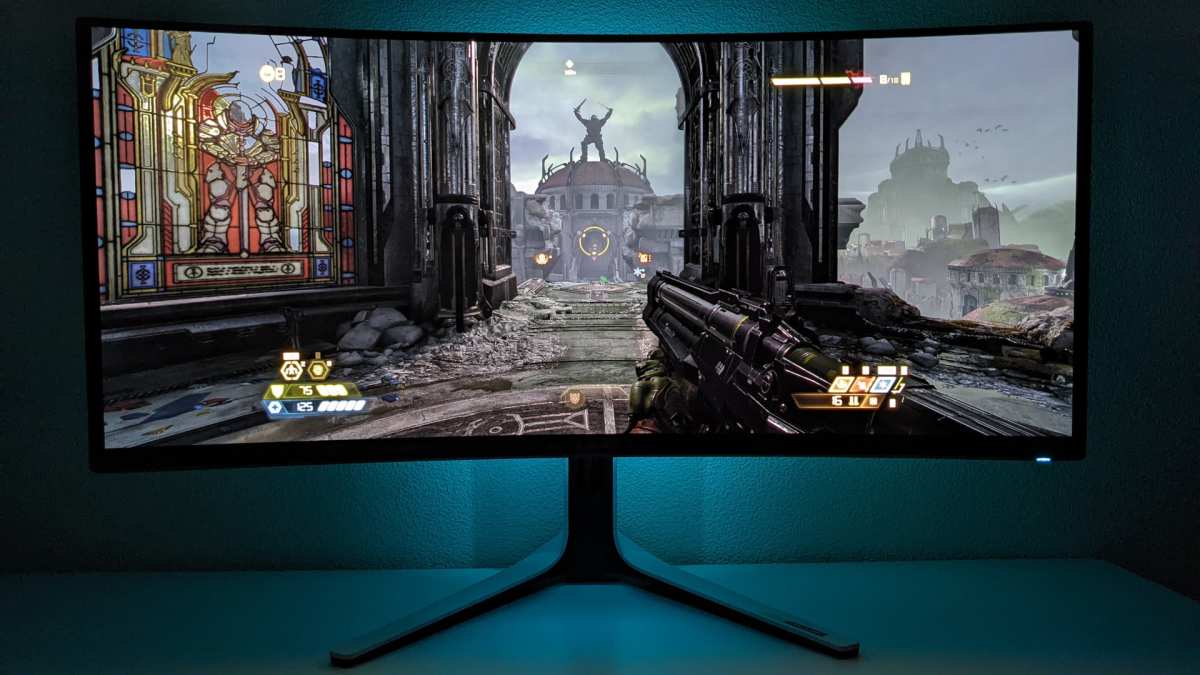
If you've just plugged in a USB-C monitor and the colors look washed out, oversaturated, or just plain wrong, you're not imagining things. Learning how to calibrate a USB-C monitor properly matters more than most people realize, because these displays often ship with factory settings that prioritize punchy visuals over accuracy. The good news is you can fix this yourself with the right approach.
The tricky part is that USB-C adds variables most calibration guides ignore. You're dealing with DisplayPort Alt Mode or HDMI Alt Mode handshakes, potential DDC/CI communication issues through the USB-C cable, and operating system quirks that treat USB-C displays differently than native HDMI or DisplayPort panels. Per VESA's DisplayPort 2.0 specification, USB-C can carry up to 80 Gbps of video data, but whether your cable, monitor, and laptop actually negotiate that bandwidth correctly is another story entirely.
Let's walk through this step by step, starting with figuring out exactly what you're working with.
Quick Answer
Calibrate a USB-C monitor by first confirming your cable supports DisplayPort Alt Mode and DDC/CI is enabled in the monitor's OSD. Then choose your calibration path: use a hardware colorimeter for professional accuracy, or your operating system's built-in tools for a free software-only approach. Set your target values (typically D65 white point, 120 cd/m² luminance, gamma 2.2), run the profiling measurement, and install the resulting ICC profile.
Recalibrate every two to four weeks for color-critical work.
Why Your USB-C Monitor Colors Look Wrong (And Why It's Not Obvious)
Here's what's actually happening when you plug in a USB-C monitor and the colors feel off. Most USB-C monitors ship with vivid or "standard" picture modes that boost saturation and contrast to look appealing on a showroom floor. That's fine for casual browsing, but it means reds are punchier than they should be, skin tones skew warm, and you can't trust what you're seeing for any color-critical work.
The USB-C connection itself can also introduce problems that HDMI and DisplayPort setups don't face. If your cable only supports USB 2.0 data speeds without DisplayPort Alt Mode, you might be running at a reduced resolution or refresh rate without realizing it. Some USB-C hubs and docks strip EDID information or interfere with DDC/CI commands, which means your computer can't communicate brightness or color settings to the monitor properly.
We've seen cases where a perfectly capable monitor looked terrible simply because the USB-C cable was charging-only, forcing the display into a fallback mode with limited color range.
There's also an operating system layer that catches people off guard. macOS and Windows handle ICC profiles differently, and macOS in particular has a habit of overriding custom profiles with its own ColorSync defaults after sleep cycles or reboots. If you've ever calibrated a monitor on a MacBook only to find the colors shifted the next morning, that's what's happening. The profile is installed, but the OS isn't consistently applying it.
First, Figure Out What You're Working With
Before you touch any calibration software, you need to understand your actual setup. This is where most people go wrong. They download a calibration tool, run it blindly, and then wonder why the results are inconsistent or why brightness controls stop responding.
A few minutes of diagnostic work up front saves you hours of frustration later.
Check Your USB-C Connection Type
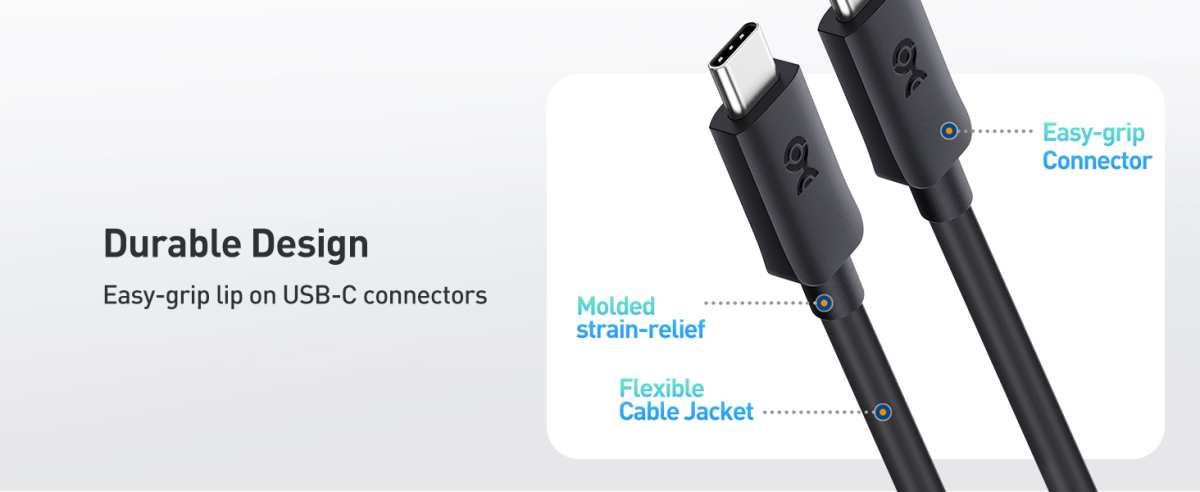
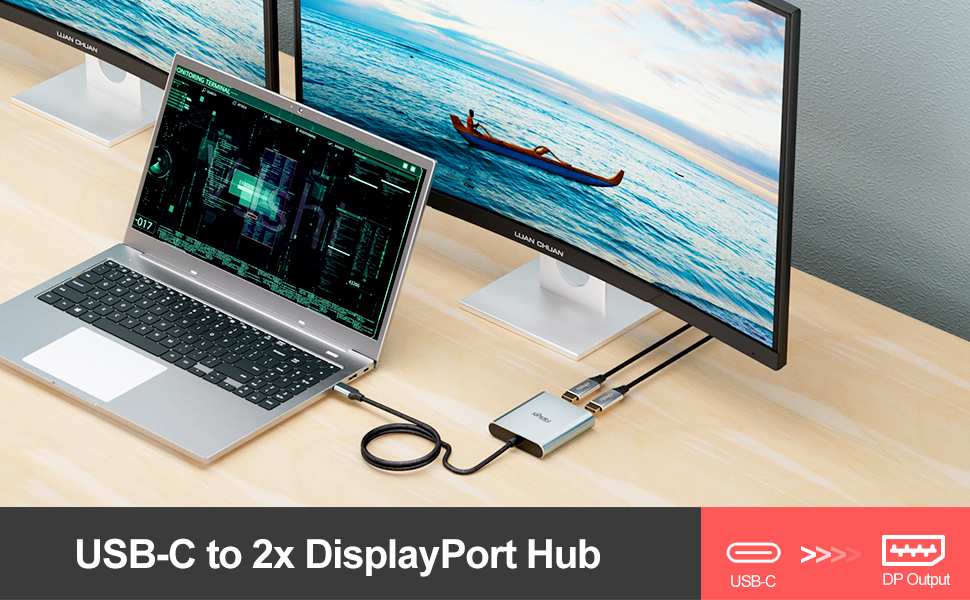
Not all USB-C cables are created equal, and this is the single most common source of calibration headaches. You need a cable that supports DisplayPort Alt Mode (or HDMI Alt Mode) to carry a video signal. A USB-C cable that only handles charging and USB 2.0 data will not transmit video at all, and a cable that supports USB 3.1 data but not Alt Mode won't work for display output either.
Here's a quick checklist to verify your connection:
- Check the cable markings: Look for "DP Alt Mode," "4K," "8K," or "Thunderbolt" printed on the cable sheath.
- Check your laptop specs: Confirm your laptop's USB-C port supports DisplayPort Alt Mode output. Not all USB-C ports on laptops do.
- Check the monitor's specs: Verify which USB-C input type the monitor supports. Some monitors have one USB-C port for video and another that's data-only.
- Look at your current resolution and refresh rate: If you're stuck at 30 Hz or a lower resolution than the panel supports, your cable likely doesn't have enough bandwidth.
If you're using a USB-C dock or hub between your laptop and monitor, add another variable. Some docks support DisplayPort Alt Mode passthrough, while others only output via DisplayLink (a USB graphics adapter protocol that adds latency and can limit color range). DisplayLink connections often don't support DDC/CI at all, which blocks software-based brightness and calibration control.
Confirm DDC/CI Is Actually Working
DDC/CI stands for Display Data Channel Command Interface. It's the protocol that lets your computer send brightness, contrast, and color adjustment commands to the monitor. Without it working, your calibration software can't control the monitor remotely, and you'll be stuck adjusting everything manually through the monitor's physical buttons.
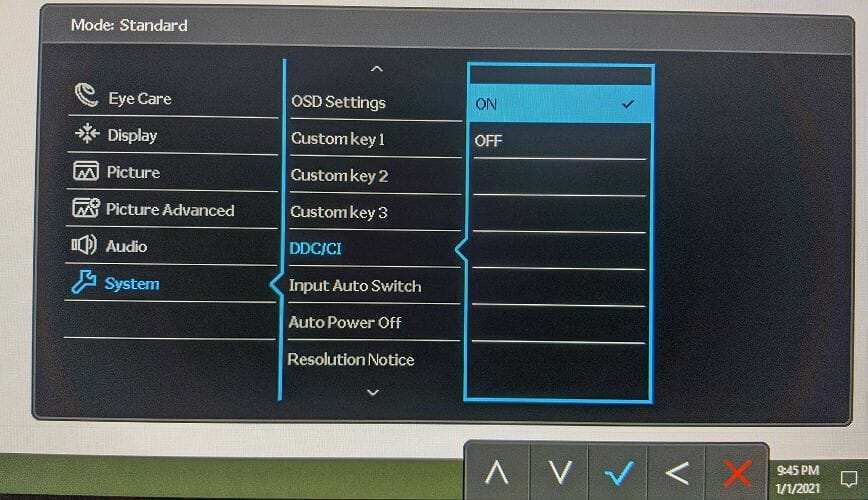
Image source: Bing (Web (fair-use with source credit))
To check if DDC/CI is working:
- Enable it in the monitor's OSD. Look under "System," "Setup," or "Input Control" in the on-screen display menu. It's sometimes turned off by default.
- Test with a utility. On Windows, use ClickMonitorDDC or Monitorian to see if you can adjust brightness from your desktop. On macOS, try the Lunar app or DisplayBuddy.
- If brightness sliders don't respond, DDC/CI isn't communicating. Common causes include USB-C hubs blocking the channel, a cable that doesn't pass the DDC/CI signal, or a monitor firmware bug.
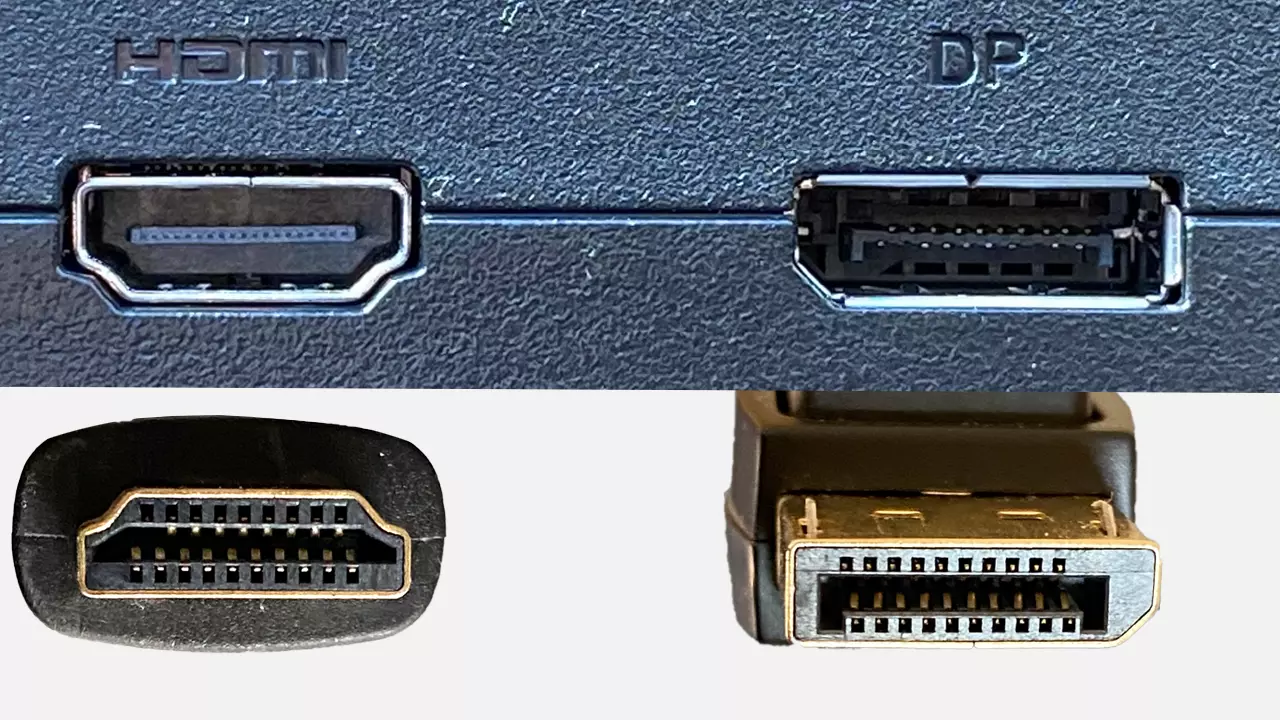
When DDC/CI fails over USB-C, the most reliable fix is connecting the monitor via a direct HDMI or DisplayPort cable for calibration, then switching back to USB-C afterward. The ICC profile itself will still work over USB-C even if the control channel doesn't.
Identify Your Operating System and GPU
Your calibration workflow depends heavily on which OS and graphics driver you're running. Here's why it matters:
| OS / GPU | Key Consideration |
|---|---|
| macOS + Apple Silicon | ColorSync manages ICC profiles. macOS sometimes reverts to default profiles after wake. Night Shift and True Tone interfere with calibration. |
| macOS + eGPU | External GPUs can apply their own color adjustments that override ICC profiles. Disable GPU-side color enhancements. |
| Windows + NVIDIA | NVIDIA Control Panel has its own color settings (digital vibrance, gamma) that can conflict with ICC profiles. Reset to defaults before calibrating. |
| Windows + AMD | AMD Radeon Software applies color adjustments at the driver level. Check "Color Temperature" settings aren't overriding your profile. |
| Windows + Intel | Intel Graphics Command Center can reset color settings after driver updates. Disable "Adaptive Brightness" and power-saving display features. |
| Linux | Use DisplayCAL with the argyllCMS driver. DDC/CI support varies by desktop environment. Wayland sessions may not support DDC/CI yet. |
Write down your exact OS version, GPU model, and driver version before you start. If something goes wrong later, you'll know exactly what environment you were working in.
Quick Answer: The Calibration Path Depends on Your Setup
There's no single "right" way to calibrate a USB-C monitor. The best method depends on what tools you have, what you're calibrating for, and how much accuracy you actually need. A graphic designer preparing print files has very different requirements than someone who just wants their monitor to look comfortable during a ten-hour workday.
Here's the decision framework we recommend:
- If you own a colorimeter (like an X-Rite i1Display Pro, Calibrite ColorChecker Display, or Datacolor SpyderX), you can achieve professional-grade accuracy with Delta E values below 2.0. This is the gold standard for photography, video editing, and design work.
- If you don't have a colorimeter, you can still improve things using your OS's built-in calibration tools. The results won't be instrument-grade, but they'll be noticeably better than factory defaults for general use.
- If your monitor supports hardware calibration (storing a profile directly in the monitor's internal LUT), you get the best of both worlds. The profile travels with the monitor regardless of which computer it's connected to.
- If you just need brightness and contrast fixed, and DDC/CI is working, you can skip ICC profiles entirely and adjust settings through the monitor's OSD or a desktop utility.
Let's walk through each path in detail.
The Decision Tree: Which Calibration Method Fits Your Situation
Branch 1: You Have a Colorimeter (Best Accuracy)
This is the path for anyone doing photography, video color grading, print design, medical imaging, or any work where color accuracy has real consequences. A colorimeter measures actual light output from your panel and builds a custom ICC profile that corrects the display's specific deviations.
What you need:
- A colorimeter device (Calibrite ColorChecker Display Plus, X-Rite i1Display Pro Plus, or Datacolor SpyderX Pro are the most reliable options as of 2026)
- Calibration software (DisplayCAL is free and excellent; Calman and LightSpace are paid options for professionals)
- A USB port for the colorimeter (connect it directly to your laptop, not through the monitor's USB hub, to avoid communication issues)
Target settings for most work:
| Parameter | Recommended Value | Notes |
|---|---|---|
| White point | D65 (6500K) | Standard for web, video, and most print work |
| Luminance | 120 cd/m² | For a normally lit room; drop to 80 cd/m² for dim environments |
| Gamma | 2.2 | Standard for Windows and web; use L* gamma for macOS if preferred |
| Color space target | sRGB | For web/general use; Adobe RGB for print; DCI-P3 for video |
Pros:
- Measurable, repeatable accuracy
- Corrects for panel-specific color deviations
- Creates a verifiable ICC profile you can share or archive
Cons:
- Requires purchasing hardware ($75 to $250+)
- Needs recalibration every 2, 4 weeks
- Software learning curve if you've never used DisplayCAL or similar tools
Branch 2: You're Calibrating by Eye Using Built-In Tools
If you don't have a colorimeter and don't want to buy one, both macOS and Windows include built-in display calibration utilities. These guide you through adjusting gamma, brightness, contrast, and color balance visually. It's not instrument-accurate, but it's free and takes about ten minutes.
On macOS:
Open System Settings → Displays → click "Display Calibration" or use the older "ColorSync Utility" for more advanced options. The built-in assistant walks you through adjusting the native gamma and white point using on-screen sliders.
On Windows:
Search for "Calibrate display color" in the Start menu to launch dccw.exe. This tool guides you through gamma, brightness, contrast, and color balance adjustments with visual reference images.
Pros:
- Free, built into the OS
- No additional hardware needed
- Better than factory defaults for casual use
Cons:
- Human eye is unreliable for color matching (we're great at detecting differences, terrible at absolute judgment)
- Results vary wildly between individuals
- No ICC profile is created with actual measurement data
Branch 3: Your Monitor Supports Hardware Calibration
Some higher-end USB-C monitors (like certain Dell UltraSharp, BenQ SW series, ASUS ProArt, and Eizo ColorEdge models) have built-in 1D or 3D LUTs that can store calibration data directly in the monitor's firmware. This means the calibration happens at the hardware level, independent of the operating system.
How it works:
You connect a colorimeter and run the monitor's proprietary calibration software (or sometimes the calibration runs from the monitor's own OSD). The software writes correction data into the monitor's internal LUT. The result is accurate color regardless of which computer or OS you connect.
Pros:
- Profile stays with the monitor, not the computer
- Works with any source device
- Most accurate method when available
Cons:
- Only available on specific monitor models
- Proprietary software can be clunky
- Some implementations only offer 1D LUT correction (less accurate than 3D)
Branch 4: You Just Need to Fix Brightness/Contrast Over USB-C
Sometimes calibration isn't the real problem. Your USB-C monitor might just be too bright, stuck in the wrong picture mode, or limited to a partial color range. Here's a quick diagnostic checklist:
- Check the picture mode: Switch from "Vivid" or "Movie" to "sRGB," "Adobe RGB," or "Standard" in the monitor's OSD. This alone often fixes 80% of color issues.
- Check the color format: Make sure the monitor is set to RGB, not YCbCr, unless your GPU is specifically outputting in that format.
- Check the color depth: If your GPU is outputting 8-bit to a 10-bit panel, you may see banding. Set the output to 10-bit in your GPU control panel if supported.
- Check the HDR state: If Windows or macOS has HDR enabled but the monitor's HDR mode is mediocre, colors will look desaturated in SDR content. Disable HDR unless you're specifically working with HDR content.
- Check the limited vs. full range: Some USB-C monitors default to limited RGB range (16, 235) instead of full range (0, 255). This makes blacks look gray and whites look dull. Fix this in your NVIDIA/AMD/Intel GPU settings under "Output dynamic range."
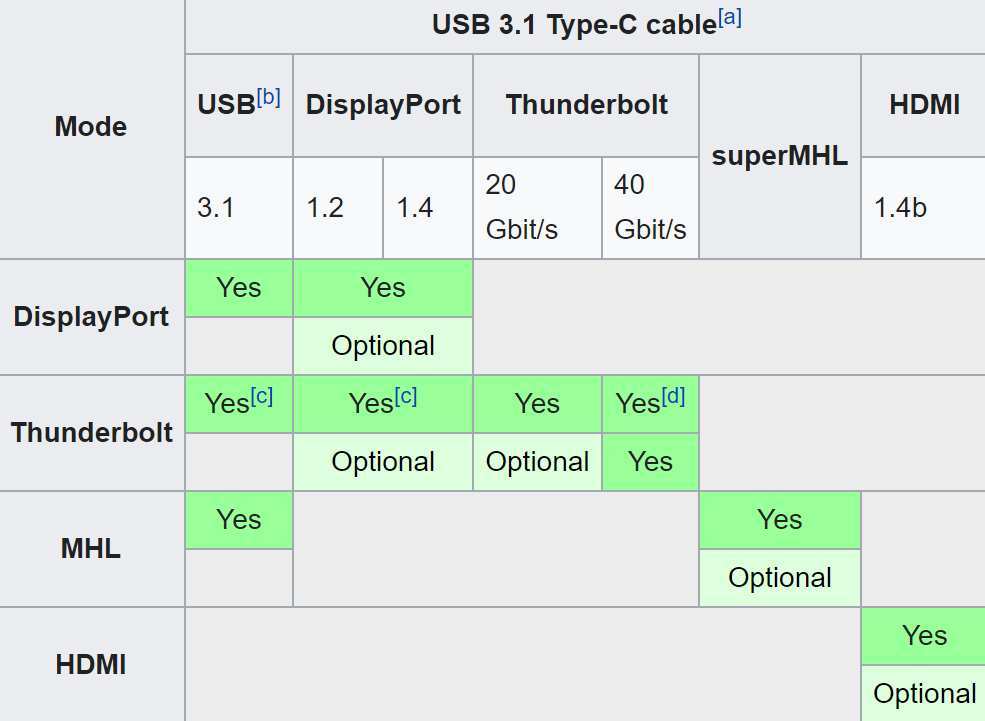
Image source: Bing (Web (fair-use with source credit))
If you've checked all of these and the display still looks wrong, you're likely dealing with a panel that genuinely needs ICC profiling. That takes us back to Branch 1 or Branch 2.
Step-by-Step: Full Colorimeter Calibration Workflow
This is the professional path. If you've got a colorimeter and you want results you can trust for client work, print preparation, or color grading, follow these steps in order. Skipping steps or doing them out of sequence is the most common reason people get poor results from what should be a reliable process.
Prepare Your Monitor and Environment
Start with the physical setup. Turn on the monitor and let it warm up for at least 30 minutes. Panel color shifts as it reaches operating temperature, and calibrating on a cold panel gives you a profile that drifts within the first hour of use.
Set your room lighting to what you'll normally work in. Don't calibrate in a dark room if you work in a bright office. Ambient light affects how your eyes perceive the display, and the profile needs to match your real working conditions.
Reset the monitor to factory defaults through the OSD. This clears any previous adjustments that might conflict with your new calibration. Then set the picture mode to "Custom" or "User" so the software can write values freely.
Configure Your Target Settings
Open your calibration software. If you're using DisplayCAL (the most popular free option), you'll see a settings screen where you choose your targets. For most people, these are the right values:
- White point: D65 (6500K). This matches the standard daylight white point used in web content, video, and most print workflows. Use D50 (5000K) only if you're specifically matching print viewing booth conditions.
- Luminance: 120 cd/m². This is comfortable for a normally lit room. If your workspace is dim, drop to 80 cd/m². For HDR content creation, you may target 160 cd/m² or higher depending on your workflow.
- Gamma: 2.2. This is the standard for Windows and web content. Some macOS workflows use the L* gamma curve, which perceptually maps tones differently.
- Profile type: Matrix + 3D LUT if your software supports it. A simple matrix profile works fine for monitors with uniform color behavior. 3D LUT correction handles monitors with non-uniform gamut mapping better.
If your monitor supports hardware calibration, the software will write the LUT directly to the monitor. Otherwise, it creates a software ICC profile that your GPU applies at the output stage.
Run the Profiling Measurement
Place the colorimeter on the center of the screen. Most software shows a positioning target. Make sure the sensor sits flat against the panel with no light leaking around the edges.
If you're using an OLED display, be gentle. OLED panels can show temporary image retention if a colorimeter sits in one spot too long.
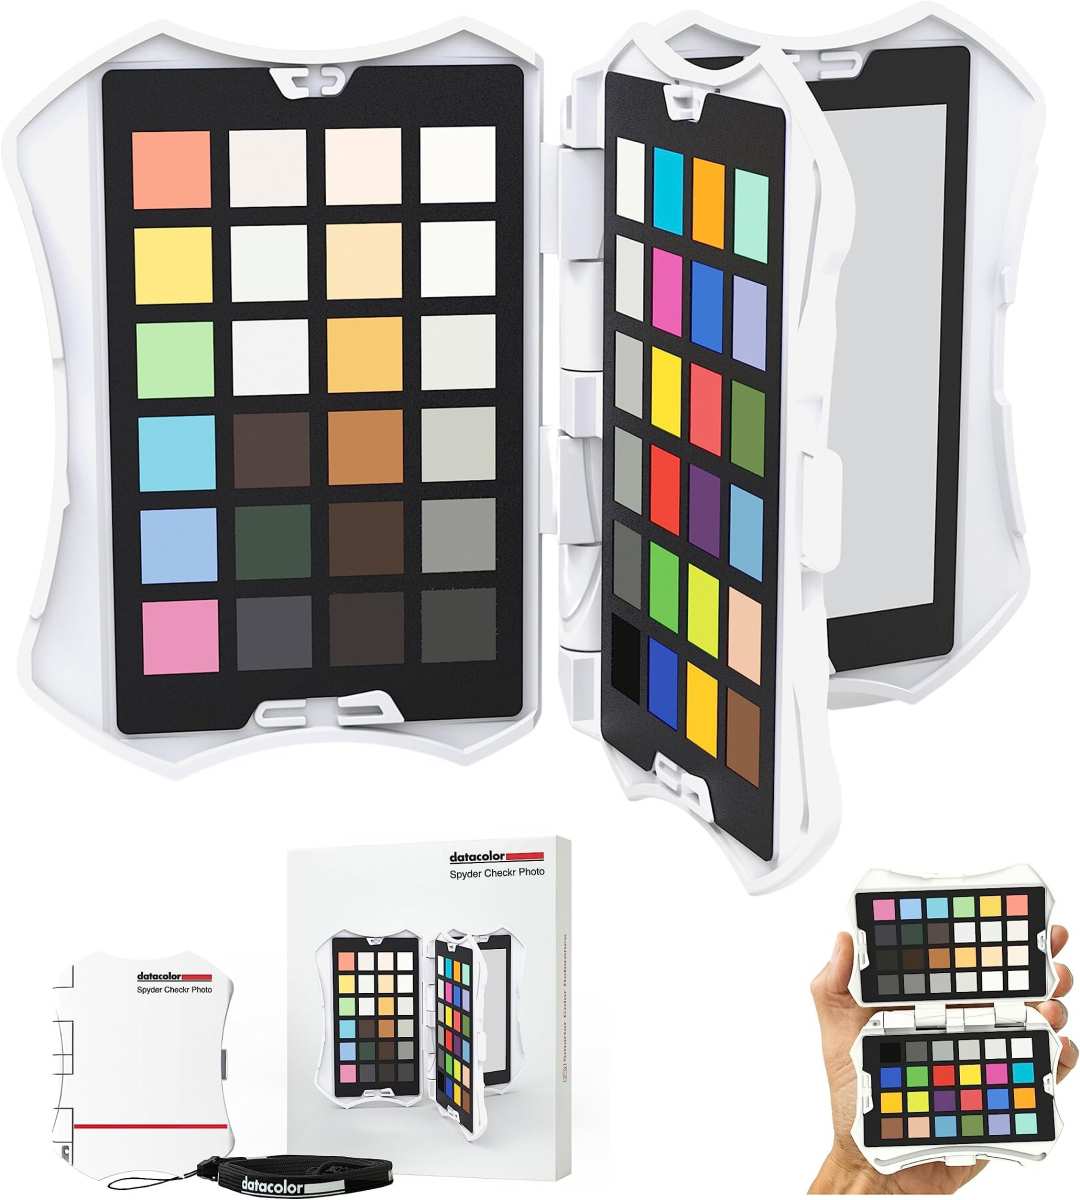
Image source: Bing (Web (fair-use with source credit))
The software will display a series of color patches. The colorimeter measures each one. This takes 5 to 15 minutes depending on the number of patches and the speed of your panel.
Don't touch the screen or move the colorimeter during this process.
If you see large measurement errors or the software reports "unstable readings," check that the colorimeter is properly seated and that no ambient light is hitting the sensor. Some anti-glare screen coatings can interfere with measurement accuracy. In that case, try lifting the colorimeter slightly off the panel surface.
Install and Verify Your ICC Profile
Once the measurement completes, the software generates an ICC profile and asks where to save it. On Windows, it typically goes to C:\Windows\System32\spool\drivers\color. On macOS, it goes to /Library/ColorSync/Profiles (system-wide) or ~/Library/ColorSync/Profiles (user-only).
The software should automatically set the new profile as the default for that display. Verify this:
- Windows: Open Color Management → Devices tab → select your monitor → check that your new profile is set as default.
- macOS: Open System Settings → Displays → select your monitor → verify the profile is selected in the profile list.
After applying the profile, let the display settle for a few minutes. Then open a known reference image, something you've seen printed or on a calibrated display before. The colors should look more neutral and less saturated than before.
If they look worse, you may have selected the wrong target values or the profile didn't load correctly.
Step-by-Step: Software-Only Calibration (No Colorimeter)
Not everyone needs a colorimeter. If you're setting up a second monitor for coding, general office work, or casual photo viewing, the built-in OS tools get you surprisingly close to acceptable accuracy. The key is understanding what you're adjusting and why.
macOS Built-In Display Calibrator
Open System Settings, go to Displays, and look for the "Color profile" or "Customize" option. On older macOS versions, you can access the full calibrator through the ColorSync Utility. The built-in assistant shows you a series of screens where you adjust:
- Native gamma: You'll see two sliders that adjust the display's gamma curve. The goal is to make the center dot blend into the background pattern. This is subjective, so take your time.
- Target white point: Adjust the slider until the screen looks neutral to you. The default is D65, which is correct for most workflows.
- Administrator access: The system may ask for your password to save the profile system-wide.
The resulting profile is saved as a custom ICC file. macOS applies it automatically whenever that monitor is connected. The downside is that macOS may override it after a reboot or wake cycle. If your colors shift overnight, re-select the profile manually in Display settings.
Windows Color Management Calibration
Search for "Calibrate display color" in the Start menu. The dccw.exe wizard walks you through four adjustments:
- Gamma: A screen shows a dot in the center of a gradient. Adjust the slider until the dot nearly disappears into the background. This sets the midtone response curve.
- Brightness: Adjust until you can barely distinguish the logo in the dark area of the test image. Too high and you lose shadow detail. Too low and blacks crush.
- Contrast: Adjust until you can see the details in the white areas without them blooming into pure white.
- Color balance: Adjust red, green, and blue sliders until the gray bars look neutral with no color tint.
Windows saves the resulting ICM profile and applies it automatically. You can verify it's active by opening Color Management, selecting your monitor, and checking the profile list.
What You Lose Without a Colorimeter
Software-only calibration adjusts the GPU's output signal, not the monitor itself. This means you're limited to the corrections a graphics driver can apply. You can fix gamma, white point, and basic color balance.
You cannot fix gamut errors, non-uniformity across the panel, or color shifts at different viewing angles.
For most non-critical work, this is fine. For anything where color accuracy matters to a client, a publication, or a print house, you need measured data. The human eye simply cannot reliably judge absolute color values.
We're excellent at spotting differences between two colors side by side. We're terrible at knowing whether a single gray patch is truly neutral.
Common USB-C Monitor Calibration Problems and Fixes
ICC Profile Not Loading or Being Ignored
This is the number one complaint we see. You calibrate, save the profile, set it as default, and nothing changes. Or it works for a while and then reverts.
On macOS, the most common cause is ColorSync reassigning profiles after display reconfiguration. The fix is to delete any duplicate profiles for the same monitor and ensure only one custom profile exists. On Windows, GPU driver updates frequently reset color management settings.
After any driver update, re-verify your profile is still set as active.
Another cause is multi-monitor setups where the OS assigns the wrong profile to the wrong display. Disconnect the secondary monitor, calibrate each display individually, then reconnect.
Brightness Keeps Resetting After Sleep
This almost always points to DDC/CI communication breaking during the sleep/wake cycle. The monitor loses its brightness setting and reverts to the OSD default. The fix is to disable any power-saving features in the monitor OSD that reset settings on power cycle.
Some monitors have a "Factory Reset on Power Loss" option that should be turned off.
On macOS, the True Tone and Ambient Light Compensation features can also override your calibrated brightness. Disable both in Display settings before calibrating.
DDC/CI Not Working Over USB-C
If your calibration software can't control the monitor's brightness remotely, DDC/CI isn't passing through the USB-C connection. Try these fixes in order:
- Enable DDC/CI in the monitor's OSD menu (it's often disabled by default).
- Connect the colorimeter or control utility directly to the laptop's USB port, not through a hub.
- Try a different USB-C cable. Some cables don't pass the DDC/CI clock channel.
- If you're using a dock, bypass it temporarily and connect the monitor directly to the laptop.
- Update the monitor's firmware. Several manufacturers have released firmware updates specifically fixing DDC/CI over USB-C.
Colors Look Worse After Calibrating
If your calibrated display looks dull or flat compared to the factory "Vivid" mode, that's actually correct. Factory presets boost saturation and contrast to look eye-catching. Calibration targets accuracy, which can look less exciting by comparison.
That said, if colors look genuinely wrong (green tint, crushed blacks, banding), the profile may have been created with incorrect settings. Check that you selected the right panel type in your software. Some calibration tools ask whether your display is IPS, VA, or TN, and the correction matrices differ.
Also verify you didn't accidentally set the luminance target too low, which makes everything look dim and muddy.
USB-C Specific Gotchas Most Guides Skip
Cable and Bandwidth Issues
USB-C cables that support DisplayPort Alt Mode come in different bandwidth tiers. A cable rated for DP 1.2 supports 4K at 60 Hz. A cable rated for DP 1.4 supports 4K at 120 Hz or 8K at 60 Hz with DSC (Display Stream Compression).
If your cable is limited to DP 1.2 but you're trying to run a high-resolution, high-refresh display, the system may fall back to 4:2:0 chroma subsampling. This reduces color resolution and can make text look fuzzy and colors appear less precise.
For calibration purposes, make sure you're running at the monitor's native resolution and full chroma range (4:4:4). Check your GPU control panel's output color format settings. If it shows YCbCr 4:2:0, switch to RGB 4:4:4.
Dock and Hub Interference
USB-C docks are convenient, but they're a common source of calibration problems. Many docks use DisplayLink chips for video output, which creates a virtual display adapter rather than passing through the native GPU output. DisplayLink connections often don't support DDC/CI, HDR, or ICC profile application properly.
If you must use a dock, look for one that supports "DisplayPort Alt Mode passthrough" rather than DisplayLink. These docks pass the native GPU signal through to the monitor without intermediary processing. Brands like CalDigit, Anker, and Belkin make docks that handle this correctly, but always verify the specific model supports native DP Alt Mode.
macOS vs. Windows Profile Management Differences
macOS and Windows handle ICC profiles at different stages of the rendering pipeline. macOS applies the profile at the ColorSync level, which means it affects all applications uniformly. Windows applies profiles through the Windows Color System, but some applications (particularly games and full-screen video players) bypass the ICC pipeline entirely.
This means your calibration might look perfect in Photoshop but wrong in a full-screen video player on Windows. The fix for full-screen applications is to use an overlay or driver-level calibration tool like the one built into NVIDIA Control Panel or AMD Radeon Software. These apply corrections at the GPU output stage, which catches everything including full-screen apps.
On macOS, the bigger issue is that the system sometimes reverts to a generic profile after waking from sleep. If this happens repeatedly, a free utility like SwitchResX can force the correct profile to reload on wake.
How Often Should You Recalibrate?
Panel characteristics drift over time. Backlight LEDs age, color filters shift, and OLED panels experience organic material degradation. The rate of drift depends on the panel technology:
| Panel Type | Recommended Recalibration Interval |
|---|---|
| IPS (LED backlight) | Every 30 days |
| VA (LED backlight) | Every 30 days |
| Mini-LED (IPS/VA) | Every 30 days |
| OLED | Every 14 days |
| Professional reference (Eizo CG, NEC PA) | Every 14 to 21 days |
If you're doing color-critical work, calibrate more frequently. If you're just trying to keep a second monitor looking reasonable for office work, every 60 to 90 days is usually sufficient.
Environmental factors matter too. If your workspace temperature changes significantly between seasons, your panel's color response will shift with it. Calibrate when the room is at its normal working temperature, not during a cold morning startup.
Quick-Reference Comparison: Tools and Methods
| Method | Accuracy | Cost | Best For |
|---|---|---|---|
| Hardware colorimeter + DisplayCAL | Delta E < 2.0 | $75 to $250 (hardware) + free (software) | Photography, video, print design |
| Hardware colorimeter + Calman | Delta E < 1.0 | $200 to $2,000+ | Professional color grading, broadcast |
| Monitor hardware calibration (built-in LUT) | Delta E < 1.0 | Requires compatible monitor ($400+) | Multi-OS environments, shared workstations |
| macOS built-in calibrator | Subjective | Free | General use, casual photo editing |
| Windows dccw.exe | Subjective | Free | General use, office work |
| OSD-only adjustments (no profile) | Low | Free | Quick fixes, non-critical displays |
Frequently Asked Questions
Can I calibrate a USB-C monitor without a colorimeter?
Yes. Both macOS and Windows include built-in calibration tools that let you adjust gamma, white point, brightness, and contrast visually. The results won't match a colorimeter's accuracy, but they're noticeably better than factory defaults for everyday use.
Why does my ICC profile stop working after sleep on macOS?
macOS sometimes reverts to the default ColorSync profile after a sleep/wake cycle. Disable True Tone and Ambient Light Compensation in Display settings. If the problem persists, use a utility like SwitchResX to force the correct profile to reload on wake.
Does a USB-C dock affect monitor calibration?
It can. Docks that use DisplayLink for video output often strip DDC/CI support and interfere with ICC profile application. Use a dock that supports native DisplayPort Alt Mode passthrough for the most reliable calibration experience.
What Delta E value should I aim for?
For professional color work, aim for an average Delta E below 2.0. Most people can't perceive differences below this threshold. For reference-grade work like medical imaging or print proofing, target Delta E below 1.0.
Do I need to calibrate if my monitor came with a factory calibration report?
Factory calibration applies to the specific unit that was tested at the factory, but panel characteristics vary slightly between units and drift over time. A factory report tells you the monitor is capable of accuracy. Your own calibration ensures your specific unit is accurate right now.
How long does a full colorimeter calibration take?
Expect 15 to 30 minutes total. This includes monitor warm-up time, software configuration, the measurement pass itself, and profile verification. The actual measurement takes 5 to 15 minutes depending on the number of color patches your software uses.
Final Recommendation: Pick Your Path Based on What You Actually Need
If you're doing professional photo editing, video color grading, or print design, invest in a colorimeter and use DisplayCAL or a paid alternative. The Calibrite ColorChecker Display Plus and the free DisplayCAL combination gives you reference-grade accuracy for under $100 total. It's the single best upgrade you can make to a USB-C monitor for color work.
If you're a remote worker who just wants your display to look comfortable and reasonably accurate, spend ten minutes with your OS built-in calibration tool and call it done. Check your picture mode first. Switch off any "Eco" or "Dynamic Contrast" features in the monitor OSD.
Those cause more color problems than people realize.
And if your USB-C monitor keeps ignoring your settings after sleep, or DDC/CI controls aren't responding, don't keep fighting the software layer. Check your cable, check your dock, and consider connecting via HDMI or DisplayPort just to rule out USB-C as the bottleneck. Sometimes the simplest fix is the one you didn't try because it seemed too obvious.

Similar Posts