How to Connect USB C Monitor with HDMI Adapter

Figuring out how to connect a USB-C monitor with an HDMI adapter isn't as straightforward as grabbing the first dongle you see on Amazon. The problem is that not every USB-C port is built the same way. Some carry a video signal, some don't, and buying the wrong adapter is a frustrating (and expensive) mistake.
The good news is that once you know what your port supports, the actual connection takes about two minutes. Let's walk through exactly how to get this working without the guesswork.
Image source: Bing (Web (fair-use with source credit))
Quick Answer
Plug a USB-C to HDMI adapter into your laptop's USB-C port. Connect an HDMI cable from the adapter to your monitor. Switch the monitor to the correct HDMI input.
Open your display settings and choose mirror or extend mode. If nothing shows up, your USB-C port may not support video output.
First Things First: Does Your USB-C Port Actually Support Video?
This is where most people get tripped up. They buy an adapter, plug it in, and get nothing. The USB-C connector shape tells you nothing about what that port can actually do.
A USB-C port can be configured in several ways. Some ports handle data and charging only. Others carry a full video signal.
You need to know which type you have before spending money on any adapter.
How to Check What Your Port Supports
Look for a symbol next to the USB-C port on your device. Manufacturers usually print a small icon indicating the port's capabilities.
Here's what the common symbols mean:
| Symbol | Meaning | Video Support? |
|---|---|---|
| Lightning bolt (no "D") | Thunderbolt 3 or 4 | Yes, full video output |
| "D" shape with "P" and "D" | DisplayPort Alt Mode | Yes, native video output |
| USB trident (SS or 10) | USB data only | No video |
| Battery or plug icon | Charging only | No video |
| No symbol at all | Varies by device | Check the manual |
If you don't see a symbol, check your laptop or device manual. Look up your exact model number on the manufacturer's website. Search for terms like "USB-C DisplayPort Alt Mode" or "USB-C video output" in the specs sheet.
Manufacturer specifications for devices like the MacBook Pro, Dell XPS, and Lenovo ThinkPad lines clearly state whether each USB-C port supports video. Don't guess. It takes 30 seconds to verify and saves you from buying the wrong thing.
What If Your Port Doesn't Support Video?
You still have options. A DisplayLink adapter uses software to push a video signal through a standard USB data port. It's not as clean as native Alt Mode, but it works.
The catch is that DisplayLink requires installing a driver on your computer. That means it won't work with every operating system, and it uses some CPU overhead. For basic office work it's fine.
For gaming or video editing, you'll notice the difference.
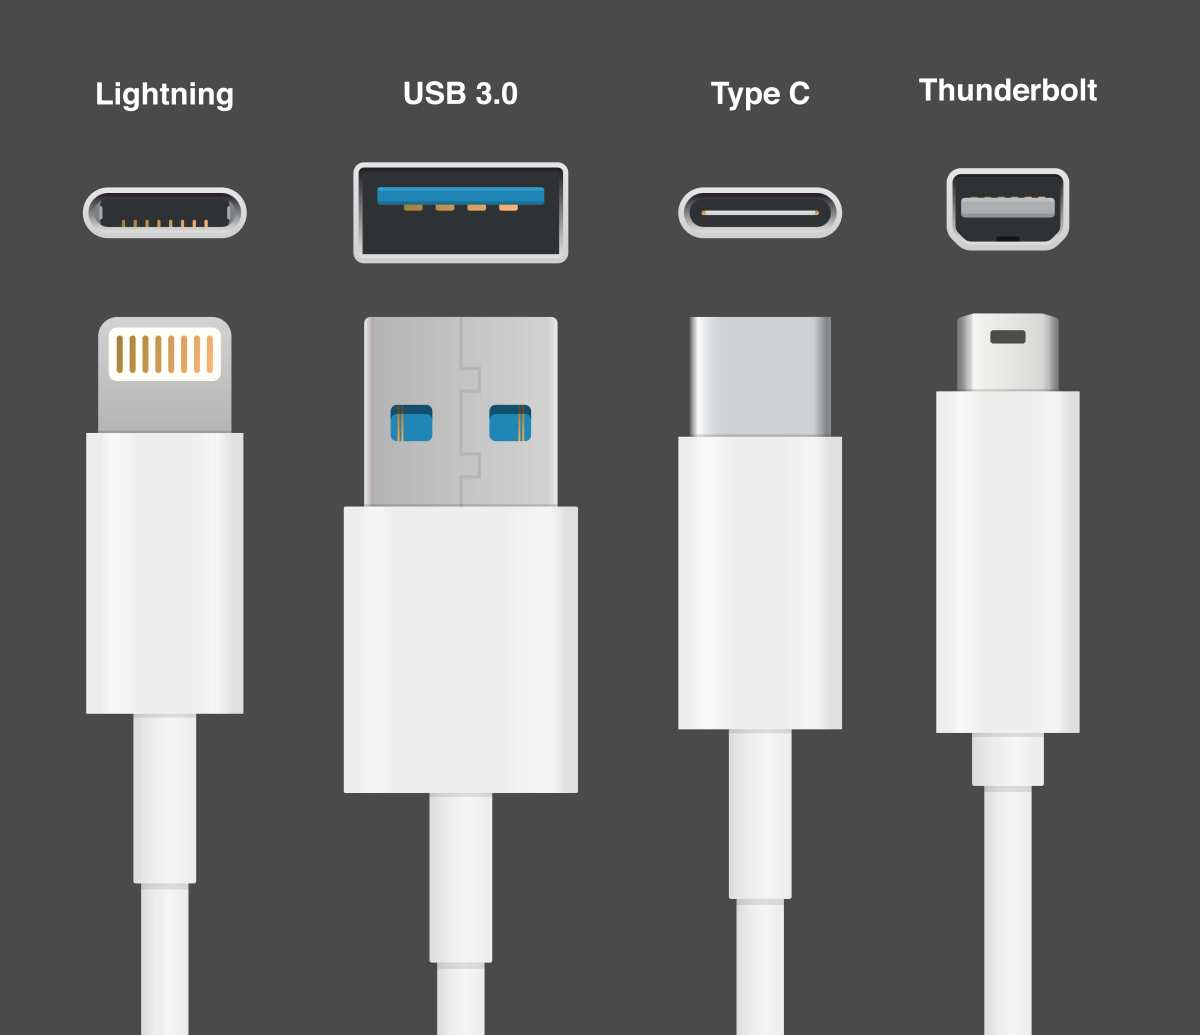
Image source: Bing (Web (fair-use with source credit))
USB-C Alt Mode vs. DisplayLink vs. Thunderbolt — What's the Difference and Why It Matters
These three technologies all send video through a USB-C port, but they work very differently. Picking the right one depends entirely on what your device supports.
DisplayPort Alt Mode
This is the most common method. It reroutes the USB-C port's pins to carry a native DisplayPort signal. Your adapter then converts that DisplayPort signal to HDMI.
The key advantage is that it's plug and play. No drivers, no software, no fuss. The video signal goes straight from your GPU to the adapter to your monitor.
The downside? It only works if your device's USB-C port explicitly supports DisplayPort Alt Mode. Many budget laptops and phones skip this feature entirely.
Thunderbolt 3 and 4
Thunderbolt ports carry DisplayPort video natively as part of their protocol. Every Thunderbolt port supports video output. That's a requirement of the Thunderbolt specification.
If you see a lightning bolt symbol next to your USB-C port, you're good to go. Thunderbolt also carries data and power through the same connector, which is why it's the gold standard for docking stations.
Thunderbolt 4, as of 2026 the current standard, guarantees support for at least one 4K display output. Thunderbolt 3 supports display output too, though specific capabilities depend on the device manufacturer's implementation.
DisplayLink
DisplayLink is a software-based solution. It compresses the video signal on your CPU, sends it as regular USB data through any standard USB port, and decompresses it in the adapter hardware.
This is your fallback option when your USB-C port doesn't support Alt Mode or Thunderbolt. It works with almost any device that has a USB port.
The tradeoffs are real though. You need to install DisplayLink drivers. There's a small but noticeable CPU hit.
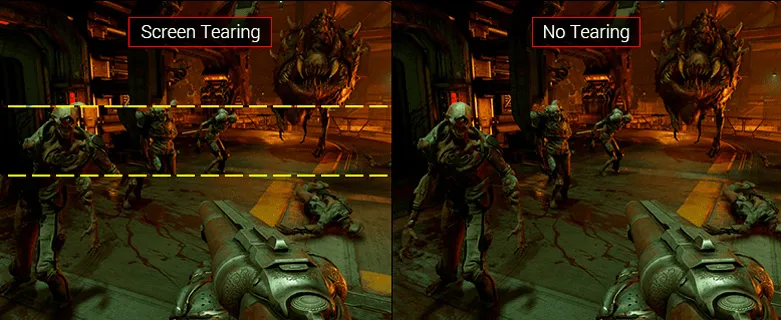
And latency is higher than native Alt Mode or Thunderbolt, which matters for fast motion content.
| Feature | DisplayPort Alt Mode | Thunderbolt 3/4 | DisplayLink |
|---|---|---|---|
| Requires driver | No | No | Yes |
| Works on any USB-C port | No (Alt Mode required) | No (Thunderbolt required) | Yes (any USB port) |
| Latency | Minimal | Minimal | Slightly higher |
| CPU usage | None | None | Low to moderate |
| Max resolution | Depends on version | Up to 4K+ | Up to 4K (varies) |
| Best for | Most laptops with video support | Premium laptops and docks | Devices without native video |
Quick Match: Which Adapter Do You Actually Need?
Stop guessing. Use this simple decision flow to figure out exactly what you need to buy.
If your USB-C port supports DisplayPort Alt Mode or Thunderbolt:
Buy a simple USB-C to HDMI adapter. These are passive adapters that convert the signal electrically. No drivers needed.
They're small, cheap, and reliable.
If your USB-C port is data-only (no video support):
Buy a DisplayLink USB-C to HDMI adapter. Make sure your operating system is supported. Download the DisplayLink driver from the manufacturer's website before setup.
If you also need to charge your laptop while using the monitor:
Buy a USB-C to HDMI adapter with Power Delivery (PD) passthrough. This lets you plug your charger into the adapter, which passes power through to your laptop.
If you need multiple displays or extra ports:
Skip the simple adapter. Get a USB-C hub or docking station with HDMI output. These give you video output plus USB ports, SD card readers, and sometimes ethernet.
What About Resolution and Refresh Rate?
Not all adapters handle the same maximum resolution. The HDMI version built into the adapter determines what you get.
- HDMI 1.4 adapters: Up to 4K at 30Hz, or 1080p at 60Hz
- HDMI 2.0 adapters: Up to 4K at 60Hz
- HDMI 2.1 adapters: Up to 4K at 120Hz or 8K at 30Hz
For office work and general use, 4K at 30Hz is perfectly fine. For gaming, video editing, or anything with fast motion, you want 60Hz minimum. Check the adapter specs before buying.
Most people shopping for a basic adapter don't need HDMI 2.1. An HDMI 2.0 adapter handles 4K at 60Hz, which covers the vast majority of monitors on the market as of 2026.
Step-by-Step: Connecting Your USB-C Device to an HDMI Monitor
Once you've got the right adapter, the physical setup is straightforward. Here's exactly what to do.
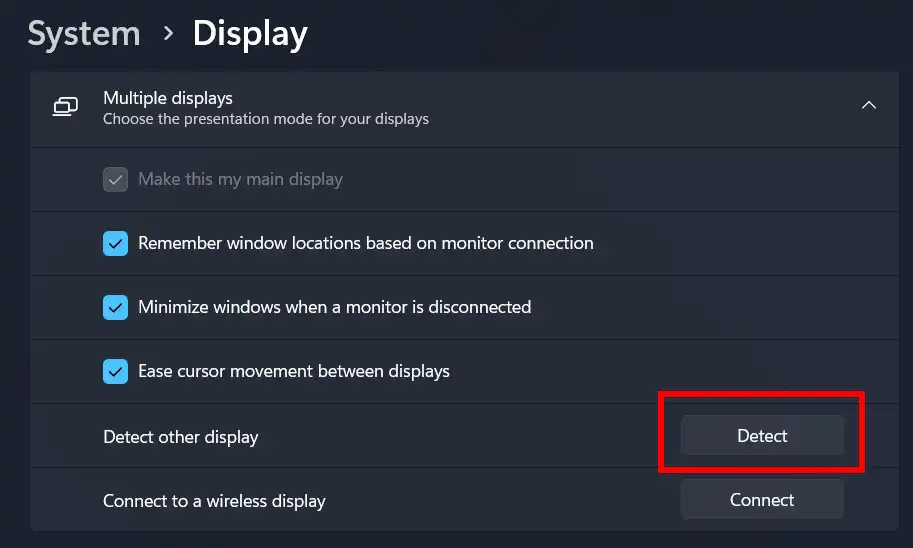
Image source: Bing (Web (fair-use with source credit))
What You Need Before You Start
- A USB-C to HDMI adapter (confirmed compatible with your device)
- An HDMI cable (Standard High Speed or High Speed with Ethernet)
- Your laptop or source device
- An HDMI-compatible monitor or TV
- (For DisplayLink adapters) The latest driver installed on your computer
The Physical Connection
Plug the adapter into your laptop's USB-C port. It should seat firmly. USB-C connectors are reversible, so orientation doesn't matter.
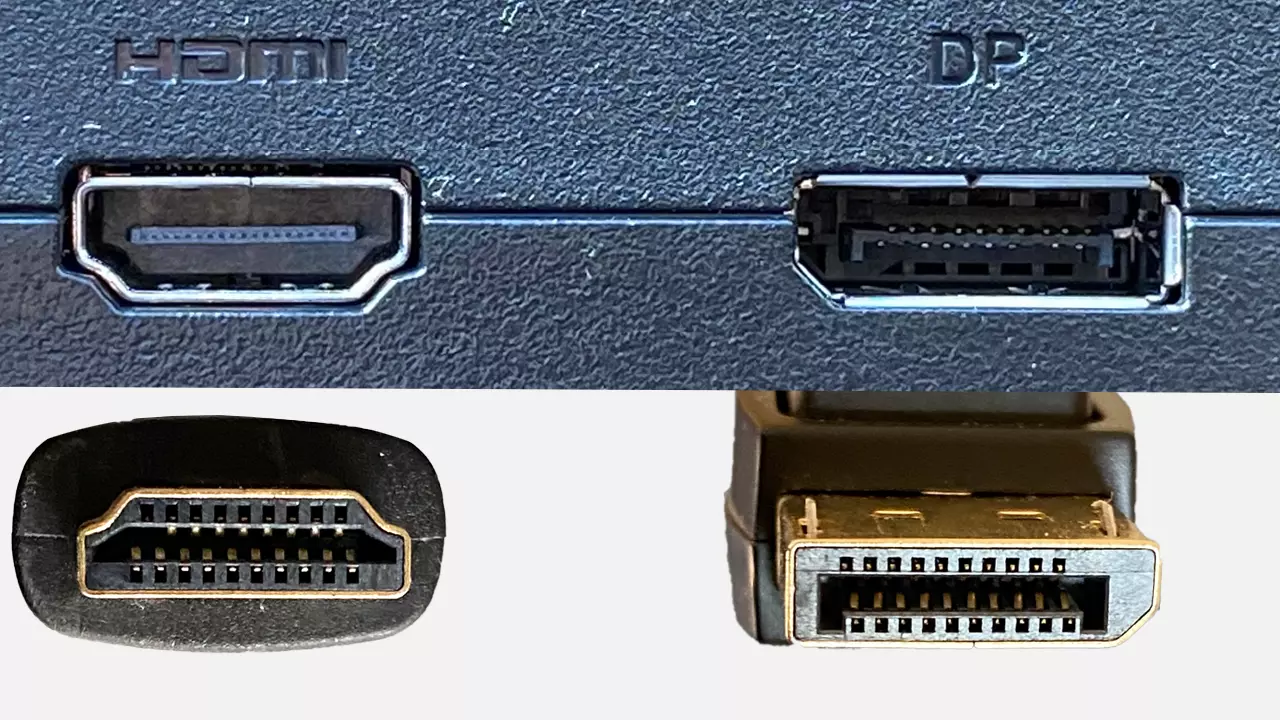
Connect one end of the HDMI cable to the adapter. The HDMI connector only fits one way. Don't force it.
Connect the other end of the HDMI cable to your monitor or TV. Note which HDMI input number you're using (HDMI 1, HDMI 2, etc.).
Switch the monitor to the correct input. Use the monitor's input/source button to select the HDMI port you connected to.
Power on your laptop if it isn't already on. Most devices detect the external display automatically.
That's the hardware side. If you see a picture on the external monitor, you're done with the physical setup. If not, move on to the software configuration.
Configuring Your Display Settings
Once the physical connection is made, you need to tell your operating system how to use the external display.
On Windows 10 and 11:
Right-click the desktop and select "Display settings." Scroll to the "Multiple displays" section. If the external monitor isn't showing up, click "Detect." Then choose "Duplicate these displays" (mirror mode) or "Extend these displays" (dual-screen mode). You can also press Windows key + P to toggle between display modes quickly.
On macOS:
Open System Settings (or System Preferences on older macOS versions). Go to Displays. Your Mac should detect the external monitor automatically.
Under "Arrangement," uncheck "Mirror Displays" if you want extended desktop mode instead of mirroring. Drag the white menu bar to set which display is your primary screen.
On ChromeOS:
Click the status area in the bottom-right corner (where the time is). Click the gear icon for settings. Scroll to "Device" then "Displays." Your Chromebook should detect the HDMI display.
Adjust the resolution and arrangement to your preference.
If the display isn't detected on any platform, try unplugging and replugging the adapter. Restart the computer with everything connected. And double-check that your USB-C port actually supports video output.
Common Problems and How to Fix Them
Most connection issues come down to one of a few root causes. Here's how to troubleshoot them systematically.
"No Signal" on the Monitor
This is the most common complaint. The monitor is on, the cable is connected, but the screen stays blank.
Start with the basics. Make sure the monitor is set to the correct HDMI input. Most monitors have multiple inputs, and they don't always auto-switch.
If the input is correct, unplug the adapter and plug it back in. Try a different HDMI cable if you have one. Cables do fail, especially cheaper ones that have been bent or crimped.
If you're still getting nothing, your USB-C port probably doesn't support video output. Go back and check those port symbols. This is the number one reason adapters appear to be "dead on arrival."
Picture Looks Blurry or Wrong Resolution
Your monitor is working, but the image doesn't look right. Text is fuzzy, or the desktop doesn't fill the screen properly.
This usually means your computer is outputting a resolution that doesn't match the monitor's native panel resolution. Go into your display settings and manually select the correct resolution. For most 4K monitors, that's 3840 x 2160.
For 1080p monitors, it's 1920 x 1080.
If the option for the correct resolution isn't available, your adapter may be an older HDMI 1.4 model that caps out at lower bandwidth. You'll need an HDMI 2.0 adapter to push higher resolutions at 60Hz.
Also check the scaling settings. Windows and macOS both have scaling options that can make things look blurry if set incorrectly for the display size.
No Audio Through the Monitor Speakers
Video works fine, but sound still comes out of your laptop speakers. HDMI carries both video and audio, so this should work automatically.
On Windows, right-click the speaker icon in the taskbar. Open "Sound settings" and check the output device. Your monitor or TV should appear as an available audio device.
Select it as the default.
On macOS, open System Settings, go to Sound, then Output. Select the HDMI display from the list.
If the monitor doesn't show up as an audio device, the adapter may not support audio passthrough. Some cheaper adapters only carry video. Check the adapter specs before assuming it's a software issue.
Adapter Gets Hot or Connection Drops Intermittently
Adapters get warm during use. That's normal. But if yours is hot to the touch or the signal cuts out randomly, something is wrong.
First, check that you're not overloading the adapter's bandwidth. Pushing 4K at 60Hz through a cheap HDMI 1.4 adapter causes it to overheat. Match the adapter to your resolution needs.
Second, check the cable length. Long HDMI cables (over 10 feet) can cause signal degradation, especially with cheaper cables. The adapter has to work harder to maintain the connection, which generates more heat.
Third, make sure the adapter has adequate ventilation. If it's buried under a stack of papers or wedged against a wall, heat builds up. Give it some breathing room.
If problems persist, the adapter itself may be defective. Aggregate user reviews for budget adapters show higher failure rates compared to mid-range options. Sometimes spending a few more dollars saves a lot of headaches.
USB-C to HDMI Adapter vs. USB-C Hub vs. USB-C Dock — Which Setup Makes Sense for You?
A simple adapter isn't your only option. Depending on what you need, a hub or dock might be a better fit.
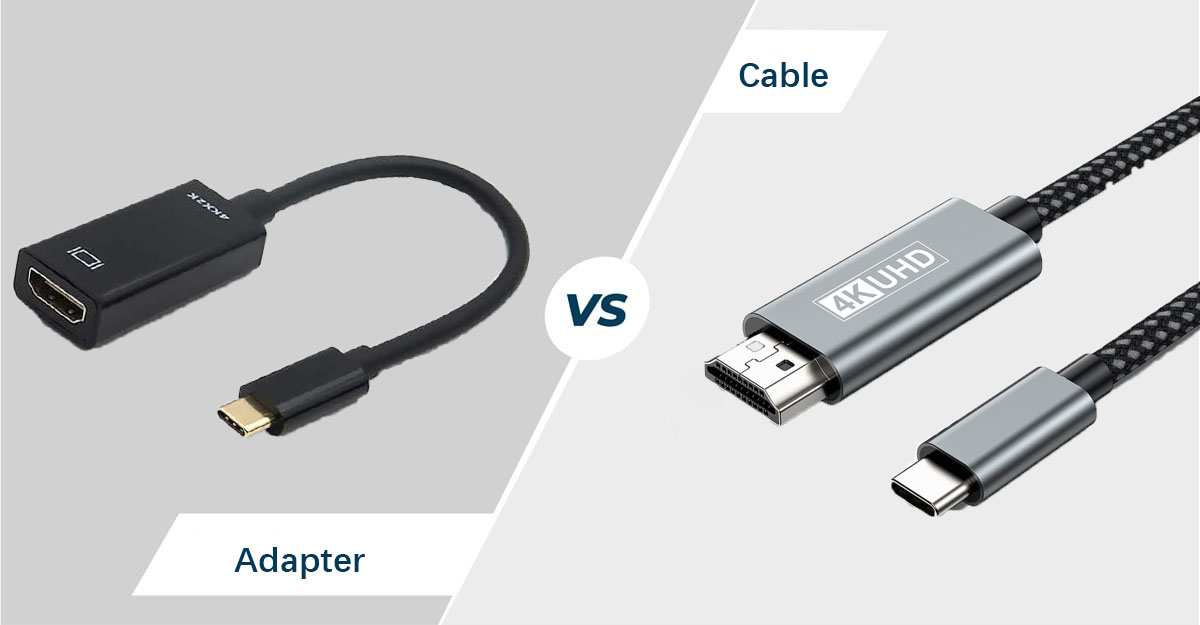
Image source: Bing (Web (fair-use with source credit))
Simple USB-C to HDMI Adapter
Best for: Single external display, minimal setup, travel.
These are small, usually about the size of a thumb drive. They convert your USB-C video signal to HDMI with no extra features. Prices range from $10 to $25 for basic models.
The advantage is portability and simplicity. Toss it in your bag, plug it in, done. No drivers, no extra cables, no power bricks.
The downside is that you get exactly one HDMI output and nothing else. If you need to charge your laptop at the same time, you'll need an adapter with Power Delivery passthrough, which costs a bit more ($25 to $40).
USB-C Hub with HDMI
Best for: Adding a few extra ports alongside your display.
A hub gives you HDMI output plus USB-A ports, an SD card reader, and sometimes ethernet. These are great for people who need to connect a few peripherals without carrying a bunch of separate dongles.
Hubs typically cost $30 to $60. They're larger than a simple adapter but still portable. Most are bus-powered, meaning they draw power from your laptop's USB-C port.
One thing to watch for: not all hubs support the same video specs. Some cap out at 4K at 30Hz. Check the product specs carefully if you need higher refresh rates.
USB-C Docking Station
Best for: Permanent desk setup with multiple displays and full connectivity.
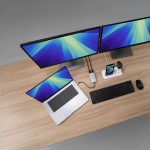
Docking stations are the full-featured option. They sit on your desk, connect to your laptop with a single USB-C cable, and provide multiple display outputs, USB ports, ethernet, audio, and charging.
Prices range from $80 to $250 or more. They're not portable. But if you use your laptop as a desktop replacement, a dock is the cleanest solution.
Most docks use DisplayLink or Thunderbolt technology. Make sure your laptop supports the dock's requirements before buying. A Thunderbolt dock won't work properly on a laptop that only supports USB 3.2.
| Option | Price Range | Portability | Best For |
|---|---|---|---|
| Simple adapter | $10–$25 | Excellent | Travel, single display |
| Hub with HDMI | $30–$60 | Good | Multi-peripheral setup |
| Docking station | $80–$250+ | Not portable | Full desk workstation |
Real Scenarios: What Works and What Doesn't
Let's look at how this plays out with specific devices and setups.
MacBook Air/Pro to 4K Monitor
Every MacBook with a USB-C port (2018 and later for Air, 2016 and later for Pro) supports Thunderbolt 3 or Thunderbolt 4. That means DisplayPort Alt Mode is built in.
A basic USB-C to HDMI adapter works perfectly here. For 4K at 60Hz, grab an HDMI 2.0 adapter. Apple's own USB-C Digital AV Multiport Adapter runs about $70 and includes HDMI plus a USB-A port and a USB-C charging port.
Third-party options with the same specs run $20 to $35.
One macOS quirk: some users report that macOS doesn't always detect the display on first plug. A quick display sleep and wake usually fixes it. Or just restart with everything connected.
Windows Laptop to Living Room TV
This is a common setup for streaming or presentations. Most modern Windows laptops with USB-C support DisplayPort Alt Mode, but not all. Budget models sometimes skip it.
If your laptop supports Alt Mode, a simple adapter and a 10-foot HDMI cable gets the job done. Set the TV to "Game Mode" or "PC Mode" to reduce input lag if you're doing anything interactive.
If your laptop doesn't support Alt Mode, a DisplayLink adapter is your fallback. Install the driver first, then connect. Expect a slight increase in CPU usage, but for video playback it's fine.
Chromebook to Office Monitor
Chromebooks are hit or miss with USB-C video. Higher-end models like the Lenovo ThinkPad C13 Yoga or Acer Chromebook Spin 713 support Alt Mode. Budget models often don't.
Check your specific Chromebook model's specs. If it supports Alt Mode, any standard USB-C to HDMI adapter works. ChromeOS handles external displays well, with solid multi-monitor support built into the OS.
If your Chromebook doesn't support Alt Mode, DisplayLink adapters do work with ChromeOS, but driver installation is more involved. You'll need to install the DisplayLink app from the Chrome Web Store and enable it in settings.
Samsung Phone (DeX) to External Display
Samsung's DeX mode turns your Galaxy phone into a desktop experience when connected to a monitor. Most DeX-compatible phones support video output over USB-C natively.
You can use a simple USB-C to HDMI adapter or a USB-C hub with HDMI. Samsung also sells its own DeX Station and DeX Pad, though third-party options work just fine.
One limitation: not all apps scale well to a large display in DeX mode. Most Google and Microsoft apps work great. Some mobile-only apps don't resize properly and appear in a small window.
What to Look for When Buying an Adapter
Not all adapters are created equal. Here's what actually matters.
HDMI version support. Match this to your monitor. If you have a 4K 60Hz display, don't buy an HDMI 1.4 adapter that caps at 30Hz. Look for HDMI 2.0 at minimum.
Build quality. Aluminum housings dissipate heat better than plastic. They also tend to last longer. Aggregate user reviews consistently show plastic-bodied adapters failing sooner, especially with daily use.
Power delivery passthrough. If you want to charge your laptop through the same USB-C port, make sure the adapter has a PD input. Check the wattage. Most laptops need at least 45W to charge effectively while in use.
Some fast-charge at 65W or 100W.
Cable length and flexibility. Adapter-only designs (no built-in cable) are more portable but require a separate cable. Integrated cable designs are more convenient but harder to replace if the cable fails.
Return policy. Buy from a retailer with a good return policy. If your adapter doesn't work with your specific device, you want to be able to send it back without hassle.
Avoid the cheapest no-name adapters on marketplace sites. They often overpromise on specs and underdeliver. A $15 adapter from a known brand is a better bet than a $7 mystery dongle.
Frequently Asked Questions
Do all USB-C ports support HDMI output?
No. Only USB-C ports with DisplayPort Alt Mode or Thunderbolt support can output video through an adapter. Many budget devices have USB-C ports that handle data and charging only.
Check your device specs or look for the port symbols before buying an adapter.
Can I use a USB-C to HDMI adapter for two monitors?
A single basic adapter supports one external display. To run two monitors, you need either a docking station with dual video outputs or a combination of one native video port and a DisplayLink adapter.
Does USB-C to HDMI work with 4K?
Yes, if the adapter supports HDMI 2.0 or higher. For 4K at 60Hz, make sure the adapter specifically lists HDMI 2.0 support. Older HDMI 1.4 adapters limit 4K to 30Hz, which feels sluggish for anything beyond basic office work.
Do I need to install drivers for a USB-C to HDMI adapter?
Not for standard Alt Mode or Thunderbolt adapters. These are plug and play on Windows, macOS, and ChromeOS. Only DisplayLink-based adapters require a driver installation.
Will a cheap USB-C to HDMI adapter work?
It depends on what "cheap" means. Budget adapters from established brands work fine for 1080p and basic 4K at 30Hz. The no-name adapters from unknown sellers often have reliability issues.
Spending $15 to $25 on a known brand is worth the small premium.
Can I connect my phone to a monitor with a USB-C to HDMI adapter?
If your phone supports USB-C Alt Mode or Samsung DeX, yes. Many Android phones support video output, but not all. iPhones use Lightning, not USB-C, so they need a specific Lightning to Digital AV Adapter instead.
The Bottom Line: Your Simple Decision Guide
Here's the fastest path to getting this working.
Step 1: Check if your USB-C port supports video. Look for Thunderbolt or DisplayPort Alt Mode symbols.
Step 2: If yes, buy a USB-C to HDMI 2.0 adapter ($15 to $30). If no, buy a DisplayLink adapter and install the driver first.
Step 3: Connect adapter, cable, and monitor. Configure your display settings.
Skip the guesswork and don't overthink it. For most people with a modern laptop, a simple $20 adapter is all you need. Check your port, match the adapter to your resolution, and you'll be up and running in minutes.

Similar Posts