How to Connect 4K Monitor to Docking Station
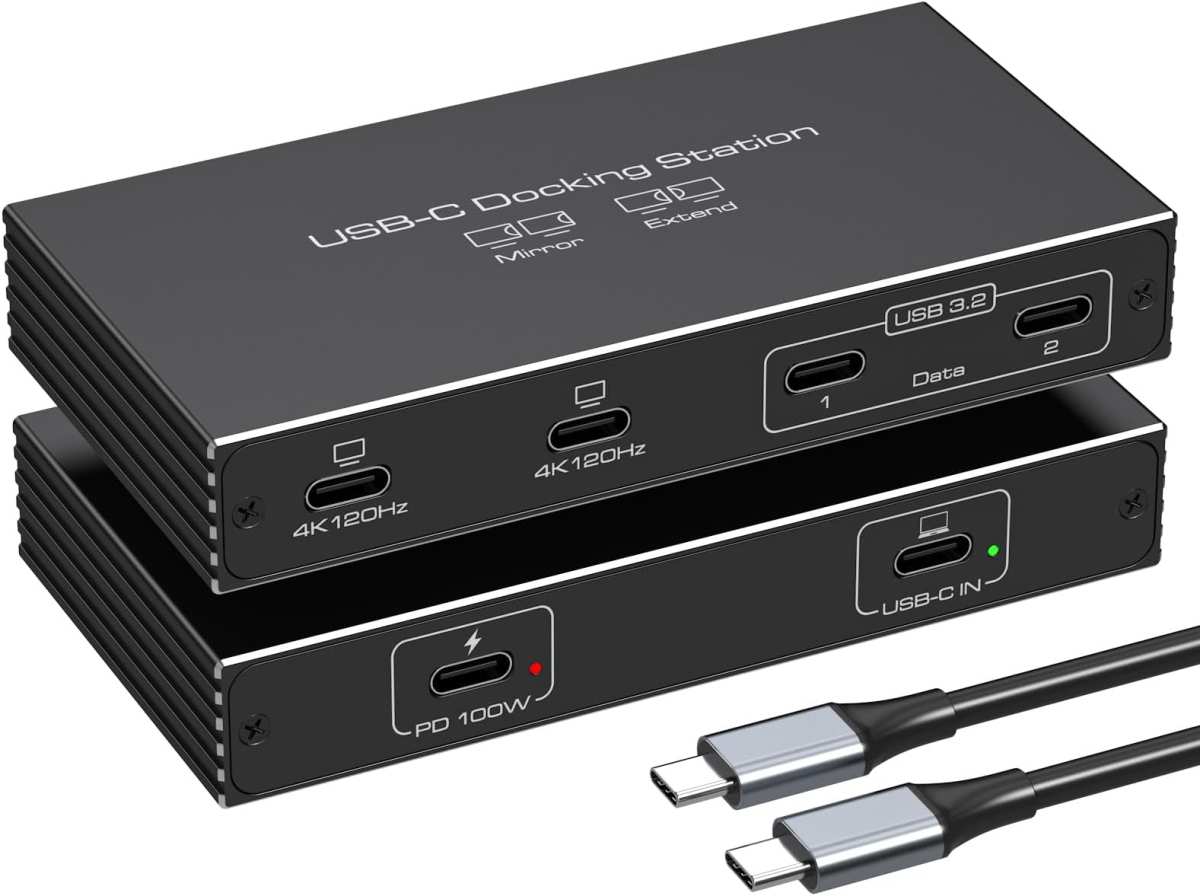
Figuring out how to connect 4K monitor to docking station setups shouldn't feel like solving a puzzle, but it often does. You plug everything in, expect a crisp image, and instead get a blank screen, a blurry display, or a choppy 30Hz refresh rate that makes your mouse cursor feel like it's dragging through mud.
The good news is that once you understand a few key compatibility rules, it all clicks into place. Let's walk through exactly what's happening behind the scenes and get your 4K display running the way it should.
Quick Answer
Connect your 4K monitor to the dock using a DisplayPort or HDMI cable that matches the dock's output. Make sure your laptop's USB-C port supports DisplayPort Alt Mode or Thunderbolt. Then set the resolution and refresh rate in your operating system's display settings.
The 30-Second Compatibility Check Before You Buy Anything
Before you order any cable or dock, you need to know three things: what your laptop's port supports, what video outputs the dock has, and what inputs your monitor accepts. Get any one of those wrong and you'll be stuck troubleshooting instead of working.
Here's the fastest way to check each one:
- Laptop port: Look for a lightning bolt icon (Thunderbolt) or a "D" shaped icon (DisplayPort Alt Mode) next to your USB-C port. Check your laptop's spec sheet if you're unsure.
- Dock outputs: Check whether the dock has HDMI, DisplayPort, or both. Note the version (HDMI 2.0, DisplayPort 1.4, etc.).
- Monitor inputs: Look at the back of your 4K monitor. It likely has HDMI, DisplayPort, or USB-C. Match this to the dock's output.
If your laptop only has USB-C without DP Alt Mode, you'll need a DisplayLink dock instead. That's a different path entirely, and we'll cover it later.
Understanding the Ports, Cables, and Standards That Actually Matter
This is where most guides lose people. But stick with it, because understanding these basics saves you from buying the wrong cable or wondering why your display looks off.
USB-C Alt Mode vs Thunderbolt vs DisplayLink — What's the Difference?
Not all USB-C ports are created equal. Your laptop's USB-C port can handle video output in one of three ways:
- USB-C DisplayPort Alt Mode: The most common method. The port carries a native DisplayPort signal over the USB-C connector. Supports 4K at 60Hz with DP 1.2 or higher.
- Thunderbolt 3 / 4: Uses the USB-C connector but provides 40 Gbps of bandwidth. Supports 4K at 60Hz easily, and can even drive dual 4K displays from a single port. Found on higher-end laptops and MacBooks.
- DisplayLink: A software-based solution. The dock compresses the video signal and sends it over standard USB data. Works on any USB-C port, even ones without DP Alt Mode. Requires a driver installation.
Here's a quick comparison:
| Feature | USB-C DP Alt Mode | Thunderbolt 3/4 | DisplayLink |
|---|---|---|---|
| Max bandwidth | 10 Gbps (Gen 2) | 40 Gbps | 10 Gbps (USB 3.2) |
| 4K @ 60Hz support | Yes (DP 1.2+) | Yes | Yes (compressed) |
| Driver required | No | No | Yes |
| Works on any USB-C port | No (needs DP Alt Mode) | No (needs Thunderbolt) | Yes |
| Latency | None | None | Minimal |
DisplayPort and HDMI Versions: Why the Number Changes Everything
The version of DisplayPort or HDMI on your dock and cable determines whether you get 4K at 30Hz or 60Hz. This is the single most common source of frustration.
- HDMI 1.4: Supports 4K but only at 30Hz. Fine for static content, noticeably choppy for scrolling and mouse movement.
- HDMI 2.0: Supports 4K at 60Hz. This is the minimum you want for a smooth experience.
- HDMI 2.1: Supports 4K at 120Hz and higher. Overkill for most office work, common on newer docks.
- DisplayPort 1.2: Supports 4K at 60Hz. The baseline for a good 4K experience.
- DisplayPort 1.4: Supports 4K at 120Hz with DSC, or 4K at 60Hz with HDR.
The weak link rule applies here. If your dock has HDMI 2.0, your cable is HDMI 1.4, and your monitor supports HDMI 2.0, you'll be stuck at 30Hz. Every component in the chain needs to meet the minimum version.
Step-by-Step: How to Connect Your 4K Monitor to a Docking Station
Let's get your display working. Follow these steps in order, and you'll either have a working setup or know exactly where the problem is.
Step 1: Identify What Your Laptop Port Actually Supports
Check your laptop's spec sheet or look at the icons near the USB-C port. A lightning bolt means Thunderbolt. A "D" shaped icon means DisplayPort Alt Mode.
No icon at all means you might only have data and charging, which rules out native video output.
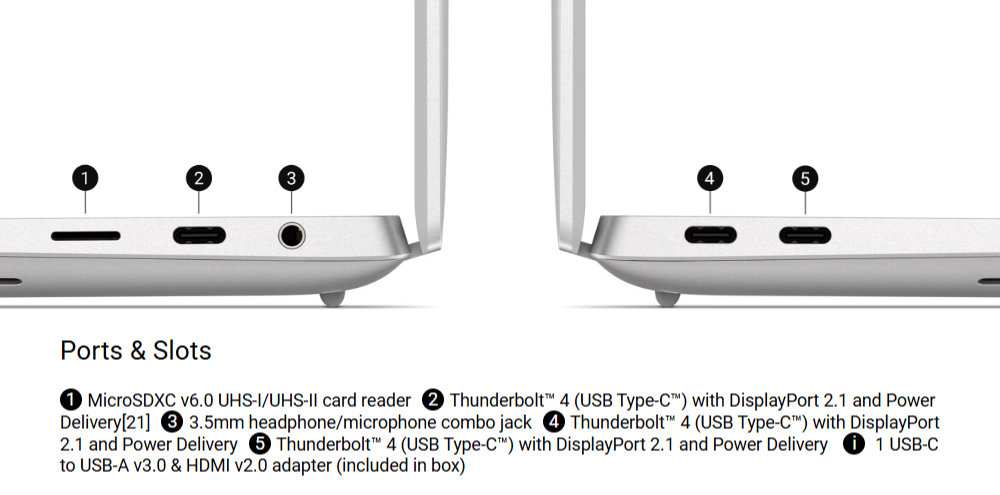
Common laptops and their port capabilities (as of 2026):
- Apple MacBook Air/Pro (M1/M2/M3/M4): Thunderbolt / USB 4, supports DP Alt Mode natively
- Dell XPS 13/15/16: Thunderbolt 4 on most models
- Lenovo ThinkPad X1 Carbon / T14: Thunderbolt 4 or USB-C with DP Alt Mode (varies by generation)
- HP Spectre / EliteBook: Usually USB-C with DP Alt Mode, some models have Thunderbolt
- Budget laptops (Acer, ASUS, lower-end models): Often USB-C without DP Alt Mode, check carefully
If you're not sure, search your exact laptop model plus "USB-C DisplayPort Alt Mode" and you'll find the answer in the manufacturer's documentation.
Step 2: Check Your Dock's Video Output Specs
Look at the back of your dock. What video ports are there? Check the product listing or manual for the version numbers.
- If it says "HDMI 2.0" or "DisplayPort 1.2" or higher, you're good for 4K at 60Hz.
- If it says "HDMI 1.4" or "DisplayPort 1.1," you'll be limited to 4K at 30Hz.
- If it's a Thunderbolt dock, it almost certainly supports 4K at 60Hz on at least one output.
Also check how many monitors the dock supports. Some budget USB-C docks only support a single external display. If you're trying to run two 4K monitors, you need a dock that explicitly lists dual 4K support.
Step 3: Match the Right Cable or Adapter
This is where the wrong choice silently ruins your experience. You need a cable rated for the resolution and refresh rate you want.
For 4K at 60Hz, use one of these:
- DisplayPort 1.2 or 1.4 cable (DisplayPort to DisplayPort, dock to monitor)
- HDMI 2.0 or 2.1 cable (HDMI to HDMI, dock to monitor)
- USB-C to DisplayPort cable (if connecting directly from laptop to monitor)
- USB-C to HDMI 2.0 adapter or cable (if the dock has USB-C output instead of dedicated video ports)
Avoid cheap no-name cables. A cable that claims to support 4K but only has HDMI 1.4 internals will silently cap you at 30Hz. Look for cables certified by HDMI.org or VESA, or buy from reputable brands like Cable Matters, Anker, or CalDigit.
Step 4: Configure Your Display Settings After Connecting
Once everything is plugged in, your OS should detect the monitor. But you might need to adjust settings to get the right resolution and refresh rate.
On Windows:
- Right-click the desktop and select "Display settings."
- Click on the external monitor (labeled 1 or 2).
- Set "Display resolution" to 3840 × 2160.
- Click "Advanced display settings" and set the refresh rate to 60Hz if it's not already.
On macOS:
- Open System Settings > Displays.
- Select the external monitor.
- Set resolution to "Default for display" or choose "Scaled" and pick 3840 × 2160.
- Check "Refresh rate" in the dropdown and select 60Hz.
If 60Hz isn't available as an option, the bottleneck is somewhere in your chain. Check the cable, the dock's output spec, and your laptop's port capability.
4K at 30Hz vs 60Hz — Why It Feels Different Than You'd Expect
You might think 30Hz is "close enough" to 60Hz. It's not. The difference is immediately obvious the moment you move a window or scroll a webpage.
At 30Hz, the screen refreshes 30 times per second. Mouse movement feels slightly blurry. Scrolling stutters.
Dragging windows around feels sluggish. It's usable for reading static documents, but anything involving motion feels off.
At 60Hz, everything feels smooth and responsive. This is the standard refresh rate for most monitors, and it's what you should aim for.
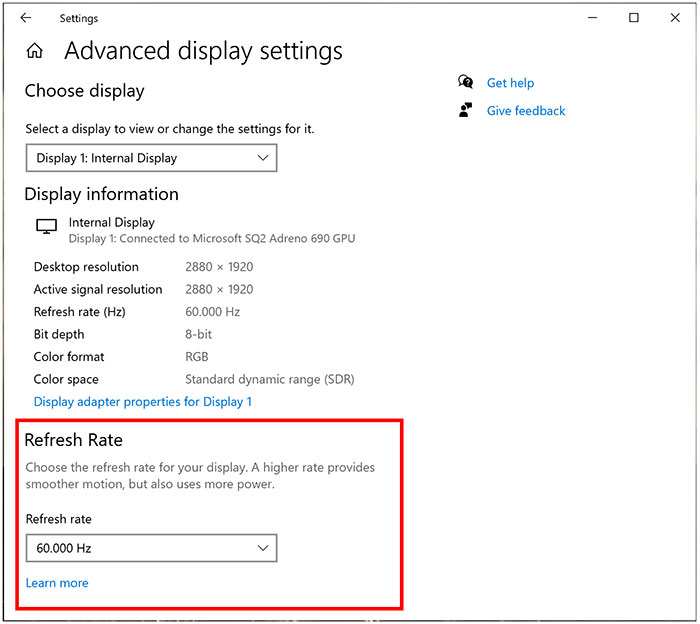
The tricky part is that your OS might not warn you it's running at 30Hz. It'll just display the correct resolution and look fine at first glance. You have to dig into the display settings to notice.
That's why so many people never realize they're leaving performance on the table.
If you're stuck at 30Hz, here's what to check:
- Cable version: An HDMI 1.4 cable will cap you at 30Hz even if everything else supports 60Hz.
- Dock output spec: Some docks only support 4K at 30Hz on certain ports. Check which port is rated for 60Hz.
- Laptop port limitation: Older USB-C implementations may not have enough bandwidth for 4K at 60Hz.
- Adapter quality: Cheap USB-C to HDMI adapters often only support HDMI 1.4.
Common Problems and How to Troubleshoot Them
Even when you've done everything right, things can still go sideways. Here are the most frequent issues people run into and how to fix them.
Monitor Shows "No Signal"
This is the most common problem, and it usually comes down to one of three things.
First, check that the dock is actually powered on. Many docking stations have an external power supply. If it's not plugged in or the cable is loose, the dock won't send any signal to the monitor.
Second, make sure you're using the correct output port on the dock. Some docks have multiple video ports, and only one might be active depending on the configuration. Try a different port if available.
Third, the cable might be the culprit. Swap it out for a known good cable. Also try disconnecting and reconnecting both ends.
Sometimes the EDID handshake (the communication between your laptop and monitor) just needs a fresh start.
If none of that works, try connecting the monitor directly to your laptop, bypassing the dock entirely. If that works, the problem is definitely the dock or cable, not the monitor.
Stuck at 4K 30Hz When You Should Get 60Hz
You've got the right resolution but the refresh rate won't go above 30Hz. This almost always means one component in your chain doesn't support the bandwidth needed for 60Hz.
Check these in order:
- Cable: Is it rated for HDMI 2.0 or DisplayPort 1.2? An HDMI 1.4 cable will cap you at 30Hz.
- Dock output: Some docks have one port that supports 60Hz and another limited to 30Hz. Check the manual.
- Adapter: If you're using a USB-C to HDMI adapter, many cheap ones only support HDMI 1.4. Look for one explicitly labeled "4K 60Hz" or "HDMI 2.0."
- Display settings: Sometimes Windows doesn't default to 60Hz. Go into advanced display settings and manually select it.
Laptop Won't Charge Through the Dock
Not all docks pass power through to your laptop, and not all that do provide enough wattage. If your laptop came with a 65W charger and the dock only delivers 30W, your laptop might charge slowly or not at all under heavy use.
Check the dock's power delivery rating. It should be listed in the specs as "PD" followed by a wattage number. For most laptops, you want at least 60W.
Powerful laptops with discrete GPUs often need 90W or more.
Also, some laptops require specific power profiles. Check your laptop's documentation for charging requirements.
Flickering, Dropouts, or Intermittent Connection
A flickering display usually points to a cable quality issue or a bandwidth problem. The signal is partially getting through but not reliably.
Try these fixes:
- Use a shorter cable. Longer cables (over 6 feet / 2 meters) can degrade the signal, especially at higher resolutions.
- Check for bent pins in the cable connectors.
- Update your graphics drivers. Outdated Intel, AMD, or NVIDIA drivers are a common cause of display instability.
- Update the dock's firmware. Many docks receive firmware updates that fix compatibility issues. Check the manufacturer's website.
- If using DisplayLink, make sure you have the latest DisplayLink driver installed.
Direct Cable vs Dock vs Hub — Which Setup Actually Makes Sense for You?
Not everyone needs a full docking station. Sometimes a simple cable or a small hub is all you need, and it'll save you money and desk space.
Here's how to decide:
| Setup | Best for | Pros | Cons |
|---|---|---|---|
| Direct USB-C cable (laptop to monitor) | Single monitor, minimal desk | Cheapest, simplest, no dock needed | No extra ports, monitor must have USB-C input |
| USB-C hub | Single monitor, need a few extra ports | Compact, affordable, portable | Limited video bandwidth, may cap at 30Hz |
| USB-C Alt Mode dock (single 4K) | Single 4K monitor, need peripherals | Clean single-cable setup, good value | Limited to one external display |
| Thunderbolt dock | Dual monitors, power users | Full bandwidth, dual 4K support, most ports | Expensive, requires Thunderbolt port on laptop |
| DisplayLink dock | Laptop without DP Alt Mode | Works on any USB port | Requires driver, slight latency, CPU overhead |
If you just need one 4K monitor and a couple of USB devices, a USB-C hub with HDMI 2.0 output is often the smarter choice. You don't need to spend $200 on a Thunderbolt dock for that.
If you're running two 4K monitors or need maximum performance, a Thunderbolt dock is worth the investment. The extra bandwidth makes a real difference.
Real-World Scenarios: What Works With Popular Laptops and Docks
Let's look at some common combinations and what to expect.
MacBook Air/Pro With USB-C Dock
Apple's M-series chips support DisplayPort Alt Mode natively over USB-C. A standard USB-C dock with DisplayPort or HDMI 2.0 will drive a 4K monitor at 60Hz without issues.
One thing to watch for: some cheaper docks don't play well with macOS display scaling. If you're getting a blurry image at "looks like 2560×1440" scaled resolution, check that the dock is outputting the correct signal. Most users report the best results with docks from CalDigit, Anker, and Belkin for MacBooks.
Dell XPS or Lenovo ThinkPad With Thunderbolt Dock
These laptops typically have Thunderbolt 4 ports, which means they can handle any Thunderbolt dock on the market. A Thunderbolt dock from the same brand (Dell WD series, Lenovo ThinkPad docks) usually offers the best compatibility.
With a Thunderbolt 4 dock, you can typically run dual 4K monitors at 60Hz from a single cable. The 40 Gbps bandwidth handles it comfortably.
Budget USB-C Laptop With DisplayLink Dock
If your laptop's USB-C port doesn't support DP Alt Mode, DisplayLink is your best option. It uses software to compress the display signal and send it over regular USB data.
The tradeoff is that it uses some CPU resources and requires a driver. For office work, this is barely noticeable. For video playback or creative work, you might see slight latency or compression artifacts.
Popular DisplayLink docks include the Plugable UD-6950 and the StarTech DK30CH2DPD. Both support dual 4K displays and work with any USB-C port.
Quick Reference: Bandwidth and Cable Requirements at a Glance
Here's a summary table so you can quickly check what you need:
| Resolution and Refresh Rate | Minimum Cable/Port Spec | Bandwidth Required |
|---|---|---|
| 4K @ 30Hz | HDMI 1.4 or DisplayPort 1.2 | ~8.9 Gbps |
| 4K @ 60Hz | HDMI 2.0 or DisplayPort 1.2 | ~17.8 Gbps |
| 4K @ 60Hz with HDR | HDMI 2.0a or DisplayPort 1.4 | ~17.8 Gbps |
| 4K @ 120Hz | HDMI 2.1 or DisplayPort 1.4 with DSC | ~35.6 Gbps |
| Dual 4K @ 60Hz | Thunderbolt 3/4 or dual DisplayPort 1.4 | ~35.6 Gbps |
If you're buying a cable and want to future-proof, get at least an HDMI 2.0 or DisplayPort 1.4 cable. They're not much more expensive and they'll handle 4K at 60Hz without breaking a sweat.
Expert Tips Most Guides Skip
A few things that experienced users learn the hard way:
- Dock firmware matters. Manufacturers regularly release updates that fix display compatibility issues. If your dock is acting weird, check for a firmware update before replacing hardware.
- Cable length affects signal quality. For 4K at 60Hz, keep cables under 6 feet (2 meters) if possible. Longer runs may require active cables.
- macOS scaling can confuse people. macOS renders at a higher resolution and then scales down, which can look slightly different from native 4K on Windows. This is normal behavior, not a defect.
- Some docks share bandwidth between ports. If you plug in a USB 3.0 external drive and the display flickers, the dock might be sharing bandwidth between the video output and USB ports. Try moving the drive to a different port.
- Check your laptop's GPU specs. Some integrated GPUs have limits on how many external displays they can drive and at what resolution. Intel's product specifications list these limits clearly.
Frequently Asked Questions
Can I use a USB-C to HDMI adapter instead of a dock?
Yes, if you just need a single video output. Make sure the adapter supports HDMI 2.0 for 4K at 60Hz. Many cheap adapters only support HDMI 1.4, which caps you at 30Hz.
Why does my 4K monitor look blurry on macOS?
macOS uses HiDPI scaling by default, which renders at a higher effective resolution and scales the interface. This can sometimes look slightly soft on non-Retina 4K monitors. Try adjusting the scaled resolution in System Settings > Displays.
Do I need a Thunderbolt dock for one 4K monitor?
No. A standard USB-C dock with DisplayPort Alt Mode handles a single 4K monitor at 60Hz just fine. Thunderbolt docks are only necessary for dual 4K displays or if your laptop lacks DP Alt Mode.
Will a DisplayLink dock work for gaming?
DisplayLink introduces slight latency and uses CPU resources for compression. It's fine for office work and video playback, but it's not ideal for fast-paced gaming where every millisecond counts.
My dock has two video ports but only one works. Why?
Some docks share bandwidth between video outputs. If you're using a USB-C Alt Mode dock, it might only support a single external display. Check the dock's specifications for multi-monitor support.
Final Decision Guide: Pick the Right Setup Based on What You Already Own
Here's a quick way to figure out your best path forward:
- If your laptop has Thunderbolt: Get a Thunderbolt dock. You'll get the best performance, dual 4K support, and the cleanest single-cable setup.
- If your laptop has USB-C with DP Alt Mode: A standard USB-C dock with HDMI 2.0 or DisplayPort 1.2+ will handle a single 4K monitor at 60Hz without any issues.
- If your laptop's USB-C port lacks DP Alt Mode: Your best option is a DisplayLink dock. It works on any USB port, just remember to install the driver.
- If you only need one monitor and a couple of USB devices: Skip the full dock. A simple USB-C to HDMI 2.0 adapter or a compact hub is cheaper and simpler.
The most important thing to remember is to check every link in the chain. Your laptop port, your dock's output, your cable, and your monitor's input all need to support the resolution and refresh rate you want. One weak link and the whole setup underperforms.
Now go check what that USB-C port on your laptop actually supports. That's where every good 4K setup starts.
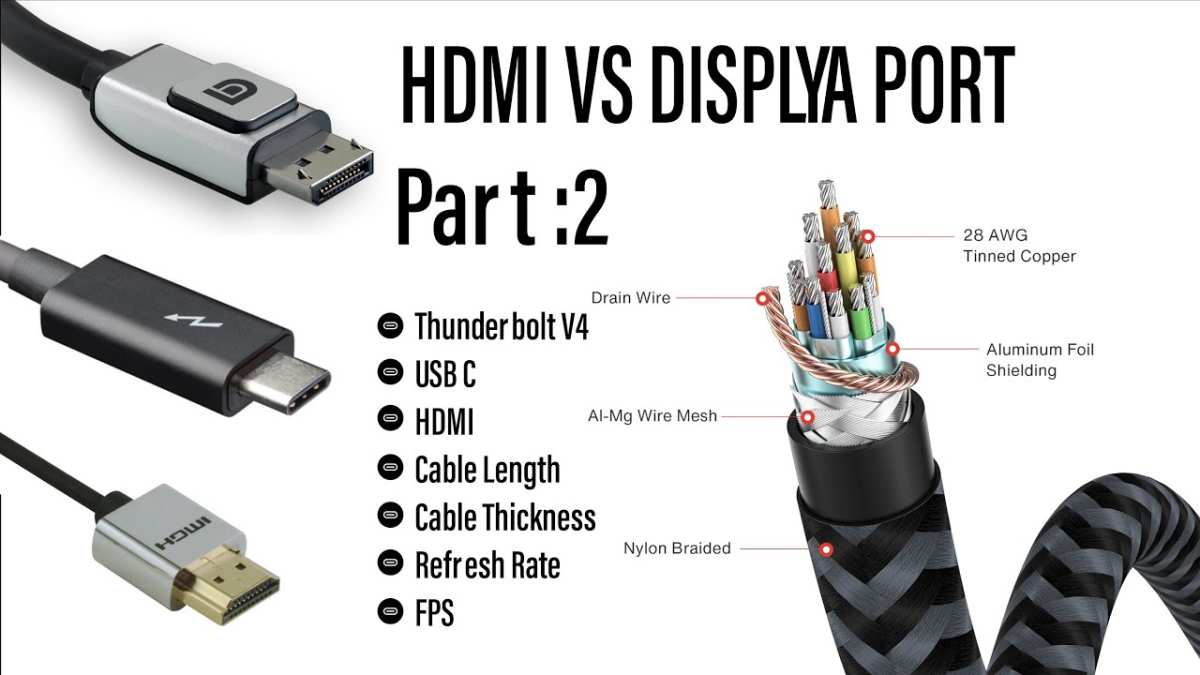
Image source: Bing (Web (fair-use with source credit))

Similar Posts