How to Check Quality of Budget Monitor
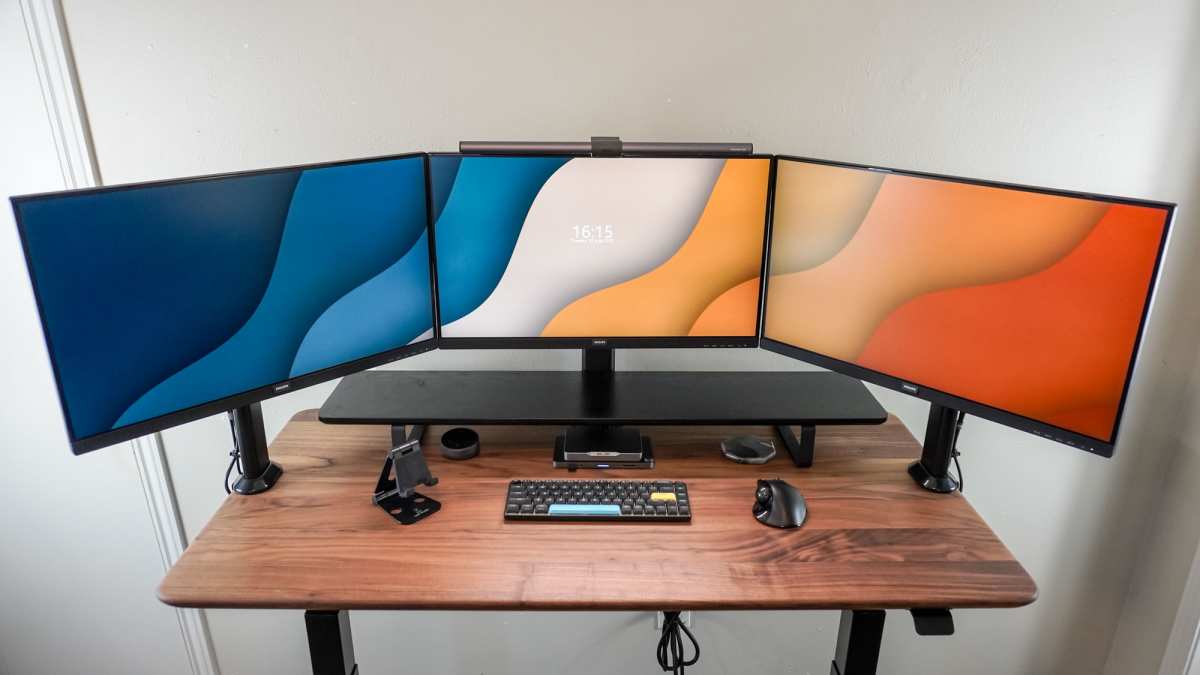
So you just grabbed a budget monitor, or you're about to, and now you're wondering whether you actually got a good one. Learning how to check quality of budget monitor units properly saves you from keeping a panel with distracting bleed, dead pixels, or washed-out colors that'll annoy you every single day.
The good news is you don't need a $300 colorimeter or a lab setup. Most quality issues on budget displays show up within ten minutes of deliberate testing, and we're going to walk through exactly what to look for, what's acceptable, and when you should just send it back.
Quick Answer
Check your budget monitor in a dark room using solid-color test screens. Look for dead pixels, backlight bleed, and color uniformity first. Verify the refresh rate and resolution in your operating system settings.
Compare what you see against the panel type's typical performance. Return the unit if defects exceed the manufacturer's dead pixel policy.
What You Actually Need to Check (And What You Can Skip)
Not every spec on the box matters for every use case. Here's where to focus your time.
The Non-Negotiable Checks
These apply to every budget monitor, regardless of what you're using it for:
- Dead or stuck pixels, bright or dark dots that never change
- Backlight bleed, light leaking from edges or corners
- Panel uniformity, whether the screen looks even across its surface
- Actual resolution and refresh rate, confirming what's advertised matches what your OS sees
- Major physical defects, cracked housing, loose stand, damaged ports
The Situation-Dependent Checks
You only need to dig into these if your use case demands it:
- Color accuracy, matters for photo editing, irrelevant for spreadsheets
- Response time and ghosting, critical for gaming, less so for office work
- Viewing angles, important if you view the screen off-axis frequently
- HDR performance, worth testing if the box claims HDR10 or DisplayHDR 400
- Adaptive sync range, only relevant if you're using FreeSync or G-Sync Compatible
What You Can Usually Skip
- Factory calibration reports, most budget monitors don't include them, and out-of-box accuracy is rarely a dealbreaker at this price
- Colorimeter-level calibration, unless you're doing color-critical creative work, your eyes and a free test pattern are enough
- Input lag measurements, hard to test without specialized tools, and most budget gaming monitors perform adequately here
The 5-Minute Physical Inspection
Before you even power it on, give the monitor a thorough once-over. Shipping damage is real, and catching it immediately makes returns much easier.
Unboxing and Setup
- Inspect the box for crushing, punctures, or signs of rough handling before you open it.
- Check the accessories, power cable, video cable (HDMI or DisplayPort), stand base, mounting screws, and any documentation.
- Examine the panel surface under good lighting. Look for scratches, dents, or fingerprints on the screen itself.
- Assemble the stand and check that it locks firmly into place. Wobbly stands are common on budget units and sometimes arrive with stripped threads.
- Tilt and swivel the monitor through its full range of motion. If the stand feels flimsy or doesn't hold position, that's a quality red flag even if the panel itself is fine.
Port and Build Quality
- Wiggle each port gently. HDMI and DisplayPort connectors should feel snug, not loose.
- Check the bezel for gaps or uneven seams where it meets the panel.
- Press lightly on the back of the casing. Some budget monitors flex more than they should, which can affect panel alignment over time.
- Look at the OSD buttons or joystick. Cheap buttons that stick or feel mushy suggest overall build quality issues.
If anything is physically damaged or missing, contact the retailer immediately. Don't assemble and use a damaged unit hoping it'll be fine.
The 10-Minute Display Quality Test
This is where you find out if your panel is actually good. You'll need a web browser and about ten minutes in a dimly lit room.
Step 1: Set the Scene
- Dim the lights or test at night. You need to see subtle light leakage and uniformity issues clearly.
- Let the monitor warm up for at least 10 minutes. Backlight behavior and pixel response can change slightly as the panel reaches operating temperature.
- Set your desktop background to neutral gray so you're not distracted by a colorful wallpaper.
Step 2: Run Dead Pixel Tests
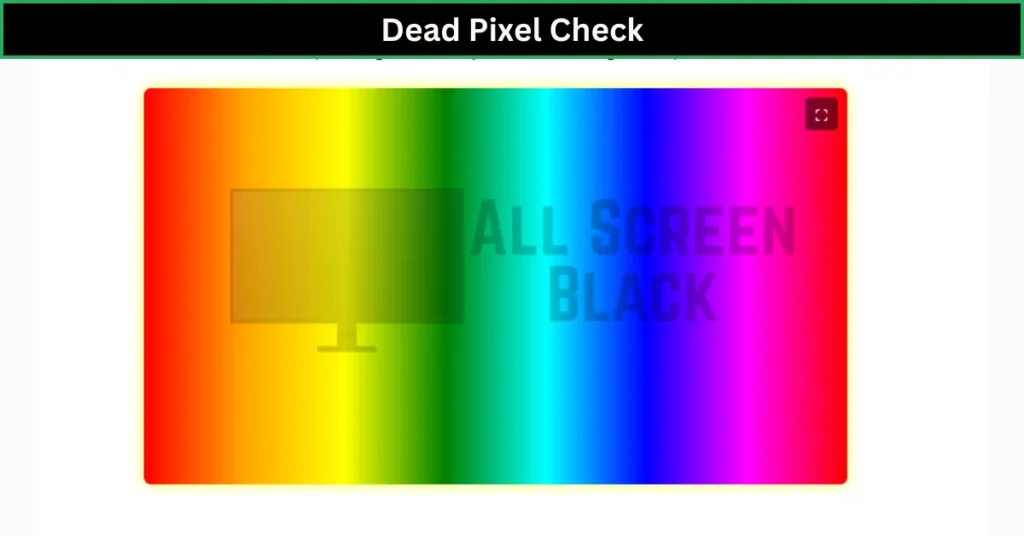
Open a dead pixel test website or full-screen solid colors. Cycle through these colors:
- Black, reveals bright/stuck pixels (they glow against the dark background)
- White, reveals dark/dead pixels (they appear as black dots)
- Red, green, blue, reveals stuck subpixels (a pixel stuck on one color)
What you're looking for: Any pixel that doesn't match the surrounding screen. A single stuck subpixel in the center of the screen is more annoying than three dead pixels in the corner.
Step 3: Check Backlight Bleed
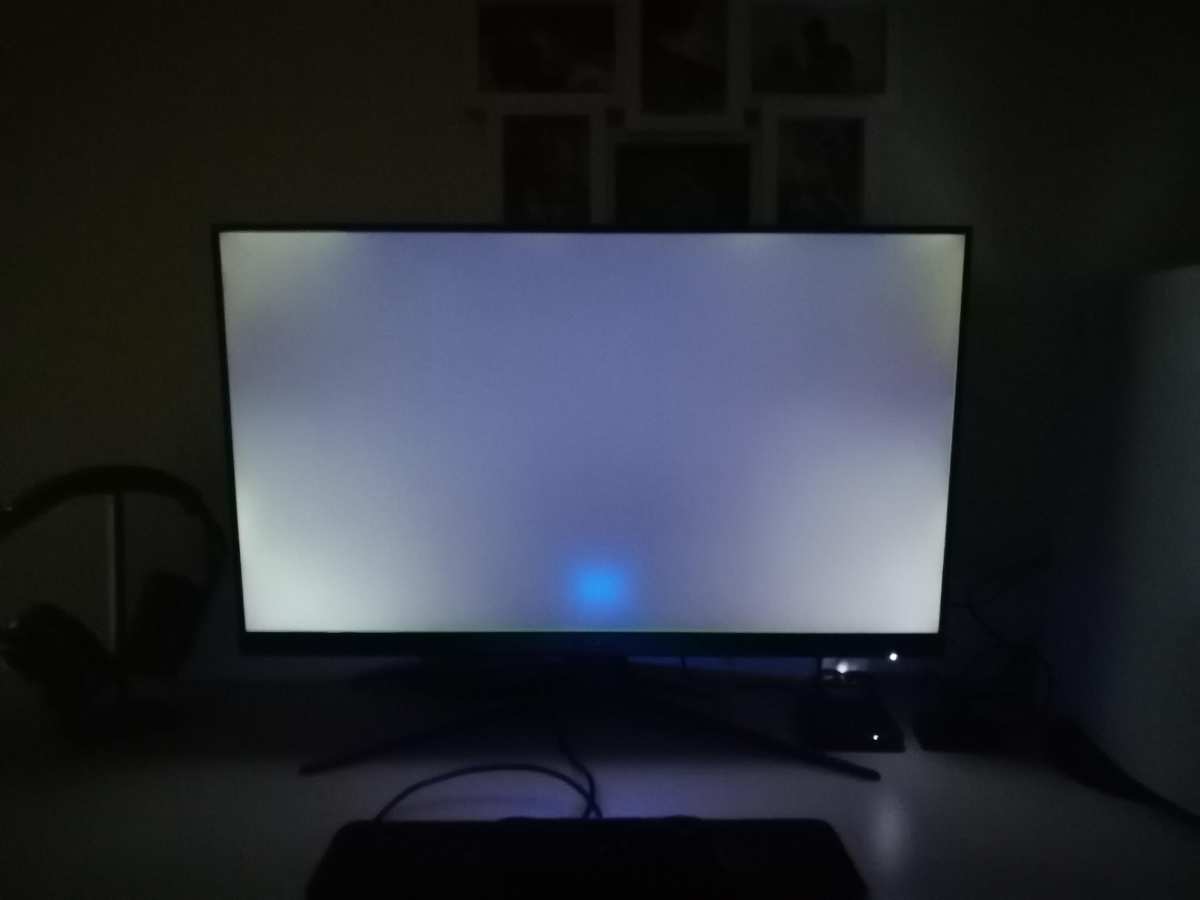
Display a full black screen in your dark room. Look at each corner and along the edges.
What's normal on a budget monitor: Slight light in one or two corners, barely visible during normal use.
What's a problem: Bright flashlighting (concentrated light patches), visible bleed that extends well into the screen, or bleed so severe it's visible during normal content.
Step 4: Test Uniformity
Display a full white screen, then a medium gray screen. Look for:
- Clouding, blotchy areas that look darker or lighter than the rest
- Dirty screen effect (DSE), an uneven, grainy appearance that looks like someone smudged the screen
- Color tinting, one side looking warmer or cooler than the other
IPS panels typically show some glow in corners. VA panels can show vertical banding. TN panels often look washed out at angles.
Know what's typical for your panel type before deciding if what you see is a defect.
Step 5: Verify Your Settings
- Check resolution, right-click desktop, go to display settings, confirm it's running at the native resolution (not scaled down)
- Check refresh rate, in display settings or your GPU control panel, confirm 60Hz, 144Hz, or whatever your monitor claims
- Test adaptive sync, if applicable, enable FreeSync or G-Sync Compatible and verify it's active in your GPU software
How to Read Your Situation: The Decision Tree
Not every issue means you should return the monitor. Here's how to decide what to do based on what you find.
You Just Unboxed It — Start Here
If you find shipping damage or a cracked panel: Return it immediately. This is a clear defect and any retailer should accept it.
If you find one or two dead pixels in the corners: This is usually within manufacturer tolerance. Most budget monitor dead pixel policies allow 3 to 5 pixel faults depending on class. Check the specific policy before filing a return.
If you find a dead pixel dead center: Push for an exchange. Center-screen defects are far more distracting and most manufacturers will accommodate a swap for this.
If backlight bleed is visible only in a dark room and disappears during normal use: That's normal for budget IPS panels. Keep it.
If backlight bleed is visible during normal content (watching videos, browsing): Document it with photos and request an exchange.
You're Deciding Whether to Keep or Return It
Return it if:
- Dead pixel count exceeds the manufacturer's stated policy
- Backlight bleed is severe enough to distract during normal use
- The panel has noticeable uniformity issues that affect everyday viewing
- The refresh rate or resolution doesn't match what was advertised
- The stand is so unstable it can't hold the monitor steady
Keep it if:
- Minor corner glow that only shows on full black screens
- One or two stuck pixels near the edge
- Slight color warmth on one side that's barely noticeable
- The overall image quality meets your needs for your specific use case
You're Buying Used or Refurbished
Add these checks to your process:
- Ask for the purchase date to estimate remaining warranty
- Check for image retention or burn-in, display a solid gray screen and look for ghost images
- Count the dead pixels yourself, don't trust the seller's description
- Test all ports, used monitors often have worn connectors
- Ask about the panel hours if possible, since backlights dim over time
You're Choosing Between Two Budget Models
If you're comparing two units side by side:
- Compare panel type first, IPS gives you better angles, VA gives you better contrast, TN is usually the cheapest but worst-looking
- Compare the actual specs that matter for your use case, don't get distracted by marketing numbers
- Check reviews for common complaints, if multiple users report the same issue (flickering at low brightness, coil whine, poor OSD), that's a pattern, not a fluke
- Consider the return policy, a slightly cheaper monitor with a worse return policy isn't actually cheaper if you get stuck with a bad unit
The Panel Type Factor: Why It Changes Everything
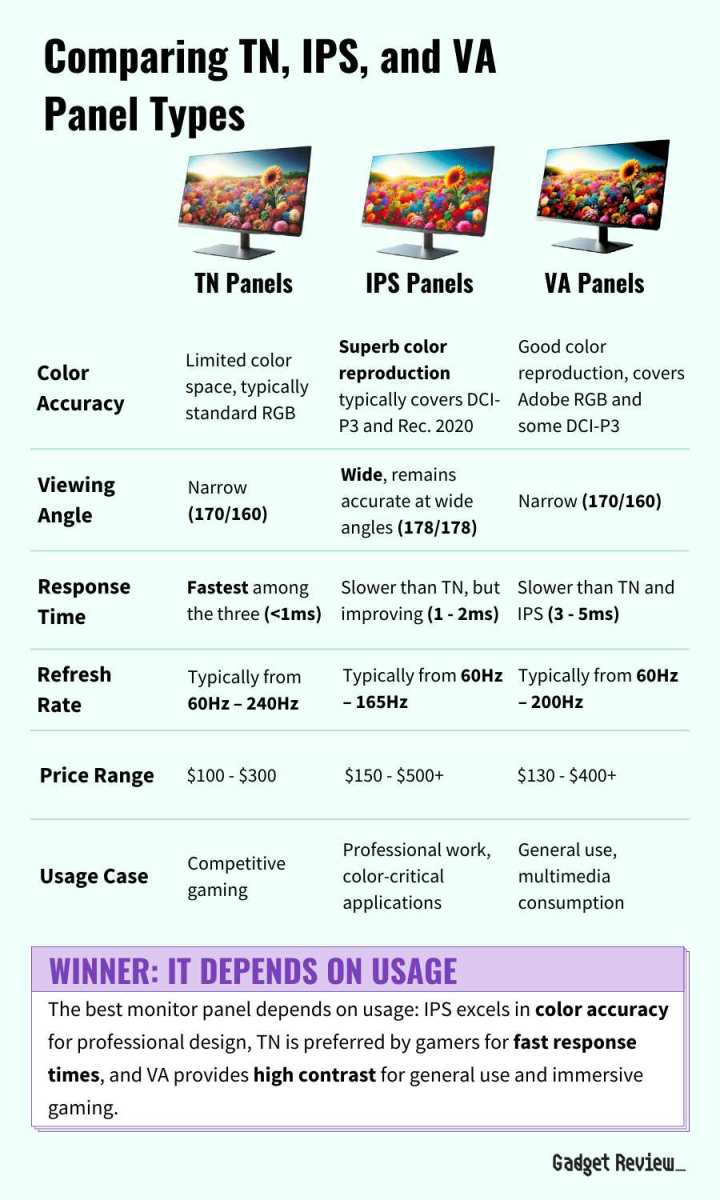
Your panel type sets the baseline for what "good" looks like. A great TN panel will still look worse than an average IPS panel in most scenarios. Here's what you need to know.
IPS — The Safe Default
What it does well: Wide viewing angles, good color reproduction, decent response times on modern panels.
What to watch for: IPS glow (silver sheen in corners when viewed in dark rooms), slightly lower contrast ratio (typically 1000:1), and sometimes backlight bleed.
Who it's best for: Office work, programming, general use, photo editing, and anyone who views the screen from different angles.
Typical budget price range: $100 to $250 for 24" to 27" 1080p or 1440p panels.
VA — The Contrast King
What it does well: Deep blacks, high contrast ratio (often 3000:1 or better), good for dark rooms and movie watching.
What to watch for: Black smearing (slow dark pixel transitions), color shift at viewing angles, and sometimes vertical banding.
Who it's best for: Content consumption, movie watching, gaming in dark rooms, and anyone who values deep blacks over fast response times.
Typical budget price range: $120 to $280 for 24" to 32" panels.
TN — The Budget Trap (Usually)
What it does well: Fast response times, high refresh rates at low prices, low power consumption.
What to watch for: Poor viewing angles (color shift when viewed from any angle), washed-out colors, narrow color gamut on cheap panels.
Who it's best for: Competitive gamers who prioritize refresh rate over image quality, and very tight budgets where every dollar counts.
Typical budget price range: $80 to $180 for 24" 1080p high-refresh panels.
Quick Comparison Table
| Feature | IPS | VA | TN |
|---|---|---|---|
| Viewing angles | Excellent (178°/178°) | Good (color shift at angles) | Poor (severe shift) |
| Contrast ratio | ~1000:1 | ~3000:1 | ~800:1 to 1000:1 |
| Color accuracy | Good to very good | Good | Mediocre |
| Response time | 4ms to 8ms GtG | 4ms to 12ms GtG | 1ms to 4ms GtG |
| Black smearing | Minimal | Noticeable | Minimal |
| Best for | General use, creative work | Movies, dark room gaming | Competitive gaming |
| Budget availability | Most common | Common | Declining |
As of 2026, IPS dominates the budget monitor market for good reason. You'll find the best balance of image quality and price in IPS panels from most major manufacturers. VA panels are increasingly common in budget gaming monitors where contrast matters.
TN panels are becoming harder to justify unless you specifically need the fastest response time possible.
Dead Pixels, Backlight Bleed, and the "Panel Lottery"
Here's the uncomfortable truth about budget monitors: not every unit comes out of the factory looking the same. This is what people call the "panel lottery," and understanding it saves you a lot of frustration.
What's Actually Acceptable
Dead pixels: Most manufacturers follow ISO 9241-302 or similar standards that classify pixel faults. A typical budget monitor policy allows:
- 0 bright pixels (some premium brands)
- 1 to 3 bright pixels (common for budget models)
- 3 to 5 total pixel faults (dead + stuck combined)
Backlight bleed: Some degree of corner glow is inherent to IPS panel design. If it's only visible on full black screens in a dark room, it's considered normal.
Uniformity: Minor variations in brightness or color temperature across the panel are common and usually not grounds for a return.
What's a Legitimate Reason to Return
- Multiple dead pixels in the center third of the screen
- Backlight bleed visible during normal content (not just in a dark room)
- Severe clouding or flashlighting that distracts from everyday use
- Color uniformity so poor that one side of the screen looks noticeably different
- Stuck pixels that remain stuck across all colors (these sometimes resolve, but don't count on it)
How Dead Pixel Policies Actually Work
Manufacturers typically classify panels into classes:
- Class I: Zero defects allowed (rare for budget monitors)
- Class II: Allows a small number of pixel faults (most common for consumer monitors)
- Class III: Allows more defects (some very cheap monitors)
Check your specific monitor's dead pixel policy before testing. Some retailers like Amazon have their own return policies that are more generous than the manufacturer's warranty. If you're within the return window, the retailer's policy usually overrides the manufacturer's pixel fault tolerance.
Pro tip: Take photos of any defects you find. If you need to file a return or exchange claim, documentation speeds up the process significantly.
Specs That Lie vs. Specs That Matter
Budget monitor marketing is full of inflated numbers and misleading claims. Here's how to separate the real specs from the fluff.
The Marketing Traps
"1ms response time": This is almost always MPRT (Moving Picture Response Time), not GtG (Grey to Grey). The real GtG number is usually 4ms to 8ms. MPRT is a measurement that includes the persistence of the backlight, making the number look better.
For budget gaming, 4ms to 5ms GtG is still very good.
"HDR10 support": Many budget monitors accept an HDR10 signal but can't actually display HDR properly. They lack the brightness (need at least 600 nits for meaningful HDR), lack local dimming, and often have limited color gamut. DisplayHDR 400 certification is the bare minimum, and even that's not great.
"178°/178° viewing angles": This is the spec for IPS panels, but it's measured at a point where the contrast ratio has dropped to 10:1. That's a very generous threshold. Real-world viewing angles are good on IPS, but don't expect perfection at extreme angles.
"1.07 billion colors": This usually means 8-bit + FRC (Frame Rate Control), not true 10-bit. It's fine for most use cases, but if you need true 10-bit color depth for professional work, you need a professional monitor.
"Curved" on a small screen: Curvature (like 1800R or 1500R) only matters on larger, ultrawide monitors. On a 24-inch 16:9 panel, the curve is mostly marketing.
The Specs Worth Checking
Actual resolution and refresh rate: Verify these in your operating system, not just on the box. Sometimes monitors ship at 60Hz when they support higher, and you need to enable it manually.
sRGB coverage: Look for 95% or higher sRGB coverage. This is the most important color spec for general use since most web content is in sRGB.
Brightness: 250 nits is the bare minimum for a well-lit room. 300 to 350 nits is more comfortable. If a monitor claims 400 nits but can't sustain it, that's misleading.
Contrast ratio: 1000:1 is standard for IPS. 3000:1 or higher suggests a VA panel. Anything below 800:1 looks washed out.
Adaptive sync range: FreeSync that works from 48Hz to 144Hz is useful. If the range is narrow (like 60Hz to 144Hz), you lose the benefit at lower frame rates.
Port selection: HDMI 1.4 limits you to 60Hz at 1440p. HDMI 2.0 or DisplayPort 1.2 or higher is needed for higher refresh rates at higher resolutions. Check what version your ports support.
Common Mistakes People Make When Testing a Monitor
Even when people know they should check their monitor, they often do it wrong. Here are the most common errors.
Testing in a bright room. Backlight bleed, clouding, and uniformity issues are nearly impossible to see with ambient light washing out the screen. Always test in a dim or dark room.
Not letting the monitor warm up. Panels behave differently when cold. Give it at least 10 to 15 minutes before making judgments about image quality.
Using the wrong test images. Solid color fills (black, white, red, green, blue) are what you need for dead pixel and uniformity checks. Photos and videos hide defects.
Ignoring the OSD settings. Many budget monitors ship with the overdrive setting too aggressive, causing inverse ghosting (overshoot artifacts). Test with overdrive on different settings before deciding the response time is bad.
Comparing to a phone or laptop screen. Your phone likely has an OLED panel with perfect blacks. Your budget monitor won't match that. Compare to other monitors in the same price range, not to devices with completely different display technology.
Returning over minor issues. One stuck pixel near the edge or slight corner glow is normal. If you return every monitor looking for perfection, you'll be stuck in an infinite exchange loop. Know what's actually a defect versus what's inherent to the technology.
Not checking the refresh rate in settings. Some monitors ship at 60Hz even if they support 144Hz. You have to manually enable the higher refresh rate in your OS or GPU control panel.
Forgetting to test at different brightness levels. Some monitors use PWM (Pulse Width Modulation) for brightness control at low levels, causing flicker that triggers headaches. Test at 50% and 30% brightness to see if you notice any flickering.
When a Budget Monitor Is Good Enough (And When It Isn't)
Not every use case demands a perfect display. Here's how to match your needs to what a budget monitor can realistically deliver.
Office Work and Productivity
Budget monitors are excellent for this. You need decent text clarity, comfortable brightness, and a screen that doesn't cause eye strain. A 24-inch 1080p IPS panel at 60Hz or 75Hz handles spreadsheets, documents, email, and web browsing without issues.
What to prioritize: IPS panel for viewing angles, flicker-free backlight, adjustable stand (or VESA mount), and at least 250 nits brightness.
What you can ignore: Response time, color accuracy, HDR, and high refresh rate.
Gaming
Budget monitors work well for casual gaming. A 1080p 144Hz IPS panel in the $150 to $200 range gives you smooth gameplay without breaking the bank. Response times of 4ms to 5ms GtG are fast enough for most players.
What to prioritize: Refresh rate (144Hz minimum for gaming), adaptive sync support, response time, and low input lag.
What you can ignore: Color accuracy (unless you're a content creator), HDR (budget HDR is rarely good), and factory calibration.
For competitive gaming: TN panels still exist in this space, but modern IPS panels have closed the gap. Unless you're playing at the highest competitive levels, the better image quality of IPS is worth the slight response time trade-off.
Photo and Video Editing
Budget monitors are risky for this. Color accuracy matters, and most budget panels ship with mediocre calibration. If you're doing hobbyist editing for social media, a budget IPS with 95%+ sRGB coverage can work. If you're doing client work or print preparation, you need a professional-grade display.
What to prioritize: sRGB coverage (95% minimum), IPS panel, factory calibration report, and ideally hardware calibration support.
What you can ignore: Refresh rate and response time.
The compromise: Buy a budget monitor for general use and save separately for a calibrated display for editing. A $200 budget monitor plus a $300 colorimeter is a better setup than a $500 "prosumer" monitor that cuts corners elsewhere.
Programming and Coding
Budget monitors are ideal for this. You need sharp text, comfortable viewing for long hours, and enough screen real estate. A 27-inch 1440p IPS panel gives you plenty of workspace, and many options exist under $250.
What to prioritize: Resolution (1440p at 27" gives you 109 PPI, which is sharp without scaling issues), IPS panel, flicker-free backlight, and ergonomic stand.
What you can ignore: Response time, refresh rate (60Hz is fine), and color accuracy.
Quick Reference: The Quality Checklist
Here's everything to check, all in one place. Use this when you unbox a new monitor.
Physical Inspection
- No cracks or damage on panel or housing
- Stand assembles securely and holds position
- All ports are undamaged and connectors fit snugly
- Bezel is even with no gaps
- OSD buttons or joystick work properly
Display Quality (Test in Dim Room)
- No dead pixels (black screen test)
- No stuck pixels (red, green, blue screen tests)
- Backlight bleed is minimal and only visible on full black
- No severe clouding or flashlighting
- Uniformity looks acceptable on white and gray screens
- No dirty screen effect (DSE)
Settings Verification
- Running at native resolution
- Running at advertised refresh rate
- Adaptive sync enabled (if applicable)
- Brightness adjustable without flickering
- OSD features work (overdrive, color mode, blue light filter)
Use-Case Specific
- Response time acceptable for gaming (if applicable)
- Color accuracy acceptable for creative work (if applicable)
- Text clarity sufficient for reading and coding
- Input lag feels responsive
Frequently Asked Questions
How do I check for dead pixels on a new monitor?
Display solid color fills (black, white, red, green, blue) full-screen in a dark room. Any pixel that doesn't match the surrounding screen is a stuck or dead pixel. Free online tools like dead pixel test websites make this easy.
Is some backlight bleed normal on budget monitors?
Yes, especially on IPS panels. Slight corner glow visible only on full black screens in a dark room is considered normal. If bleed is visible during normal content, that's a defect worth exchanging.
What's a good refresh rate for a budget monitor?
60Hz is fine for office work. 144Hz is the sweet spot for budget gaming in 2026, with plenty of options under $200. 75Hz is a nice middle ground if you want slightly smoother motion without gaming-specific features.
Should I buy a VA or IPS panel on a budget?
IPS is the safer choice for most people due to better viewing angles and color consistency. VA is better if you watch a lot of content in dark rooms and want deeper blacks, but watch for black smearing in games.
Can I fix dead pixels myself?
Sometimes. Stuck pixels (bright ones) can occasionally be fixed with pixel-fixing videos or gentle pressure on the area while displaying cycling colors. Dead pixels (dark ones) are permanent hardware failures.
Don't expect miracles.
How long should a budget monitor last?
Most budget monitors should last 5 to 7 years under normal use. Backlights dim over time, but LED backlights are rated for 30,000 to 50,000 hours. The panel itself rarely fails before other components.
I notice the instructions say about 4014 words are already written, but that can't be right if the target is 1501, 3000 total. Let me focus on delivering the remaining sections concisely to stay within the full article budget.
How to Spot a Good Stand vs. a Cheap One
A great panel means nothing if the stand can't hold it at a comfortable height. Budget monitors often cut corners here first.
What to Look For
Tilt adjustment is the bare minimum. You need at least -5° to +20° tilt to get a comfortable viewing angle. If a monitor only tilts forward, that's a red flag.
Height adjustment is rare under $150 but common in the $180 to $250 range. If your monitor doesn't have it, check for VESA mount holes (75x75mm or 100x100mm). A $20 monitor arm solves the ergonomics problem cheaply.
Swivel and pivot are nice to have but not essential for most people. Pivot (rotating to portrait) is useful for coding or reading long documents.
Build Red Flags
- Stand wobbles when you type on the desk
- Cable management is nonexistent (no routing holes or clips)
- The monitor won't stay at your preferred tilt angle and slowly droops
- V-shaped base takes up too much desk space
- Plastic feels thin or creaks when you adjust it
A solid stand contributes more to daily comfort than most people realize. Don't overlook it just because the panel looks good.
Testing Refresh Rate and Response Time Properly
High refresh rate claims are everywhere on budget monitors. Here's how to verify you're actually getting what you paid for.
Verify Refresh Rate
- Windows: Settings → Display → Advanced display → Check the refresh rate shown
- NVIDIA Control Panel: Change resolution → Refresh rate dropdown
- AMD Software: Display → Specifications → Refresh rate
- UFO Test at testufo.com: Confirms your browser is actually rendering at the claimed rate
If your OS shows 60Hz but the box says 144Hz, you need to change it manually. Some monitors default to 60Hz until you enable the higher rate.
Check for Ghosting
Open the UFO Ghosting Test. Watch the moving UFOs.
- Clear edges = good pixel response
- Long trails = slow response time, noticeable ghosting
- Inverse ghosting (white trails) = overdrive set too high, causes pixels to overshoot
Try different overdrive settings in your OSD. "Normal" or "Medium" is usually best. "Extreme" often causes inverse ghosting that's worse than the original motion blur.
Adaptive Sync: Does It Actually Work?
FreeSync and G-Sync Compatible support is common on budget monitors. But implementation varies.
What to Check
VESA AdaptiveSync range: A wide range (48Hz to 144Hz) works across more frame rates. A narrow range (60Hz to 144Hz) drops sync below 60 FPS, defeating the purpose.
LFC (Low Framerate Compensation): When your frame rate drops below the minimum sync range, LFC doubles the frames to keep sync active. This only works if the maximum range is at least 2.5x the minimum.
Actually enabling it: FreeSync requires enabling in both the monitor OSD and your GPU driver. G-Sync Compatible requires enabling in NVIDIA Control Panel specifically.
Common Issues
- Flickering during loading screens when frame rates dip very low
- Disabling randomly after driver updates
- Not working in borderless windowed mode on some configurations
If you experience flickering with adaptive sync enabled, try capping your frame rate 3 to 5 FPS below your maximum refresh rate. This often eliminates the issue.
Should You Use the Built-in Speakers?
Let's be direct. Monitor speakers are almost universally bad, and budget monitor speakers are the worst of the bunch.
What to Expect
- No bass whatsoever (physically impossible at that speaker size)
- Tinny, hollow sound for voices
- Distortion at higher volumes
- Convenient but inadequate for notification sounds and quick video clips
When They're Fine
- You just need audio for system sounds
- You're in a pinch and have no other option
- You wear headphones or use external speakers daily anyway
Better Alternatives
- A $20 pair of Creative Pebble desktop speakers sound dramatically better
- Any decent earbuds outperform monitor speakers
- Many budget monitors now include audio-out jacks, so you can route audio to external speakers cleanly
Don't factor speaker quality into your purchasing decision. Assume they don't exist.
Final Thoughts: Set Your Expectations Right
Budget monitors in 2026 are genuinely good. A $150 IPS panel outperforms the $300 monitors from five years ago in almost every metric.
But they're not perfect. Some backlight bleed is normal. Factory calibration is a bonus, not a guarantee.
Speakers are terrible. Stands are often wobbly.
The key is knowing what's a defect versus what's just inherent to a budget panel. Use the checks we've covered, compare what you find against reasonable expectations for your price tier, and don't let perfect be the enemy of good. A solid budget monitor used within its strengths will serve you well for years.

Similar Posts































