How to Check Hz on 4K Monitor
So you bought a 4K monitor that promised 120Hz or 144Hz, but something feels off. Your games don't look as crisp as the reviews showed. Windows looks stuck on that sluggish 60Hz setting.
Figuring out how to check Hz on a 4K monitor isn't always as straightforward as you'd expect. Sometimes the operating system reports a lower refresh rate. Sometimes the cable is the real bottleneck.
Here's the good news: getting your monitor running at its full refresh rate usually comes down to three things. You need the right cable, the correct port, and the right setting in your operating system. We'll walk you through each one step by step.
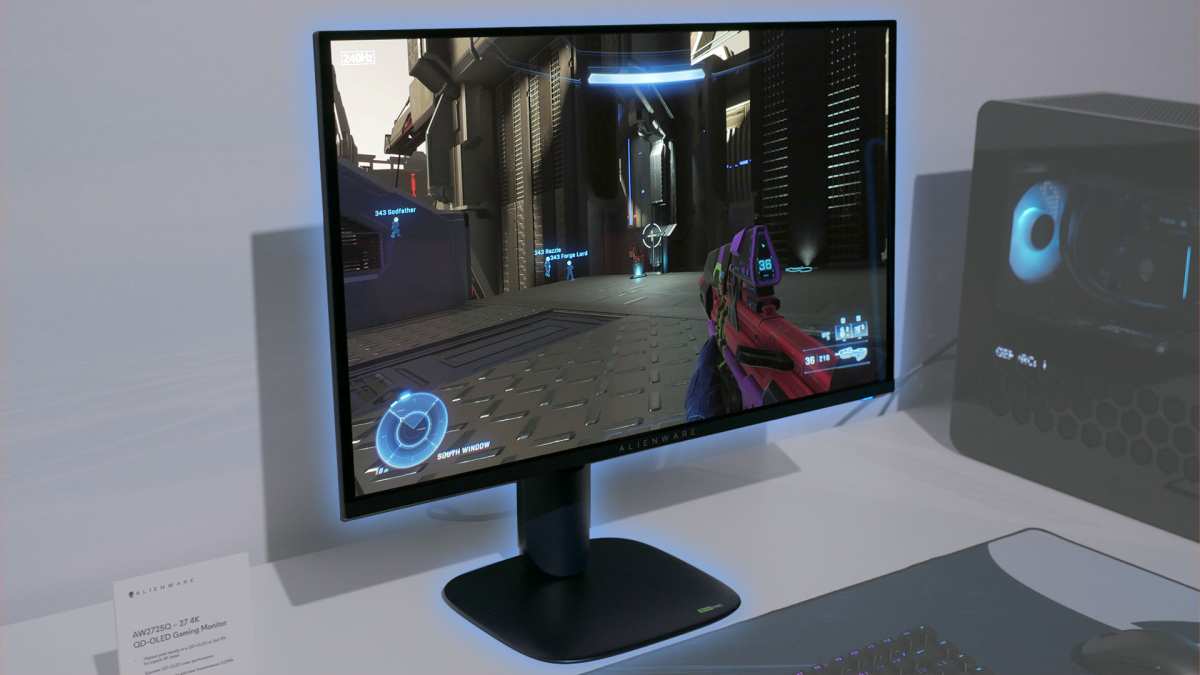
Image source: Bing (Web)
Quick Answer: How to Check Hz on a 4K Monitor Right Now
Right-click your desktop. Go to Display Settings, then Advanced Display. Look for "Refresh rate" in the dropdown menu.
That shows what your monitor is currently running at. It doesn't always show what it can run at though.
The Three Ways Your Refresh Rate Gets Limited (And Why)
Your monitor's refresh rate is only as fast as the weakest link in the chain. That chain runs from your GPU, through the cable, into the port on your monitor, and finally into the monitor's own internal settings.
Most people think it's just a Windows setting. It rarely is.
Your Cable Is Probably the Culprit
This is the single most common reason a 4K monitor won't hit its advertised refresh rate. Not all cables are created equal. Not even close.
A standard HDMI 2.0 cable maxes out at 4K resolution and 60Hz. That's a hard bandwidth limit baked into the spec. If your monitor is rated for 120Hz or 144Hz, that HDMI 2.0 cable simply can't push enough data.
Here's the quick breakdown:
- HDMI 2.0: 4K at 60Hz maximum. Found in most cables shipped before 2019.
- HDMI 2.1: 4K at 120Hz. Required for PS5 and Xbox Series X at full spec.
- DisplayPort 1.4: 4K at 120Hz with DSC (Display Stream Compression) enabled.
- DisplayPort 2.1: 4K at 144Hz+ without breaking a sweat. Found on newer GPUs and monitors.
The cable itself usually has no printed version number on it. You often can't tell HDMI 2.0 from HDMI 2.1 just by looking. That's what makes this so frustrating.
Your best bet is checking the packaging or specs sheet the cable came in. If it was a free cable in the box with a TV or monitor, assume it's HDMI 2.0 unless stated otherwise.
Manufacturer specifications for most 4K gaming monitors confirm DisplayPort is the safest bet for high refresh rates. HDMI 2.1 works perfectly when both the cable and ports on each end support it.
Your Port Matters More Than You Think
Even if you've got the right cable, plugging it into the wrong port will tank your refresh rate. This catches people all the time, especially on monitors with multiple input options.
Most 4K monitors have at least two HDMI ports and one DisplayPort. Some also include USB-C with DisplayPort Alt Mode. But here's the thing.
Not every port on the back of your monitor supports the same maximum refresh rate.
A typical 4K 144Hz monitor might support 144Hz over DisplayPort 1.4, but only 60Hz over HDMI 2.0. Plug into the HDMI port with an older HDMI cable and you're stuck at 60Hz. No amount of Windows settings tweaking will fix that.
Check your monitor's manual or spec sheet. Look for terms like "HDMI 2.1" or "DP 1.4" listed next to specific ports. Some monitors label this on the physical port itself, but most don't.
Laptops add another layer of confusion. A USB-C port might support DisplayPort Alt Mode. It might not.
It might support it but only at reduced bandwidth. The only reliable way to know is to check your laptop's detailed specs from the manufacturer's support page.
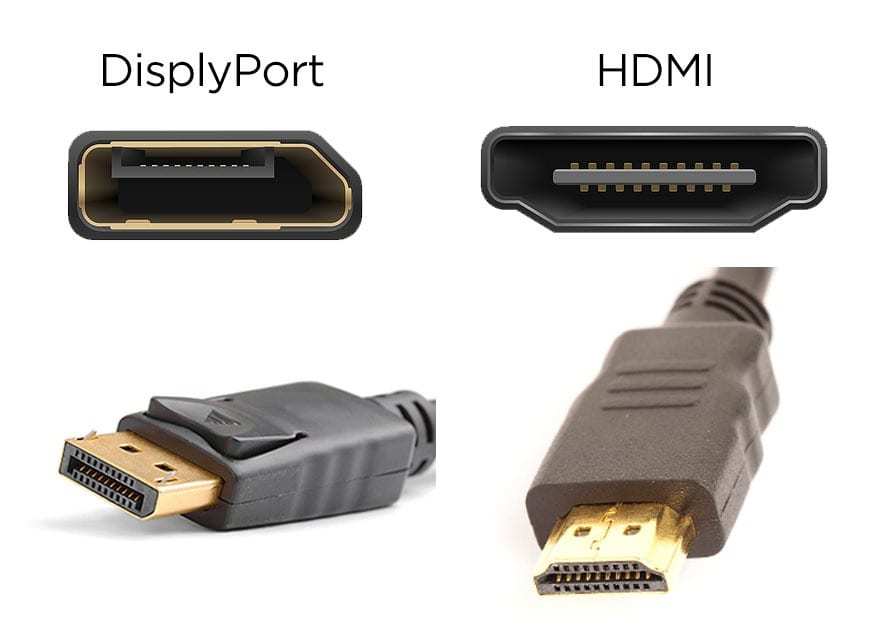
Image source: Bing (Web)
Your Monitor OSD Might Be Locking You Out
Here's one most people overlook. Your monitor's On-Screen Display, the little menu you access through buttons on the monitor itself, sometimes has a refresh rate cap baked in by default.
Some 4K monitors ship with the refresh rate set to 60Hz in the OSD even though the panel itself is capable of 120Hz or 144Hz. The manufacturer does this to ensure stability out of the box. They assume the user will change it once set up.
Look for settings in your monitor OSD like:
- Refresh Rate or Overclock
- Adaptive Sync (FreeSync, G-Sync Compatible)
- HDMI Mode (Standard vs. Enhanced vs. Ultra High Speed)
Gigabyte monitors, for example, often require you to enable "Overclock" in the OSD to reach 144Hz at 4K. Without that toggle flipped, the option never appears in Windows. ASUS, Dell, and LG monitors have similar quirks depending on the specific model.
We'll cover the Windows steps next. Just know that if you follow the software steps and still don't see the refresh rate you expect, check the monitor OSD first before anything else.
Step-by-Step: Check and Change Refresh Rate on Windows
Windows gives you two main paths to check and change your refresh rate. The built-in Settings app shows you what's currently active. Your GPU control panel shows you everything your hardware chain can actually support.
Start with Windows Settings first. It's quick and tells you where you stand right now. Then move to the GPU control panel if the number looks wrong.
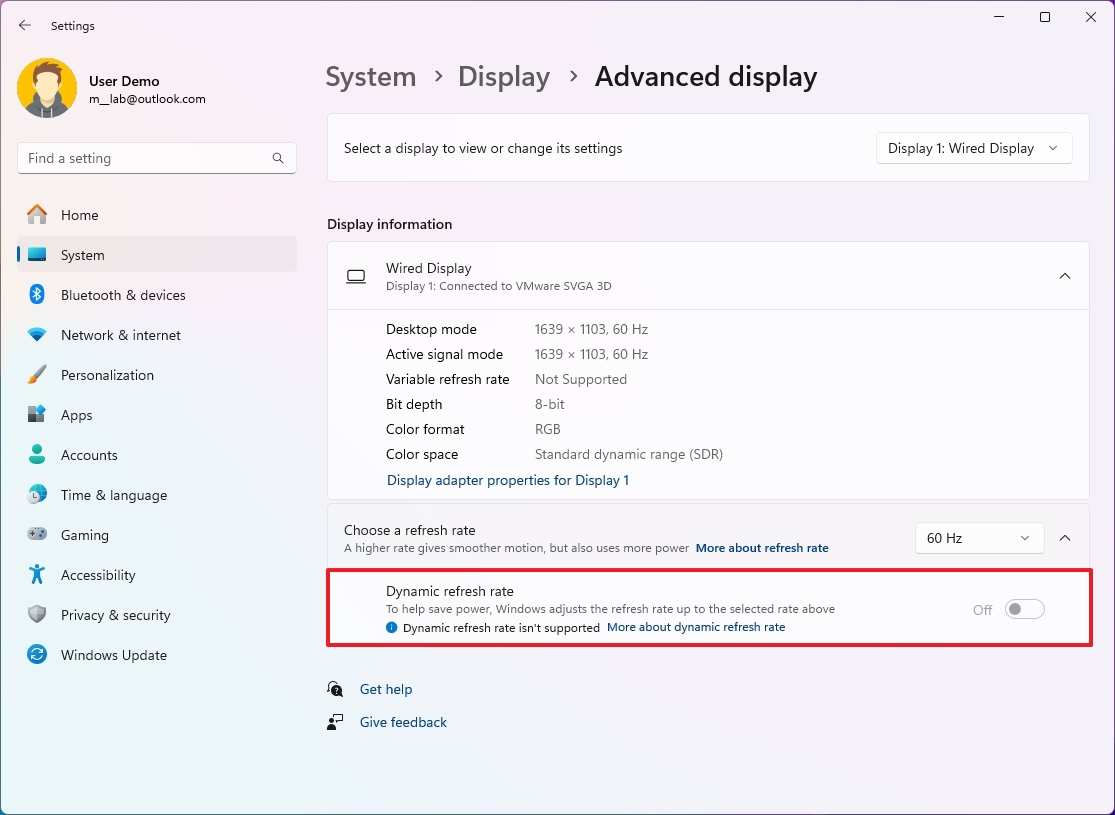
Image source: Bing (Web)
Windows Display Settings (The First Place to Look)
This takes about 30 seconds. Here's exactly what to do:
- Right-click on your desktop background. A context menu appears.
- Select "Display settings." This opens the Settings app to the Display section.
- Scroll down and click "Advanced display." In Windows 11, this is under the "Related settings" area. In Windows 10, it's labeled "Advanced display settings."
- Look at the "Refresh rate" field. It might show a dropdown or just a static number. The number displayed is your monitor's current operating refresh rate.
If you only see 60Hz in the dropdown, that doesn't necessarily mean your monitor is capped. It could mean the cable, port, or monitor OSD is limiting what Windows can offer. We'll address that later.
If you see the refresh rate you want in the dropdown, select it. Windows will apply it for 15 seconds and ask if you want to keep the change. If the screen goes black or looks wrong during those 15 seconds, don't panic.
It'll revert automatically.
One more thing. If you have multiple monitors, make sure you select the correct one at the top of the Advanced Display page before checking the refresh rate. Windows lets you click on monitor 1 or monitor 2 to view each one's individual capabilities.
Step-by-Step: Check and Change Refresh Rate on Windows (GPU Control Panel)
Windows Settings shows you the current state. Your GPU control panel shows you what's actually possible. If the two don't match, the GPU panel is where you'll find the missing options.
NVIDIA Control Panel (For NVIDIA GPU Users)
If you have an NVIDIA GeForce or Quadro card, the Control Panel gives you deeper access to the display pipeline. Here's the path:
- Right-click the desktop and select "NVIDIA Control Panel." If it's not there, update your drivers from NVIDIA's website or GeForce Experience.
- Under "Display" in the left sidebar, click "Change resolution." This shows every resolution and refresh rate combination your GPU and monitor have negotiated.
- Look at the "Refresh rate" dropdown on the right. If you only see 60Hz, the issue is upstream. Check your cable, port, or monitor OSD.
- If you see your desired refresh rate, select it and click "Apply." The screen will flicker briefly. Confirm the change when prompted.
There's also a "Customize" button below the resolution list. If your monitor supports a refresh rate that isn't showing up, you can create a custom resolution here. Click "Create Custom Resolution," enter the exact timing parameters, and test it.
This is an advanced step. If the custom resolution doesn't work, the screen reverts after 15 seconds.
One important note. NVIDIA GPUs will only show refresh rates that the monitor's EDID reports as supported. If the EDID is wrong or limited, the option won't appear.
That's where tools like Custom Resolution Utility (CRU) come in, which we'll cover later.
AMD Radeon Software (For AMD GPU Users)
AMD's interface has changed over the years, but the core path stays the same:
- Right-click the desktop and select "AMD Software: Adrenalin Edition." If you don't have it, download it from AMD's support site.
- Click the gear icon (Settings) in the top right, then select "Display." This shows your connected monitors and their capabilities.
- Look for the refresh rate listed under your monitor's info panel. Some versions of Radeon Software also let you toggle refresh rate directly from this screen.
- If the rate looks wrong, check the "Custom Resolutions" section under the Display tab. AMD lets you manually add resolution and refresh rate profiles here.
Radeon Software also has a "Troubleshoot" option that can detect common display configuration issues. It's not perfect, but it catches things like mismatched HDMI versions more often than not.
Step-by-Step: Check and Change Refresh Rate on Mac
macOS handles refresh rate detection differently than Windows. Apple's system is more opinionated about what it shows you, and the options depend heavily on the Mac model and monitor combination.
Here's the standard path on macOS Ventura and later:
- Click the Apple menu and select "System Settings."
- Go to "Displays" in the left sidebar. If you have multiple monitors, click the correct one.
- Look for the "Refresh Rate" dropdown. macOS might show it as a pop-up menu or a list of options. If you only see "60Hz," the Mac has determined that's the maximum the monitor supports over the current connection.
On older macOS versions (Monterey and earlier), this setting lives in System Preferences under Displays. You may need to hold the Option key and click "Scaled" to see additional refresh rate options.
Apple's M-series Macs generally handle 4K high refresh rates well over Thunderbolt and USB-C. Intel Macs can be more limited. The specific Thunderbolt controller in your machine determines the available bandwidth.
Check your Mac's tech specs page on Apple's support site for the exact display capabilities.
One quirk worth knowing. macOS sometimes hides higher refresh rates if HDR is enabled. If you're not seeing 120Hz as an option, try turning off HDR temporarily in the same Displays settings panel.
Step-by-Step: Check Refresh Rate on PS5 and Xbox Series X
Console gamers face a slightly different challenge. Both the PlayStation 5 and Xbox Series X support 4K at 120Hz, but only under specific conditions.
PS5
- Go to Settings > Screen and Video > Video Output.
- Select "Refresh Rate." The PS5 will show what it's currently outputting. If it says 60Hz, the console has determined the display chain can't handle 120Hz.
- To enable 120Hz, go to Settings > Screen and Video > Video Output > 120Hz Output and set it to "Automatic."
The PS5 requires HDMI 2.1 for 4K at 120Hz. If your monitor only has DisplayPort and no HDMI 2.1 port, you're out of luck for 120Hz on PS5. Some monitors have HDMI 2.1 but only at 4K 60Hz over their other HDMI ports.
Check the manual carefully.
Xbox Series X
- Go to Settings > General > TV & display options.
- Click "Refresh rate" under the "Display" section. You'll see 60Hz or 120Hz as options.
- If 120Hz is grayed out, go back to "4K TV details." This screen runs a diagnostic and tells you exactly what your monitor supports over the current connection.
Xbox is actually better than PS5 at telling you why a feature isn't available. The "4K TV details" screen will show green checkmarks for supported features and gray X marks for unsupported ones. If "120Hz" has an X, the console has detected a limitation in the cable, port, or monitor.
Both consoles benefit from using the HDMI cable that came in the box. Those are certified Ultra High Speed HDMI cables rated for 48 Gbps. Third-party cables labeled "HDMI 2.1" sometimes don't meet the full spec.
This is a known issue reported across multiple user forums.
How to Verify Your Actual Refresh Rate (Not Just the Setting)
Windows says 120Hz. Your GPU control panel says 120Hz. But is the monitor actually refreshing at 120Hz?
Sometimes the software reports one number while the hardware does another.
The best free tool for this is the UFO Test at testufo.com. It's a simple browser-based animation that visually confirms your refresh rate.
Here's how to use it:
- Open your browser and go to testufo.com.
- Look at the number displayed at the top of the page. This is the refresh rate the browser is detecting.
- Compare it to what Windows reports. If they match, you're good. If they don't, something in the chain is misreporting.
The test works by measuring how many frames the browser can render per second. It's not a perfect hardware-level measurement, but it's accurate enough to catch most configuration issues.
Another option is to check your monitor's built-in OSD. Many gaming monitors have an "Information" page in the menu that shows the actual incoming signal resolution and refresh rate. This is the ground truth.
If the OSD says 60Hz but Windows says 120Hz, the monitor is telling you what it's actually receiving. Trust the OSD over the OS.
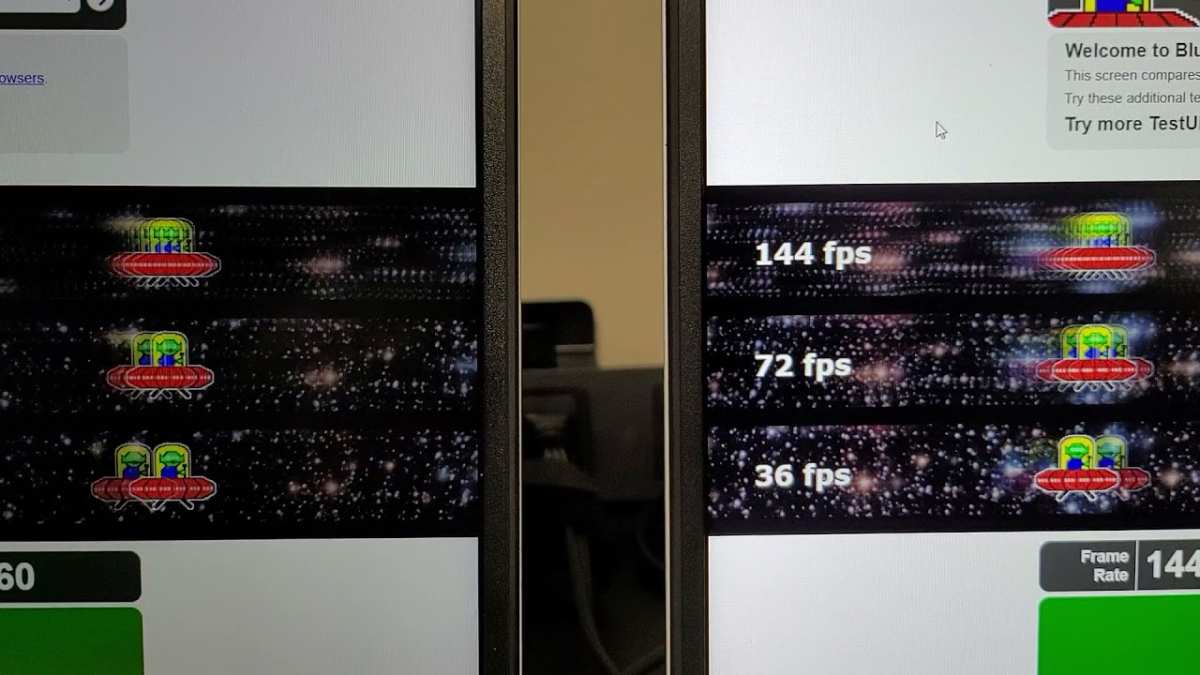
Image source: Bing (Web)
Common Mistakes That Keep You Stuck at 60Hz
After covering all the steps, let's talk about the mistakes that trip people up the most. If you've followed the steps above and still can't get your desired refresh rate, one of these is almost certainly the reason.
Using the motherboard's video output instead of the GPU. If your monitor is plugged into the HDMI port on your motherboard's I/O panel, you're using the CPU's integrated graphics. That port may not support 4K at high refresh rates. Always plug into the discrete GPU's ports.
Using an old DisplayPort cable rated only for DP 1.2. DisplayPort 1.2 tops out at 4K 60Hz. You need DP 1.4 for higher refresh rates at 4K. The cable itself doesn't have version labeling in most cases, so check the specs if you're unsure.
Forgetting to check the monitor OSD for a refresh rate toggle. As mentioned earlier, some monitors require you to manually enable the higher refresh rate in the on-screen menu. Windows won't show the option until you do.
Having HDR enabled on macOS. This can hide higher refresh rates from the Displays settings panel. Turn it off temporarily to see if the option appears.
Running an outdated GPU driver. Both NVIDIA and AMD occasionally add monitor compatibility fixes in driver updates. If a refresh rate option is missing, a driver update might unlock it.
Using a USB-C to HDMI adapter that only supports HDMI 2.0. Many USB-C adapters are limited to 4K 60Hz. Look for adapters specifically rated for HDMI 2.1 or use a USB-C to DisplayPort cable instead.
Quick Reference: Cables, Ports, and Maximum Refresh Rates at 4K
Here's a fast-reference table you can come back to. It covers the most common scenarios for 3840×2160 resolution.
| Standard | Max Bandwidth | Max Refresh Rate at 4K | Notes |
|---|---|---|---|
| HDMI 2.0 | 18 Gbps | 60Hz | Most common "old" standard |
| HDMI 2.1 | 48 Gbps | 120Hz | Required for PS5/Xbox 4K@120 |
| DisplayPort 1.2 | 17.28 Gbps | 60Hz | Obsolete for high-refresh 4K |
| DisplayPort 1.4 | 32.4 Gbps | 120Hz (DSC) / 98Hz (native) | DSC required above 98Hz |
| DisplayPort 2.1 | 77.37 Gbps (UHBR20) | 144Hz+ | Newest GPUs and monitors only |
If your setup isn't reaching the refresh rate you want, find your cable standard and port type in this table. Whichever end of the chain has the lower spec is your bottleneck.
When to Use DisplayPort vs HDMI for 4K High Refresh Rate
DisplayPort wins for PC gaming at 4K high refresh rates. It's been the standard for high-refresh PC monitors for years. Most 4K 144Hz monitors are designed around DisplayPort as the primary high-bandwidth input.
HDMI 2.1 matters most for console gaming. The PS5 and Xbox Series X use HDMI exclusively. They need HDMI 2.1 for 4K 120Hz.
No exceptions.
Some monitors have both DisplayPort 1.4 and HDMI 2.1. In that case, use DisplayPort for your PC and HDMI 2.1 for your console. Each port connects to the same panel but through different internal processing paths.
USB-C with DisplayPort Alt Mode is a third option for laptops. Not all USB-C ports support it. Look for the DP icon next to the port, or check your laptop's spec sheet.
A USB-C to DisplayPort cable often provides better results than a USB-C to HDMI adapter for high refresh rates at 4K.
What to Do If Your Monitor's Max Refresh Rate Still Won't Show Up
You've checked the cable. You've checked the port. You've checked the OSD.
The refresh rate you want still isn't in the list.
Here's your next move, in order of likelihood to work:
Update your GPU drivers. Both NVIDIA and AMD release driver updates that improve monitor compatibility. A driver from 2023 might not recognize a monitor released in 2024.
Check for a monitor firmware update. Some monitors ship with outdated firmware that limits EDID reporting. Manufacturers occasionally release firmware updates that unlock higher refresh rates or fix compatibility bugs.
Try a different cable. Even if your cable is rated for the right standard, manufacturing defects happen. A different cable from a reputable brand often resolves "missing" refresh rate options.
Use Custom Resolution Utility (CRU). This free tool lets you manually edit the EDID data that your monitor reports to Windows. You can add custom refresh rates that the monitor supports but isn't advertising. Use CRU with caution. Incorrect settings can cause a black screen, though most monitors will revert automatically.
Try the monitor on a different computer. If the refresh rate options appear on another machine, the issue is with your original GPU or its drivers, not the monitor.
If none of these work, contact the monitor manufacturer's support. Some panels have hardware revisions with different capabilities despite sharing the same model name. That's rare, but it happens.
Frequently Asked Questions
How do I check my monitor's refresh rate in Windows 11?
Right-click the desktop. Go to Display Settings, then Advanced Display. The refresh rate dropdown shows your current setting.
For more options, use your GPU's control panel.
Why does my 4K 144Hz monitor only show 60Hz?
Your cable, port, or monitor OSD is almost certainly the bottleneck. Check that you're using DisplayPort 1.4 or HDMI 2.1. Verify the monitor's on-screen menu isn't capping the rate.
Can I run 4K at 120Hz over HDMI?
Yes, but only with HDMI 2.1 on both the GPU side and the monitor side. HDMI 2.0 is limited to 4K 60Hz.
Does the UFO test give accurate refresh rate readings?
It's accurate enough for verification. It measures browser rendering speed, which typically matches the display's actual refresh rate. For ground truth, check your monitor's OSD information panel instead.
Do I need a special cable for 4K 144Hz?
You need DisplayPort 1.4 with DSC support or DisplayPort 2.1 for 4K 144Hz without compression. Not all DP cables are created equal. Check that your cable matches the required spec.

Similar Posts