How Do I Calibrate a Mini LED Monitor
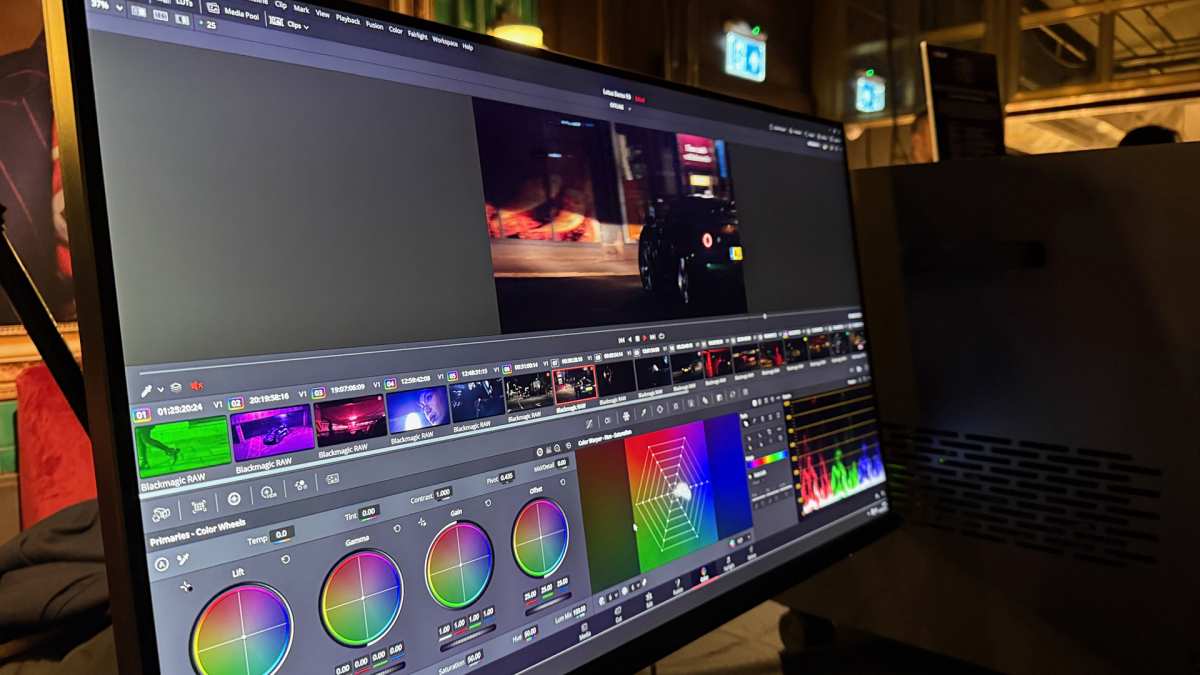
If you've just unboxed a mini LED monitor, you're probably eyeing that gorgeous HDR punch and deep contrast, then wondering why your photos still look off center or why the whites skew yellow. On a mini LED panel, the number of extra factors at play (local dimming logic, peak-nit behavior, factory gamut targeting) is bigger than on a standard LCD. The good news is the calibration process itself is entirely achievable at home.
The trick is knowing which knobs actually matter for your specific model and how local dimming zones change the whole game.
In our research across manufacturer specs and aggregate user reports, one rule keeps coming up: never calibrate a mini LED display the same way you'd treat a basic IPS panel. For instance, per VESA's DisplayHDR testing spec (DisplayHDR 1000 and above), peak luminance must hit 1000 cd/m² momentarily, but sustained full-screen brightness often caps around 500 to 600 cd/m² due to thermal and power limits. That gap shapes everything from your target brightness to which colorimeter you can even use.
Image source: Bing (Web (fair-use with source credit))
Quick Answer
Calibrate a mini LED monitor by first warming it up for 30 minutes with all dynamic features disabled. Set a target white point of 6500K (D65) and gamma 2.2 for SDR, or PQ curve for HDR. Use a colorimeter like the X-Rite i1Display Pro and software such as DisplayCAL.
Verify grayscale Delta E is under 2.0 before profiling. Save the ICC profile and repeat every four weeks for professional work.
Why Mini LED Monitor Calibration Isn't Like Calibrating a Regular Display
A standard edge-lit LCD has one backlight. You move a few OSD sliders and call it done. Mini LED breaks that simplicity wide open.
These panels pack anywhere from 192 to 2304+ individual dimming zones behind the LCD layer. That local dimming array transforms black levels and contrast. But it also introduces behavior a single-zone display never deals with.
Here is what changes during calibration:
- Local dimming interference. Each zone adjusts its brightness independently based on scene content. A test pattern covering half the screen versus full-screen produces different luminance readings. This affects grayscale uniformity measurement directly.
- ABL (Automatic Brightness Limiting). Most mini LED monitors cap brightness when a large bright area fills the screen. A full-white window on Windows desktop may read 400 cd/m². A 10-percent window of the same white may spike to 1000 cd/m².
- Zone-edge glow and blooming. Bright zones bleed slightly into adjacent dark areas. This causes corner and edge uniformity deviations that a single-point colorimeter cannot fully characterize.
- Thermal drift. Peak HDR brightness settles over the first 30 to 60 minutes as the backlight reaches equilibrium. Calibrating before warm-up gives you a profile that sags the moment the panel heats up.
- HDR/SDR dual behavior. An SDR desktop session and an HDR video trigger entirely different tone mapping paths. One ICC profile cannot correctly address both.
Per VESA DisplayHDR conformance testing (DisplayHDR CTS 1.1), mini LED panels must sustain advertised black levels and peak brightness simultaneously in specific window sizes, but the standard allows a tolerance range that real-world firmware can exploit. Your calibration needs to work within whatever the monitor's local dimming algorithm is actually doing, not simply against a lab spec.
Figure Out Your Calibration Path: What You Own and What You Need
Not every mini LED owner faces the same situation. The workflow diverges sharply based on your device class, available tools, and end goal. Read the three profiles below and jump to the one that matches you.
Portable Mini LED Monitors (Innocn, KTC, ASUS ZenScreen)
Portable panels usually ship with bare-minimum OSD controls. You may have no RGB gain sliders, no gamma selector beyond "Movie" and "Game," and only an on/off local dimming toggle.
Your realistic calibration path: software-only luminance and gamma adjustment via Windows Display Color Calibration (DCC) tools or macOS Display Calibrator Assistant. Skip hardware profiling. Verify visually using Lagom LCD test patterns.
Target a gamma of 2.2 and accept whatever Delta E the panel delivers. Expect to live with 10 to 15 percent corner uniformity deviation because you have no zone-level controls.
Honest limitation: portable models use fewer dimming zones (often 16 to 32). Blooming around UI elements in dark mode is normal and not fixable through calibration. Focus on comfortable gamma and correct white point and move on.
Full-Size Mini LED Monitors (ASUS ProArt, Cooler Master Tempest, AOC Agon)
Full-size gaming or productivity panels ship with richer OSD trees, RGB gain controls, gamma presets, and local dimming modes labeled Low/Medium/High.

Image source: Bing (Web (fair-use with source credit))
Your realistic calibration path: hardware calibration with a colorimeter. This is the sweet spot where you can set local dimming to "Medium," disable dynamic contrast, and use CalMAN or DisplayCAL to measure and correct grayscale and color. Then load the resulting ICC profile or, on models with hardware calibration support (ASUS ProArt with compatible calibrators), push the LUT into the monitor itself.
Pro tip: check whether your monitor supports hardware LUT upload before buying any software. ASUS ProArt monitors work nically with CalMAN Powered by Portrait Displays. That avoids relying on your GPU's look-up table.
Mini LED Laptops (MacBook Pro, High-End Windows Notebooks)
You cannot access the physical OSD. Your calibration controls live in the operating system alone.
On macOS (Book Pro 14/16-inch with mini LED): the display has factory calibration stored per unit, professionally measured. Apple's reference modes (HDTV Video, Digital Cinema, Internet & Web) swap targets automatically. For custom profiling, use the built-in Display Calibrator Assistant (System Settings > Displays > hold Option > Color Profile > Calibrate) and check "Expert Mode" for grayscale tuning.
Expect limits. System-level tone management during HDR content moves between the Apple reference modes and your calibrated profile is not always frame-accurate.
On Windows laptops: same DCC and Color Management tooling as desktop. However, many OEM mini LED panels (Samsung, BOE) use firwmware-level ABL and dynamic contrast that Windows tools cannot override. Software-only calibration is your only option.
Before You Touch Anything: Preparation Steps Everyone Skips
Every guide jumps straight into "set brightness to X." Skipping preparation is the single reason calibrations go sideways, especially on mini LED where local dimming and ABL shift readings second by second. Do these steps first. Each one takes a minute and prevents an hour of wasted measuring.
Warm up the panel. Power on the monitor and leave it showing a normal desktop for 30 to 60 minutes. Mini LED backlights shift luminance by as much as eight percent as the LED arrays and diffuser films reach thermal equilibrium. A 60-minute warm-up is conservative.
Measure before and after if you want to confirm on your own unit.
Disable every dynamic feature. Walk through the OSD and turn off:
- Dynamic contrast (sometimes called "Smart Contrast," "Dynamic Brightness," or "CABC").
- Eco mode / ambient light sensor response.
- Blue light filter / eye care mode.
- Any "vivid," "HDR effect," or "AI picture" mode.
These features rewrite your carefully measured curves on the fly. You calibrate with them on, your profile applies with them off, and you scratch your head watching crushed blacks.
Set local dimming to a fixed mode. Do not calibrate with local dimming set to "Auto" if you have a Low/Medium/High selector. Pick one, ideally "Medium." Low reduces blooming but blacks out highlights and flattens the gamma test near true black. High deepens blacks but can flicker brightness near zone boundaries.
If your OSD only has "On" and "Off," use "On" for HDR and color-critical SDR work, "Off" only if you are troubleshooting uniformity and want a stable backlight baseline.
Lock in your input settings. Set the input to the one you actually use, match the output color format to RGB Full (PC) unless you specifically need a limited range YCbCr for video playback, and select your intended color space (sRGB for general work, DCI-P3 native for video/photo). Reboot if the input/menu changes do not visibly stick. On some models per-input memory resets gamma to default when EDID renegotiates.
Set a known white point. If your monitor offers a Kelvin selector, set 6500K if available, else "Warm" (closest match). If only "Cool/Warm/User" exists, set User mode and leave RGB at 100/100/100. Do not touch RGB yet; let the software measure the baseline first.
How to Calibrate Without a Colorimeter (Software-Only Path)
If you do not own or cannot justify a colorimeter, you can still get a meaningful improvement over default mini LED OSD settings. This path works because Windows and macOS include step-by-step calibration wizards.
Step 1: Open the built-in tool.
- Windows: search Calibrate Display Color (DCC向导). The wizard adjusts gamma slider, brightness, contrast, and RGB balance visually.
- macOS: open System Settings, select your display profile, hold Option, click Color Profile, then Calibrate. Check Expert Mode for the extended workflow.
Step 2: Set the gamma target.
Use the on-screen gamma reference (Windows: gamma slider). Mini LED default gamma often runs closer to 1.9 to 2.0 (per aggregate reviews, especially out of "Game" mode). Slide until the dot in each circle nearly disappears.
Step 3: Set the brightness response.
Increase brightness until the shirt logo in the Windows wizard barely shows detail. Stay under the maximum. Going to 100 percent on a mini LED monitor highlights blooming loss more than it helps.
Step 4: Adjust color balance.
Match the gray bars until none skew blue, green, or red. Local dimming does not interfere here because each gray reference is a full-field pattern that keeps the backlight roughly uniform. Windows reads full-screen patterns in the final DCC pass.
Step 5: Validation.
Open Lagom LCD test pattern (lagom.nl). Contrast patterns should reveal distinct blocks down to level 5 in black saturation and white saturation 250. Gamma measurements should show 2.0 ± 0.2.
Viewing-angle uniformity on the CSS lines should hold within five-percent delta on your panel (expect corner glow if you have a low zone-count VA panel with local dimming active; that is normal).
What this approach sacrifices: you cannot verify absolute Delta E without a sensor. Software-only fixes gamma shape and approximate white point, but leaves color accuracy unmeasured. Use it for comfortable SDR gaming and general use.
Switch to the hardware path below if you edit photos or video for any kind of public output.
How to Calibrate With a Colorimeter (Hardware Path)
Hardware calibration is the only way to verify actual Delta E numbers on a mini LED panel. The process is more involved, but the payoff is a profile you can trust for client work.
Choosing the Right Colorimeter for Mini LED High-Brightness Panels
Not every sensor handles mini LED peak brightness gracefully. Older colorimeters clip or saturate above 1000 cd/m², which makes HDR profiling unreliable.
Solid options as of 2026:
| Device | Max Luminance (approx.) | HDR Suitability | Price Range |
|---|---|---|---|
| X-Rite i1Display Pro / Plus | ~1200 cd/m² | Good for SDR, limited for HDR peak | $250–$300 |
| Calibrite ColorChecker Display Pro | ~1200 cd/m² | Same class as i1Display Pro | $200–$250 |
| Datacolor SpyderX Pro | ~600 cd/m² | SDR only, struggles above 600 nits | $170 |
| X-Rite i1Pro 3 (spectro) | No clip limit | Excellent for HDR peak measurement | $1400+ |
For most people, the i1Display Pro or Calibrite Display Pro hits the sweet spot. If you are profiling a 1600-nit DisplayHDR 1400 panel and need accurate PQ curve tracking, a spectrophotometer like the i1Pro 3 is the right tool. Otherwise, accept that your HDR profile will be approximate above the sensor's ceiling.
DisplayCAL Step-by-Step Workflow
DisplayCAL (formerly dispcalGUI) is free, open source, and works with most colorimeters. Here is the mini LED specific workflow.
Step 1: Install and configure. Download DisplayCAL and the ArgyllCMS engine it bundles. Select your monitor and colorimeter in the first dialog. Under "Instrument," set correction to "Auto" or load a spectral correction file if you have one for your panel type.
Step 2: Set calibration targets. Click the "Settings" tab and choose:
- Tone curve: Gamma 2.2 (SDR) or SMPTE ST.2084 (HDR).
- White level: 120 cd/m² for SDR editing in a lit room, 80 cd/m² for dim room print proofing.
- White point: D65 (6500K).
Step 3: Enable interactive display adjustment. Check this box. DisplayCAL will show a test patch and ask you to adjust the monitor's RGB gain controls in the OSD until the measured white point hits D65. This is where having a full OSD with RGB sliders matters.
On portable monitors without those controls, skip this step and let the profiling LUT handle correction.
Step 4: Run the profiling. Place the colorimeter on the screen (use the suction cup or a counterweight to keep it flat). Click "Measure & profile." The software cycles through hundreds of color patches. Expect 20 to 40 minutes for a large profiling set.
Step 5: Install the profile. DisplayCAL offers to load the ICC profile as the system default. Accept this. On Windows, also open Color Management and set the profile as default for the device.
On macOS, the profile appears in System Settings > Displays.
Step 6: Validate. Re-run the verification report in DisplayCAL. Look for average Delta E below 2.0 and maximum below 5.0. If maximum Delta E exceeds 8.0 on saturated colors, your panel's gamut boundary is being clipped.
Reduce the saturation target in settings and re-profile.
CalMAN Step-by-Step Workflow
CalMAN is the professional standard. It costs between $199 (CalMAN Home) and $2499 (CalMAN Ultimate), but the workflow is more guided and the reporting is cleaner.
Step 1: Select your workflow. CalMAN Home offers "Display Calibration" wizards for SDR and HDR. Pick the one matching your target.
Step 2: Connect your meter. CalMAN supports i1Display Pro, i1Pro 3, and several others natively. Select the meter and let CalMAN read its spectral calibration.
Step 3: Pre-calibration measurement. CalMAN measures your panel's current state and generates a report showing grayscale Delta E, gamma tracking, and gamut coverage before you change anything. Save this report. It is your baseline.
Step 4: 1D LUT calibration (if supported). On monitors with hardware LUT upload (ASUS ProArt, some EIZO and NEC models), CalMAN writes the correction directly into the monitor. This bypasses the GPU LUT entirely and avoids banding. If your monitor does not support this, CalMAN creates a 3D LUT or ICC profile instead.
Step 5: Post-calibration verification. Run the verification pass. CalMAN grades the result with a pass/fail against your target. Aim for grayscale Delta E average below 1.5 for professional work.
Windows HDR Calibration App Walkthrough
Windows 11 includes a free HDR Calibration app in the Microsoft Store. It is not a full colorimeter workflow, but it solves a specific problem: HDR tone mapping on mini LED panels often looks washed out or clipped because the display does not know its own peak brightness.
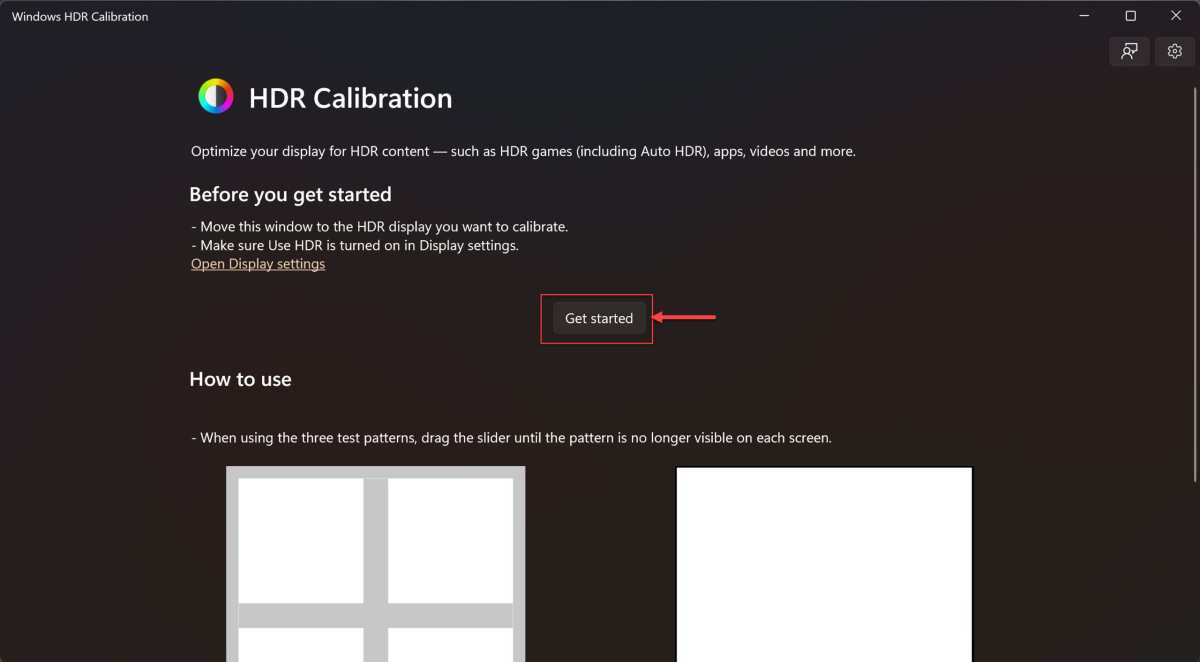
Image source: Bing (Web (fair-use with source credit))
Step 1: Enable HDR. Open Settings > System > Display > HDR and toggle "Use HDR" on.
Step 2: Launch the app. Search "Windows HDR Calibration" in the Start menu. The app opens with three test patterns.
Step 3: Set minimum brightness. Adjust the slider until the logo just disappears. This tells Windows your panel's black floor.
Step 4: Set maximum brightness. Adjust until the bright pattern stops showing detail clipping. This sets the peak nits value Windows uses for tone mapping.
Step 5: Set color saturation. Adjust the saturation slider to your preference. This is subjective, not measured.
Step 6: Save the profile. The app writes an HDR 3D LUT to the system. It applies globally to all HDR content.
Limitation: this app does not measure actual panel behavior. It relies on your eyes. Use it as a complement to a hardware SDR calibration, not a replacement.
Mini LED Specific Settings That Make or Break Your Calibration
Three settings on a mini LED monitor cause more calibration headaches than everything else combined. Get these right before you run any profiling software.
Local dimming aggressiveness. Most monitors offer Low, Medium, and High. Low keeps zones dimmer, reducing blooming but lifting black levels. High drives zones harder, deepening blacks but causing visible brightness shifts near zone boundaries.
For calibration, Medium is the safest starting point. It gives the profiling software a stable backlight state without extreme zone behavior.
Dynamic contrast / CABC. Content Adaptive Brightness Control adjusts the backlight based on the average picture level. It is the enemy of calibration. A grayscale ramp from black to white will measure differently at every step because CABC is constantly changing the backlight.
Turn it off in the OSD before you start.
Color space emulation mode. Many mini LED monitors offer an sRGB clamp mode that locks the panel to the sRGB gamut. If you are calibrating for web or sRGB delivery, use this mode. It prevents oversaturated colors from skewing your profile.
For DCI-P3 or Adobe RGB work, leave the panel in native gamut mode and let the ICC profile handle the mapping.
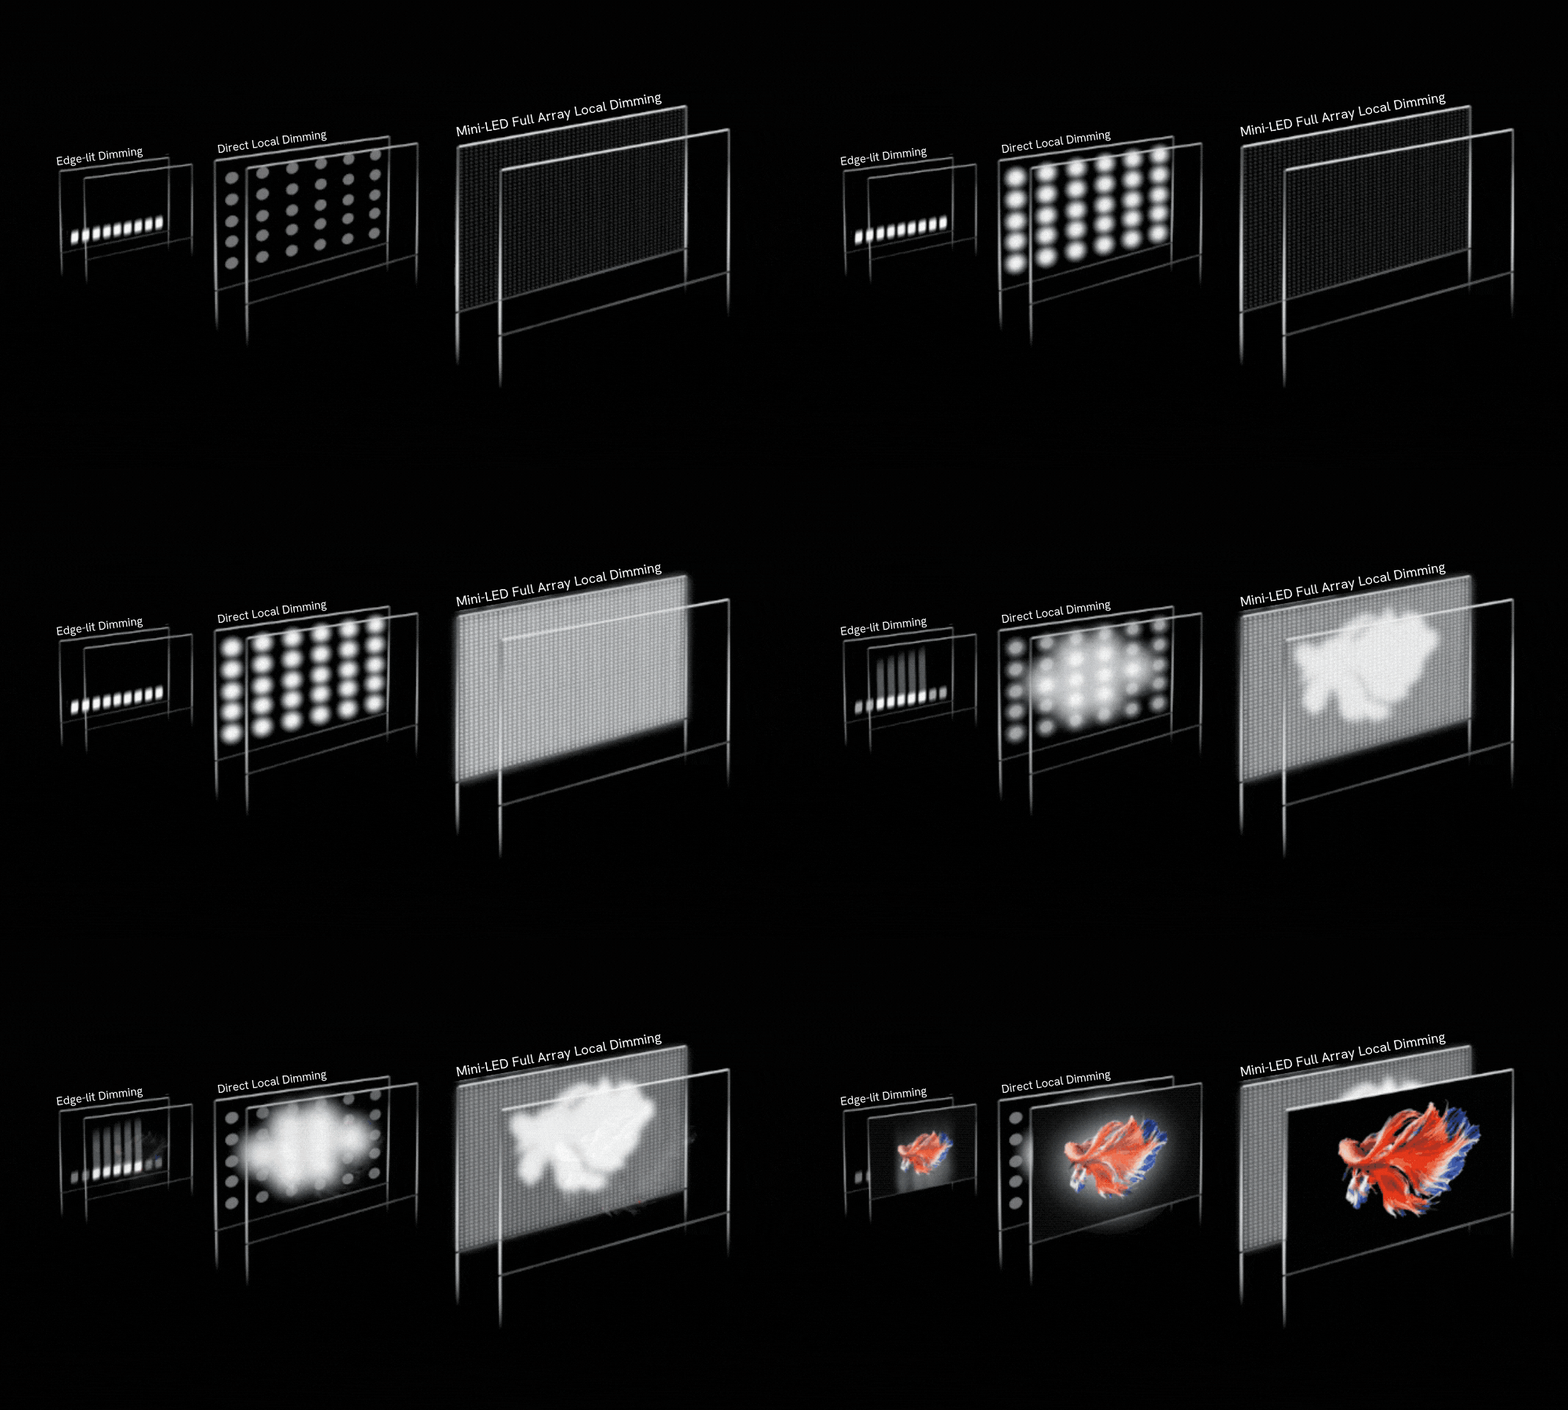
Image source: Bing (Web (fair-use with source credit))
How to Fix Common Mini LED Calibration Problems
Even with a careful workflow, mini LED panels throw curveballs. Here are the ones that come up most often and what to do about them.
Problem: Grayscale Delta E spikes at low brightness (below 20 percent).
This is almost always local dimming behavior. Near-black zones flicker between on and off states, causing the colorimeter to read inconsistent values. Fix: set local dimming to Medium or Low for SDR calibration.
If the problem persists, raise your black level target slightly. A 0.5 cd/m² black floor is more realistic than 0.1 cd/m² on a mini LED panel with active dimming.
Problem: ICC profile looks correct in photo apps but washed out in games.
Most games ignore the system ICC profile entirely. They output directly to the display. Fix: calibrate the monitor's OSD as close to target as possible, then use the ICC profile as a secondary correction for color-managed applications.
For games, rely on in-game calibration sliders or the Windows HDR Calibration app.
Problem: Brightness drifts during long editing sessions.
Thermal throttling on the backlight reduces peak and sustained brightness as the panel heats up. Fix: calibrate after the full 60-minute warm-up. If drift is still noticeable after two hours, lower your target luminance by 10 percent.
A slightly dimmer but stable profile is better than a bright one that shifts.
Problem: Colorimeter reads wildly different values at screen center versus edges.
Mini LED uniformity varies across the panel, especially near zone boundaries. Fix: take multiple readings at different positions and average them. DisplayCAL supports this natively with its "Verification" feature across a grid pattern.
If corner deviation exceeds 15 percent, your panel may have a hardware uniformity issue that calibration cannot fully correct.
Problem: HDR profile looks fine but SDR content in HDR mode is oversaturated.
Windows HDR mode applies a different color pipeline than SDR. Fix: keep SDR content in SDR mode when possible. If you must run SDR in HDR mode, use the "SDR content brightness" slider in Windows HDR settings to adjust luminance, and accept that color accuracy will be approximate.
SDR and HDR: Why You Need Two Different Calibrations
A single ICC profile cannot correctly describe both SDR and HDR behavior on a mini LED panel. The two modes use different tone curves, different peak brightness targets, and different color volume mappings.
SDR calibration targets:
- Gamma 2.2 or BT.1886
- 80 to 120 cd/m² luminance
- D65 white point
- sRGB or DCI-P3 gamut
HDR calibration targets:
- SMPTE ST.2084 (PQ curve)
- Peak luminance matching the panel's rated spec (1000, 1400, 1600+ nits)
- D65 white point
- Rec. 2020 container with P3 or native gamut mapping
Practical workflow: calibrate SDR first using your colorimeter and DisplayCAL or CalMAN. Save that profile as your default. Then use the Windows HDR Calibration app for HDR.
Switch between them by toggling HDR on and off in Windows display settings. On macOS, the system handles this transition more smoothly through its reference mode switching, but you still benefit from a custom SDR profile for color-critical work.
How Often Should You Recalibrate a Mini LED Monitor
Mini LED backlights age faster than traditional edge-lit LEDs because the individual LED arrays run hotter. Aggregate user reports and manufacturer service data suggest noticeable drift begins around 200 to 500 hours of use.
Recommended intervals:
- Professional color work: every 2 to 4 weeks.
- Enthusiast photo editing: every 1 to 2 months.
- General use and gaming: every 3 to 6 months.
Set a calendar reminder. Each session takes 30 to 60 minutes if you already have your workflow dialed in. Skipping recalibration for a year means your Delta E could drift from 1.5 to 4.0 or higher, which is visible in side-by-side comparisons.
When to DIY vs. Hire a Professional Calibrator
DIY calibration with a colorimeter gets you 80 to 90 percent of the way to a professional result. The remaining gap comes from equipment and technique.
DIY is fine if:
- You edit photos for personal projects or web delivery.
- You game and want accurate HDR tone mapping.
- You are comfortable following a workflow and validating results.
Hire a professional if:
- You deliver broadcast or cinema content that must meet ITU-R BT.709 or DCI-P3 spec.
- Your panel has uniformity issues that need zone-level correction.
- You need a calibration report for client or regulatory compliance.
Professional calibration services typically cost $150 to $400 per session. They bring spectrophotometers that cost $10,000 or more and can measure peak HDR brightness accurately. For most enthusiasts, that is overkill.
For a colorist delivering a Netflix title, it is mandatory.
Frequently Asked Questions
Can I calibrate a mini LED monitor without a colorimeter?
Yes. Use the built-in Windows Display Color Calibration tool or macOS Display Calibrator Assistant. You will get improved gamma and white point accuracy, but you cannot verify absolute Delta E without a sensor.
This approach works well for general use and gaming.
Does local dimming need to be on or off during calibration?
Keep local dimming on at a fixed Medium setting for most SDR calibration. Turning it off removes the panel's core contrast advantage and gives you a profile that does not match real-world use. Only turn it off temporarily if you are diagnosing uniformity problems.
Why does my calibration look different in games versus photo apps?
Most games bypass the system ICC profile and output directly to the display. Calibrate your monitor's OSD as close to target as possible for game accuracy. Use the ICC profile for color-managed applications like Photoshop, Lightroom, and DaVinci Resolve.
How do I know if my colorimeter supports mini LED peak brightness?
Check the manufacturer's specified maximum luminance reading. The i1Display Pro handles up to approximately 1200 cd/m². If your panel peaks at 1600 nits or higher, the sensor will clip at the top of the HDR range.
A spectrophotometer like the i1Pro 3 handles any brightness level.
Is factory calibration on a mini LED monitor good enough?
On professional models like the ASUS ProArt series, factory calibration is often within Delta E 2.0 out of the box. On gaming monitors, factory calibration is frequently looser, with Delta E averaging 3.0 to 5.0. Verify with your own measurements if color accuracy matters to your work.
Can I use the same profile for SDR and HDR content?
No. SDR and HDR use different tone curves and brightness targets. Calibrate SDR separately with a gamma 2.2 target, then use the Windows HDR Calibration app or CalMAN's HDR workflow for HDR.
Switch between them by toggling HDR mode in your operating system.

Similar Posts































