Do 144Hz Monitors Work with Mac
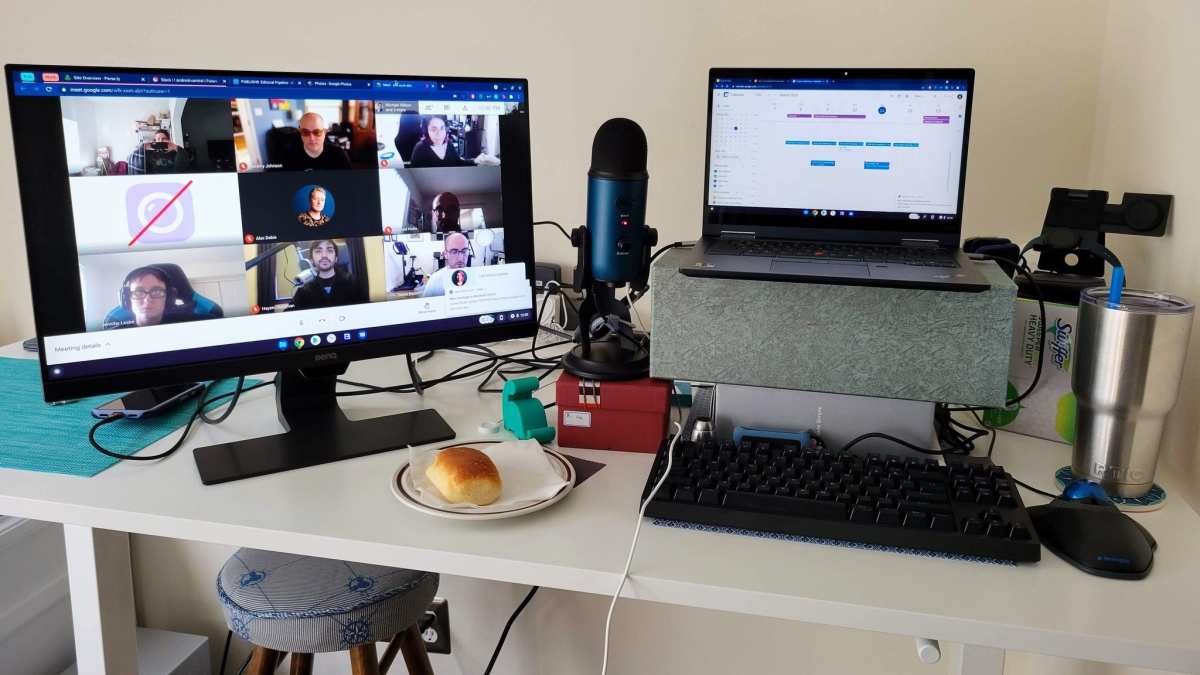
Image source: Openverse / cogdogblog
do 144hz monitors work with mac
Do 144Hz monitors work with Mac? It's one of the most common questions from Mac users who want smoother motion, whether for gaming, creative work, or just a snappier desktop experience. The honest answer is: it depends entirely on which Mac you own, what ports you're using, and what cable or adapter is in the middle.
Plenty of people buy a 144Hz monitor, plug it into their Mac, and wonder why everything still looks like 60Hz. It's not the monitor's fault. Apple's hardware and macOS handle external display refresh rates differently than Windows, and the details matter.
Let's walk through exactly what you need to know so you don't waste money on gear that won't perform the way you expect.
The Short Answer
Yes, many Macs can drive a 144Hz external monitor. But your specific Mac model determines whether it works at full refresh rate. The cable and port you choose also make or break the setup. macOS sometimes hides the 144Hz option unless you know where to look.
Why Most People Get This Wrong
The biggest misconception is that any Mac with a USB-C or Thunderbolt port automatically supports high refresh rates on an external display. That's not how it works. Apple Silicon chips have specific display controller limitations that vary by tier.
A base M1 or M2 chip, like the one in a MacBook Air or 13-inch MacBook Pro, only supports a single external display. And the bandwidth available for that display depends on whether you're using the native DisplayPort Alt Mode over USB-C or going through an HDMI adapter. Many users grab a cheap USB-C to HDMI dongle, connect their 144Hz monitor, and never see anything above 60Hz.
The adapter is the bottleneck.
Another common mistake is assuming macOS will show all available refresh rates by default. It won't. You often need to hold the Option key while clicking "Scaled" in System Settings to reveal the full list of refresh rate options.
Skip that step and you'll think your monitor is stuck at 60Hz when it's perfectly capable of more.
What Actually Determines If 144Hz Works on Your Mac
Three things control whether you get 144Hz on your Mac. Your Mac's chip and its display controller. The physical port and cable or adapter you're using.
And whether macOS is configured to actually output at that refresh rate.
Get all three right and it works beautifully. Get any one of them wrong and you're stuck at 60Hz wondering what went wrong.
Your Mac's Chip Matters More Than Anything
Apple Silicon chips are not created equal when it comes to external display support. Here's the breakdown as of 2026.
| Mac Chip | External Displays Supported | Max Refresh Rate Potential |
|---|---|---|
| Base M1 / M2 / M3 | 1 external display | Up to 144Hz at 1080p via USB-C to DisplayPort |
| M1 Pro / Max | Up to 2 external displays (Pro) or 4 (Max) | Up to 144Hz+ depending on resolution |
| M2 Pro / Max | Up to 2 external displays (Pro) or 4 (Max) | Up to 144Hz+ depending on resolution |
| M3 Pro / Max | Up to 2 external displays (Pro) or 4 (Max) | Up to 144Hz+ depending on resolution |
| Intel Macs (2016–2020) | Varies by model | Often limited by GPU; check specs |
The base M1/M2/M3 chips in the MacBook Air and entry-level 13-inch MacBook Pro can technically push 144Hz, but only at lower resolutions like 1080p and only with the right connection. Push to 1440p at 144Hz and you may run into bandwidth limits depending on your cable.
M1 Pro/Max and newer chips have more display pipeline bandwidth, so they handle 144Hz at 1440p or even 4K at higher refresh rates more comfortably. If you're buying a monitor specifically for a Pro or Max machine, you've got more headroom.
The Port You Use Changes Everything
Your Mac's physical ports determine what signaling protocol gets sent to the monitor. And not all ports are equal.
USB-C with DisplayPort Alt Mode is the most reliable path to 144Hz on a Mac. This sends a native DisplayPort signal over the USB-C connector. No conversion, no translation.
Just a clean DP signal straight to your monitor.
HDMI is trickier. The Mac Studio and some desktop Macs have HDMI 2.1 ports, which have plenty of bandwidth for 144Hz. But the MacBook Pro 14-inch and 16-inch models have HDMI 2.0 ports, which cap out at 144Hz only at 1080p.
At 1440p, HDMI 2.0 typically limits you to 60Hz or maybe 120Hz with reduced color settings.
Thunderbolt 4 ports on newer Macs carry DisplayPort 1.4 signaling natively. That means a simple USB-C to DisplayPort cable gets you full bandwidth for high refresh rates.
Your Cable or Adapter Is Often the Hidden Problem
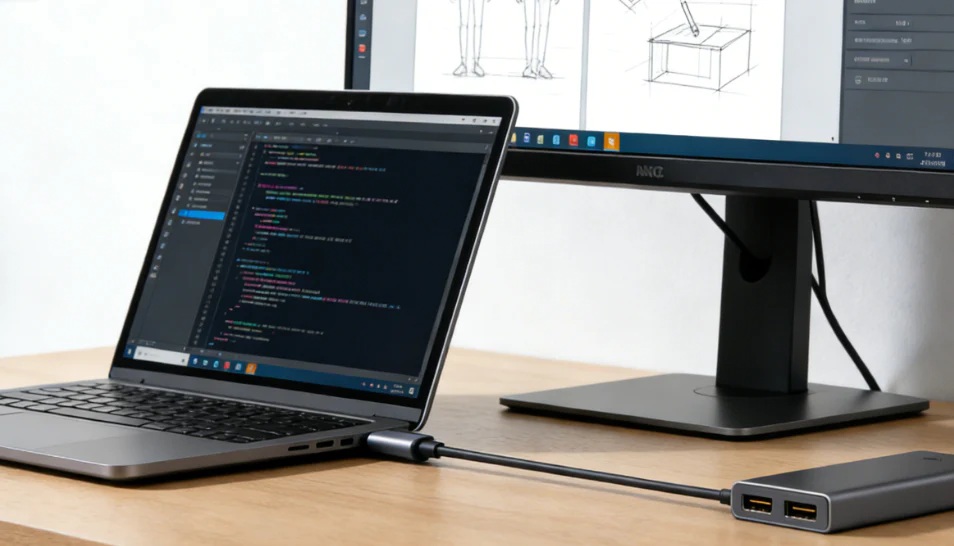
This is where most setups fail. A cheap USB-C to HDMI adapter from a no-name brand on Amazon might only support HDMI 1.4, which can't do 144Hz at any meaningful resolution. Even some name-brand hubs limit HDMI output to 60Hz because they're designed for office productivity, not gaming.
For the most reliable 144Hz experience, use a USB-C to DisplayPort cable (not an adapter, a cable with different ends). These are inexpensive, widely available, and they carry a native DisplayPort signal that macOS handles well. Look for cables that explicitly support DisplayPort 1.4.
If you must go through HDMI, make sure your adapter or cable is rated for HDMI 2.0 at minimum, or HDMI 2.1 if you want 144Hz at 1440p or above.

Image source: Wikimedia Commons / Belkin+Abisys (CC BY-SA)
The Decision Tree: Does Your Mac Support 144Hz?
Follow these steps in order. Each one narrows down whether your setup can actually hit 144Hz.
Step 1: Identify Your Mac Model and Chip
Go to Apple Menu > About This Mac. Note the exact chip name. If it says "Apple M1" without "Pro" or "Max," you have the base chip.
Same for M2 or M3 without a suffix.
Base chips can do 144Hz but only at 1080p with the right cable. Pro and Max chips have more bandwidth and can handle higher resolutions at 144Hz.
Step 2: Check Your Available Ports
Look at the physical ports on your Mac. Do you have a built-in HDMI port? If so, what version?
Check Apple's tech specs page for your exact model. Do you have USB-C or Thunderbolt ports? All modern Macs do, and these are your best bet for high refresh rates.
Step 3: Match Your Monitor's Input to the Right Connection
Check what inputs your 144Hz monitor has. Most 144Hz gaming monitors offer DisplayPort and HDMI. If your monitor has DisplayPort, use a USB-C to DisplayPort cable.
That's the simplest, most reliable connection.
If your monitor only has HDMI, you need a USB-C to HDMI adapter rated for HDMI 2.0 or higher. For 144Hz at 1080p, HDMI 2.0 works. For 144Hz at 1440p, you need HDMI 2.1.
Step 4: Verify the Refresh Rate in macOS
Once connected, go to System Settings > Displays. Click on your external monitor. Look for a "Refresh Rate" dropdown.
If you only see 60Hz, hold the Option key on your keyboard and click "Scaled" in the resolution section. This reveals additional refresh rate options that macOS hides by default.
Select 144Hz from the list. If it doesn't appear, your cable, adapter, or port isn't providing enough bandwidth. Go back to Step 3 and try a different connection method.
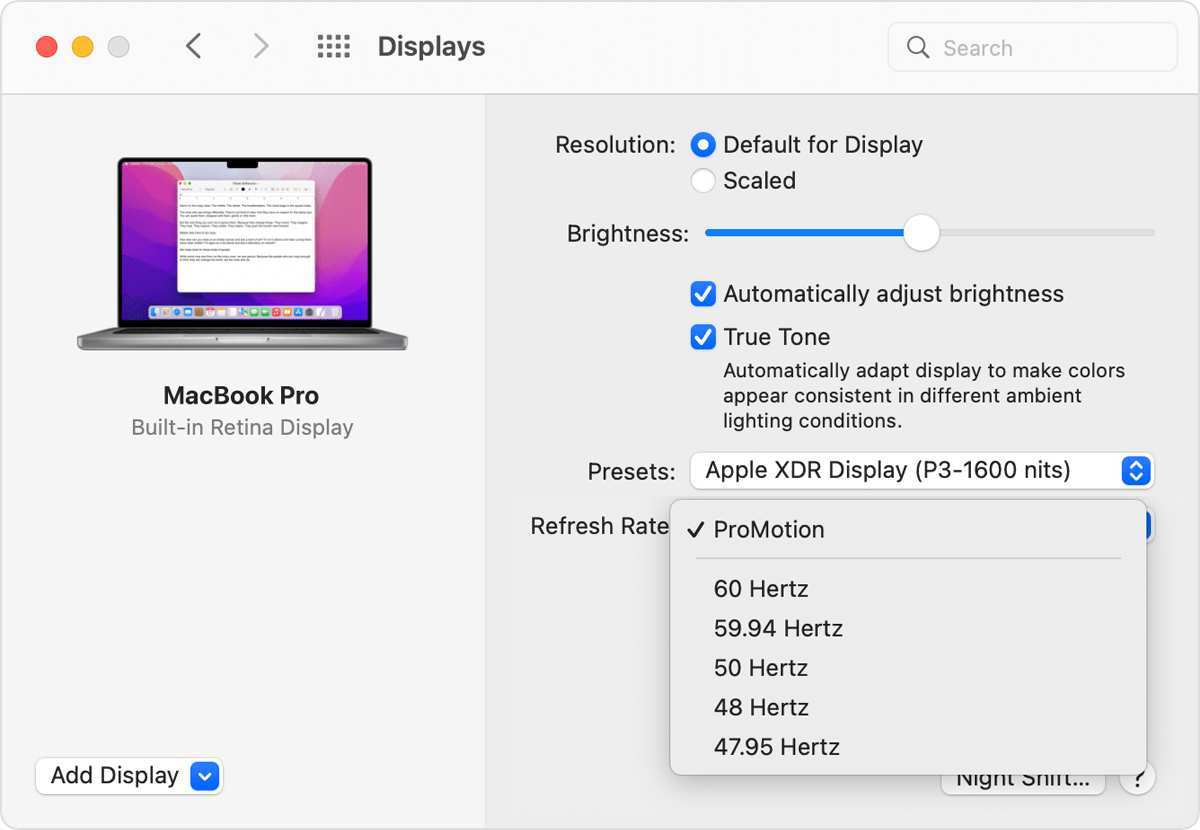
Image source: Bing (Web (fair-use with source credit))
Connection Options Ranked From Best to Worst
Not all connections are equal. Here's how they stack up for getting 144Hz working on a Mac.
1. USB-C to DisplayPort cable (best option)
This is the gold standard. Native DisplayPort signal, no conversion, minimal latency. Works with any Mac that has a USB-C port supporting DisplayPort Alt Mode, which is essentially every Mac made since 2016.
Get a cable rated for DisplayPort 1.4 for maximum bandwidth headroom.
2. USB-C to HDMI 2.1 adapter or cable
Works well if your Mac and adapter both support HDMI 2.1. Gives you 144Hz at 1440p and above. The catch is that many Macs only have HDMI 2.0 ports built in, and many USB-C to HDMI adapters are still HDMI 2.0.
Double-check the specs before buying.
3. Built-in HDMI port (Mac Studio, some iMacs)
Depends entirely on the HDMI version. Mac Studio has HDMI 2.1, which supports 144Hz at 1440p. Older Intel Macs may have HDMI 1.4 or 2.0, which limits you.
Check your specific model's tech specs.
4. USB-C hub or dock with HDMI output (least reliable)
Most multi-port USB-C hubs prioritize compatibility over bandwidth. Many cap HDMI output at 60Hz because they're designed for office monitors, not gaming displays. Some high-end docks support 144Hz, but you need to verify the specs carefully.
If you're using a hub and stuck at 60Hz, try a direct USB-C to DisplayPort cable instead.
Real-World Scenarios: What Works and What Doesn't
Let's get specific. Aggregate user reports and Apple's own tech specs paint a pretty clear picture of what happens in practice.
Base M1/M2 MacBook Air or 13" MacBook Pro
These machines support one external display. With a USB-C to DisplayPort cable, 144Hz at 1080p works reliably. At 1440p, you may need to drop to 120Hz or 1080p to hit a full 144Hz.
Going through HDMI on these models typically limits you to 60Hz at higher resolutions because the internal HDMI controller on the base chip is bandwidth-limited.
M1 Pro/Max or M2/M3 Pro/Max MacBook Pro
This is where things get comfortable. These chips drive multiple external displays with enough bandwidth for 144Hz at 1440p over a USB-C to DisplayPort cable. Users consistently report 144Hz working at 1440p without issues.
Some even push 4K at 120Hz, though 4K at 144Hz may require DisplayPort 1.4 with DSC (Display Stream Compression) support on the monitor.
Mac Studio or Mac Pro
The Mac Studio's HDMI 2.1 port supports 144Hz at 1440p and even 4K at higher refresh rates. Combined with Thunderbolt 4 ports, these machines are the most flexible Macs for high-refresh external displays. If you're building a setup around a Studio or Pro, 144Hz is essentially a given with proper cabling.
Intel Macs (2016–2020)
Results vary widely. Models with dedicated AMD GPUs (like the Radeon Pro 560X or Vega options) can drive 144Hz at 1080p. Models relying on integrated Intel graphics may struggle.
Check your specific model's external display support on Apple's support pages. Many Intel Macs work fine with 144Hz over Thunderbolt 3 to DisplayPort, but HDMI is often limited to 60Hz.
Common Mistakes That Lock You at 60Hz
Here's what we see trip people up most often.
Using a USB-C hub with HDMI output. Most hubs cap at 60Hz. They're built for spreadsheets, not frame rates. If you're plugged through a hub and stuck at 60Hz, try a direct cable connection first.
Not revealing hidden refresh rate options in macOS. You must hold Option and click "Scaled" to see all available refresh rates. Without this step, macOS often only shows 60Hz as an option.
Buying a USB-C to HDMI cable without checking the HDMI version. If the cable is HDMI 1.4, you won't get 144Hz at any resolution above 1080p, if at all. Look for HDMI 2.0 minimum, or better yet, skip HDMI entirely and use DisplayPort.
Assuming the monitor auto-detects the higher refresh rate. Many 144Hz monitors ship set to 60Hz in their on-screen display menu. You may need to manually enable the higher refresh rate in the monitor's own settings, then select it in macOS.
Using a DisplayPort cable rated for an older spec. DisplayPort 1.2 can handle 144Hz at 1080p but not much beyond that. For 144Hz at 1440p, you want a cable rated for DisplayPort 1.4.
Quick Troubleshooting Checklist
If you're connected but not seeing 144Hz, work through this list.
- Confirm your Mac model and chip in About This Mac.
- Verify your cable supports the right spec (DisplayPort 1.4 or HDMI 2.0+).
- Hold Option and click Scaled in Displays settings to reveal all refresh rates.
- Check your monitor's on-screen display menu for a refresh rate or "overclocking" setting.
- Try a different port on your Mac if available.
- Restart the Mac with the monitor connected.
- Update macOS. Apple has fixed display compatibility issues in point releases before.
- Test with a different cable to rule out a defective one.
What About G-Sync and FreeSync on Mac?
This is where Mac users hit a real wall. macOS does not support G-Sync. NVIDIA's adaptive sync technology simply doesn't have a macOS driver pathway. If G-Sync is a must-have for you, that's a Windows-only feature.
FreeSync works partially. macOS supports some FreeSync monitors over DisplayPort, but the implementation isn't as robust as on Windows. Some users report smooth adaptive sync. Others experience flickering or inconsistent behavior.
It depends heavily on the specific monitor model.
If adaptive sync is a priority, check user reports for your specific monitor with Mac before buying. Don't assume it'll work just because the monitor supports FreeSync.
Best 144Hz Monitors for Mac Users in 2025
You don't need a "Mac-specific" monitor. Any 144Hz monitor with a DisplayPort input will work with the right cable. That said, some models tend to play nicer with macOS based on user feedback.
Look for monitors with DisplayPort 1.4 input, USB-C input with DisplayPort Alt Mode, and firmware that's been updated recently. Brands like LG, Dell, ASUS, and Samsung all have 144Hz models that Mac users report success with.
A few categories worth considering.
1080p 144Hz monitors ($150, $250): Easiest to drive from any Mac. Great for gaming on base M1/M2 chips. The LG UltraGear series and ASUS VY line are popular picks.
1440p 144Hz monitors ($250, $400): The sweet spot for most Mac users. Sharp enough for productivity, fast enough for gaming. Works well with M1 Pro/Max and newer chips. The Dell S2721DGF and LG 27GP850 are frequently recommended.
4K 144Hz monitors ($500+): Demanding on the connection side. You need DisplayPort 1.4 with DSC or HDMI 2.1. Best suited for Mac Studio or M2/M3 Max machines. The Samsung Odyssey series and ASUS ROG Swift models fall here.
Image source: Bing (Web (fair-use with source credit))
Frequently Asked Questions
Can a MacBook Air run a 144Hz monitor?
Yes, a MacBook Air with a base M1 or M2 chip can output 144Hz to an external monitor. You need a USB-C to DisplayPort cable and you'll likely be limited to 1080p at 144Hz. The built-in display stays at 60Hz.
Only the external monitor gets the higher refresh rate.
Why is my 144Hz monitor stuck at 60Hz on Mac?
The most common cause is using a cable or adapter that doesn't support enough bandwidth. Switch to a USB-C to DisplayPort cable. Also hold Option and click "Scaled" in your Displays settings to reveal hidden refresh rate options.
Does macOS support 240Hz monitors?
Some Macs can drive 240Hz monitors, but only at lower resolutions like 1080p. The bandwidth requirements are significant. You need a high-quality DisplayPort 1.4 cable and a Mac with enough display pipeline bandwidth.
M2 and M3 Pro/Max chips handle this better than base chips.
Do I need a special cable for 144Hz on Mac?
You need a cable that supports enough bandwidth. A USB-C to DisplayPort 1.4 cable is the safest bet. Avoid cheap, no-name cables.
Look for cables from brands like Cable Matters, Anker, or Belkin that explicitly list DisplayPort 1.4 support.
Will a 144Hz monitor improve my Mac's everyday experience?
Yes, even outside of gaming. Scrolling, window animations, and cursor movement all feel noticeably smoother at 144Hz compared to 60Hz. Many users say they can't go back once they've tried it.
The difference is immediately visible in daily use.
The Bottom Line: Should You Buy a 144Hz Monitor for Your Mac?
If you have an M1 Pro/Max, M2/M3 Pro/Max, or any Mac Studio model, absolutely yes. A 144Hz monitor is a great upgrade and it'll work with a simple USB-C to DisplayPort cable. You'll get smoother motion in everything you do.
If you have a base M1/M2/M3 MacBook Air or 13-inch MacBook Pro, it's more limited. You can get 144Hz at 1080p with the right cable. That's still a solid improvement over 60Hz.
Just know that you won't have the resolution headroom that higher-end chips offer.
The key takeaway is this. The monitor is rarely the problem. It's almost always the cable, the adapter, or a hidden macOS setting.
Get those three things right and your 144Hz monitor will work exactly as expected with your Mac.
Troubleshooting When 144Hz Still Won't Show Up
You've checked the cable. You've held Option and clicked Scaled. But 1944Hz still won't appear.
Try these fixes in order.
Reset the display connection. Unplug the cable from both ends. Wait ten seconds. Plug the monitor end in first, then the Mac.
This forces macOS to re-read the monitor's EDID data, which tells the system what refresh rates are available.
Boot with the display connected. Some Macs only detect the full refresh rate range during startup. Shut down your Mac. Make sure the monitor is powered on and connected.
Then power on the Mac.
Try a different resolution first. Switch to a lower resolution, like 1080p. Check if 144Hz appears. If it does, your cable can't handle the bandwidth at higher resolutions.
You need a better cable.
**Check for firmware updates on the monitor.**LG, Samsung, and ASUS have all released firmware updates that fixed macOS compatibility issues. Visit the manufacturer's support page. Update over USB if your monitor supports it.
Delete problematic plist files. On older macOS versions, corrupted display preference files can cause issues. Open Terminal and run:
sudo rm /Library/Preferences/com.apple.windowserver.plist
Then restart. This resets all display settings to defaults.
If none of these work, you may have a hardware incompatibility between your specific Mac and monitor combination. Search MacRumors forums or Reddit's r/MacOS for your exact monitor model. Aggregate community reports are often more useful than generic troubleshooting guides.
Quick Compatibility Chart by Mac Model
| Mac Model | Chip | Max External 144Hz Resolution (Reliable) | Best Connection |
|---|---|---|---|
| MacBook Air (2022) | M2 | 1080p @ 144Hz | USB-C to DisplayPort 1.4 |
| MacBook Pro 14" (2021–2023) | M1 Pro/Max, M2 Pro/Max | 1440p @ 144Hz | USB-C to DisplayPort 1.4 |
| MacBook Pro 16" (2021–2023) | M1 Pro/Max, M2 Pro/Max | 1440p @ 144Hz, 4K @ 120Hz | USB-C to DisplayPort 1.4 |
| Mac mini (2023) | M2/M2 Pro | 1080p @ 144Hz (M2), 1440p @ 144Hz (M2 Pro) | USB-C to DisplayPort 1.4 or HDMI 2.1 |
| Mac Studio (2022–2023) | M2 Max/Ultra | 1440p @ 144Hz, 4K @ 144Hz | USB-C to DisplayPort 1.4 or HDMI 2.1 |
| iMac 24" (2021–2023) | M1/M3 | 1080p @ 144Hz | USB-C to DisplayPort 1.4 |
| Mac Pro (2023) | M2 Ultra | 1440p @ 144Hz, 4K @ 144Hz | USB-C to DisplayPort 1.4 |
This chart reflects aggregate user reports and manufacturer specifications. Individual results vary based on cable quality and monitor firmware.
What About Using a 144Hz Monitor for Non-Gaming Tasks?
You don't need to game to benefit from 144Hz on a Mac. The entire macOS interface feels smoother at higher refresh rates. Scrolling through web pages, dragging windows, and using Mission Control all look noticeably cleaner.
Motion blur is reduced significantly. If you spend hours reading documents or coding, the reduced eye strain from smoother scrolling is real. Many users report less fatigue during long work sessions on high-refresh external displays.
Video editors working with 120fps or 144fps footage can also benefit. Playing back high-frame-rate content at a matching refresh rate eliminates stutter. This requires setting both the monitor and the playback software to the correct refresh rate.
Final Recommendation
If you own a Mac with an M1 Pro/Max chip or newer, buy a 144Hz monitor with confidence. Use a quality USB-C to DisplayPort 1.4 cable. You'll get a great experience for both work and play.
If you own a base M1/M2/M3 MacBook Air or 13-inch MacBook Pro, a 144Hz monitor still works. Just set your expectations to 1080p at 144Hz. That's a meaningful upgrade over 60Hz for everyday use.
Avoid cheap USB-C hubs for video output. They're the number one cause of 60Hz lock-ups. A direct cable connection solves most problems.
Check your specific monitor model against community forums before buying. Some monitors play nicer with macOS than others. A few minutes of research saves hours of troubleshooting.
The bottom line is simple. 144Hz monitors absolutely work with most Macs. The connection method and settings make all difference. Get those right and you'll wonder how you ever went back to 60Hz.

Similar Posts