Can Curved Gaming Monitors Be Mounted
Can curved gaming monitors be mounted? Yes, absolutely. The vast majority of curved gaming monitors use standard VESA mounting patterns on the back, which means they work with virtually any off-the-shelf monitor arm or wall mount. But the curve itself introduces a few quirks that flat monitors don't deal with.
Once you know what to check, it's straightforward.
The key detail most people miss is that a curve radius, called "R" by manufacturers like Samsung and LG, determines how much gap you'll see between the back of the panel and a flat mount bracket. Per VESA's Flat Display Mounting Interface (FDMI) standards, compliance covers the screw pattern and screw size, not the contour of the housing behind it. So compatibility is confirmed, but fitment takes a bit more attention.
Let's walk through everything you need to know.
Quick Answer
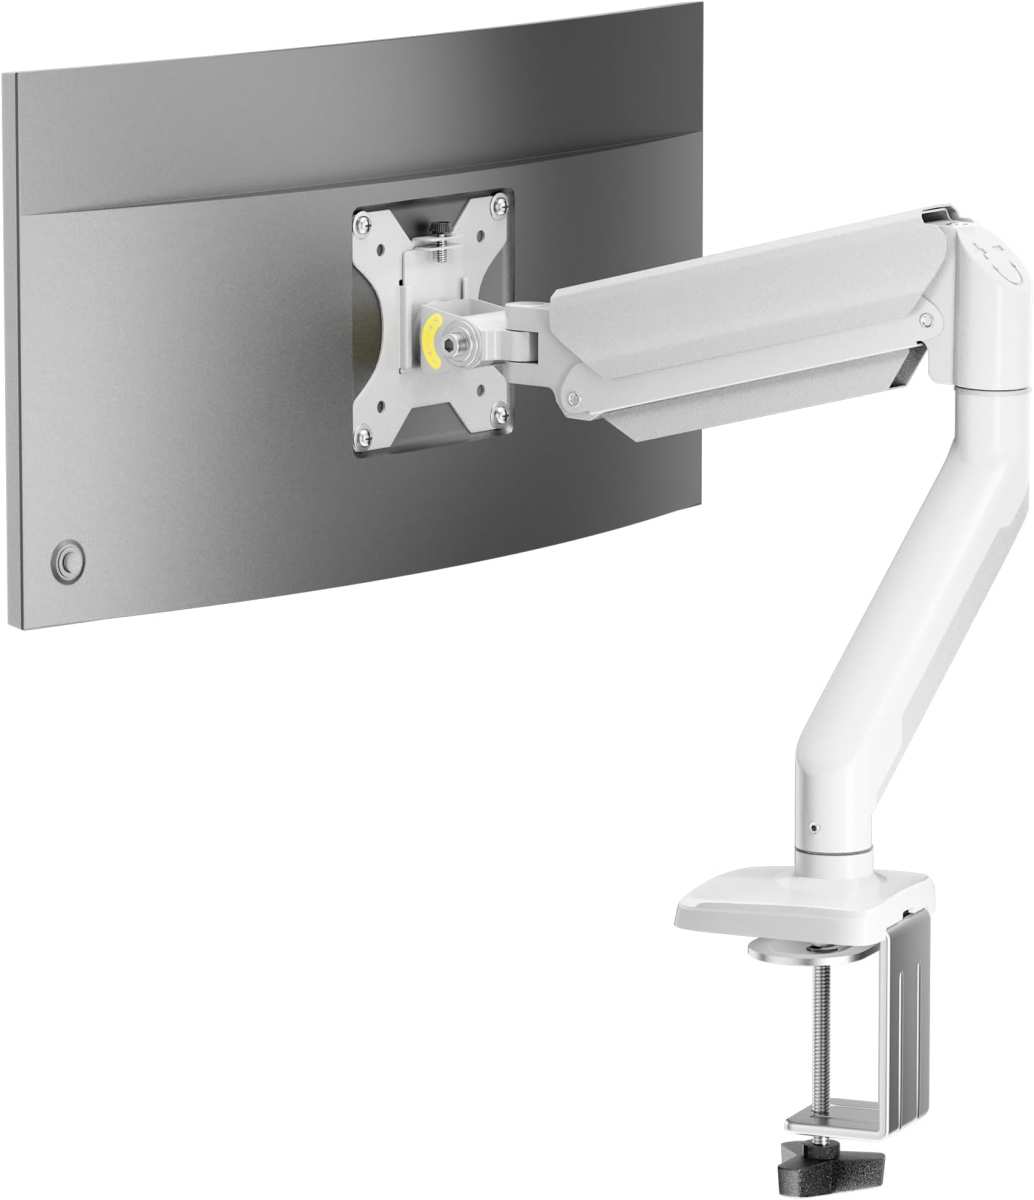
Curved gaming monitors can be mounted with standard VESA-compatible arms and brackets. Most models use a 75x75mm or 100x100mm VESA pattern. The curve radius (labeled as 1000R, 1500R, 1800R, or 3800R) affects how the rear panel sits against a flat mount.
Check your monitor's weight, VESA pattern, and available mounting surface before purchasing.
Why Curved Monitors Need Extra Mounting Attention
A flat monitor sits flush against a wall plate or mount bracket with even pressure across the entire VESA mounting area. A curved monitor doesn't. The housing on the back of a curved panel is, well, curved.
That means when you bolt a flat VESA bracket to it, only a portion of the bracket actually makes solid contact with the monitor's rear.
This creates two practical concerns. First, uneven pressure distribution. The screws and the center of the bracket bear most of the load instead of the whole contact area sharing it.
Second, clearance. Aggressive curves like 1000R push the center of the monitor further toward the wall or mount point compared to the edges. If your wall mount doesn't extend far enough, the bottom or top edge of the screen can press against the wall.
Neither of these issues makes mounting impossible. They just mean you need to choose the right mount and pay attention to specifications that flat-mount users can safely ignore.
The deeper the curve, the more these factors matter. A mild 3800R curve behaves almost like a flat panel when mounting. A tight 1000R curve, the kind Samsung and Corsair use on some of their gaming displays, creates a genuinely pronounced hump on the rear housing.
That's where most of the confusion comes from. People see the curve and assume it won't work with a mount at all. It does, but the fit details change.
What to Check Before You Buy a Mount for Your Curved Monitor
Before spending money on a mount arm or bracket, verify four things. Skip any one of them and you'll probably end up returning something or living with a setup that doesn't feel right.
VESA Pattern and Screw Compatibility
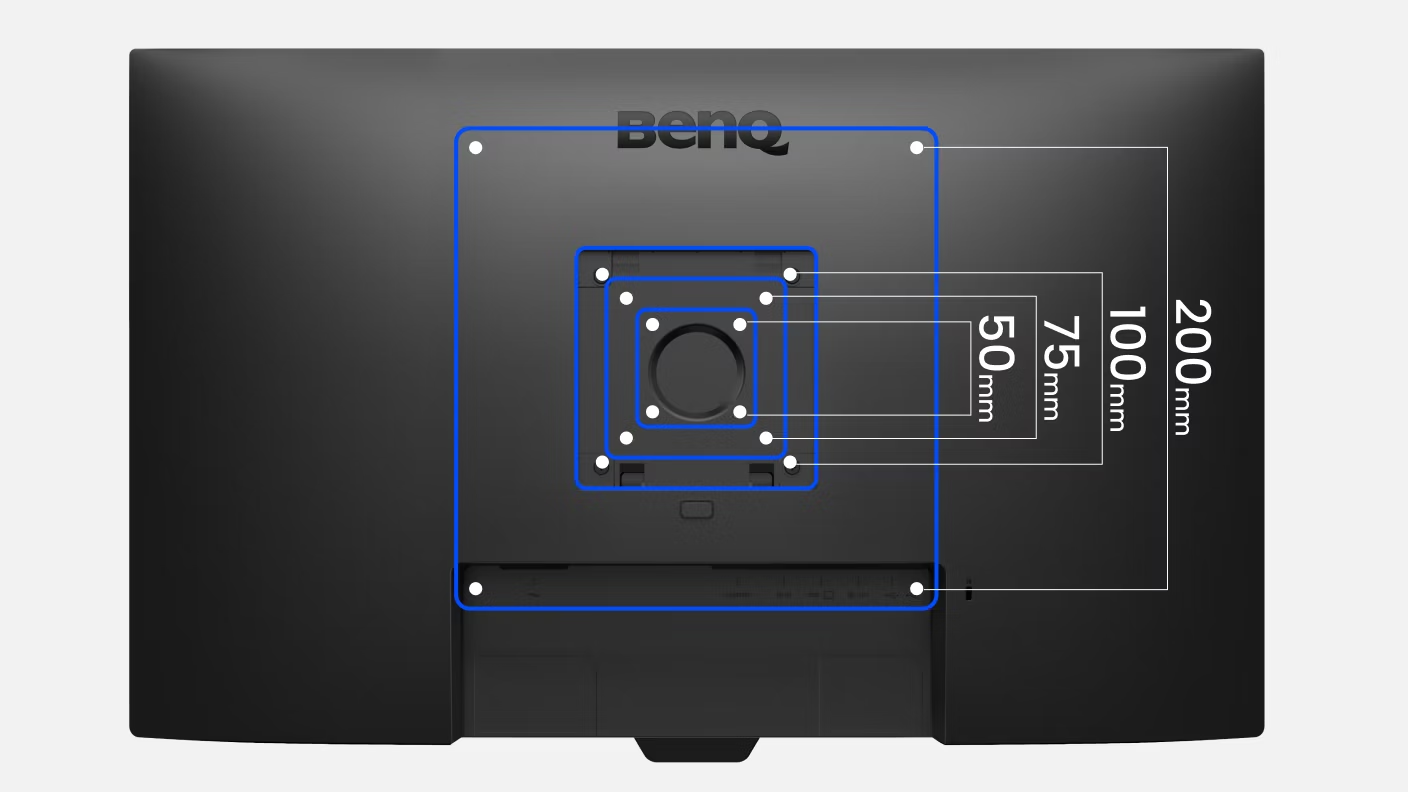
Almost every curved gaming monitor manufactured after 2018 uses one of two VESA patterns: 75x75mm or 100x100mm. The first number is horizontal spacing between screw holes, the second is vertical. Most monitors 32 inches and above use 100x100mm.
Smaller ultrawides and 27-inch curve models sometimes use 75x75mm.
The screws themselves are almost always M4 metric. The length varies, typically 10mm to 14mm, depending on how deep the threaded holes are in the monitor's rear housing. Most quality monitor arms include a selection of M4 screw lengths in the box.
Check your monitor's spec sheet or user manual for the exact pattern. Samsung, LG, Dell/Alienware, ASUS ROG, MSI, and Gigabyte all list VESA compatibility in their product specifications. If a monitor doesn't mention VESA at all, that's a red flag.
Some budget or older curve models use proprietary stand attachments with no standard mount pattern at all.
Monitor Weight vs. Arm Capacity
Curved monitors aren't unusually heavy compared to flat panels of the same size. A 34-inch curved ultrawide typically weighs between 5 and 8 kilograms without the stand. A 27-inch 1000R curved panel sits around 4 to 6 kilograms.
The important comparison is your monitor's weight against the rated capacity of the mount arm or bracket. Gas spring arms come in a wide range of capacities. Light-duty arms handle 2 to 5 kilograms.
Mid-range models cover 3 to 9 kilograms. Heavy-duty arms designed for ultrawides can support 7 to 18 kilograms.
Don't just meet the capacity. Exceed it. A monitor sitting right at the maximum rated weight of an arm leads to sagging over time, stiffness when adjusting, and potential failure of the gas spring mechanism.
Aim for a monitor weight that falls around 60 to 70 percent of the arm's stated maximum.
Curve Radius and Clearance (1000R vs. 1500R vs. 1800R)
The "R" number tells you the radius in millimeters of the circle that the screen curvature matches. A 1000R curve matches a circle with a 1,000mm radius. That's a tight, pronounced curve.
A 1500R curve is noticeably gentler. 1800R is fairly subtle. 3800R is barely perceptible compared to flat.
For mounting purposes, tighter curves create more clearance issues because the midpoint of the screen protrudes further backward relative to the edges. This matters most for fixed wall mounts that sit close to the wall surface. An articulating arm that extends 20 or more inches from the wall gives the curve enough breathing room.
A fixed mount with only 2 to 3 inches of offset might not.
If you're running a 1000R monitor on a fixed wall mount, measure the depth of the mount's wall plate and the monitor's stand attachment point before committing. Some 1000R panels need at least 4 to 6 inches of extension from the wall to prevent the bottom edge of the screen from making contact.
The Flat Mounting Zone Problem
Here's the thing most product reviews skip. Even though the monitor housing curves, the VESA mounting area on the back sometimes includes a flat mounting zone. This is a recessed or flat section specifically designed for mount compatibility.
Samsung uses this approach on several Odyssey series models. ASUS ROG panels often have it too.
When a monitor has a flat mounting zone, the VESA bracket sits flush against that flat area. The curve of the panel doesn't create uneven pressure because the bracket isn't touching the curved section at all. If your monitor has this feature, mounting becomes as simple as it is on a flat panel.
Not every curved monitor has a flat mounting zone though. Some models curve across the entire rear housing with no recessed flat section. In that case, the VESA bracket bridges across the curve with the screws and center of the bracket carrying the load.
This is manageable with decent hardware. It's just something to be aware of and worth checking in your specific monitor's manual or spec documentation.
Curved Monitor Mount Options Compared
Not every mount type works equally well with every curved monitor. The right pick depends on your curve radius, monitor weight, desk setup, and how you want the screen positioned.
Full-Articulating Gas Spring Arms
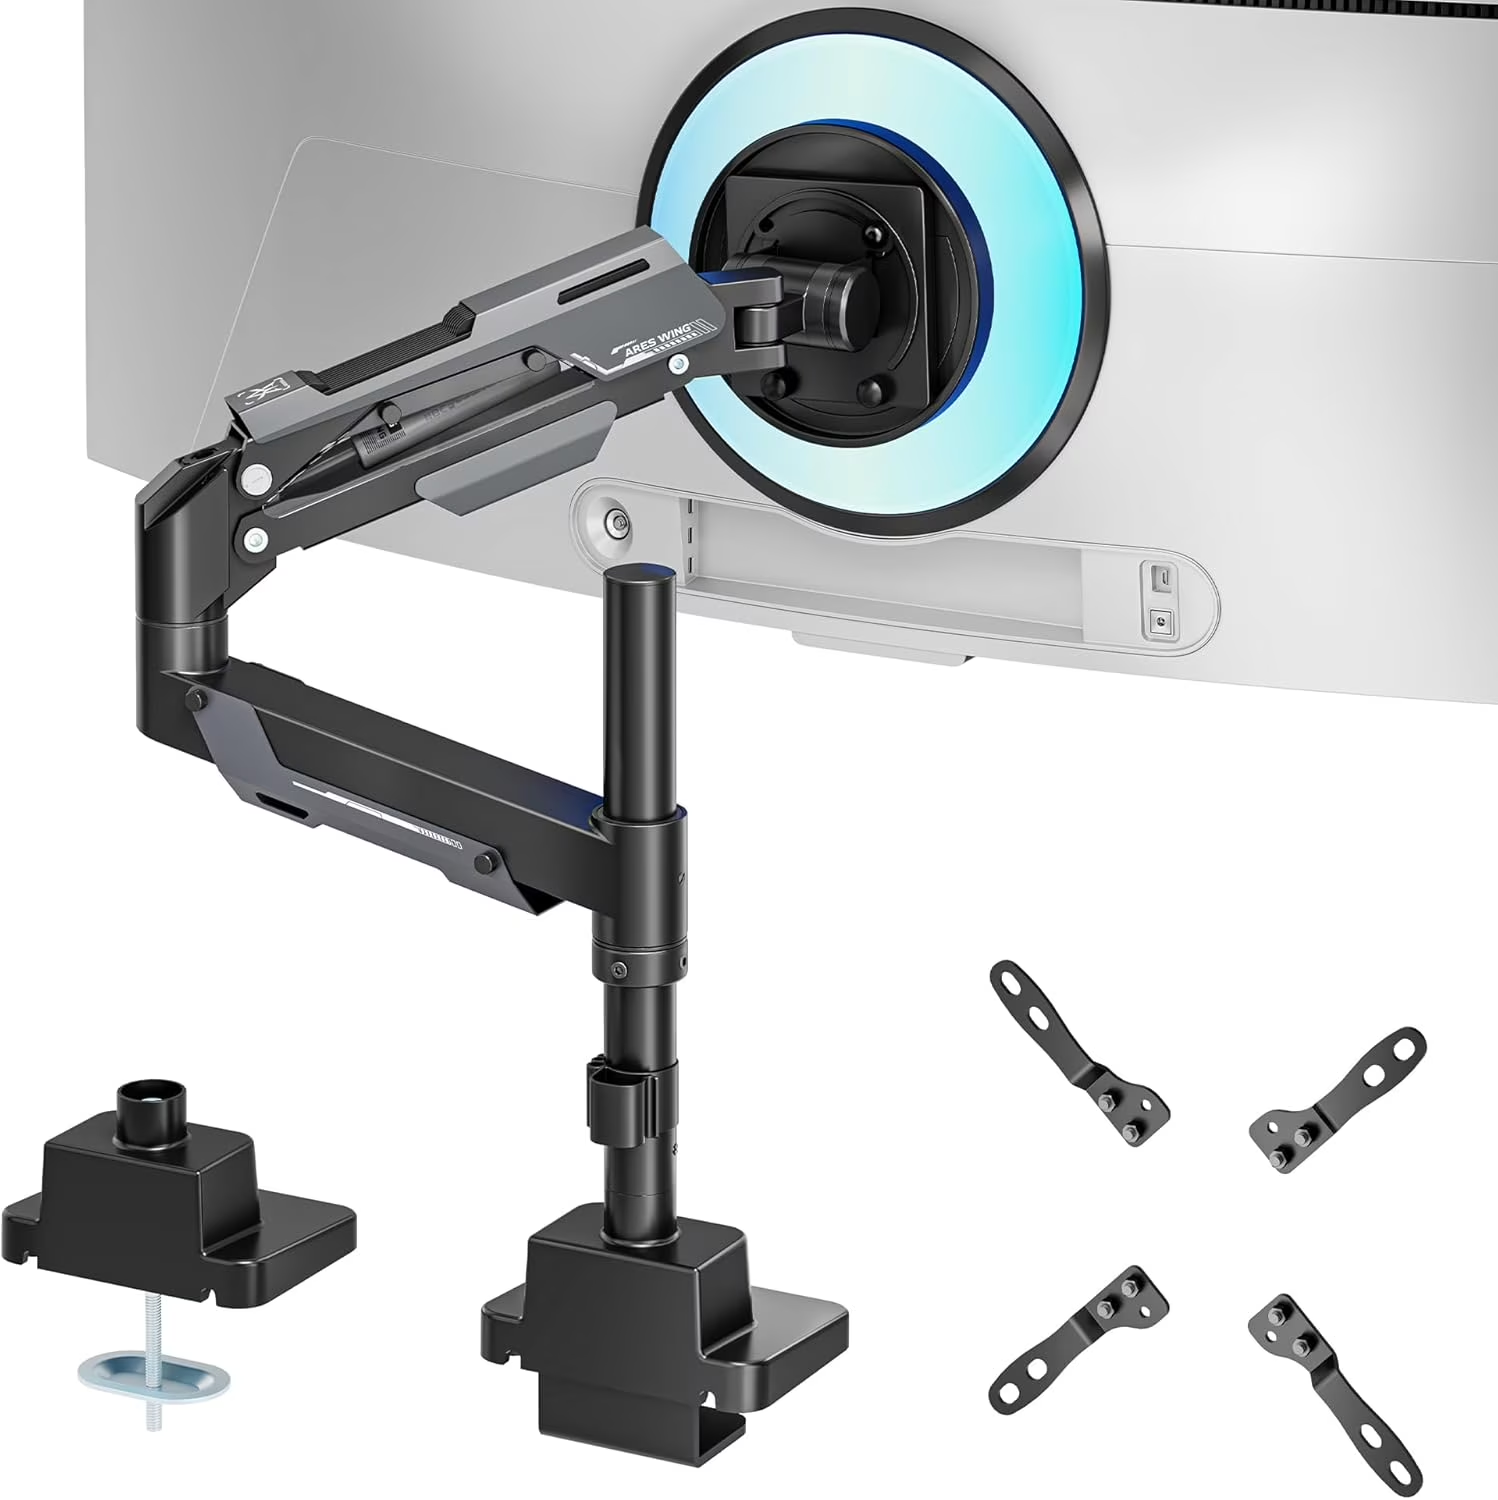
This is the most popular option for curved gaming monitors, and for good reason. A gas spring arm gives you movement in every direction: tilt, swivel, height adjustment, and rotation from landscape to portrait. The gas spring mechanism counterbalances the monitor's weight so it feels almost weightless when you move it.
For curved monitors, articulation matters. You can extend the screen away from the wall or monitor riser, which solves the clearance problem that tight curves create. Most quality articulating arms extend between 20 and 30 inches from the base, giving even a 1000R panel plenty of room.
The downside is price. A reliable gas spring arm runs anywhere from $30 for budget models to $200-plus for premium brands like Humanscale or Ergotron, as of 2026. Budget arms sometimes struggle with heavier ultrawides in the 8-plus kilogram range, where the gas spring either can't hold position or feels stiff during adjustment.
Mid-range options between $50 and $80 tend to hit the sweet spot for single curved monitors up to 38 inches.
Look for arms that specify compatibility with curved or ultrawide monitors. Some newer models don't say it explicitly, but most arms with VESA 75×75 and 100×100 support handle curved panels without issue. Quick-release VESA plates are a nice bonus if you ever want to swap monitors.
Fixed Wall Mounts
Wall mounts hold the monitor in a set position with minimal or no articulation. They look clean and work well in spaces where you don't need to adjust the screen often. For curved monitors, they work as long as the mount provides enough depth to clear the curve.
The problem with fixed mounts and aggressive curves comes back to clearance. A standard fixed wall mount holds the monitor anywhere from 1.5 to 4 inches from the wall surface. That's fine for a 1500R or 1800R panel.
A 1000R curve might cause the lower or upper edge of the screen to contact the wall. Before buying, check the mount's depth and compare it to your monitor's rear protrusion at the VESA point.
Fixed mounts also lock you into one height and angle. For a gaming setup where you might switch between sitting and standing, or where you want to share screen visibility with someone across the room, that lack of adjustment can be limiting. They're more suited to secondary displays, office multitasking monitors, or wall-mounted setup in a clean entertainment space.
The cost advantage is real. Basic fixed wall mounts run $20 to $40. Heavy-duty fixed mounts for larger ultrawides go up to around $70.
If your situation doesn't require articulation, a fixed mount is the most budget-friendly path.
Desk Clamp vs. Grommet Mount
Both of these are base types for monitor arms, meaning you need them whether you go with a gas spring or a mechanical arm. The choice between them depends on your desk.
A clamp mount attaches to the edge of your desk by tightening a metal plate against the underside. It's the most common option and works on most standard wood, laminate, or particle board desks. The downsides: it can't work on glass desks, and it might not open wide enough for thick solid-wood desks over 2 or 3 inches thick.
Most clamps accommodate desks between 0.4 and 2.4 inches thick, roughly 10 to 60mm.
A grommet mount inserts through a pre-existing hole in your desk and bolts from underneath. If your desk already has a cable management hole in the right spot, this is perfect. It's more stable than a clamp and doesn't scratch the desk surface.
The catch is you need a hole that fits the mount's stem, usually between 0.8 and 2 inches in diameter, or you need to drill one yourself.
For curved monitors, gromtet mounts can be slightly more stable because the mount stem has a lower profile on the desk surface. This helps with the weight distribution on larger curved displays. Either base type monitors and brackets handle the curve itself the same way.
The difference is in desk compatibility and long-term stability under weight.
| Mount Type | Best For | Weight Range | Curve Compatibility | Price Range |
|---|---|---|---|---|
| Full-articulating gas spring arm | Adjustable multi-position use, gaming setups | 2 to 18 kg depending on model | Excellent; extension clears curve | $30 to $200 |
| Fixed wall mount | Permanent setups, clean aesthetic | Varies by model | Good for 1500R+, check depth for 1000R | $20 to $70 |
| Desk clamp (arm base) | Most wood/laminate desks | Dependent on arm, not base | Same as arm selection | Included with arm |
| Grommet mount (arm base) | Desks with existing cable holes, max stability | Dependent on arm, not base | Same as arm selection | Included with arm |
| Dual-monitor arm | Two curved or mixed flat/curved setups | Must support combined weight | Good with sufficient extension per arm | $60 to $300 |
Step-by-Step: How to Mount a Curved Gaming Monitor
The actual mounting process takes about 15 to 30 minutes for a single monitor. It's not complicated, but doing it right the first time saves you from wobbles, cable mess, and frustration later.
Step 1: Remove the Factory Stand
Most curved gaming monitors ship with a stand that attaches via a quick-release clip or a set of screws on the back. Lay the monitor face-down on a clean, soft surface. A towel or the monitor's original packaging foam works well, since you don't want to scratch the screen.
Press the release button or remove the retaining screws. The stand should lift straight off. Don't force it.
If it won't budge, check the user manual for your specific model because some stands have a secondary locking tab. Keep the stand and hardware in a bag in case you ever want to switch back.
Step 2: Attach the VESA Plate to the Monitor
Your monitor arm or wall mount includes a VESA mounting plate. Line up the holes on the plate with the VESA pattern on the back of the curved monitor. If the rear housing is curved and the plate is flat, you might notice a small gap at the top or bottom of the plate.
That's normal as long as the screws are seating properly.
Use the M4 screws that came with your mount, not the ones from the factory stand, since they're often different lengths. Finger-tighten all four screws first, then snug them down with a Phillips screwdriver. Don't overtighten.
You're threading into plastic or thin metal on most monitors. If the screw feels like it's binding, back it out and try again.
Step 3: Secure the Arm or Bracket to Your Desk or Wall
For a desk clamp, position the mount's base at the edge of your desk where you want the monitor centered. Tighten the clamp from underneath until it feels solid with no wobble. If your desk is thicker than the clamp's rated range, you'll need a different mounting method.
For a wall mount, mark the drill holes using a level to make sure the bracket won't sit crooked. Stud mounting is always preferred. If you can't hit at least one stud, use toggle bolts rated for at least twice your monitor's weight.
The drywall alone won't cut it for anything over about 5 kilograms. Anchoring into wood studs with lag bolts gives you a rock-solid setup that won't shift over time.
Step 4: Hook the Monitor Onto the Mount
Many gas spring arms use a quick-release system where you hook the VESA plate onto the arm's mounting head. Lift the monitor and guide the plate onto the rail or bracket. Click it into place, then check that it's fully seated before letting go.
Nothing ruins your day faster than watching a monitor slip off a half-secured mount.
Step 5: Adjust Tension, Angle, and Cable Routing
Once mounted, the monitor might drift up or down. Adjust the gas spring tension on the arm until the monitor stays put at any position. Most arms have an Allen wrench adjustment hidden in the joint or along the arm shaft.
Turn it incrementally. Too much tension and the monitor floats upward. Too little and it sinks.
Route your display and power cables through any cable management channels on the arm so they don't dangle. Leave enough slack in the cables that you can adjust the monitor's position without pulling anything tight. The last thing you want is a cable that unplugs itself every time you tilt the screen.
Common Mistakes People Make With Curved Monitor Mounts
Our research shows the same patterns coming up repeatedly in user reviews and forum posts. Avoiding these saves time, money, and occasionally a cracked monitor.
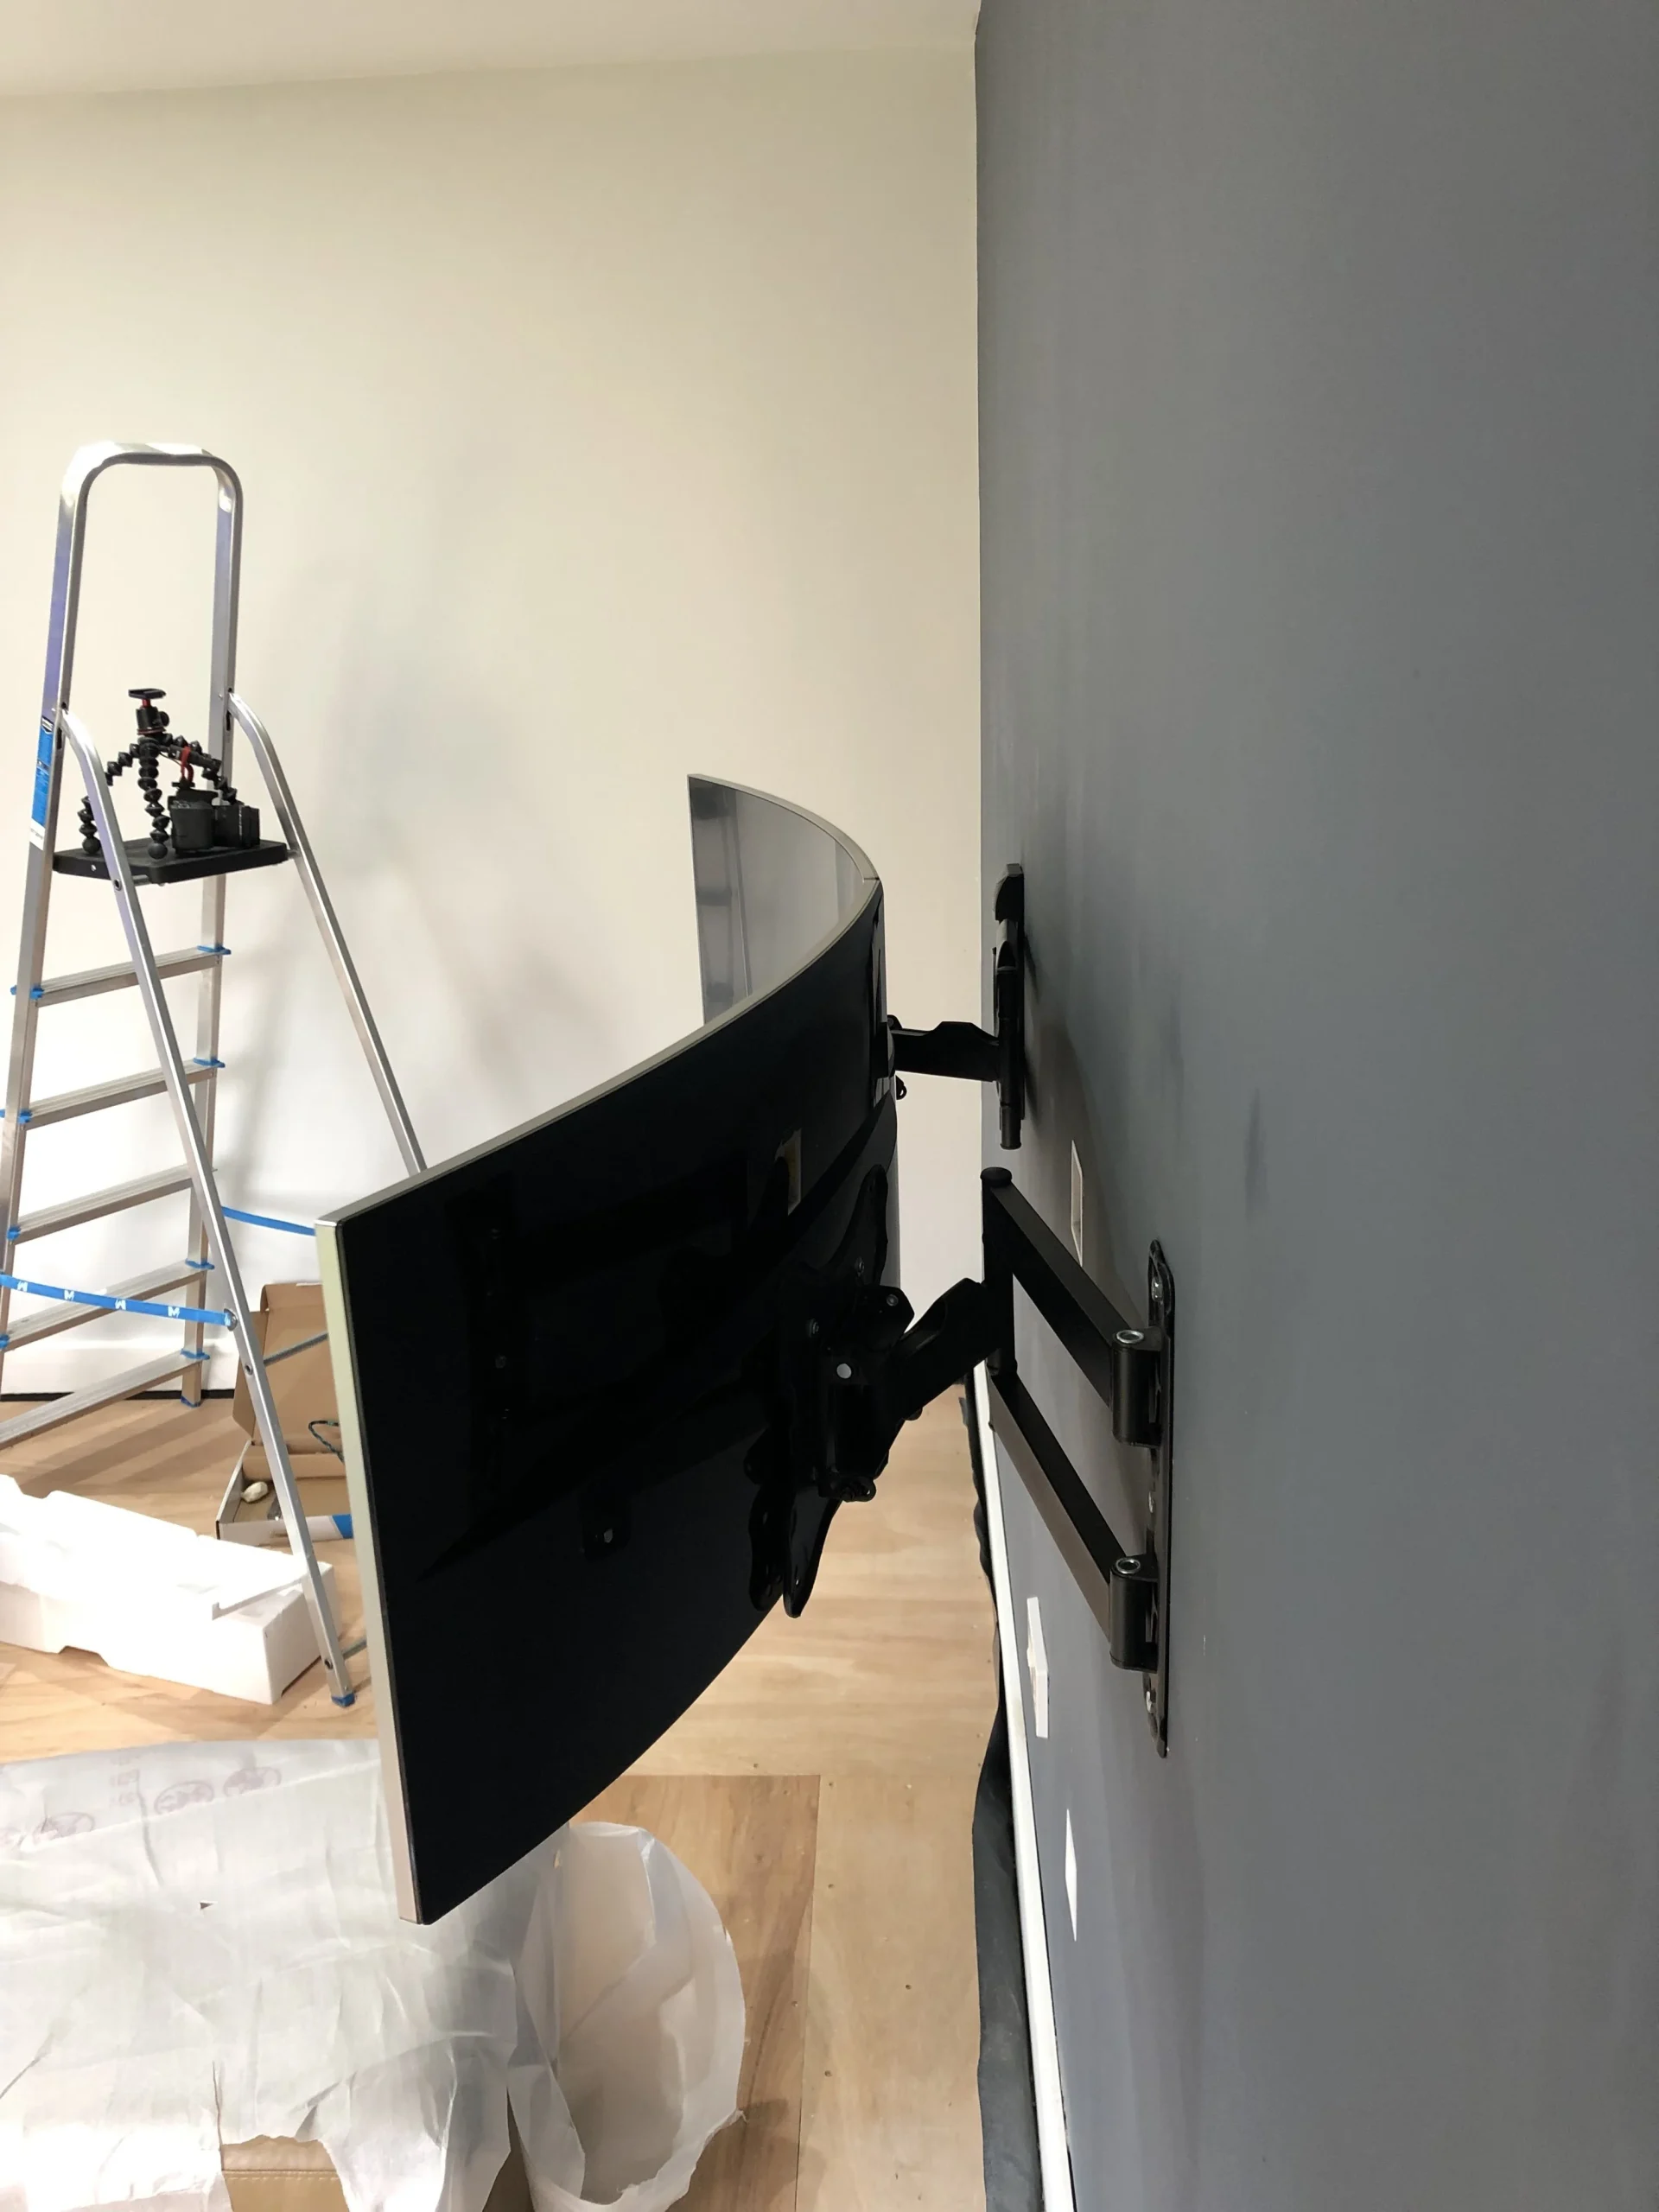
- Ignoring the curve radius when choosing a fixed wall mount. A 1000R monitor on a shallow mount presses the screen edges against the wall. This scratches the bezel and limits tilt range. Always check depth clearance.
- Overlooking desk thickness with clamp mounts. A 3-inch solid oak desk won't fit in a clamp rated for 60mm max. You'll end up forcing it and potentially cracking the wood or stripping the clamp threads.
- Mounting on drywall without appropriate anchors. Standard plastic wall anchors pull out under monitor weight over time. Toggle bolts in drywall or lag screws in studs are the only reliable options.
- Using screws that are too long for the VESA holes. An M4 screw that's even 3 or 4mm too long can crack the internal mounting point on the monitor. Use the screws included with the mount or measure the hole depth precisely.
- Forgetting to adjust gas spring tension. A monitor that drifts out of position daily is almost always a tension issue, not a hardware incompatibility. Spend that extra minute dialing it in.
- Not checking warranty terms. Some monitor manufacturers void the warranty if you use a third-party mount, although this is uncommon. Check the warranty documentation before making any decision.
Real-World Scenarios: What Works and What Doesn't
Looking at aggregate feedback from verified buyers and editorial reports gives a good picture of what holds up. Here are three common setups and how they typically play out.
Single 34" Ultrawide Curved on a Mid-Range Arm
The 34-inch curved ultrawide, like the LG 34GN850 or Samsung Odyssey G5, weighs around 6 to 7 kilograms without the stand. A mid-range gas spring arm in the $50 to $80 range handles this weight with room to spare. Most verified users on forums report no sag issues after six months.
Works well with both clamp and grommet desk mounting. The 1900R curve on these models creates minimal clearance issues.
However, budget arms rated at exactly 7 kilograms often start to show downward drift after a few months. Spending $10 to $15 more on an arm with a higher weight capacity solves this. The arm doesn't need to be specified for curved screens; any solid single-arm gas spring unit works.
27" 1000R Curved on a Wall Mount
This is the scenario that catches people off guard since tight curves and shallow wall mounts conflict. The 1000R curve on 27-inch models protrudes about 60mm further at the center of the screen compared to the VESA mounting area. A basic fixed wall mount gives only 25 to 35mm of extension.
That's not enough. The screen's bottom edge touches the wall when tilted.
The fix is a wall mount with at least 100mm of extension or an articulating wall arm that swings outward. Several models from Sanus and Ergotron offer this kind of reach for $50 to $90. Once mounted, the 100R curve creates an immersive field of sight that flat mounts can't match.
Many sim racing enthusiasts favor this setup for the sense of wrap-around visibility.
Dual Curved Monitors on a Twin Arm Setup
Running two curved monitors side by side is popular for productivity and trading desks. A dual-mount arm must handle the combined weight. Two 27-inch curved panels at roughly 5 kilograms each mean a total of 10 kilograms, and the arm accommodates that.
The main issue: the inner edges of the two screens might touch at the curve unless the arm has enough separation.
Arm bases designed for curved screens adjust the spacing wider to prevent contact, costing roughly $120 to $200 for a reliable dual gas spring unit. Standard dual arms work too, but you'll need to push the monitors apart well enough to avoid edge contact. Curved bezels often sit flush at the edges, which adds another centimeter or two of clearance.
Costs and What to Expect to Spend
Mount pricing varies widely based on type and build quality. Here's a realistic breakdown as of 2026.
A basic gas spring arm for a single curved monitor runs $30 to $50. These work fine for lighter panels up to 6 kilograms. Expect some wobble at full extension and potential sag over time.
Mid-range arms from $50 to $90 offer noticeably better build quality, smoother articulation, and more reliable gas springs. This is the sweet spot for most curved gaming monitors.
Premium arms from $100 to $200 come with better warranties, integrated USB hubs, and refined adjustment mechanisms. If you're mounting a heavy ultrawide or you want a setup that lasts for years, this tier is worth it. Fixed wall mounts stay cheap at $20 to $40 for basic models, or $50 to $80 for heavy-duty versions with articulation.
Dual-arm setups start around $60 for budget options and go up to $250 for premium dual articulating units. Add $10 to $20 if you need a separate cable management kit. The total cost of mounting a curved monitor, including the mount and any accessories, typically lands between $30 and $150 for a single screen.
Frequently Asked Questions
Can I use a regular monitor arm for a curved gaming monitor?
Yes. Any monitor arm with the correct VESA pattern (75x75mm or 100x100mm) and sufficient weight capacity works with a curved monitor. The curve of the screen doesn't affect the arm's attachment point.
Just make sure the arm has enough extension to clear the curve from your desk or wall.
Does the curve radius affect which mount I need?
It does, especially for fixed wall mounts. A 1000R curve needs more depth clearance than a 1500R or 1800R curve. For articulating arms, the curve radius matters less because you can extend the monitor outward.
Check the mount's depth or extension specs against your monitor's rear protrusion.
Will mounting a curved monitor void the warranty?
Most manufacturers don't void the warranty for using third-party mounts as long as you use the correct VESA pattern and screws. Some brands, particularly certain Dell and ASUS models, have specific warranty language about mounting. Check your warranty documentation to be sure.
Can I mount two curved monitors on one dual arm?
Yes, but make sure the dual arm has enough weight capacity for both monitors combined. Also check that the arm positions the monitors far enough apart that the curved edges don't touch. Some dual arms designed for curved screens have wider spacing adjustments to prevent this.
How much weight can a monitor arm hold for a curved screen?
It depends on the arm. Budget arms handle 2 to 5 kilograms. Mid-range arms support 3 to 9 kilograms.
Heavy-duty arms go up to 18 kilograms. Your monitor's weight should fall at around 60 to 70 percent of the arm's maximum rated capacity for the best long-term performance.
Is a desk clamp or grommet mount better for curved monitors?
Both work fine. A grommet mount offers slightly more stability because it bolts through the desk rather than clamping to the edge. If your desk has a cable management hole in the right spot, grommet is the better choice.
If not, a quality clamp mount holds just as well for most curved gaming monitors.

Similar Posts