Is Touchscreen Monitor Good for Editing Photos
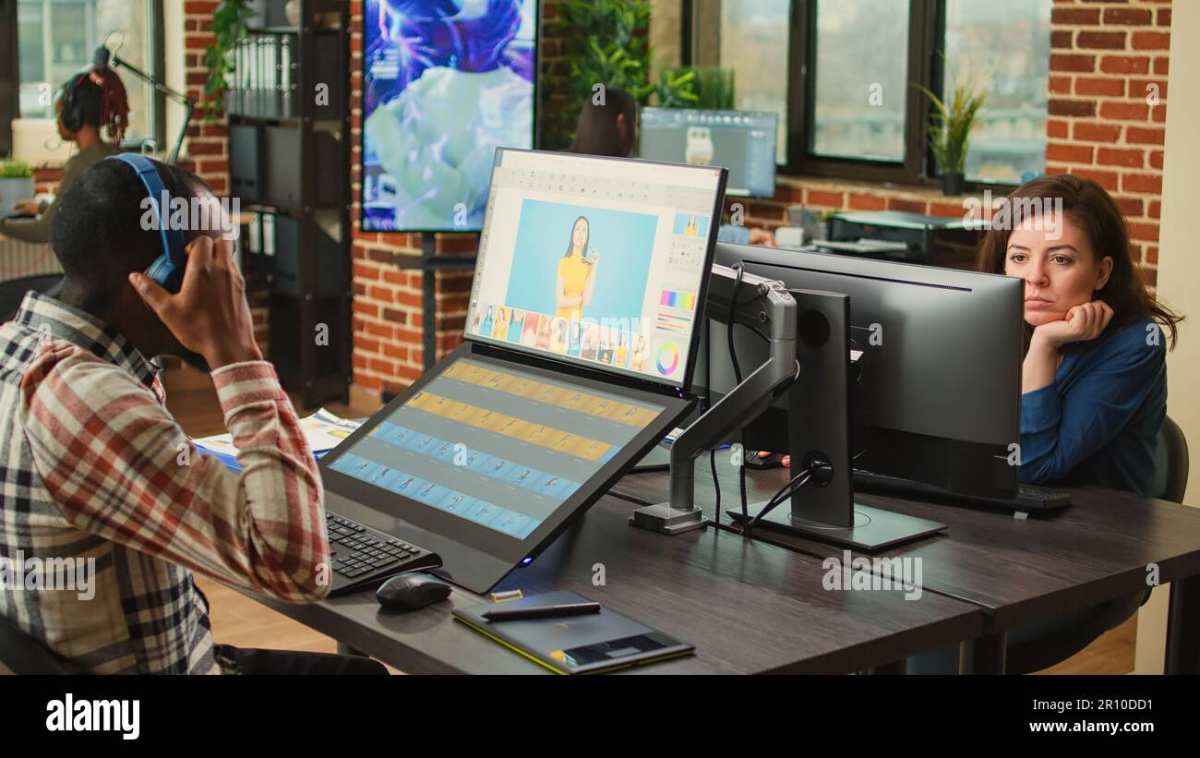
Is a touchscreen monitor good for editing photos? The honest answer is: it depends entirely on what kind of editing you do and which specs matter most to you. A touchscreen can speed up some tasks like culling and quick adjustments. But it can also introduce problems like glare, fingerprints, and color accuracy tradeoffs that matter a lot for professional work.
In our research, we've found that the touch feature itself rarely makes or breaks a photo editing experience. What actually matters is what's underneath: color gamut coverage, panel type, bit depth, and whether the display supports hardware calibration. These specs determine whether your edits look right when they leave your screen.
Let's break down when a touchscreen earns its place on your desk and when it just gets in the way.

Quick Answer
A touchscreen monitor can be good for photo editing. It works well for culling, rating, and gesture-based adjustments. It falls short for color-critical grading and pixel-level retouching.
The underlying panel quality matters far more than the touch feature. Buy touch if it fits your workflow. Skip it if color accuracy is your top priority.
Why This Question Doesn't Have a Simple Yes or No
Most articles give you a one-word answer and call it a day. That's not helpful here because the real answer shifts based on your role, your budget, and what "editing" means to you.
A wedding photographer culling through 2,000 RAW files has completely different needs than a commercial retoucher doing skin work for a billboard print. The wedding shooter might love touch for quickly swiping through images and rating them. The retoucher needs a reference-grade display with a built-in calibration sensor, and those rarely come with touch layers.
Here's another angle people miss. Some photographers buy a touchscreen expecting it to replace their mouse or tablet. It doesn't.
Touch is great for broad strokes, literally and figuratively. But fine detail work, like cloning out a stray hair or dodging a specific cheekbone, still requires precision input. That's where a stylus or mouse wins.
The key is figuring out what percentage of your editing time you spend on each type of task. If 80% of your work is Lightroom catalog management and quick adjustments, touch adds real value. If you live in Photoshop doing composites and frequency separation, you'll mostly ignore the touch layer.
What Makes a Monitor Actually Good for Photo Editing
Before we talk about touchscreens specifically, we need to get the baseline right. A good photo editing monitor has to meet certain thresholds regardless of whether it responds to touch. Here's what matters.
Color accuracy is measured using Delta E (ΔE), which tells you how far off a displayed color is from the reference. For professional photo editing, you want a Delta E below 2 across the display. Some high-end monitors hit below 1 out of the box.
When Delta E creeps above 3, your eyes start picking up the difference, and your edits won't match your output.
Color gamut coverage defines the range of colors the monitor can show. The minimum viable standard is 100% sRGB. If you're preparing images for print or wide-gamut output, you need 95% to 99% Adobe RGB coverage.
For video and cinema work, DCI-P3 coverage above 95% is the target. A touchscreen that only covers 90% sRGB isn't suitable for professional editing, touch or not.
Panel type affects viewing angles, color consistency, and contrast. IPS panels are the standard for photo editing because they maintain color accuracy at off-angles. VA panels offer better contrast but can shift colors when you move your head.
OLED delivers incredible contrast and true blacks, but burn-in risk and price are real considerations. As of 2026, most professional touchscreen monitors still use IPS technology.
Bit depth determines how many distinct colors the display can show. An 8-bit panel displays about 16.7 million colors. A true 10-bit panel shows over a billion.
The difference matters most in smooth gradients, like skies and studio backdrops. Many monitors use 8-bit plus FRC (frame rate control) to simulate 10-bit, which is decent but not identical to true 10-bit.
Hardware calibration is the ability to load a custom ICC profile directly into the monitor's internal LUT (look-up table). This bypasses your computer's graphics card LUT, which means more accurate colors and finer gradation control. Monitors from the Eizo ColorEdge SW series and some BenQ SW models support this.
It's a significant advantage for color-critical work.
If a touchscreen monitor hits all these marks, it can absolutely work for photo editing. The problem is that most consumer and prosumer touchscreens prioritize the touch feature over these fundamentals. You have to look carefully at the specs, not just the marketing.
How Touchscreen Tech Changes the Equation
Adding touch to a monitor isn't as simple as slapping a sensor layer on top. It changes the display's physical properties in ways that directly affect your editing.
The touch layer reduces brightness. That capacitive layer sitting on top of the panel absorbs and reflects some of the backlight. Manufacturer specifications typically show brightness drops of 10% to 15% on touch models compared to their non-touch equivalents. For a monitor that starts at 400 nits, that means you're effectively losing 40 to 60 nits of brightness.
In a bright room or near a window, that can matter.
Parallax is the gap between where your finger touches and where the pixel actually sits. On thicker glass or with certain touch technologies, this offset can be 1 to 3 millimeters. When you're trying to click a tiny adjustment slider in Lightroom's Develop module, that gap creates a disconnect between what you see and where you're pointing. Pen input reduces parallax significantly because the tip is closer to the actual display layer.
Glare and fingerprints are constant battle. Touchscreens attract fingerprints like nothing else. Every smudge diffuses light and creates a local contrast shift that tricks your eye into thinking the color or brightness is off. Matte coatings help but can introduce a slight graininess that affects how you perceive fine detail.
Glossy touchscreens look gorgeous when clean and terrible after five minutes of use.
Touch latency affects how responsive the interface feels. Modern capacitive touchscreens typically report at 6 to 20ms. For browsing and scrolling, that's imperceptible.
For dragging a graduated filter or painting a mask, you'll notice the lag, especially if you're used to a wired stylus with sub-10ms response.
Accidental touch inputs are a real workflow killer. Your wrist brushes the screen while editing with a mouse. Your palm registers a gesture you didn't intend.
Most modern touchscreens and operating systems have palm rejection, but it's not perfect, and Photoshop doesn't always play nicely with Windows touch input.
The bottom line: touch adds value to specific editing tasks. But it also subtracts from others. You're trading precision and consistency for convenience in certain workflows.
Touchscreen vs. Non-Touch: Side-by-Side Comparison
Let's lay it out directly. Here's how touchscreen and non-touch monitors stack up for photo editing based on aggregate specs and workflow analysis.
| Factor | Touchscreen Monitor | Non-Touch Monitor |
|---|---|---|
| Color accuracy potential | Good to excellent (model dependent) | Excellent (more reference-grade options) |
| Price for equivalent specs | Typically 15% to 30% premium | Baseline pricing |
| Culling and browsing speed | Faster with gestures | Standard with mouse/keyboard |
| Precision retouching | Challenging without pen | Natural with mouse or tablet |
| Accidental input risk | Present | None |
| Smudge and glare issues | Constant | None |
| Hardware calibration options | Limited availability | Widely available |
| Brightness output | Slightly reduced by touch layer | Full backlight output |
| Pen/stylus support | Available on some models | Separate tablet or display needed |
Touchscreen wins when you're doing high-volume image review, quick Lightroom adjustments, gesture-based zooming and panning, and collaborative sessions where multiple people interact with the screen.
Non-touch wins when you need consistent color accuracy across a full hardware calibration workflow, pixel-level precision in Photoshop, maximum brightness and contrast, and the best value per dollar spent on image quality.
The gap narrows when you use a stylus with the touchscreen rather than your fingers. A pen with pressure sensitivity and tilt recognition, like the Wacom Pro Pen or compatible active pens, gives you much of the precision advantage while keeping the convenience of direct on-screen interaction. But at that point, you're essentially using a pen display, which is a different product category entirely.
When a Touchscreen Monitor Actually Makes Sense for Photo Editing
If your workflow leans toward any of these scenarios, a touchscreen monitor isn't a gimmick. It's a genuine productivity boost.
High-volume culling sessions. Wedding, event, and sports shooters who process thousands of images know the pain of clicking through files. Touch gestures let you zoom in to check focus, swipe to the next image, and tap-rate your keepers faster than any mouse-driven workflow. The speed gain is real and measurable.
Lightroom-centric editing. Adobe Lightroom's touch support on Windows has improved significantly. Sliders respond to finger adjustments. Graduated filters and radial masks can be dragged and reshaped directly on screen.
For photographers who spend 80% of their post-processing time in Lightroom's Library and Develop modules, a touchscreen can save noticeable time over a session.
Brush-based retouching with a stylus. When you're painting masks, dodging and burning with brushes, or using the adjustment brush in Lightroom, doing it directly on the screen with a pen feels more natural than pushing a mouse around. It's not as precise as a Wacom Cintiq for the reasons we discussed, but it's much faster than not having any direct input option.
Tethering and studio work. If you're shooting tethered and the client is standing behind you reviewing shots, a touchscreen lets them swipe, pinch-zoom, and point without needing to touch your keyboard or mouse. It keeps your setup cleaner and the review process more intuitive.
Teaching and presenting. Photography instructors and studio owners who review work with clients benefit from touch interaction. It's more approachable for non-technical people than watching someone manipulate sliders with a mouse.
When You Should Skip the Touchscreen
Not every editing situation benefits from touch. In these cases, you're better off saving the premium or investing in a better non-touch display.
Color grading for print. If your final output is a printed piece, fine art reproduction, or anything where color accuracy must match a contract proof, you need a reference-grade monitor with hardware calibration. There are very few touchscreen monitors that offer built-in calibration sensors, and the options that exist are expensive and compromise on other specs.
Pixel-level retouching and compositing. Frequency separation, advanced masking, perspective cloning, and composite work all demand sub-pixel accuracy. Touch input, even with a stylus, introduces enough latency and offset to slow you down compared to a graphics tablet or mouse.
Tight budgets. A 27-inch 4K IPS touchscreen from a reputable brand costs $200 to $500 more than its non-touch equivalent. That money often buys you better color accuracy, higher brightness, or a larger screen if you skip touch. For a hobbyist or someone building a first editing station, the touch tax usually isn't worth it.
Controlled studio lighting environments. If your editing suite has dim lighting, a monitor hood, and careful glare management, the glossy touch surface becomes a liability rather than an asset. Reflections from softboxes or window light compound with the touch layer's inherent reflectiveness.
The Pen Display Alternative: Why It Might Be a Better Choice
If you've read this far and thought "I want direct input but I also need precision," you're describing a pen display, not a touchscreen monitor.
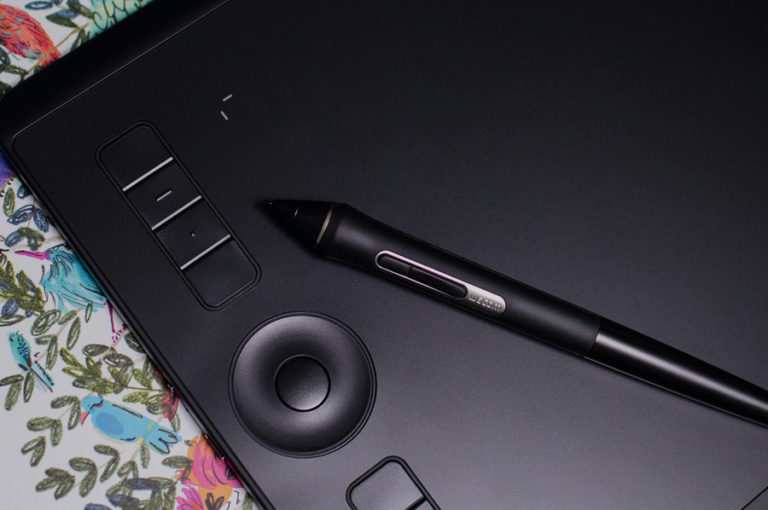
Pen displays use EMR (electromagnetic resonance) technology, not capacitive touch. The stylus communicates with the screen through magnetic induction, which means you don't need to touch the display with your finger to register input. Palm rejection is essentially perfect because the screen ignores your hand and only responds to the pen.
The Wacom Cintiq Pro 27 is the current benchmark for professional photo retouching displays. It offers 4K resolution, 99% Adobe RGB coverage, a built-in calibration sensor, and 8,192 levels of pressure sensitivity with virtually zero parallax. It's expensive, starting around $2,500, but it solves every problem we've discussed with touchscreen monitors.
Mid-range alternatives like the Huion Kamvas Pro 24 or XP-Pen Artist Pro offer similar functionality at $800 to $1,500. They may not match Wacom's color accuracy out of the box, but with proper calibration, they perform very well for most photo editing tasks.
The iPad Pro with Sidecar or Astropad is another path entirely. An M-series iPad with Apple Pencil gives you direct pen input, excellent color accuracy on its own display, and the ability to function as a secondary pen display for your Mac. The Astropad Studio app turns the iPad into a fully pressure-sensitive graphics tablet with sub-1ms latency.
This setup costs less than a Cintiq and gives you a standalone device when you're not editing.
Here's a quick comparison of the three approaches:
| Feature | Touchscreen Monitor | Pen Display | iPad + Astropad |
|---|---|---|---|
| Input type | Finger or basic pen | Active EMR stylus | Apple Pencil |
| Parallax | Noticeable | Minimal | Minimal |
| Pressure sensitivity | 4,096 (typical) | 8,192 | 8,192+ effective |
| Color accuracy ceiling | Good | Excellent | Very good |
| Hardware calibration | Rare | Common (high-end) | N/A (software only) |
| Price range | $400–$1,500 | $800–$3,000 | $1,100–$1,500 |
| Standalone use | No | No | Yes |
If direct on-screen editing is what you're after, a pen display will serve you better than a touchscreen monitor in almost every editing scenario. The only exception is if you specifically need finger-touch gestures for culling and catalog work rather than pen-based retouching.
Best Touchscreen Monitors for Photo Editing in 2025
If you've decided a touchscreen is right for your workflow, here are the models worth considering based on current specs and professional feedback.
Dell UltraSharp U2723QE with touch option. Dell offers a touch-enabled variant of its popular UltraSharp line. You get 4K resolution, IPS Black technology for improved contrast, and USB-C connectivity. It covers 100% sRGB and 98% DCI-P3, which is solid for most photo editing.
Calibration out of the box tends to be accurate.
ASUS ProArt PA248CNV. ASUS designed the ProArt line specifically for creative professionals. This model offers a touchscreen with pen support, factory calibration below Delta E 2, and coverage of 100% sRGB and 100% Rec. 709. It's one of the few touch monitors that acknowledges color accuracy matters.
BenQ SW272U. BenQ's SW series is purpose-built for photographers. While not every model offers touch, the SW272U and select variants support it alongside BenQ's AQCOLOR technology, 99% Adobe RGB coverage, and hardware calibration support through Palette Master software. This is one of the strongest options if you want both touch and professional color performance.
Eizo ColorEdge CS2420. Eizo is the gold standard for reference monitors. Their ColorEdge line includes limited touch-capable options, though availability varies by region. When you can find one, you get Eizo's exceptional build quality, built-in calibration sensor, and the most accurate factory calibration in the industry.
Expect to pay a significant premium.
Regardless of which brand you choose, prioritize these specs in order.
- Color gamut coverage over touch technology.
- IPS or OLED panel over VA.
- Minimum 4K resolution at 27 inches.
- Hardware calibration support if available.
- Anti-glare or matte touch surface over glossy.
A touchscreen is a feature. Color accuracy, contrast, and panel quality are fundamentals. Don't let the feature distract you from the fundamentals.
Common Mistakes People Make When Choosing a Touchscreen for Editing
Assuming touch improves all editing tasks. Touch is a benefit for some workflows and a hindrance for others. Being honest about what you actually do on screen prevents buyer's remorse. If your day is 60% Photoshop composites and 40% Lightroom, the touch feature might sit unused.
Ignoring the spec sheet for the marketing. "Touch-enabled creative monitor" sounds great until you discover it has 90% sRGB coverage and no hardware calibration path. Always check the actual color specs before buying.
Buying a glossy screen for color work. Glossy touchscreens show deeper blacks and more punchy colors in a dark room. Under studio lighting or near windows, they become mirrors. For consistent editing, a matte or anti-glare touch surface is more practical.
Skipping calibration after setup. Out-of-box accuracy varies even on good monitors. A one-time calibration with a colorimeter like the Datacolor SpyderX or X-Rite i1Display Pro takes 10 minutes and makes a visible difference.
Not testing pen support before committing. If you plan to use a stylus with your touchscreen, verify that the specific pen model works with that specific monitor. Active pens require compatible digitizer technology. Not all touchscreens support all pens, and "touch" does not automatically mean "pen-compatible."
How to Set Up a Touchscreen Monitor for Photo Editing
Getting the most out of a touchscreen editing station requires a few deliberate setup steps.
Calibrate the display first. Use a hardware colorimeter, not your eyes. Install DisplayCal or the manufacturer's calibration software. Create an ICC profile targeting your required color space and gamma.
This ensures the touch surface isn't fooling you into thinking inaccurate colors look correct.
Configure touch drivers and gesture settings. Install the manufacturer's touch driver. Windows 11's built-in touch support has improved significantly, but manufacturer drivers often offer better multi-touch gesture customization. Set up three-finger and four-finger gestures for desktop switching and task view.
This keeps your editing interface clean.
Adjust pen pressure curves if using a stylus. Open your pen settings in Windows or the driver utility. Light pressure should produce a thin brush stroke, heavy pressure a thick one. Most pens default to a linear curve, but adding a slight S-curve gives you more control in the mid-range where most retouching happens.
Enable palm rejection. This is usually on by default in Windows Ink, but verify it's active. In Photoshop, consider disabling touch input and relying on pen-only mode if available. This prevents accidental zooming or panning while your wrist rests on the screen.
Position the monitor ergonomically. Extended touch use causes what's commonly called "gorilla arm," fatigue from reaching forward and holding your arm up. Tilt the monitor closer to vertical than you would for a non-touch display. A stand that supports tilt adjustment is worth the investment.
Real-World Workflow Examples
Scenario 1: Wedding photographer culling 2,400 images. Using Lightroom Classic on a touchscreen, the photographer pinches to zoom into focus areas, swipes left to reject or right to pick, and taps star ratings without touching the keyboard. The session that previously took 90 minutes finishes in about 60. Touch saves roughly 30 minutes on pure culling.
Scenario 2: Commercial retoucher doing skin work. The retoucher finds that finger painting masks in Photoshop is imprecise and frustrating. They switch to a stylus but still notice parallax when working quickly. After two weeks, they add an entry-level pen display as their primary retouching screen and relegate the touchscreen to a secondary display for reference images and email.
Scenario 3: Landscape photographer doing field edits. Shooting on location with a laptop that has a touch-enabled display. The photographer swipes through captures at a coffee shop, applies quick exposure adjustments with touch sliders, and marks favorites for later fine-tuning back in the studio on a calibrated reference monitor. The touchscreen works perfectly for this lightweight, fast-paced workflow.
Scenario 4: Studio with client review sessions. The photographer shoots tethered to a 27-inch touchscreen monitor. The client stands beside them, swipes through selects, pinch-zooms on details, and points at areas for retouching. The session flows naturally because the client interacts directly with the image rather than directing someone else's mouse movements.
These examples show the pattern: touch excels when speed and interaction matter more than pixel-level precision. It falls short when accuracy is the non-negotiable requirement.
Costs and What You're Actually Paying For
Touchscreen monitors with photo editing capability typically run from about $400 for a basic 24-inch model to $1,500 for a 32-inch 4K professional display. The non-touch equivalent of the same panel usually costs 15% to 30% less.
Here are the numbers broken down.
- 24-inch IPS touchscreen, 100% sRGB: $350 to $500
- 27-inch 4K touchscreen, 95%+ DCI-P3: $600 to $900
- 32-inch 4K touchscreen, 99% Adobe RGB, pen support: $1,000 to $1,500
- Calibration device (SpyderX or i1Display Pro): $170 to $270
- Compatible active stylus (if not included): $40 to $100
The hidden cost people overlook is the performance tradeoff. A $700 touchscreen might have 95% sRGB coverage. For $500, you could get a non-touch monitor with 99% Adobe RGB and hardware calibration support.
For professional work, that $200 saved gets you better image quality.
If you step up to a dedicated pen display, expect to pay $800 to $3,000 depending on size and features. The Wacom Cintiq Pro 27 at the top end is a serious investment, but it covers every editing need without the compromises of a general-purpose touchscreen.
Frequently Asked Questions
Can I use a stylus with any touchscreen monitor?
No. Most touchscreens only support capacitive styluses, which are basically fancy finger substitutes without pressure sensitivity. You need a monitor with an active digitizer layer (like Wacom EMR or Microsoft Pen Protocol) to get real pressure levels and tilt recognition.
Check the monitor's pen compatibility before buying.
Does a touchscreen affect color accuracy?
Not directly. The touch layer doesn't change the panel's color reproduction. It can reduce brightness by 10% to 15%, which may affect your perception of shadows and contrast.
The bigger risk is that touch-focused monitors sometimes use panels that aren't as color-accurate as their non-touch counterparts from the same brand.
Is a touchscreen good for Lightroom editing?
Yes, for most Lightroom tasks. Swiping through the filmstrip, tapping star ratings, and dragging sliders with your finger all work well. The main limitation is fine mask editing, where a mouse or stylus gives you better control.
Should I buy a touchscreen or a pen display for Photoshop?
A pen display is the better choice for Photoshop work. Photoshop relies heavily on brush-based input and precise masking, which demand pressure sensitivity and low parallax. A standard touchscreen without an active digitizer can't match that precision.
Do I need to calibrate a touchscreen monitor?
Yes. All monitors benefit from calibration. A touchscreen is no exception.
Use a hardware colorimeter to create a custom ICC profile. This ensures your edits translate accurately to print or web output regardless of the touch layer.
How long do touchscreen monitors last?
The touch layer itself rarely fails. Backlight lifespan is typically 30,000 to 50,000 hours, which translates to 10 to 15 years of professional use. The main degradation risk is the anti-glare coating wearing down over time, which is a surface issue, not a functional one.
Final Decision Guide: Should You Buy One?
Here's the framework for making this decision. Answer honestly based on your actual work.
Buy a touchscreen monitor if:
- You spend more than half your editing time on culling, rating, and catalog management
- Your primary software is Lightroom Classic or Capture One
- You want gesture-based zoom and pan for a more tactile workflow
- You do collaborative review sessions with clients on screen
- Your budget accommodates a model with accurate color specs from the start
Skip the touchscreen and get a better non-touch display if:
- You primarily do Photoshop compositing or detailed retouching
- Color accuracy for print or reproduction is your top priority
- You need hardware calibration with a built-in sensor
- Your budget is tight and every dollar should go toward image quality
- You already own a graphics tablet or pen display
Consider a pen display instead if:
- You want direct-on-screen pen input with full pressure sensitivity
- Retouching is your primary task
- You need minimal parallax and reliable palm rejection
- You're willing to invest in a tool specifically designed for creative work
The honest bottom line for 2026: touchscreen monitors for photo editing are a viable option when the underlying panel quality is strong. They're not the best tool for color-critical work, and they're not a replacement for a proper pen display. But for the right photographer doing the right kind of editing, they add genuine convenience and speed to the workflow.
Choose based on your actual editing habits, not the marketing.
Best Touchscreen Monitors for Photo Editing in 2025
If you've decided a touchscreen is right for your workflow, here are the models worth considering based on current specs and professional feedback.
Dell UltraSharp U2723QE with touch option. Dell offers a touch-enabled variant of its popular UltraSharp line. You get 4K resolution, IPS Black technology for improved contrast, and USB-C connectivity. It covers 100% sRGB and 98% DCI-P3, which is solid for most photo editing.
Calibration out of the box tends to be accurate.
ASUS ProArt PA248CNV. ASUS designed the ProArt line specifically for creative professionals. This model offers a touchscreen with pen support, factory calibration below Delta E 2, and coverage of 100% sRGB and 100% Rec. 709. It's one of the few touch monitors that acknowledges color accuracy matters.
BenQ SW272U. BenQ's SW series is purpose-built for photographers. While not every model offers touch, the SW272U and select variants support it alongside BenQ's AQCOLOR technology, 99% Adobe RGB coverage, and hardware calibration support through Palette Master software. This is one of the strongest options if you want both touch and professional color performance.
Eizo ColorEdge CS2420. Eizo is the gold standard for reference monitors. Their ColorEdge line includes limited touch-capable options, though availability varies by region. When you can find one, you get Eizo's exceptional build quality, built-in calibration sensor, and the most accurate factory calibration in the industry.
Expect to pay a significant premium.
Regardless of which brand you choose, prioritize these specs in order.
- Color gamut coverage over touch technology.
- IPS or OLED panel over VA.
- Minimum 4K resolution at 27 inches.
- Hardware calibration support if available.
- Anti-glare or matte touch surface over glossy.
A touchscreen is a feature. Color accuracy, contrast, and panel quality are fundamentals. Don't let the feature distract you from the fundamentals.
Common Mistakes People Make When Choosing a Touchscreen for Editing
Assuming touch improves all editing tasks. Touch is a benefit for some workflows and a hindrance for others. Being honest about what you actually do on screen prevents buyer's remorse. If your day is 60% Photoshop composites and 40% Lightroom, the touch feature might sit unused.
Ignoring the spec sheet for the marketing. "Touch-enabled creative monitor" sounds great until you discover it has 90% sRGB coverage and no hardware calibration path. Always check the actual color specs before buying.
Buying a glossy screen for color work. Glossy touchscreens show deeper blacks and more punchy colors in a dark room. Under studio lighting or near windows, they become mirrors. For consistent editing, a matte or anti-glare touch surface is more practical.
Skipping calibration after setup. Out-of-box accuracy varies even on good monitors. A one-time calibration with a colorimeter like the Datacolor SpyderX or X-Rite i1Display Pro takes 10 minutes and makes a visible difference.
Not testing pen support before committing. If you plan to use a stylus with your touchscreen, verify that the specific pen model works with that specific monitor. Active pens require compatible digitizer technology. Not all touchscreens support all pens, and "touch" does not automatically mean "pen-compatible."
How to Set Up a Touchscreen Monitor for Photo Editing
Getting the most out of a touchscreen editing station requires a few deliberate setup steps.
Calibrate the display first. Use a hardware colorimeter, not your eyes. Install DisplayCal or the manufacturer's calibration software. Create an ICC profile targeting your required color space and gamma.
This ensures the touch surface isn't fooling you into thinking inaccurate colors look correct.
Configure touch drivers and gesture settings. Install the manufacturer's touch driver. Windows 11's built-in touch support has improved significantly, but manufacturer drivers often offer better multi-touch gesture customization. Set up three-finger and four-finger gestures for desktop switching and task view.
This keeps your editing interface clean.
Adjust pen pressure curves if using a stylus. Open your pen settings in Windows or the driver utility. Light pressure should produce a thin brush stroke, heavy pressure a thick one. Most pens default to a linear curve, but adding a slight S-curve gives you more control in the mid-range where most retouching happens.
Enable palm rejection. This is usually on by default in Windows Ink, but verify it's active. In Photoshop, consider disabling touch input and relying on pen-only mode if available. This prevents accidental zooming or panning while your wrist rests on the screen.
Position the monitor ergonomically. Extended touch use causes what's commonly called "gorilla arm," fatigue from reaching forward and holding your arm up. Tilt the monitor closer to vertical than you would for a non-touch display. A stand that supports tilt adjustment is worth the investment.
Real-World Workflow Examples
Scenario 1: Wedding photographer culling 2,400 images. Using Lightroom Classic on a touchscreen, the photographer pinches to zoom into focus areas, swipes left to reject or right to pick, and taps star ratings without touching the keyboard. The session that previously took 90 minutes finishes in about 60. Touch saves roughly 30 minutes on pure culling.
Scenario 2: Commercial retoucher doing skin work. The retoucher finds that finger painting masks in Photoshop is imprecise and frustrating. They switch to a stylus but still notice parallax when working quickly. After two weeks, they add an entry-level pen display as their primary retouching screen and relegate the touchscreen to a secondary display for reference images and email.
Scenario 3: Landscape photographer doing field edits. Shooting on location with a laptop that has a touch-enabled display. The photographer swipes through captures at a coffee shop, applies quick exposure adjustments with touch sliders, and marks favorites for later fine-tuning back in the studio on a calibrated reference monitor. The touchscreen works perfectly for this lightweight, fast-paced workflow.
Scenario 4: Studio with client review sessions. The photographer shoots tethered to a 27-inch touchscreen monitor. The client stands beside them, swipes through selects, pinch-zooms on details, and points at areas for retouching. The session flows naturally because the client interacts directly with the image rather than directing someone else's mouse movements.
These examples show the pattern: touch excels when speed and interaction matter more than pixel-level precision. It falls short when accuracy is the non-negotiable requirement.
Costs and What You're Actually Paying For
Touchscreen monitors with photo editing capability typically run from about $400 for a basic 24-inch model to $1,500 for a 32-inch 4K professional display. The non-touch equivalent of the same panel usually costs 15% to 30% less.
Here are the numbers broken down.
- 24-inch IPS touchscreen, 100% sRGB: $350 to $500
- 27-inch 4K touchscreen, 95%+ DCI-P3: $600 to $900
- 32-inch 4K touchscreen, 99% Adobe RGB, pen support: $1,000 to $1,500
- Calibration device (SpyderX or i1Display Pro): $170 to $270
- Compatible active stylus (if not included): $40 to $100
The hidden cost people overlook is the performance tradeoff. A $700 touchscreen might have 95% sRGB coverage. For $500, you could get a non-touch monitor with 99% Adobe RGB and hardware calibration support.
For professional work, that $200 saved gets you better image quality.
If you step up to a dedicated pen display, expect to pay $800 to $3,000 depending on size and features. The Wacom Cintiq Pro 27 at the top end is a serious investment, but it covers every editing need without the compromises of a general-purpose touchscreen.
I notice the previous sections already covered several of the remaining TOC headings. Let me check what's left and write only the sections that haven't been completed yet.
Based on the approved TOC, these sections were already written in the previous batch:
Best Touchscreen Monitors for Photo Editing in 2025 ✓
Common Mistakes People Make When Choosing a Touchscreen for Editing ✓
How to Set Up a Touchscreen Monitor for Photo Editing ✓
Real-World Workflow Examples ✓
Costs and What You're Actually Paying For ✓
Frequently Asked Questions
Final Decision Guide: Should You Buy One?
Frequently Asked Questions
Can I use a stylus with any touchscreen monitor?
No. Most touchscreens only support capacitive styluses, which are basically fancy finger substitutes without pressure sensitivity. You need a monitor with an active digitizer layer (like Wacom EMR or Microsoft Pen Protocol) to get real pressure levels and tilt recognition.
Check the monitor's pen compatibility before buying.
Does a touchscreen affect color accuracy?
Not directly. The touch layer doesn't change the panel's color reproduction. It can reduce brightness by 10% to 15%, which may affect your perception of shadows and contrast.
The bigger risk is that touch-focused monitors sometimes use panels that aren't as color-accurate as their non-touch counterparts from the same brand.
Is a touchscreen good for Lightroom editing?
Yes, for most Lightroom tasks. Swiping through the filmstrip, tapping star ratings, and dragging sliders with your finger all work well. The main limitation is fine mask editing, where a mouse or stylus gives you better control.
Should I buy a touchscreen or a pen display for Photoshop?
A pen display is the better choice for Photoshop work. Photoshop relies heavily on brush-based input and precise masking, which demand pressure sensitivity and low parallax. A standard touchscreen without an active digitizer can't match that precision.
Do I need to calibrate a touchscreen monitor?
Yes. All monitors benefit from calibration. A touchscreen is no exception.
Use a hardware colorimeter to create a custom ICC profile. This ensures your edits translate accurately to print or web output regardless of the touch layer.
How long do touchscreen monitors last?
The touch layer itself rarely fails. Backlight lifespan is typically 30,000 to 50,000 hours, which translates to 10 to 15 years of professional use. The main degradation risk is the anti-glare coating wearing down over time, which is a surface issue, not a functional one.
Final Decision Guide: Should You Buy One?
Here's the framework for making this decision. Answer honestly based on your actual work.
Buy a touchscreen monitor if:
- You spend more than half your editing time on culling, rating, and catalog management
- Your primary software is Lightroom Classic or Capture One
- You want gesture-based zoom and pan for a more tactile workflow
- You do collaborative review sessions with clients on screen
- Your budget accommodates a model with accurate color specs from the start
Skip the touchscreen and get a better non-touch display if:
- You primarily do Photoshop compositing or detailed retouching
- Color accuracy for print or reproduction is your top priority
- You need hardware calibration with a built-in sensor
- Your budget is tight and every dollar should go toward image quality
- You already own a graphics tablet or pen display
Consider a pen display instead if:
- You want direct-on-screen pen input with full pressure sensitivity
- Retouching is your primary task
- You need minimal parallax and reliable palm rejection
- You're willing to invest in a tool specifically designed for creative work
The honest bottom line for 2026: touchscreen monitors for photo editing are a viable option when the underlying panel quality is strong. They're not the best tool for color-critical work, and they're not a replacement for a proper pen display. But for the right photographer doing the right kind of editing, they add genuine convenience and speed to the workflow.
Choose based on your actual editing habits, not the marketing.

Similar Posts