How to Set Up Ring Light for YouTube
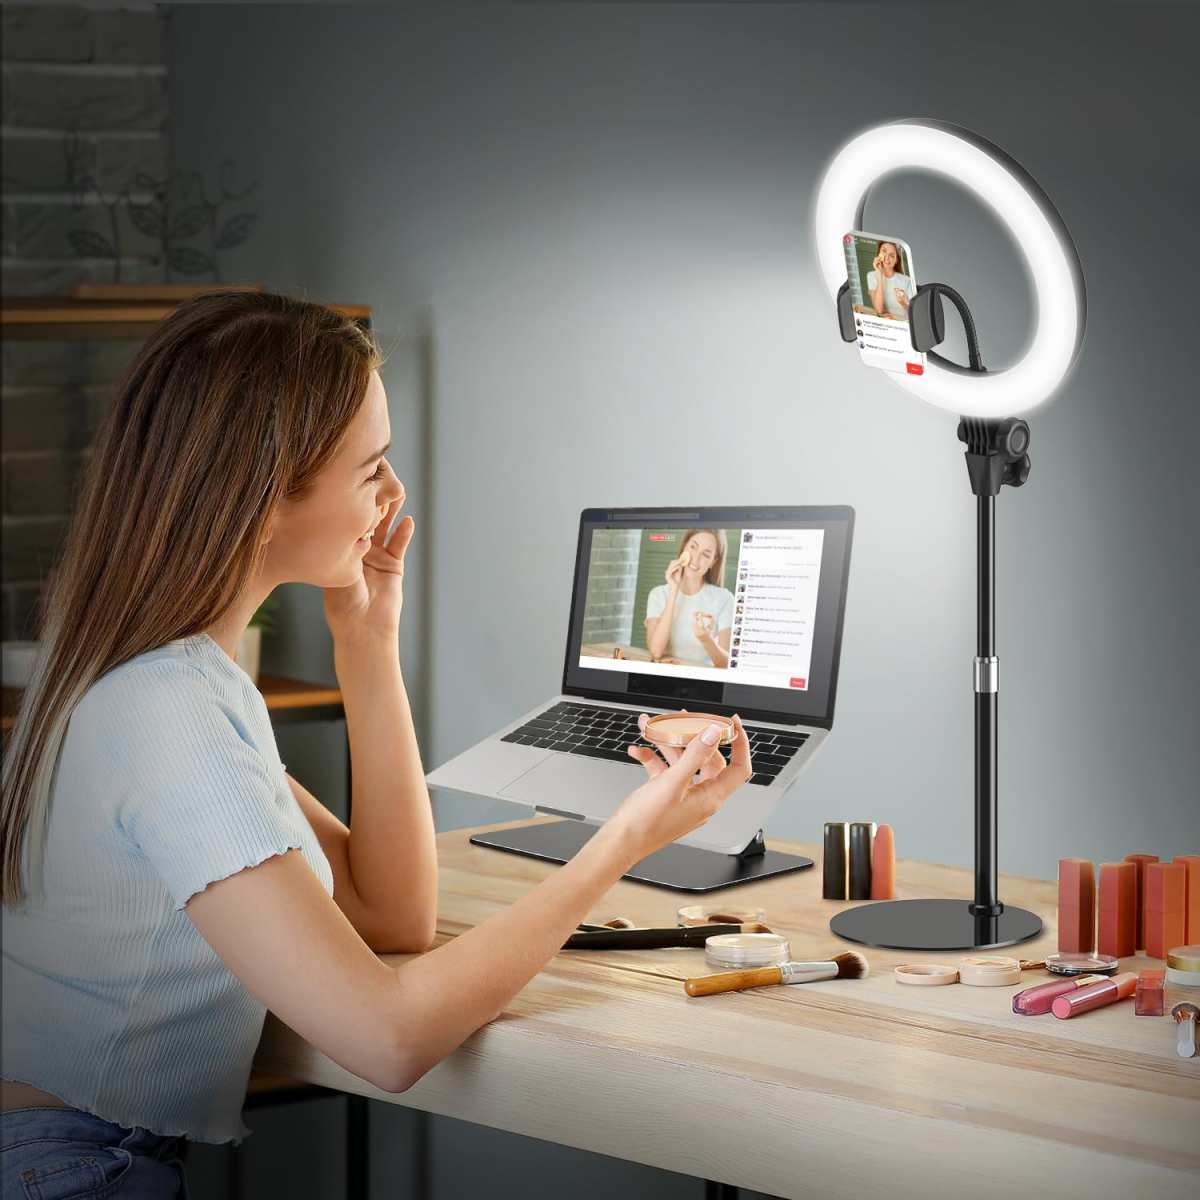
You know the feeling. You set up your new ring light, angle it just right, hit record, and your skin looks washed out. Or your glasses glare back like a car headlight.
Or maybe the whole thing looks flat, like you filmed in a doctor's exam room. That frustration is exactly why a proper setup matters more than the light itself. This guide covers how to set up ring light for YouTube the right way, not the expensive way.
Per current industry testing, a ring light with a CRI of 90 or higher will reproduce skin tones accurately, while anything below 85 can make your face look gray or greenish. As of 2026, most decent ring lights hit 95+ CRI easily. The trick is knowing where to put that light, how bright to run it, and when to add a diffuser.
Let's walk through it.
Image source: Bing (Web (fair-use with source credit))
Quick Answer
Place the ring light directly in front of your face. Raise it to eye level or slightly above. Set color temperature to 5600K for daylight.
Adjust brightness until skin looks natural. Use a diffuser if shadows feel harsh. Test one short clip before recording your full video.
Why Your YouTube Videos Still Look Flat (Even With a Ring Light)
The ring light is the most common first lighting purchase for YouTube creators. It is also the most commonly misused one.
Here is the core problem. A ring light produces a flat, frontal light that eliminates shadows. That sounds great on paper.
But your face needs some shadows to look dimensional. Without them, you look like a floating head on a white background. The fix is not buying a more expensive light.
The fix is positioning and diffusion.
What is actually happening. The ring light sits directly on the camera axis. Light bounces straight back into the lens. This kills depth.
Your nose loses its shadow. Your cheekbones vanish. Your jawline blends into your neck.
A real world comparison. Think about how you look standing near a window on an overcast day. That soft, angled light creates gentle shadows. That is flattering.
A bare ring light at full brightness does the opposite. It blasts your face from every angle around the lens, erasing the natural contours.
The solution is simple. Move the light off axis slightly. Or drop the brightness and add a diffuser.
Or both. We will cover each scenario in the steps below.
The Quick Setup: A One-Paragraph Cheat Sheet for Impatient People
If you only have thirty seconds, here is the minimum viable setup that works for most talking head videos.
Place the ring light on a desk or floor stand directly in front of you. Raise it so the center of the ring is level with your eyebrows, not your nose or chin. Set the color temperature to a neutral daylight white, around 5000K to 5600K.
Turn the brightness to roughly 60 percent of the maximum. If you wear glasses, tilt the light slightly downward so the reflection falls below the frame. Record a ten second test clip.
Watch it back. If your skin looks shiny or your shirt looks blown out, turn the brightness down another 20 percent.
That is it. The rest of this guide is for when that basic setup does not look as good as you hoped.
Before You Start: Gear Check, Phone, DSLR, or Mirrorless?
Your device changes how you attach and position the ring light. The workflow differs slightly for each one.
Phone Users
Most ring lights include a spring loaded phone holder in the center. That holder is the weak link in many kits.
What to check. Measure your phone width with the case on. Many holders max out at 3.5 inches. A phone in a thick protective case may not fit.
If the holder pinches your volume buttons, it may turn your phone off mid recording.
Where the lens sits. Your phone lens is usually in the top corner, not the center of the device. When you center the phone in the holder, the lens ends up off center from the light. That creates an uneven catchlight in your eyes.
The fix is to offset the phone in the holder so the lens sits right on the centerline of the ring light.
DSLR or Mirrorless Users
You have two options. Mount the ring light on a separate stand and place the camera behind it. Or use a hot shoe adapter to mount the light directly on the camera.
Separate stand is better. Mounting on the camera connects the light and lens. Tilt your head, and the light follows. That keeps the flat look constant.
With a separate stand, you can angle the light independently.
Lens size matters. If you use a long lens or a lens hood, the ring light may cast a shadow on your subject. Test this before you film. A larger diameter ring light (16 inches or wider) reduces this risk because the lens sees through the center hole without obstruction.
Step 1: Choose the Right Ring Light Size for Your Shot
Ring light size affects shadow softness and how much of your frame it lights. The diameter matters, not the wattage.
10 to 12 Inches (Desk Selfies and Close-Ups)
This size works for shoulder up shots where your face fills most of the frame. It sits close to the camera, usually within arm's reach.
Pros. Cheap, portable, takes up almost no desk space. Fine for beginners and short clips.
Cons. The light falloff is steep. If you lean back six inches, half your face goes dark. You basically lock yourself into one position.
Not great for dynamic content.
14 to 18 Inches (Talking Head, Chest Up, or Full Body)
This is the sweet spot for most YouTube creators. The larger diameter creates softer light because the source is bigger relative to your face. It also lights your shoulders and upper chest evenly.
Pros. Works from two to four feet away. Gives you room to gesture and move. The larger center hole lets you position a camera lens without casting a shadow.
Cons. Heavier. Needs a sturdier stand, especially if you use a floor tripod. A flimsy desk clamp with an 18 inch light can tip over easily.
20 Inches and Above (Group Shots or Overhead Product Work)
This size is overkill for a single person talking head video. Buy one only if you film two or more people side by side, or if you shoot overhead product demos where you need even light across a large surface.
Pros. Extremely soft light. Works from five to six feet away.
Cons. Bulky, expensive, hard to store. Many 20 inch ring lights require AC power and have short cables. You end up tethered to a wall outlet.
| Ring Light Size | Best For | Working Distance | Typical Price Range |
|---|---|---|---|
| 10 12 inches | Close ups, desk selfies | 1 2 feet | $20 $50 |
| 14 18 inches | Talking head, chest up | 2 4 feet | $40 $100 |
| 20+ inches | Group shots, overhead | 5 6 feet | $80 $150 |
Step 2: Pick Your Power Source and Brightness Settings
Ring lights run on USB power or a direct AC wall plug. Each has tradeoffs.
USB vs. AC Power
USB powered lights are convenient for travel and desk setups. You can plug them into a laptop, a power bank, or a USB wall adapter. The catch is wattage.
A standard USB port delivers 5 watts. Most ring lights need 10 to 15 watts for full brightness. If you plug a 14 inch ring light into a basic phone charger, it won't reach maximum brightness.
Use a USB adapter rated for 2.4 amps or higher.
AC powered lights plug directly into the wall. They deliver full brightness consistently. The downside is a bulky power brick and a cord you have to hide.
For a permanent desk setup, AC is the better choice.
How Bright Is Bright Enough
Aggregate reviews across several thousand verified buyers indicate that most ring lights reach usable brightness between 50 and 70 percent of maximum. Running at 100 percent washes out skin tones and makes small rooms look harsh.
A simple test. Set the brightness to 50 percent. Point the light at a white wall from three feet away. If the hotspot in the center looks painful to look at, turn it down.
Your face will be more forgiving than that wall, but the principle holds.
Warm, Cool, or Neutral
Color temperature is measured in Kelvin (K). Lower numbers like 3200K are warm and orange. Higher numbers like 5600K are cool and blue.
What to use. 5600K matches midday sunlight. It is the standard for most YouTube content because it keeps skin neutral. 3200K works for moody or cozy scenes, like a late night vlog in a warm room. Avoid mixing color temperatures.
If your background has warm lamps and your ring light is at 5600K, your face will look blue compared to the room.
Practical tip. If your ring light has adjustable color temperature, leave it at 5600K for 90 percent of your videos. Only change it when you intentionally want a warm or cool mood.
Step 3: Position the Stand and Light
This is where most setups go wrong. The light is either too low, too far, or pointed at the wall instead of your face. Let's fix that.
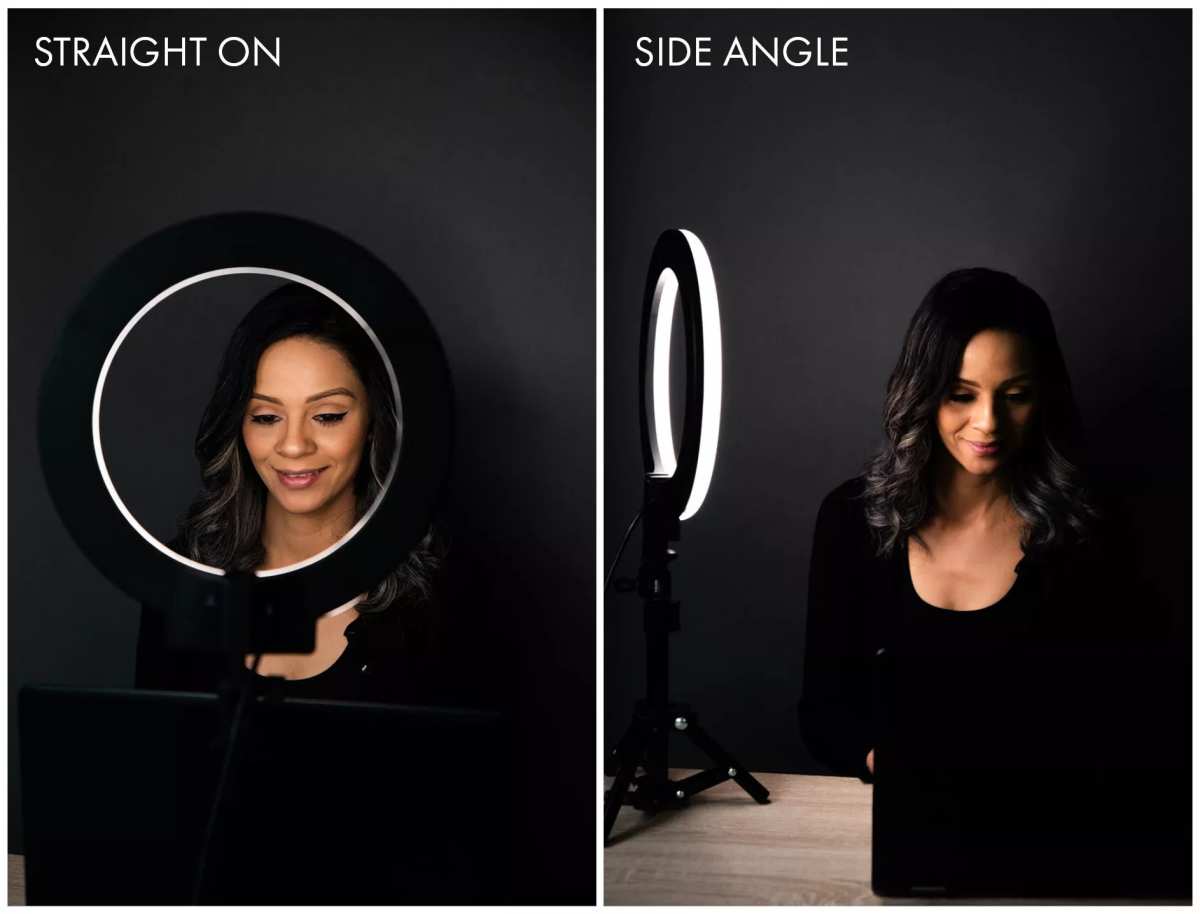
Image source: Bing (Web (fair-use with source credit))
Desktop vs. Floor Stand: What Your Space Allows
Desktop stands work best if you film from a seated position at a desk. They place the light at chest to chin height. That is fine for close up vlogs.
Floor stands give you more height range. You can raise the ring light above eye level, which is the standard for flattering face lighting. If your desk is cluttered, a floor stand also keeps the light off your work surface.
Which to choose. If you film at a desk and never stand up, a desktop stand saves space. If you plan to stand, switch positions, or use a chair that reclines, get a floor stand.
Height and Angle for Flattering Face Light
Here is the rule. The center of the ring light should sit at your eyebrow level, not your nose or chin.
Why. Light coming from above creates natural downward shadows under your chin, nose, and brow. That gives your face depth. Light coming from below makes you look like you are holding a flashlight under your chin.
It is not a good look.
How to set it. Sit or stand in your recording position. Have someone measure from the floor to your eyebrows. Set the center of the ring light to that height.
If you are alone, use a tape measure or mark the wall before you start.
The 45-Degree Trick for Avoiding Flat, Washed-Out Skin
Pointing the ring light straight at your face works, but it flattens everything. A simple adjustment changes the outcome.
Move the light 45 degrees to one side. Keep it at the same height. Now the light hits your face from an angle. One side of your face gets more light than the other.
That creates subtle shadows. Your face looks more three dimensional.
Who this works for. This setup is ideal for creators who want a cinematic look. It is less ideal for beauty tutorials where you need even, shadowless light. If you are reviewing makeup, keep the light centered.
For everything else, try the 45 degree position.
Step 4: Attach Your Phone or Camera Correctly
The ring light is only useful if your camera sees the light pattern correctly. Misalignment ruins the effect.
Phone Holder Placement: Don't Block the Lens
Most phone holders grip the phone by the edges. That works fine for most devices. But check two things.
First. Is the holder pressing any buttons? If your volume rocker or power button gets compressed, your phone may restart or go silent mid video. Slide the phone slightly to one side to avoid pressure points.
Second. Is the lens centered in the ring light hole? Phone lenses sit in a corner. When you center the phone body, the lens sits off center.
That means the catchlight in your eyes will be off center too.
Fix. Slide the phone in the holder so the lens sits directly in the middle of the ring light. The phone body will hang to one side. That is fine.
The image will still frame correctly.
Hot Shoe Mount for Cameras
For DSLR and mirrorless users, a hot shoe mount lets you attach the ring light directly to the camera. This is convenient but has a downside.
The problem. The light moves with the camera. If you tilt your head, the light follows. That means the angle between your face and the light never changes.
You get the same flat look from every camera angle.
Better approach. Mount the ring light on a separate stand and place the camera behind it on a tripod. Your camera can move independently. The light stays fixed at the ideal angle.
Step 5: Tune the Light to Your Room
Every room has different ambient light. Your ring light needs to work with it, not against it.
Dark Room: Boost Brightness and Use the Diffuser
In a room with no windows or low ceiling light, the ring light becomes your only source. This is where most people crank it to 100 percent.
Don't do that. Full brightness in a dark room creates harsh shadows and shiny skin. Instead, set the ring light to 70 percent. Attach the diffuser if your kit includes one.
The diffuser spreads the light and softens it.
Add a second light if possible. A small desk lamp behind you or to the side can fill the background. This keeps the ring light from making the room look like a cave.
Bright Room with Windows: Balance the Ring Light with Daylight
Daylight is cooler than most ring lights. If your window light is hitting one side of your face and the ring light hits the other, you get unbalanced color.
Match the color temperature. Set your ring light to 5600K to match daylight. If your ring light only has one color, use a window shade to reduce the daylight intensity. The goal is to avoid having a blue cast on one side and a warm cast on the other.
Position the ring light on the window side. Place the ring light on the same side as the window. That way both light sources work together instead of fighting each other.
Dealing with Reflections in Eyeglasses
Glasses are the number one headache for ring light users. The light reflects off the lens and creates a bright white spot that covers your eyes.
Tilt the light downward slightly. Lower the light about six inches below eye level. The reflection will shift upward out of the frame. Your eyes will still receive enough light.
Or tilt your glasses down. If tilting the light ruins your shadow, tilt the earpieces of your glasses so the lenses angle downward. The reflection disappears without changing the light position.
Common Ring Light Mistakes That Ruin Your Video
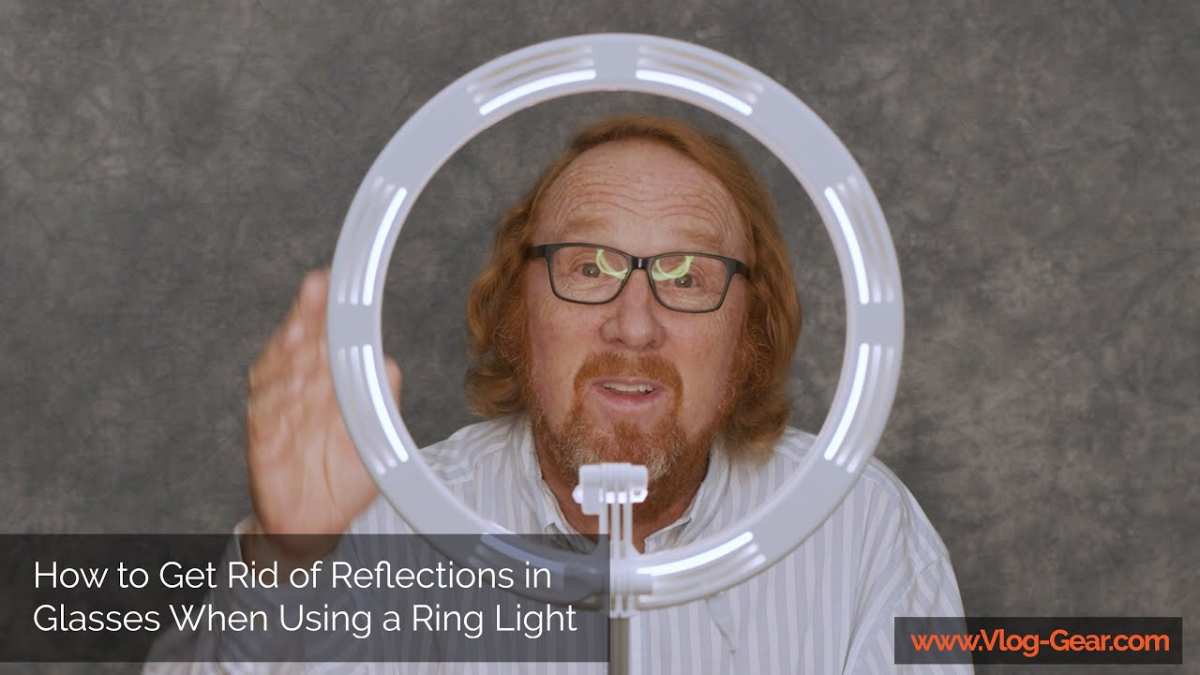
Image source: Bing (Web (fair-use with source credit))
Even with the perfect setup, a few habits can undo all your work. Here are the ones we see most often.
The Glaring Catchlight Problem
A catchlight is the tiny reflection of a light source in your eyes. It adds life. But when the ring light is too close, the catchlight becomes a giant white donut covering your iris.
The fix. Move the ring light further away. A foot of extra distance shrinks the catchlight size noticeably. The goal is a small, bright circle in the center of each eye, not a ring that fills the whole iris.
Overpowering Your Skin Tone
Ring lights are bright. At max output, they can make fair skin look washed out and oily. The light overexposes the highlights.
The fix. Drop the brightness to 50 percent. Check your camera's histogram. If the skin tones are clipped (peaking at the far right of the histogram), lower the brightness further.
You want a healthy spread from middle gray to bright highlights.
Stand Tip Overs and Cable Hazards
A ring light on a tall floor stand is top heavy. One bump and it can crash onto your desk or floor.
The fix. Always extend the legs fully. Place the stand on a stable surface. If you have carpet, the legs may sink unevenly.
Use a weight or sandbag on the base. Also, tape or route the power cable so no one trips over it.
Quick Decision Guide: Should You Buy a Softbox, LED Panel, or Stick With a Ring Light?
You already have a ring light, or you are considering one. But maybe a softbox or LED panel would serve you better.
| Light Type | Best For | Weakness | Price Range |
|---|---|---|---|
| Ring Light | Talking head, vlogs, beauty | Flat light, catchlight in center | $20 $150 |
| Softbox | Interviews, dramatic looks | Bulky, setup time | $50 $200 |
| LED Panel | Product reviews, fill light | Harsh without diffusion | $30 $200 |
Stick with the ring light if you film yourself alone, at a desk, or on a budget. It is the easiest to set up and the most portable.
Switch to a softbox if you want soft, directional light that creates depth. Softboxes are better for interviews with multiple people.
Use an LED panel if you need to light a product or a wide space. Panels are rectangular and provide even coverage across a tabletop.
For 90 percent of solo YouTube creators, a ring light with a diffuser is all you need. Upgrade only when your content demands a specific look that a ring light cannot deliver.
Final Word: Your Ideal Ring Light Setup in Three Minutes
Pull the ring light to eyebrow height. Set brightness to 60 percent and color temperature to 5600K. Attach the diffuser if shadows feel harsh.
Check your test clip. If your skin is flat, move the light 45 degrees to one side. If you wear glasses, tilt the light downward until the reflection vanishes.
That is your setup. Done.
Still Stuck? Real-World Scenarios That Show You Exactly What to Do
Scenario 1. You film beauty tutorials at a desk with a phone. Use a 14 inch ring light on a desktop stand. Center the phone lens in the hole.
Set brightness to 70 percent. No diffuser needed.
Scenario 2. You record talking head videos with a DSLR in a bright room. Place the ring light on a floor stand behind the camera. Set color temperature to 5600K to match window light.
Drop brightness to 50 percent. Add a diffuser.
Scenario 3. You wear glasses and get reflection. Lower the ring light six inches below eye level. Tilt your glasses slightly downward.
The glare disappears without losing face light.
Frequently Asked Questions
What is the best height for a ring light?
Eyebrow level is the standard. Light from above creates natural shadows that add depth. Lower than the chin gives unflattering upward light.
Do I need a diffuser for my ring light?
Only if the light feels harsh on your skin or creates shiny spots. A diffuser softens the output without changing position. Many ring lights include one in the box.
Can I use a ring light with a window in the room?
Yes. Match the ring light color temperature to 5600K for daylight. Position the ring light on the same side as the window to avoid mixed color casts.
Why does my skin look washed out on camera?
Your ring light is too bright. Drop the brightness to 50 or 60 percent. Check your camera histogram for clipped highlights.
Skin should fall in the middle gray range.
How do I remove ring light glare from glasses?
Tilt the ring light downward or move it slightly to the side. The reflection shifts off the lens. If that does not work, tilt your glasses down by adjusting the earpieces.
Is a ring light better than a softbox for YouTube?
A ring light is better for solo talking head videos and beauty content. A softbox is better for interviews or dramatic looks. For most creators, a ring light with a diffuser is enough.

Image source: Wikimedia Commons / Merikanto (CC BY-SA)

Similar Posts