How to Set 4K Monitor as Primary Display
Learning how to set 4K monitor as your primary display takes about two minutes once you know where to look. The process is straightforward, but there are a few gotchas that trip people up, mostly around cables, ports, and scaling.
Before you touch any settings, you should verify your GPU and cable can actually push 3840×2160 at 60Hz. HDMI 2.0 (released in 2013) is the minimum for 4K/60Hz, and DisplayPort 1.2 handles it comfortably. Let's get into the details.

Image source: Wikimedia Commons / geckzilla (CC BY)
Quick Answer
Go to your display settings and find the connected 4K monitor in the layout. Select it, then check the box labeled "Make this my main display" on Windows, or drag the menu bar to it on macOS. If the option is grayed out, your GPU driver likely needs an update.
If the resolution won't go to 3840×2160, check your cable and port version first.
Why This Isn't Always Straightforward
Most guides tell you to open Display Settings and click one checkbox. That works, until it doesn't. Where people run into trouble is the stuff that happens before they ever reach that checkbox.
The Cable Problem Nobody Warns You About
Here's the most common issue we've seen in user reports. Someone buys a 4K monitor, hooks it up with whatever cable is in the drawer, and wonders why the image looks choppy or the resolution tops out at 1920×1080. The culprit is almost always the cable.
Not all HDMI cables support 4K at 60Hz. You need at least HDMI 2.0 for that. If you're using an older HDMI 1.4 cable, you'll be stuck at 30Hz, which feels terrible for desktop use.
DisplayPort is generally the safer bet for PC-to-monitor connections, especially if you want 4K above 60Hz.
Cable version | Max bandwidth | 4K support
—|—|—
HDMI 1.4 | 10.2 Gbps | 4K at 30Hz
HDMI 2.0 | 18 Gbps | 4K at 60Hz
HDMI 2.1 | 48 Gbps | 4K at 120Hz+
DisplayPort 1.2 | 17.28 Gbps | 4K at 60Hz
DisplayPort 1.4 | 32.4 Gbps | 4K at 120Hz (with DSC)
GPU Port Limitations That Block 4K at 60Hz+
Your graphics card matters as much as your cable. Many budget and older GPUs have DisplayPort 1.2 and HDMI 1.4. That means you'll hit the 30Hz ceiling if you accidentally plug into the wrong port.
Some GPUs route certain ports through the motherboard's integrated graphics rather than the dedicated GPU. Always check your physical ports match your GPU output. On a desktop, the horizontal slots on the back panel are your dedicated GPU.
The vertical ports near the USB headers belong to the motherboard.
Laptop vs. Desktop — Different Paths
Laptops add another layer of complexity. Many laptops route video output through the integrated GPU, which may not support 4K output at all. Others support it only through specific ports, usually Thunderbolt or USB-C with DisplayPort Alt Mode.
If your laptop has both HDMI and USB-C, check the manual or specs page. One of those ports almost certainly has better 4K support. You want to use that one for your primary 4K display.
Step-by-Step: Windows 10 and Windows 11
Before You Open Any Settings
Grab a few things first. Make sure you have a cable that supports at least HDMI 2.0 or DisplayPort 1.2. Confirm your GPU supports 3840×2160 output (virtually any GPU from the last decade does, but it takes ten seconds to verify on the manufacturer's website).
Update your graphics driver before you start. Running an outdated driver is the single most common reason the "Make this my main display" checkbox is grayed out or the correct resolution doesn't show up.
- NVIDIA GPUs: Download GeForce Experience or grab the driver directly from NVIDIA's website.
- AMD GPUs: Use AMD Adrenalin or download from AMD's support page.
- Intel integrated graphics: Use the Intel Driver & Support Assistant tool.
Setting the Primary Display on Windows
Once your cable and driver are in good shape, the actual setup is quick.
For Windows 11:
- Right-click on the desktop background and select Display settings.
- You'll see numbered rectangles representing your monitors. Click the one that matches your 4K monitor. If you're not sure which is which, click Identify and large numbers will flash on each screen.
- Scroll down to the Multiple displays section.
- Check the box labeled Make this my main display. That's it.
For Windows 10:
The process is nearly identical. Right-click the desktop, choose Display settings, select the 4K monitor in the layout, and check Make this my main display under the Multiple displays dropdown.
After you do this, the taskbar, Start menu, and system tray will move to the designated monitor. New applications will also open on that screen by default.

Image source: Wikimedia Commons / OS: Microsoft Corporation Screenshot: PantheraLeo1359531 (talk)
Setting the Primary Display on macOS
Apple calls this "changing the menu bar position," which confuses people the first time around.
- Open Apple Menu > System Settings (or System Preferences on older macOS).
- Go to Displays.
- Click Arrange or look for the display layout diagram.
- You'll see a small white bar at the top of one of the monitor rectangles. Drag that bar onto the rectangle representing your 4K monitor.
- That display is now your primary display. The menu bar, Dock position, and default app opening behavior all follow that white bar.
Setting the Primary Display on Linux (GNOME/KDE)
On GNOME-based distros like Ubuntu, open Settings > Displays. Select your 4K monitor and toggle on Primary. On KDE Plasma, go to System Settings > Display and Monitor, select the 4K display, and click Set as Primary.
The exact wording varies slightly between desktop environments, but the concept is universal. Pick the display, flag it as primary, apply.
DisplayPort vs. HDMI: Which to Use for 4K Primary
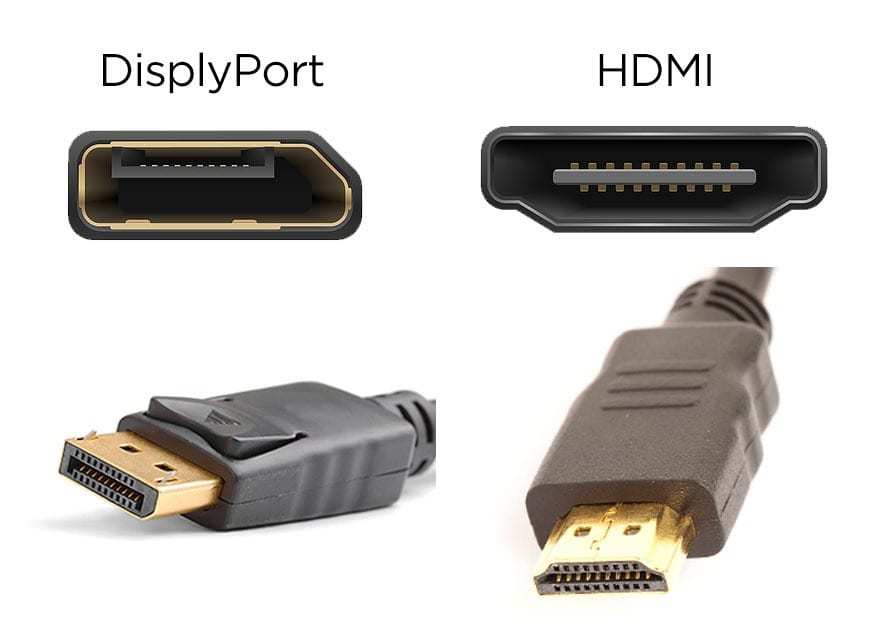
If your monitor and GPU support both DisplayPort and HDMI, go with DisplayPort first. It's the more reliable standard for PC monitors, supports higher refresh rates at 4K, and handles adaptive sync better on most implementations.
HDMI is perfectly fine for 4K/60Hz with a 2.0 or 2.1 cable. It just has more edge cases where things don't work as expected, especially with older cables mixed in.
Image source: Bing (Web content, fair-use with source credit)
| Scenario | Best choice | Why |
|---|---|---|
| PC desktop to 4K monitor, 60Hz | DisplayPort 1.2+ | Most reliable, widely supported |
| PC to 4K TV, 120Hz gaming | HDMI 2.1 | Higher bandwidth, standard on TVs |
| Laptop with USB-C output | USB-C to DisplayPort | DP Alt Mode is more universal |
| Budget GPU, 4K/60Hz office use | Either (HDMI 2.0+) | Both handle 4K/60 without issues |
Troubleshooting: When It Doesn't Work
Even when you follow every step correctly, things occasionally go sideways. Here are the most common problems and what actually fixes them.
"Make This My Main Display" Is Grayed Out
This almost always points to a driver problem. Your OS can see the monitor, but the GPU driver isn't allowing display arrangement changes. Update your graphics driver, restart, and the checkbox should become active.
If it still won't cooperate, try disconnecting the secondary monitor, rebooting, and setting the 4K as primary with only one display connected.
Resolution Stuck Below 3840×2160
Check your cable first. An old HDMI 1.4 cable will cap you at 1080p or 4K/30Hz. Swap to a certified HDMI 2.0 or DisplayPort 1.2 cable.
Then verify you're plugged into the correct port on your GPU, not the motherboard's video output. Finally, check your GPU's specs to confirm it supports 4K output on that particular port.
Refresh Rate Stuck at 30Hz
Same root cause as the resolution issue. Your cable or port version can't handle the bandwidth needed for 4K at 60Hz. In Windows, you can verify the current refresh rate by going to Display Settings > Advanced Display and checking the refresh rate dropdown.
If 60Hz isn't available, the bottleneck is your cable or port, not your monitor.
Monitor Not Detected at All
Try a different cable. Try a different port on your GPU. Make sure the monitor is set to the correct input source.
If none of that works, update your GPU driver. In stubborn cases, a full shutdown (not restart) of the computer clears detection issues that a soft reboot misses.
Taskbar or Menu Bar on the Wrong Screen
This is a cosmetic issue that just means the primary display setting didn't stick. On Windows, go back to Display Settings, select the correct monitor, and re-check Make this my main display. On macOS, open Displays preferences again and drag the white menu bar to the right rectangle.
Sometimes a restart is needed for the change to fully apply.
Scaling and Text Clarity on 4K
Once the 4K monitor is your primary display, you'll notice text and icons look extremely small at native resolution. That's normal. A 27-inch 4K screen at 100% scaling makes everything nearly unreadable at arm's length.
Windows will usually suggest 150% scaling for a 27" 4K display. For a 32" 4K monitor, 125% is more comfortable. You can adjust this in Display Settings > Scale. macOS handles this differently with its "Default for display" setting that renders at 2x retina resolution, then scales the UI.
Avoid odd scaling values like 175% if you're running mixed DPI with a secondary monitor. It causes blurriness on some applications, especially older software that doesn't handle DPI scaling well.
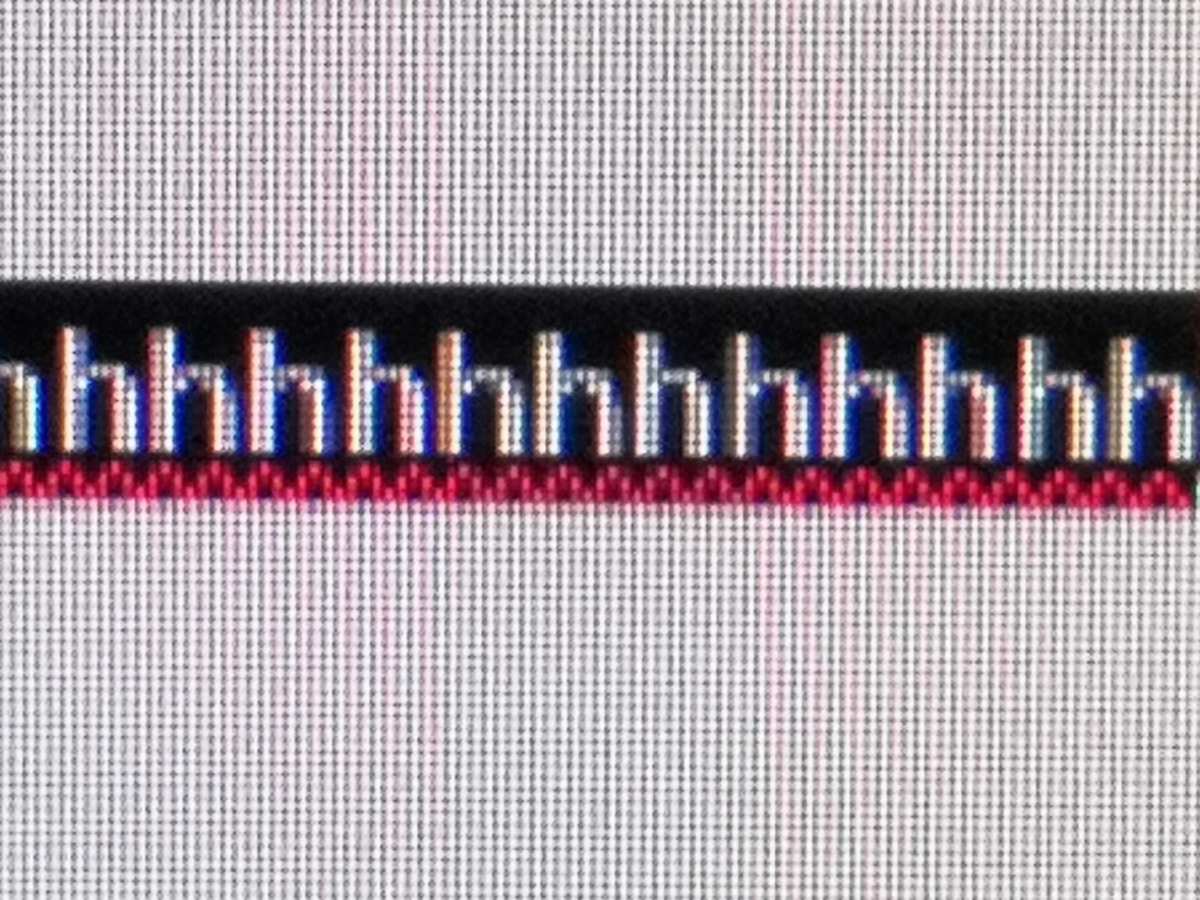
Image source: Bing (Web content, fair-use with source credit)
Real-World Scenarios
Laptop + 4K External Monitor (Work From Home Setup)
This is one of the most common setups people ask about. You close the laptop lid, use the 4K display as your main screen, and work like you're on a desktop. Primary display setup is the same process as above, but you'll also want to adjust your power settings so the laptop doesn't sleep when the lid closes.
In Windows, search "lid close settings" in the Start menu and change the action to "Do nothing" when plugged in.
Desktop with Two Monitors — One 4K, One 1080p
Smooth 4K/60Hz operation is achievable in most dual-monitor setups. A dedicated GPU with multiple outputs (e.g., one DisplayPort and one HDMI) will keep bandwidth independent. The key is making sure both monitors are connected to the dedicated GPU, not accidentally mixing dedicated and motherboard outputs.
Set the 4K as primary and use scaling that's comfortable. If your 1080p monitor looks blurry after adjusting scaling for the 4K display, check your GPU control panel for per-display scaling overrides.
Mac with 4K External Display
Apple has excellent 4K support across its modern lineup. Any Mac with Thunderbolt 3 or later handles 4K/60Hz without issue. Use a USB-C to DisplayPort cable for the most reliable connection.
In macOS, the primary display is set by dragging the white menu bar in the display arrangement window. Apple's "Default for display" scaling usually looks great on 4K monitors, but you can choose "Scaled" for more options. For Macs with limited ports, a Thunderbolt dock can give you extra display outputs while maintaining full 4K support.
Frequently Asked Questions
Does setting a 4K monitor as primary affect gaming performance?
Not directly. The GPU workload is determined by resolution and refresh rate, not which display is flagged as primary. Games will launch on the primary monitor by default, which is usually what you want.
If a game opens on the wrong display, you can change that in the game's settings or move it manually before launching full-screen.
Can I set a 4K monitor as primary if my other monitor is 1080p?
Yes, and this is a very common setup. Each monitor runs at its own native resolution. The 4K display will show 3840×2160 and the 1080p will show 1920×1080.
Just be aware that scaling differences between screens can cause blurriness on some older applications when dragged between displays.
Why does my 4K monitor say 30Hz in the settings?
Your cable or port doesn't have enough bandwidth for 4K at 60Hz. Swap to an HDMI 2.0 or DisplayPort 1.2 (or newer) cable and confirm you're plugged into a port that supports it. Also verify the setting in Display Settings > Advanced Display > Refresh rate after changing the cable.
Do I need to restart after changing the primary display?
No restart is required for the primary display change to apply. If the taskbar or menu bar doesn't move to the correct screen, disconnect and reconnect the display, or sign out and back in. A full restart is overkill for this change.
What's better for 4K primary, DisplayPort or HDMI?
DisplayPort 1.2 or newer is the preferred connection for PC monitors. It's more reliable for 4K at higher refresh rates and handles adaptive sync better. HDMI 2.0 works fine for 4K/60Hz but has more compatibility edge cases.
Either works well if the cable and port versions match.
Mistakes to Avoid
Using the wrong port on a desktop GPU. Plugging your 4K monitor into the motherboard's HDMI instead of the graphics card's output is the single most common mistake. The motherboard ports run through integrated graphics, which often can't handle 4K at all. Always use the ports on the dedicated GPU, the horizontal slots lower on the back panel.
Ignoring cable version requirements. Grabbing whatever HDMI cable is in a drawer without checking its version. If it's HDMI 1.4, you'll be stuck at 30Hz. Look for "High Speed" or "Premium High Speed" labeling on the cable sheath, or just use a DisplayPort cable.
Setting scaling once and forgetting about it. If you set 150% scaling for the 4K display but your secondary 1080p monitor looks blurry, you've hit a mixed-DPI issue. Some older applications don't handle this well. You can mitigate it by using per-display scaling overrides in your GPU control panel, but it's not a perfect fix for every application.
Not updating drivers before troubleshooting. Hours can be wasted chasing display settings that won't stick, all because the GPU driver is two years old. Always update first.
Costs, Pricing, and Specs to Know
Setting a 4K monitor as primary doesn't cost anything beyond the hardware you already own. But if you're buying cables or accessories, here's what to expect.
| Item | Typical price range | What to look for |
|---|---|---|
| DisplayPort 1.4 cable | $8–$15 | VESA-certified, supports HBR3 |
| HDMI 2.0 cable | $6–$12 | "Premium High Speed" labeled |
| HDMI 2.1 cable | $12–$25 | "Ultra High Speed" certified |
| USB-C to DP adapter | $15–$30 | Supports DP Alt Mode |
| 4K monitor (27") | $250–$500 | 60Hz, IPS, HDR10 minimum |
| 4K monitor (32") | $350–$700 | Higher pixel density comfort |
The cable is the cheapest part of the setup and the most common point of failure. Spending $12 on a certified cable saves more headaches than any other purchase in this process.
Expert Tips
Set the primary display before arranging your desktop icons. Icons tend to pile up on whichever monitor is primary at the moment. If you rearrange after setting the primary, you'll move them twice.
Use your GPU control panel for fine-grained control. Windows Display Settings handles the basics, but NVIDIA Control Panel, AMD Adrenalin, and Intel Graphics Command Center give you access to refresh rate overrides, color depth, and per-display scaling. If Windows won't show you the option you need, the GPU control panel usually will.
Label your display inputs. If your monitor has multiple inputs, set the correct one as the active source in the monitor's on-screen display menu before troubleshooting in Windows. A surprising number of "my monitor isn't detected" cases come down to the monitor being on the wrong input.
For multi-monitor setups, match refresh rates when possible. Running one monitor at 60Hz and another at 144Hz can cause stuttering on some GPUs, especially at lower frame rates. If you notice micro-stutter, try setting both displays to 60Hz temporarily to see if it resolves.
Safety, Warnings, and Compliance
There are no electrical safety concerns with display setup. The relevant compliance issue is HDCP 2.2. If you plan to watch protected 4K content from services like Netflix or Disney+, your cable, monitor, and GPU all need to support HDCP 2.2.
Without it, the content will downscale to 1080p or refuse to play entirely.
Using uncertified or damaged cables can cause signal degradation, but won't harm your hardware. The worst outcome is a blank screen or flickering, not component damage.
Maintenance and Long-Term Optimization
Once your 4K monitor is set as primary, there's very little ongoing maintenance. The main thing to watch for is driver updates. GPU driver updates occasionally reset display preferences, including which monitor is primary.
After a major driver update, double-check your display settings.
If you notice text looking blurry after a Windows update, check that your scaling percentage hasn't reset. Windows feature updates have been known to revert custom scaling to 100%, which on a 27" 4K display makes everything painfully small.
Periodically check your refresh rate in Display Settings > Advanced Display to confirm you're still running at 60Hz or higher. Some updates or software installations can reset this to 30Hz without obvious visual warning until you move a mouse cursor and notice the lag.

Similar Posts